Toggle Background Color
MDS has received a large rewrite for revision 5 and is now hosted on github at this location:
https://github.com/Chromatophore/MDS
Note that many function names have changed so old scripts should probably keep using the old MDS for now.
----------------------------------------------------------
OLD VERSION STUFF IS BELOW
MastiDS.avs revision 4
This is the readme for revision 4 of MastiDS, and you can obtain the code for this here: http://pastebin.com/N7Xh95CQ
(Thanks Farrin N. Abbott of CopyCatFilms for the title card art, and Peter Wiegel for the font)
ALSO I guess Youtube does 60fps now so maybe don't do that whole ChangeFPS(30) thing any more? You'll want to use MDS_SetAFC(60) if you want to maintain the 1 second transition effects!
Table of Contents
----------------------------------------
1) Introduction and The 3.2 Rules
2) A Simple Example
3) What Not To Do
4) Things You Might Want To Know About
- I used your system perfectly and my video is all black now, what gives?
- Does this work with 3DS footage?
- What is this AFC thing?
- Making videos for websites that aren't youtube
- I only want to go between 2 layouts, but do it a dozen times. Is there an easier way to do this?
- This readme is too long! Tell me the most useful things already!
5) Effects Function List
- New to R4
6) Making MDS Work For You
- Custom Layouts
- Custom Transitions
- Custom Resize Functions
- Custom... uh... well what else have you got?
7) Being clearer on the problem this solves
----------------------------------------
1) Introduction and The 3.2 Rules
MastiDS is a (theoretically) handy avisynth animation engine for LPs of DS games. It's designed to use the avi output of DeSmuME, the format of which is the 2 screens stacked vertically, each at a resolution of 256x192, and place those screens in a variety of manners in a 1280x768 screen space - that's 5 DS screens wide and 4 DS screens high, is fairly close to widescreen, and normally uses point resizes to achieve this, preserving pixelly goodness. This was just a guess by me on what would be a good way to do this, and if you disagree, there are (quite a few) options for manipulating the system.
The main reason the system is supposed to be useful is that it employs a state system, whereby each time you apply an effect, it remembers what arrangement the screens were left in. This way, when you want to move the screens to a different layout, you simply tell it how you would like them to be arranged, and it animates them from the way the screens were last arranged to the way you wish them to be arranged now. Because of this, the frame numbers you supply must be in chronological order.
If that doesn't make a lot of sense to you right now, that's fine: The system is designed so you hopefully don't have to worry about the majority of the details. However, here are the rules you should stick to while using it:
1) You need to supply a copy of the 256x384 video to the majority of functions (it will throw an error if the raw video supplied does not match these)
2) You must apply effects in a chronological order in your script, and far enough apart that the previous effect has finished animating. (It will throw an error if you do not)
3) Edit your clips with standard functions before and after you employ, not between, MDS calls, or your working clip and raw clip may fall out of sync.
(3.2) Your raw video should have audio, only because I added a bunch of audiodubs to make the audio all line up and if you don't have audio, it'll throw an error)
2) A Simple Example
Here's a simple example of how to use MDS. First, grab a copy of the file from pastebin above. Now let's let's make a new avs file to mess around with. The first order of business is importing MastiDS.avs and then making a basic script that loads an avi (note that the test poster seems to have stolen the slashes from my paths):
code:
import("MastiDS.avs")
#raw = Avisource("H:LPMyDeSmuMErecording.avi") # Uncomment and use this if you have a video
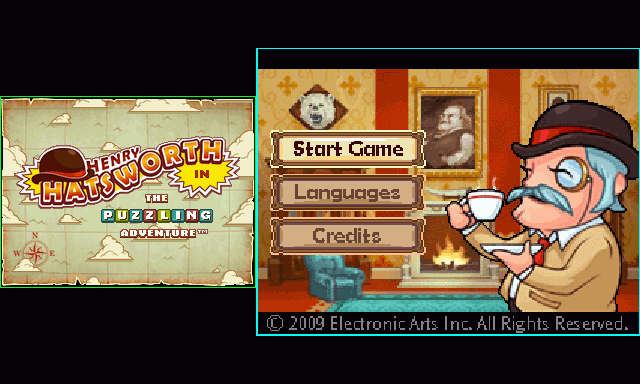
raw = ImageSource("H:LPHatsworth.png",0,10000,fps=60,pixel_type="RGB32").AudioDub(blankclip()) #This is my standin for you having a video
#It just provides me a DS looking clip to work with! In fact, you could download and use the
#image below with the above line if you wanted an example to work with!
raw = raw.ChangeFPS(30)
raw
What the above code does should be fairly clear: it loads your avi into a variable called raw, changes it's FPS to 30, and then duplicates raw into that elusive last variable that Avisynth is so well known for.
The hurdles you could face at this step are
- If it can't find the MastiDS.avs file, in which case, you may need to specify the full path (or check its file extension) - importing like I do here tries to load it from the same folder that the avs file we're working on is in. If you'd find it convenient, you may also like to rename it to MastiDS.avsi, and place it in your avisynth/plugins directory, which should make it autoload the script for every script you make.
- You might not have a DeSmuME recording to play around with, so instead of that, I load up a copy of the image directly below this step and use that as my video source instead.
- You might find, further down the line, that you get an error complaining that "layer only support RGB32 and YUY2 formats". In that case, you can add .converttoRGB32() to the end of your avisource call.
- Basically, before you start using MDS calls, you're expected to be providing a 256x384 video in it's relatively final form. Regardless of where your video came from, above this point you can do basically any scripting you want to get to that point.
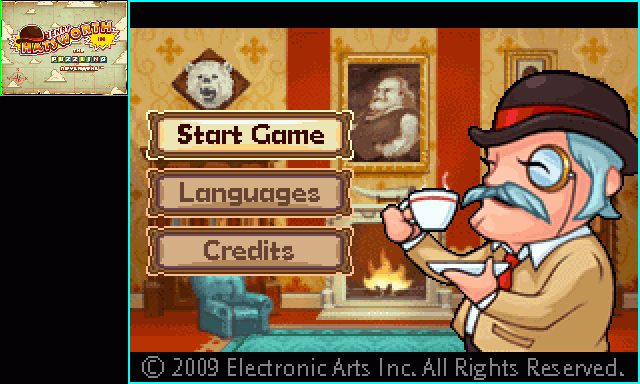
Anyway, if we preview this script, this is just going to be your basic video, and should look something like this:
Now, let's use start actually using some of the engine's functionality, starting with MDS' vertical stack function. Lets add the following line to the end of the script:
code:
MDS_VertStack()
Note that this is the equivalent of saying this (I'll use quote for code I don't actually want you to put in your script!)
quote:
last = MDS_VertStack(last)
MDS_VertStack is a function that either takes a single parameter, 3 parameters, or 4 parameters, and in this case the parameter that it wants is a single clip with your raw video in it. Since raw is currently in the last variable, this works out just fine for us.
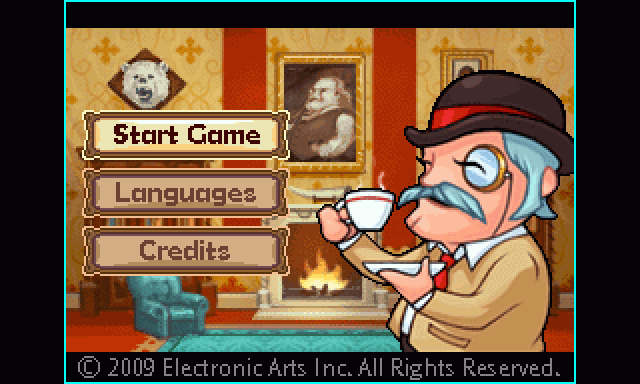
Anyway, if we preview our script now, things should have changed a little bit:

This is what's supposed to happen. Generally speaking, you always want to start using MDS with a command like this - a non animated function with a single parameter. There's a selection of different layouts you could start with, and there's a full list of them, plus a guide on how to make your own, later on.
If you get an error saying that it there is no function named MDS_VertStack, then the MastiDS.avs file didn't get imported correctly for some reason. If it compains that "layer only support RGB32 and YUY2 formats", add .converttoRGB32() to the end of your avisource, or add raw = converttoRGB32(raw) next to the changeFPS call you should have.
So, back to the example. Really all we've done here is magnified the video by 2x and stuck some black borders on it. The real usefulness of the system will depend on the content that you're trying to show people. Let's say that in our video, we start a new game and then there's an introduction video that only plays on the top screen - it runs from frame 125 until frame 300. After that, the top screen goes blank, and there's a name entry prompt on the lower screen.
As a result, we decide we would like to zoom in on the top screen for those intro frames, and then switch to the bottom screen. We have a great many options for doing doing this, but let's use a vertical sliding effect for this example. So, replacing the single VertStack() call we made above, let's do this instead:
code:
MDS_VertStack()				#We have both top and bottom screens at the start of the video
MDS_TopVSlideA(raw,125)		#Imaginary Intro starts around 125
MDS_BotVSlideA(raw,300)		#Intro ends at 300 and Name entry starts up on bottom
This time we're using some functions with more than one parameter - while we're only defining 2 params, there's actually 3:
quote:
last = MDS_TopVSlideA(last,raw,125)
last = MDS_BotVSlideA(last,raw,300)
This kind of command will probably be the bulk of your script.
Assuming you've not been having problems so far, you should be able to preview your script now, and watch your video zoom in on the top screen from frame 125 to 155, and slide down to the lower screen from frame 300 to 330. You may notice that there's 30 frames between the pairs of numbers I just mentioned. That number is a variable that you can manipulate, called the Animation Frame Count, or AFC, and we'll touch on that in a later section.
Really though, that's basically it: you just make more calls like these, showcasing the game as you feel appropriate, until the end of the video.
For example, let's pop it back to a vertical stack with one final call:
code:
MDS_VertStackA(raw,400) #Back to the vertical stack
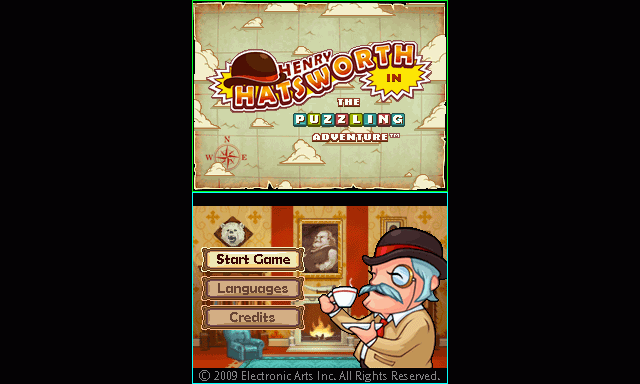
And it'll zip back to both screens from frame 400 to 430. Here's a little gif of what it would look like if it was halfsized, reduced to 20 colours, at 10 FPS and looping forever:
If that was all you wanted to do, you could simply finish your script (probably with ConvertToYV12()). However, two notes:
- Firstly, we can use a new function, MDS_SmoothSettings(), called before our other functions, to improve the visual quality of the transitions, at the cost of the preview/encode being more computationally intensive
- In all these transitions, we haven't used anything that puts the screens into the left/right border areas. If we upload our video like this, it may get window boxed (both letterboxed and pillarboxed) depending on how it is displayed, which isn't really good practice, so, we should chop off those side borders that we aren't using. Given that, here's what the script ended up looking like:
code:
import("MastiDS.avs")

raw = ImageSource("H:LPHatsworth.png",0,10000,fps=60,pixel_type="RGB32").AudioDub(blankclip())
raw = raw.ChangeFPS(30)
raw

MDS_SmoothSettings()		#Use some higher quality transition effects

MDS_VertStack()				#We have both top and bottom screens at the start of the video
MDS_TopVSlideA(raw,125)		#"Intro" starts around 125
MDS_BotVSlideA(raw,300)		#Intro ends at 300 and "Name entry" being on bottom
MDS_VertStackA(raw,400)		#Back to the vertical stack

crop(128,0,-128,0)			#Crop off those unused borders to help prevent windowboxing - you can also use MDS_Border instead of 128
ConvertToYV12()				#Convert to YV12 so Megui doesn't complain!
We can give this script right to our encoder of choice, eg, MeGUI, upload to youtube, and you should be done.
3) What not to do
There are a few caveats with using this system, as touched on in the introduction. Most of the things you can do 'wrong' will throw an error when you try to preview the video, however there are a few things that aren't as easily accounted for. Although, I guess I could have checked they had the same frame count...
a) Because of the way the system works, the output video and the supplied raw video should remain in sync. A really easy way to get them to be out of sync is to do something like the following:
code:
MDS_VertStack()
MDS_TopVSlideA(raw,125)
MDS_BotVSlideA(raw,300)
#Oh, There is a loading screen at 350 til frame 375, let's just edit that out!
loop(0,350,375)
MDS_VertStackA(raw,400 - 25)		#Changed to try and account for the above edit
First of all, you can indeed use loop as sort of a reverse trim. Secondly, this edits our output video separately from the raw video, the frame that '400 - 25' now refers will be a different frame in the output video to the one in the raw video, causing them to get desynchronised, which would make the final transition all sorts of messed up. Ideally, do all of your editing either before or after you use MDS functions, or, if you really want to do it in the middle of things, apply the same edit to the raw video as well. But generally:
code:
#loop(0,350,375)	#Do edits either before...

MDS_VertStack()
MDS_TopVSlideA(raw,125)
MDS_BotVSlideA(raw,300)
MDS_VertStackA(raw,???)

#loop(0,350,375)	#Or after.
b) I mean, I'd hope it was obvious, but, if you decide you want to insert an extra little layout transition in anywhere, say at frame 200, you need to place it on a line where the frame numbers follow consecutively (so, in the example, between 125 and 300).
c) Also, please crop off the black side borders if you do not use them. eg
code:
crop(MDS_Border,0,-MDS_Border,0)
d) You might like to try to avoid using any effects that employ a 3x pixel multiplication, eg, SBSL/SBSR for long periods of video - 2x and 4x pixel multiplications encode very nicely, but 3x tends to take a lot longer to encode and take up more space - it's one of those things about video encoding, but, if you're going youtube only, you don't really need to worry about this. To some extent, the same thing applies to positioning the images at odd x/y coordinates, so I guess try to keep things in multiplies of 2 or 4.
e) I forgot to do any nice checking on the clip c input for many functions - if it isn't 1280x768, things will complain about frame size not matching. This shouldn't cause you any problems if you follow the guidelines set out earlier.
4) Things You Might Want To Know About
- I used your system perfectly and my video is all black now, what gives?
Some means of recording a video result in the mask being set to be full alpha, which is fine until you layer them. Try using the ResetMask() filter on your raw clip! (Thanks nidoking). This is mostly relevant if you record with FRAPS.
- Does this work with 3DS footage?
Currently, it does not, but only because I don't have a supply of 3DS footage to make it work with. It might be a smaller or larger affair to make it work with them, I haven't really tried, but, I'm interested in doing so. If this is something you'd like to use, shoot me a line either in the something awful TSF/PM or at mastigophoran at gmail dot com and I'll be happy to help out.
- What is this AFC thing?
The AFC is a variable that's used to specify over how many frames all the transitions in MastiDS last. It defaults to 30, so on a 30 FPS video, the transitions will last 1 second. If you want faster transitions, or if you're working with a video with a different frame rate, you can change this value by calling the following function:
MDS_SetAFC(int newAFC)
Note that this will only apply to transitions that are in the script after this line, which can either be a help or a hindrance.
- Making videos for websites that aren't youtube
MastiDS by default outputs a video with the expectation that you're trying to get 720p on Youtube. For other websites, like at the time of writing, Blip, this just isn't necessary, and it's also the case if you have some way of providing your source video to people - there just isn't really a point to a video this big when it's not being converted again. Because of this, you might want to output a video in a smaller size (or possibly, make one video for YT, and another for everywhere else). You have a few choices with this, and possibly the simplest is a 640x384, half the size of the regular output, and do everything in half size. If that sounds good, you can use these functions:
MDS_SetDefaultParams() - Sets the screen up the way it normally is
MDS_SetHalfSizeParams() - Sets the output to be processed at half the size it usually is
MDS_SetVertHalfSizeParams() - Sets the output to be processed at half size for vertically oriented videos. Expects you to have called VerticalMode beforehands.
MDS_Set169WideScreen() - Creates a 16:9 widescreen video, 1364x768 (1364 for yuv purposes, apparently)
Alternatively, if you want to mess around even more with things, you can use this function:
MDS_SetParams(int "pMaxX", int "pMaxY", int "pSzX", int "pSzY", int "pQSzX", int "pQSzY", int "pSBSX", int "pSBSY") - let's you set things up however you want.
With SetParams, you can specify exactly what you want, but, if you just want a 4:3 output, you're probably better off just cropping the borders off of the sides of the regular output. You can also just resize the final output video, but this isn't perfect.
Ideally, you would call one of these functions once, at the beginning of your script.
Also note that, when using eg half size, some layouts will display one of the screens at a size below that of the original video. When doing this, MDS will use a different resize filter (outside of the animated sequences) for this, which defaults to Spline36Resize.
- I only want to go between 2 layouts, but do it a dozen times. Is there an easier way to do this?
Avisynth, as a scripting language, is pretty bad at doing the same things over and over, and since in reality, you'll probably only use 2 or 3 effects in your videos, you might just end up with a script that has 50 calls to VertStackA and BotA one after another. Never having used it to actually make an LP video, I was given some ideas and asked to investigate what the options were for tidying this sort of thing up. So, ideally without any extra avisynth plugins being necessary, I came up with some options.
Firstly, every layout command that takes (c,raw,frame) also takes (c,raw,frame,frame2). If Frame2 is specified, then at that frame, the layout will revert (either instantly or animated, depending on the call you make) to whatever it was when this line was called. In addition to this, I made the following command:
MDS_flipflop(clip c, clip raw, string func1, string func2, int f1, int "f2", int "f3", int "f4" ... int "f41", int "f42")
What this function is... is complicated. The first thing it does is call func1(c, raw, f1), then if declared, func2(c, raw, f2). It then recursively calls itself, shifting all of the parameters down by 2 over and over, up until it gets to the end (I only went up to 42, so up to 21 times).
So, what do these commands do for you? Well it means that this:
code:
MDS_BotVSlide()

MDS_VertStackA(raw,100)
MDS_BotVSlideA(raw,150)
MDS_VertStackA(raw,200)
MDS_BotVSlideA(raw,250)
MDS_VertStackA(raw,300)
MDS_BotVSlideA(raw,350)
MDS_VertStackA(raw,400)
MDS_BotVSlideA(raw,450)
MDS_VertStackA(raw,500)
Can be written as:
code:
MDS_BotVSlide()

MDS_VertStackA(raw,100,150)
MDS_VertStackA(raw,200,250)
MDS_VertStackA(raw,300,350)
MDS_VertStackA(raw,400,450)
MDS_VertStackA(raw,500)
And also as
code:
MDS_BotVSlide()

MDS_flipflop(raw,"MDS_VertStackA","MDS_BotVSlideA",100,150,200,250,300,350,400,450,500)
Flipflop should work with any number of params, odd/even, whatever, it should be fine. These still have to follow the rules, with each and every frame number must be consecutive.
- This readme is too long! Tell me the most useful things you added in this new version already!
OK so, new to revision 4 are some new useful features you might care about. Here's the first:
MDS_DraftSettings()
and
MDS_SmoothSettings()
Call these to select the (default) Draft settings or some higher quality nice output settings. You want these nice output settings when:
- You want higher quality animations between layouts, as it uses a smoother+slower resize filter for these.
- You are using one of the few layouts that has a non integer multiple, for example, MDS_VertStackGap.
Secondly, some DS games are played with the DS vertically, and some ask you to change orientation halfway through! If you use DeSmuME's built in recording function, you should be able to change the orientation it's displaying the game to you with so you don't have to suffer. If you're screen recording then you'll have to do some work to get the correct raw format back, sorry!
I built in support for vertical screens and transition effects that rotate the screens. You can activate vertical mode with the following:
MDS_SetVerticalMode(bool "RotateToRight", bool "NoParamChange") setting TRUE will rotate to the right instead of the left, and noparamchange prevents current expected sizes from being automatically manipulated, use if things are actually already in vertical mode and are getting improperly resized after this call)
(call it after any setparams style commands, eg MDS_SetHalfSizeParams())
and your default layouts will be like MDS_SideWays(...) or MDS_SideWaysGap(...). Since the screens generally just fit on the display at a nice magnification, I didn't really make a lot of layouts for this, you'll have to make your own if you need them. Technically All the other layouts still work, but they'l look weird.
MDS_SetHorizontalMode(bool "NoParamChange") is its counterpart if you need that for some reason.
For the transition from 'normal' to 'rotated', I used the Zoom plugin (click the plugin text to get a zip from the avisynth wiki, the links on doom9 are dead afaik), although you could actually use whatver plugin you wanted! MDS tells avisynth to evaluate the following line:
zoom(c,angle = string(val))
Where c and val are provided by the wrapper, c is the video clip and val is a rotation in degrees. You can replace this string by calling MDS_ChangeAnimWorker("yout string here"), and it will replace this with whatever you want.
Anyway new layout functions are all listed below, with a big NEW TO R4 next to them. Enjoy?
5) Effects Function List
I came up with quite a few example styles to use for the system, but I can think of probably a dozen more right now. Every style I've created has both an immediate application function, and an animated function, and each of those has 3 overloading options - ie, 3 different arrangements for its parameters.
The format for the overloads in the majority of function are as follows;
FunctionName(clip raw)
: This returns a clip with the effect applied throughout the whole video. You'll generally only use this only once: to setup your video how you want it. They exist because they're also called internally during:
FunctionName(clip c, clip raw, int frame)
: This type of function is the main one you'll be using - It'll apply the relevant function throughout the rest of the video from the frame specified. Secretly though, it's actually the same function as this one:
FunctionName(clip c, clip raw, int frame, int "frame2")
: Frame2 is an optional variable (denoted by the fact it's in speach marks) that declares where what this function does will be undone, and it will revert to the last layout you set.
And just another reminder, that you do not need to include the first parameter if you want your video to use the last variable as that first parameter. Avisynth can be confusing, but it can also make things look fairly neat and tidy. Obviously, if you have a preference on last, you should be able to stick with it.
Anyway, here's the list of functions that use the above parameter style. Note that all the screen shots here are at 50% size, so you can see more than one of them at once:
Layout type functions:
2x, Side by Side
MDS_SBS(clip raw) or (clip c, clip raw, int frame, int "frame2")
MDS_SBSA(clip raw) or (clip c, clip raw, int frame, int "frame2")
Side by Side Emphasis Left (top screen) 3x 2x
MDS_SBSL(so on and so forth as above...)
MDS_SBSLA(...)

Side by Side Emphasis Right (bottom screen) 2x 3x
MDS_SBSR(...)
MDS_SBSRA(...)
Top screen x4, bottom screen LR
MDS_Top(...)
MDS_TopA(...)

Top screen x4 only, centred, bottom is offscreen in LR corner
MDS_TopO(...)
MDS_TopOA(...)

Bottom screen x4, top screen UL
MDS_Bot(...)
MDS_BotA(...)
Bottom screen x4 only, centred, top is offscreen in UR corner
MDS_BotO(...)
MDS_BotOA(...)
Both 4x, Top screen centred, bottom screen to the right hand side
MDS_TopHSlide(...)
MDS_TopHSlideA(...)

Both 4x, Bottom screen centred, bottom screen to the left hand side
MDS_BotHSlide(...)
MDS_BotHSlideA(...)

Both 4x, Top screen centred, bottom screen offscreen below
MDS_TopVSlide(...)
MDS_TopVSlideA(...)
Both 4x, Bottom screen centred, top screen offscreen above
MDS_BotVSlide(...)
MDS_BotVSlideA(...)
Both 2x, Stacked vertically
MDS_VertStack(...)
MDS_VertStackA(...)
New to R4
Uncertain magnification. Suggest MDS_SmoothSettings() for final video! Gap parameter optional, default 92/-92 with MDS_SmoothSettings. Must be -ve for higher quality result!
MDS_VertStackGap..., gap = "your pixel gap")
MDS_VertStackGapA..., gap = "your pixel gap")
Both 2x, Rotated sideways. This is really only for the next 2 effects. If called on its own, expects MDS_VerticalMode() to have been used:
MDS_RotateEffectSub(...)
MDS_RotateEffectSubA(...)

Both 2x, EXPECTS TO BE CALLED AFTER MDS_VertStack! Stacked Vertically, with special transition to MDS_RotateEffectSub. Doesn't accept frame2, but does have an optional bool to rotate to the right instead. Also activates VerticalMode
MDS_VStackToRotated(clip c, clip raw, int frame, bool "RightInstead")
Both 2x, EXPECTS TO BE CALLED AFTER MDS_RotateEffectSub! The uh, the opposite of the above! Also deactivates VerticalMode
MDS_RotatedToVStack(clip c, clip raw, int frame, bool "RightInstead")
Both 3x, stuck together in the middle of the screen. Expects VerticalMode.
MDS_SideWays(...)
MDS_SideWaysA(...)
Both 3x, with maximum gap between them to not reduce scaling (would be equivilent of approx 42 pixel gap between real screens, 'real' gap is ~92 according to wikipedia). Expects VerticalMode.
MDS_SideWaysCGap(...)
MDS_SideWaysCGapA(...)
Uncertain magnification. Suggest MDS_SmoothSettings() for final video! Gap parameter optional, default 92/-92 with MDS_SmoothSettings. Must be -ve for higher quality result! Expects VerticalMode.
MDS_SideWaysGap(..., gap = "your pixel gap")
MDS_SideWaysGapA(..., gap = "your pixel gap")
Transition type functions:
As well as the above, there are a couple of extra functions for assisting in fading from one screen to the other in some capacity (doing it yourself during MDS calls can result in a desync, or upsetting your audio, etc, so, I made some functions to help you do this:
MDS_Dissolve(clip c, clip raw, int frame, string layout)
With 2 handy sub functions:
MDS_DissolveToBot(clip c, clip raw, int frame, string "layout")
MDS_DissolveToTop(clip c, clip raw, int frame, string "layout")
The layout variable is a string intended to contain a string with the name of a non animated MDS function (eg, "MDS_VertStack", with the speach marks) - note that the layout function you name must have a single clip parameter as a valid overload, or MDS will throw an error. In DissolveToBot/DissolveToTop, this variable is optional, and defaults to MDS_BotVSlide and MDS_TopVSlide in each case - these exist just as examples, they don't do anything the regular MDS_Dissolve doesn't do, so if you have a layout you call a lot, you can save writing it in and make your own function:
code:
function My_Function_Name_Here(clip c, clip raw, int frame)
{
	MDS_Dissolve(c,raw,frame,"MDS_SBS")
}
I made a similar set of functions for Fades. The caveat is that these will fade to black in half the frames set in the AFC, then fade to the specified layout in the other half, meaning the whole transition takes the same amount of time as any other: AFC many frames. If that isn't your cup of tea, you can use LongFade, which will both FadeOut and FadeOut for the full AFC length, making the whole transition last for 2xAFC:
MDS_Fade(clip c, clip raw, int frame, string layout, bool "fadeaudio")
MDS_FadeToBot(clip c, clip raw, int frame, string "layout", bool "fadeaudio")
MDS_FadeToTop(clip c, clip raw, int frame, string "layout", bool "fadeaudio")
MDS_LongFade(clip c, clip raw, int frame, string layout, bool "fadeaudio")
These work in basically the same fashion as the Dissolve functions above. They do however have an extra, optional, variable: fadeaudio. While it defaults to false, you can set it to true to fade the audio with the video - not sure this is useful but seemed appropriate to put in here. Again, the layouts default to MDS_BotVSlide and MDS_TopVSlide in each case for FadeToBot/FadeToTop, and these are just a couple of helper functions.
The final few effect functions are explained literally 6 lines down, and are intended to let you animate to positions you have determined yourself, simplifying the process of making your own custom styles, which handily will also be explained in the next section!
6) Making MDS work for you
The most important thing I want to relate to you in this section is that: MastiDS is at its heart an engine, not just a library of possible effects - if you want to do something with it that I didn't add, odds are, you can make it do what you want it to without too much effort.
Firstly, then:
Custom Layouts
There are 3 functions to help you make your own layouts. These are:
MDS_Custom_TargetData(int TSX, int TSY, int BSX, int BSY, int TPX, int TPY, int BPX, int BPY)
MDS_Custom(...)
MDS_CustomA(...)
Let's say you want to make your own custom layout that uses the animation engine/state system MDS provides. For example, let's make a picture in picture effect.
To do this, first, we'll make a function: this function is effectively going to be your version of MDS_[layoutname](...), so, you'll call it in the same way you call all of those functions I've made. Since we almost always use the 3/4 parameter version of an animated function, let's make one of those:
code:
function My_PIP_Effect(clip c, clip raw, int frame, int "frame2")
{

}
Now we need to work out how we would position the frames in the screen space MDS operates in. Here, you have two choices: you can hard code in some numbers, or, you can use some of the numbers that MDS calculates from its configuration functions. I'm going to do both for this tutorial, as it can be relevant if you're making videos for both youtube and other websites at the same time.
Since we know MDS normally does a 4x magnify for a fullscreen display, let's say we want to take the picture in picture to be 1/4 that size. Let's also put it in the lower right corner. To do this, we're going to use the MDS_Custom_TargetData function - this function takes 8 parameters, which seems like a lot. However, they're fairly simply: Top Size X, Top Size Y, Bottom Size X, Bottom Size Y, Top Position X, Top Position Y, Bottom Position X, Bottom Position Y. These positions work from the top right corner, though, so while the main screen will be easy to position, we'll need to do a bit of extra math for the smaller one:
Size Top:
256 * 4 = 1024, 192 * 4 = 768
Size Bottom:
256 and 192
Top Position:
0 + Border = 128 , 0
Bottom Position:
X pos;
0 + Border + Size Top X - Size Bottom X = 0 + 128 + 1024 - 256 = 896
Y pos;
0 + FrameSizeY - Size Bottom Y = 768 - 192 = 576
So, we could use the following:
code:
MDS_Custom_TargetData( 1024,768 , 256,192 , 128,0 , 896,576)
However, we could also make use of the variables that exist in MDS: MDS already knows the size of the borders and max X and Y sizes, and in fact, has a series of functions that allow you to change these without having to alter your script to produce different sized videos. Therefore, it's in your interest to use these variables if that's something you intend to make use of:
global MDS_MaxX = 1280
global MDS_MaxY = 768
global MDS_SzX = 1024
global MDS_SzY = 768
global MDS_QSzX = 256
global MDS_QSzY = 192
global MDS_SBSX = 512
global MDS_SBSY = 384
global MDS_Border = 128
So, let's remake that TargetData call using these variables:
code:
MDS_Custom_TargetData( MDS_SzX,MDS_SzY , MDS_QSzX,MDS_QSzY , MDS_Border,0 , (MDS_Border + MDS_SzX - MDS_QSzX),(MDS_MaxY - MDS_QSzY)
Now that we have this call in place, we should immediately call either MDS_Custom or MDS_CustomA. So in that case, our final custom function will look like this:
code:
function My_PIP_EffectA(clip c, clip raw, int frame, int "frame2")
{
	MDS_Custom_TargetData( MDS_SzX,MDS_SzY , MDS_QSzX,MDS_QSzY , MDS_Border,0 , (MDS_Border + MDS_SzX - MDS_QSzX),(MDS_MaxY - MDS_QSzY) )
	MDS_CustomA(c,raw,frame,frame2)
}

Now provided we have this in our script, we can call My_PIP_EffectA in amongst all the other MDS calls we were going to make. We could go back to our example and do something like this:
code:
MDS_VertStack()
MDS_TopVSlideA(raw,125)
My_PIP_Effect(raw,300)
MDS_VertStackA(raw,400)
And that would be fine.
If you want to have several custom layouts in a single script, this is no problem: just create another function and set up the position values in it in the same way we did here.
Note that, if you're layering screens on top of other screens, you'll find that MDS draws the Top screen first, then the bottom screen. If we wanted to reverse the Picture in Picture effect above, the bottom screen would be drawn over the top of the top screen, occluding it entirely. In cases like this, you can use this function:
MDS_TopOnTop(bool Bfirst)
If you set this to true, calls after this line will have the top screen rendered after (and therefore on top of) the bottom screen. Calling it again with false will turn it off. You can of course there for integrate it into your custom functions so you don't need to think about it too much.
One last thing (spoiler: there is always another thing) - if you are creating a custom function that results in a noninteger multiple for your final screen layout, you can add the following line to your function, just after you set up your target data:
code:
global MDS_OneTimeUseDown = TRUE
Which will force MDS to use the resize filter for when the output is < 1x - this filter usually has blending enabled, so it should result in a smoother, but blended, output, which of course makes sense when not done on an integer multiple. You may want to combine this with the blockpreserve function, although blockpreserve is set to 4 with the smooth settings anyway so you may be overriding this.
Custom Transitions
Let's say you want to use another plugin for a transition effect. If you want to just clip out part of your video, this is fine, you use it either before, on your raw video, or after, on your output video. If however you want to transition from one layout to another layout, this can be quite complicated. Except that of course: it isn't! I just grabbed the first transition plugin I could find, TransAll: http://avisynth.org/vcmohan/TransAll/docs/index.html
I picked a function from this plugin at random, TransSprite.
If I want to transition from eg MDS_Top to MDS_VertStack, I can do the following:
code:
MDS_TopA(raw,500)
MDS_CustomTransition(raw,600,"MDS_VertStack","TransSprite")
And simply name the function in the last variable. Note however that this has a condition: The function quoted will need to work with the following parameters:
FunctionName(clipA,clipB,TransitionLengthInFrames)
Most transition functions I've found DO work like this, but, on the off chance there are ones that don't, or have extra parameters you wish to control, you can, instead of calling the filter directly, call a custom function:
code:
MDS_CustomTransition(raw,600,"MDS_VertStack","Wrapper_TransSprite")

...

Function Wrapper_TransSprite(clip c1, clip c2, int f)
{
	TransSprite(c1,c2,f,"up")
}
Custom Resize Functions
So, let's say your game doesn't really want to be pointresized up to full screen, or, you don't like the point resizes being used when scaling between layouts. You have several commands available to you:
MDS_ChangeResizeFilter(string FilterName) - this will change the filter name used when scaling from one transition to another. Point Resize is much faster than some of the 'nicer' methods, so, once you have one you like, consider commenting it out until you're encoding your final video. The resize function you put here must work the following call FilterName(clip, size X, size Y), which I think all of the default avisynth filters do, but if you have one that doesn't, you can make and supply the name of a wrapper function which maps the parameters for you.
consider: MDS_SetBlockPreserve(int Factor) - when set to a number greater than 1, will pointresize your video by that many times before applying the resize filter. This will help stop your video getting overly blurry at at higher magnifications if you were just trying to smooth out the animations.
and MDS_SetFinalResizeMethods(string "OneXorMore", string "BelowOneX")
After a transition from one layout to another, or when you just call a non animated effect, MDS resizes your video with (possibly) a different filter than it would during an animation. By Default, for layouts where the result has an X size >= the base video horizontal size (defined by MDS_basesizeX), it will use PointResize, and when the size is below that value, it will use Spline36Resize. If you want it to use different filters for either of these cases, you can set them here.
Custom... uh... well what else have you got?
There are still (still!) a few more functions that exist that you might use. In fact there are quite a few as of revision 4, you're really better off going and looking in the AVS file to have the most up to date idea of what the easy options are, as some globals can be easily changed but don't have a function associated with doing so.
MDS_ResetLastframe()
MDS shouts errors at you if you supply a frame number that is lower than the last frame you called + the AFC variable. If you wanted to do like 2 videos in one AVS file, I guess this could cause you some problems, so if you want it to just do what you tell it to, you can call this, and it will reset the last frame number to 0.
Then there are a lot of worker functions:
MDS_ChangeAnimationWorker(string FuncName)
and
MDS_ChangePositionWorker(string FuncName)
If you decide you don't like the way MDS does something, you can change the functions it uses for the Animation and Positioning processes it performs.
MDS_ChangeCropWorkers(string "TopGetter", string "BotGetter")
If you wanted to provide a source video that doesn't match the stacked on top of one another system that MDS normally expects, or just want to mess with things even more, you can change the functions that get called to obtain the clips of the top and bottom screens from the raw video you supply. If you do alter these because you're using a different input format, you will probably also need this function:
MDS_ChangeBaseSizes(int BaseX, int BaseY)
As MDS will shout errors at you constantly if you provide it with video that doesn't isn't BaseX by 2*BaseY high. These variables are only used in the crop functions and in the Error detection, so, feel free to change them.
Vertical mode actually uses this functionality to change way it crops the raw footage (by including a turnleft/turnright), so, if you're messing with that and wish to use it, be aware of this.
There's also MDS_SetFinalPositionMethods(string OngoingFunctionName) but I genuinly don't really know what it's useful for. It changes the way the frames are positioned after the transition is completed, so it's probably only relevent if you're really changing the way the system works.
7) Being clearer on the problem this solves
You can skip this section if you just want, I just thought I'd add it to help explain what the problem is and what this code does to solve it. For this, I'm going to use an analogy!
Figure 1:
Imagine you're instructing someone to draw a line between 4 positions on a piece of paper to make a Z so you write down the instructions on a piece of paper and give it to them, a bit like this:
1) start to A, 2) go to B, 3) go to C, 4) go to D

For the sake of this example, they do so, and all is fine and wonderful.
Figure 2:
You want to change things up by either adding or removing a point, so, for the sake of this example, you decide you don't want them to connect up C any more and just draw a line from B to D. So, you just cross out your instruction to go to C, like so:
1) start to A, 2) go to B, 3) go to C 4) go to D.
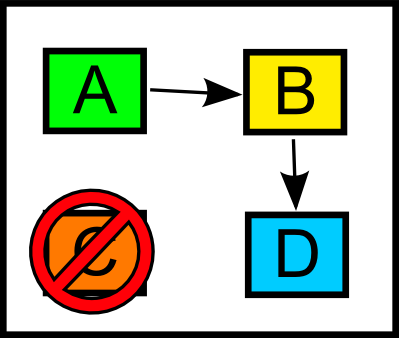
And again they bend to your whims and draw a line in a straight forwards manner and get a prize or something. It's not a Z any more, but it's what you wanted!
Now instead let's get a robot to do the same job. The robot doesn't really think like humans do, and it also doesn't really understand instructions like humans do. This robot's name happens to be Avisynth:
Going back to figure 1 again, we want them to draw lines starting at A, then to B, C and D. Here's a picture in case you've forgotten:
You say:
1) start at A...
 Where's A?
Uh, start at coordinates... uh [1,1]?
OK!
2) Go to B!
Where's B?
ok, go to [9,1]
OK, but where am I?
You're at [1,1], go from [1,1] to [9,1]!
OK!
And so on, you'll end up saying something like this:
1) Start at [1,1] 2) Go from [1,1] to [9,1] 3) Go from [9,1] to [1,9] 4) Go from [1,9] to [9,9]
And the robot dutifully draws you the Z of your dreams.
This is all fine as well. However, what if we want to remove one of those steps? Let's just do what we did last time, and cross out step 3:
1) Start at [1,1] 2) Go from [1,1] to [9,1] 3) Go from [9,1] to [1,9] 4) Go from [1,9] to [9,9]
We end up with something like this:
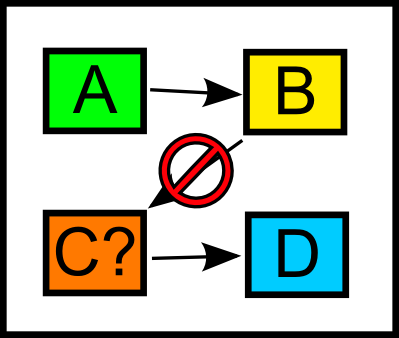
And it draws a perfectly fine = sign, but it isn't the weird drawing of a corner that you'd wanted! Avisynth's problem here is that it it's designed to be very versatile and do things in non linear ways, and as such, has no memory about the last operation you did with it. Because of this, we had to define not only where we wanted the line drawn to, but also where it should start from in each step, so, we need to change one of the other steps as well or else it will start the line from C in step 4. We can't solve this by using variables to say in advance where A, B, C and D are, as we still have to include where the line starts in each step.
While the details are slightly different, overall it's the same problem faced by a DS screen animation handler, and it's this problem that this engine tries to solve.
The aim of this system is to make avisynth seem like it works in a style similar to that of the human in Figure 2, where you can just tell them where to draw the next line to. The reason for that is twofold:
1) Making an animation function that independently moves 2 screens to both different positions and sizes is more complicated than drawing a straight line. Having to define your start position with 8 numbers, on top of the 8 numbers for your end position, gets old pretty fast.
2) It just makes more sense to me this way.
At the lowest level, the base design of the engine is pretty simple: it uses some global variables and stores the sizes and positions of the last way you told it to set up the screens and uses that information when you ask it to move them to a new location, after which it stores those positions and sizes in those start variables. This is why there is such a restriction on working in a chronological order. There isn't really any way around this afaik, at least not in avisynth.
Anyway, I think that's just about everything!