Toggle Background Color
Looks like Roving Clans was the thread’s choice, so setseke ho we’re going to buy the whole world.
Turn One
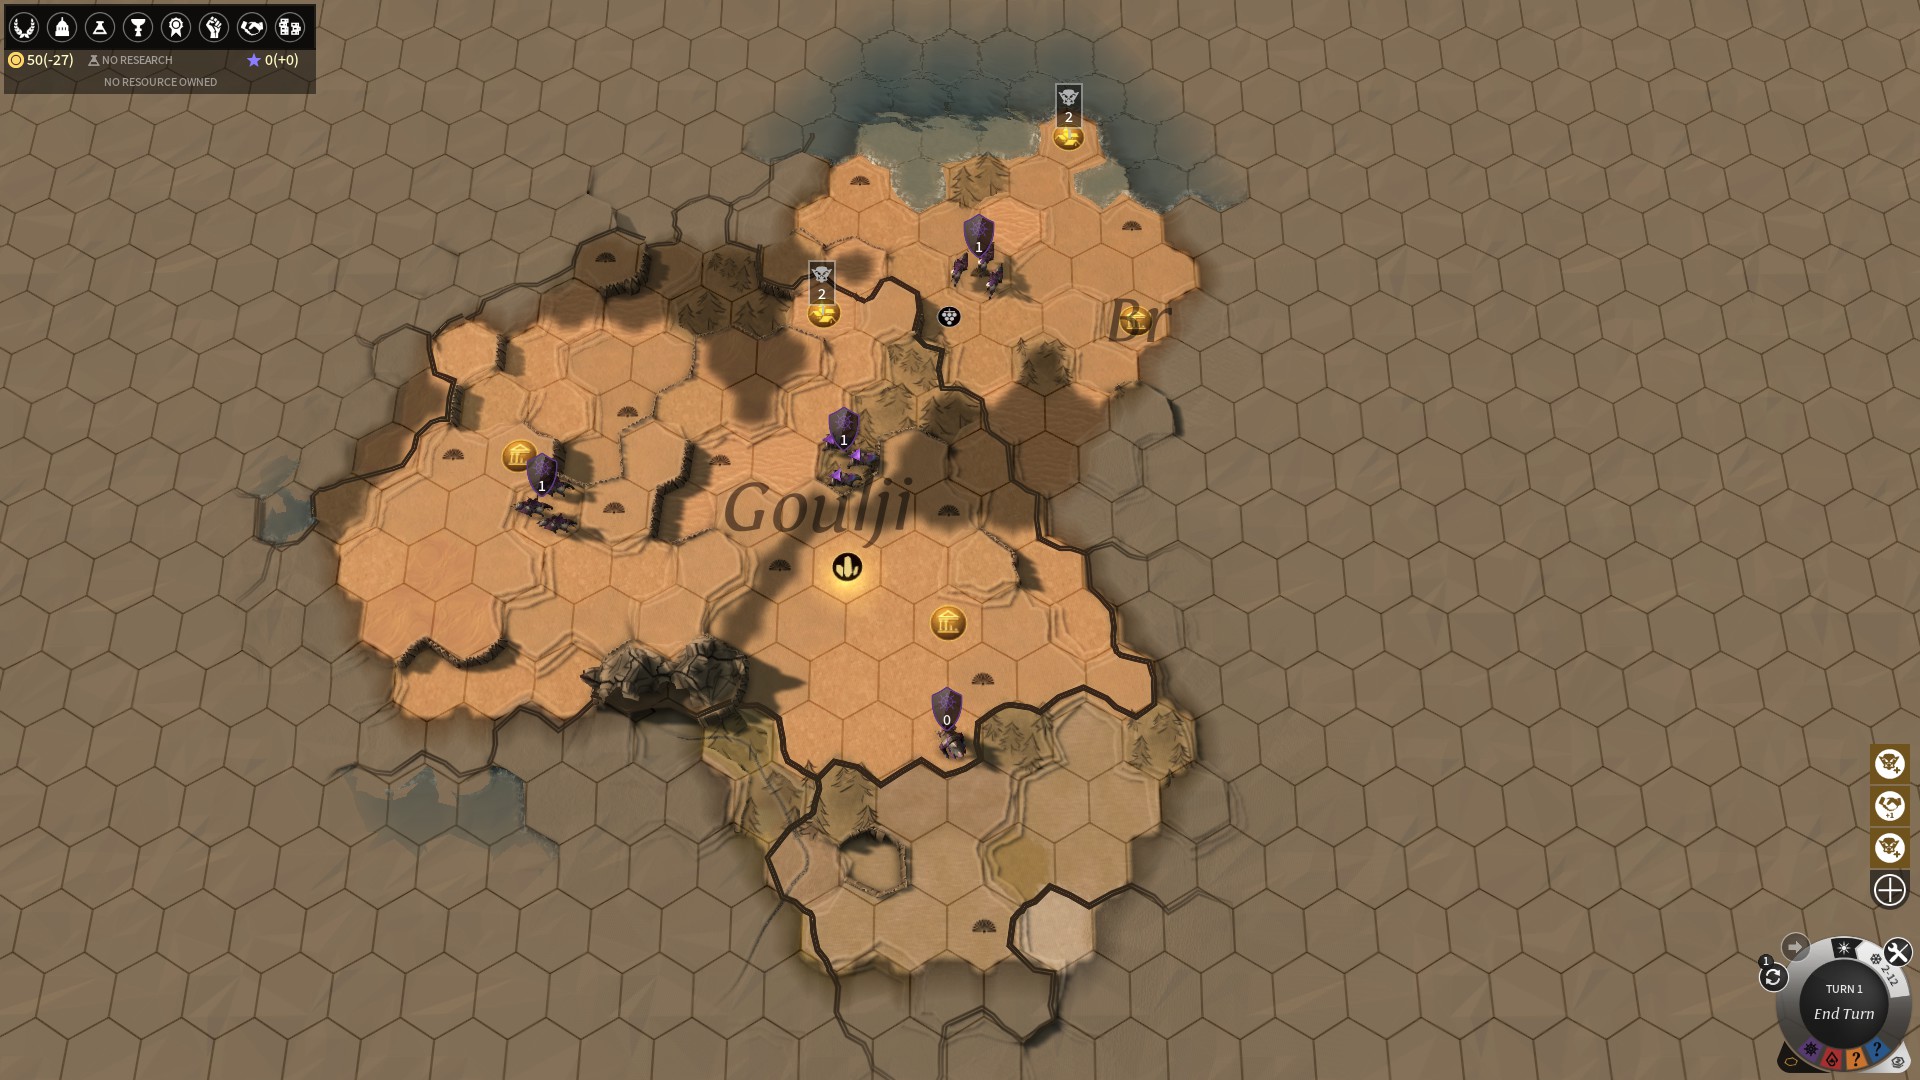
Here’s what the screen looks like as we start out:
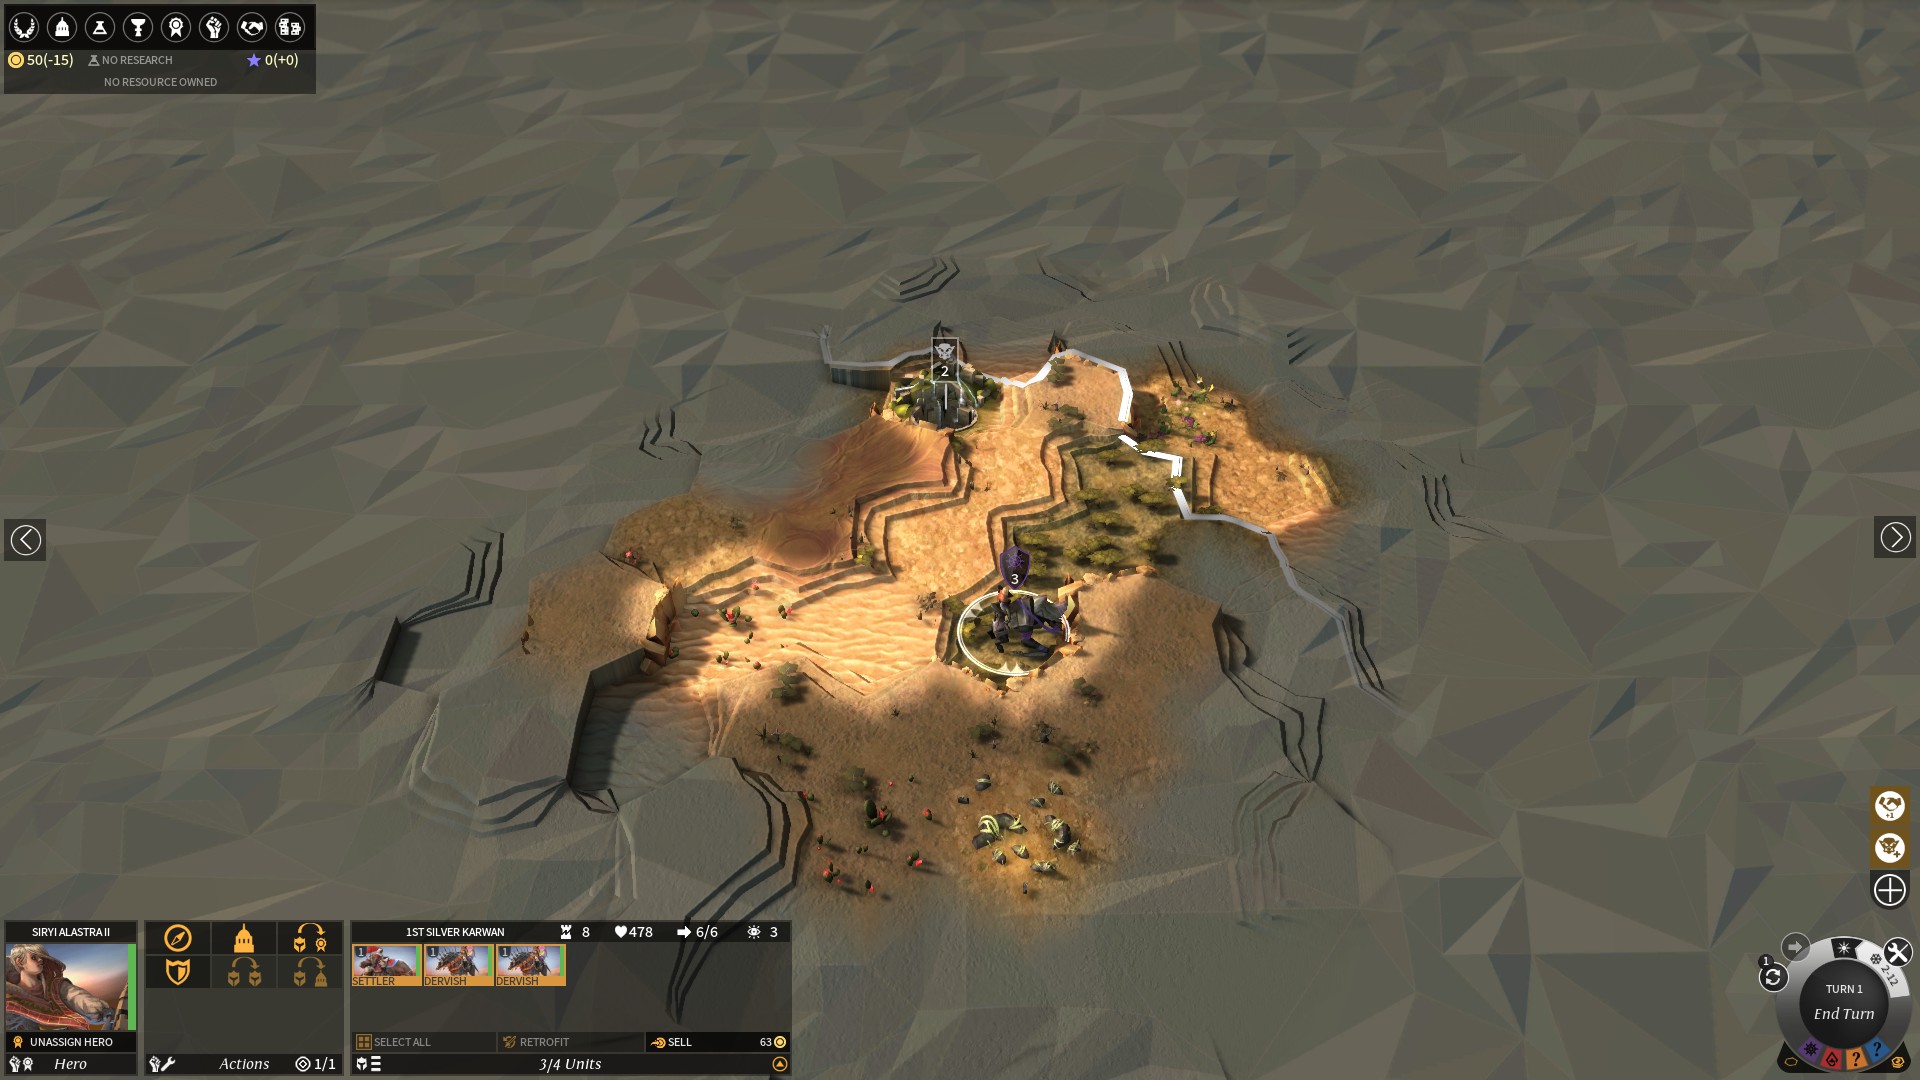
We start the game with two Dervishes (cavalry), a settler, and Siryi Alastra II, a fairly versatile Roving Clans hero who works well as either a general or a governor.
So the first decision of the game, before tech choices, before building choices, hell before laying down the capital: to split or not to split?
It’s fairly safe for some time to split your army into three parts - two soldiers and one hero - and explore the continent as fast as you can, because minor faction (barbarian/environmental) armies don’t start showing up for the first several turns. After that, however, your stacks are pretty much toast and you need to recall your hero. I prefer this strategy when my starting units are weak or I plan to use my hero as a governor. It nets a lot more ruins bonuses, including the amazing possibility of getting advanced extractors.
The alternative is to not split, and keep one stack of units running around clearing out minor faction villages. This is my preferred opening with Necrophages and with armies that I know can beat the locals, such as Drakken. Helps if I’m not particularly planning on using the hero as a governor.
Both sides have their pros and cons. The major pros of splitting are that you get lots of ruins bonuses, have a much better idea of where to settle your next couple cities, and can more easily initiate diplomacy with others. This also leaves you vulnerable to roaming armies once those fire up. Meanwhile, stacking means that you’re clearing out minor factions and thus prevent roaming armies but you often wind up fumbling around in the dark for city sites. An important aside is to consider the quest your faction has - the Necrophage quest requires burning down some minor faction villages, while the Wild Walkers need to explore multiple ruins.
Since we’re playing Roving Clans, I’m just going to elect to split our army into three and explore in three different directions, especially since the start location doesn’t look that great at first glance. Here’s what we see after I’ve split the armies.
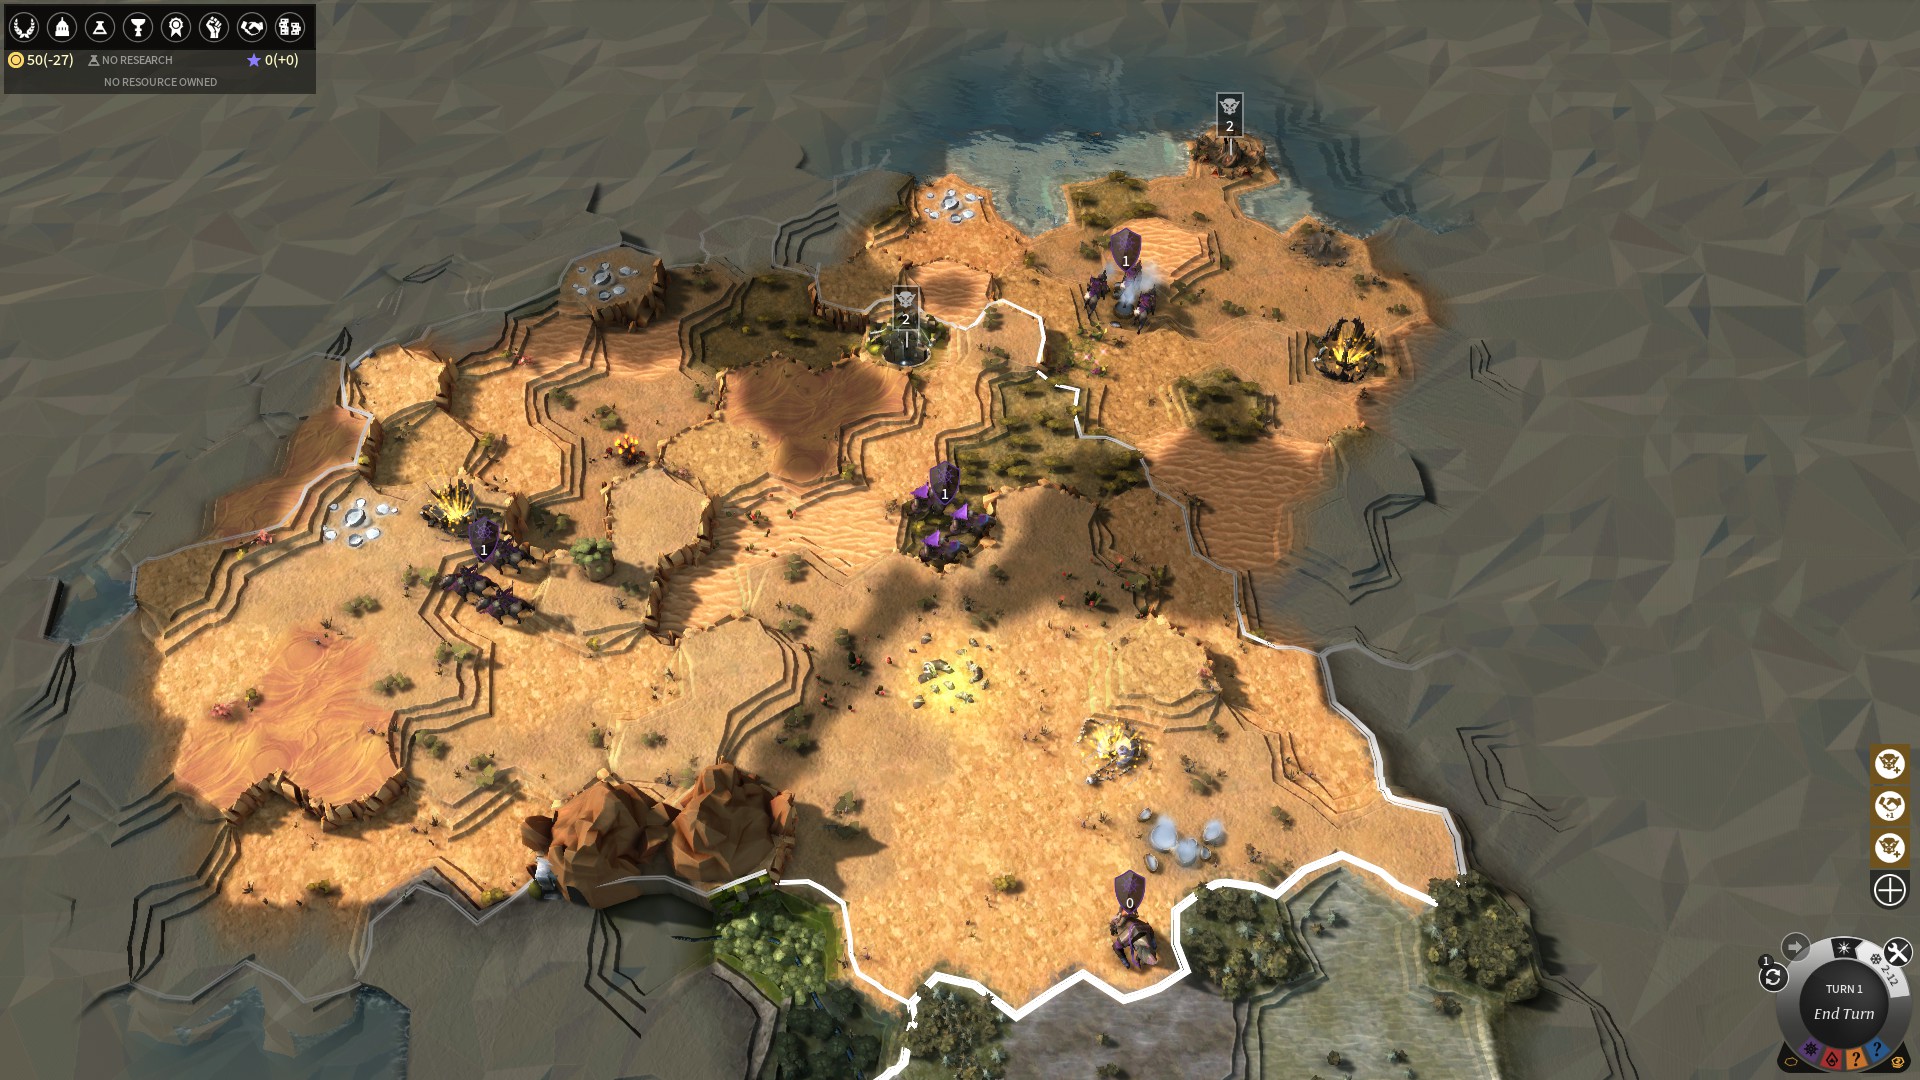
And I’m really glad that I decided to explore like that before settling, since I uncovered some much better terrain for settling.
Which leads us right to decision #2: where to put your starting city. The basic rubric is to maximize production, but honestly it’s a little more complicated than that. You can expand your city to exploit more tiles than you start with, and expanding five times is a pretty safe bet for your first couple cities, so consider how you want the city to look later in the game. You also want to exploit a happiness tile like Dragon Tree or Mychordia if possible. Finally, not all forms of production are equally useful at all points in the game.
How does production work in this game? Well, there’s five primary resources: food, industry, dust, science, and influence, referred to collectively as FIDSI. Food is used to increase the population of cities, industry to produce buildings, dust is the currency and used for a lot of different things (including rushing production), science for research, and influence for things like peace treaties and trade deals. You really need all of them in some quantity or another, but your priorities over the course of the game shift. For the starting city, I tend to favor food and industry, since those are the engines of getting out settlers to expand your empire.
With that in mind, sometimes you won’t find a suitable position in the first turn. You really shouldn’t stall more than one turn, tempo matters, but placement is also crucial. One advantage of splitting here is that you stand a much better chance of finding a site that’s useful, and this can justify splitting for only the first turn and then re-merging.
Here’s three images of our starting location
yes that is the same image
This is what it looks like through the default camera view.
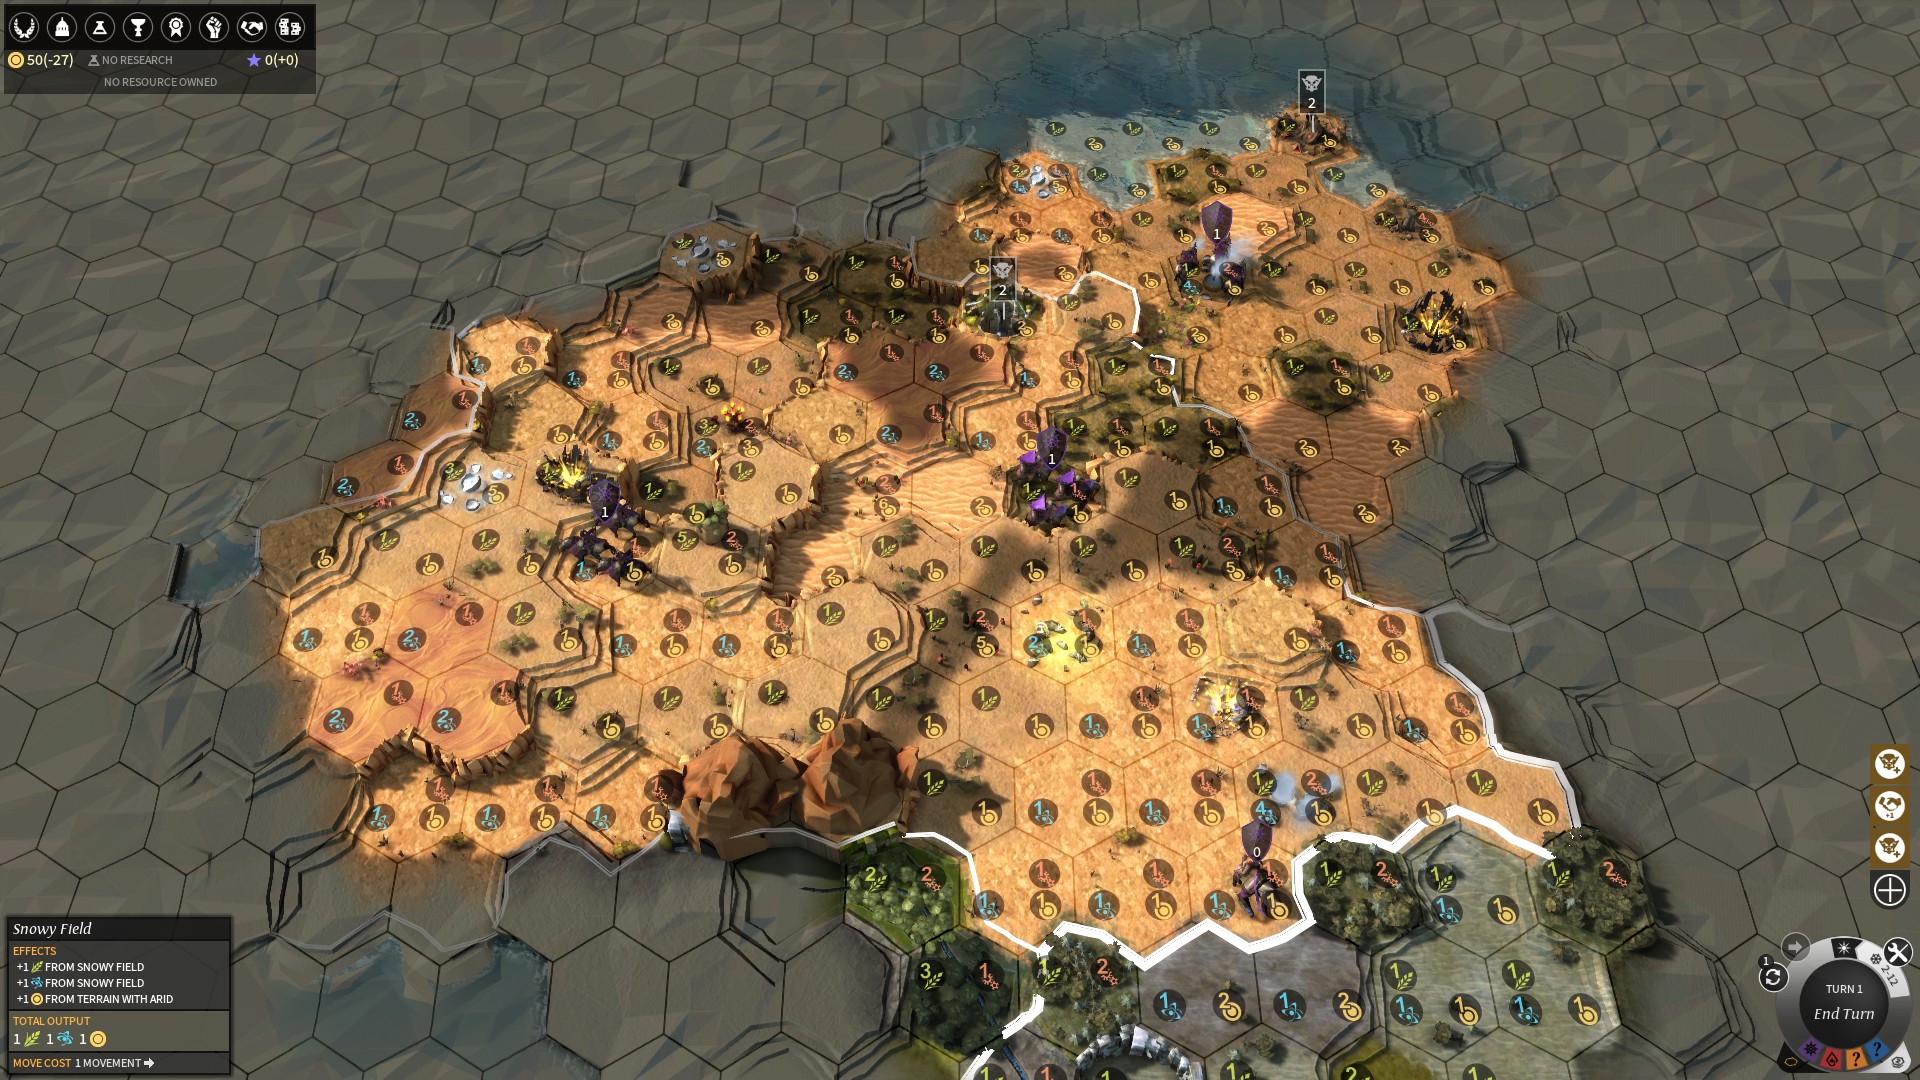
This is what it looks like with the production overlay, which is useful for predicting how productive the city is going to be in the future. I typically play with the production overlay on, but it interferes with the aesthetics of the game so most of my screenshots won’t have it.
This is what it looks like zoomed out. The zoomed out view actually makes some critical information very accessible - notably, those flower-looking things are anomalies, special tiles with bonus production and sometimes bonus happiness. It also makes viewing special resources easier: that cluster of grapes in white with the circle around it is a luxury resource ,wine in this case, and the yellow colored crystal-looking thing is a strategic resource, in this case glassteel, one of the two starting resources. Luxuries are always white, and each strategic has its own color.
The village looking things are minor faction villages - these are not at this point owned by any empire, and are indeed hostile to all empires. However, they can be brought over to our cause, either through parley, bribes, or being burnt down and then repopulated, and once pacified they can be assimilated into our empire to provide us with 1)the ability to recruit their specific units and 2)a passive bonus associated with that minor faction. We’re going to try to get as many of them into the Roving Clans agenda through peaceful means as possible. The things that look like greek temples are ruins, and exploring them will typically lead to either nothing or a small pile of dust, but occasionally we’ll get something really great out of them.
Some of you may have noticed that there are borders around some of the tiles. These are the borders for [regions]. Regions are a pretty unfamiliar concept to most 4X players - you can only have one city per region, and if you have a city within a region you claim the entire region. Each region has its own resources, which are collected by extractors built by the city with no regard for their distance from the city center. Each region also has one minor faction in it, with between one and three villages (the starting region always has one village). You don’t have to have all your regions adjacent to one another, but it helps. In our case, our home region starts with the minor faction Delvers, basically dwarves.
One spot in our starting region is clearly superior to the others - the spot in between the three anomalies on the left side. I’ve put our starting city there.
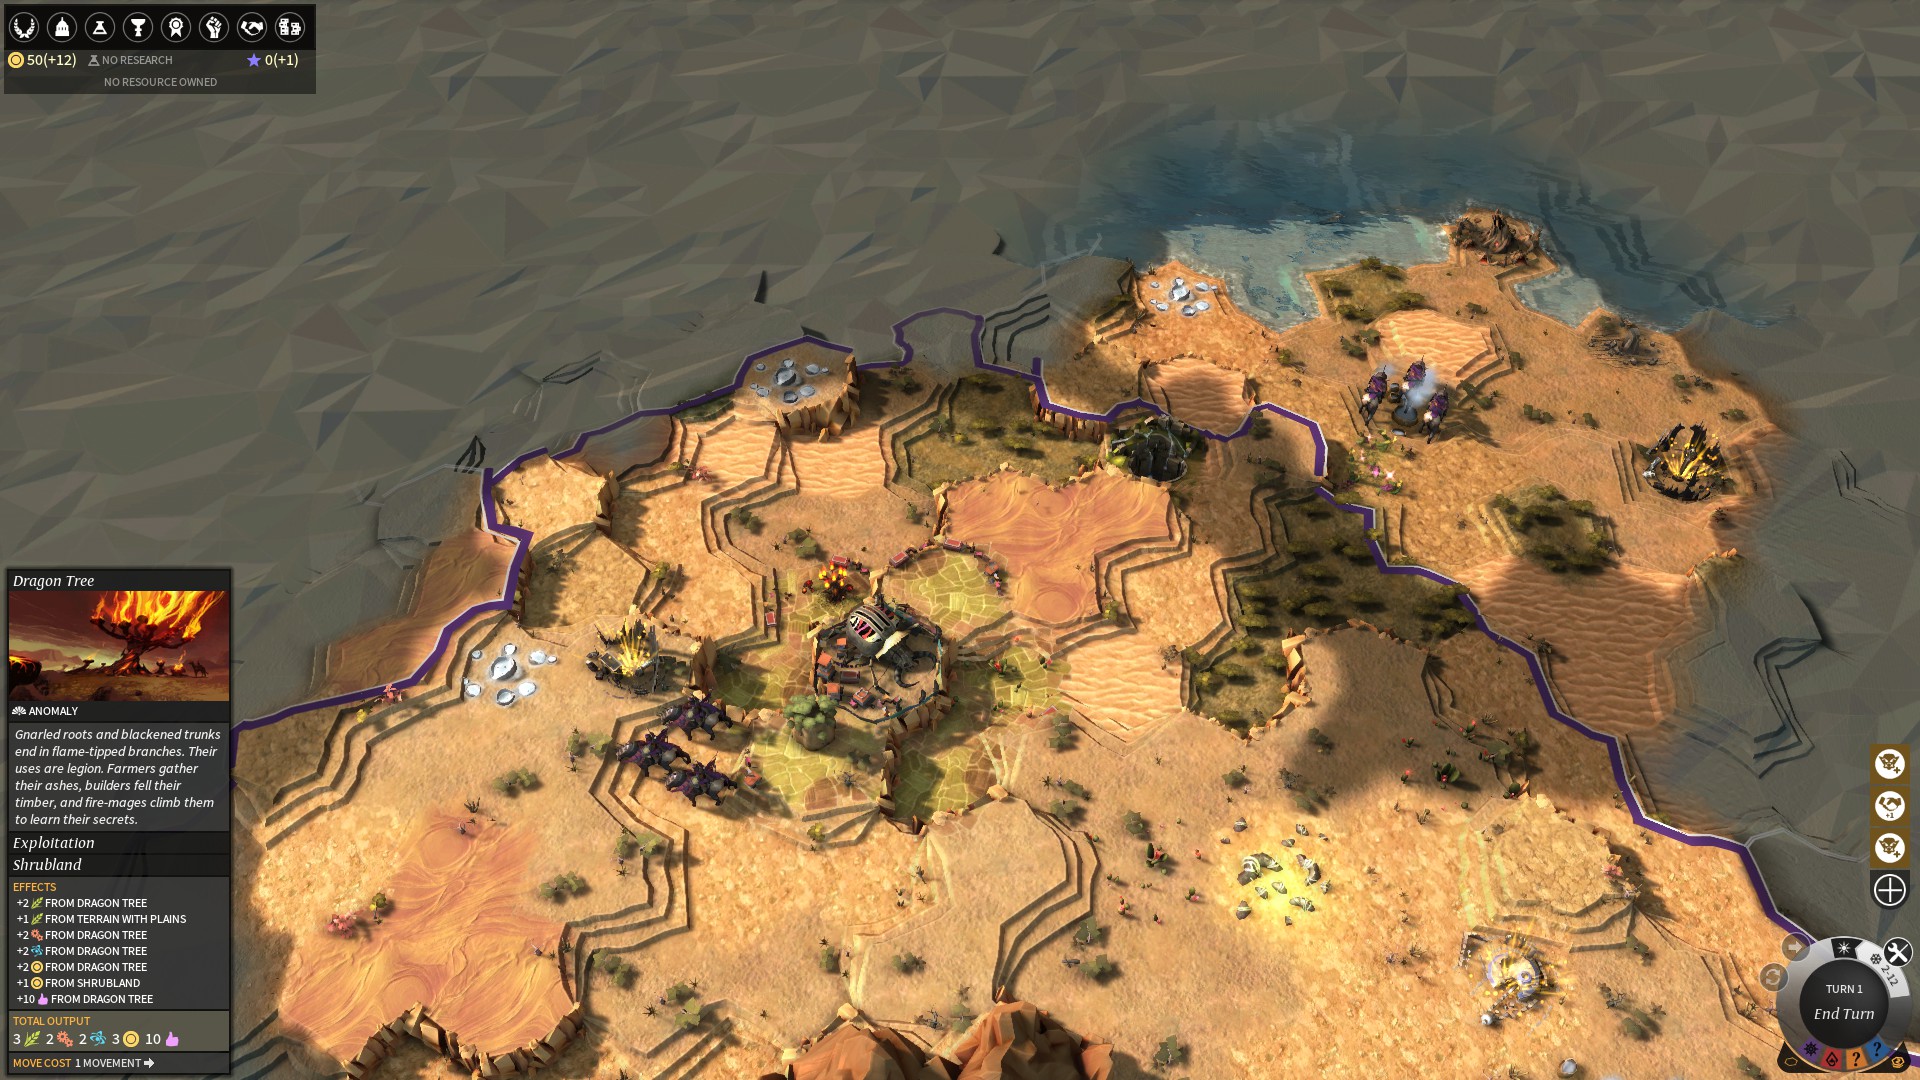
In the lower left you can see the tooltip for the main reason I settled here - the Dragon Tree, which provides us with pretty good production and bonus happiness, which I’ll talk about later.
In order to end the turn, we need to select a technology and a starting production. I’ve chosen the very safe Language Square technology (enables parley and bribe actions on minor faction villages) and the very, very safe Founder’s Memorial building (only one per empire but you virtually always want it out as fast as possible since it’s very cheap and very productive).
And with that, turn one ends.
Turn Two
First thing that pops up on turn 2 is the faction quest
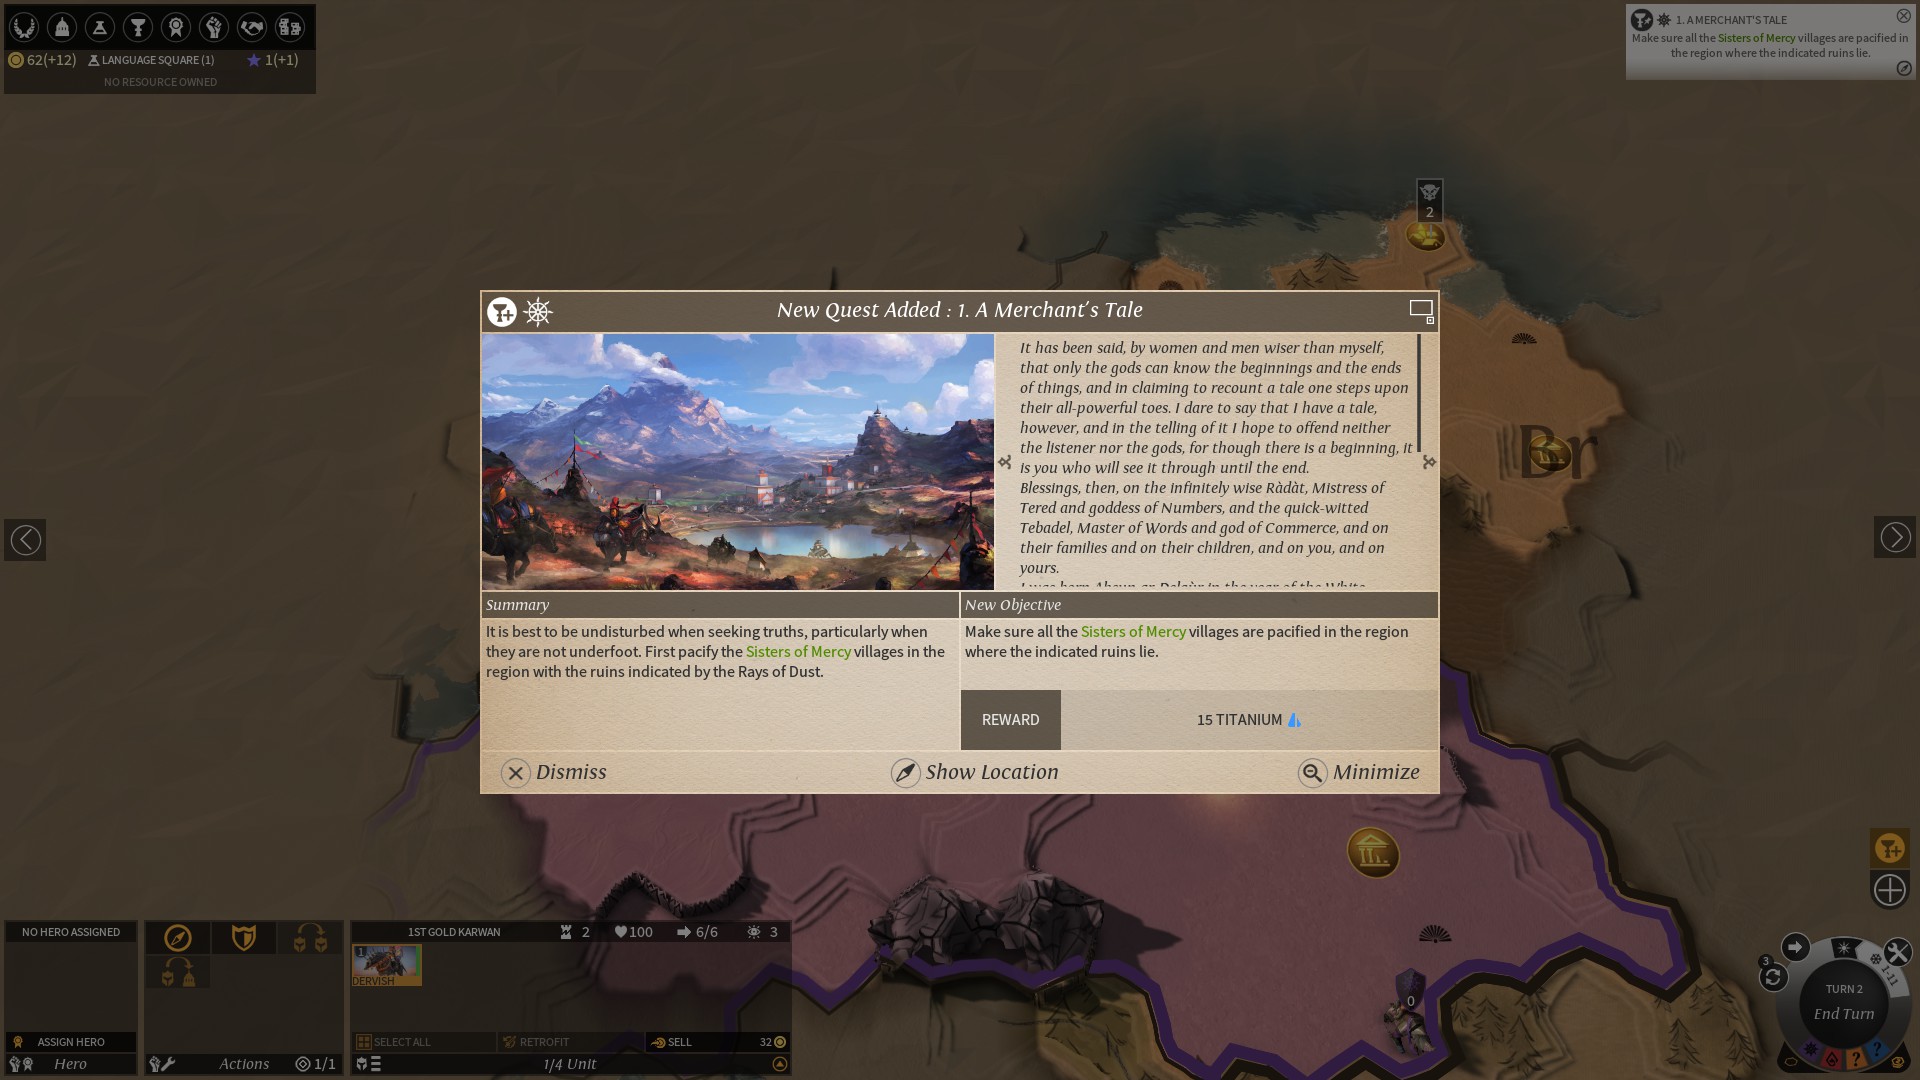
Each faction has its own questline, composed of a series of challenges linked together with rewards. There are some generally common features - a free unsellable hero, for example, or a requirement to conquer somebody else’s city. You generally want to try to fulfill the quest as well as you can, some of the rewards are really good - one of which is the blueprints for Temple of the Earth's Core, the building that triggers a wonder victory.
In addition to this large questline, we’ll be doing a lot of really small questlines, whether from minor factions or from ruins. These quests vary significantly in their requirements and rewards, There’s no penalty for failing them, so there’s no reason not to pick them up, but fulfilling some of them like settling a really far flung region or declaring war on a major faction can get you in trouble if you do them.
Anyway, this quest asks us to pacify all the villages in a region (Sisters of Mercy refers to a specific minor faction). We can do this by burning them all to the ground and rebuilding them, but we’re going for a more peaceful play.
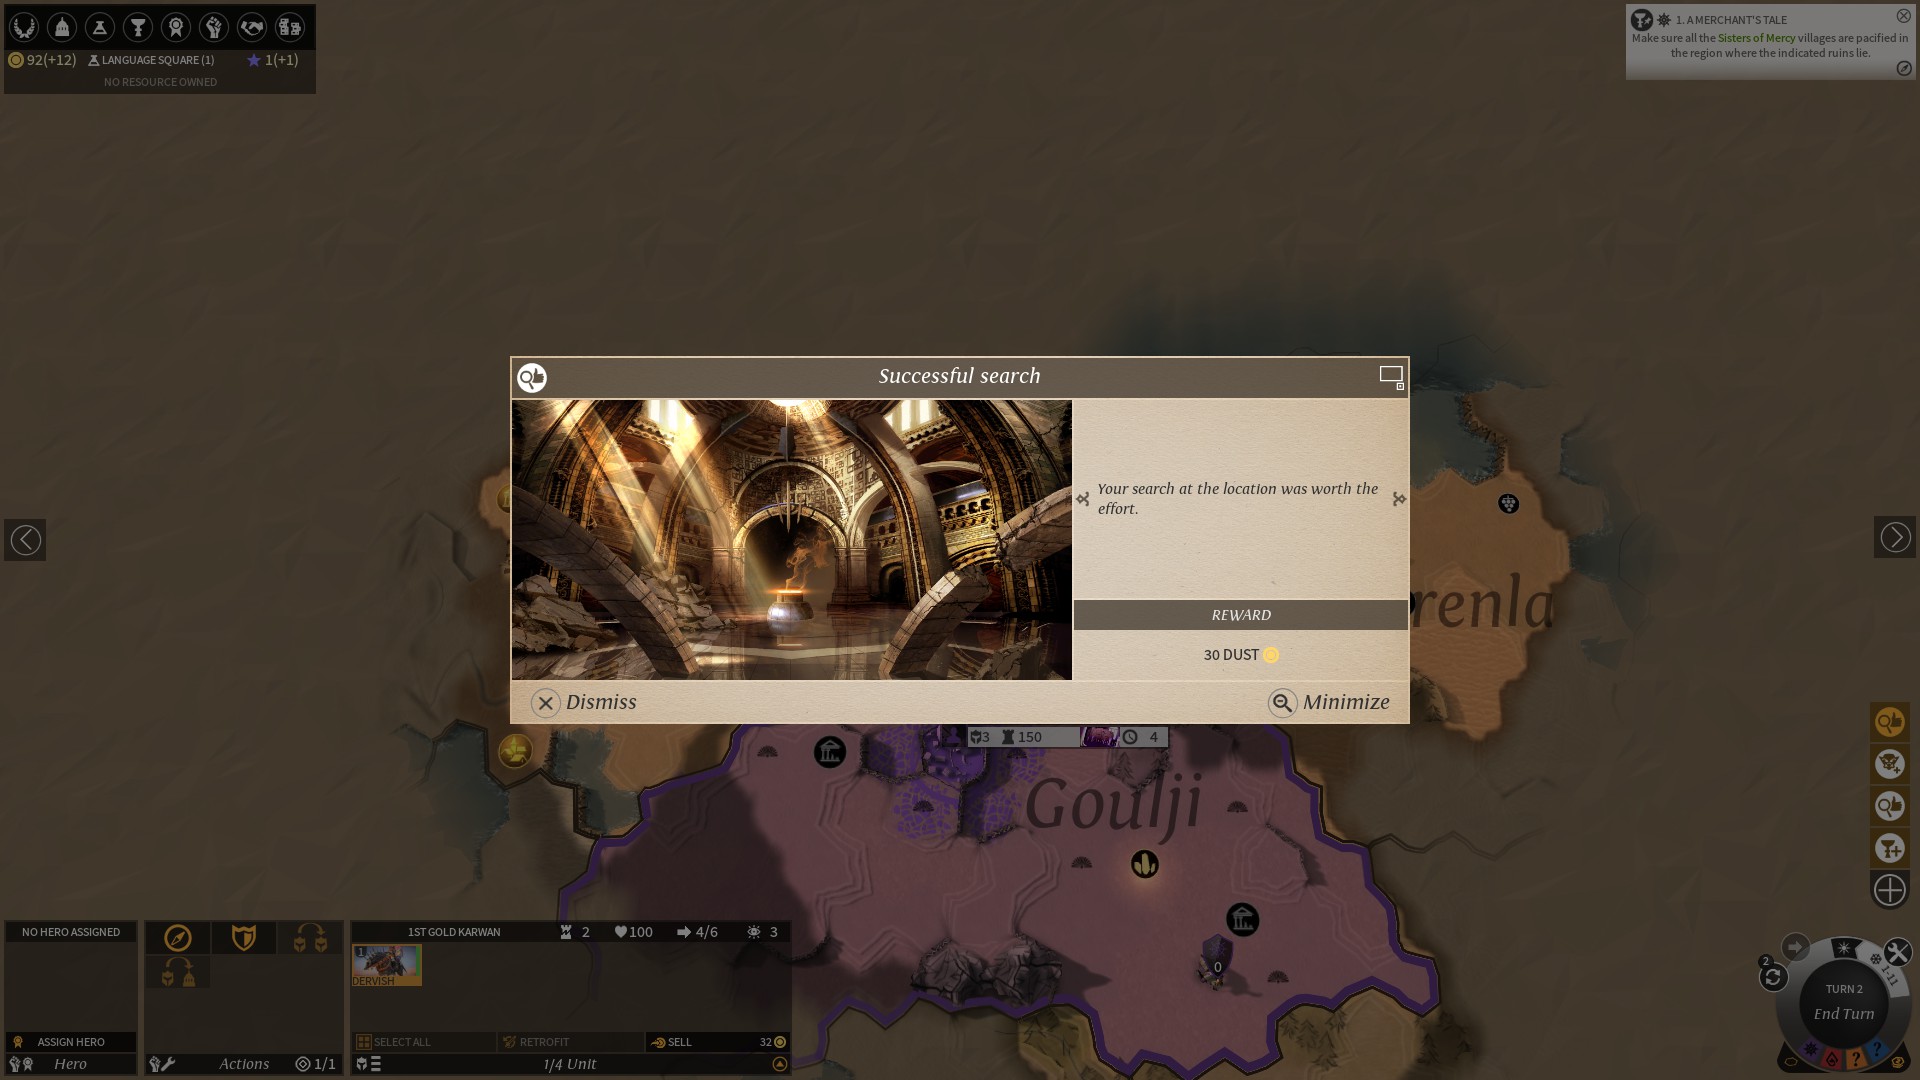
We’ve also explored some ruins. Here’s a very typical haul from one:
We also got this from a ruin
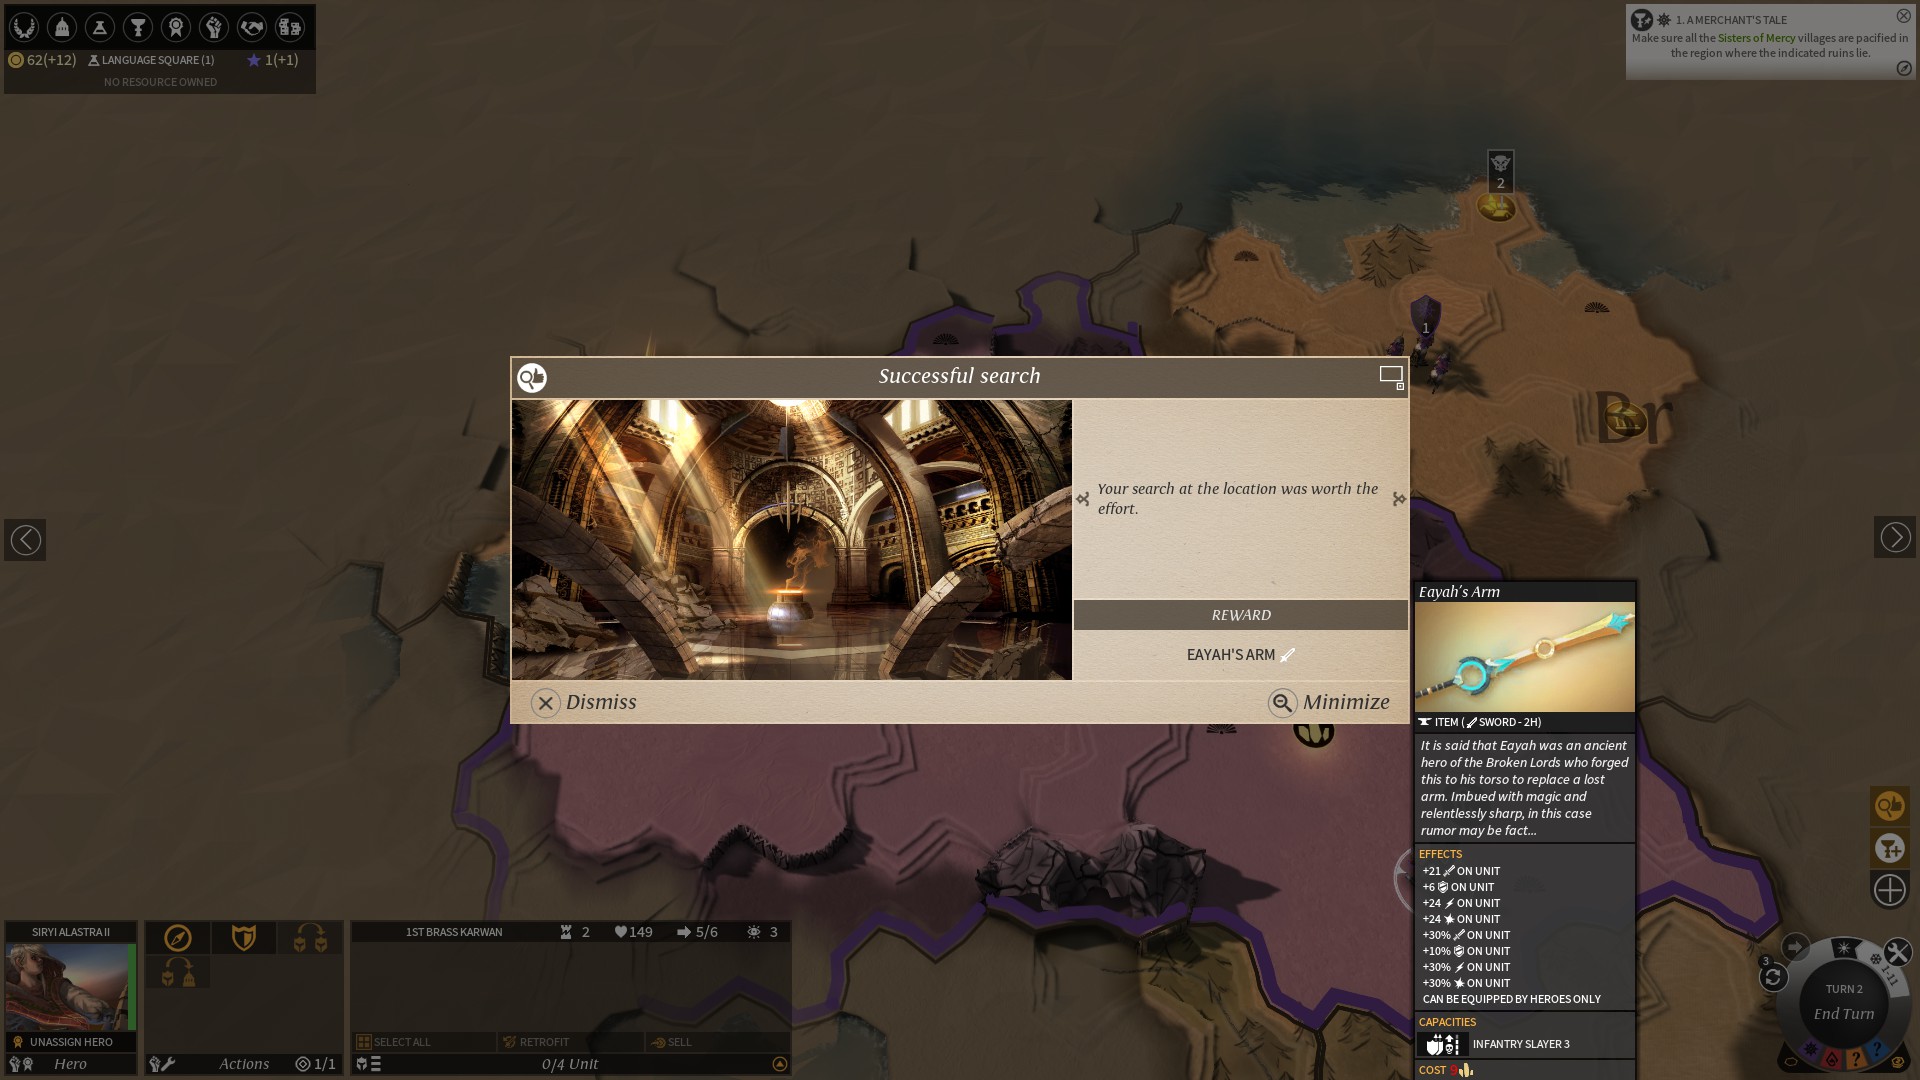
Since our hero is an archer, she can’t equip it, but the blueprint for it is forever ours, so we can later on give them to any infantry heroes we might recruit.
I probably won’t show any more ruins outcomes unless they’re an interesting quest. There’s no real need to see “We got 50 dust,” “We got 20 dust,” etc etc etc.
Turn Three
Turn three opens with this alert:
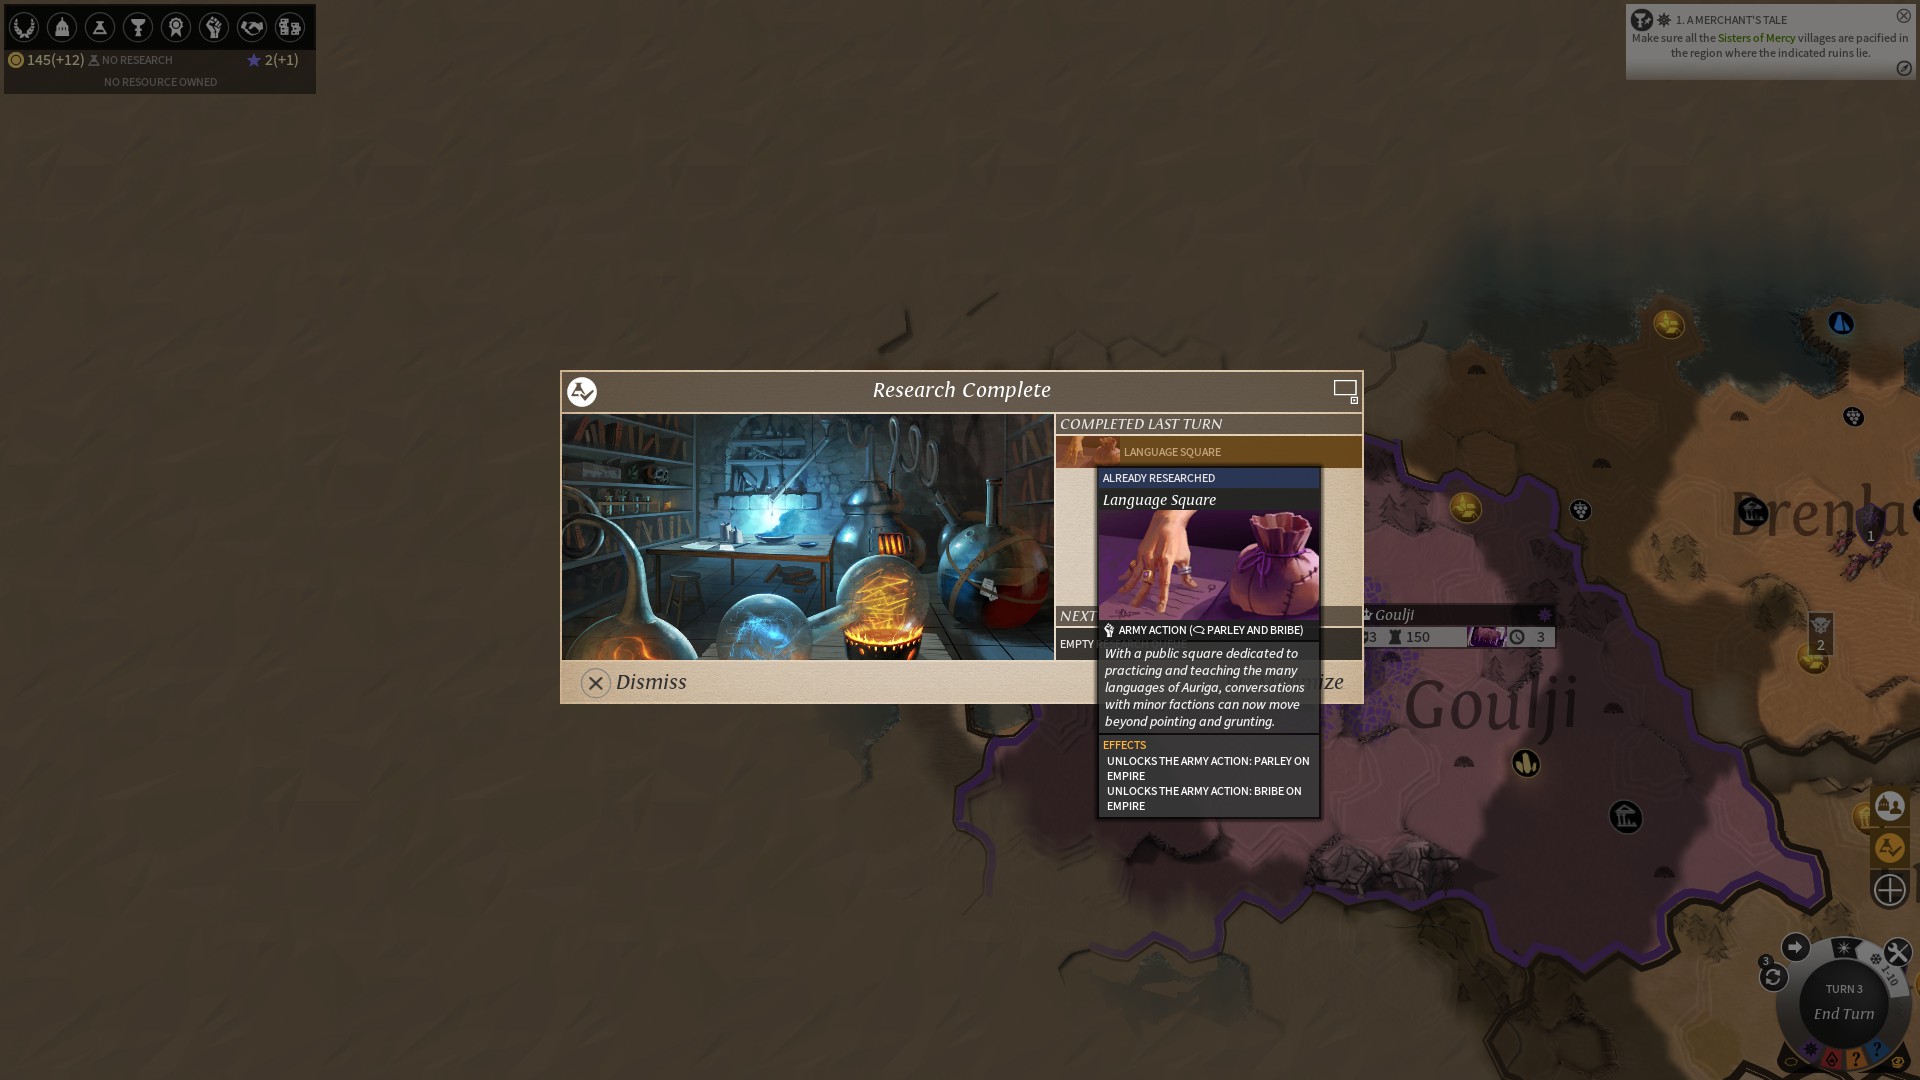
Language square is a pretty potent opening for peaceful play, since it allows you to pacify minor villages without warfare - which also means you can pacify all the villages in a region in a single stroke rather than destroying them one by one.
Now I’m going to let you choose our next technology. Here’s what the technology setup looks like:
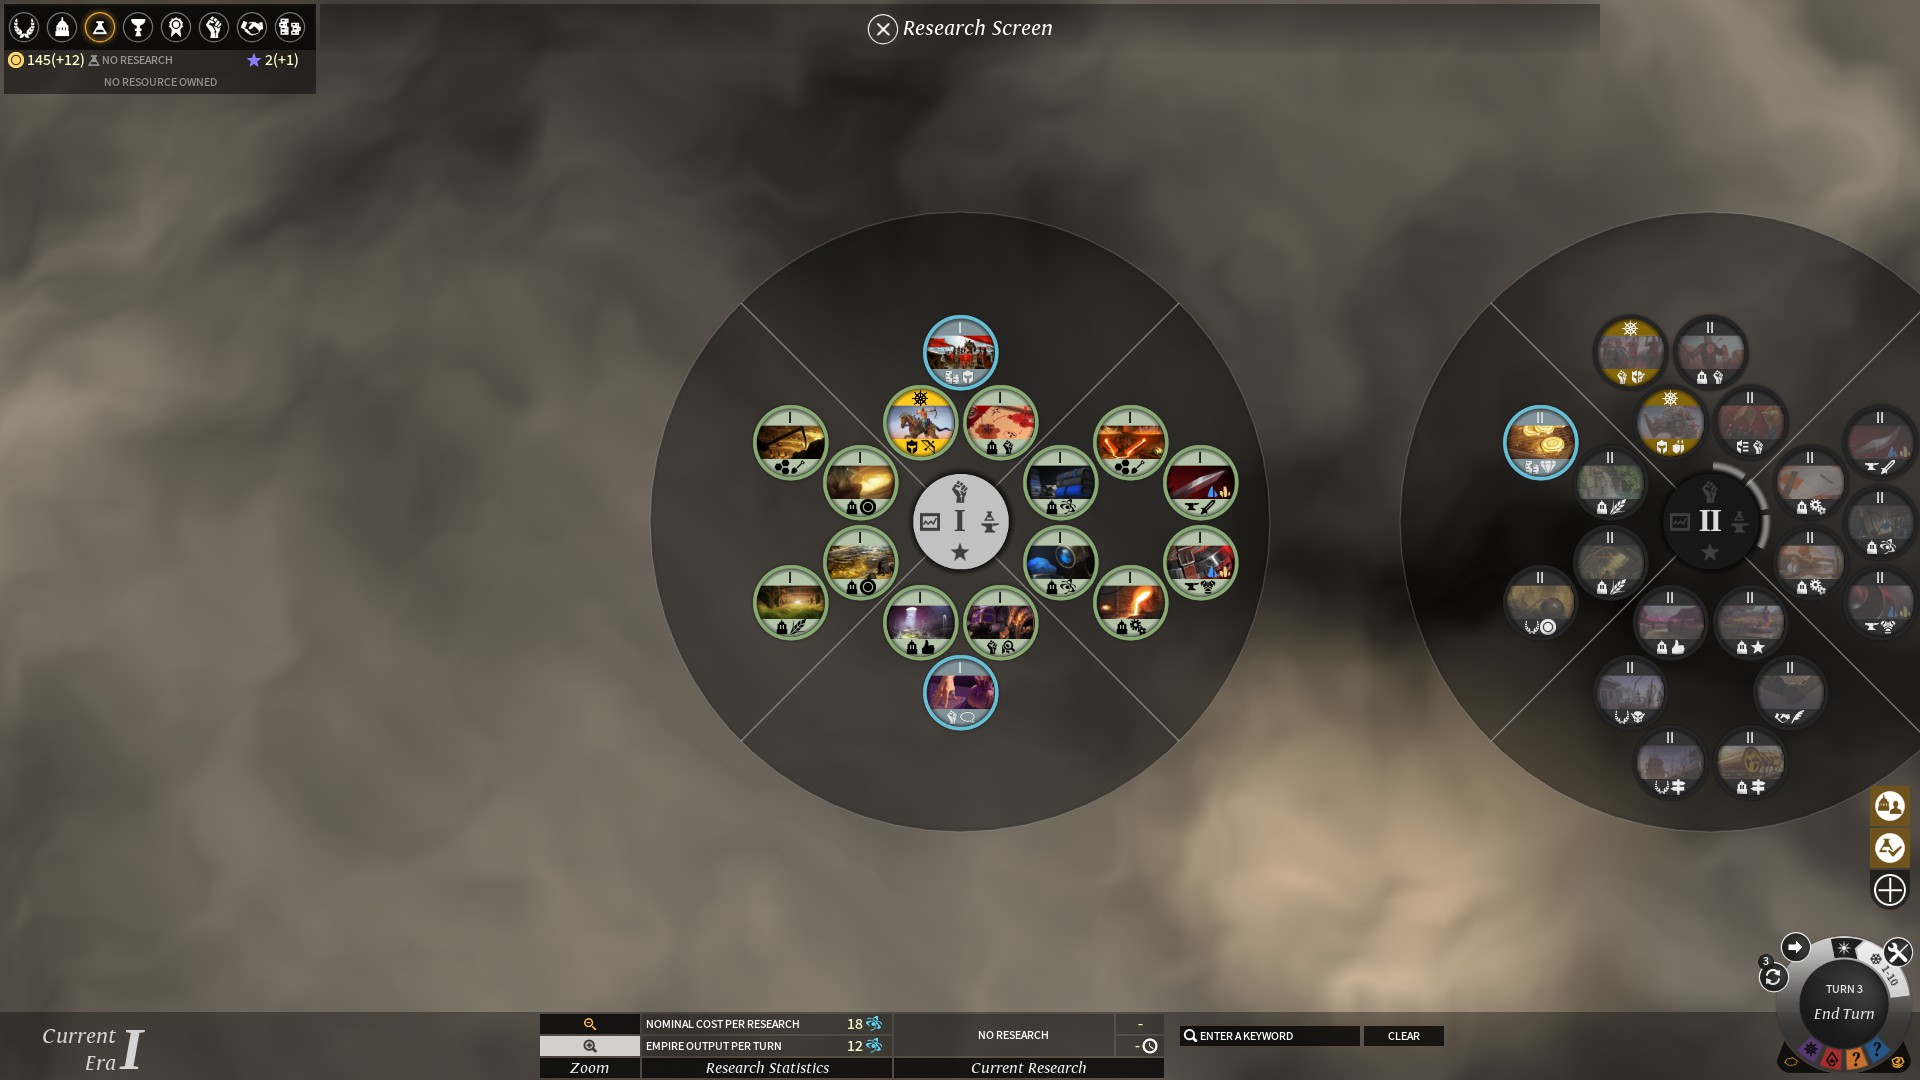
It’s not so much a tech tree as a sort of tech column - you can research the technologies for a given era in any order you want to, and once you pass a certain threshold of total technologies researched, you unlock the next era. We started with two technologies already researched, Mercenary Market and Imperial Coinage, which give us access to the game’s market, and together with Language Square we have three technologies towards the nine we need to start researching era two techs.
Techs are divided into four quadrants, which are largely thematic. The upper quadrant is Military, and is where you get new unit types and technologies that enhance your recruitment and garrison. The right quadrant is Science and Industry, which includes both those types of buildings as well as new equipment for our troops. The lower quadrant is Empire and Expansion, which includes trade routes, happiness boosters, and influence generators. And the left quadrant is Economy and Population, which is mostly dust and food buildings.
It’s worth pointing out that later techs aren’t always better than earlier techs. Era one techs in particular stand out as good things for starting cities to have. It’s also worth pointing out that you’re never going to research everything. Each technology increases the cost of the next technology, so you want to be selective with which technologies you research rather than playing Pokemon with them.
That said, we need a new tech before we go any further. I’m giving you the choice between four technologies: Public Library for faster science, Mill Foundry for more industry, Empire Mint for dust production, and Seed Storage for population growth.