Toggle Background Color
--------------------------
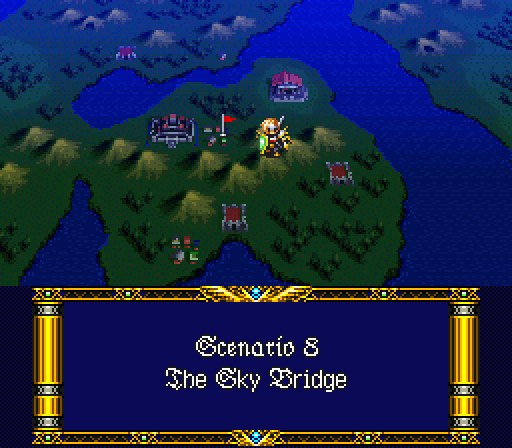
Scenario 8  -
-
The Murder Bridge
--------------------------
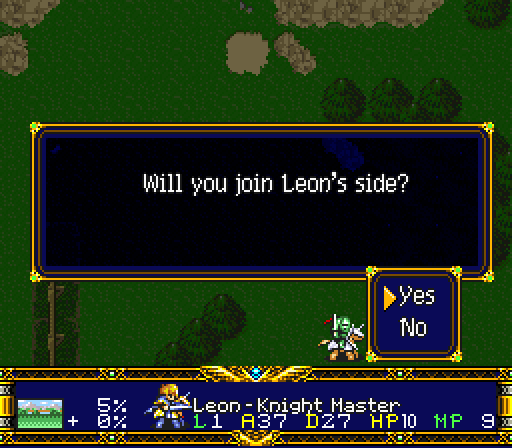
The thread chose to play on the side of Light - fulfilling the ancient prophecy according to our deity's wishes.
Yes No
 Fighter, I'm sorry, but I will go with Leon. I know how Sonya feels...
 As long as the Imperial Army exists, I can see her again. Anyway, I can't just let her act like that.
No one but me seems to be able to stop Sonya. Even if the only solution is to kill her...
 I see... Do as you like.
Leon! Do me a favour. Let me go with you!
 You're a mercenary? What is your name?
My name is Rohga. As a general of the Empire, you've probably heard that name before.
So, you're Rohga? I've heard that you're a skillful mercenary.
Okay, you have permission. I'll glad to have you with us.
Thanks, I will surely be a great help to you! Bye, Fighter.
Fighter... Today we met as friends but that changes nothing. When next we meet, it shall be enemies.
Yeah...
What a shame... You have incredible potential. I would have liked to call such a man my comrade. Farewell, Fighter!
 He's gone...
If you saved the villagers... which is really really hard to not do.
 You've helped us, and we must thank you somehow. Please, take this.
Fighter was handed 300P!
 We should hurry, too. It's still quite a long way to Baldea.
We can't just stay here. Let's go to Baldea!

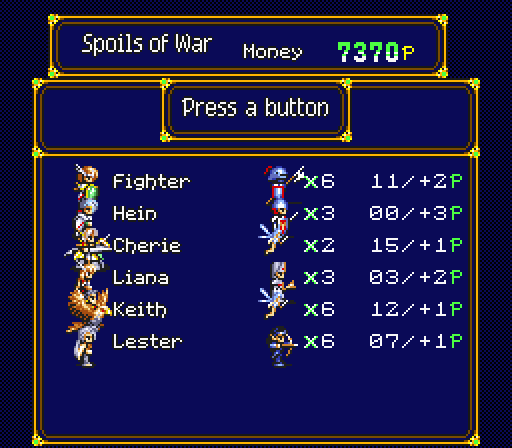
And that's Scenario 7 all wrapped up on the path to Light. Let us kill in name of Lushiris and the Descendants of Light! You'll also note on our Spoils of War screen, Rohga is no longer there - given he's abandoned our lovely ship, the HMS Fighter, and joined forces with the Dreadnought Imperial. Onto Scenario 8 proper!

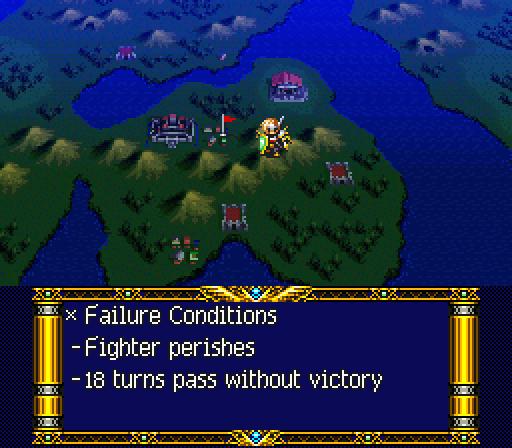
After a short-lived alliance with General Leon of the Blue Dragon Knights, Fighter resolved to battle the Empire to the end. Locked in a scramble against time and foe to recover Langrisser, Fighter and his companions fell prey to an imperial ambush. An imperial regiment lay across a suspension bridge - the only path between the cliffs of a deep chasm. Kr?mer, under orders from Imelda, the general of the Water Dragon Navy, planned to sever the ropes and collapse the bridge. If the bridge collapses before the companions can pass, it will deal them an unrecoverable blow in the race for Langrisser. With no other option, the companions moved onto the bridge to battle time and foe to force their way through enemy lines...


A scenario involved a bridge over a great chasm and an ambush... why is my heart palpitating and I'm feeling increasingly frustrated and have an urge to chuck something hard at a TV screen... images... haunting visages that portent a great calamity... they are coming back to me...
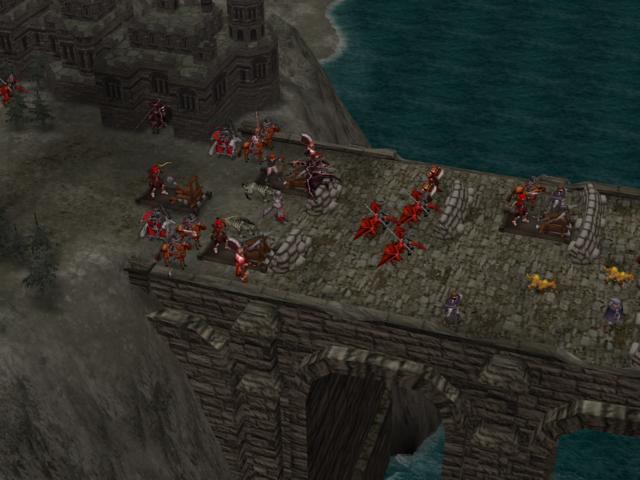
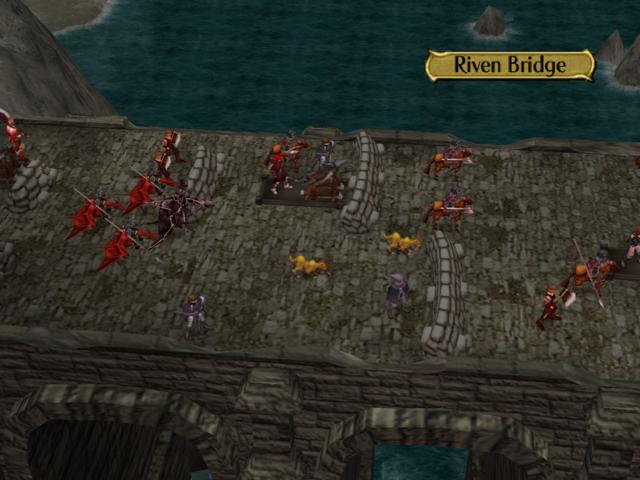
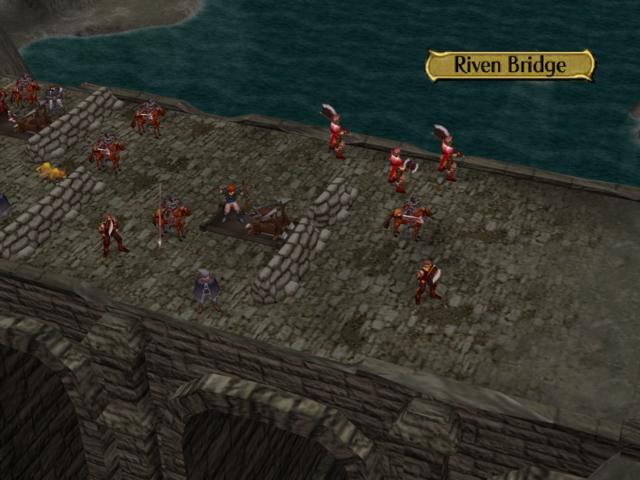

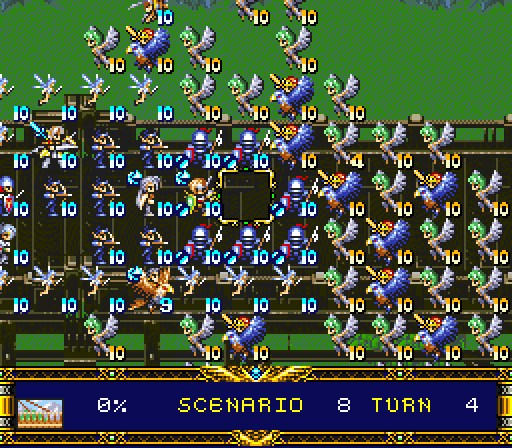
 ARRRGGGHHHH-! Oh wait... never mind, as we're attacking from the west not the east. Let us cleanse ourselves of nightmares past and begin the path towards the Light. All hail Lushiris, no ambush shall prevail whilst we are guided by her love and grace! Here is the map:


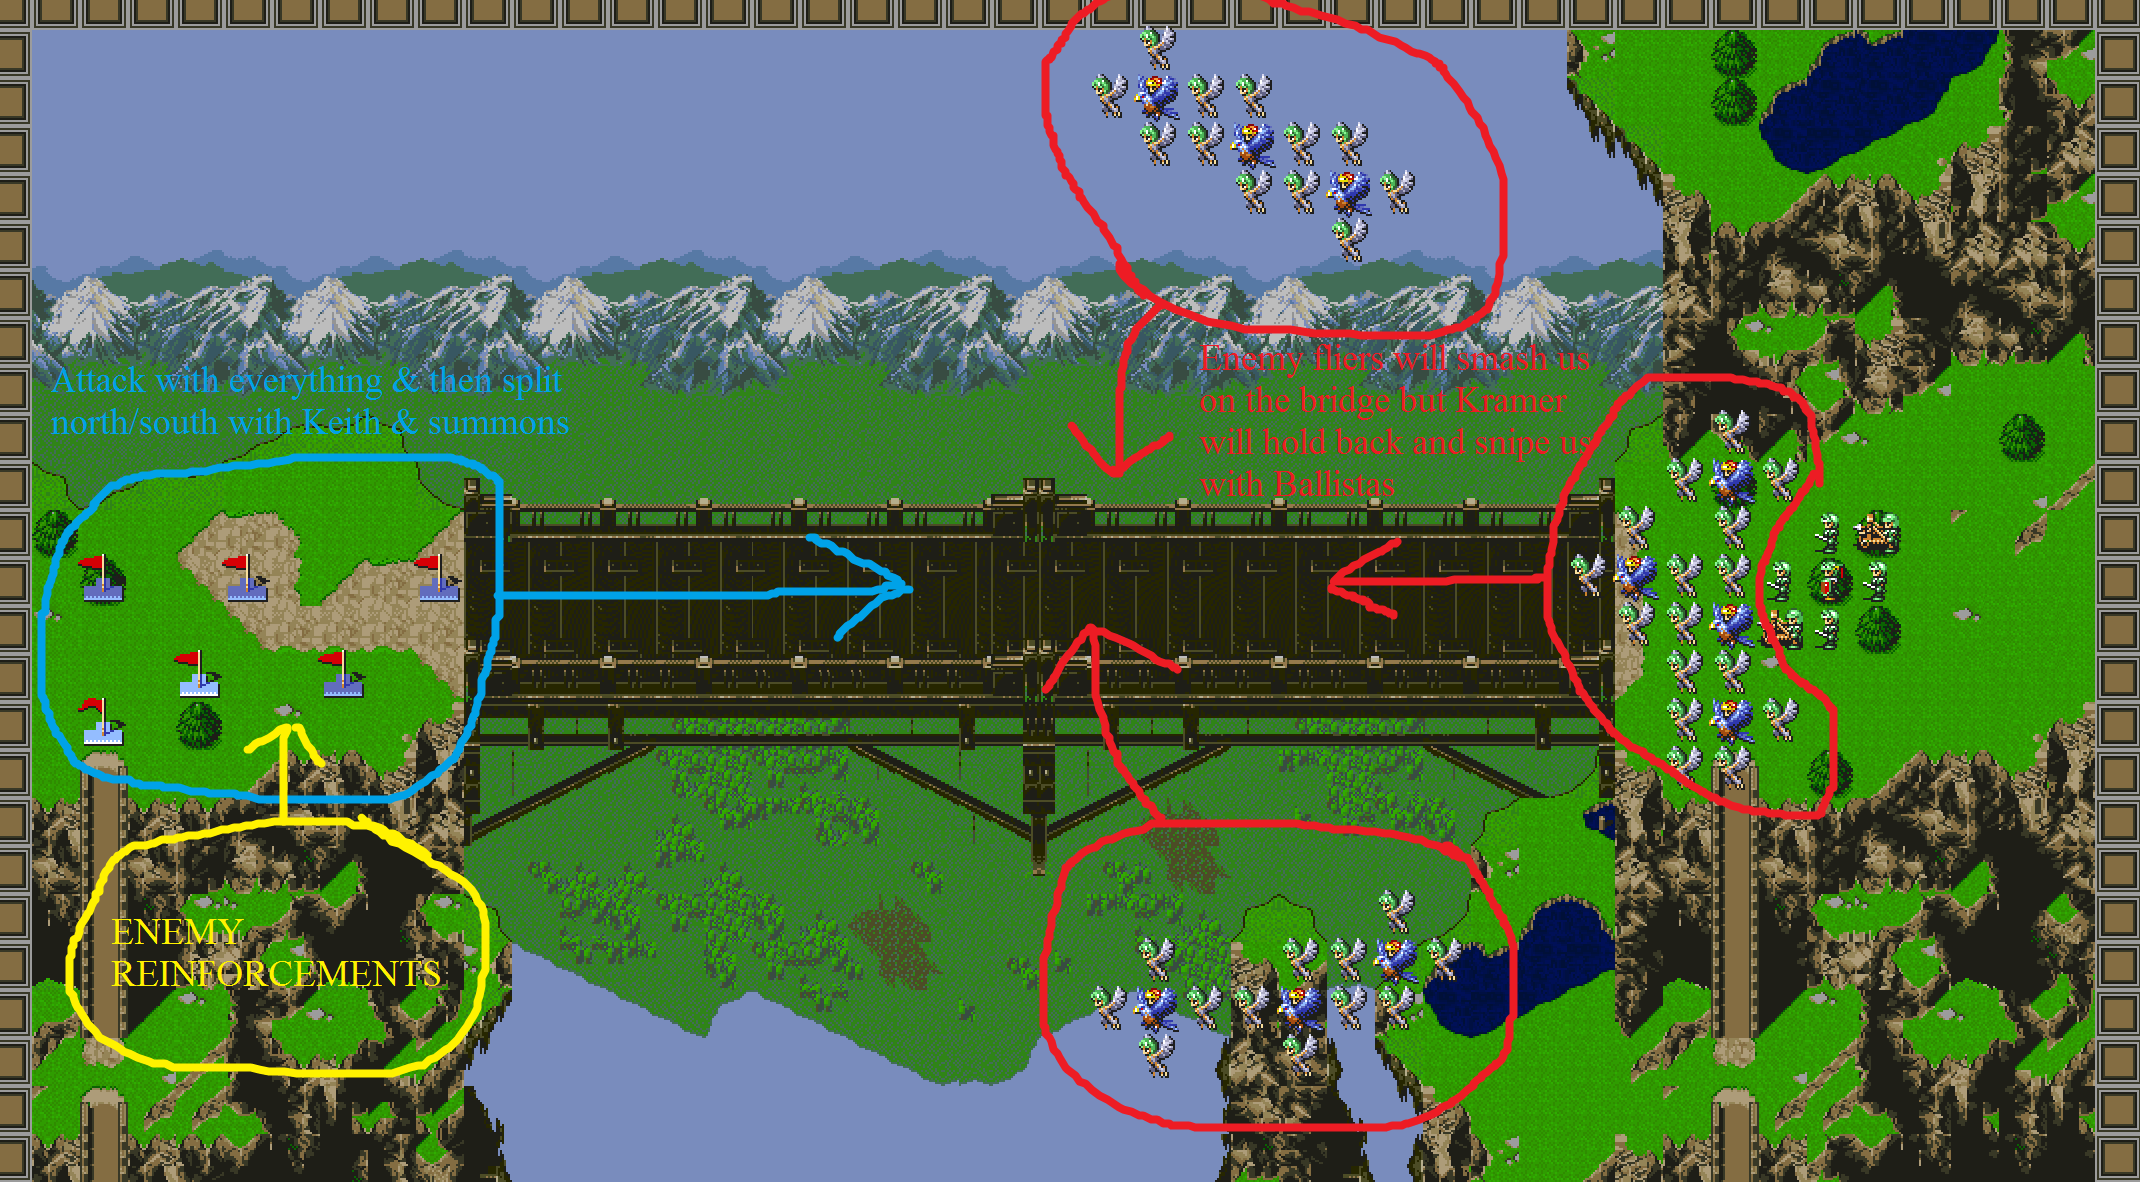
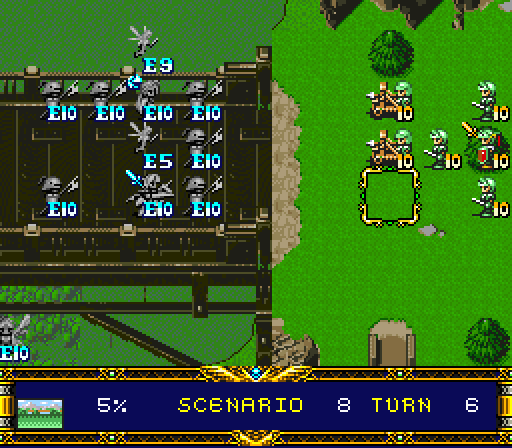
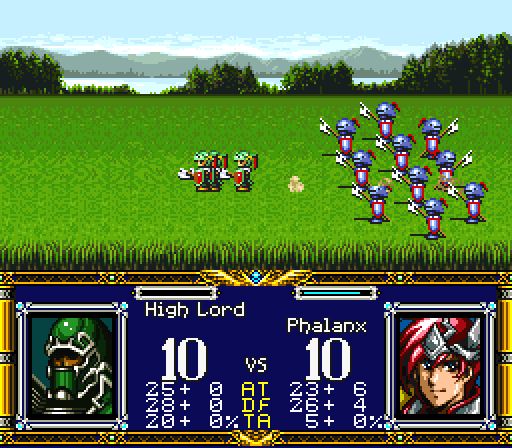
I tried to showcase the plan a la Paul.Power style... It's not great, but I think you all get the idea. Smash through the center and break the core of their offensive. I may be remembering incorrectly about the arrival of reinforcements but if they are to appear, it'd be behind our lines. All our enemies aside from Kr?mer's men are fliers, as such bowmen and fliers are our best counters to them. As always Fighter's phalanxes can blunt their charge as well.

As you can see there's one equipment change to Keith - he gets the Dragon Scale and of course, since no Iron Dumbbell no sweet summon for Hein/Liana 

Hein has a new unit to play with - Crusader. A much improved version of the Monk with pretty good stats with Hein's boosts (30AT!, 26DF).

Here's our unit placement - Keith will push hard south along with Cherie though she is restricted to being on the bridge. Lester will snipe northern fliers with his elves, this is a good map for him to catch up now that Rohga is outta the team. Hein will spellspam and summon - Liana will do the same. Fighter shall lead the vanguard. Also, note that we have an 18 turn timer after which we'll automatically lose due to Kr?mer by collapsing the bridge... even if we're already on the other side.


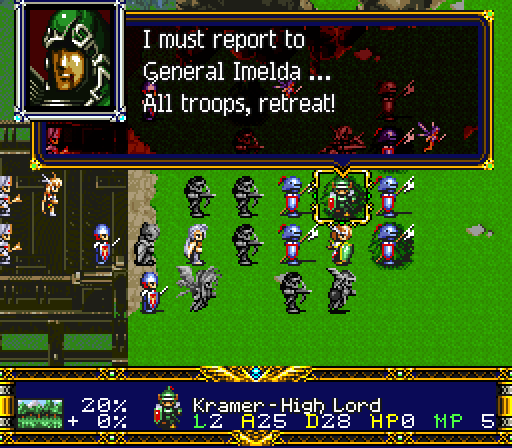
 If we don't cut the lines in time, General Imelda will have my head...
Hurry up! If we take out the bridge, it will halt their advance.
Cut the lines before they can get across!


Curses! You're earlier than I thought! I, Kr?mer of the Water Dragon Navy, shall let you proceed no further!
 The Imperial forces have made it this far ahead... Impressive...
 They've already fortified the border... I'm sorry our Kalxathian forces weren't able to stop them...
It's all right, Keith. It can't be helped.
The last battle was proof Kalxath alone isn't strong enough... Besides, we're out of time.
I'm worried about the stronghold up ahead. Let's hurry. We have to get past them!
Fighter! Let's break through their advance guard!
Yeah, the Empire is probably after Langrisser as we speak.
All right! Let's go, everyone!

Turn 1 is nothing special as we're rapidly coming to expect. Still, it's important to put your fliers just over the bridge rail so that your land based units can utilize the maximum amount of space the bridge gives you.
Also, this is just my thoughts but why is the Water Dragon Navy have a dedicated airborne unit such as Kr?mer's entire army? Wouldn't this be better if it were Vargas's Blazing Dragon Army or even just create a new sub-army like Kr?mer's Airborne Force... I know the Navy & Airforce now have better integration for a lot of reasons such as aircraft carriers but you wouldn't think so in these times. My point is... Kr?mer is not one of us, a proud seamen... therefore, he should just die for even thinking about attempting such an operation. 

 Yes, Sir!
They don't move an inch. It's really not much of an ambush if you don't press your advantage as soon the opportunity arises.
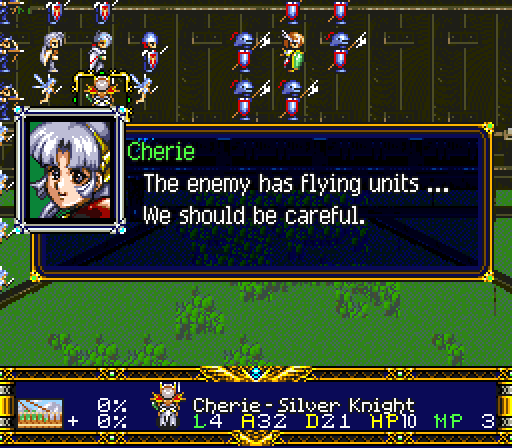
They move quickly and could surround us.
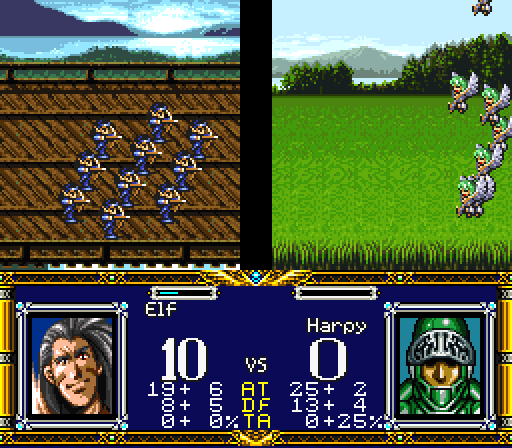
That's right. But they can be easily defeated by Elves. Flying troops are very weak to bow attacks.
Is that so? You know so much, Hein!
Huh? Cherie, you didn't know that about flying units?
I, I knew that! I just... Oh shut up, Hein!
Princess, you can't survive without such basic knowledge. I've been telling you to study your tactics.
It's so boring to study. The best way to learn is through real battle.
So, you didn't know that, after all.
S, shut up!


Turn 2 is done. Another uneventful but tactically important turn, as we mobilize and position our forces for greatest gain towards our goal of breaking their ambush and leveling up some of our weaker dudes.
br />

Yes, Sir! Feel the power of the Water Dragon Navy!

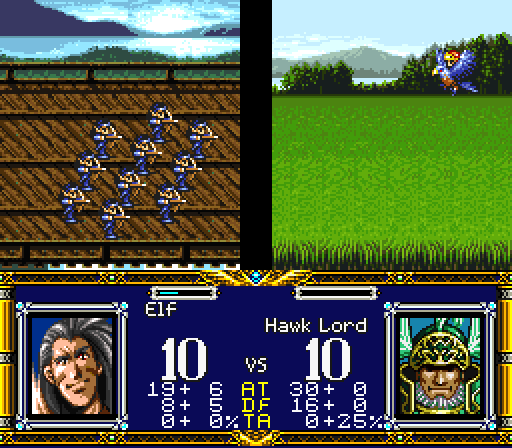
Even in closed ranks, they can freely adapt their formation to the situation at hand... It shows they really have an advanced knowledge of tactics.
But they don't quite have a good grasp on strategy, my dear Keith - which is what will win the war. Jessica's current political maneuvering and how Leon would have betrayed the Empire's alliance with the Demon Tribe are good indicators of this. But yes, it's a good ambush nonetheless but will it accomplish the goal of stopping our advance...? No, probably not.
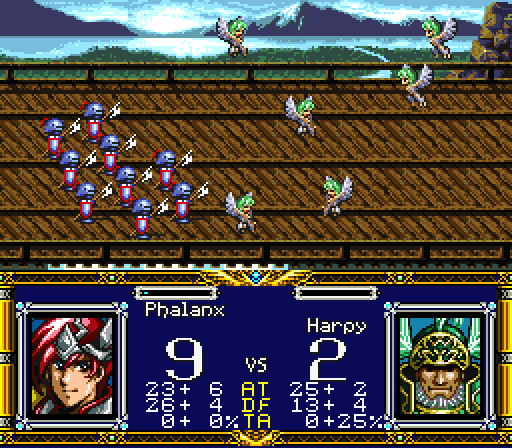
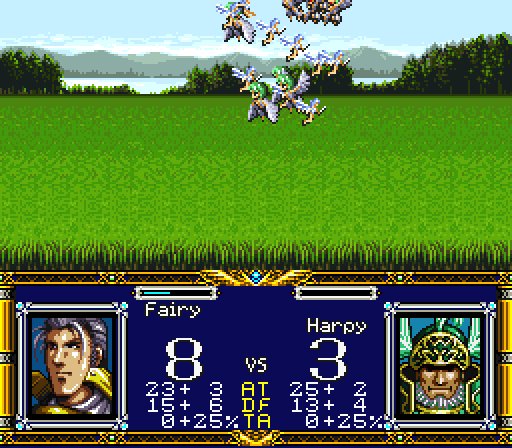
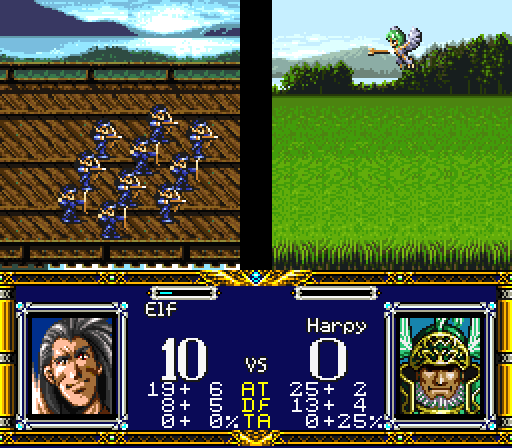
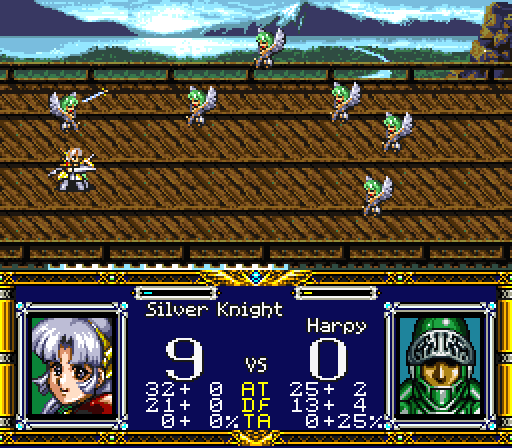
It's now time for Lester to go nuts with his Elves - I don't believe I've discussed it yet, but Elves have a range of 1-3 squares but as you might expect it's always best to attack at 2-3 to avoid counters (from non-ranged units). First, I'll need to soften them up with Fighter to make some room on the bridge for Lester's sniping team.
Let's go!
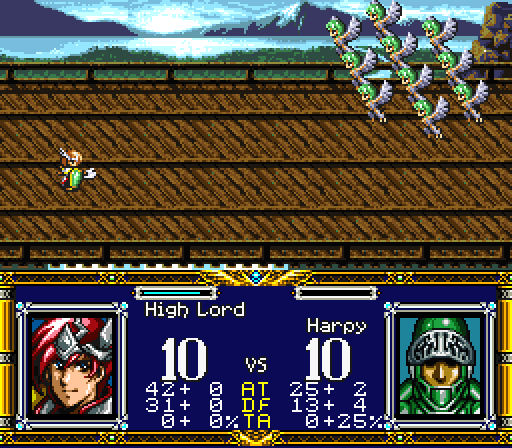
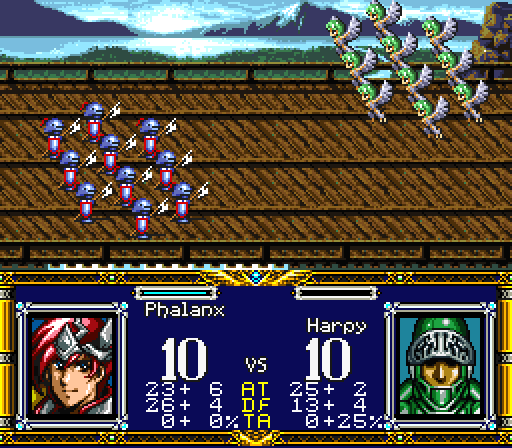
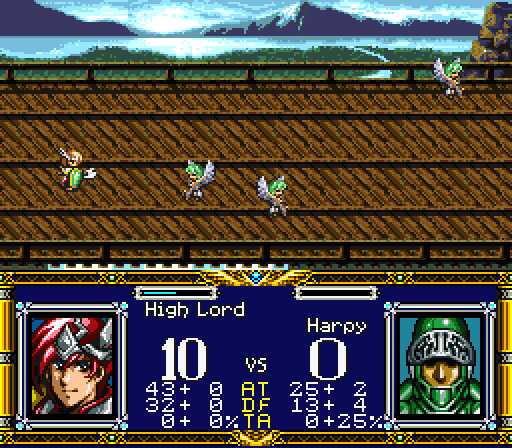
This is how the phalanx deal with flying threats - chucking their side arms (I think those are swords/daggers) at them. Fighter on the other hand, has infinite axes for infinite  Now this happens a few more times for our armored brethren and here's the aftermath of their brutal offensive.


Level up! AT+1, DF+1, MP+1
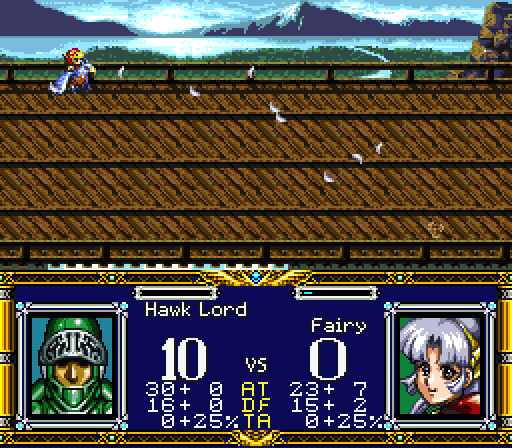
It went quite well, softened up quite a few Harpies for Lester & Hein and took a Hawk Lord down to 2HP, which is great for our counter-offensive. I do worry about leaving our weaker troops vulnerable but it's a necessary risk for the glory of EXP. It's time for Lester's team to move out.
 Hey, there! Prepare for my onslaught!

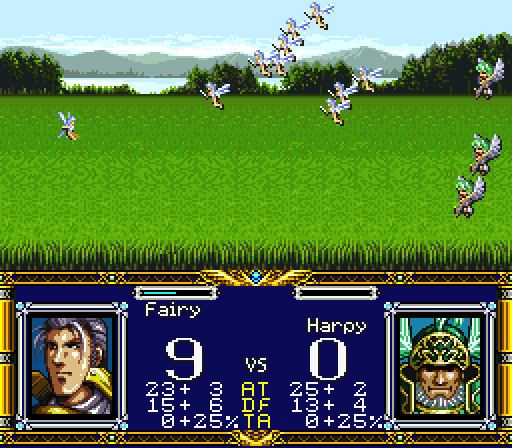
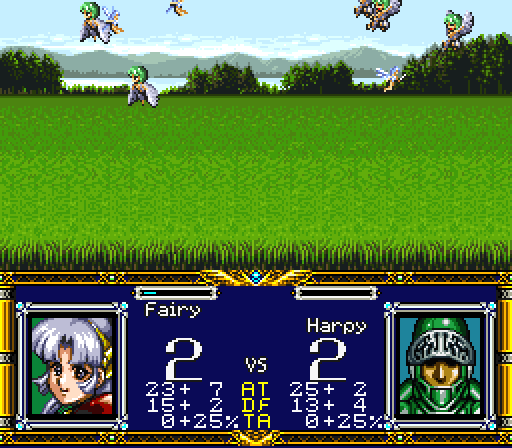
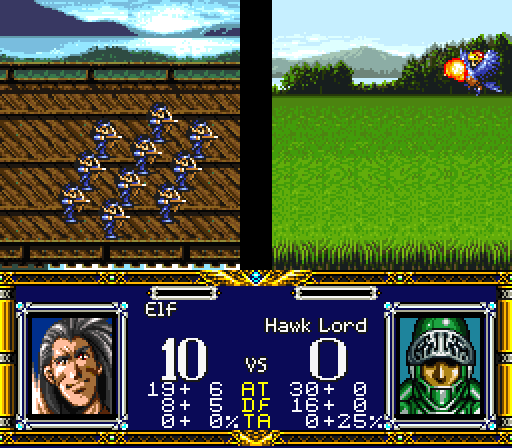
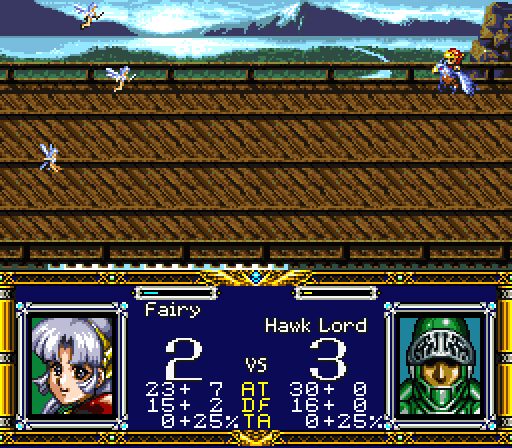
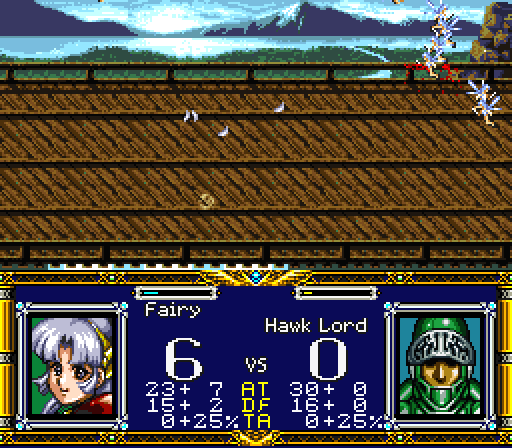
It really is easy for Lester to rack up kills if we keep him and his Elves safe from counters. Lester's men take out 2 more Harpies and unfortunately, the rest of his elves are out of range for this turn. Next turn the carnage will continue. Hein starts off by summoning his new best friend, Freyja.
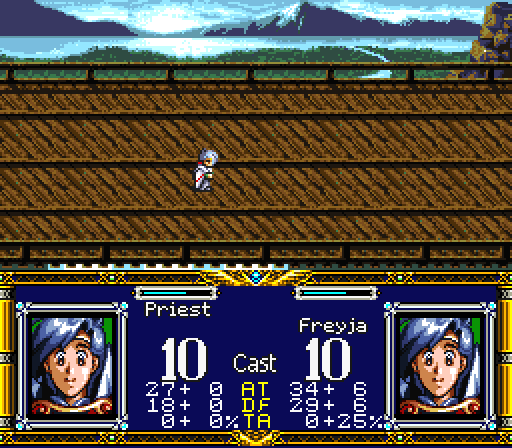

Freyja is pretty great (base stats = 34AT, 29DF) and has some great spell selection for this stage of the game. I'll be using her and Valkyrie to help deal with the northern fliers whilst Keith deals with the south. She should be fine on her own but I'll see if I can get Hein to fling a few fireballs her way as need be. Freyja attacks.
All right! Let's go!

She could totally solo the top if she wanted to, but that'd be inefficient and we're on a timer here! Liana summons Valkyrie and we move onto what Cherie and Keith are doing.

Cherie moves up to protect Lester's flank and just form a wall of faeries to deal with any harpy that comes close. Keith will actually go on the offensive down south but also protect Lester's other flank. Beautiful tactics, no?
We can't let the Imperials just walk all over us!
 Long live the Kaiser!
Keith takes out the weakened commander and sets up his  appropriately. This looks like a good move but we'll see how well it plays out next turn. Turn 3 has crossed the finish line.

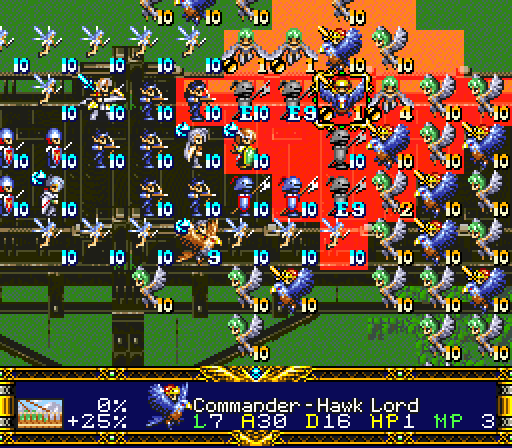
My defensive 'square' formation worked! We weren't attacked at all and now we can pick off our opponents at our leisure with Fighter maintaining the formation's spear point. We need to keep pressing forward since to stay on this bridge ere long is to invite ruin. One downside of DL & perhaps other Langrisser games, is the tendency for a battle to devolve into a giant clusterfuck of dudes. Still, there is order here amid the chaos and we shall prevail.

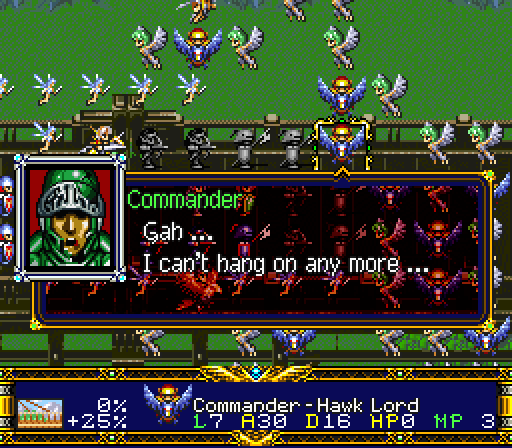
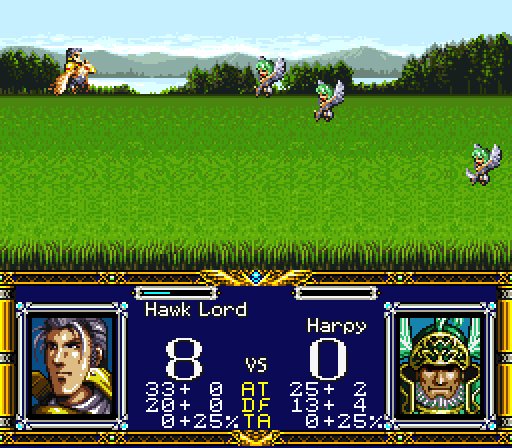
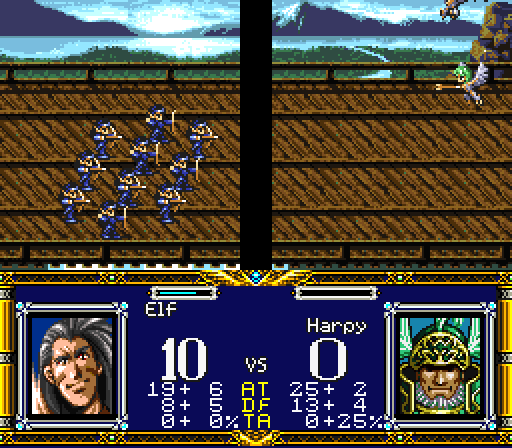
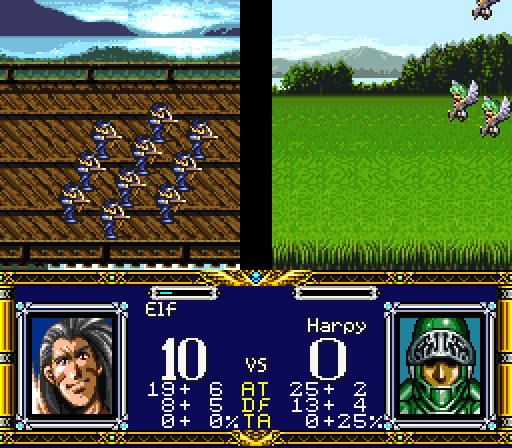
This happens once more against another Harpy before I realize I'm out of room for the rest of Phalanxes down south and so move to retreat them and let Lester's Elves move in and take care of the rest.

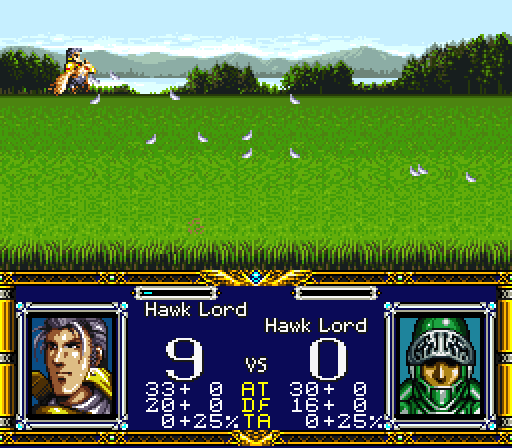
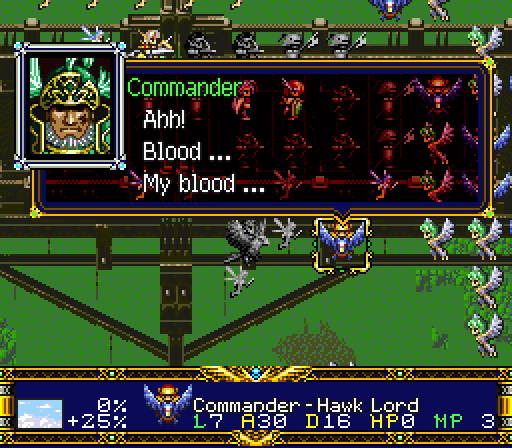
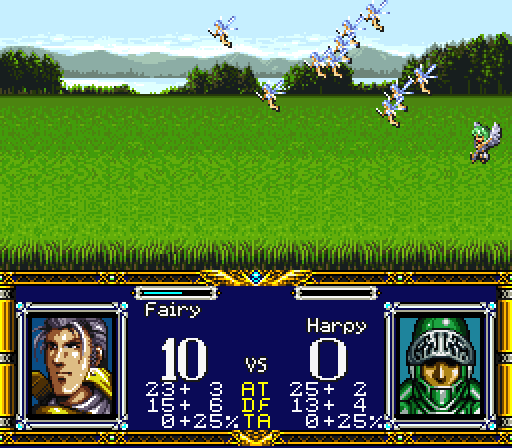
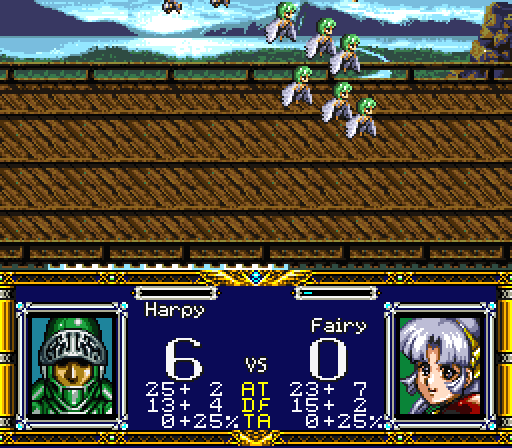
As you can see all the members of this airborne unit are on very low HP, so Lester will be able to obliterate them in one fell swoop.
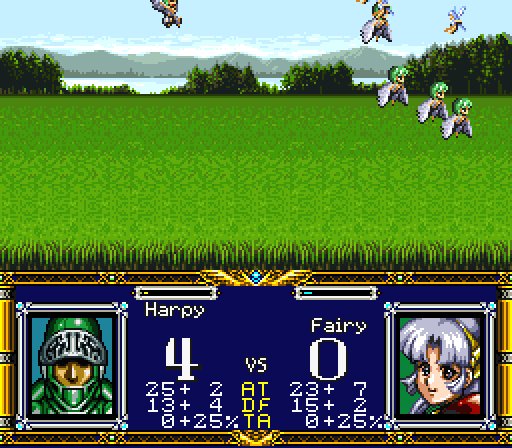
We take out the 3 Harpies in quick succession and then focus on the Hawk Lord himself.


Level up! AT+1
Too easy  Now Keith gets in on the action, since Fighter can heal him up as need be.

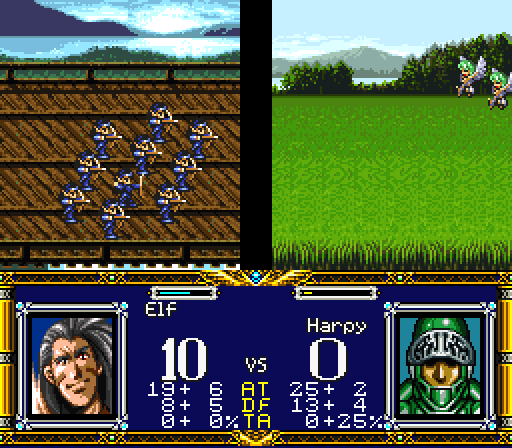
He bags himself two kills and without messing up his position too much. Lester's remaining Elves have got this.
I always find this particular animation funny - the Hawk Lord becomes a pin cushion until he can't take it anymore and just explodes. Cherie gets in on the action before I start shooting off heals from Fighter & Hein.
Don't get in my way!


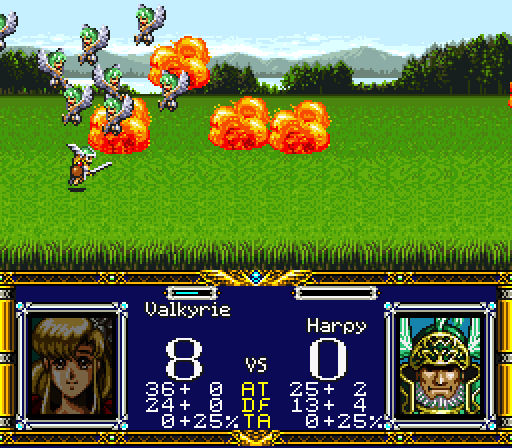
Freyja helps out and now good ol' Valkyrie is gonna try to take out the Hawk Lord.


Ugh... Too strong...
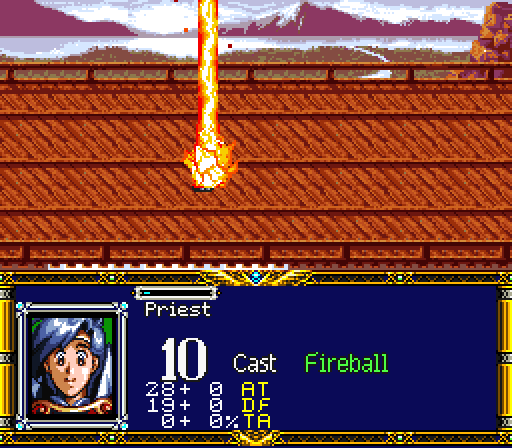
Now the healing can begin, so let's go in order with our next shots - no heal, Fighter's heal and lastly, Hein's heal.


I move Lester up and Cherie in his place, so that her CR reaches most of her overextended Faeries. Here's how Turn 4 ended:

As you can see Fighter & co. have pushed their attack forward and have driven the enemy from our southern flank, there still remains one annoyance on our northern flank but we shall swat them away like the flies they are soon enough. No losses yet, so this map is going extremely well compared to my normal performance. Let's see what the next turn has in store for us.

So... nothing happens again, so everything is falling into place. Lester continues his onslaught.

Level up! DF+1

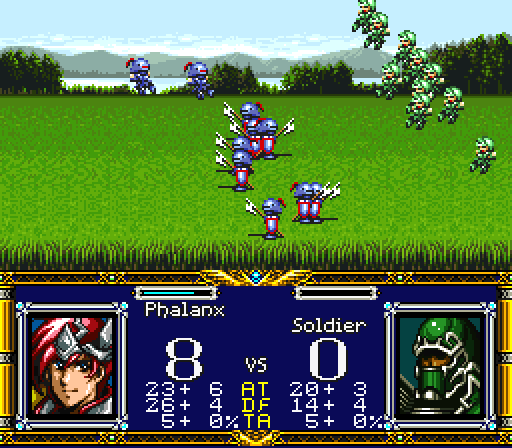
Fighter presses on some more, with Lester's follow up coming straight after - a 1-2 knockout blow.


The northern forces heads into the fray, with Lester's support.


Ugh! This is it...


Lester's elves soften up the rest and we can now move in with Keith to take them out and get some more delicious EXP. This is a great level for mage Hein or Captain Lester to grind up some levels (both get Elves). Fighter softens up another dude.


Feels kinda odd we got that message for attacking that particular Hawk Lord's unit. I suppose he was meant to lead the southern charge but that really didn't work out for their army. Hein heals up Keith's Faeries and Cherie moves forward. Hein gets a level out of it and a pretty good one to boot!
Level up! AT+1, DF+1, MP+1, Force Heal1 was learned!

Gahh-!


Level up!


Here's where our forces stand at the end of Turn 5. The northern flank is clear, we've pocketed a Hawk Lord and will destroy him next turn, Cherie's faeries are a bit overextended and could be taken out. There are two full airborne units on our southern flank but Keith's forces should act as an effective deterrent. Still let's not assume anything as we end our turn.
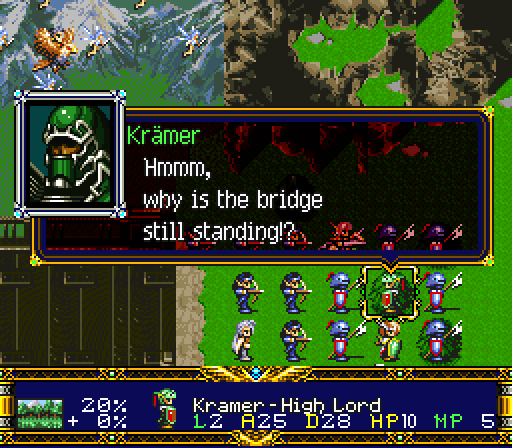
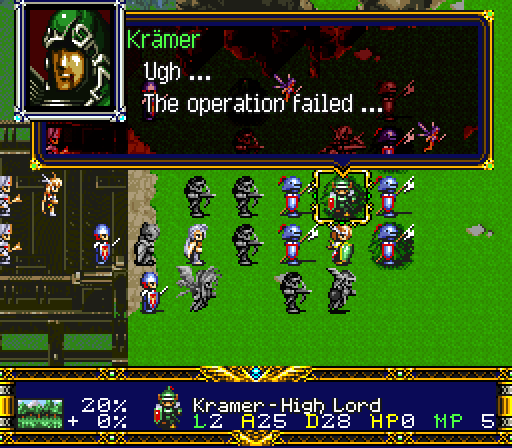
You still haven't taken down the bridge?

A minor gaffe by Masaya, since this NPC portrait is normally a Kalxathian generic commander so you can see his colour for the window is blue when it should be red.
Well, hurry it up! We can't let them take another step!
 Yes, Sir!
When Kr?mer's forces attack us...
You'll go no further!
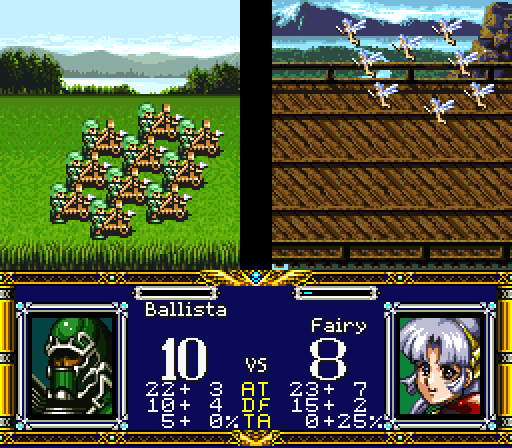

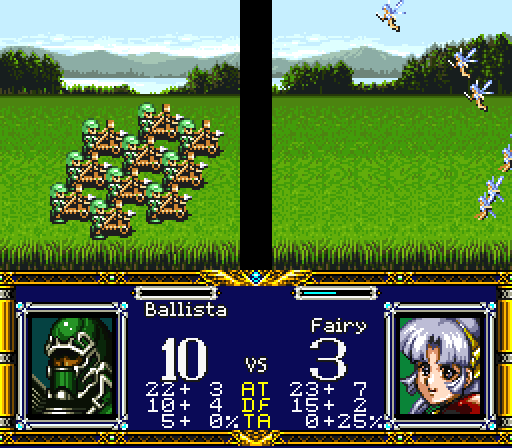
FUCK! That was too close. Ballistae have huge range and if it weren't for Kr?mer giving mediocre bonuses they would have smashed our Faeries. It's on now.

3 Faeries down! I knew I shouldn't have overextended Cherie... but I wanted her to get some EXP damnnit! Oh well, they didn't break the pocket and they've exposed themselves by taking out Cherie's forces. Time to finish this.

Lester's elves just wrecks everything. Cherie moves in.

As you can see, the DL team definitely had fun with this script. Now for some more Lester action!


Argh! I'm finished...
Level up! AT+1
Just... yeah. If you know how to break DL, some of these missions can be made ridiculously easy. Keith & the northern summons take flight to crush the remnants of the ambush force.

Hein throws in a fireball for good measure and Keith cleans up.


Impossible! How could I...
Level up! MP+1


Well, even if I'm the last one standing, I won't let you pass!
That's Turn 6 - we eliminated the ambushing airborne units and the path to Kr?mer is now wide open. I worry that I'll lose another Fairy to Ballistae fire but such is a risk one takes to obliterate an ambushing force.
Just a bit more... Just a little more time and they'll be ours! I can do it by myself if I have to!

Somehow, we made it through. I'll retreat these Faeries, smash through the remaining resistance and that'll be that. First, we heal up with Liana & Hein.

Level up!
When Fighter finally crosses the bridge...

(CC:40)
Engineers, what are you doing!? The bridge is still up! If you don't hurry, they'll get across!
Too late, buddy. Now to take everyone out, grab a secret tile or two and finish off Kr?mer.


It's all coming to an end now. Just need to grab that secret tiles and that's it. After all that, Kr?mer himself is a total pushover. I give Liana another kill and just pincushion with Lester. Still need to get those tiles though -.- Fighter & Keith are on their way to it now.


Kr?mer pulls a Fighter and takes no damage from 3 Elves. So I just pocket him with Fighter's men and wait for the tiles to be gotten. That's Turn 8 basically... let's skip ahead a two turns to Turn 10. I've captured the highlights in the meantime.


It's sturdier than we thought.
Hurry, hurry!
Yes, Sir!

Now, let's get the last secret tile and finish this.

Hidden beneath the sapling you spot a little sprite... What will you do to it?
Smile at it, Scare it, Don't say anything

MDF raised!
Now let's whittle down the boss and finish him off with our weakest team member, Cherie. Valkyrie throws out a fireball, Lester plinks away at him and Freyja buffs up Cherie with Attack2. Hein also gets off a Magic Arrow. Lastly, the finisher, Cherie's Eins Zwei Drei!


Level up!
Level up! AT+1, MP+1
Level up! AT+1, DF+1, MP+1
Level up! AT+1

Fighter! Let's hurry! There must be a reason those Imperials were trying to drop the bridge.
Clearly, their goal was to stay our advance. I fear for the stronghold.
Worse yet... this likely gave them time to find Baldea, too.
We certainly must hurry. The Empire is after Langrisser.
Let's get to the stronghold, quickly!
They may have already laid siege to the stronghold...
Yeah... but don't worry. My battle instructor is there.
Oh, really?
Well then, we can rely on him, if he's the one who made you the beastly, tough swordswoman you are now.
Hein...! You... You insensitive bastard! How could you call a cute girl like me "tough" and "beastly"? (CC:41)
Right, Fighter?
Well...
No, those are the right words! You're cute, Cherie, but you're also a tough girl!
... That's enough, let's hurry.
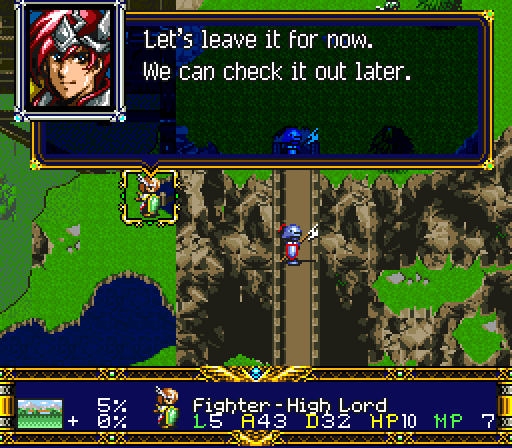
Hmmm, I just remembered, I saw a cave by the cliff. What should we do...?
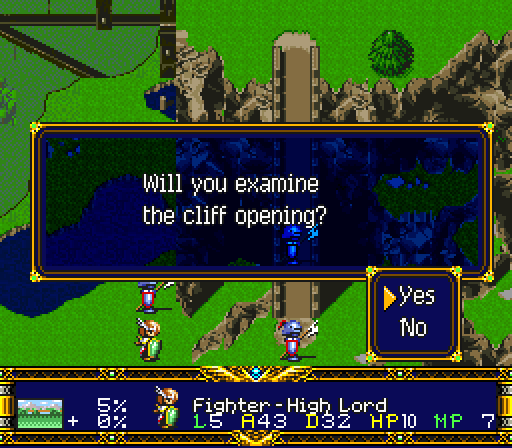
Yes No
Let's have a look. I feel uneasy leaving it unchecked.
We really don't have time to look into it.
I know, but there might be something there to help in our battle against the Empire.
Well, Fighter, if you say so, I guess it's all right.
All right, everyone! Let's check the cave.

Well, breaking the ambush was no mean feat and we can now push on to Baldea. Next time, we go spelunking and deal with the dread inhabitants that lurk there.
Thanks to Fedule's excellent Fire Emblem: Path of Radiance LP and DarkHamsterLord's great Corpse Party LP for images and music respectively.