Toggle Background Color
The first sidequest of Hector?s story and the first true fog of war chapter of the game, this is the also the last chapter (other than the final one) in which one cannot do battle preparations to change your formation. Largely as a result of those latter two factors, it has a well-earned reputation as one of the hardest chapters of the game on HHM despite being extremely simple on every other difficulty.
Chapter Summary:
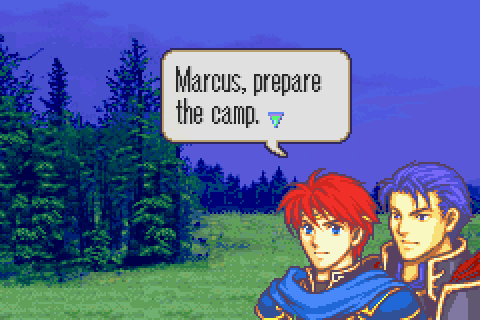
On the way to Laus, Hector and Eliwood come across some bandits waylaying a hapless merchant just before making camp for the night and come to his aid. After they save his life, the merchant- Merlinus-joins the group to help them manage their supplies and gear.
When you think about it, this whole chapter is about the kinds of unglamorous work that are involved in traveling about the pre-modern world on campaign: making camp to have shelter at night, keeping a good inventory of weapons and gear, hauling tons of supplies around, etc. As a veteran soldier, Marcus is skilled at all sorts of things like that as well as fighting and Eliwood, as a nobleman, probably isn?t and has to rely on them. Relatedly, the knight-in-training Lowen is also a good cook and even Marcus greatly values his skill in that area.
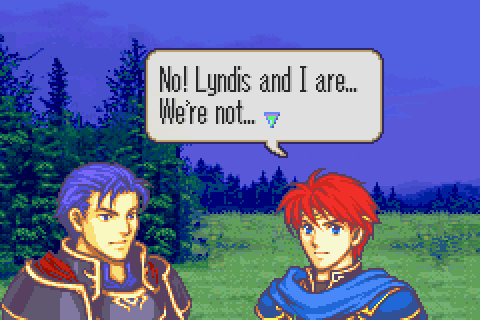
They?re currently traveling through the fringes of Caelin and Hector takes the opportunity to tease Eliwood for his obvious attraction to Lyn. It?s conversations like these that are so important for humanizing them.
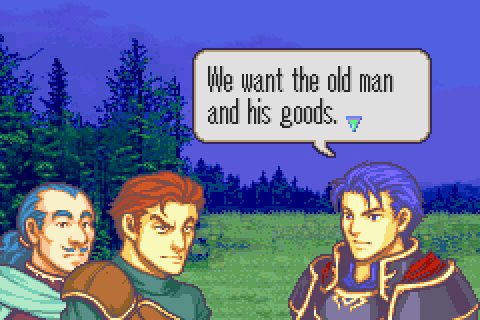
They hear a man crying for help and run to his aid, but Hector manages to make them sound like a second group of thieves just trying to take the plunder for themselves.
The War Room, Part 13
Some of you may remember that Chapter 9 was also a fog of war level (that time because of actual fog instead of darkness), but I still consider this to be the first ?true? fog chapter because the fog only appeared on chapter 9 after turn 2. That meant on that chapter you knew the location and strength of the enemy (other than reinforcements) as you deployed. Here you have very little idea and will have to adapt your strategy as you find out more during play.
Fog of war chapters can be some of the more difficult ones in the game, but not really in a legitimate way. Approaching them is often something of a matter of guess and check ? kind of like FE6 and Awakening on the hardest difficulties. In those cases it?s a matter of powerful enemy reinforcements appearing unpredictably and then attacking immediately with you having no chance to change formation. Actually, that?s pretty much the same thing that happens in fog of war for all intents and purposes.
Anyway, there are a couple of things to know about fog of war levels before you can start strategizing. First of all, the enemy is completely unaffected. They know the exact location and strength of all your units at all times same as always. Furthermore, unlike the player, they don?t need to have vision to one of your units to run up and attack it. So don?t ever try to hide a unit or assume they can?t see it.
Second, the vision range of all your units other than thieves is 3 spaces. Thieves see 8 spaces, which is a MUCH larger total area (approximately 6x more I believe). You cannot attack an enemy who one of your troops doesn?t currently have in his vision range (and remember that your vision range only updates after one of your units finishes its turn, so you cannot move into fog and then attack an enemy who turns out to be next to you or anything).
Third, if you try to move into or through the space of an enemy hidden in the fog, your unit will stop just before going into the space in question and its turn will immediately end.
Fourth, torches increase the vision range of the unit using it by 4 spaces (this boost then decreases by 1 per turn thereafter). Using a torch again just resets this bonus to 4 rather than adding a further 4.
The torch staff (which also costs 100 per use) on the other hand reveals a fairly large area centered around a target square up to ? the caster?s magic stat away.
So what does this mean? First of all, bring all your thieves and torches. If your vision range is good enough, the map functionally ceases to be fog of war at all because there?s no longer any way for the enemy to attack you by surprise.
Each torch use costs 100 gold but they?re often worth it in turns you can save by being able to strategize properly. To those of you who?ve done some calculus (or geometry for that matter), it?ll be clear that the flat +4 vision range bonus is best used on someone who already has a large vision range (so thieves). To see why, consider what happens to the area of a circle if you add 4 to its radius. A circle of radius 3 starts with an area of about 27. If its radius increases to 7, the area increases to about 150. A circle of radius 8 starts with an area of about 200. If the radius increases to 12, the area increases to 450. As you can see, the increase in revealed area is far greater for the circle that was bigger to start with: the thief vision range circle.
Of course, sometimes you have a large fog of war map and need good vision in 2 areas more than you need great vision in 1. In that case it might be worthwhile to give your torch to a unit other than the thief. Or just bring 2 thieves or 2 torches.
Second of all, try to keep your vulnerable units at least 7 squares of movement (considering terrain) from any fogged areas (or surrounded by allies or the like).
Third, don?t count on units like cavaliers and knights and flyers not running into weapons that counter them.
Fourth, on levels where you can control your starting position, note that you can reposition your thief around the edges of your allowed area to reveal different zones before the map even begins and thus learn some additional information in advance.
Fifth, before you move a unit (especially your thief), make sure that moving it won?t plunge an enemy you need to attack into fog. Get the order right or you can end up in serious trouble. Similarly, if you don?t have much to do with a unit, consider moving it so you can reveal an area your better units can attack into but not currently see into.
Preparations & The Map
Once again I?m staring down the barrel of a loaded terrible starting formation, but this time at least I have most units equipped with what they need
Objective: Protect Merlinus (that little green unit) for 7 turns.
Secondary Objective: Visit the top right village for 5000 gold
Secondary Objective: Kill Puzon the boss and every other enemy you can find.
Reinforcements: Quite a few of mixed types. Exact turns are hard to figure out since all fortresses they spawn from are hidden at least some of the time.
Turn Limit: 7
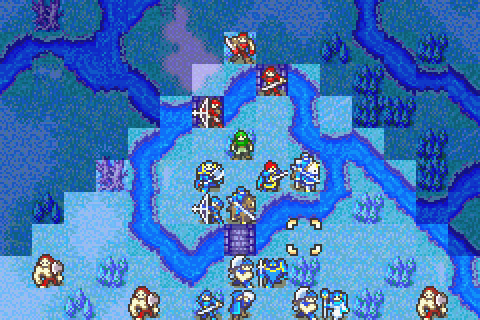
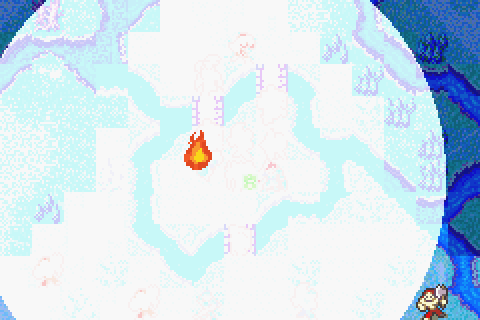
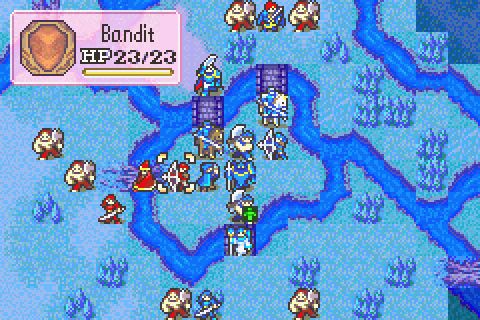
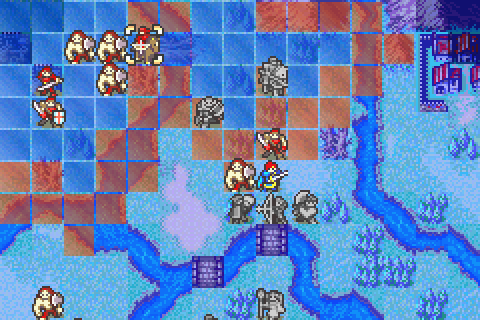
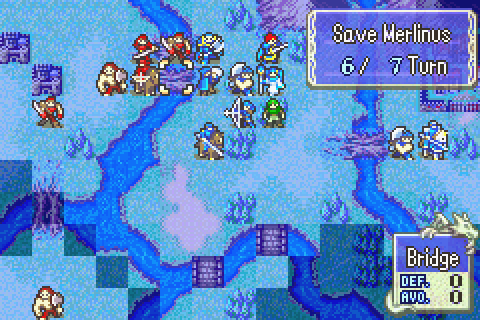
That?s all I can see at the beginning of the map, but to give you a better idea of what?s really out there, here?s the maximum area that can be revealed on turn 1:
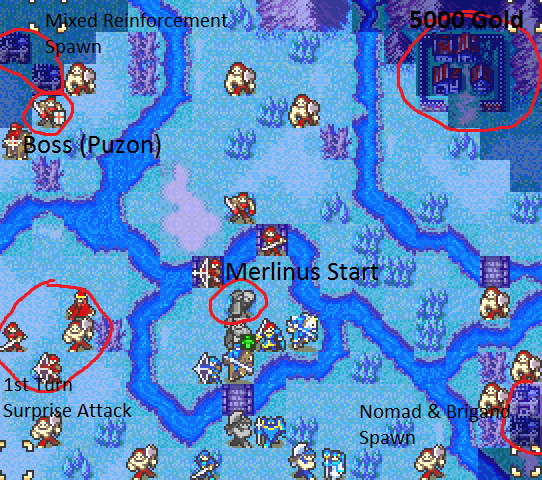
Note that horde of rather dangerous enemies on the other side of the western river which were entirely invisible at the start. They?re much less numerous on non-HHM, but on this difficulty will tear down the snag and all charge in on turn 1. That they have 2 ranged units in the group means they can almost certainly kill someone you thought was safe.
Also note that there are numerous fortresses from which enemies will spawn. Since it?s not possible to watch them all at all times, I?m not entirely sure what units spawn on every single turn. The last turn any appear on though is 6.
Getting to that top right village might look nearly impossible since the mid-right brigand can run to it almost immediately, but fortunately he waits 1 turn to use his handaxe on the snag just south of him and that gives you all the time you need because, like on the previous level, he?ll prioritize attacking units over destroying the village.
Finally, one important thing to understand is that though you have to survive 7 turns to win and the turn limit for max rank is 7, the map actually takes 8 turns. No matter what. Every single survival chapter counts one more turn than it should. On some survival chapters you can avoid this problem by killing the boss early, but on this chapter that doesn?t actually end things, so you just have to eat the -1 turn.
Characters:
I?ll introduce Merlinus next level, when he?s actually usable and has his real stats.

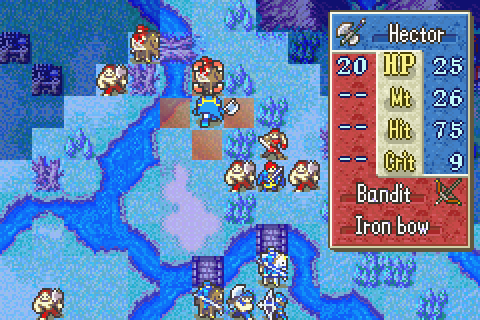
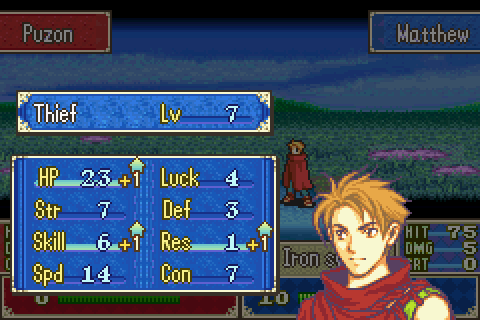
The first boss who?s genuinely hard to kill rather than just hard to kill in a few turns with Hector unaided, Puzon lurks in the fog on the northwestern island and is armed with rather good stats for this part of the game and a steel sword which he?s big enough to wield. This means that he?ll wreck even an excellent Hector and absolutely murder anyone else who isn?t Oswin or Marcus (and Oswin doesn?t hold up so well against him either). He moves if you enter his range, but does not seek you out otherwise and is entirely optional. I?ll be killing him for honor and glory more than XP.
From what we learn about him and read in his character summary, Puzon is actually a mercenary who was just hired on by these bandits when they needed someone of more skill. He seems to be respected but not necessarily the leader- or at least not the unquestioned leader- of this group. More like an adviser who?s also the most dangerous member. He?s their Marcus! And much like Marcus, he?s justifiably proud of his skill.
Playing Through:
The first few turns are the hardest; there is fighting on up to 4 fronts (north, west across the soon to be broken snag, southwest, and southeast). Fortunately, only the north and southeast actually receive reinforcements, so once the initial wave from all sides is broken, the map quiets down a fair amount.
One other problem I have to deal with is that, again, my starting formation does not have people where I want them. Why is Serra exposed to the enemy and maximally far away from the most intense fighting? Why is Oswin in an area where he can only fight brigands? Again, why is Rebecca up close to the serious enemies?
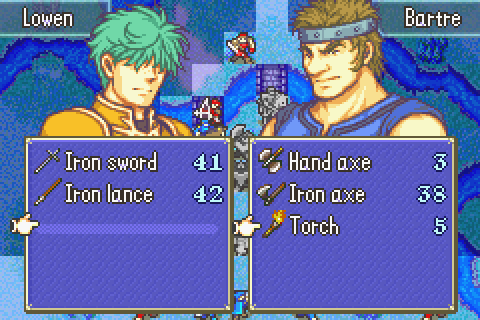
Further, I still don?t have all my gear properly distributed because Bartre was alone when he acquired the torch I?d like Matthew to have and Marcus didn?t have a chance to distribute one of his handaxes to Dorcas and Lowen still has no javelin at all due to a lack of funds.
So besides fighting all the fires that are going to spring up, I?ve got to do some first turn trading and serious repositioning.
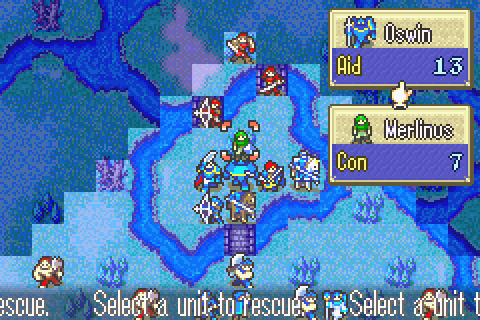
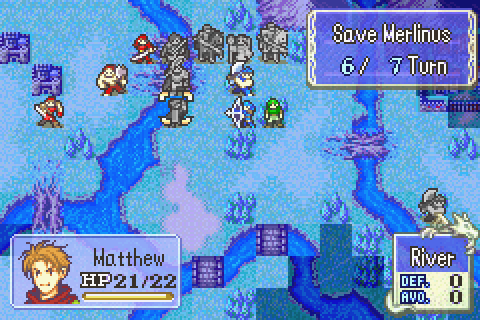
Oswin is the only one capable of fighting the western force effectively due to his javelin and high armor and the fact that Hector and Marcus are needed elsewhere. Unfortunately, he?s too slow to get there in time. I?ll rescue Merlinus just to get him out of my way rather than because I actually plan to carry him much longer. With him blocking that forest, it?s hard to move people in here and attack that archer.
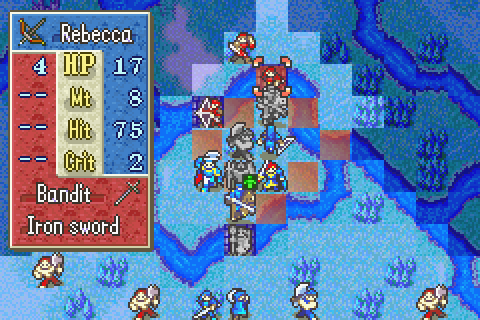
There?s nothing for it but to give another kill to Rebecca. She can?t even do the job of finishing off horribly injured enemies well with a bow, but she manages this one.
Clearing Merlinus off of that spot let me handaxe the archer with Bartre, then take his torch with lowen before finishing the archer.
And that meant Matthew could run somewhere near the front (and help block the west a bit) and take the torch and use it instead of him or Bartre having to completely waste their turn.
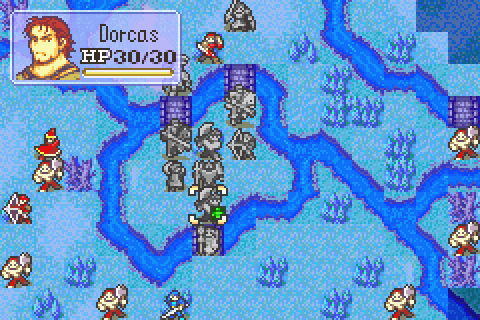
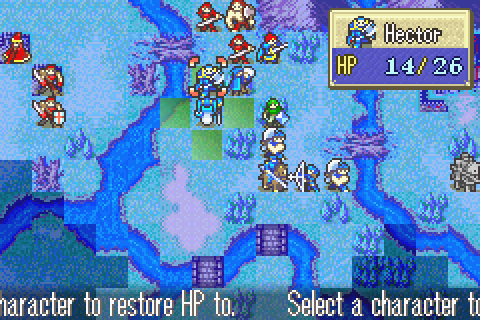
There, NOW I can see what I?m fighting. Dorcas and Serra scramble to safety and Dorcas takes Merlinus. Many guides will tell you to carry Merlinus the whole time, but I really can?t recommend that. Remember, a unit which has rescued someone takes a penalty of half its speed and skill. Even for Marcus that can be dangerous and it makes the carrying person entirely ineffective too. It?s like removing one of your units from the game. No, I?ll just take Merlinus with Dorcas so that Oswin can fight next turn and drop him once I know where?s safe.
All over the map, enemies tear down the snags. Because of the torch I know that Eliwood is fairly safe up there (if every single enemy hits him he dies, but since most of them are brigands that?s really unlikely) and I need him to start damaging those people ASAP so it?s a risk I need to run.
I couldn?t block that bridge are properly due to needing everyone to do other things, so now I need to kill that archer before I can even try to plug the breach. That?ll be tricky.
Ugh, nomads. They?re not a threat to good units, but due to huge mobility and bows they?re great at taking down your very injured guys or people like Serra. Fortunately the Wolf Beil is effective against them so Hector can instant kill them. Unfortunately, I will not be able to have anyone else trade with him and equip his iron axe after this, so he?s going to waste a fair number of charges on brigands.
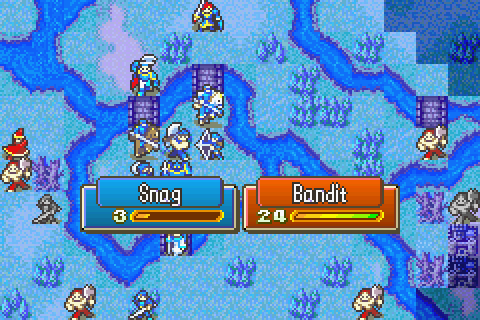
Guy can take on a more or less infinite army of brigands without trouble. The problem is that this guy has a handaxe so if I don?t kill him now, I?ll have to move out of a forest to hit him later. Since moving out of a forest will mean getting shot up by the nomads who are about to run in out of the east, I don?t have much choice but to use the Killing Edge this time. Crowd control can be worth a pretty serious money investment on rare occasions.
Marcus didn?t really need the 2 HP, but Serra couldn?t safely get to anyone else and as I said, it?s important to heal all the time for XP.
I was in a tight spot here. There were 3 enemies who could attack Eliwood (mercenary, brigand, nomad) and he?s at tiny health so any hit is death. The brigand isn?t much of a threat, but no one could take out the nomad. Instead I just had Marcus stand in the only spot it could shoot Eliwood from. Then Eliwood can finish the mercenary and he?s mostly safe.
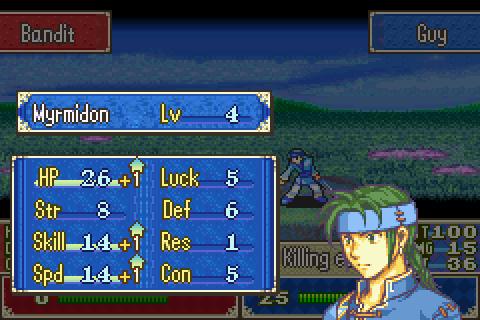
Welcome to the bench! Classic Guy.
Sweet! Hector had to use a lot of Wolf Beil there, but he netted a good level and really mangled the enemy so it?s probably worth it.
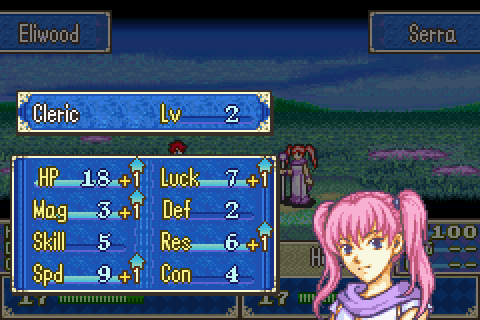
Next turn, Serra gets a pretty good level. I especially like anything that increases her defenses (HP, speed, luck). Maybe someday she?ll be able to survive more than a single attack on average.
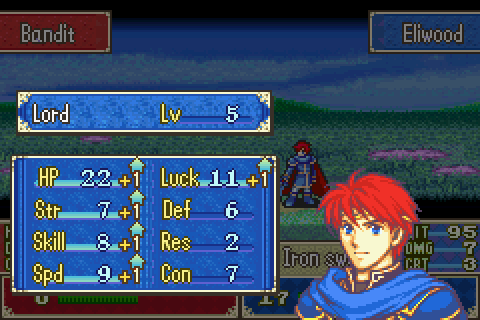
Yes! That?s my man Eliwood at work. This is a pretty good chapter for him to train overall since he starts near the front lines and a lot of enemies are vulnerable to him.
Eliwood is a decently tough character, Hector is a wall, and in a wood Matthew is nearly invincible. Just in case I swipe one of Hector?s vulneraries for him. Those myrmidons are accurate enough to be a threat. Speaking of such things, this is the ONLY level where enemy myrmidons are at all scary. You never fight many of them and once your characters have a few levels they turn into a complete joke that just about anyone can instant kill, but at this point not everyone has the Def to ignore them.
There?s pretty much no one who can get that village in time but Marcus, though I?ll be sending in Bartre to take as much of the XP as possible. For some reason, this time most of the brigands who spawn in the southeast went north instead of west to Guy, so Marcus got more than the 1 kill I usually expect.
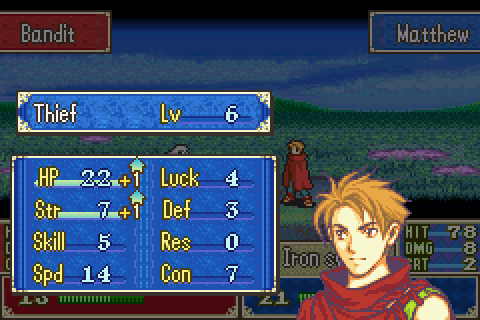
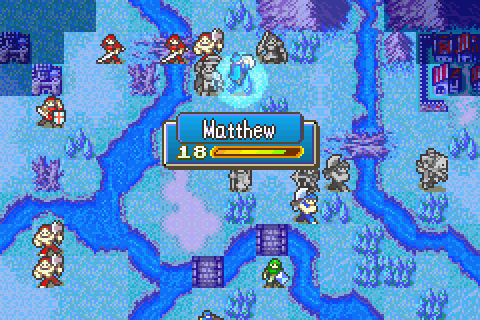
Kind of like how enemy myrmidons are only dangerous early, Matthew is only a serious fighter early, and this chapter is probably his peak. That huge speed, that dependable if low damage, and his great movement are just indispensable.
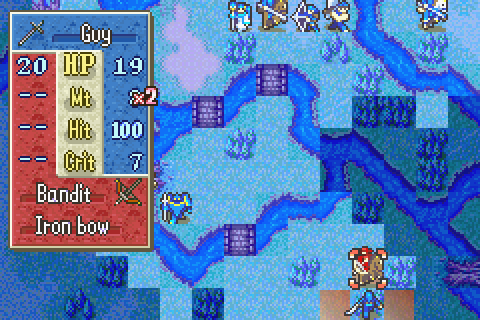
Guy is just too weak to kill even nomads at this point- even with his HHM bonuses- but he can at least dodge them long enough to take them down. Although it would be nice to kill this guy immediately with the killing edge, it?s not necessary like last time so I won?t do it.
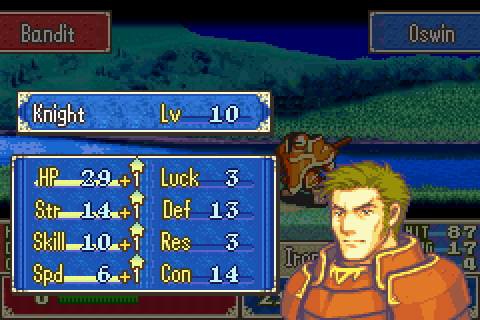
Oswin and Lowen really had a tough time defeating that archer without getting killed by the mage, but now everything is finally under control. And a good level for Oswin, though it doesn?t matter since he won?t be around after 17 anyway.
Even Hector can?t really take the heat on this level. Too many sword users and that mage is trouble since my Hector hasn?t gained a single point of Res. Thusfar I?m staying carefully out of Puzon?s range while I mow down his remaining minions, but I?ll need to agro him soon to take him down in time.

Darn it, man, you?re making all my talk about your good growths sound ridiculous!
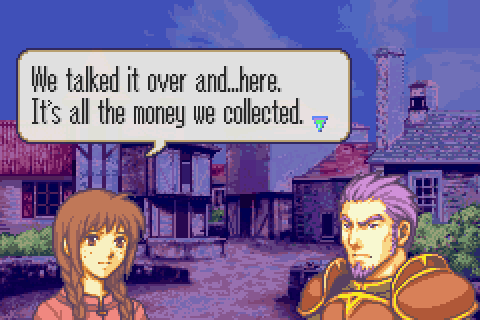
At last, Marcus visits the village and then leaves Bartre to deal with the other brigands. The villagers are willing to pay us a ton of money (5000 gold!) to get rid of these bandits for them. Remember, this is in Caelin and Lyn hates bandits more than anything. In general, this gives you the impression that she and her grandfather are rather ineffective rulers or that the civil war in Caelin she caused has really devastated the army and left the population defenseless. You know, just like a war like that really would.
All game the enemy had completely ignored that snag. This turn they suddenly teamed up to attack it, ignoring most of my other units. If I had been positioned any differently, they might have been able to kill someone.
Turns out thieves, like Lords, can run into rivers at a cost of 5 movement. Good to know.
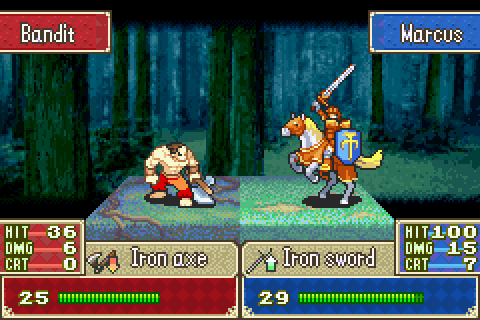
About the only time in the game someone threatening Hector can actually beat him mano a mano. Fortunately, it will take him more than 1 turn since I?d healed Hector so this just serves as a chance to get him right where I want him.

Eliwood gets another solid level. Look at those all-rounder decent stats shaping up!
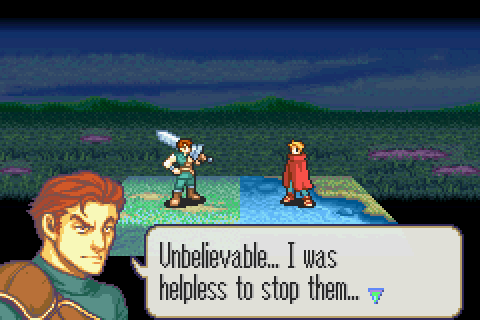
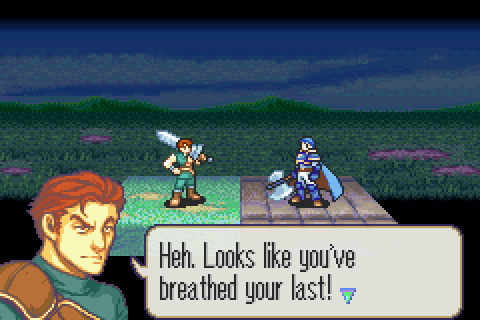
After using Hector and Marcus to weak him, it?s actually Matthew who kills Puzon since no one else could. I really like that death quote from him, it?s a nice pat on the back from the game in congratulations for managing to kill a tough boss on a level where you only needed to defend Merlinus. Plus of course the bandit retreat dialogue will be somewhat different. Note that killing this guy does not end the chapter- even exterminating all the enemies doesn?t end it early. On some survival chapters taking down the boss will end things and save you some turns.
So Matthew gets a not so great level, but it?s XP at least.
I?ve really been working hard to feed kills to Lowen in hopes of making him more usable than usual. Mine?s pretty much average, but that?s just not good enough.
Classic Dorcas. This is actually the last enemy on the level and I had no way to kill it since I needed all my other units to kill the rest. I hit it for the XP anyway.
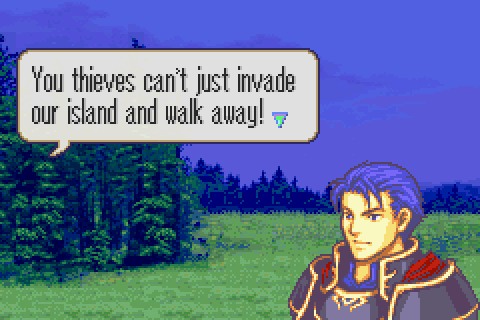
Remember how Hector made them mistake his group for a rival band of bandits muscling in on their turf? That misunderstanding never gets cleared up really. No doubt decades later the one survivor is still telling his new comrades the tale of the time his old group was wiped out by the handsomest army of bandits he ever ran into.
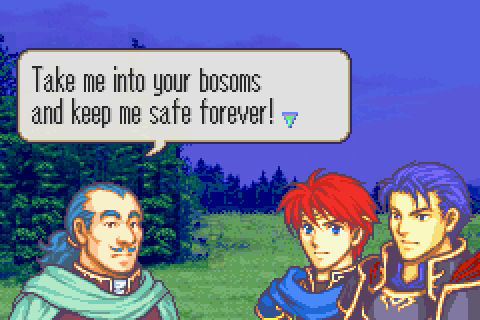
Merlinus has a weird way of saying pretty much everything. But he?s joined the party! Hooray!
Total Restarts: 4 There were some close calls this time, but I made it through alright. Oh, and I?m not counting that one restart that I did just so I could show you guys a mostly revealed version of the turn 1 map and then play for real.
Net Turn Surplus: 0. Darn you, obligatory -1 turn on survival chapters! Oh well, I?ve broken even so far overall. That?s better than usually possible
Things I Regret Missing: The lockpick on chapter 11, that darned archer on chapter 11, this one brigand who attack Marcus on chapter 12, and 2 more brigands who attacked Marcus instead of Guy or Bartre on chapter 13x.