Toggle Background Color
New Game Info
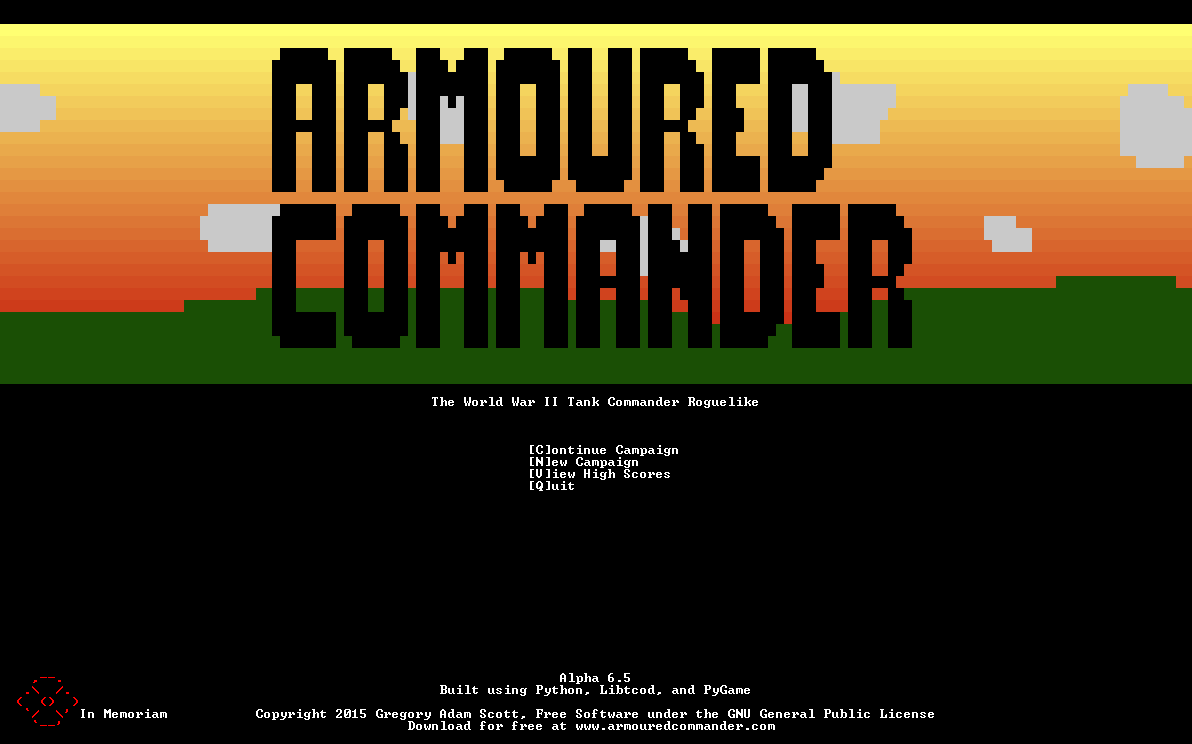
Starting up Armoured Commander presents us with the Title Screen, which has only a few options. They're all pretty self explanatory and the constant updates mean I haven't really been able to build up a high scores list, so we'll move ahead straight to starting a new game. The first few screens we're presented with give us some background information about the game and the setting, some difficulty options, and a chance to name our character and our first tank.

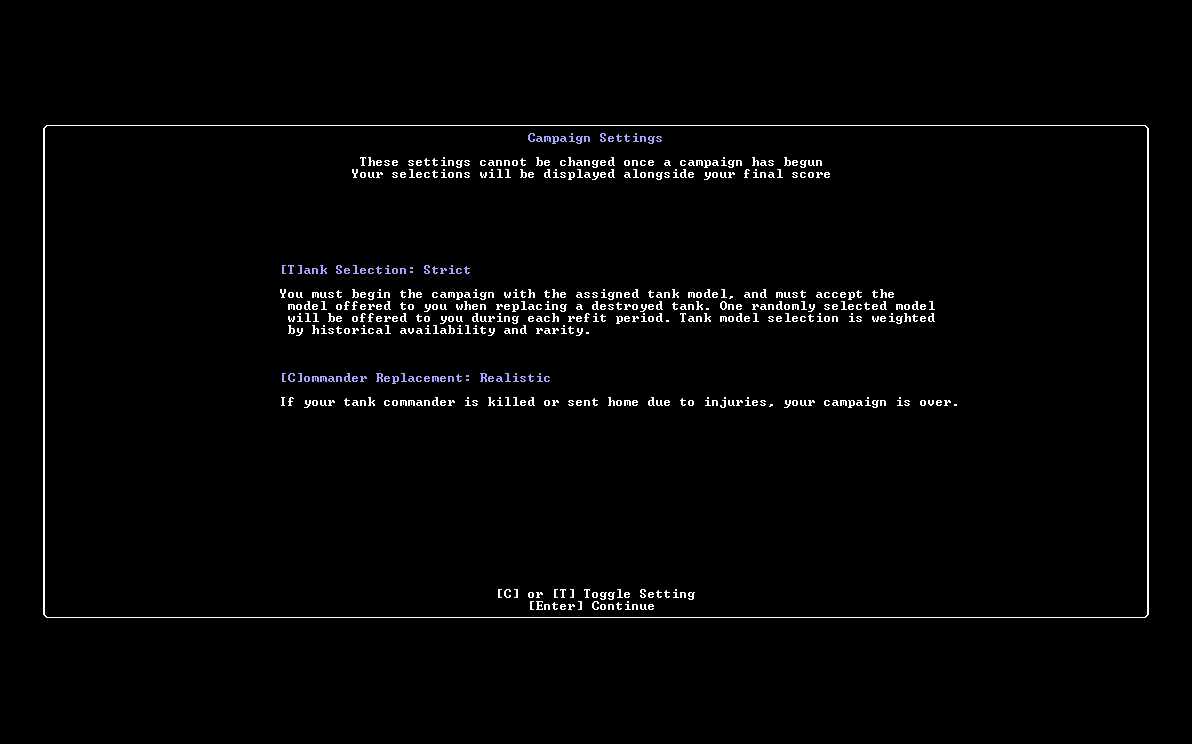
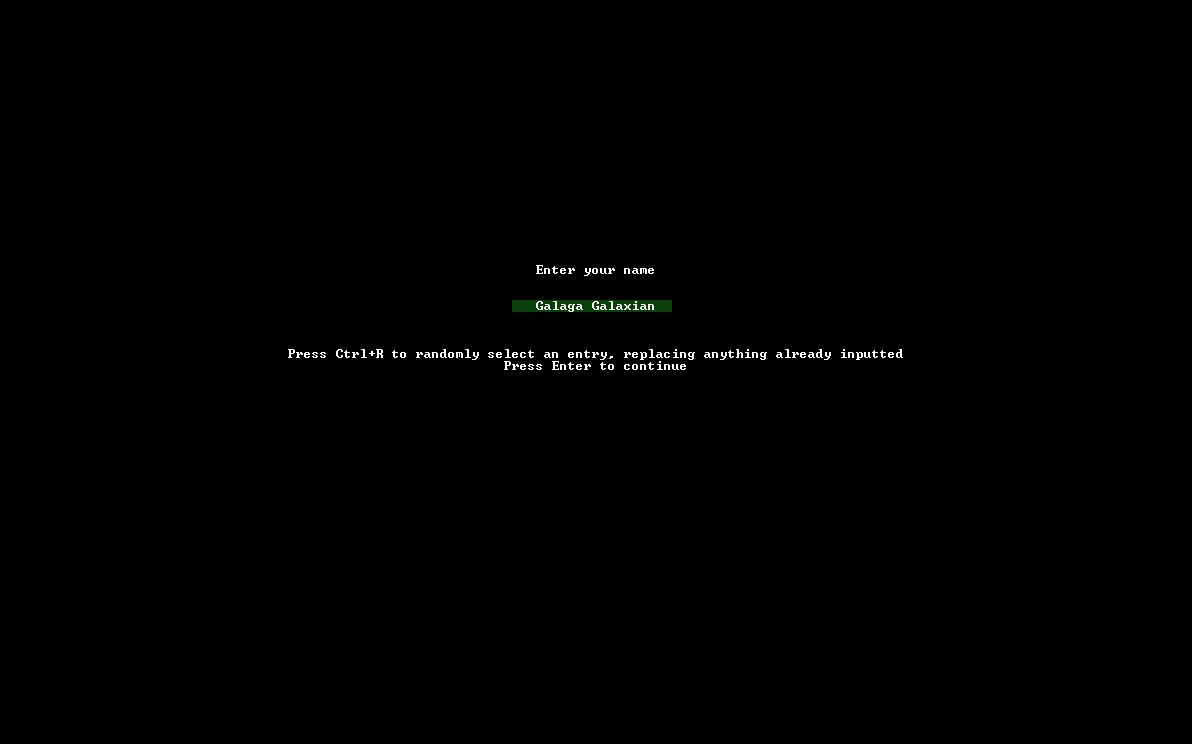
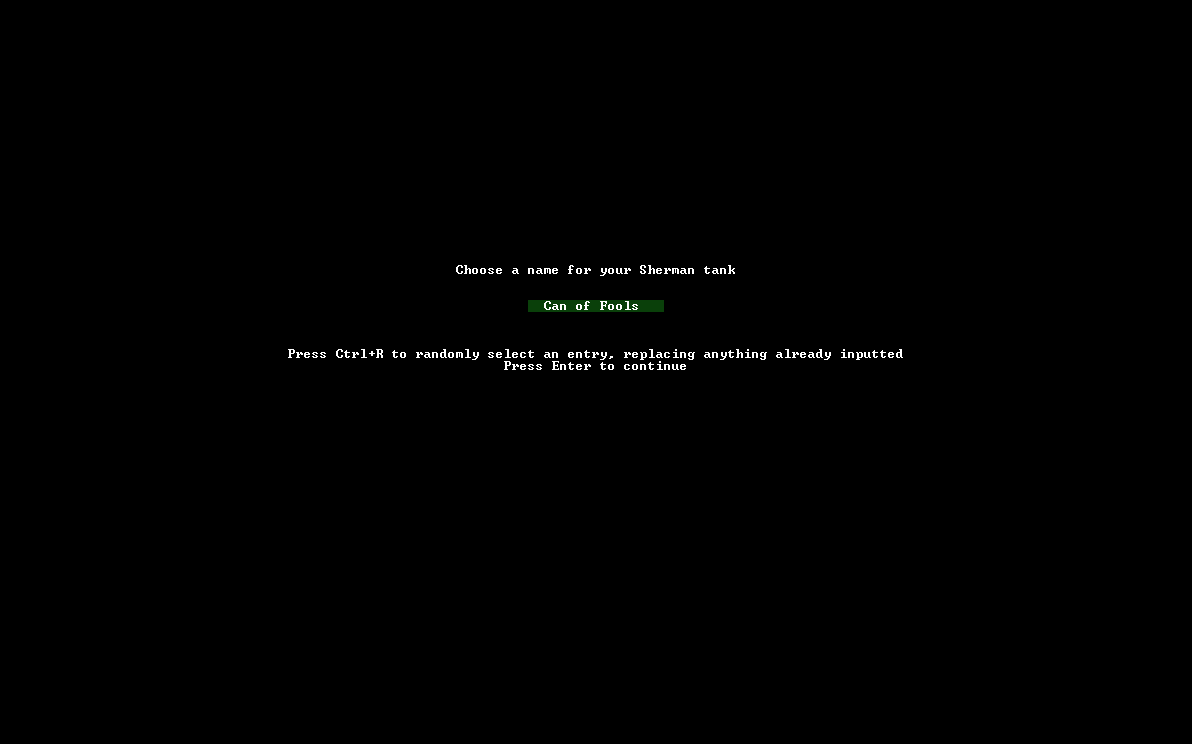
The campaign settings has two options, each of which has two different settings. Tank selection determines whether we can pick any tank we want when we need a replacement or if we'll be offered a random tank. Commander Replacement is a choice between permadeath (game over if the commander is killed or sent home due to injury) or not. By default you don't get to pick your tanks and its game over if your Commander is killed or horribly maimed, so I'll leave those settings at the default for now. Next up I name the first Tank Commander after myself, and give our tank an apt name.
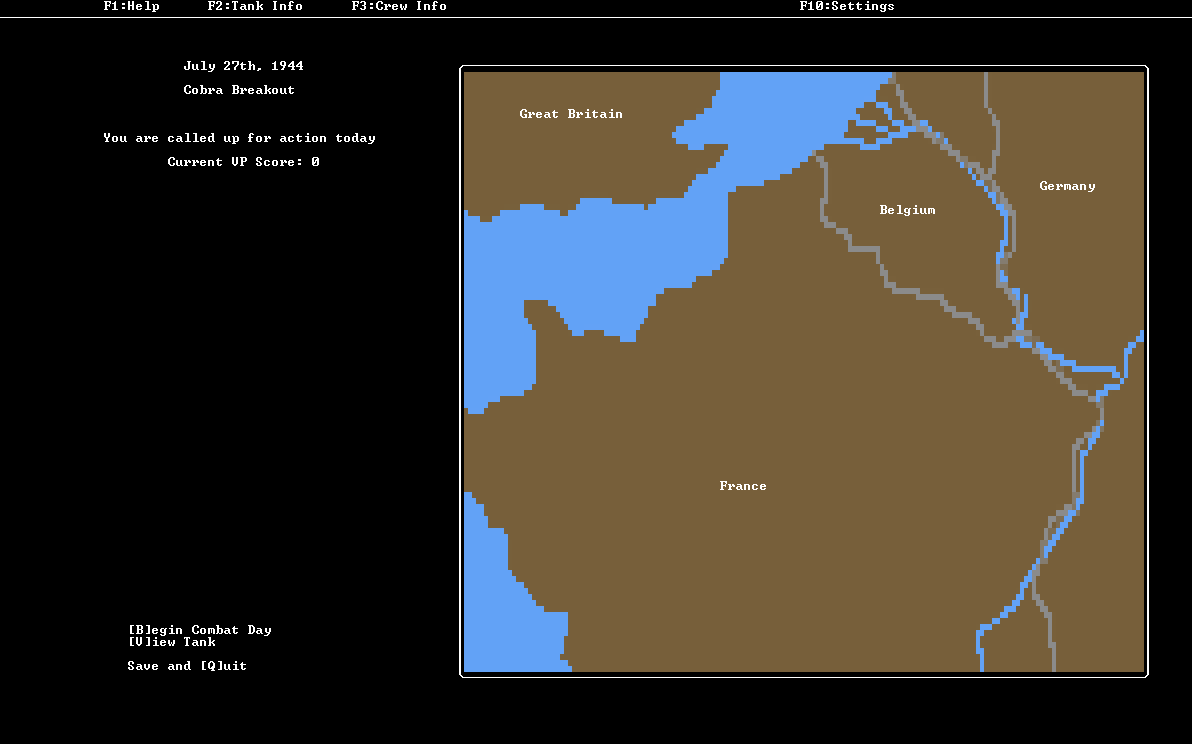
Next up we're presented with the campaign map, which informs us we have been called into battle. Eventually the dev plans to show the progress of the 4th Armored Division on this map as it fights its way into Germany, but for now it is simply a static image. Here we have the option to view our tank or start the combat day. Normally every day has a random chance of calling your tank crew into battle, but the first day of the campaign, July 27th "Cobra Breakout" is a mandatory combat day. Selecting to begin the Combat Day starts the morning briefing, but first, let's take a look at our tank and our crew!
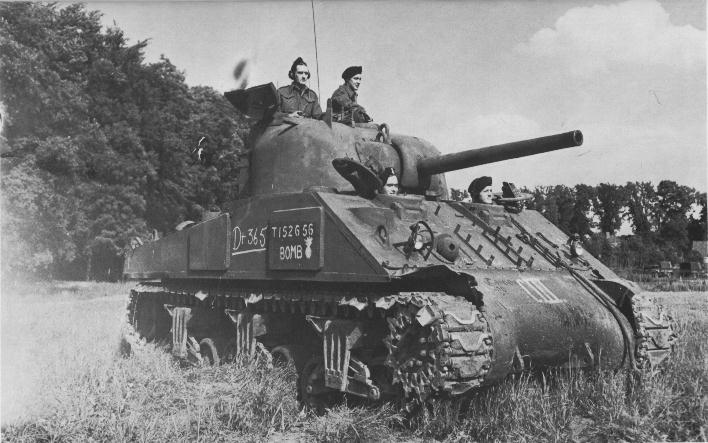
An M4A2 Sherman belonging to the Canadian Army. This particular tank, Bomb, managed to survive from the D-Day landings to VE day without being knocked out once and is on display today in Sherbrooke, Quebec. If only we turn out to be so lucky...
The M4 Sherman Tank
You start every game of Armoured Commander issued a standard M4 Sherman (A Turret). This is the most basic (and weakest) Sherman in the game, having few useful features.
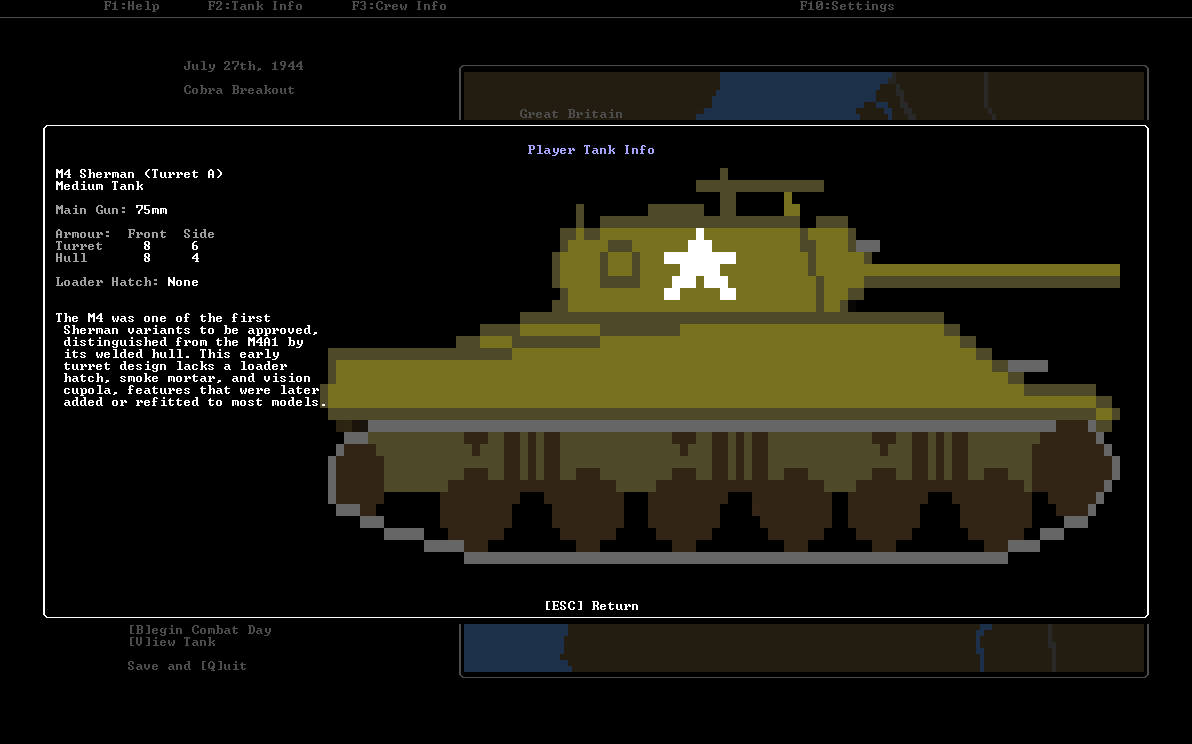
While the game features 17 "different" Shermans, it actually consists of 4 major chassis (M4, M4A1, M4A3, and M4A3E2) each of which takes one of seven different turrets, which are differentiated by letter codes. Not every Sherman can accept every turret, standard M4s, for example, can only accept A, B, and C turrets. The A turret is the basic model, while the B turret includes a separate hatch for the loader and a very useful smoke-bomb mortar. The C turret, meanwhile, has all the features of the B model but also adds an armoured vision cupola to allow the commander a good field of vision even when "buttoned up" inside the tank.
The Crew of a Sherman tank consists of 5 men, the Commander, the Gunner, the Loader, the Driver, and the Assistant Driver. The Commander tells everyone what to do, and ingame his actions largely support the rest of the crew, the Gunner is in charge of firing the main gun and the turret mounted machinegun, the Loader reloads the main gun and also operates the smoke mortar if the tank has one, the Driver of course drives the tank around while the assistant driver is basically an overall assistant, helping with spotting, passing ammo to the loader from the tank's hull ammo storage, and operating the hull-mounted machinegun. The Driver and Assistant driver are seated in the front of the tank's hull while the rest of the crew sits in the turret of the tank. I mention this because the game does actually take this into consideration and individual crew are more or less likely to be injured or killed when the tank is penetrated depending on where the tank was hit (hull or turret) and from what direction.
In ArmCom each crew member can gain experience and can obtain a variety of special skills, but I’ll go over these skills in a future update. For now, I name the remaining four crew members after the first volunteers and proceed to the morning briefing.
Day 1, Morning
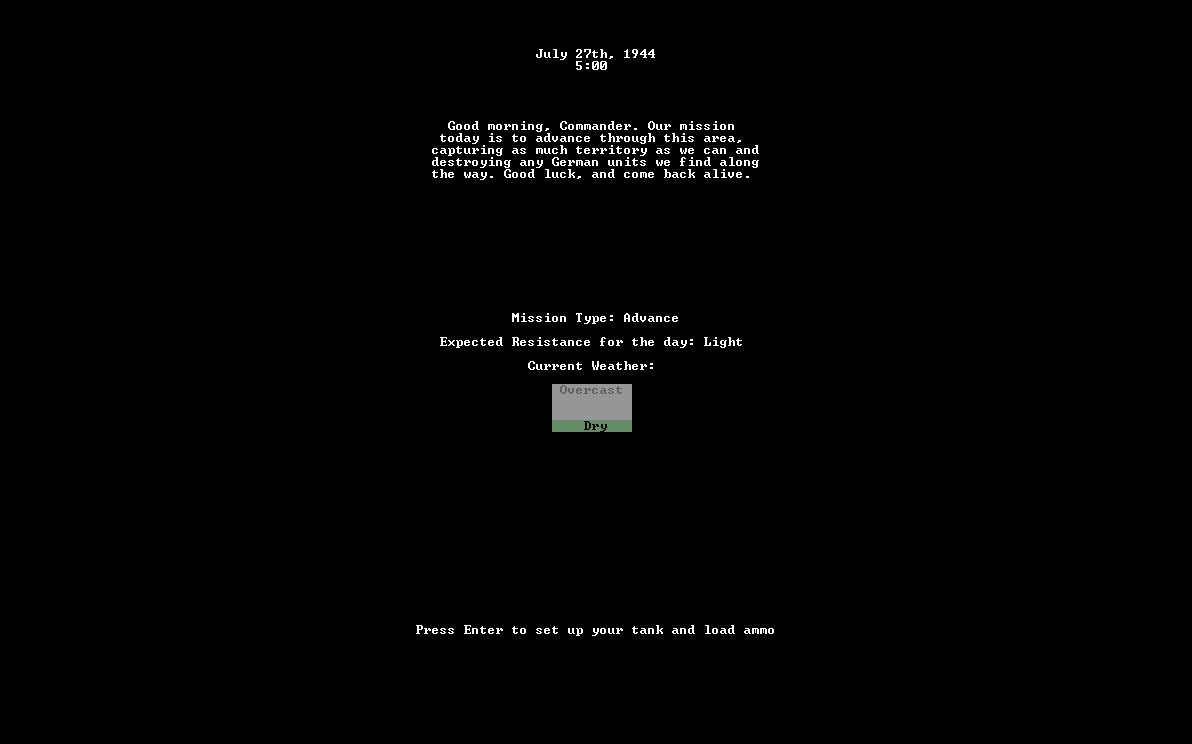
Each Combat Day begins with the morning briefing. The briefing informs us of today's mission type, the expected level of enemy resistance, and the current weather. In ArmCom there are 3 different types of mission, Advances, Battles, and Counterattacks. Today's mission is an advance, this represent our unit pushing forward to secure as much territory as possible, the enemies we encounter will be less likely to ambush us and will include non-threatening vehicles such as trucks and troop transports. Nothing we shouldn't be able to handle, right?
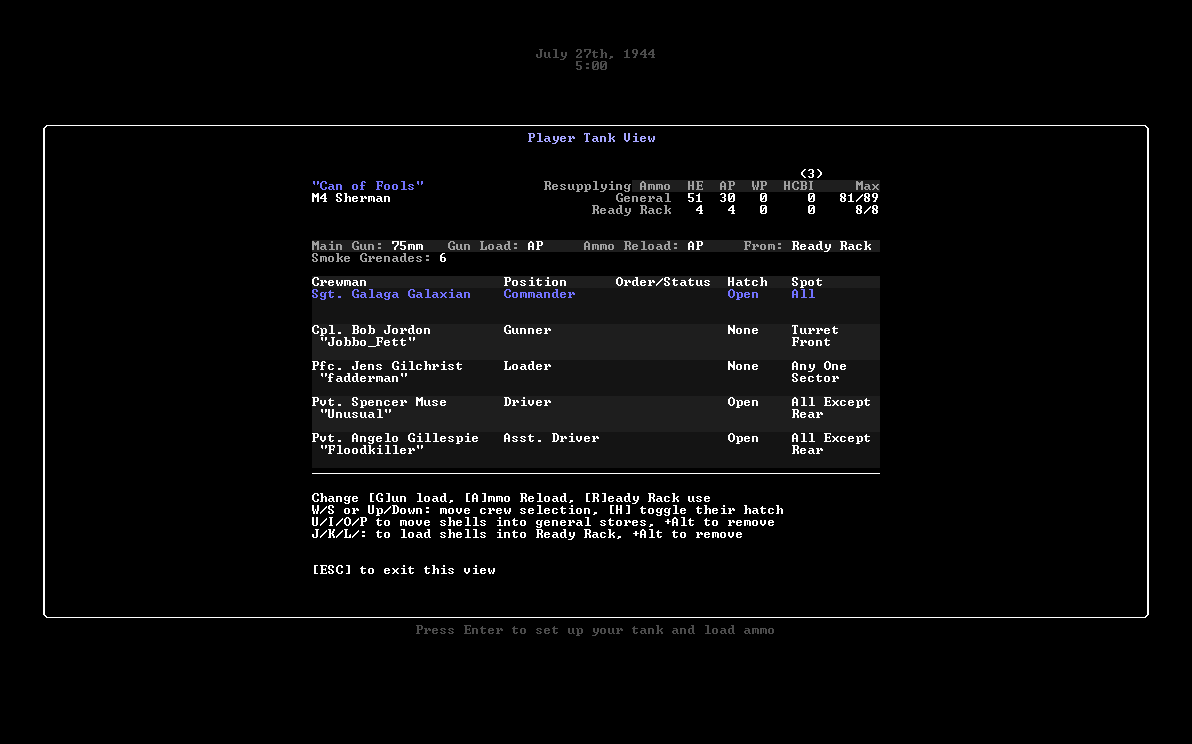
After the morning briefing you're given a chance to load your tank up with ammunition before setting out. A 75mm armed Sherman can carry four different types of ammo, and our model specifically can carry 98 rounds. The four different types of ammo available to use are High Explosives, Armor Piercing, White Phosphorus, and Hexachlorothane-Base Initiating.
* High explosives (HE) are mostly hollow shells filled with explosives, these things are great for killing enemy infantry, light vehicles, and AT-Guns, but are nearly useless against armored SPGs and Tanks.
* Armor Piercing (AP) rounds are solid "bullet" like tank shells designed to punch through enemy armor. Despite the name, ours are actually not nearly as powerful as I would prefer!
* White Phosphorus (WP) shells are basic "smoke rounds" and are fired at enemy positions to foul their view with smoke.
* Hexachlorothane-Base Initiating (HCBI) ammunition is another kind of "Smoke round". Historically these were much safer than white phosphorus, and so could be fired at friendly positions to provide them with smoke cover. That doesn't matter in this game, the important thing to know is that in this game they produce smoke for twice as long as WP rounds, 2 turns. In addition, HCBI is a "rare" ammo type, we're only provided a randomized and limited amount each day, though we can stockpile them from day to day, if we wish.
Personally, for 75mm Shermans, I have a standard ammunition loadout that I basically never deviate from, 55 HE rounds, 35 AP rounds, and 8 smoke rounds, favoring HCBI for smoke rounds whenever possible. Smoke rounds have their uses, but I don't use them that often and thus don't carry many. In addition to our general ammo stores, we also have a special ammo storage location called the Ready Rack. The ready rack is a small ammo rack or bin kept very close to the loader in order to facilitate rapid firing of the main cannon. The size of the ready rack varies between sherman types, and the one nice thing about our basic M4 is we have the largest ready rack, with ours being capable of storing 8 rounds at the loader's fingertips. I typically throw in an even split of 4 HE and 4 AP in the rack.
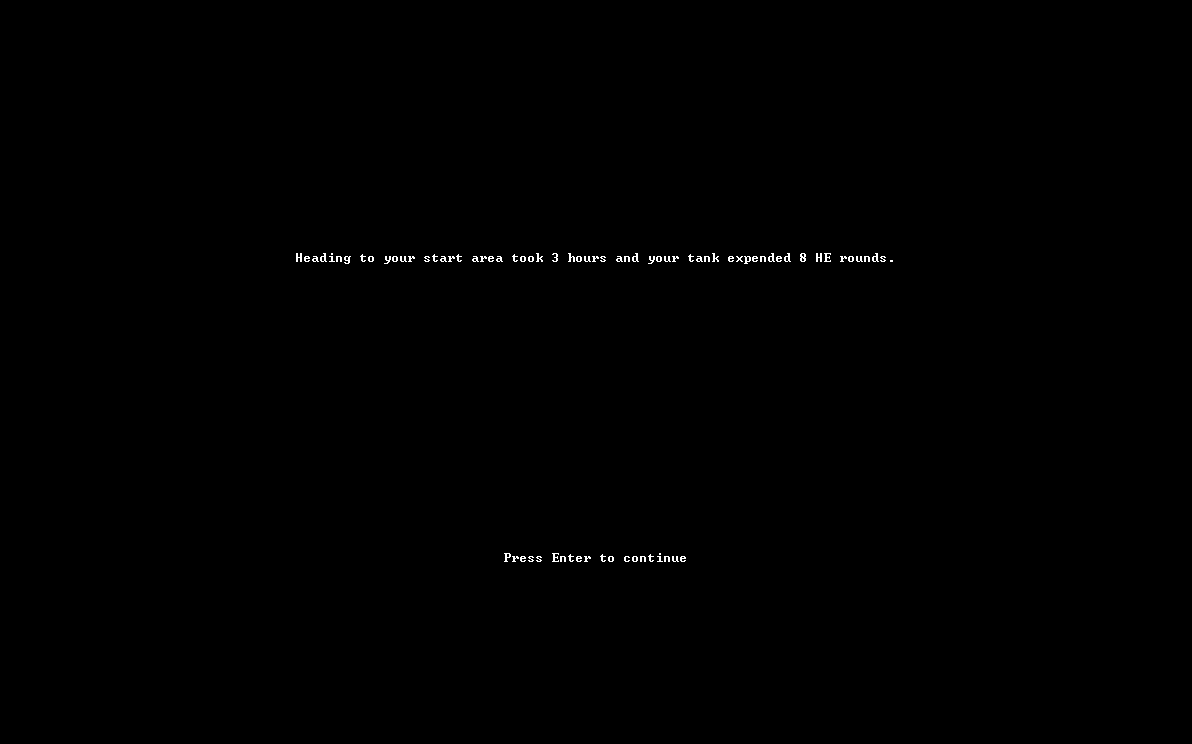
Once we've been briefed and loaded up our tank, its time to get on with it. After the loading screen the first thing you see each day is the results of the morning's deployment, this can take up to several hours and consumes a random amount of High Explosive ammo each hour, this represents your contribution to your task force blowing up any potential ambush spots with liberal gunfire as they proceed to the mission zone. After that you're deposited at the start the mission zone map (which takes up about two screens) and are given a free action to check a neighboring sector for enemy resistance.

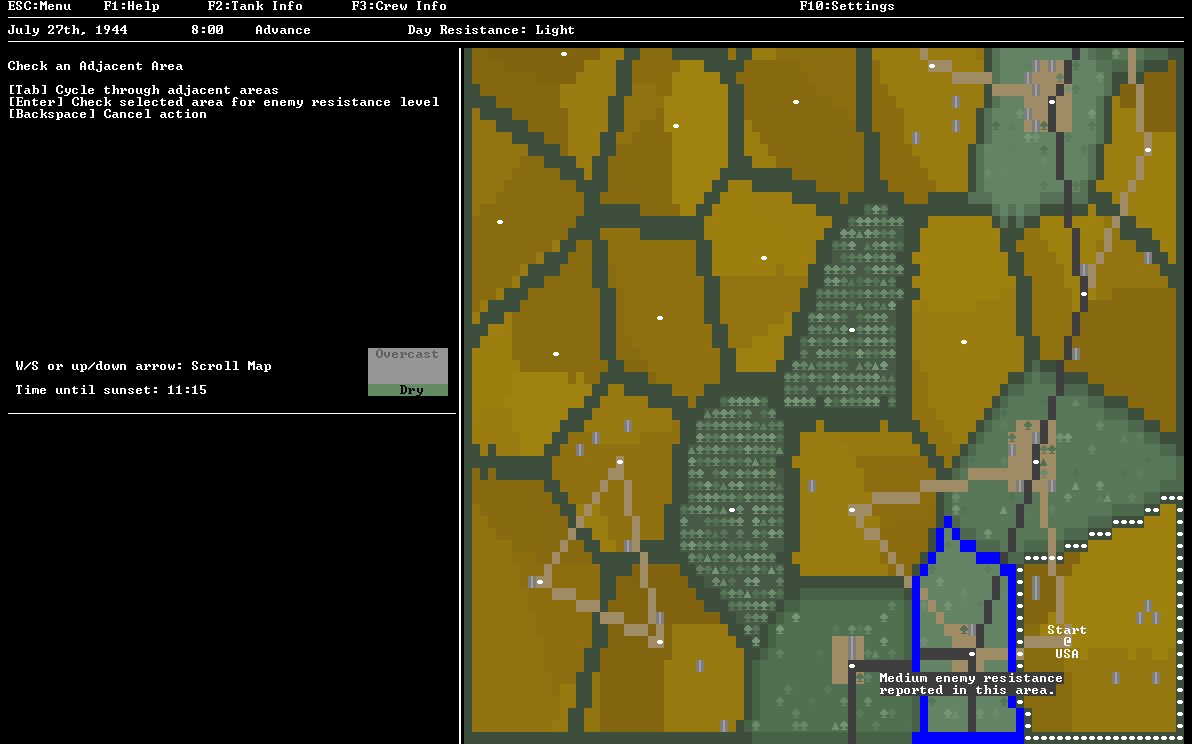
For the record, "up" is not necessarily north.
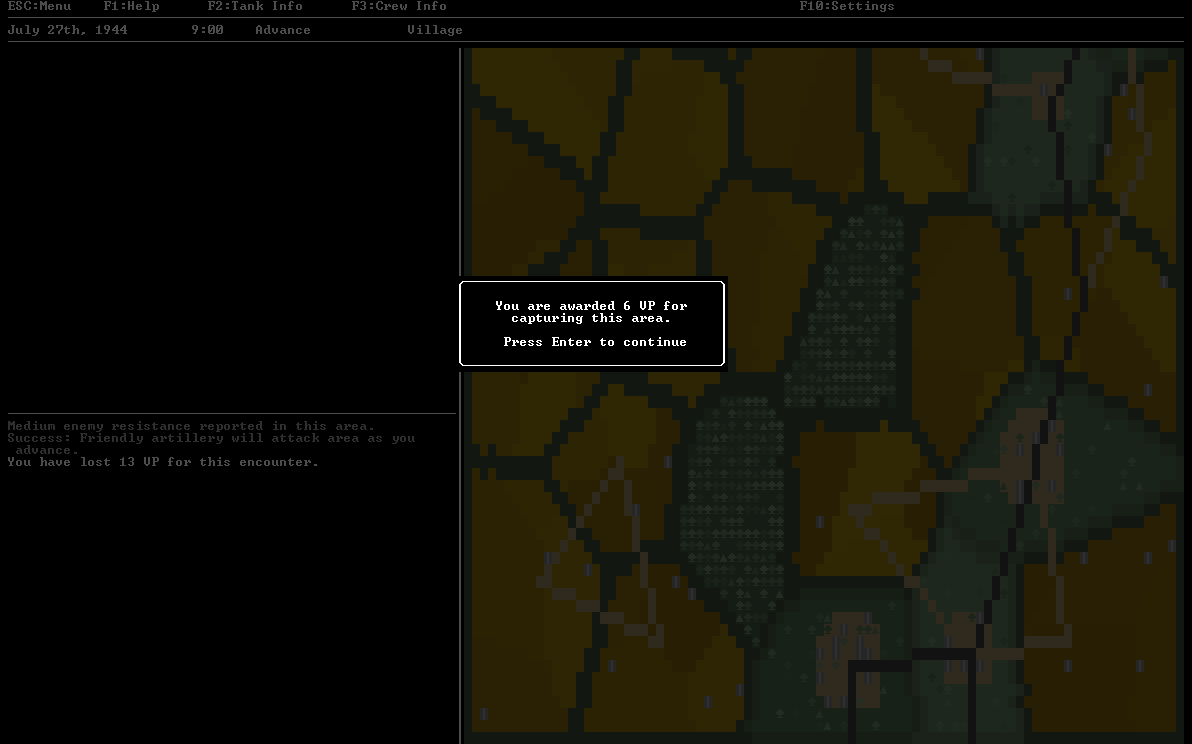
The objective in an Advance is to reach the map sector marked "EXIT" before the sun sets. While every map sector secured is worth Victory Points, successfully reaching an Exit Zone gives a significant amount of victory points and generates a new map. Each map is made up a randomized assortment of sectors, each one of four different terrain types. The green map sectors are forested areas, the yellow/brown areas are open fields, the yellow/brown areas with grey squares in them represent fields dotted with farm houses, and finally the light green areas with brown boxes and grey squares in them represent villages or small towns. In addition, the map contains dirt roads and paved roads, represented by brown and dark grey lines crossing various sectors, roads are useful in that they reduce the amount of time it takes to travel between sectors they connect. Every action on the battlemap consumes time in multiples of 15 minutes. The options available are checking an adjacent area for enemy resistance (15 minutes, represents your task force's recon elements investigating), Entering an adjacent area (15-45 minutes, depending on presence of roads), resupplying the task force (1 hour, lets you restock ammo), and calling in an artillery barrage on a neighboring sector before entering it (adds 15 minutes to the travel time).
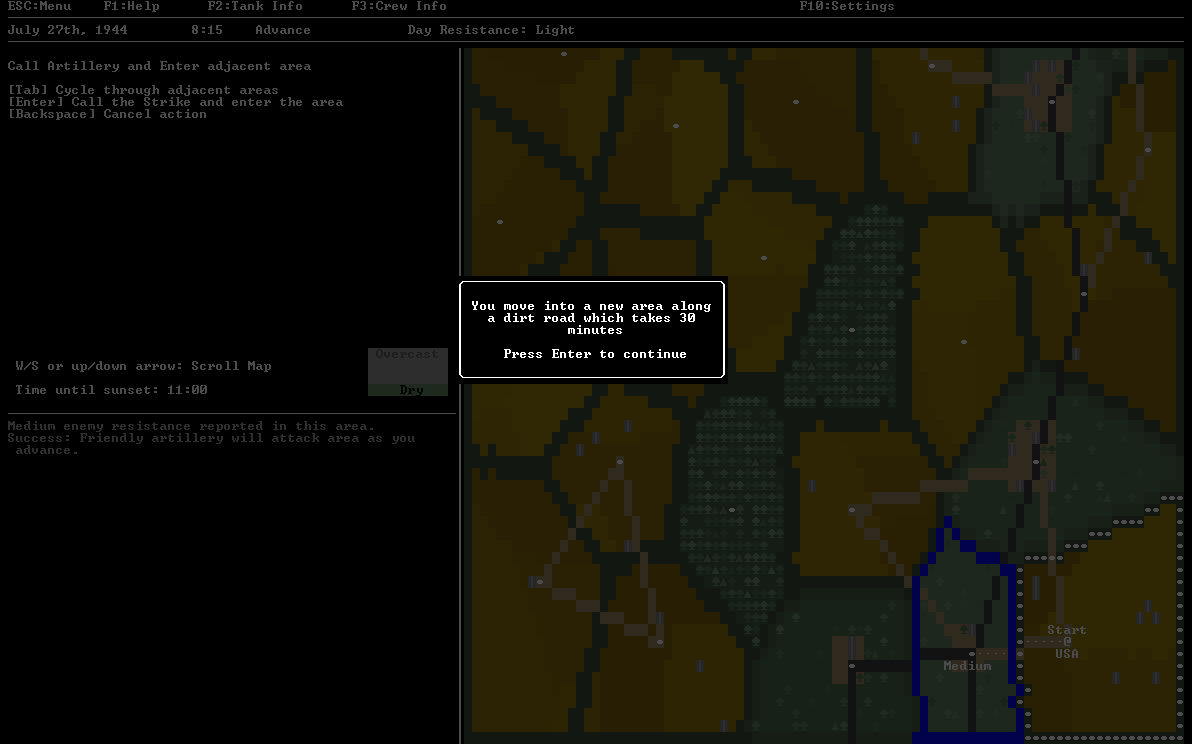
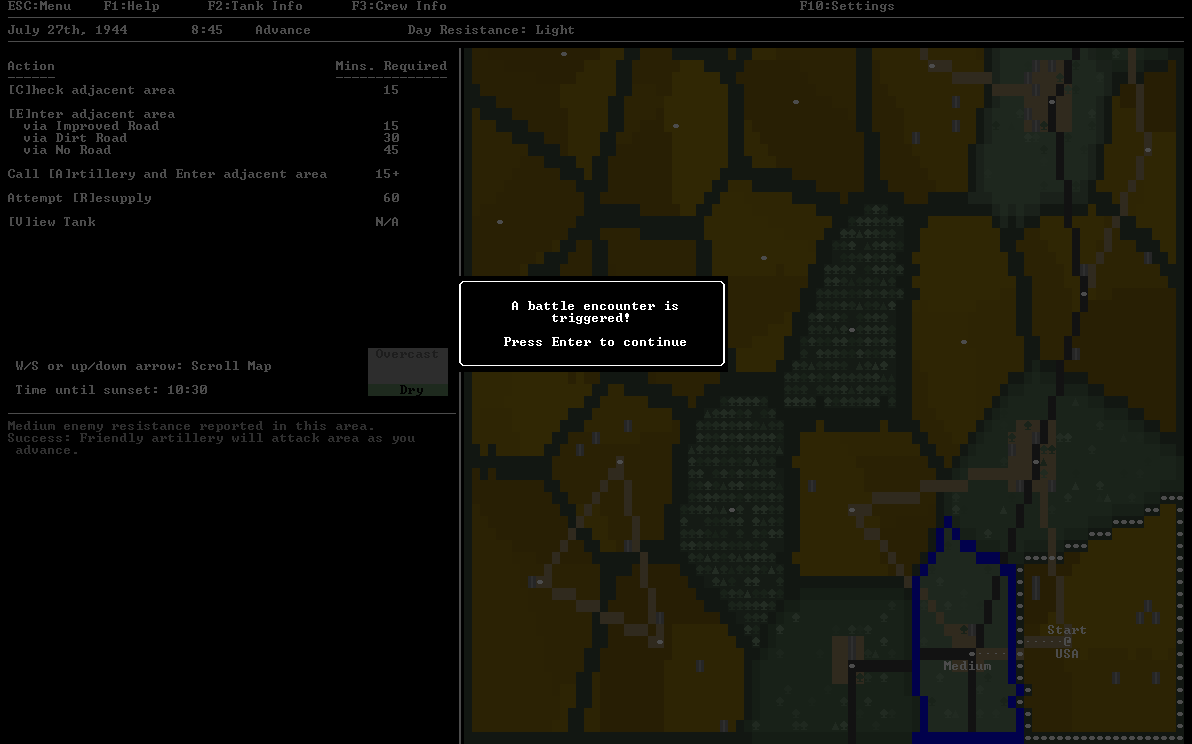
Looking at the map, I see a series of roads that lead almost the entire way to the Exit Zone, this is the path I intend to take. I prefer to travel via roads whenever possible, as far as I know, they do not effect the likelihood of enemy resistance. In addition, I will always call in artillery barrages on regions with "Heavy" resistance expected, and will frequently do so for areas of "Medium Resistance". However just because you want an artillery barrage doesn't mean you'll always get one. I believe currently you have a 70% chance of an artillery barrage call succeeding, but in the future the dev plans to limit you to a set amount each day and/or inflict ever worsening odds of a request succeeding as you call for more and more artillery as the day goes on. I'm not looking forward to that! However, this time, my call for artillery support was successful! Moving into the new map area means a randomized chance to encounter the enemy. In this case, we indeed get a battle encounter and are shifted over to the battle screen.
Our First Battle or "DIE, PANTHER, DIE!"
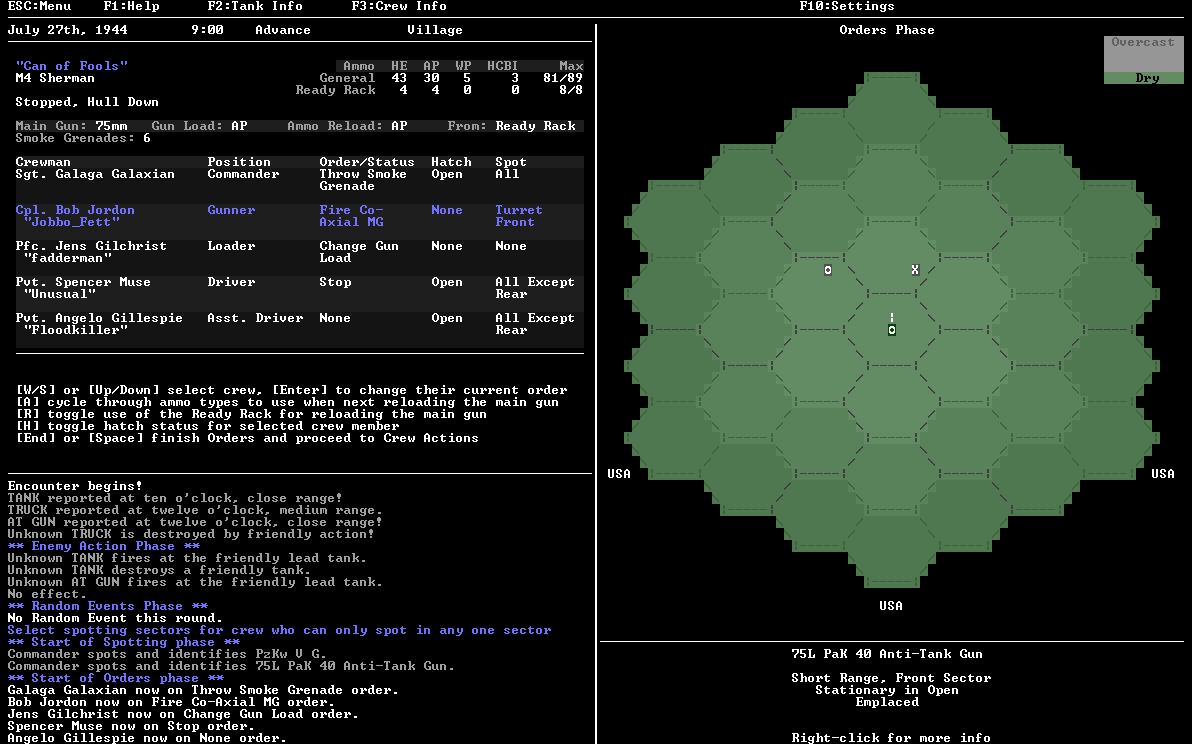
The battle screen consists of the battle map, our tank and crew's information, and a log of the ongoing battle. The battle map is a simple hex map with the center hex containing our tank, and three bands of hexes surrounding it, representing the three different ranges targets may be in relation to us; Close, Medium, or Long. In addition the map is divided into 6 arcs representing our Front, Forward sides, rear sides, and our rear. We are always the center of the map and everything on the map shifts in relation to us if we move around or pivot the tank.
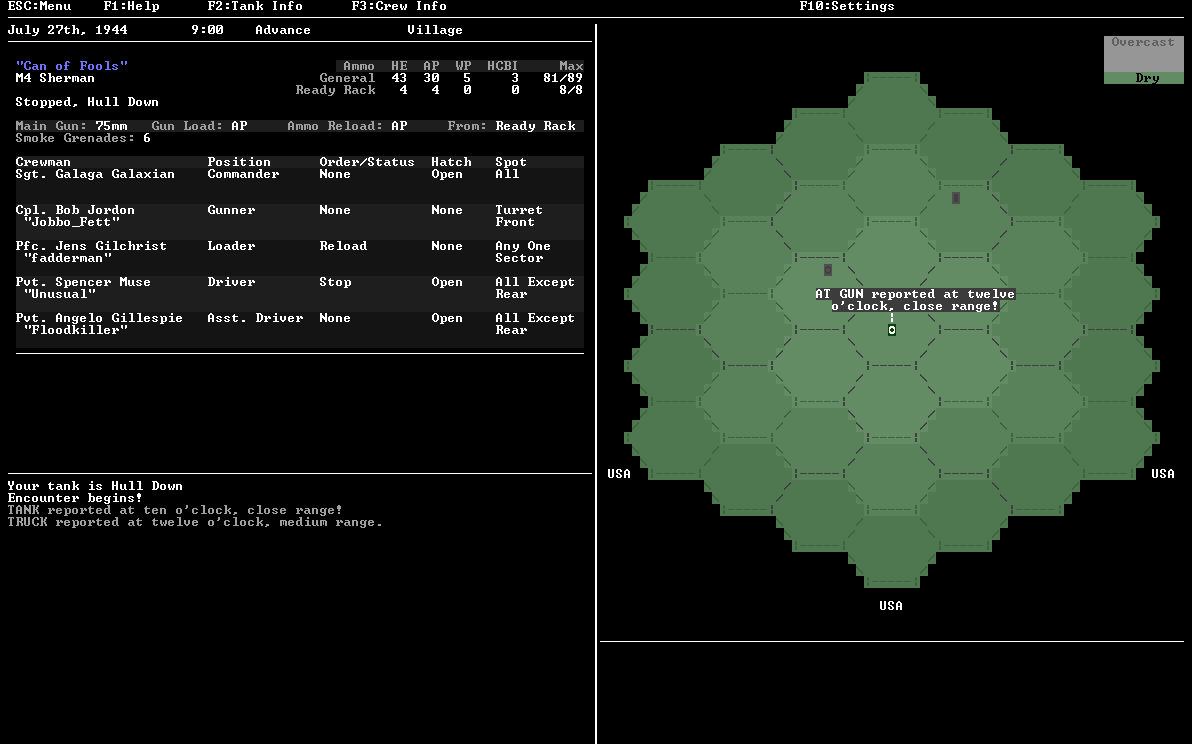
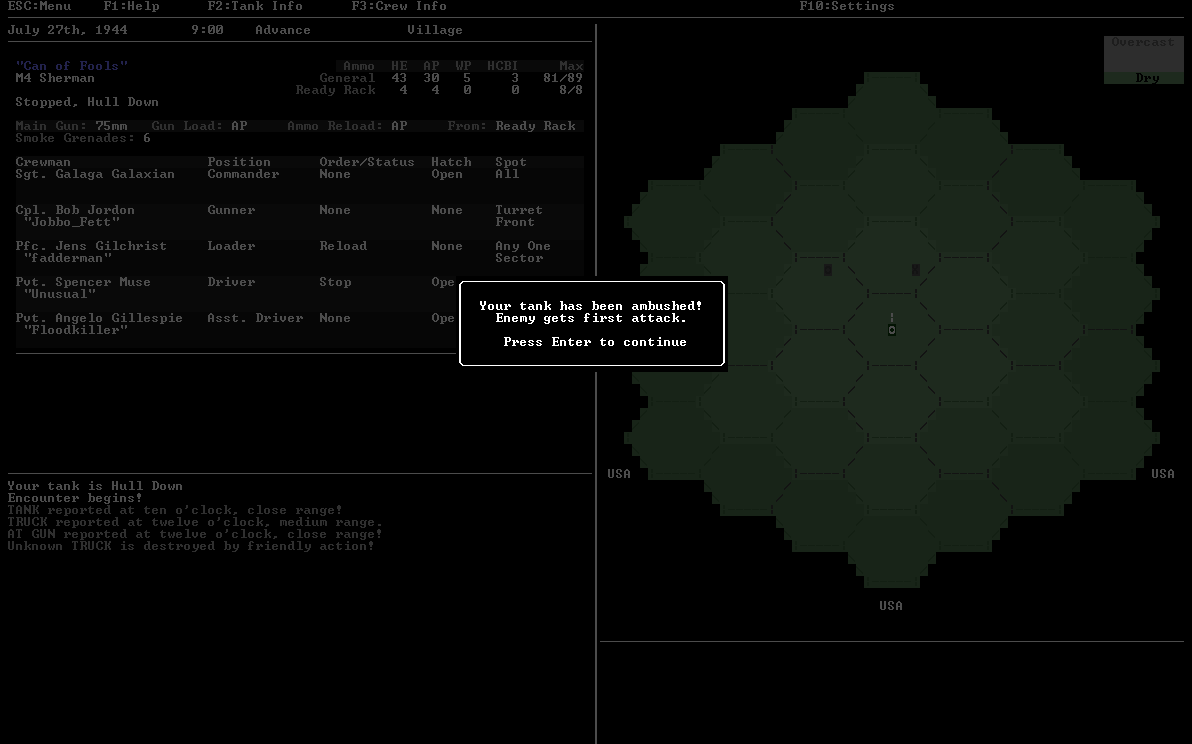
Each battle starts with a handful of enemies being randomly generated, the number depending on the map sector's resistance level (2 enemies for light, 3 for medium, and 4 for heavy). This battle begins with 3 enemies being reported, an enemy tank at Ten O'Clock/Close Range, a Truck at twelve o'clock, medium range, and an AT-gun at twelve O'clock, Close range. Not good! Good thing we've got that artillery fire! When you have artillery support, after the initial enemies are reported, there is a chance each of them may be destroyed by your requested barrage, unfortunately for us this time the only enemy the artillery destroys is the completely harmless truck. How useless! To make matters worse, its an ambush!

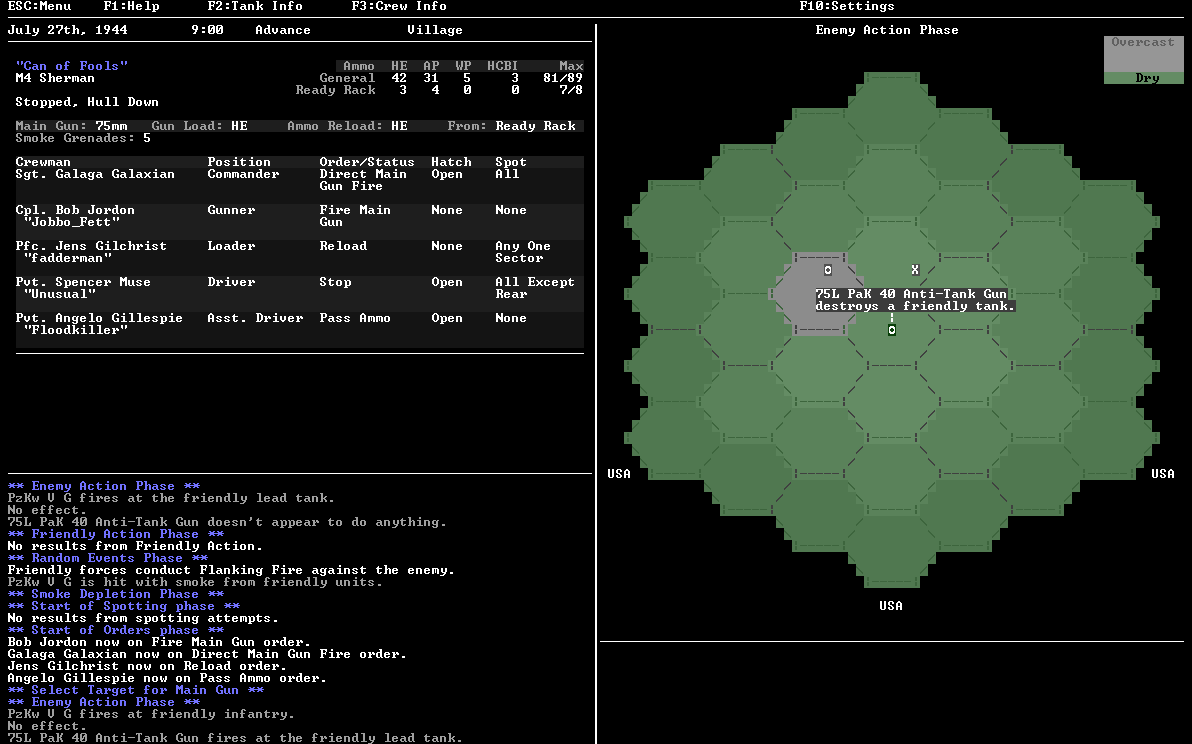
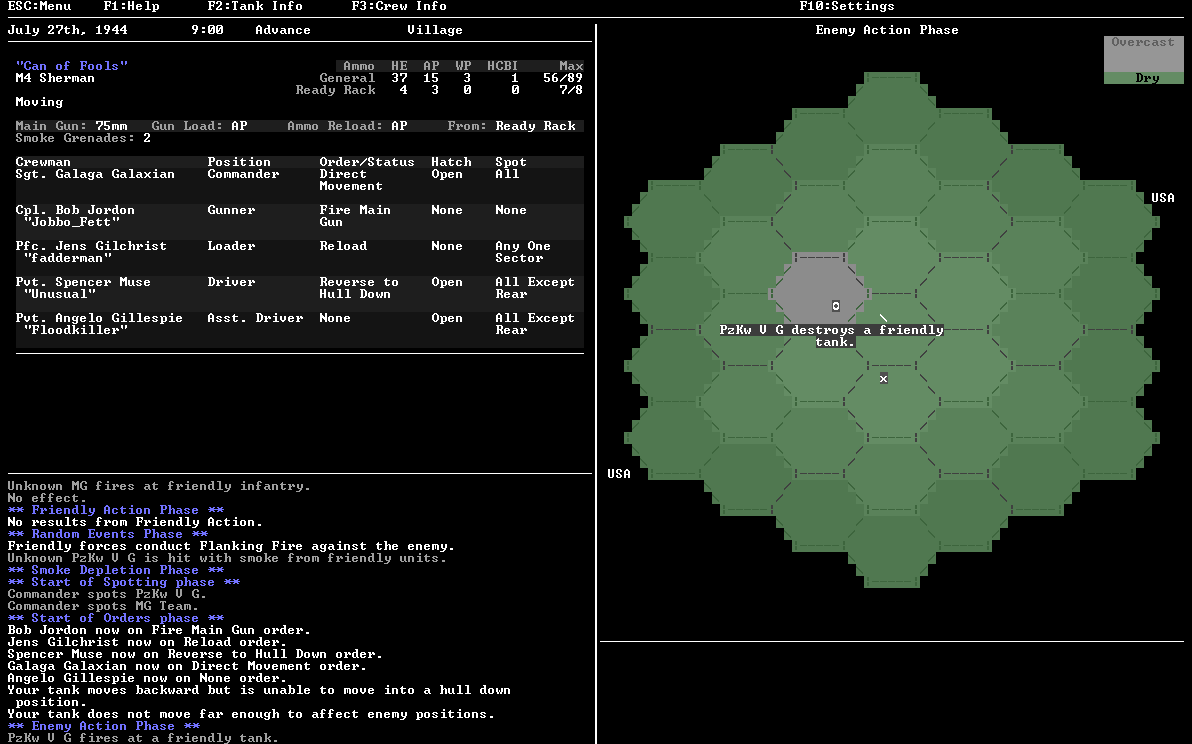
Normally we get the first turn in a battle, but in an Ambush, our part of the turn is skipped, and, yes, it is completely possible for your tank to be knocked out before you even get a chance to do anything. In this instance, both the unknown AT gun and the unknown tank decide to fire on the lead tanks, with the enemy panzer succeeding in destroying a Sherman. Losing friendlies costs you valuable victory points, so this sucks (still, better them than me, I guess). Once the enemy is done taking their actions, the random event phase triggers. This has a chance of doing various things, but this time nothing happens. With the random even phase over, a new turn begins.
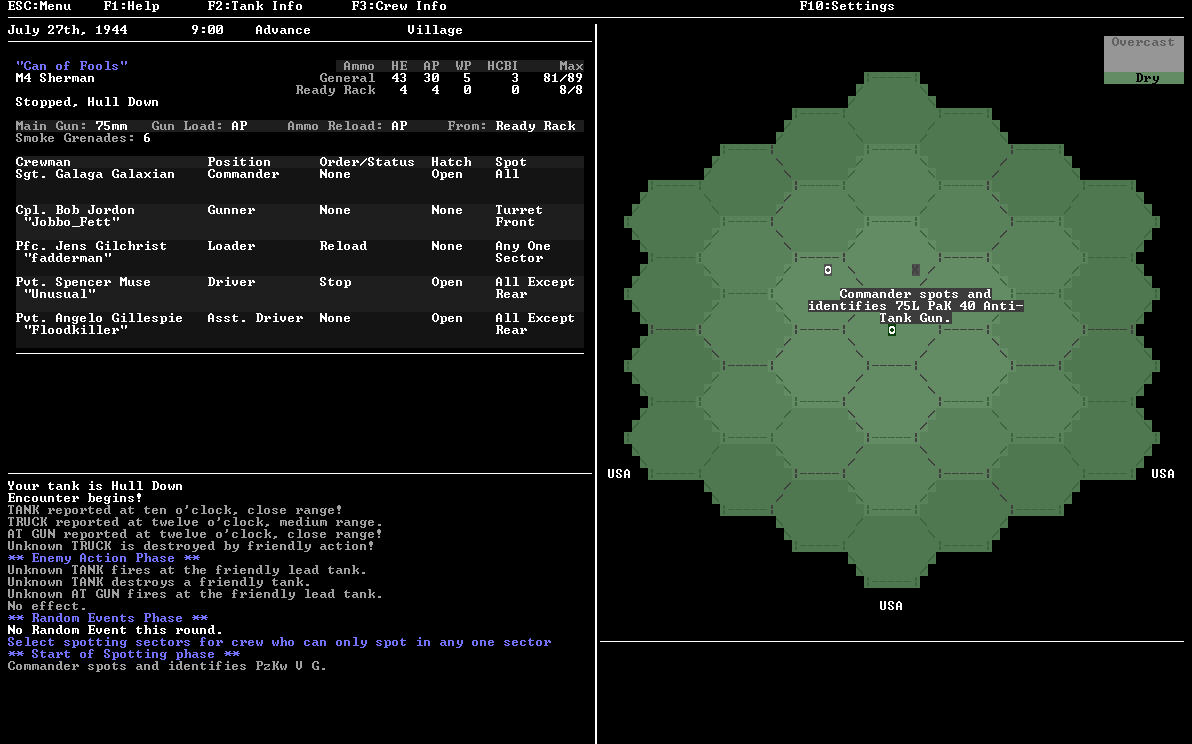
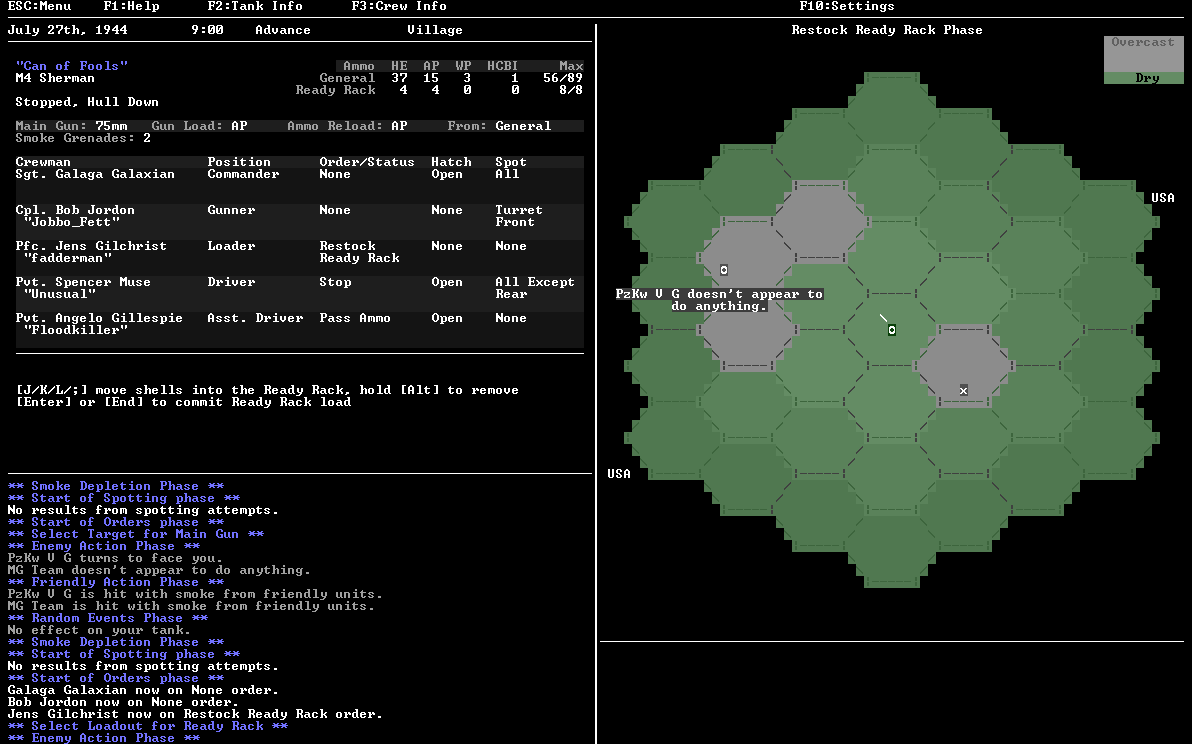
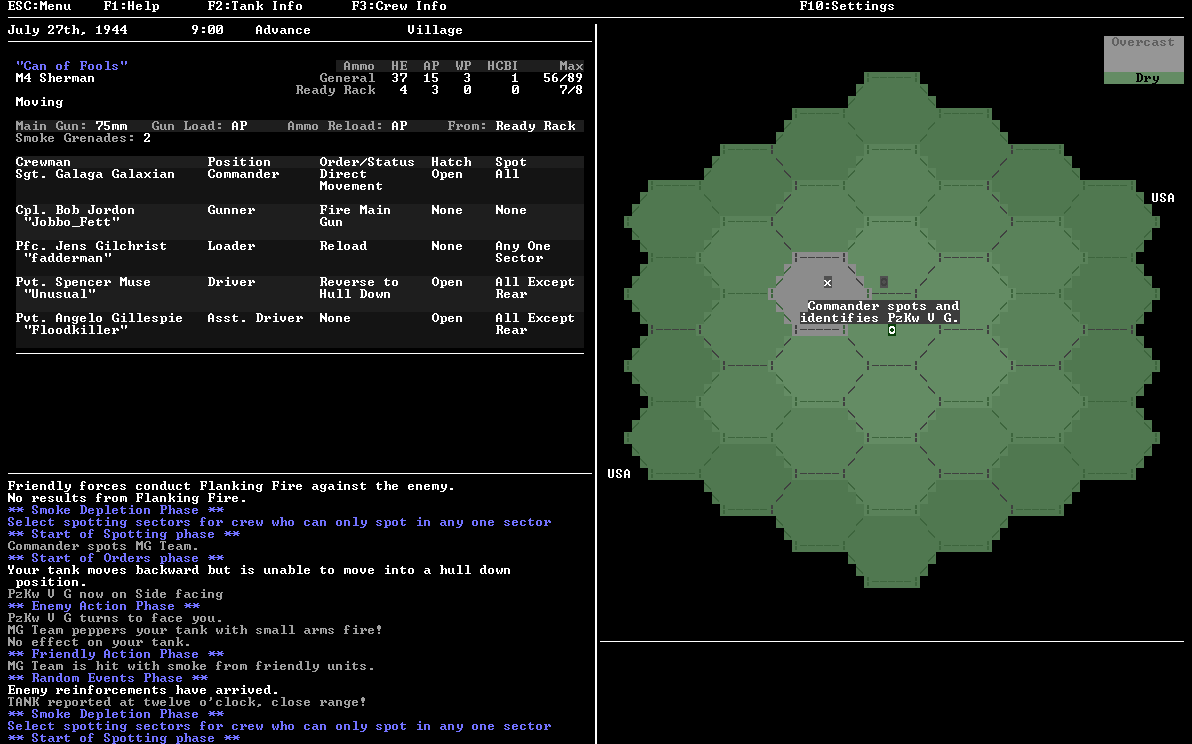
Each turn begins with the spotting phase. During this phase each of our crew members, starting with the commander, has a chance of spotting any "unknown" units and possibly identifying them. Most of our crew members have restrictions on which zones they can spot, especially if they're "buttoned up" with a closed hatch. In our tank the two crew members with the most restricted views are the Gunner, who lacks a hatch and can only see the zone the turret's gun is pointed at via his targeting scope, and the loader who, lacking a hatch on our model, can only use a periscope to check a single sector at a time. Our commander has the best view, as long as his hatch is open he can see everything, if buttoned up he can only check one sector at any given time via periscope. Our Driver and Assistant driver have pretty good views when their hatches are open, the only sector they can't see is directly to our rear, due to the turret blocking their view in that direction, when buttoned up however, they can only see into the front sector of the tank. Spotting enemy units is extremely important, as you cannot fire on something you can't see, and not knowing exactly what an enemy unit is can be very dangerous. For example, is that unknown AT gun a weak (but still dangerous) Pak 38 50mm gun, or possibly the exceptionally deadly Pak 43 88mm gun? In this case, our commander succeeds in both spotting and indentifying both enemies (if he failed the other crew members would each get a chance). For this reason I tend to keep my crew hatches open whenever possible, and I almost never close my commander's hatch, despite the risks.
In this case the enemy AT gun is a Pak 40 75mm Gun while the tank is a deadly Panzer V, better known as the Panther. Once the spotting phase is over, its time for us to take our turn and order the crew into action, but first let's see what the game has to say about these enemies. Mousing over an enemy unit on the battlemap will display information about it at the bottom of the map, such as its facing and any modifiers such as being hull down or special terrain. In addition, right clicking will bring up a window with further information.
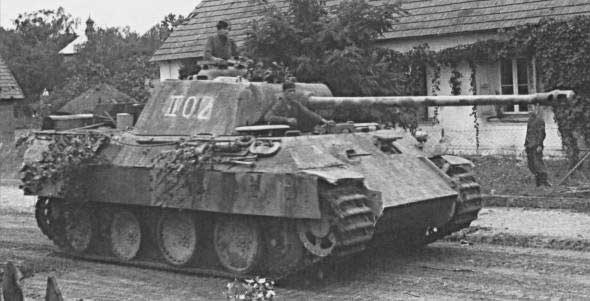
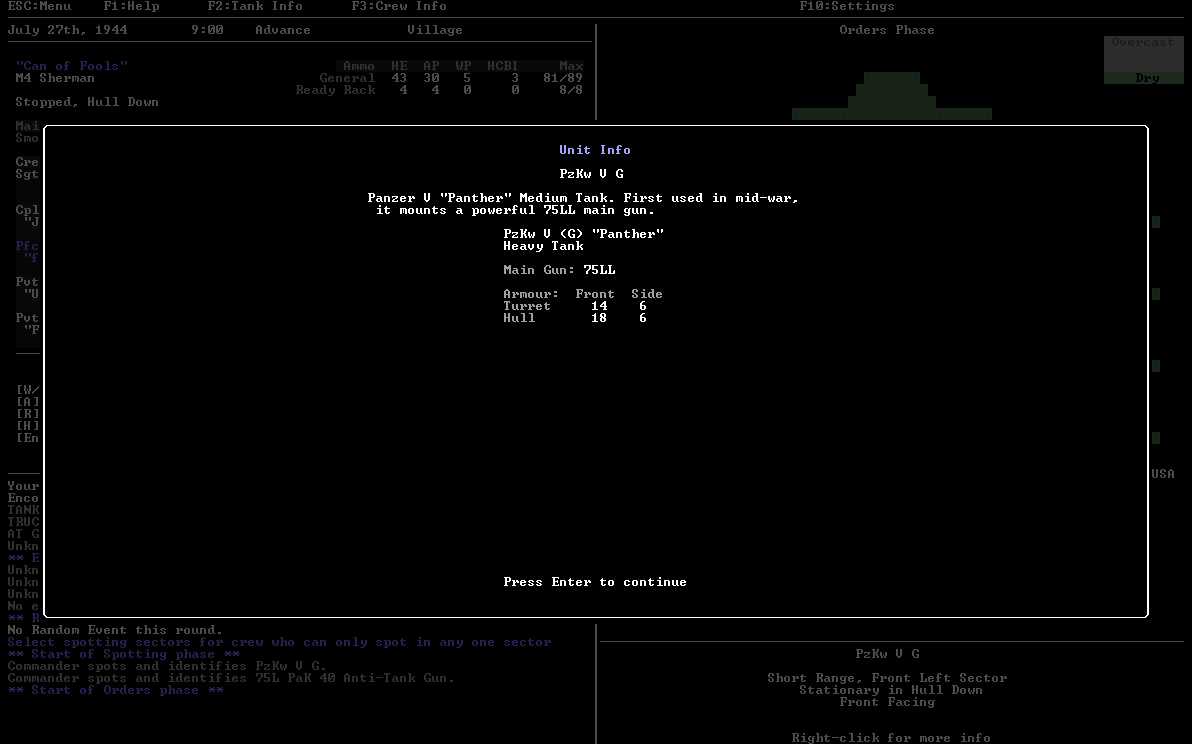
The Panther is an exceptionally dangerous enemy. Its 75mm cannon is classified by the game as a "75LL" gun, which is the second best gun class currently in the game (1st: 88LL, 2nd: 75LL, 3rd: 88L) and is deadly accurate even at long range. With this weapon, the Panther will have no trouble penetrating even our front armor. The Panther's own front armor, meanwhile, is exceptionally powerful thanks to the steep sloping you can see in the picture above. Our 75mm gun has literally no chance of penetrating the Panther's front on anything less than a critical hit (snake-eyes on a 2d6 roll), and even on a critical hit, the odds of scoring a penetration are, frankly, lousy. To make matters worse, according to the info window, this Panther is hull down, meaning its hull is protected from view by something solid enough to absorb or weaken gunfire, such a hill crest or heavy stone wall. Fortunately, we started the battle hull down ourselves, but its never a good thing to be staring down the business end of a Panther. Not much I can do about it for now though, and I decide the best course of action is to deal with the lesser, but still quite dangerous, threat, the Pak 40.
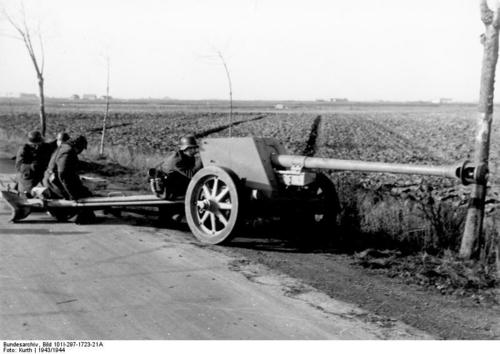
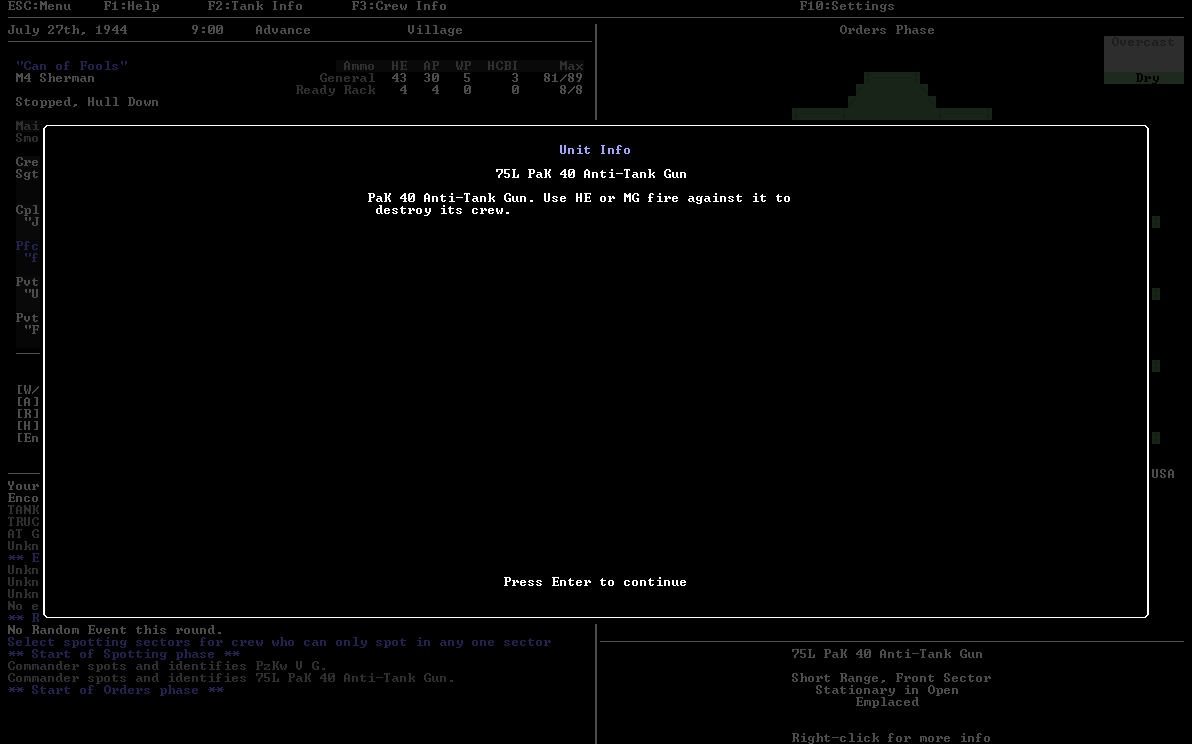
In Armored Commander, enemy AT guns come in one of three types, and the Pak 40 is the medium option. It is a 75mm anti-tank gun which according to its screen is designated as a "75L", this is the same class as our own 75mm cannon (75mm was a surprisingly popular tank gun caliber). This means that the Pak 40 has a pretty good chance of penetrating our frontal armor and almost certainly will punch through our side and rear armor, making them quite dangerous. This Particular Pak 40 is sitting in the open at close range, but is emplaced, meaning it will be harder to hit, harder to kill and is ready to fire. Still it'll be easier to kill than the panther, so we'll concentrate on it.
Unfortunately, I started the battle with an armor piercing round loaded, which will have no effect on the AT gun, which requires explosives or machinegun fire to kill. So I spend the first round mostly on the defensive. I have my commander use a smoke grenade. This will generate one turn of smoke in my tank's hex, giving enemy units a penalty if they choose to shoot at me. Perhaps unwisely, I order the gunner, Jobbo Fett, to fire his co-axial machinegun at the AT gun, hoping he might get lucky and score a kill. I say this is unwise because enemy units are more likely to shoot at you when you attack them, especially AT-guns in my experience. Meanwhile I have the loader, fadderman, remove the AP shell from the gun and replace it with a HE round. Unusual and Floodkiller, my driver and assistant driver respectively, I order to just sit tight. I have no desire to move and lose my hull down status (which could save our lives if the enemy does shoot at us) by moving and Floodkiller can't do anything since I'm not firing the main gun and being hull down prevents his bow MG from being fired.
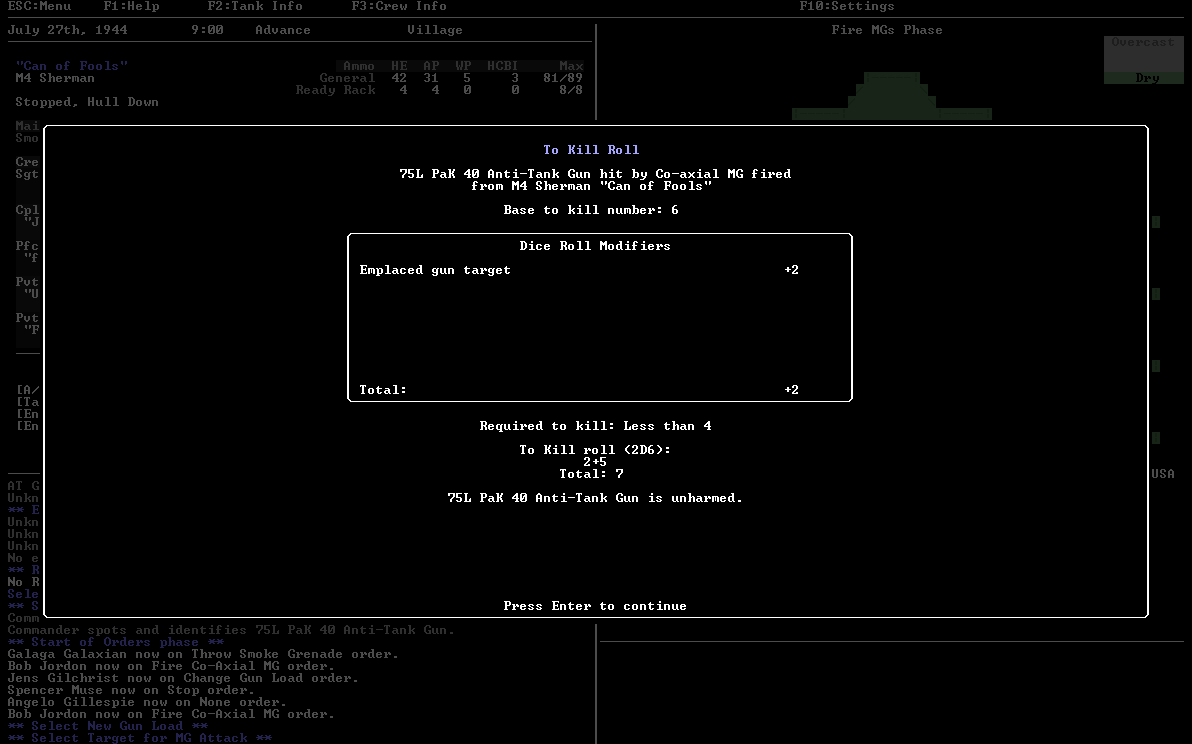
Unfortunately for me, my gunner doesn't get lucky with his MG fire, failing to roll low enough to kill the AT gun. In hindsight I should've considered ordering my crew to fire the AP round at the AT gun even knowing it would do no damage and hoping Rate of Fire would kick in, allowing me to make a follow up shot with high explosives. Once my crew take all their actions its the end of my turn and its time for the enemies to take their actions.
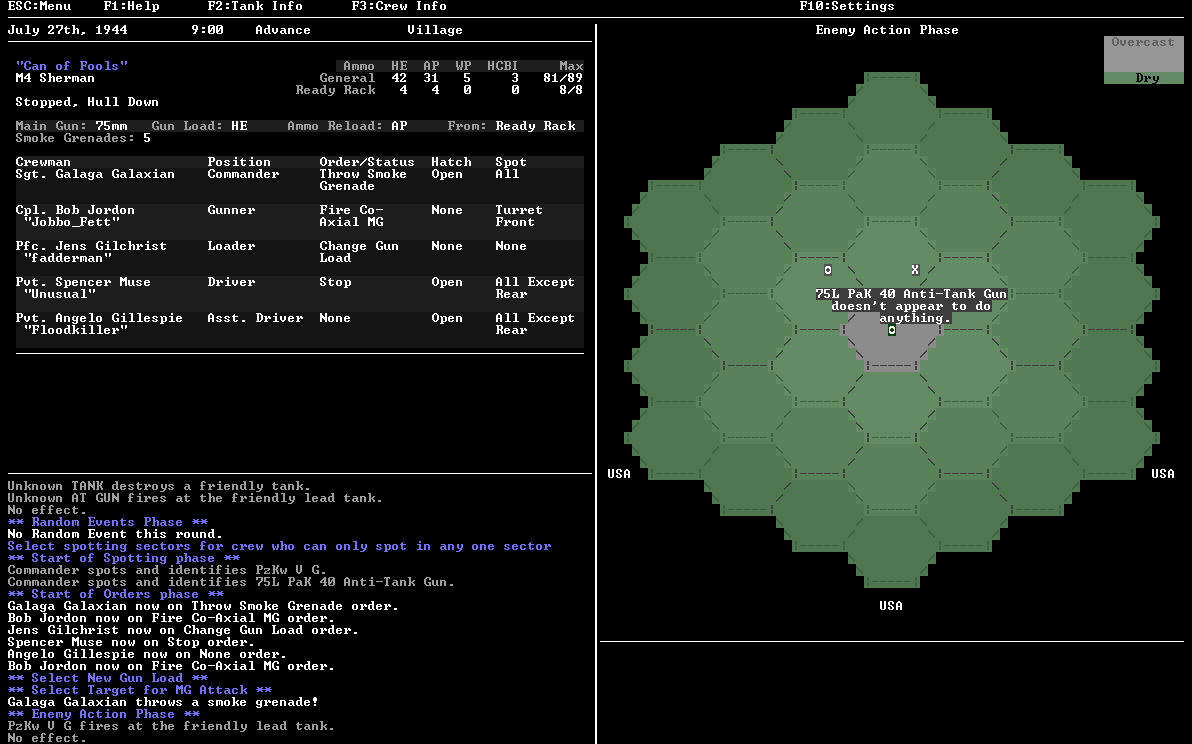
The Panther tank shoots at friendly tanks, but fails to score a kill, while the AT gun, surprisingly, does nothing. Perhaps they've fumbled a shell while reloading or maybe they're trying to decided just which Sherman they'd like to kill next. Once the enemies are done, its time for the friendly action phase, during which each enemy unit has a chance of being destroyed or being hit by smoke, representing the contributions of the other Shermans or infantry forces that make up my task force. Unfortunately they don't do anything. Random Events result in Friendly Flanking Fire, which is essentially another chance for friendly forces to kill or smoke enemies, in this case, it results in the Panther being hit by smoke. This is good, since I wasn't planning on shooting at him anyways, and it might spoil his aim if he decides to shoot at me!
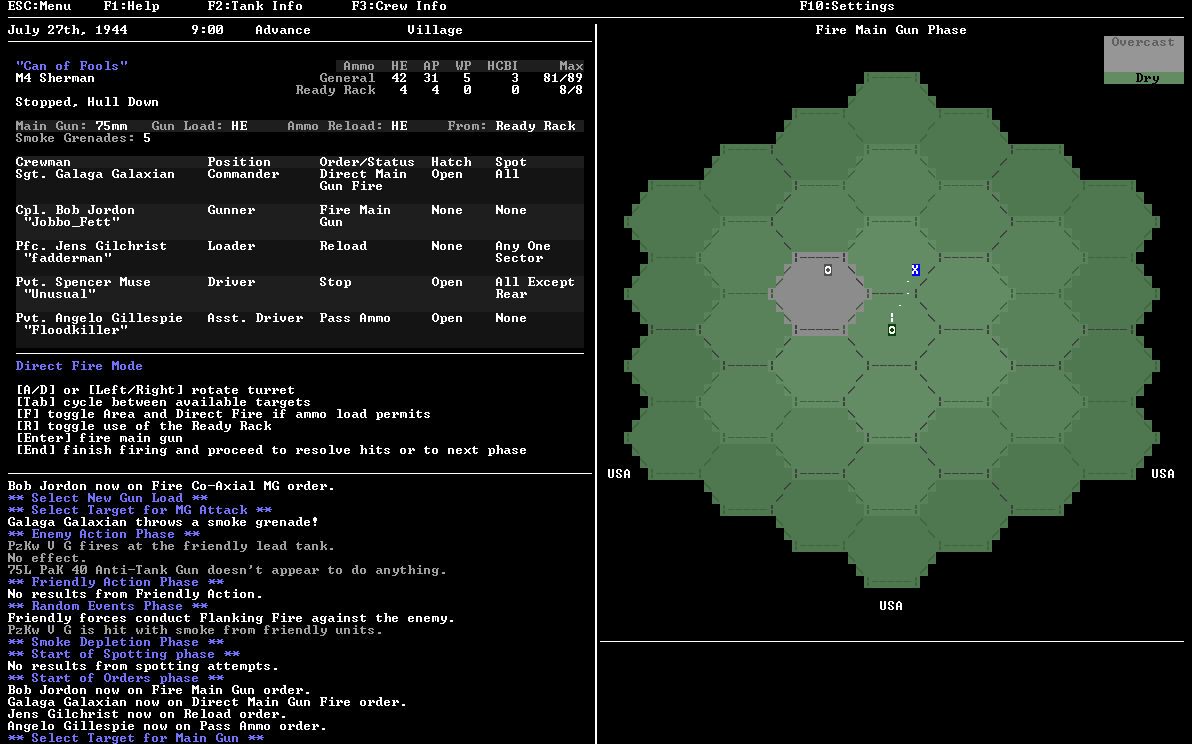
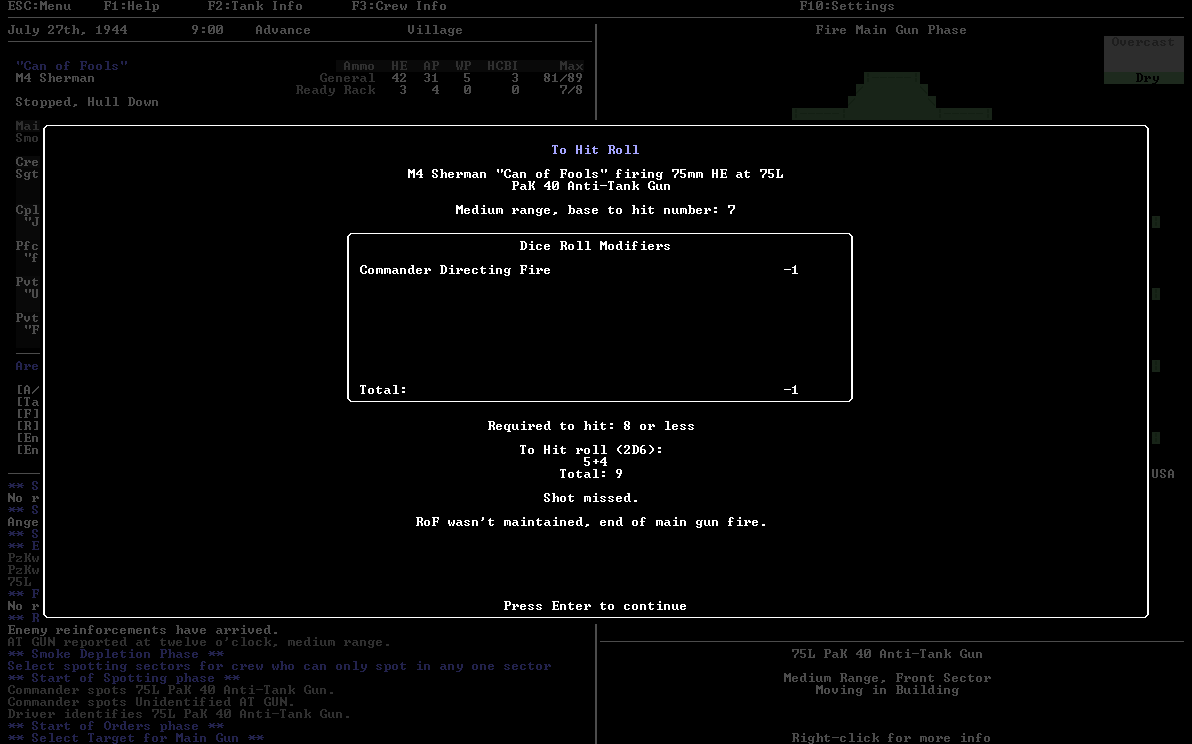
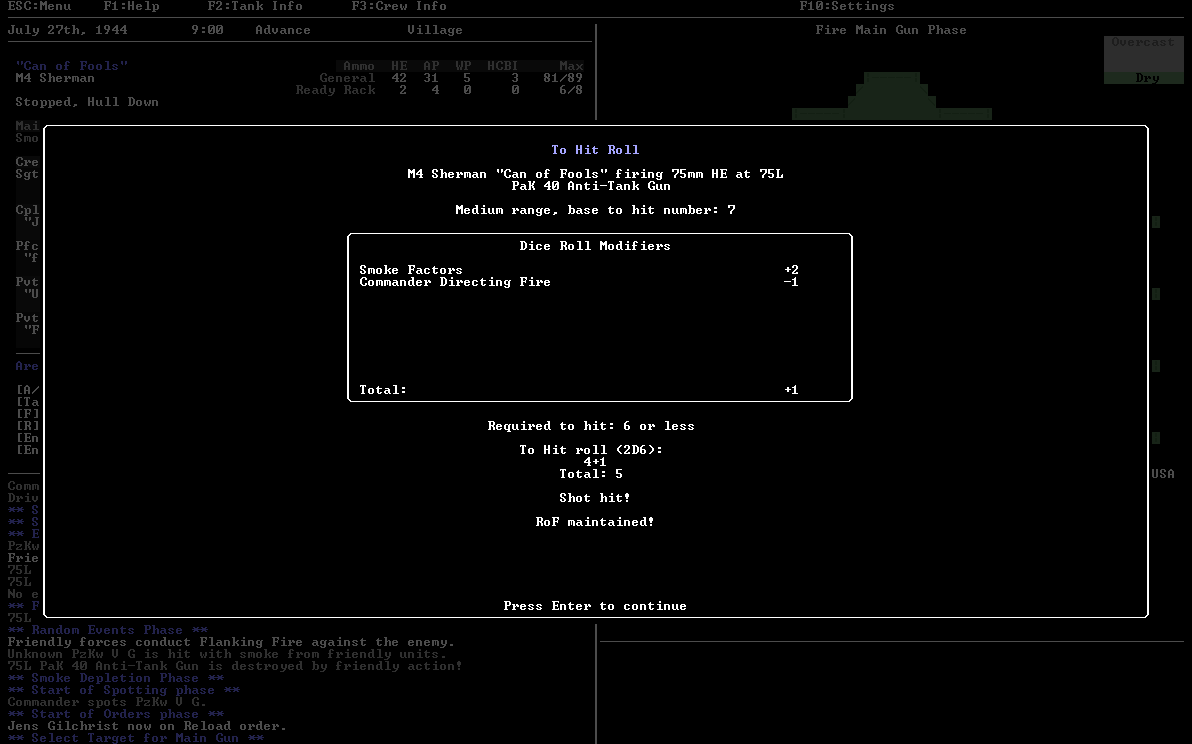
The next turn rolls around and with some HE loaded it is time to blow up that Pak! I order my Commander to Direct Main Gun Fire, which will provide a bonus to my Gunner's accuracy as the commander help calls out helpful information. Meanwhile I order the gunner to fire the main gun, the loader to reload, and the assistant driver to pass ammo. Hitting space to confirm my orders brings up the targeting selection, where I select the AT gun as my target and set a few more options, telling my loader to reload the gun with more HE and to take reloads from the ready rack. With that set, I push enter and give the order. Fire!

Despite favorable odds, my gunner misses! Even worse my loader fails to achieve rate of fire, ending my shooting action after only a single shot! Useless, both of you!  All I can do is sit and wait for the enemy to retaliate.
Well, the good news is, the Pak 40 doesn’t murder us, the bad news is, the Pak 40 instead murders another sherman tank. Those men’s probable deaths are on your hands, Jobbo! The Panther meanwhile decides tanks are boring and tries to kill some of our infantry, but fails to do so. Friendly artillery comes up as the random event, but all it succeeds in doing is generating smoke in the Pak 40’s area. Next turn I try again to shoot the Pak 40, but pull a boneheaded move, pushing space instead of enter. Enter confirms the shoot order, Space ends my action. 

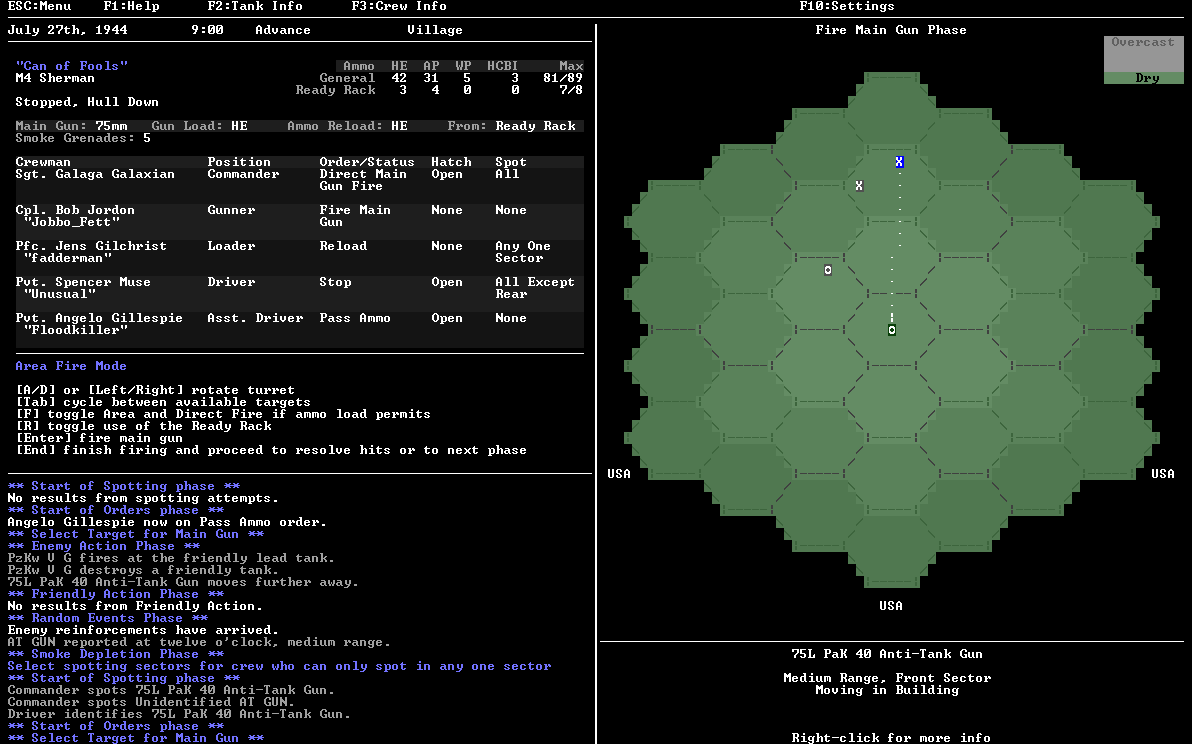
The Panther decides that infantry are stupid and goes back to what he does best, killing Shermans, and blows another allied tank away. The AT gun meanwhile has decided it doesn’t like getting shot at and moves back to medium range. This is fine by me as my gun is still reasonably accurate at medium range and it’ll cost the AT gun a turn to re-emplace itself before it can fire again. Unfortunately, the random event results in another AT gun spawning in, which coincidentally appears dead ahead at Medium range, basically right next to the previous AT gun. When the next turn begins, my commander spots the new gun, but my whole crew fails to actually identify it. However, in my time playing ArmCom (and reading the rules to Patton’s Best) I’ve learned a trick, once a given type of enemy has appeared, all further enemies of that type that appear will be the exact same kind, so this AT gun is almost certainly another Pak 40!
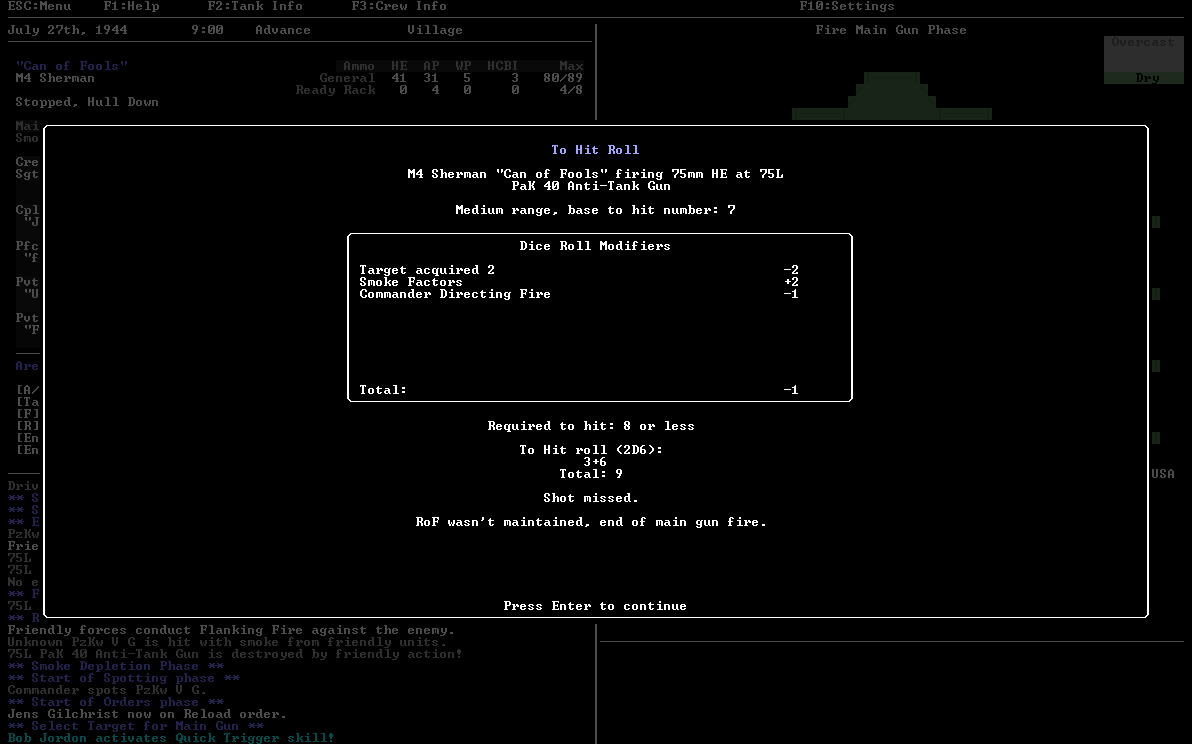
Unfortunately for me, that Pak 40 I’ve been shooting at is now considered to be in a building (or maybe just surrounded by some) which is penalty to hit. This isn’t as bad as it sounds, really. When I target the Pak 40 this time, I tell my gunner to use Area Fire mode. Direct Fire mode is what I used before and represents aiming directly at a visible target, meanwhile Area Fire mode represents lobbing shells in the general vicinity of the enemy. Our gun is considerably more likely to score a hit using area fire at medium or long range, and area fire also has the benefit of ignoring accuracy penalties for terrain. Unfortunately, area fire is less likely to score an actual kill, even if the shot hits. In addition, Armor piercing shells can’t use area fire, since they rely on scoring a direct hit. Anyways, I once again take a shot at that troublesome Pak 40 and, once again, miss. Jobbboooo!
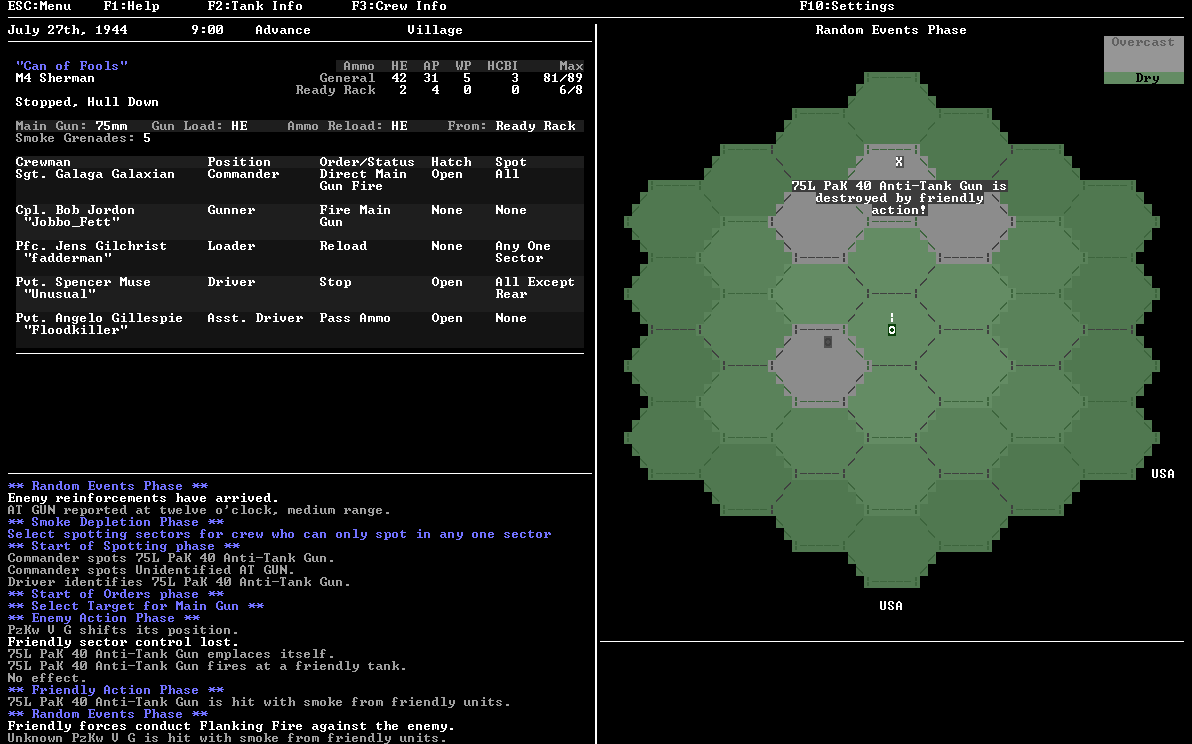
Fortunately, someone else doesn't miss and that Pak 40 is destroyed by friendlies after it emplaces itself. The enemy Panther meanwihle has moved into our rear left arc and the other Pak 40 fails to kill a friendly tank with its shot. With the original Pak 40 destroyed, its time to deal with the other one. Sure I could try to shoot the Panzer, especially since IIRC, he's on a side facing right now but I've got HE loaded in my gun and rotating my turret two sectors would be a considerable penalty to my chance to hit him and I'd already be taking a penalty for him being moving (plus I think he was hull down), so its a safer bet to try to kill the second Pak 40.
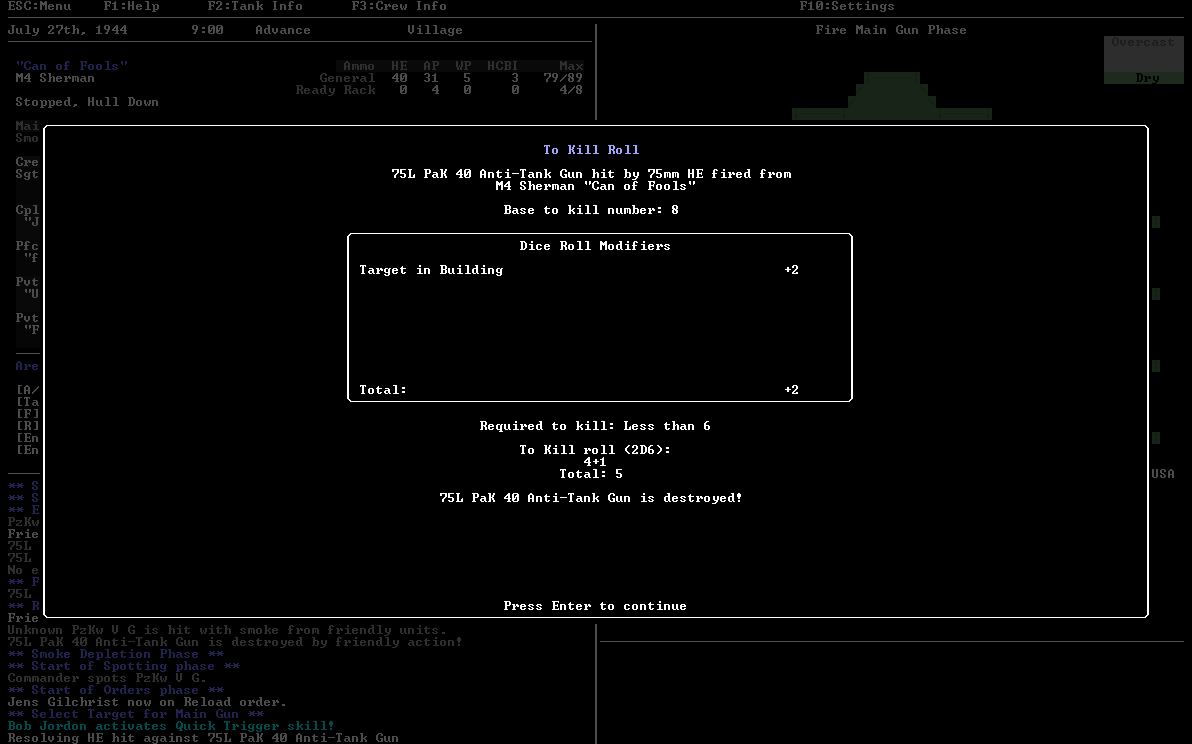
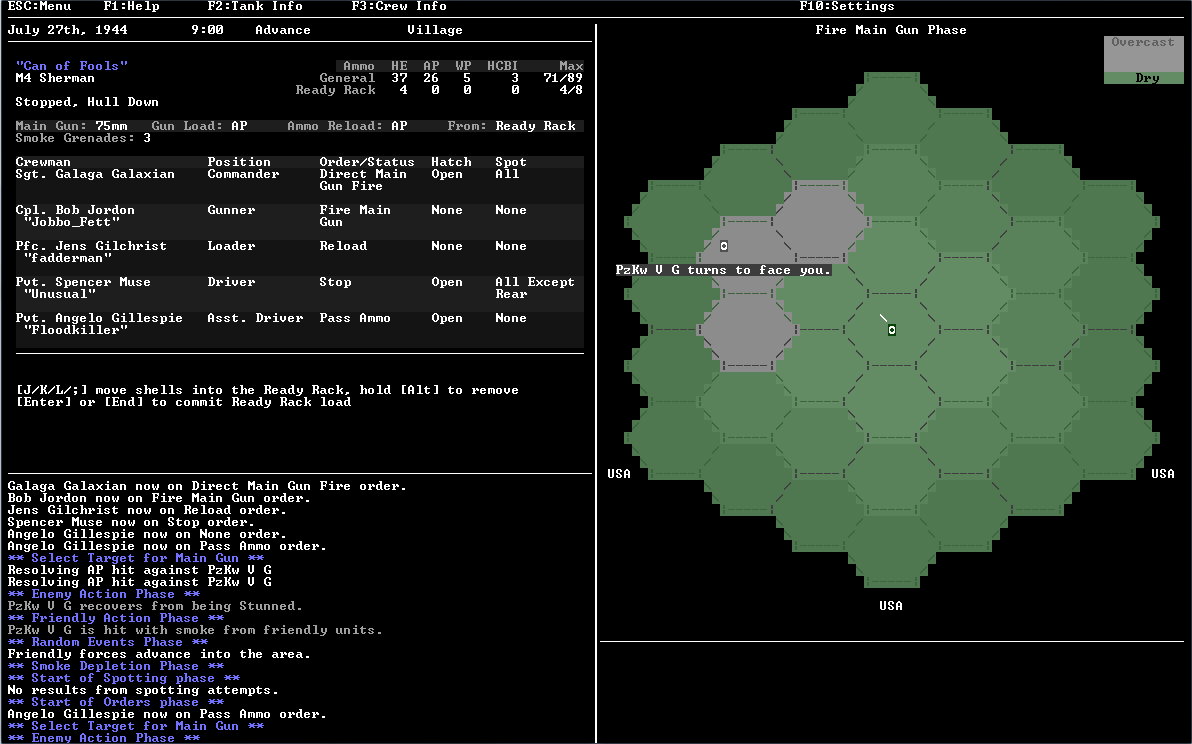
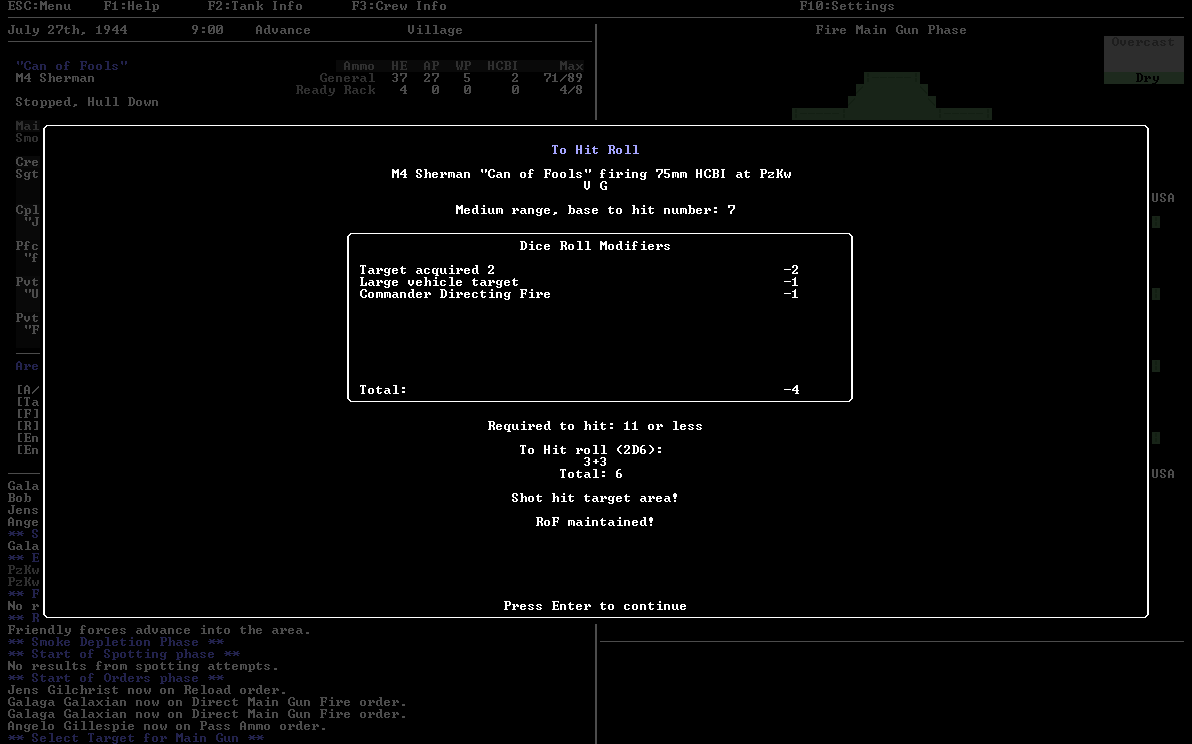
I order my crew to fire and Rate of Fire finally kicks in. Rate of Fire (RoF) represents a random chance of your crew rapidly firing off multiple shots one after the other. You're more likely to achieve rate of fire if you're reloading from the ready rack, which grants a modest bonus to the RoF roll, however if you're taking ammo from general stores, you can still get a smaller bonus to RoF chance if you have the assistant driver passing ammo to the loader. This is why I like to have the A.Driver on Pass Ammo orders even if I'm reloading from the ready rack, as there have been plenty of times where I've managed to chew through my entire stock of appropriate ready rack shells, especially in the Shermans with smaller ready racks. In addition the Gunner, the Loader, and the Assistant Driver all have purchasable skills that have a percentage chance to grant a bonus to the RoF roll (though the Assistant driver's only applies if he is actually passing ammo). In fact, you can see my gunner's RoF skill kicking in at one point down on the log window in the second screenshot. In total my crew succeeds in firing four shots at the AT gun, the first three scoring hits. One interesting quirk of rate of fire is that you don't see the results of any of your shots until you've stopped shooting, which is either when you fail a RoF roll or voluntarily stop shooting and end your action. Another thing you might notice in those screenshots is the "Target Acquired 1/2" modifier, you get a bonus to repeated shots at the same target, though either of you moving or shooting at another target will reset that bonus.
In this case, the very first shot destroys the AT Gun. Personally if I achieve Rate of Fire, I usually take another shot, as I'd rather use up too much ammo and be more likely to score a kill than to be stingy and end up not destroying a target that might end up killing me in retaliation.

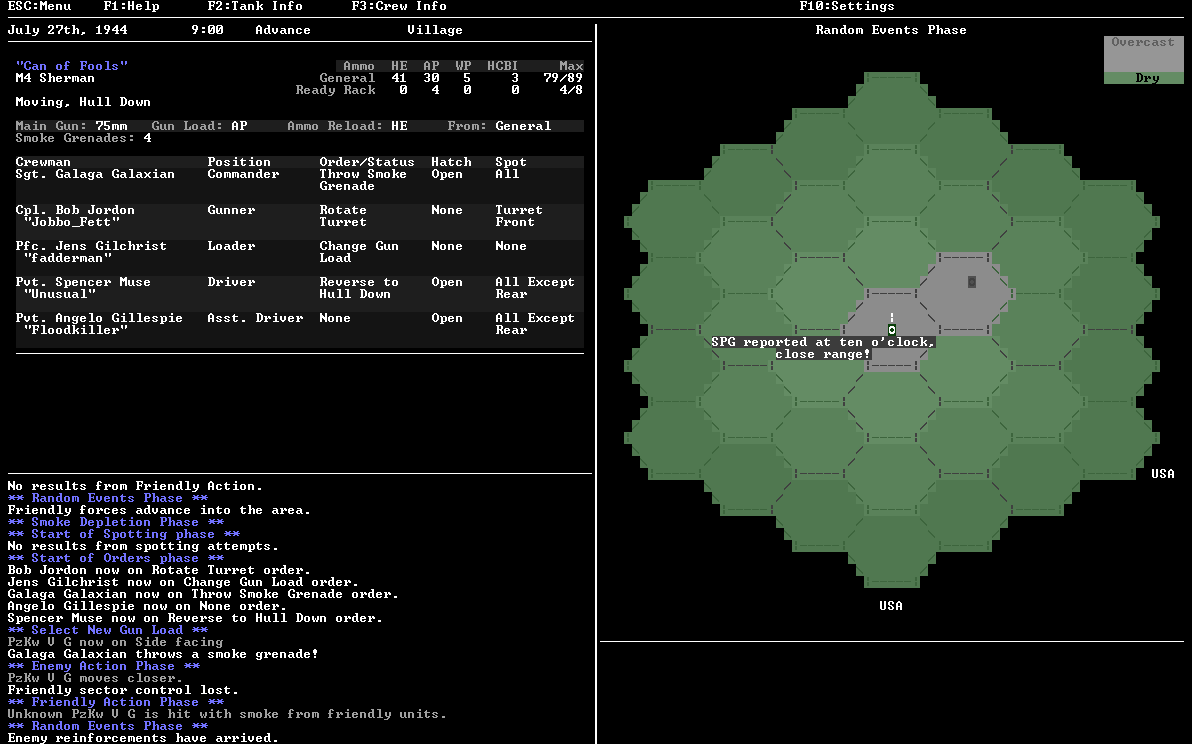
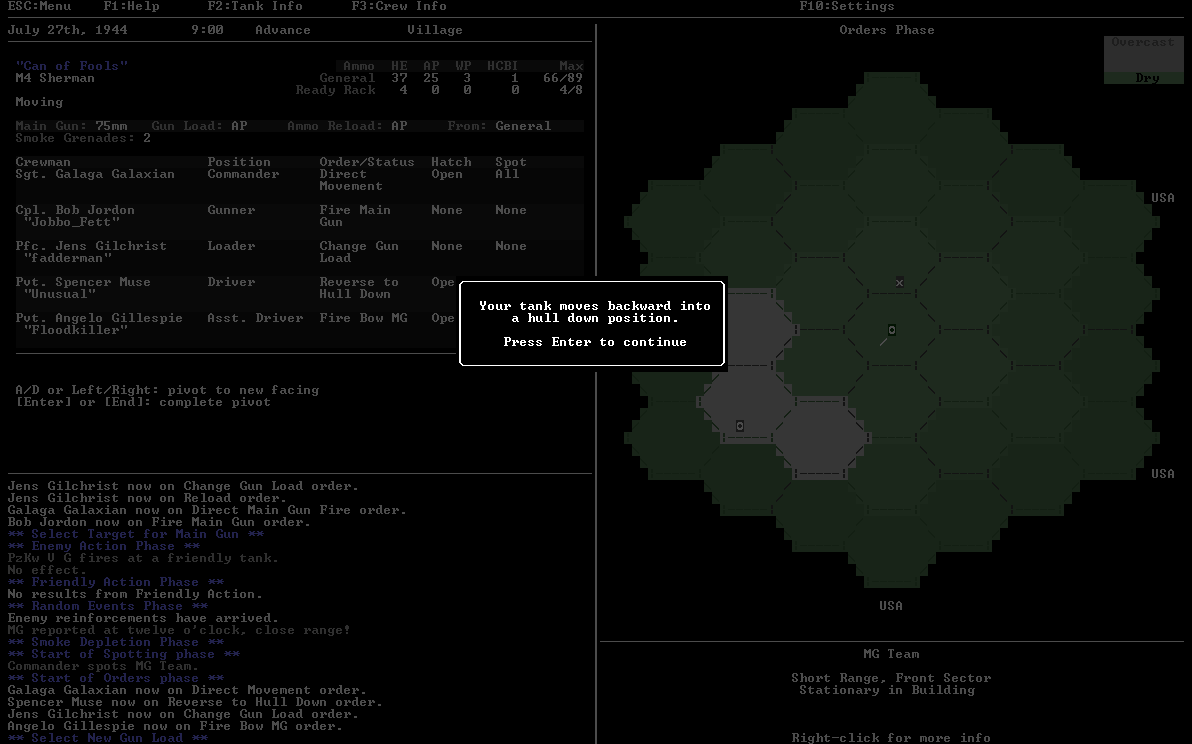
With the AT guns dealt with, its time to try to do something about that Panther. Unfortunately for me, he's in my close range rear left arc, facing me, and hull down. Not good. With my gun completely incapable of hurting him in this situation, my options right now are to sit tight and hope friendlies kill him, or attempt to maneuver and get a shot in on his much more vulnerable sides or rear. I opt for the latter, having my commander toss a smoke grenade and ordering my driver to reverse and try to find a hull down position while my Gunner rotates the turret to face the Panther (which I completely forget to actually do) and my loaders switches us to AP ammo. Results are mixed, my driver succeeds in achieving another hull down position, and the movement results in the panther now being on a side facing. Unfortunately, the Panther's action is to move closer, which takes him from my rear left arc, clear across to my front right arc. To make matters worse, another enemy spawns in at ten O'clock, close range, some kind of Self-Propelled Gun. The next turn starts with the Panther in the open, moving on a side facing while my commander successfully IDs the SPG as a Marder III.
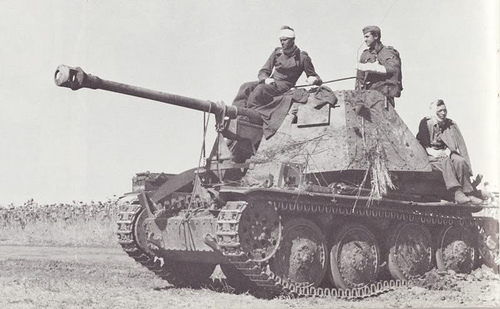
The Marder is the weakest SPG in Armoured Commander and comes in two varieties, the obsolete Marder II and the still outclassed Marder III. It carries a gun classed as a 75L (just like me and the Pak 40) and has very thin armor, even weaker than my sherman's. In addition, while not mentioned in the game's description, the Marder are open topped vehicles and unlike any other SPG or Tank, you actually have a modest chance of destroying them using HE rounds, especially from side or rear shots. That said even our mediocre AP rounds will have absolutely no trouble penetrating the front armor of a Marder.

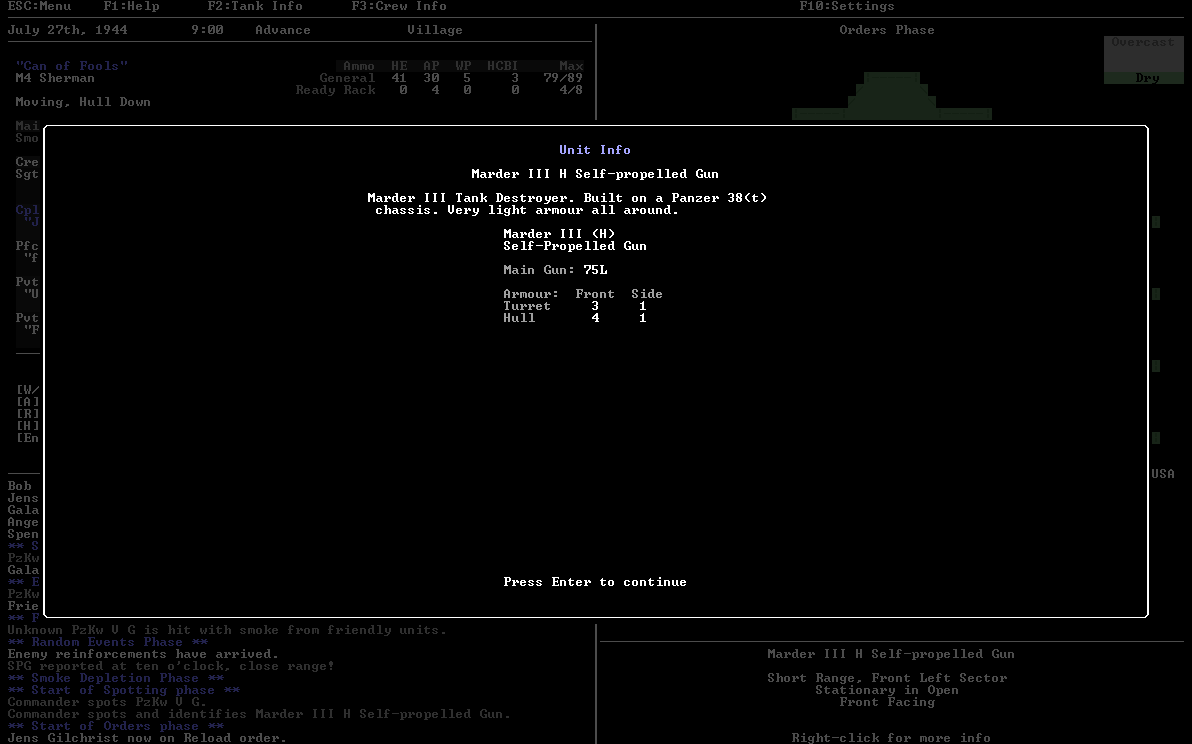
To be honest, I'm not sure what I was thinking at this point as I choose to fire at the Marder. I really don't know why, given the Panther is the larger threat and is presenting me with a shot on its side armor and he isn't even hull down! I mean, really, when a Panther gives you a view of its side armor, you take the fucking shot. But no, instead I choose to shoot at the shitbox tank destroyer. Even stranger is I decided to not use the ready rack for shooting and thus, I only get a single shot off. Worst still, this ill advised attack doesn't even kill the bloody thing despite a hit, instead I simply immobilize it. So good news: Marder III cannot move and it doesn't have a rotating turret. Bad news: Its gun is pointed at us anyways!
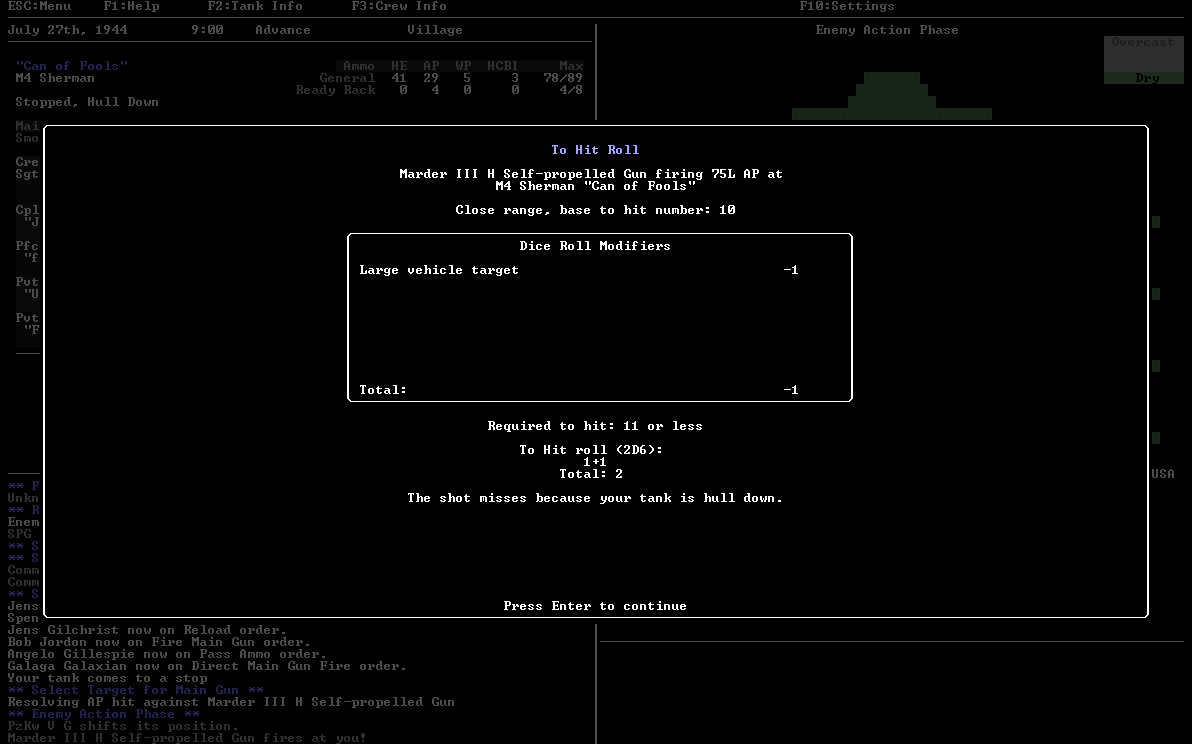
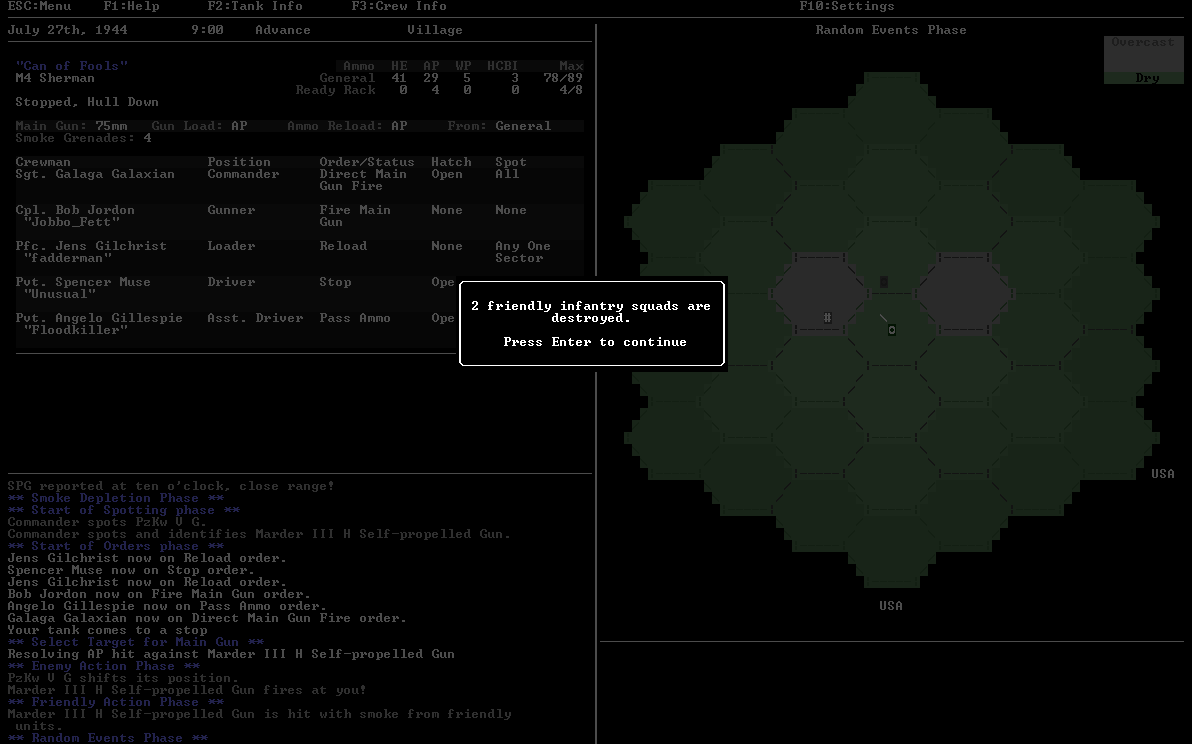
Unsurprisingly the Marder responds to my attack by returning fire, even this crappy thing is unlikely to miss at this range and, indeed, it scores a hit! Or at least it would have, had I not been hull down, instead it just misses as the shot buries itself in whatever I'm taking cover behind. The Panther, meanwhile moves into my front arc. This turn's random event is enemy artillery fire, which blows up two friendly infantry squads, argh, my victory points!
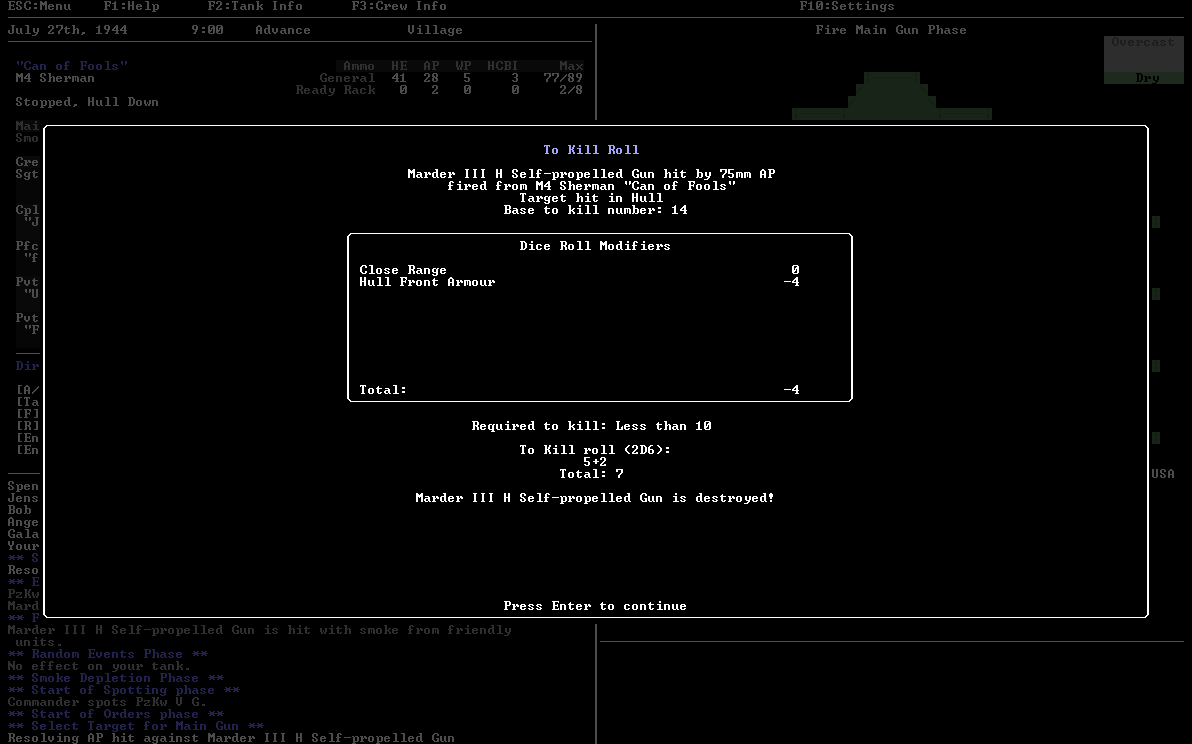
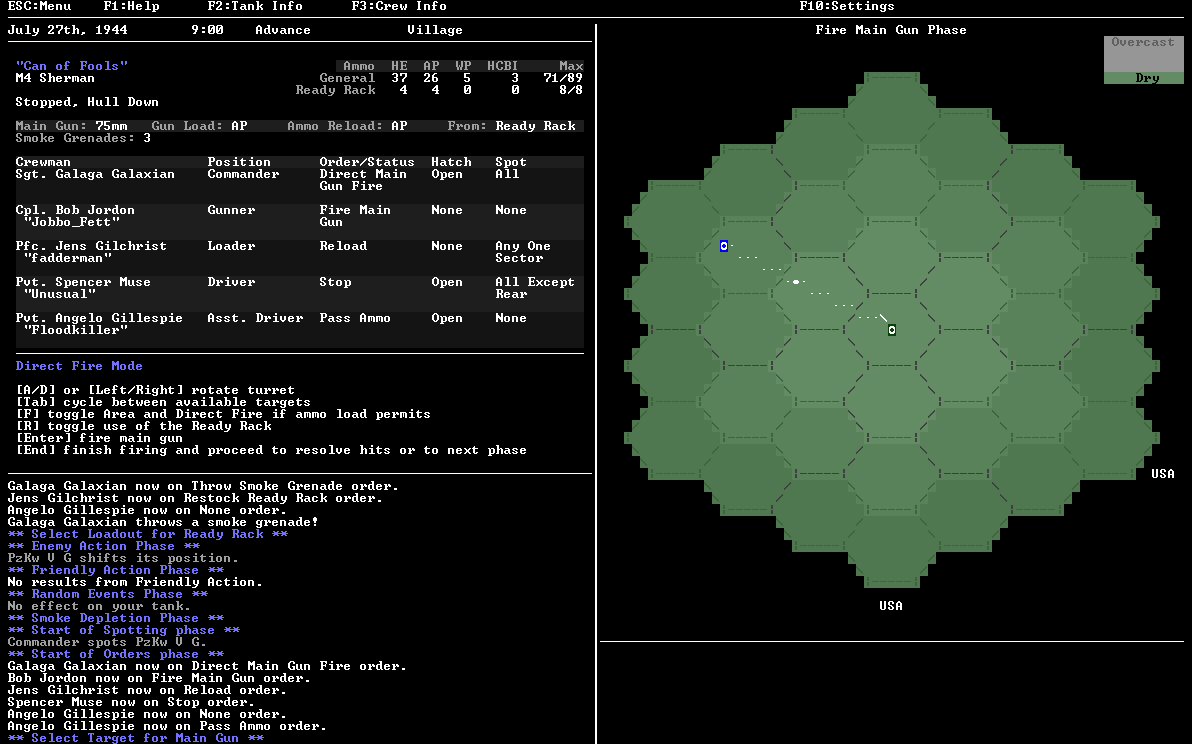
The Panther is still showing its side to me, but unfortunately at this point, I've pissed off the Marder and it has an "Acquired player as Target 1" bonus on me, meaning it is much more likely to shoot at me again and gets the same to-hit bonus for repeated attacks I can get, so I have to kill it before it kills me. I order the crew to fire, using the ready rack this time, and pump out three AP rounds at the stupid thing, all three shots hit and the first one succeeds in killing the dumb thing. Good riddance to a bad distraction. The Panther's action is to move further away, unfortunately he must've done so in reverse gear, as he ends his movement facing me, that bastard!
Well, there isn't much I can do with him staring in my direction, so I have my commander toss another smoke grenade just in case the panther decides to I'm worth a bullet while I have my loader restock my ready rack, which only had 2 AP shells left in it. The Panther decides it wants to just keep moving around and cruises on over to my left front arc, still at medium range, but now hull down. Coincidentally, this is where my turret is pointing, goooood. Oh and more enemy artillery rains down and blows up some more friendly infantry, dang.

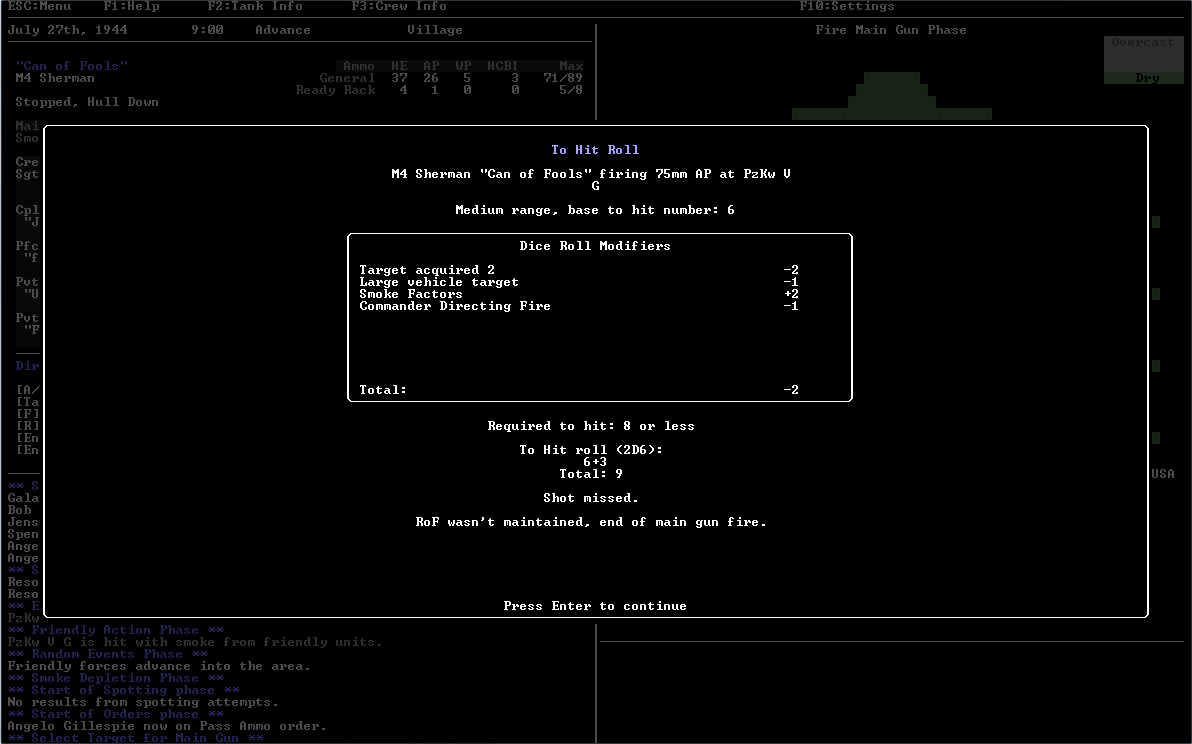
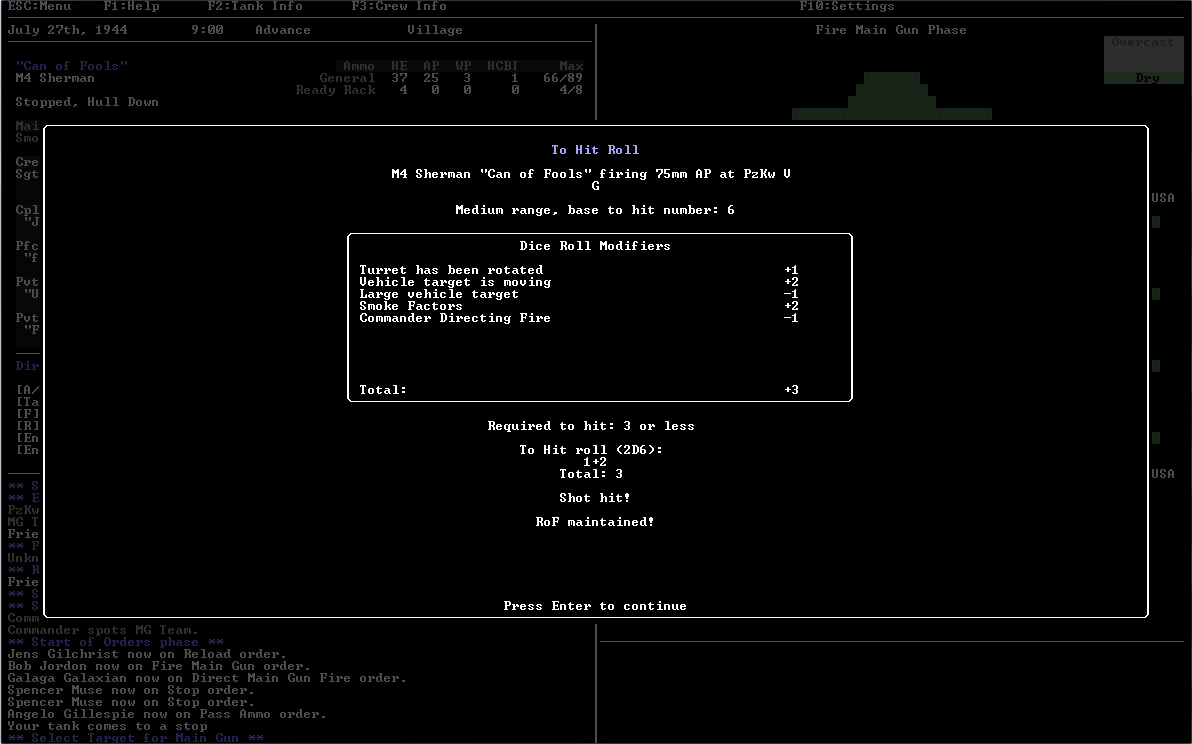
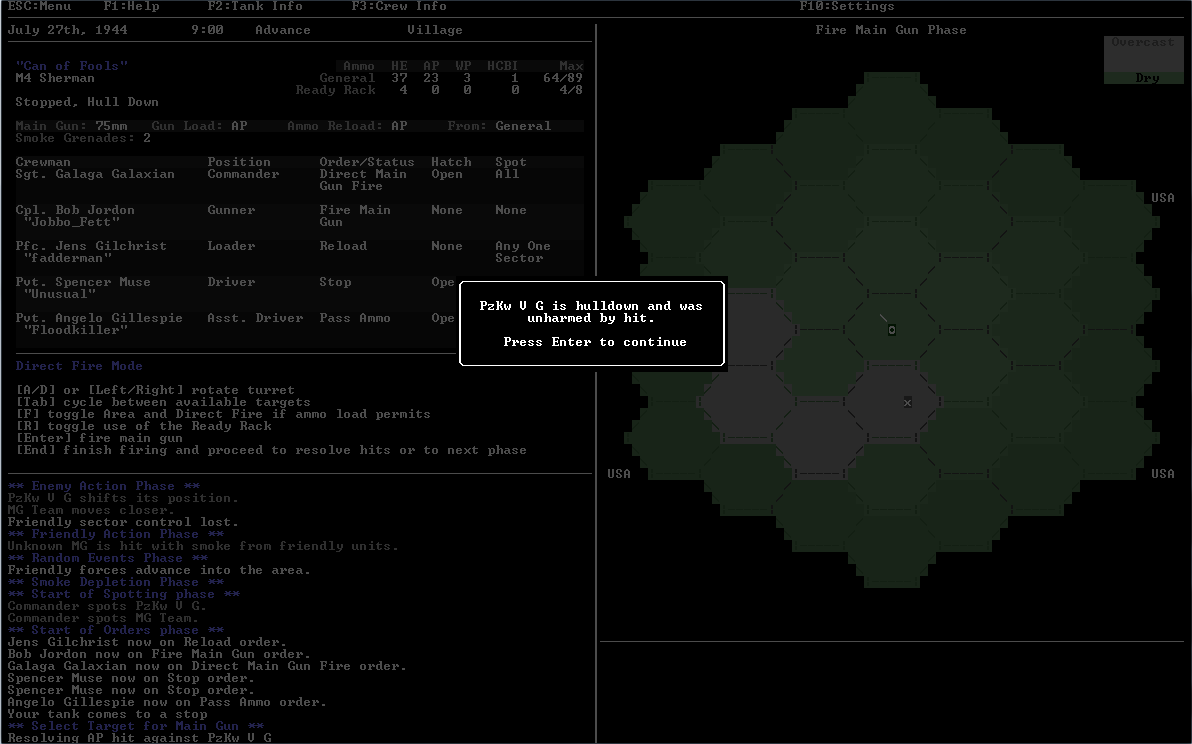
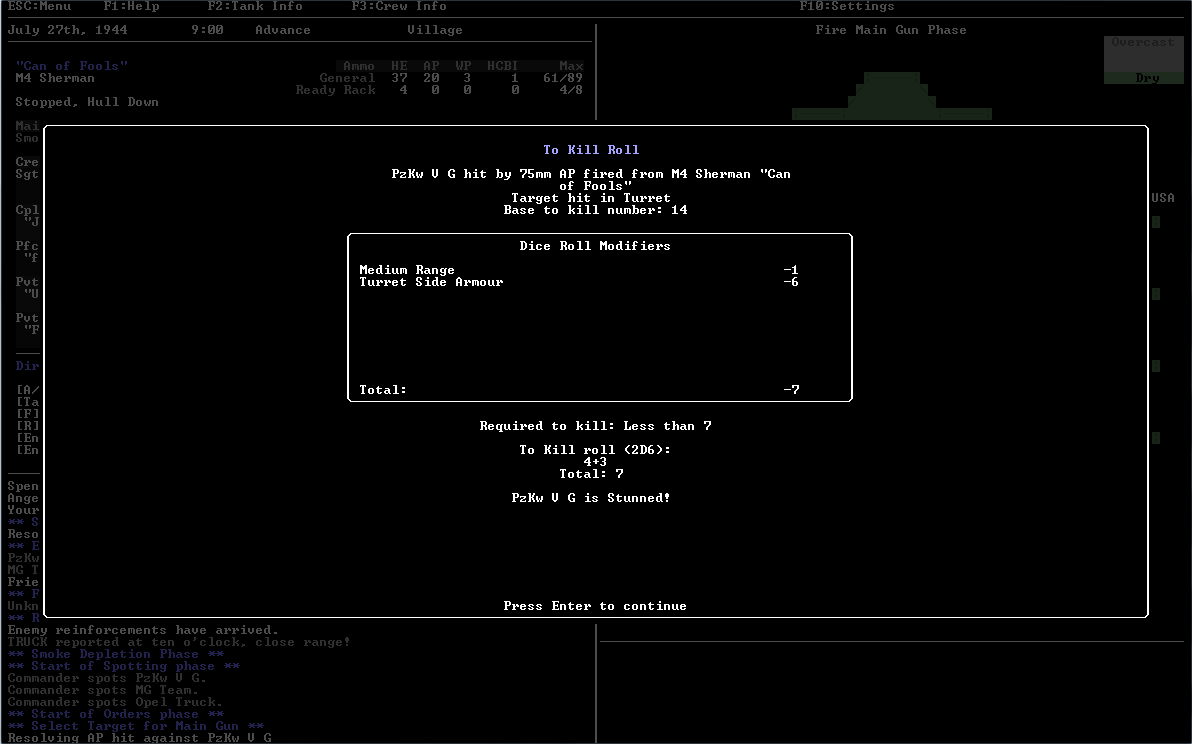
Despite being hull down, I've still got a decent chance of killing him so long as I score a hit on the turret, so I take the shot, firing four shots at the Panther. Unfortunately only one scores an actual hit, the rest either missing or failing due to the Panther's hull down status. Still, I only need to roll under a 7 to score a kill, acceptable odds on a 2d6. So, of course, I roll a 7! The one comfort to this is rolling one above what I actually need to score a kill means that the Panther tank is stunned as the crew reels from a solid hit clanging off their hull. This means they don't get to do anything but sit stunned until they recover. Unfortunately, they recover on their very first action, drat. Still, that means they've remained on a side facing and now are stationary, with me having a good bead on them, my next salvo will surely kill them...
Or not. My next shot misses and despite still having one AP shot left in the ready rack, I fail to achieve rate of fire. To make matters worse, the Panther spends its action turning to face me. Crap. Panicking a bit, I do something I rarely do, I order the loader to chamber an HCBI round while throwing another smoke grenade, which I'm rapidly running out of. The Panther must not have been sure which tank rang its bell, as it blows away the wrong Sherman.
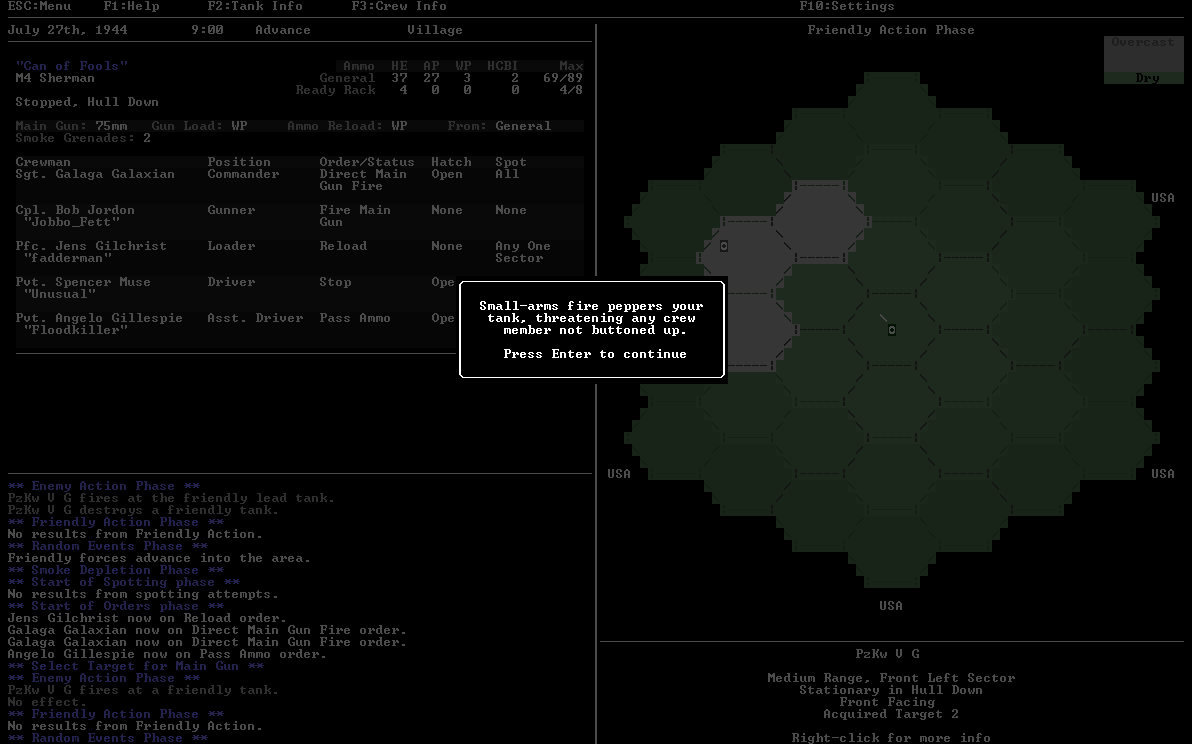
I fire the HCBI round as well as a follow up WP, both of which hit and cover the Panther in three turns of accuracy reducing smoke. The Panther retaliates by firing at another friendly Sherman but fails to score a kill, I honestly have no idea if smoke hexes protect friendly forces or just me, but I like to think I saved their lives. Meanwhile the random event this turn results in my tank taking small arms fire (from who? There is no enemy infantry on the board)! Thankfully, despite three of us sticking our heads out of open hatches, no one is hurt.
Next turn I decide that with the smoke helping protect me, I need to try to maneuver to get a shot on the Panther's side. I order my driver to advance forward. For movement there is two options in each direction, Forward/Reverse and Forward/Reverse to Hull down, the former is more likely to actually adjust the position of enemy units in relation to you, but gives you no chance of achieving a hull down position. Really wanting a shot at the panther's side, I decide to take a risk and order him to just lead foot it forward without worrying about finding cover. Unfortunately I don't get lucky and even with my commander providing a bonus by directing movement, my driver fails to move far enough to effect enemy positions. Meanwhile more enemy artillery rains down blowing up another two squads worth of friendly infantry, not a good day to be an American GI... or a tanker for that matter.
I've still got one more turn of smoke left, so I order my driver Forward to Hull Down and thankfully this time he succeeds in moving foward enough that the Panzer is shifted one hex closer to my rear and is now on a side facing. The Panther takes his action by actually moving even further, moving down into my left rear arc. Meanwhile radio reports indicate a new MG team has spawned in, located in the same hex as the Panther.
The Panther is once again presenting me its side and I take the shot, unfortunately the shot is a lousy one thanks to multiple penalties and I miss by a mile. In addition I fail to achieve rate of fire because my ready rack is empty of AP shells, having been emptied by earlier shots at the Panther. At some point during the previous few turns, I should've had my loader restock the ready rack, but forgot! Anyways, the Panther turns to once again present its nigh-invulnerable front to me. The newly spawned MG team is meanwhile destroyed by friendly forces... why couldn't they shoot the Panther instead?!
Once again panicking a bit, I decide to fire an AP round at the Panther anyways. Thankfully rate of fire kicks in and smoke rounds are loaded as I had set and I once again shroud the damnable Panther in smoke. The AP shell scored a hit as well and, of course, just bounced right off. Another MG team spawns in front of me, but who cares about them when I have this Panther to deal with!
With a couple turns of smoke laid down, I order my driver to reverse and try to find cover and shift the Panther's facing while my loader once again swaps back to armor piercing rounds. I manage to get hull down, but fail to shift the Panther's facing, which doesn't matter as the Panther voluntarily elects to move, moving back up into my front left arc. With another side shot opportunity, I once again open fire, sending two more rounds at the German tank. One shot misses while the other hits, but is nullified because the Panther is hull down. The Panther taunts me by continuing to drive forward, moving further forward into my front left arc. A truck spawns, but I don't pay attention to it, I have my white whale.
Once again I lash out at the Panther's exposed flank. Three more AP rounds spent, two miss, but one slams into the Panther's Turret, YES! Stunned... NO! WHY. WON'T. YOU. DIE! The Panther recovers in one turn again and more small arms fire peppers the tank. Did a bullet kill me? No? Who cares then, keep shooting that Panther! Another shot, another miss, no rate of fire, my poor loader and assistant driver have been drawing from general stores for several turns now. The Panther turns to face me again, once more taking it beyond my ability to strike a mortal blow. More enemy artillery rains down, more friendly infantry dead, I don't care. All I see is this Panther.
I take the opportunity to reload the ready rack, practically hoping the Panther finally decides to kill us and end this farce, instead it just sits there, doing nothing. I order my driver to advance forward as fast as possible. The Panther shifts a hex towards my rear, but moves again, putting it essentially right back where it started, but on a side facing. Once more I open fire, another miss and, despite a restocked ready rack, no RoF... The Panther responds by advancing to close range.
With its front armor facing me yet again I can do nothing but order my driver to scramble to find cover. He fails to do that and the Panther's fires, claiming another friendly Sherman. Why? Why won't he shoot at me? Am I so powerless he doesn't even consider me a threat?! Restocking the ready rack, I again order my driver to reverse and find cover, again he fails. The Panther does gets shifted to a side facing, but its pointless, as it immediately turns to present its front to me again.
TANK reported at twelve o'clock, close range.
NO! I will not allow another!
I swing the turret forward at the newcomer and open fire. He's at point blank range, in the open, stationary, on a side facing. I do to him what I seem incapable of doing to his peer. Five rounds slam into this new panther, turning the German tank into Swiss cheese.
They can be killed, they can be beaten! I order the ready rack restocked and throw the tank into reverse, once more hoping to force the Panther into movement. The German obliges by retreating to long range, where my cannon is the least accurate, but his is still deadly efficient. Meanwhile yet more small arms fire is directed towards my tank, a bullet strikes the hull near my Commander, but again, it didn't kill me, who cares? I have a cat to kill.
A couple more turns of positioning and ineffective pot shots pass. Finally though, I get a good shot, and I take it.
Finally it ends. Long before now it feels I would have killed any other panther, or it would've killed me. Frankly, this was ridiculous, I've never had such a drawn out fight with a single tank before. Honestly it probably would've ended a lot sooner if the damn thing had ever decided to shoot at me, but nope, it just did its own thing. Anyways, the remaining MG team doesn't last long before friendly forces destroy it and the battle is over.
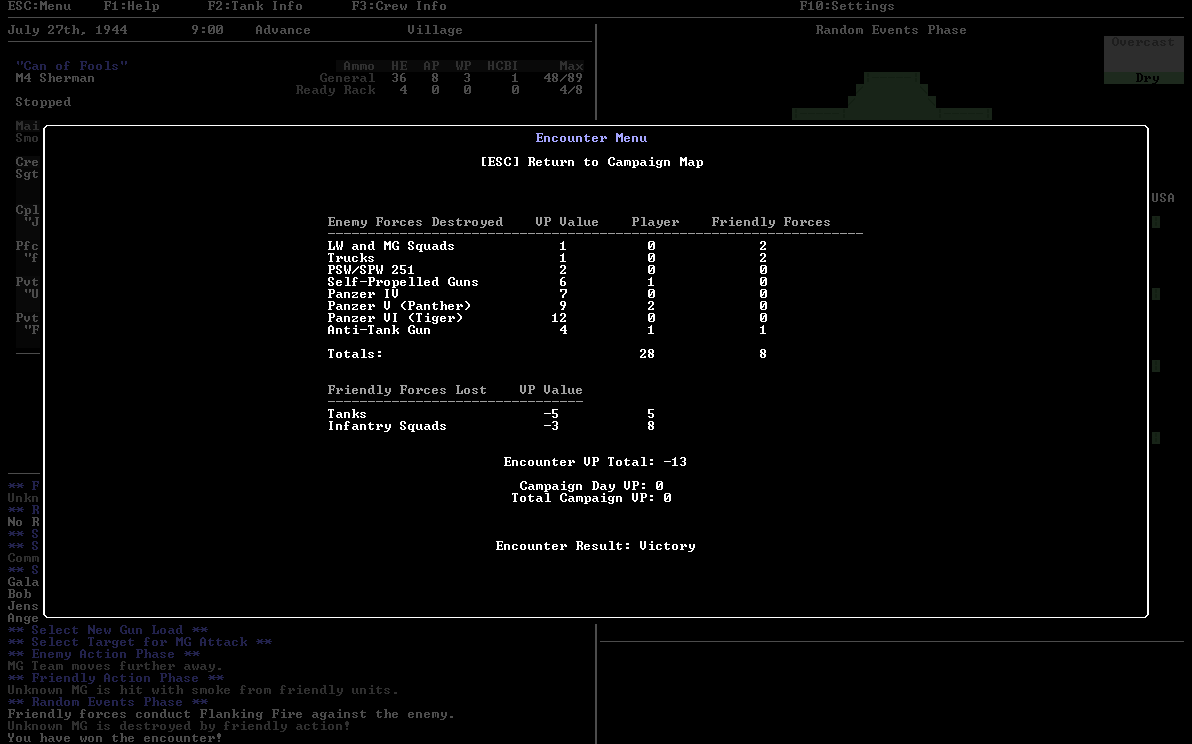
Its a Pyrrhic victory, our tally is two panthers, two MG teams, two trucks, and one Pak 40 destroyed. Meanwhile the blood price is five Shermans, a full platoon's worth, and a shocking 8 squads worth of infantry casualties. Between tankers and GIs, this is easily a hundred men killed or wounded.
I have 8 AP rounds left, I started with 35. And the morning has just begun, that battle didn't even take 15 minutes...