Toggle Background Color

The Doom Roguelike is an oddity among roguelikes. Based on the classic FPS Doom, it emphasizes fast-paced gunplay, relatively short games, and the sort of sleek, discoverable UI that is become more common in the genre now but was all but unheard of when it was first released in 2002. In combination with selectable difficulty settings -- another rarity until recently -- it's one of my go-to recommendations for people looking to get into roguelikes and wondering where to start out. Of course, it's still quite capable of murdering you even on the lower difficulty settings, and Nightmare! difficulty, like its namesake in Doom, doesn't even pretend to be fair.
It also adds a lot not present in Doom; new secret levels, new bosses, special and unique equipment, character classes, level-up bonuses, and an equipment customization system all enrich the game. (Most of these changes have since been backported to Doom itself by enterprising modders.)
While it runs on every major OS and has a very nice graphical version with sound and tiles, I'll be playing the tty version. Partly because it's what I'm used to, and partly because that lets me play it on [url=telnet://phobos.ancilla.ca:3666/]the DoomRL server[/url] and have my games recorded automatically.
For this LP I'll be playing through the whole game on normal ("Hey, Not Too Rough") difficulty, which is the lowest difficulty that still makes all the secret levels available. After that, I hope to do a rapid-fire look at all the challenge ("Angel" and "Archangel") modes, few of which I expect to complete or even get very far in, and probably Nightmare! difficulty as well just so that people can see how brutal it is.
The first few floors will probably go pretty slowly as I show off a constant barrage of new enemies and game mechanics, but things will speed up as I get further in.
DoomRL, Episode 1: Knee-Deep in the Dead
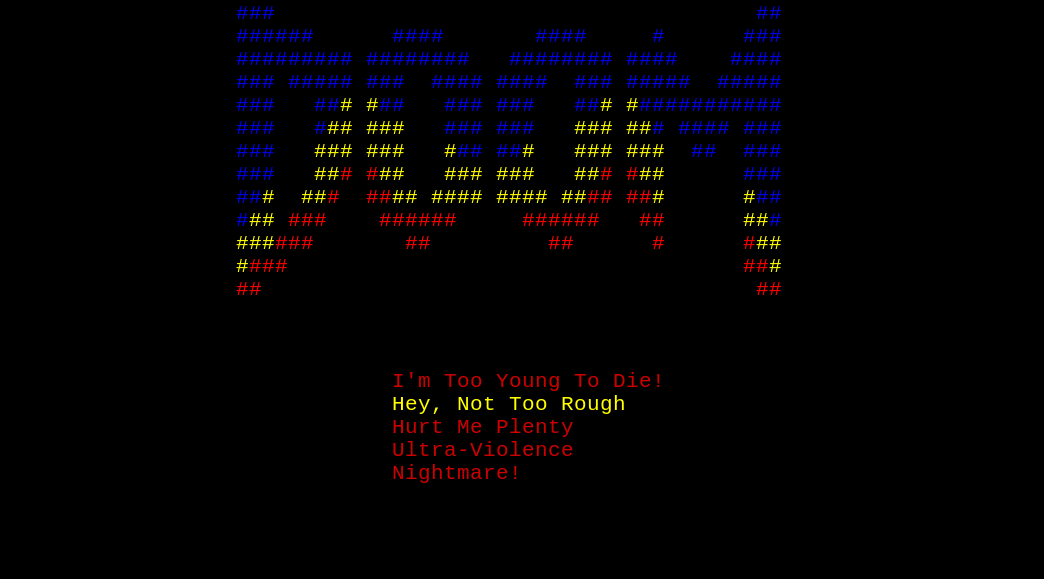
DoomRL inherits the difficulty options of Doom proper. HNTR is the "medium" difficulty, featuring normal ammo drops, powerups, and enemy spawn rates. ITYTD gives you double ammo, buff duration, and healing, an XP bonus, and fewer, weaker enemies, but you can't play challenge modes in this difficulty and some secret levels are unavailable. HMP gives you higher enemy spawn rates and spawns harder enemies sooner, but gives you a bit more ammo to balance things out.
Ultra-Violence and Nightmare! are the challenge difficulties. UV gives you even more ammo, but cranks enemy spawn rate and difficulty even higher and gives them an accuracy bonus. And Nightmare! is just cruel -- you get most of the bonuses from ITYTD back, but in exchange spawn rates and difficulty are at maximum, the enemy AI is much more aggressive, enemies move faster, and you can't even save your game -- you must complete the game in one sitting or not at all.
For this, I'm going with HNTR, both because it's the baseline difficulty and because I can complete the game semi-reliably on it.
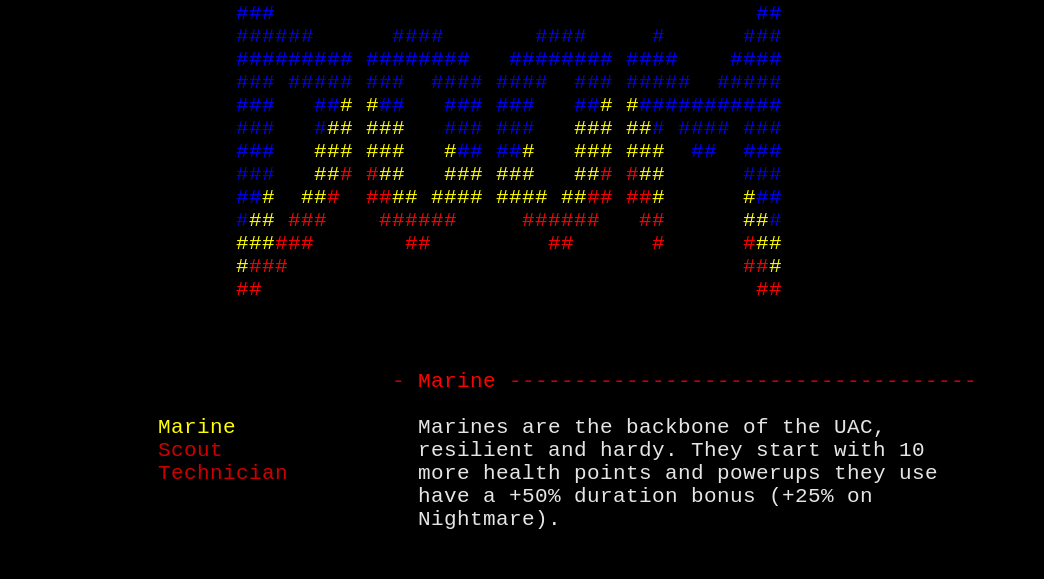
And here we see DoomRL's first non-Doom innovation: character classes and traits. Each character class has unique passive bonuses; furthermore, at character creation and each level up, you get to pick a trait, and which traits are available also varies by class. For this game I'm playing a Marine, a durable, straightforward class.
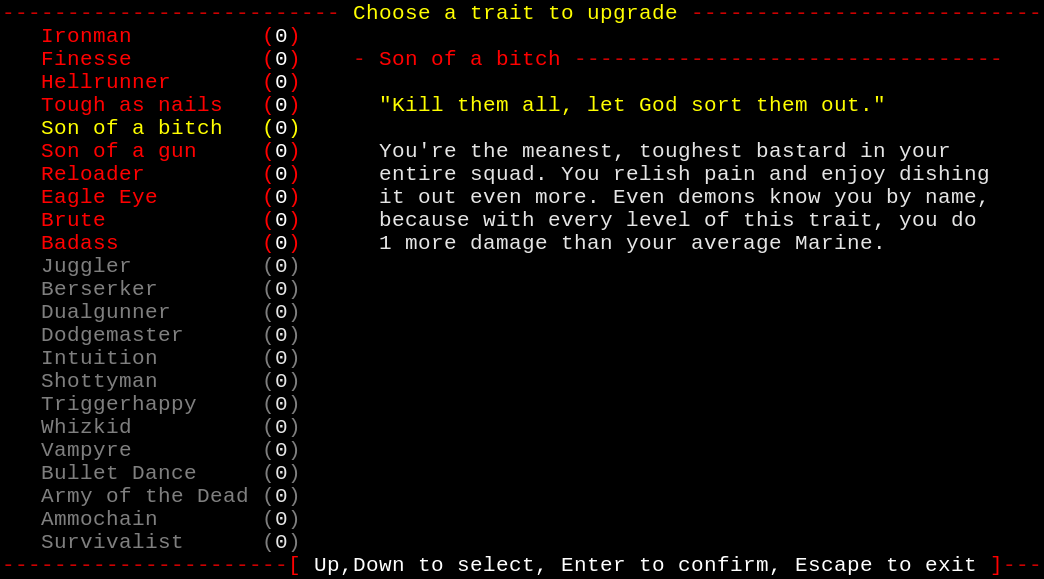
There are 23 traits available to each character. The first nine are the "basic" traits, available to all characters starting out. The next nine are "advanced" traits, which require some combination of basic traits as prerequisites -- but each class starts with one of those unlocked at level 1 too. For the Marine, it's Badass. The last five are class-specific Master traits, which not only have prerequisites, but are mutually exclusive with each other and with some non-Master traits as well.
At character creation, I pick Son of a Bitch, which gives me a flat +1 damage on every attack.
And with that, it's time to begin...
quote:
The trip was long -- you thought it would never end. But hell, a marine's job is rarely interesting. You hate the UAC -- nothing ever happens here. Now you've got to sit around and wait for your squadmates, who are supposed to check out what happened on Phobos.
Not knowing what to do with yourself, you lean back near the comm console and listen for news from your fellow marines.
Suddenly...
"Hell, what a bloodbath!" you hear from the comm. "Corpses everywhere!"
"What happened?!"
"Look, there's someone there!"
"Oh, no! God!"
Gunshots.
More Gunshots.
"This can't be happening!"
"Help! Help, I'm..." <SPLAT!>
"Jake! Where are you?! What happ... oh, fuck!"
<BANG! BANG! BANG!>
Slurp.
Silence.
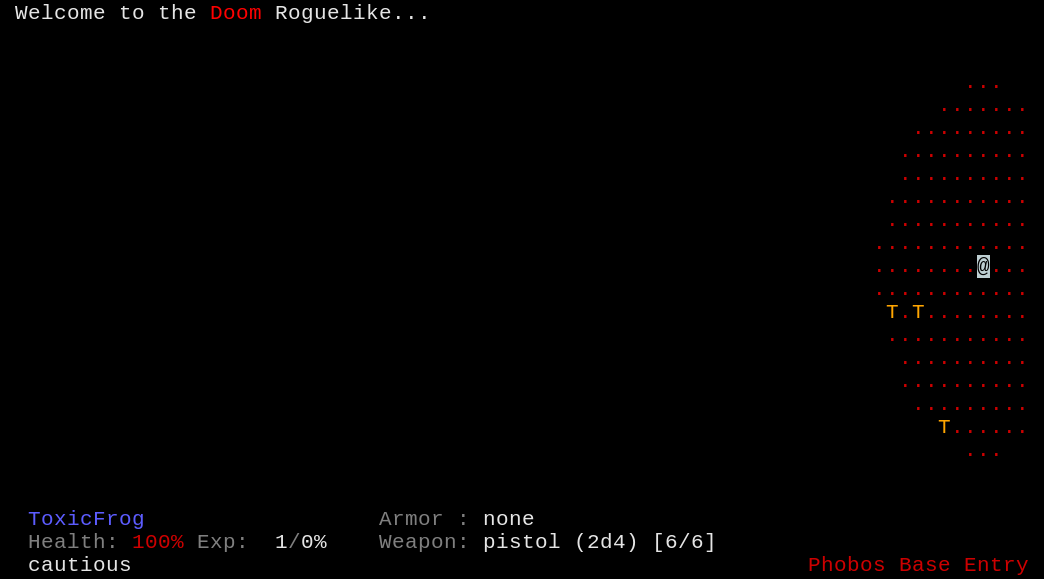
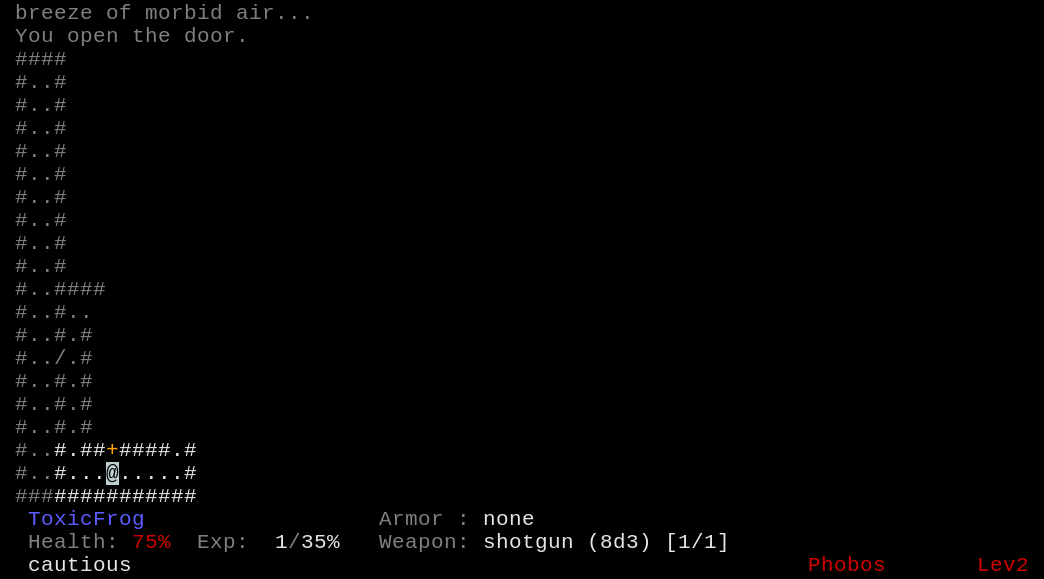
The first level is (except in some challenge modes) Phobos Base Entry, which picks one of a few different set-pieces rather than being randomly generated. You always spawn outside, with the base to the west.
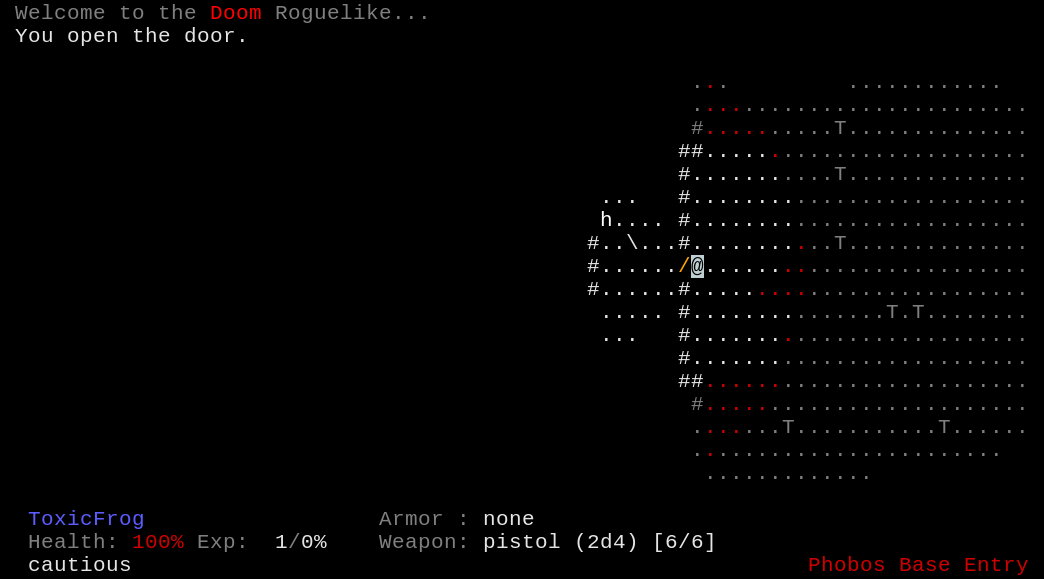
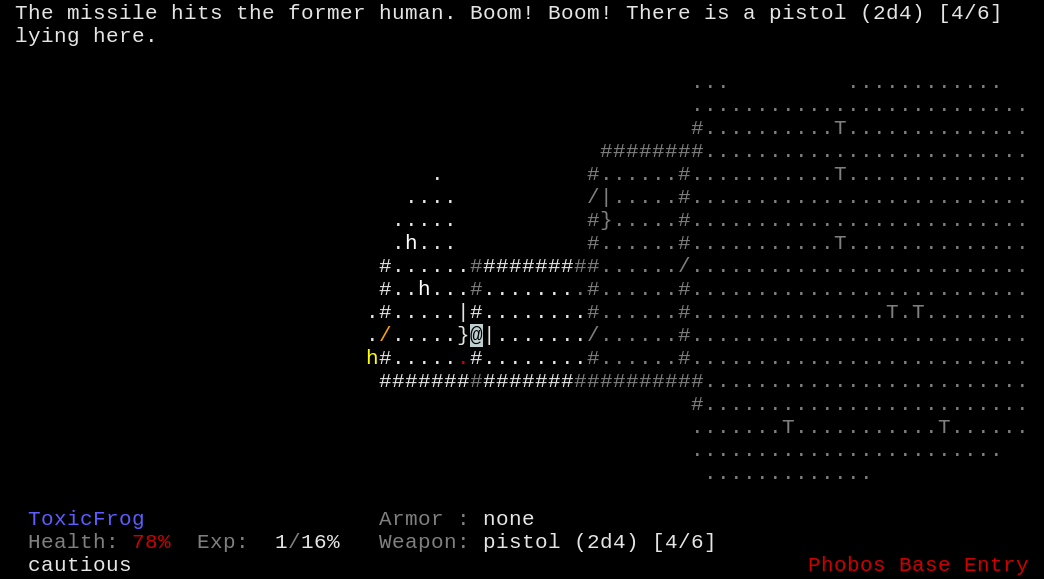
Opening the door reveals the first enemy: a Former Human (the white h), aka a zombie. It immediately fires at me with its pistol, but misses. I step into the doorway and return fire.
quote:
Your fellow soldiers who went crazy because of the demonic influence. There's no hope for them anymore. Only lead can heal their corrupted souls.
On harder difficulties I would already have fought several enemies just getting to the door, but on HNTR you generally don't see any enemies until you get inside, and sometimes the first room or two are even empty.
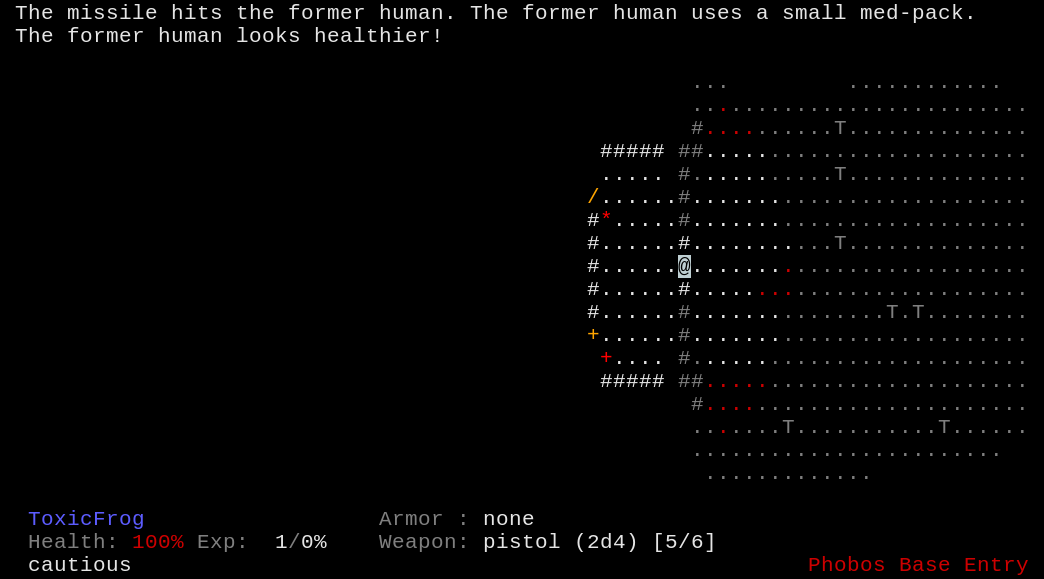
And here we see the first dick move: "intelligent" enemies, which includes all Formers, can pick up and use medkits. That + in the lower left is one of the two medkits that spawns in the entrance; the other has already been picked up by the zombie before I even opened the door. On HMP and above it's not uncommon for all the medkits to be used by enemies in your assault on the entrance.
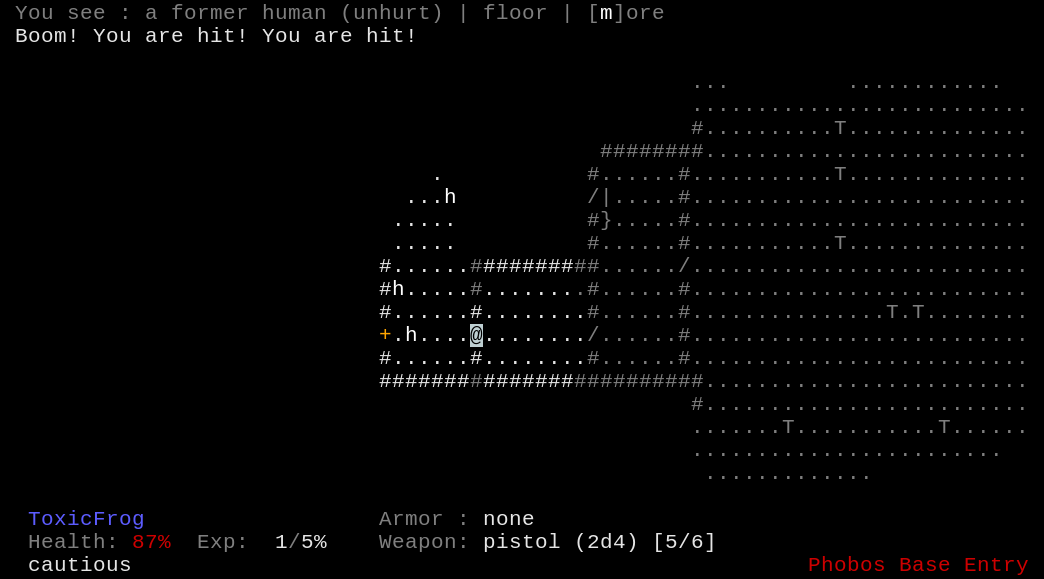
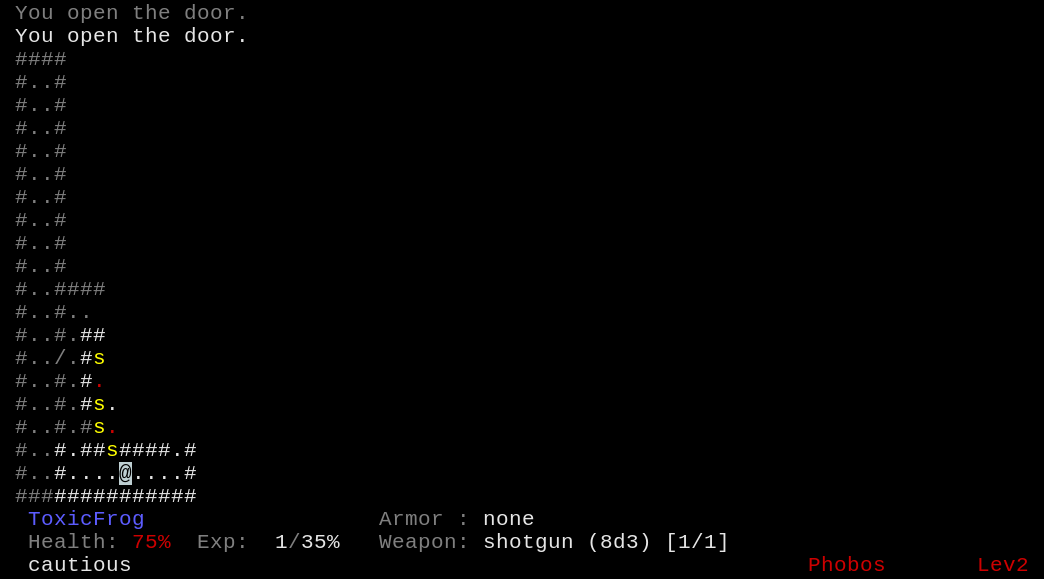
Two more shots kill it and I keep exploring. Three of them ambush me here and I step backwards out of the doorway.
Here DoomRL's visibility rules come into play. Positioned like this, I'm assumed to be peeking around the corner; I can see the zombie, and even shoot it, but it can neither see me nor return fire! This makes corners an extremely advantageous (and common) bit of terrain, but enemies can do something similar -- they can't "corner-shoot" quite like this, but there are some rare arrangements of terrain that make it possible for them to shoot you from cover.
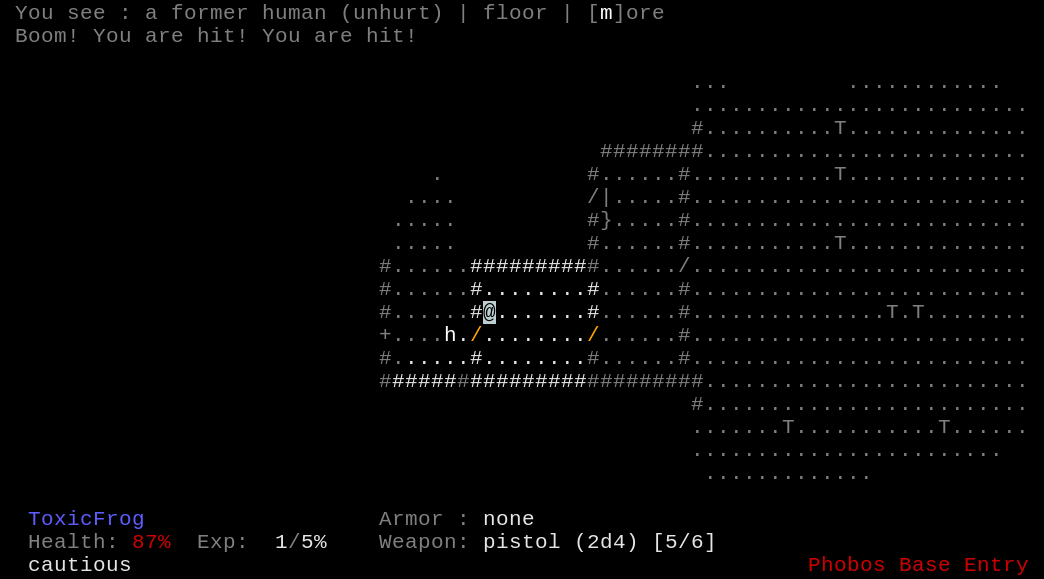
I lure two of them into the doorway and pick them off, then step forward again to finish off the rest, when the door opposite me opens and reveals a new enemy type, the Former Sergeant (aka the zombie shotgunner).
quote:
Same as former human soldiers, but meaner and tougher. They'll provide you with an extra hole if you're not careful. They always carry a shotgun, so be on your guard!
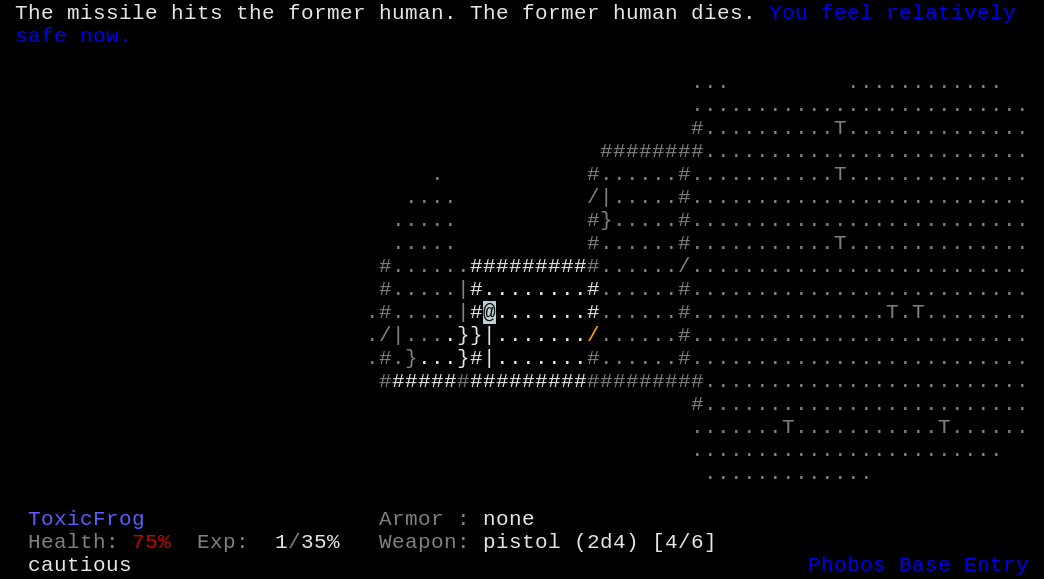
That shotgun is nasty, so I immediately take cover, lure it into the open, and kill it. The others follow and before long, every enemy on the level is dead, signified by the "you feel relatively safe now" message.
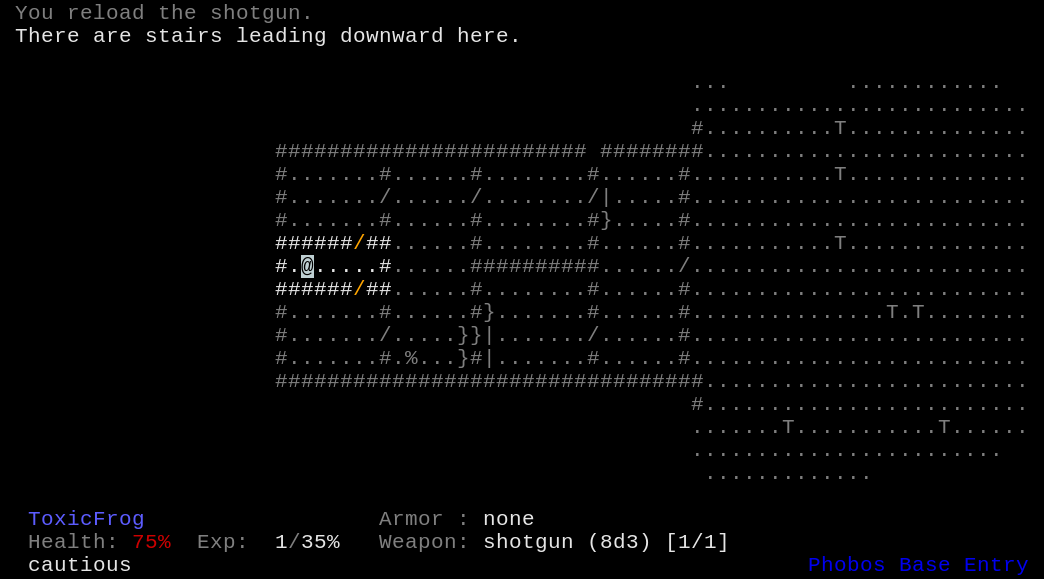
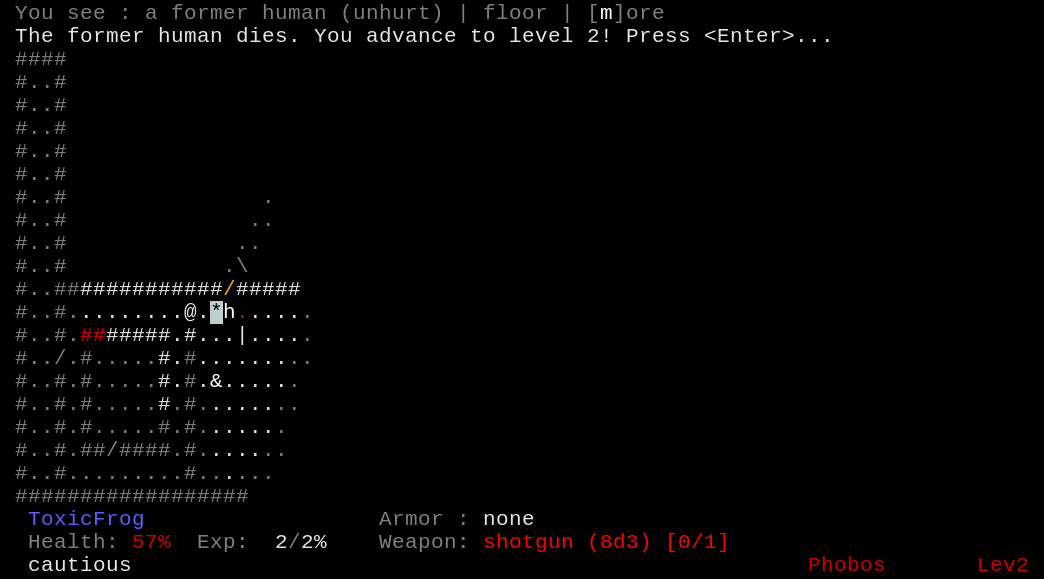
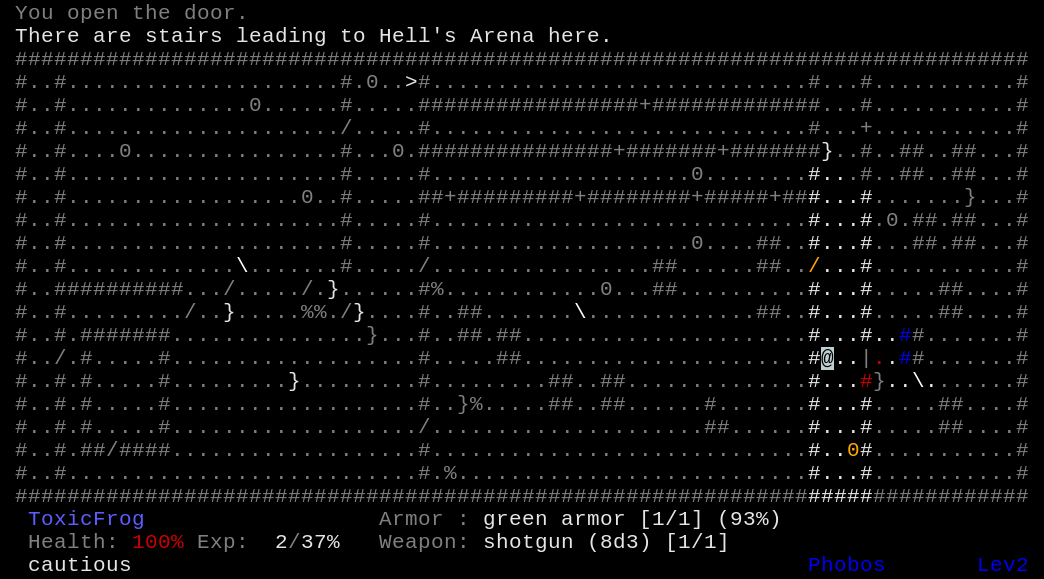
I grab the shotgun and head for the stairs. The HUD shows the basic stats: damage (8d3) and ammo [1 loaded, 1 max]. At 8d3, the worst possible roll with a shotgun does as much damage as the best possible roll with the pistol's 2d4. Even with the need to reload it after each shot, the pistol won't be seeing much more use.
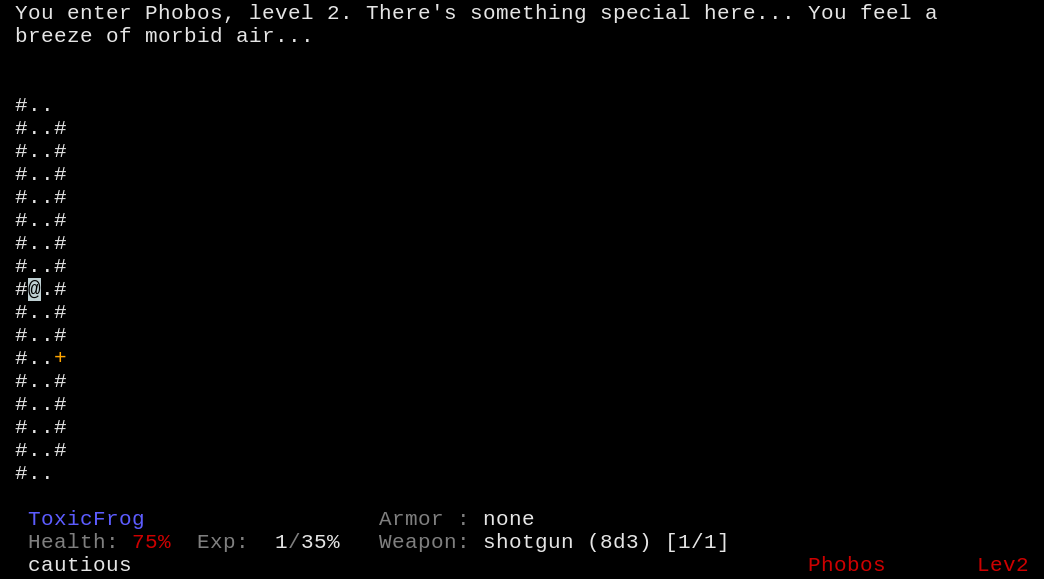
A boring entrance, but I wanted to show off the level feeling messages. "There's something special here" means that a vault has generated: a room containing out-of-depth treasure and enemies. "You feel a breeze of morbid air" is one of several messages that signify stairs to a secret level.
The first room I open contains the vault, which always takes this characteristic room-within-a-room shape. Vaults always start closed, but most enemies know how to open doors.
quote:
Quick, flying, fiery skull. These are the souls lost in hell. Let them rest in peace. Or rather, in pieces...
This one is full of Lost Souls. The weakest enemy in the game, lost souls can still be dangerous because they move and attack extremely fast, usually spawn in swarms, can fly over acid and lava, and are resistant to bullets and fire. Shotguns, however, are highly effective against them.

This also demonstrates the other cool thing about shotguns. Unlike pistols, which fire a bullet that either hits for the damage rolled or misses, shotguns hit everything in a cone, but do diminishing damage with distance. They're also ineffective against armour (damage reduction is doubled against Shrapnel damage, which most shotguns inflict), but against the unarmoured lost souls this isn't a problem.
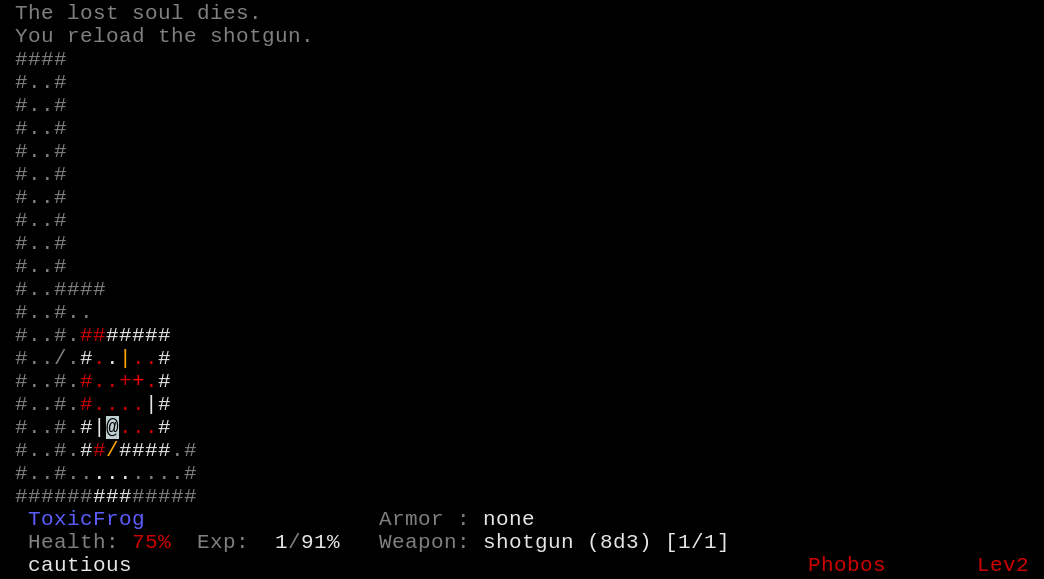
Many lost souls later, I claim the vault. Two stacks of pistol ammo, one of rockets (the orange |), and one large and one small medkit. I don't have any weapon that fires rockets yet, but I will soon, and the large medkit, unlike the small ones found on the first level, heals to 100% no matter how badly injured you are.

The next room contains two new things, a lever (&) and an Imp.
quote:
Brown demonic servants from hell, imps can cast fireballs at you. They're tough, mean and strong, and think only about sending you into oblivion...
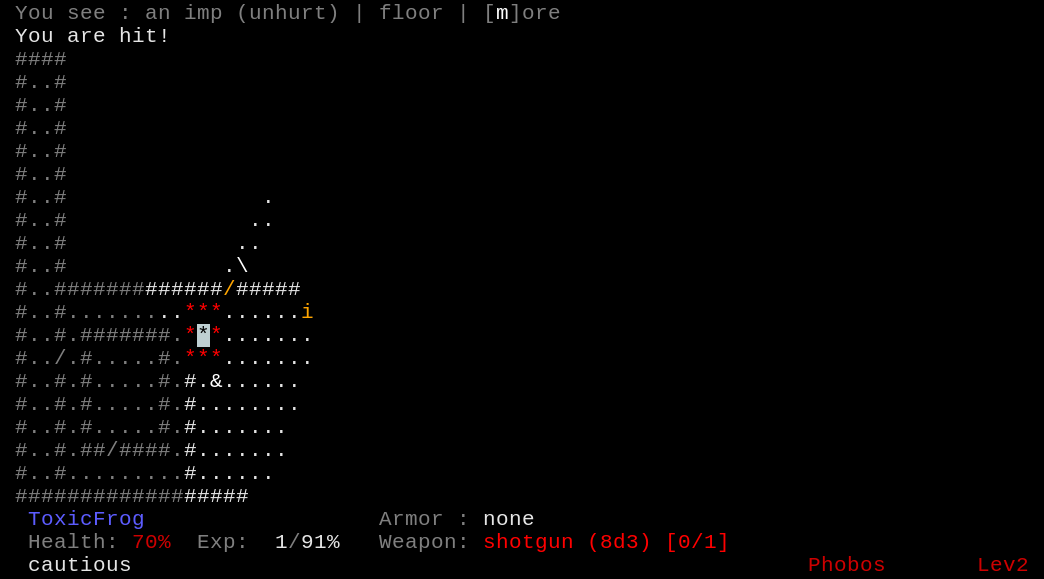
We exchange fire. The imp is knocked back one step by the shotgun blast -- any attack that does enough damage has a chance to inflict knockback -- but retaliates by hitting me in the face with a fireball. The fireball is a projectile, but explodes on impact, damaging a 3x3 area -- which means that if you have your back to the wall, even near misses can hurt you, and standing near explosive barrels is a really bad idea.
In the ensuing fight a former human shows up to help the imp and both die, getting me my first level-up! I put another point into Son of a Bitch.
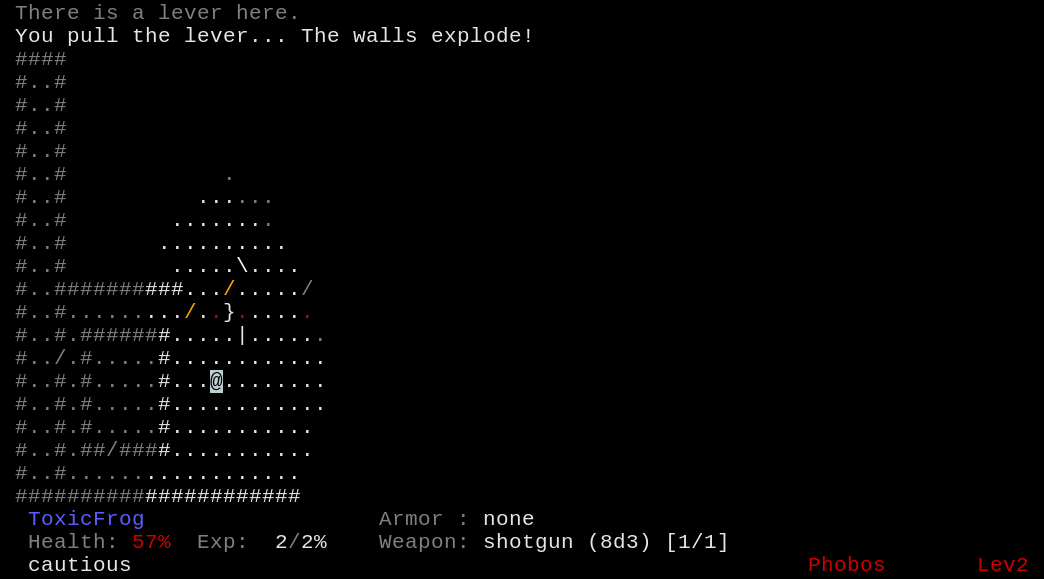
Pulling the lever causes all of the walls around this room to vanish. Levers can have a lot of different effects, from healing you or repairing your armour to flooding the entire room with lava. For this reason I usually avoid pulling them entirely unless I have some other information that tells me what they do. Levers on the first floor are usually safe, though.

Several enemies later I find a crate containing some steel boots, my first piece of armour. Boots protect against environmental hazards -- acid and lava -- and the steel boots are the weakest version, providing only 1 protection and no resistances. They have no penalties and reduce knockback slightly, though, so they're still worth wearing.

To the east I find actual body armour. This protects against everything except environmental hazards. Green armour gives minor bullet and shrapnel resistance, 1 protection, and a minor movement speed penalty.
Armour works fairly simply in this game: when you take damage, resistances take effect first. 100% resistance can actually reduce damage to 0, in which case you are completely unaffected by the attack. Otherwise, protection is then subtracted from the damage, but unlike resistance it can't reduce it below 1. Whatever is left, you take as damage.
Furthermore, damage absorbed by armour reduces the armour's durability, seen as (100%) here. As armour loses durability its protection value also falls, and once it hits 0 it is completely destroyed.
To the north we can see an explosive barrel (0). If shot, it will explode, dealing fire damage to everything nearby and potentially destroying walls and items. We can also see some crates -- the orange and blue ones are just scenery, but the red one can actually be shot open to get at the goodies inside, as can yellow crates like the one the boots came in.
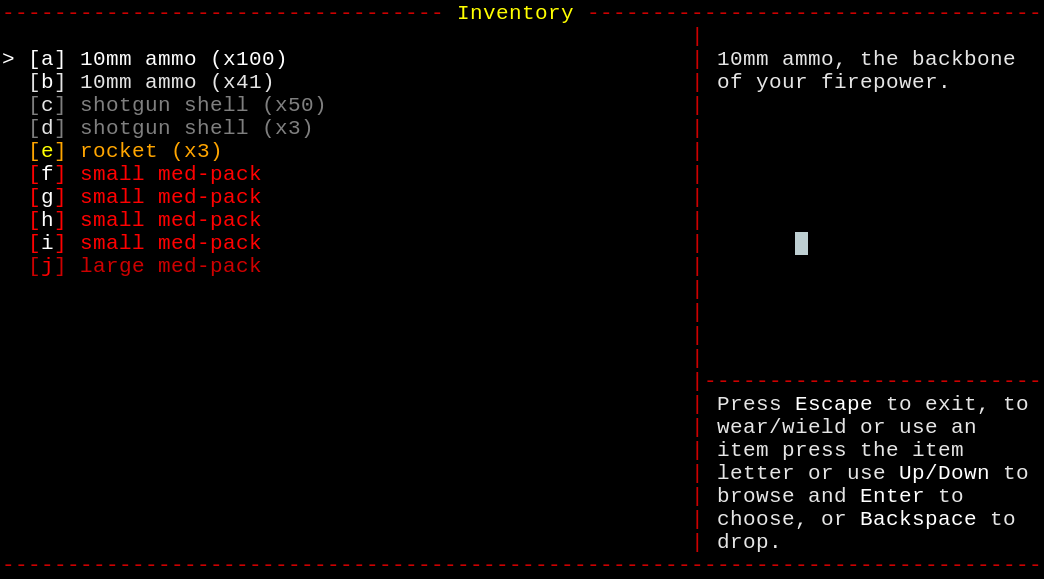
A few enemies later I'm down to 8% HP, which is honestly lower than is safe. I open the inventory and use a small medpack, which restores about a quarter of my health.
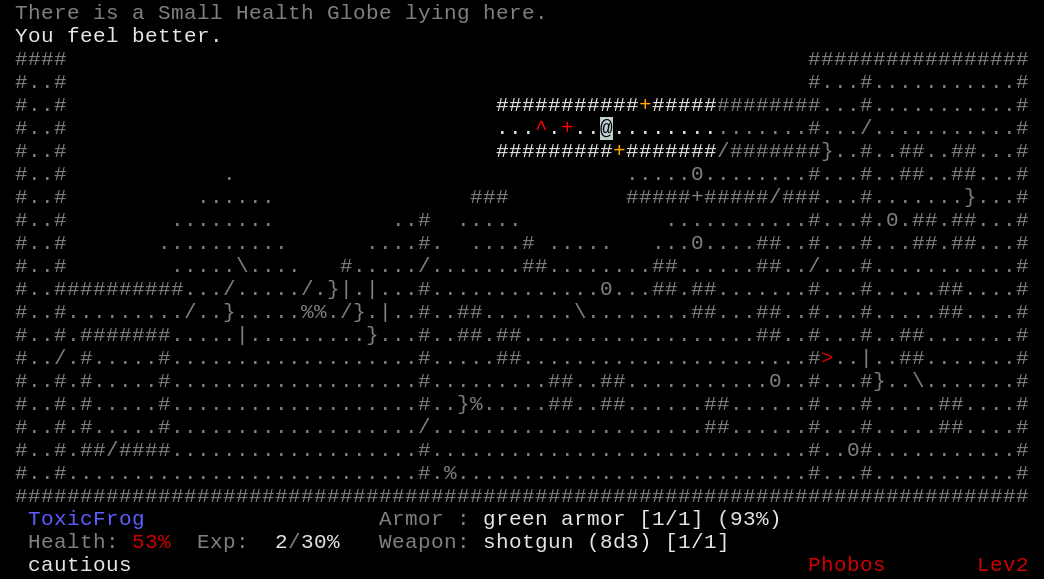
The rest of the level is pretty uneventful apart from these Small Health Globes. They behave like small medkits, with two important differences: you can't carry them (they're used instantly when picked up), and they can boost your health above 100%, although it'll gradually decay back to 100%.
Towards the end I find a Computer Map, which reveals all terrain and items in the level. Then it's just a matter of killing all the enemies, hoovering up all the loot, and heading for the stairs.
This level has two staircases; one normal staircase leading to level 3, and one red staircase leading to the Hell's Arena "secret level". (These levels aren't actually a secret, but are inspired by, and in some cases modeled on, the actual secret levels from Doom and other FPSes.) The secret levels are optional, but I'll be clearing every single one in this playthrough.
quote:
"Welcome to Hell's Arena, mortal! You are either very foolish, or very brave. Either way, I like it! And so do the crowds!" Suddenly, you hear screams everywhere! "Blood! Blood! BLOOD!" The voice booms again: "Kill all enemies, and I shall reward thee!"
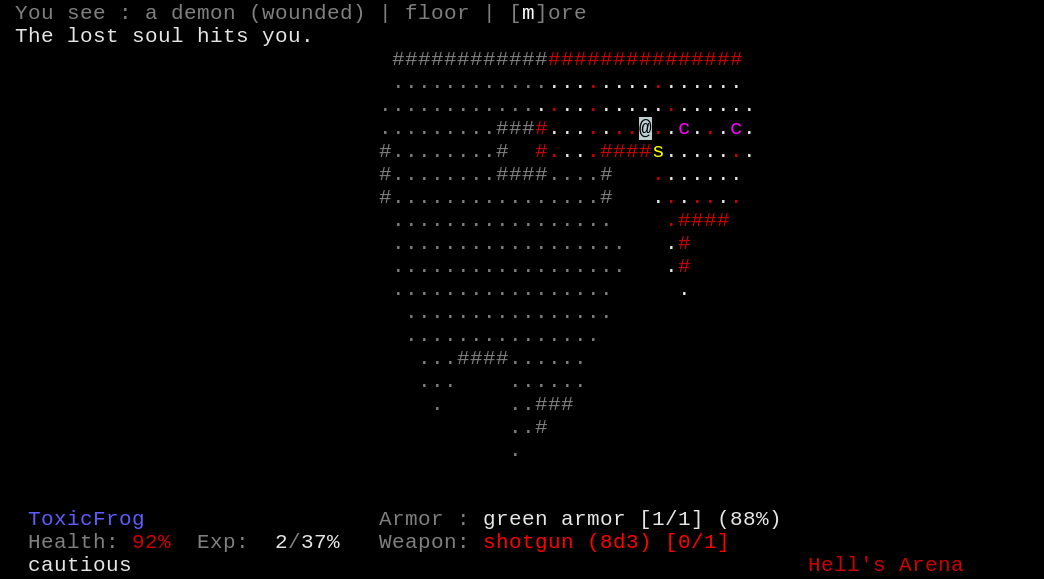
The Arena drops you into a single large room containing scattered pillars and enemies. Which enemies exactly depends on difficulty level, but on HNTR this is our first look at Demons.
quote:
You thought pink is cute? You won't anymore after meeting one of those bastards -- they are strong, tough and eager to rip your head off.
Demons are melee-only, but move slightly faster than you and hit hard, as well as having loads of health. The shotgun is a good choice for dealing with them, since it knocks them back enough to buy you some breathing room while you reload it, and as long as you can keep knocking them back they can't touch you.
Killing all enemies causes the announcer to chime in again:
quote:
"Not bad, mortal! For the weakling you are, you show some determination." You hear screams everywhere! "More Blood! MORE BLOOD!" The voice continues: "I can now let you go free, or you may try to complete the challenge!"
I of course answer yes and a bunch of new enemies spawn in, including a Cacodemon.
quote:
Big, flying, red, horned heads. They spit huge explosive plasma balls. If you don't have the weapon to handle them, better run...
Cacos have similar behaviour to Imps, but they can fly over hazards and their attacks do plasma, not fire, damage -- and plasma damage is the opposite of shrapnel damage, with your armour's protection counting for half against it. Peeking around a corner and repeatedly knocking them back with the shotgun works well, though.
During this fight I reach Level 3. I could put a third rank in Son of a Bitch, but instead I opt to boost Reloader.
Reloader posted:
"The humanity! My big gun is out of bullets! I can't believe it!"
So you're out of ammo... no problem! You're especially gifted at keeping your gun well-fed -- for every level of this trait, you can reload your gun 20% faster than the average marine!
Reloader is a good choice for shotgun users, since the main limiting factor on shotguns is the constant reloading needed.
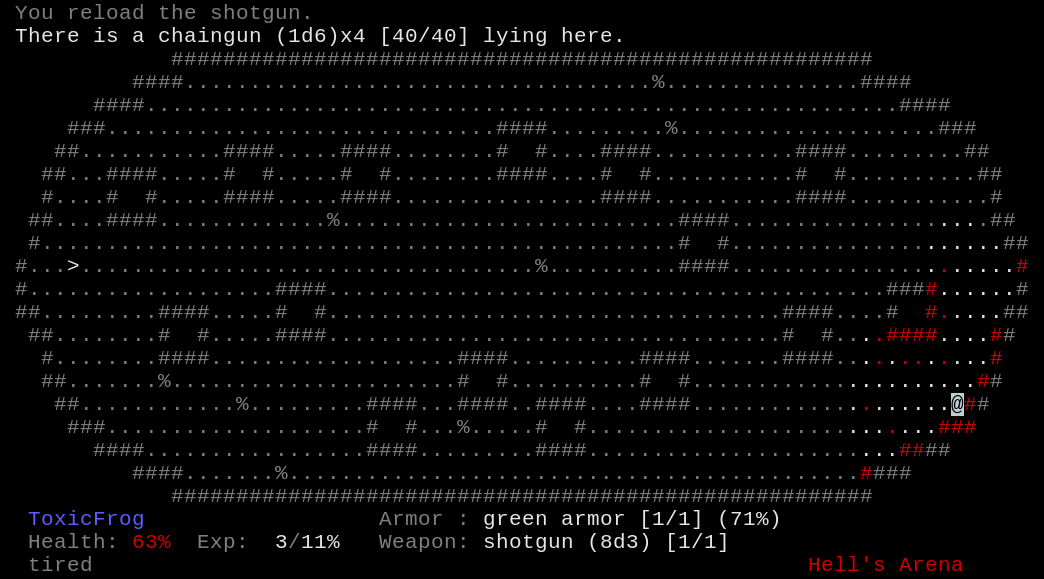
As a reward for clearing the first round and opting to continue, I also got a Chaingun placed randomly in the arena. The (1d6)x4 damage designation means that every attack fires six shots. Each shot rolls to-hit and applies damage separately, which means armour is very effective against this weapon, but against unarmoured foes that's 4d6 damage/burst if all shots connect, on par with the shotgun and without the shotgun's damage dropoff with increased range.
I swap out my offhand pistol for the chaingun and keep killing. Eventually I run out of enemies again.
quote:
"Impressive, mortal! Your determination to survive makes me excited!" You hear screams everywhere! "More Blood! MORE BLOOD!" "I can let you go now, and give you a small reward, or you can choose to fight the final challenge!"
The final round consists of three cacos and nothing else. As long as you stay in cover it's not very hard.
quote:
"Congratulations, mortal! A pity you came to destroy us, for you would make a formidable hell warrior! I grant you the title of Hell's Arena Champion, and a promise is a promise...search the arena again."
And here's the reason you do the arena: loot! In addition to loads of shotgun and 10mm ammo, you also get a suit of blue armour (2 protection, plasma resistance), a large medkit, a Supercharge (a health globe that heals you to 200%), some rockets, and a shiny new rocket launcher to use them with. This is earlier than you can find either blue armour or rocket launchers "naturally", and both are guaranteed.

Phobos 3 (the Arena is inserted between levels 2 and 3 rather than replacing 3 entirely) is a maze level. We've spawned in view of two sergeants, but fortunately you get about 4 turns of free actions before the enemies on a level "wake up", long enough to kill both of them.
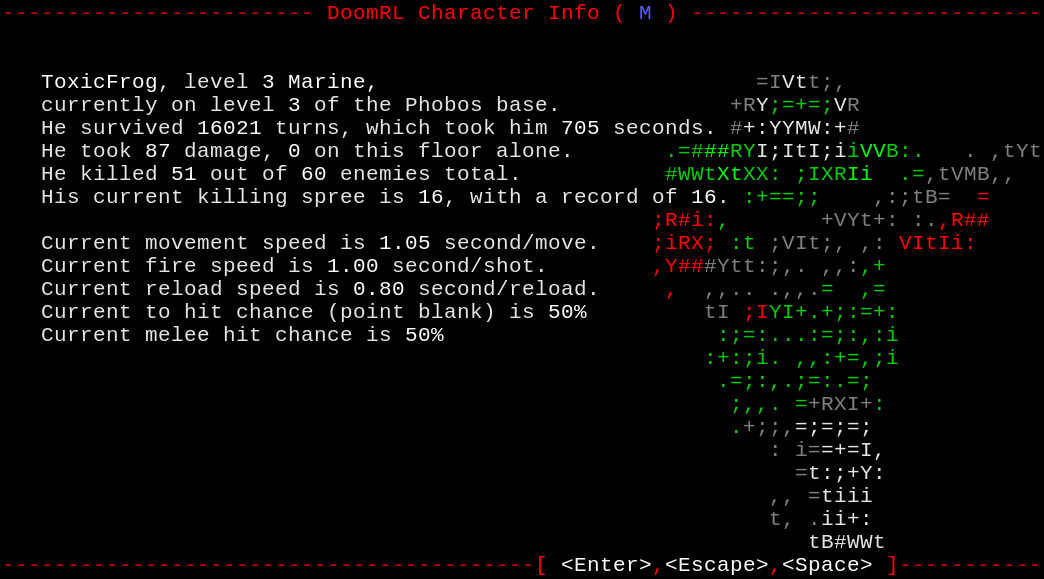
At any time you can pull up this screen. It repeats some of the info in your HUD, but also shows you information not available anywhere else: your time taken, killing spree (consecutive kills without taking damage), kill %, move/fire/reload speeds, and to-hit chances. The kill % is particularly relevant if you're trying for 100% kills, which I am; check it before leaving each level.
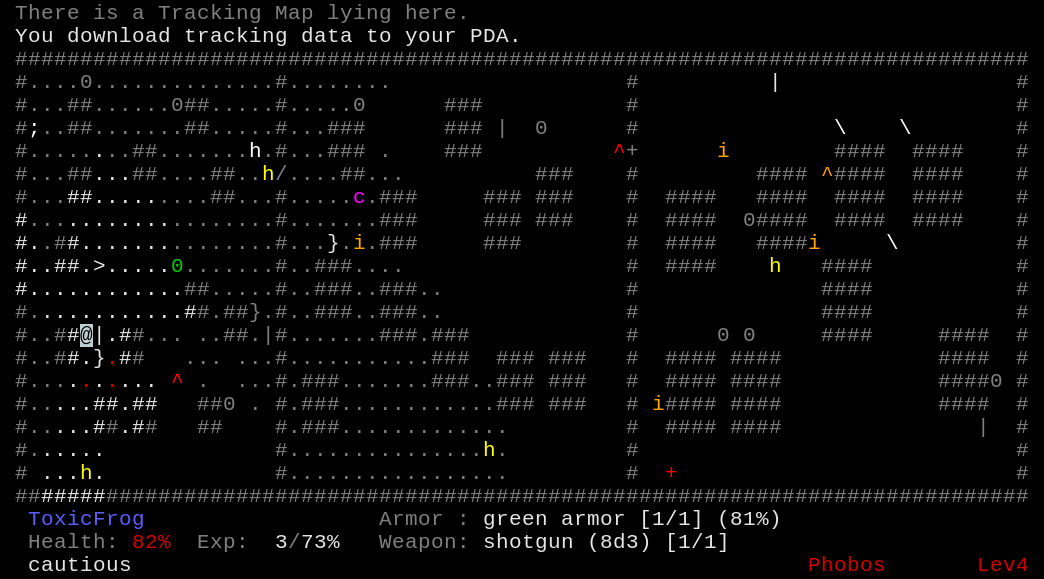
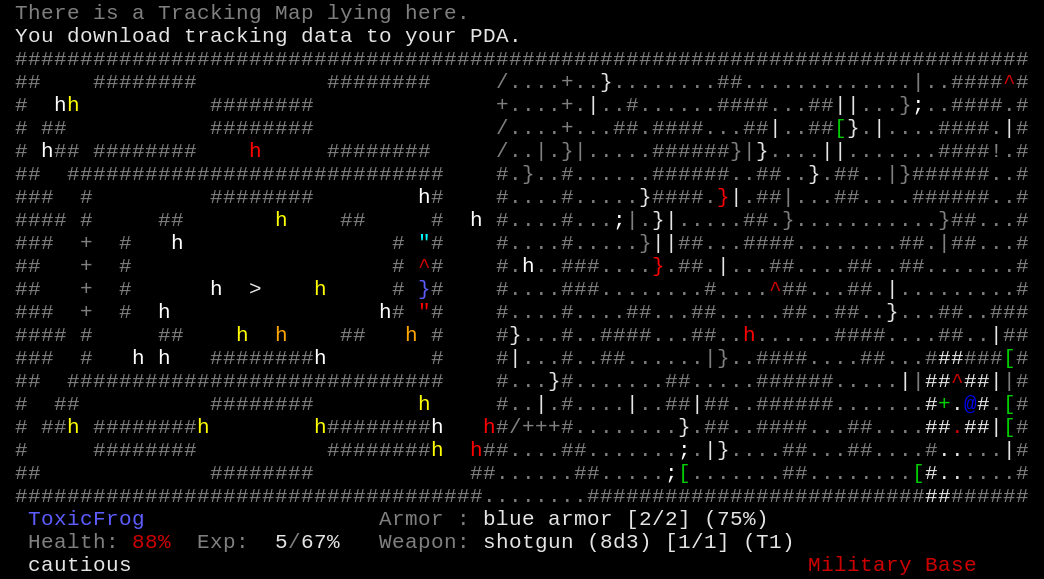
The rest of the level is uneventful, as is most of Phobos 4 apart from the presence of a Tracking Map. This is a turbocharged Computer Map, revealing not only items and terrain but also giving you real-time location for every enemy on the level. Since most of your weapons can shoot further than you can see, and enemies generally can't, this gives you a deadly advantage.
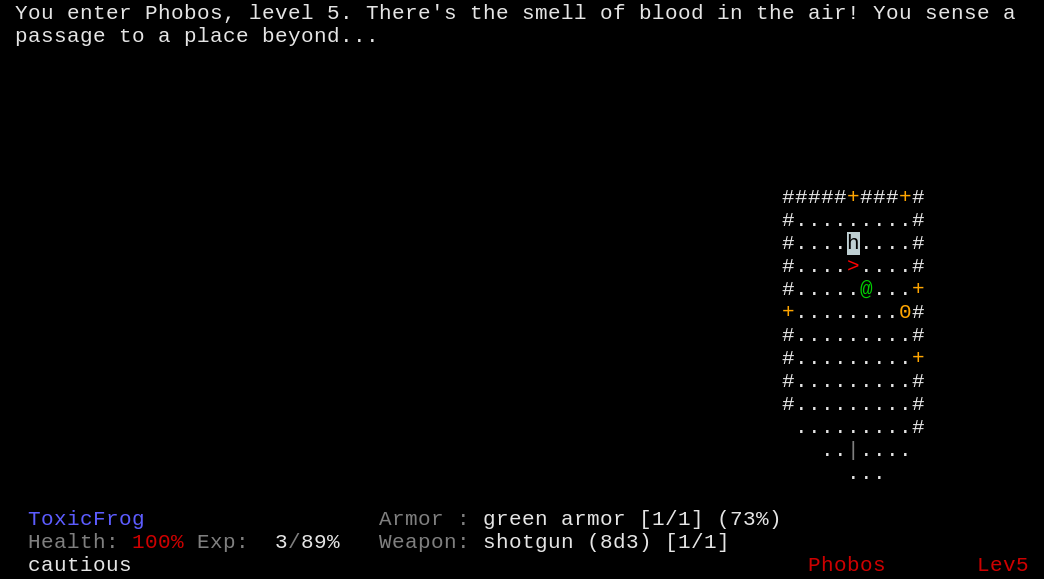
Two more level feelings. The "smell of blood" is another vault, and the "passage to a place beyond" is another secret level.
The vault contains another suit of green armour, some shotgun ammo, and our first modification pack! :woot:
Modpacks are a DoomRL addition to the game. They come in eight flavours, four uncommon and four super-rare. Individually, they can be used to upgrade your weapons and armour; certain combinations of them can also redesign your equipment into Assemblies, giving additional bonuses or major redesigns.
This is an Agility Pack, which boosts movement speed (on armour or boots) or accuracy (on weapons). I immediately apply it to my boots, then clear out the rest of the level. While doing so, I also find a Technical Pack, which reduces knockback or increases firing speed, but forget to use it on anything or put it in my backpack before leaving the level. I level up, too, and increase Reloader again.
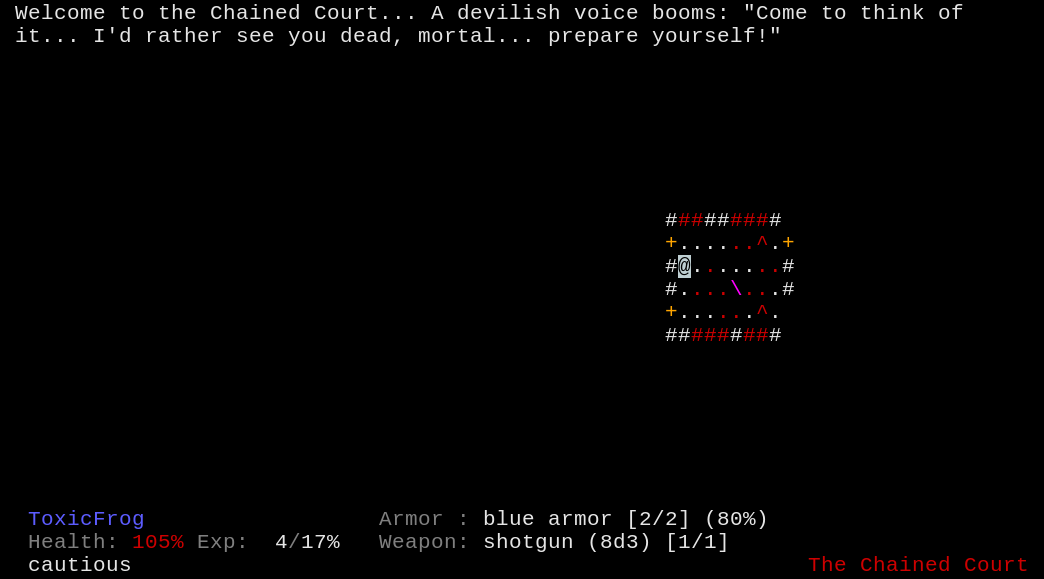
Secret level 2: the Chained Court! In earlier releases, there was just one version of this level -- and that's still in the game, as the "easy" version. But a few releases ago, they added a "hard" version, which you get only if you completed Hell's Arena earlier.
The contents of the room I spawned in deserve some attention. The ^s are Berserk Packs (which confusingly look identical to Large Health Globes); they heal you to 100% and also give you about 30 seconds of Berserk, which cranks up your melee damage, resistances, and speed. Even if you aren't a melee character these are well worth seeking out just for the healing, haste, and protection effects.
The is a melee weapon; I've passed by a few on earlier levels, but those were knives -- 2d5 damage makes them barely better than a pistol. As far as I can tell, knives primarily exist for challenge games or conducts that restrict your use of ranged weapons. This one, however, has a bright pink colour that marks it as a Special. Special equipment generally has special abilities or higher stats than "normal" gear, while still being fully accepting of modification packs.
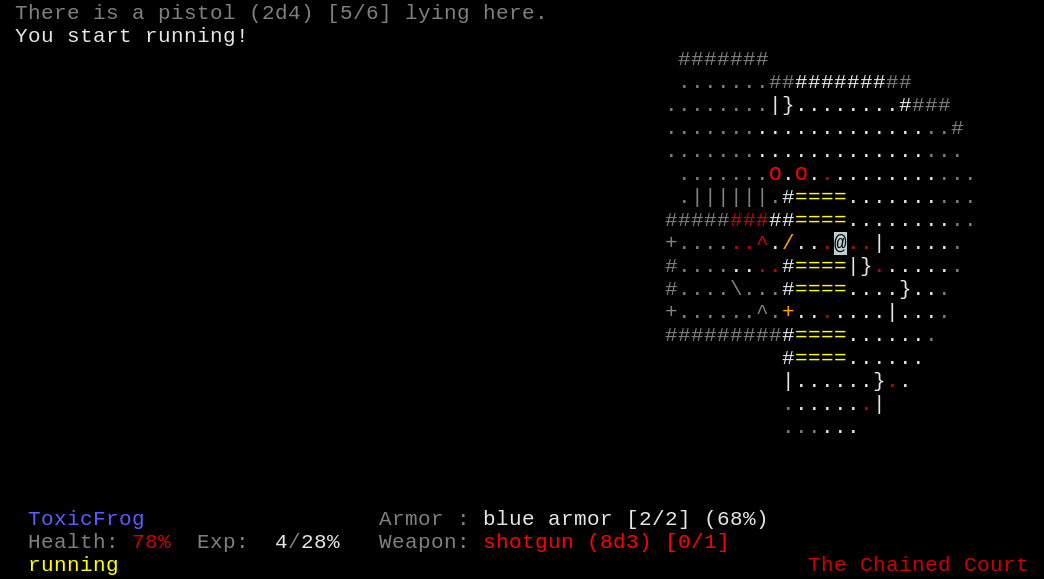
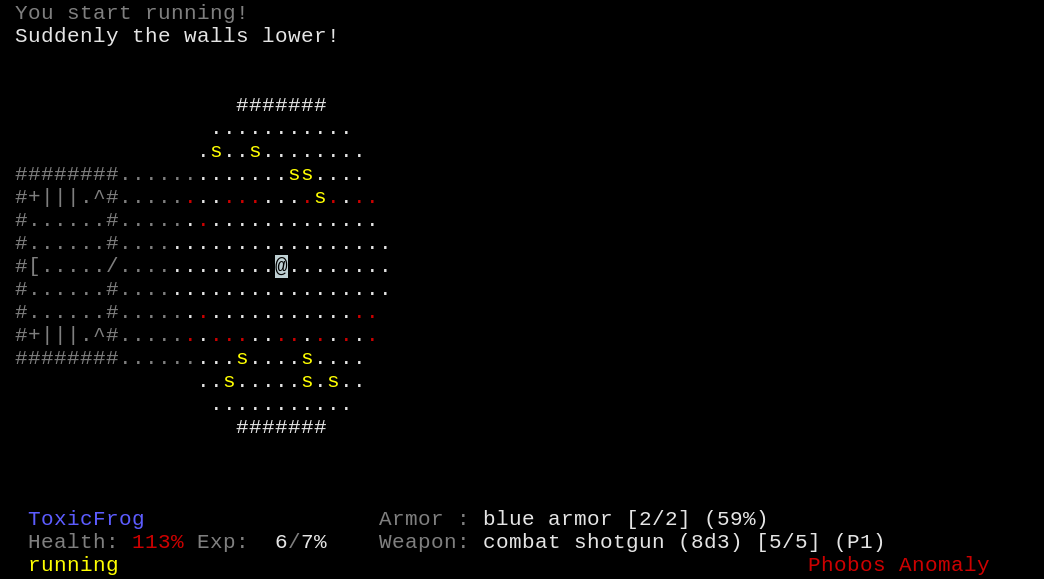
Just outside the door we have lava, formers, and cacos. I start running; this can be done at any time and gives you several turns in which you move faster and have an increased chance to dodge attacks (by moving laterally to an enemy, there's a chance that they'll fire at where you were rather than where you are). Once you've done it, though, you can't run again until you go down the stairs or use a healing item.
I try to lure the cacos over the lava so that they don't leave corpses when they die. There's a good reason for this.
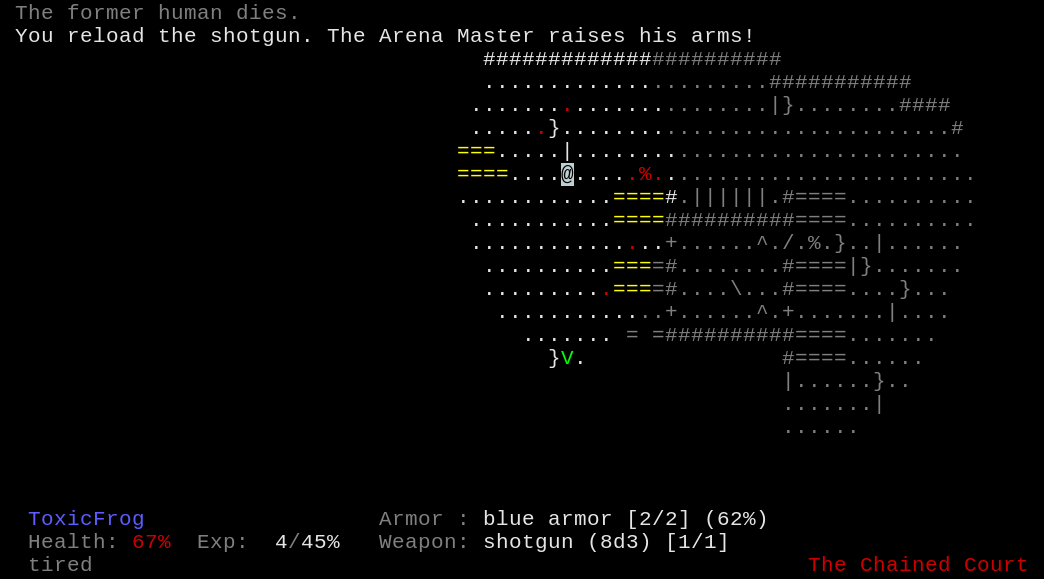
quote:
The meanest, ugliest and strongest Arch-Vile you have ever seen...
This guy.
Arch-Viles are endgame enemies with a pyrokinetic AoE attack and the ability to raise dead enemies. The Arena Master actually has weaker attacks than normal Arch-Viles, but uses its Raise Dead ability more often and has more HP. This is why I tried to kill all the cacos over lava: they're the most dangerous enemies on the level, and the Arena Master constantly resurrecting one next to you is a great way to die.
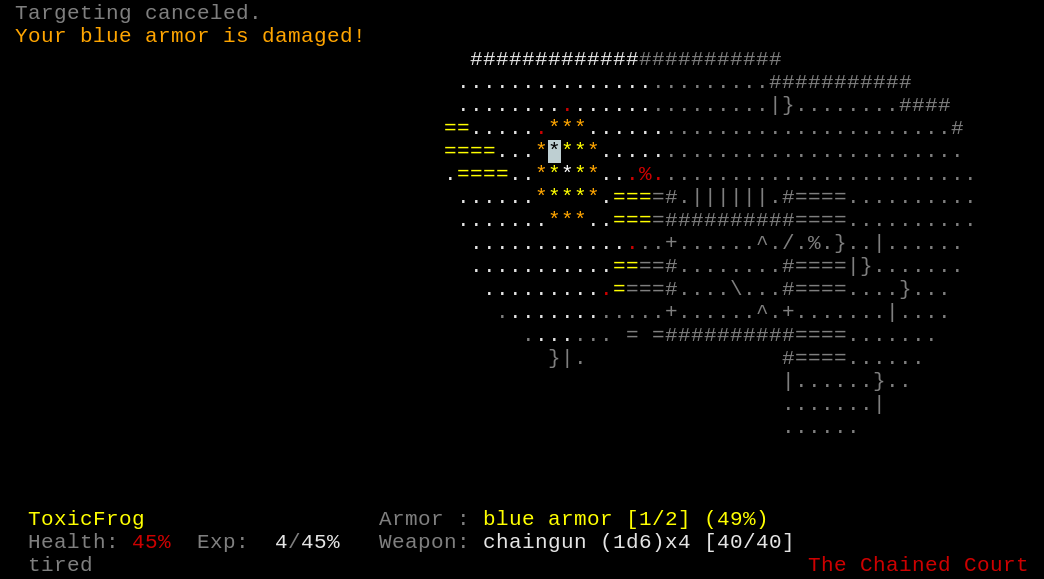
When it "raises its arms", it's preparing its fire attack; you have about one second to get clear. You can't dodge it, since it targets the space where you're standing and will detonate there no matter how you move, but if you're fast enough you can reliably clear the blast radius before it goes off. I'm not fast enough.
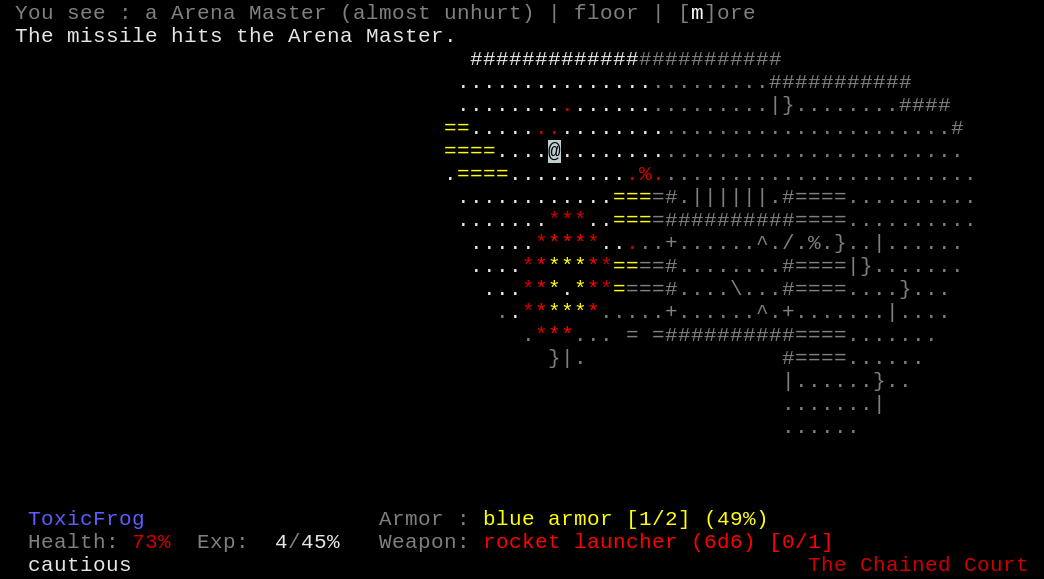
The rest of the fight consists of me smacking it in the face with rockets until it dies. It takes a lot of rockets, but the good news is that they knock the Master back, interrupting its targeting. When it dies, it leaves behind the Arena Master's Staff. This can be used from your inventory (as many times as you like, since it doesn't wear out) to hit all enemies in line of sight with fire damage, but doing so exhausts you the same as running. I grab it -- not for its fire attack, which I never remember to use, but for something we'll see much later.
The rest of the level is mop-up; I grab one of the berserk packs and go to town with my shotgun. With all enemies dead, it's time to inspect the loot.
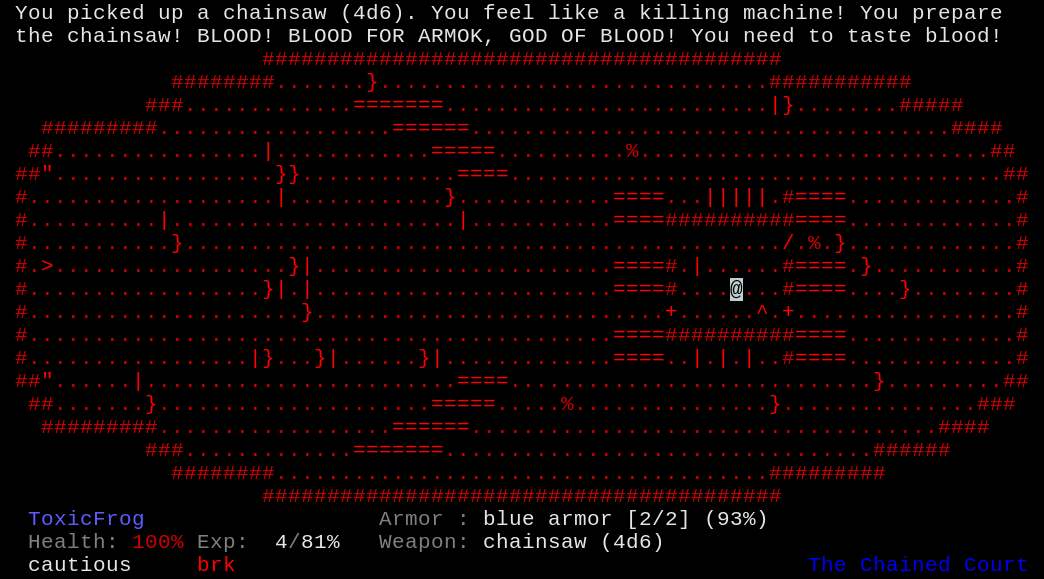
That Special Weapon in the starting room is the Chainsaw.  You get a Berserk effect the first time you pick it up, and it hits like a truck. In theory, the chaingun hits harder, since it's also 4d6 and the +2 damage from Son of a Bitch applies to every bullet; in practice, the fact that the chainsaw does all its damage in one big hit means armour is much less effective against it.
Despite that, it won't be seeing much use for most of the game. It has no accuracy bonus, which makes it hard to hit with it without melee traits, and the need to get right up in the face of what you're attacking makes it hard to avoid taking damage. But I will have a use for it later, so I stuff it in my backpack next to the Staff and head for the exit.
Along the way, I loot what's left of the level. In addition to energy cells -- ammo for more weapons I don't have yet -- I pick up a Technical pack and Power pack, putting them on the shotgun and chainsaw respectively. (The latter increases damage for weapons, and protection rating for armour.)

Level 6 features a new level layout, the large open space with individual "buildings" scattered around. The only points of interest are an envirosuit pack -- which can be used to give you temporary immunity to lava and acid pools (and high resistance to lava and acid attacks) -- and this guy, another new enemy.
quote:
Those were once really hardened marines, the tough fighting force of Earth. Now they're on the demonic side. They're really eager to make Swiss cheese out of you with their rapid fire chainguns...
More durable than the sergeants, their chainguns usually do less damage due to being more affected by armour, but are dangerous at any range. The good news is that each one killed drops a 140 10mm rounds, keeping you well supplied with ammo.
I also level up again and pick up a new trait.
Triggerhappy posted:
"Ooh, I like it! The sugar-sweet kiss of heavy ordinance!"
"Shoot first and shoot fast" has always been your motto. And nobody shoots faster than you. With each weapon you get an extra rapid shot per level of this trait.
Taking all traits into account, my (1d6)x4 chaingun is now (1d6+2)x5. More shots means more damage, but also more ammo consumption. Soon, though, I'll have something that makes ammo stop being a concern.
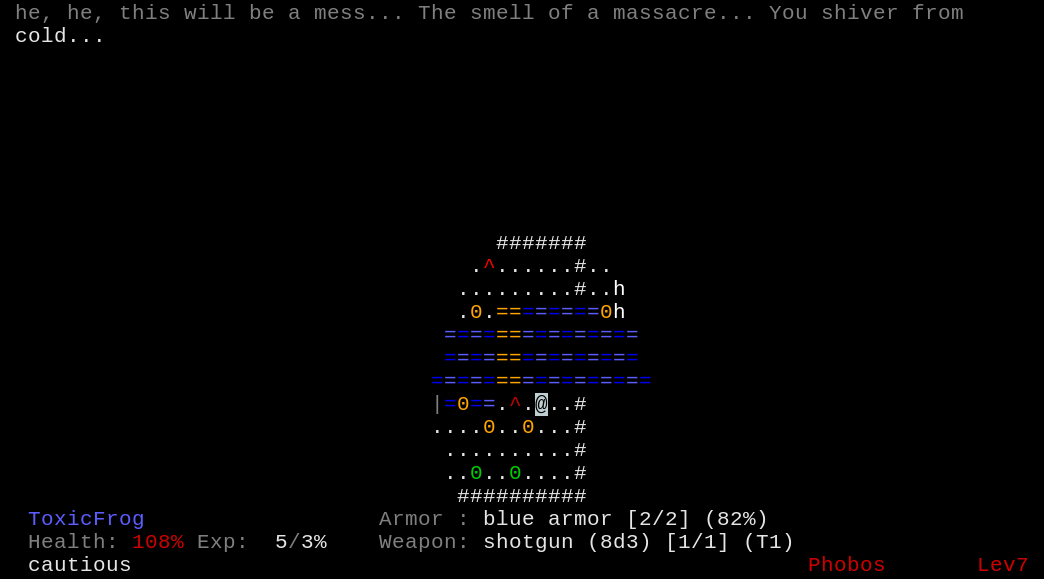
Level 7 produces two new level feelings. "Khe, he, he. This will be a mess..." means that the level has a hugely increased number of explosive barrels, some of which you can see here. (The green ones explode doing acid rather than fire damage, and leave acid pools behind; they deserve increased respect because they can make the level much harder to navigate.) "The smell of a massacre..." means that there's a lever somewhere that damages all enemies, but this doesn't preclude the presence of other levers that do nasty things to me when I pull them.
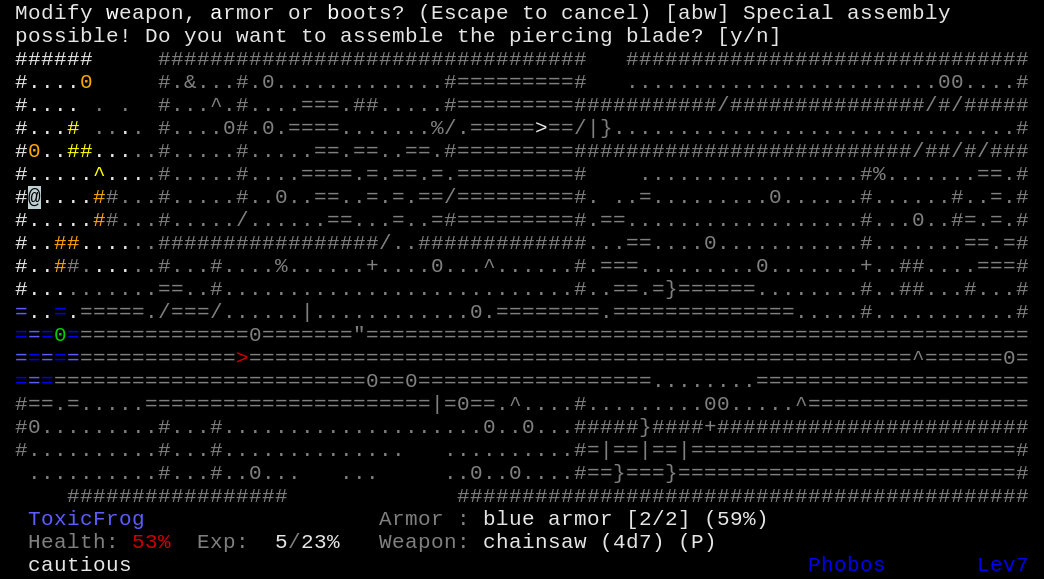
The level requires some fancy footwork to avoid getting caught next to exploding barrels, but the payoff comes when I find this Agility mod. I could use it on my boots or armour to move even faster, but instead I use it on the Chainsaw and get this message.
Normally (barring the use of a trait that raises this limit), you can only put one mod on each item. But certain two-mod combinations let you ignore this limit to form Assemblies, special constructions that gain additional bonuses instead of -- or, sometimes, as well as -- the bonuses from the mods themselves. In this case, the Piercing Blade can be made from any melee weapon + AP; you get the damage bonus of the Power mod, but instead of an accuracy bonus the weapon's damage type changes to armour piercing, meaning that it completely ignores all resistances and armour.
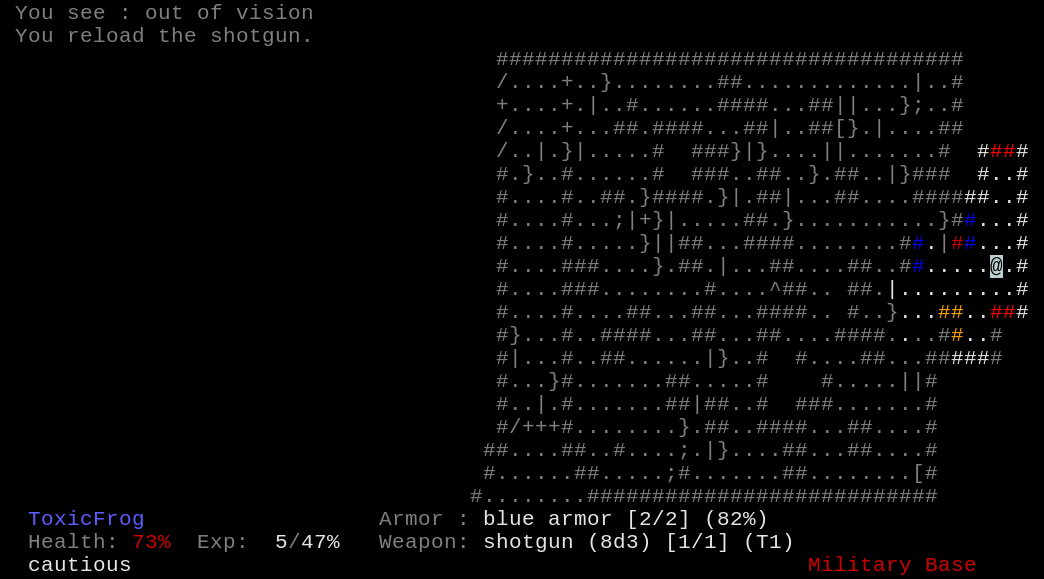
The red staircase takes me to Military Base, the last secret level of the first episode. Once again there are two versions of this level, Military Base and Phobos Lab, but unlike the Chained Court, which one you get is completely random. Of the two I like Military Base more; the enemies are harder, but Phobos Lab has some really nasty ambushes.
Military Base is also sneakier. Those red crates to the north and south? They can be destroyed. The one to the north hides a Large Health Globe. The one to the south hides a room containing Elite Formers and Elite Sergeants.
quote:
These are the elite among the former humans. As stupid as their regular counterparts, but more resilient and packing quite a punch. Too bad their weapons are set to self-destruct on death.
These are the elite among the former sergeants. And they carry firepower to boot! Too bad their weapons are set to self-destruct on death.
In addition to being more durable than the vanilla versions, they hit harder. The elite formers just do a few points more damage, but the sergeants are a real threat: they spawn with either a combat shotgun (longer range), a plasma shotgun (longer range and armour is much less effective against it), or a double shotgun (shorter range but attacks twice per shot).
It's worth opening this room, though, because it contains an envirosuit pack (I already have one, but if I didn't I'd be grabbing this one for sure) and a tracking map, making the rest of the level much easier. As a reward for clearing it I grab a Tactical Shotgun; at 7d3 it's a bit weaker than the normal shotgun, but it holds 5 shells instead of 1 and has less damage dropoff with range. Next to it I find a power mod (which goes on the new shotgun) and an agility mod, which goes on my already-modded boots to create the Tactical Boots. These give no protection at all, but +15% movement speed and regenerate durability, making them effectively industructable.

Going down the stairs takes me to the Phobos Anomaly, the final boss of episode 1. It's arguably the nastiest episode bossfight in the game, but it also starts you out with the most help: two large medkits, two large health globes, a pile of ammo, and a suit of red armour! The latter is the best "ordinary" armour in the game, granting fire resistance and 4 protection.
As you leave the entrance room and walk down the hall, the walls suddenly disappear to reveal lost souls and (thankfully offscreen) cacodemons. I lure them back to the entrance and kill them as they come through the door -- peeking out a few times to lure more in, since enemies that can't see you will eventually lose interest in tracking you down -- and then get properly geared up, grabbing the red armour and replacing two of my small medkits with the large ones. I also slap a Power mod from my inventory on the armour, upgrading it from 4 to 6 protection.
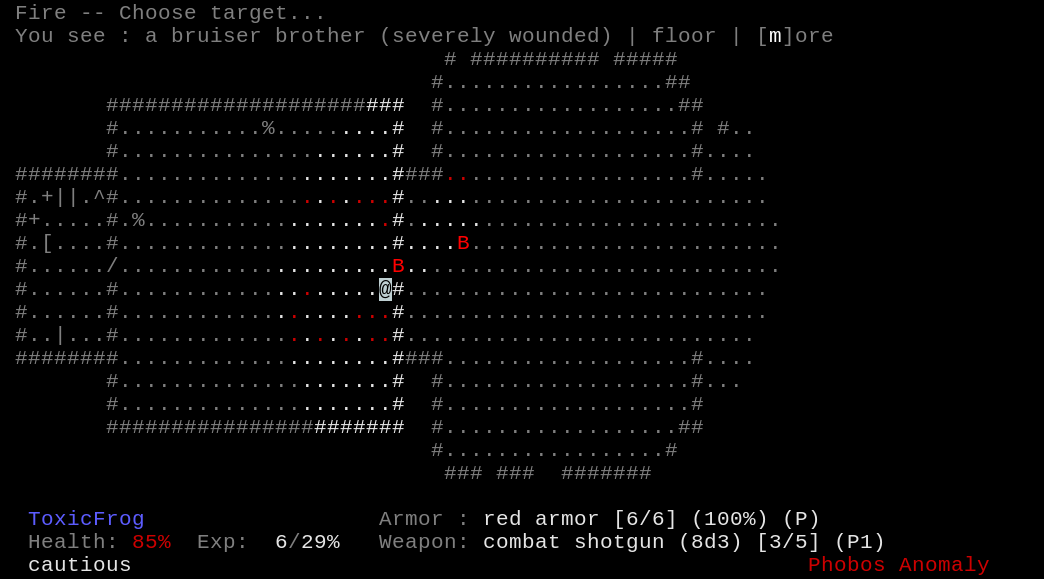
The true bossfight consists of these two guys, who burst out from behind another wall as you approach the east side of the level. They hit hard in melee and harder at range with exploding acid bolts, and are reasonably durable. And there's two of them!
quote:
Tough as a dump truck and nearly as big, these Goliaths are the worst thing on two legs since Tyrannosaurus rex.
The good news is that they have the hunts player precisely ability, which means they always know where you are and never lose interest in tracking you down. This is good because it makes it very easy to lure them into advantangeous terrain; non-dodgy characters like mine can easily lure them into a doorway where only one can attack at a time, while fast, dodgy types may prefer to engage them in one of the two wide-open rooms and try getting them into each other's lines of fire.

After killing them both with my shotgun, I grab the rockets lying against the east wall and head into a portal to end the episode.
quote:
Once you beat the big badasses and clean out the moon base you're supposed to win, aren't you? Aren't you? Where's your fat reward and ticket back home? What the hell is this? It's not supposed to end this way!
It stinks like rotten meat but it looks like the lost Deimos base. Looks like you're stuck on The Shores of Hell. And the only way out is through...
See you next time for Episode 2: the Shores of Hell!