Toggle Background Color
Last time we cleared out the starting dungeon, the Barrow-Downs, which means we're mostly done with the town of Bree for now. There's still a couple of quests to tackle here, but they'll have to wait until we have more hitpoints -- if we didn't have to worry about damage then we could probably clear them right now. Oh well.
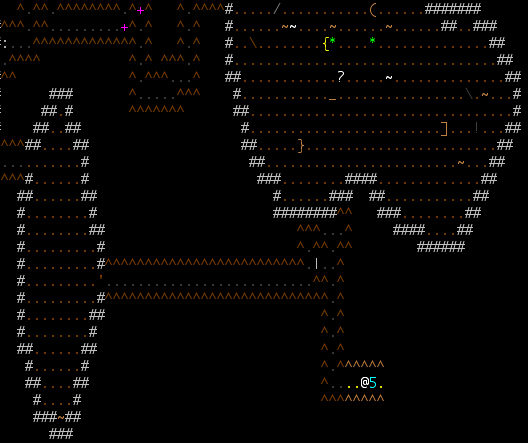
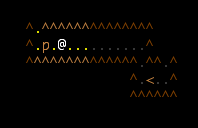
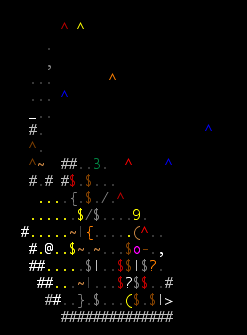
Instead, we head up to the overworld and a bit north, after first making certain to buy food and put our lantern out (overworld travel is slow!).
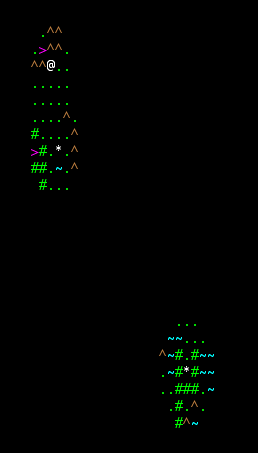
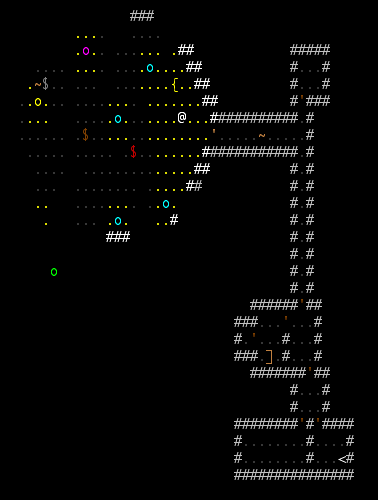
The purple > to our northwest is the Orc Cave, a nice intermediate dungeon. There's no quests (random or otherwise) in these side dungeons, but each one has a unique at the end and often some guaranteed artifacts somewhere along the way.
You can also see Lothlorien to the southeast, since we picked up a map in the Barrow-Downs with its location. There's a lot of mountains between us and Lothlorien though.
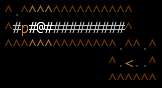
You enter a maze of down staircases. You got into a dark tunnel leading to an Orc Cave. You hear the sound of a market.
Oh, nice! The market in question is a dungeon town, and dungeon town shops can have all kinds of great stuff in them. Having one on the first level of the Orc Caves is a spot of luck. While most levels in the game are re-generated each time you visit them, dungeon towns are always the same

We clear out some novice priests and a baby green dragon, and one of the priests drops a random artifact!

Of course, we won't know what it does until we get a source of *Identify*, and it's probably not better than our elven Cord Armor, but still, that's suspiciously lucky. Or it would be, except we're a hobbit. Did I mention? Hobbits are lucky. Every race has an innate luck modifier, and hobbits have one of the best available. Being undead hurts your luck though, which is one reason I opted for Mitch to not be vampiric. Lucky characters tend to find better loot. I don't know what else it does, but the loot improvement is pretty noticeable.
Also, there's a dungeon Black Market here, the purple 7. Let's check their stock.
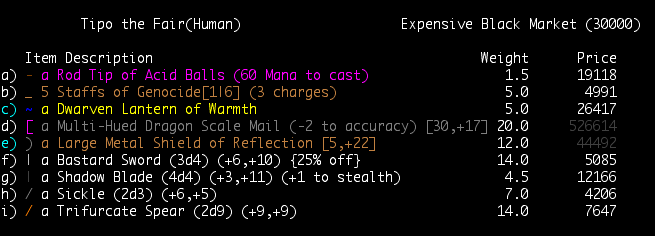
Rod Tips can be attached to rods to create a rechargable source of whatever spell the rod provides. Thus if we found a rod with at least 60 innate mana then we could attach this Rod Tip of Acid Balls to it and have an inventory item that, when zapped, created an acid ball. We have better ways to kill things, but there are other useful rod effects that we'll want to find later.
The Dwarven Lantern provides resistance to cold and never needs to be refuelled. Way too expensive for how easy oil is to come by. Multihued Dragon Scale Mail provides resistance to less than what our elven Cord Armor provides, and no stealth bonus. And we're way too bad at using magic devices to use that Staff of Genocide. So this is a bit of a bust.
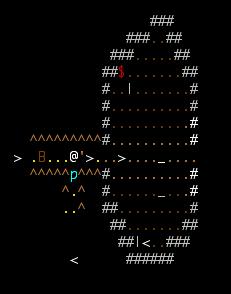
More exploring turns up nothing much; there really should be more shops around here somewhere. Instead we get this giant room of monsters:
And this is why we have attack spells that hit everything in LOS.
The Novice paladin writhes in agony. The Novice paladin flees in terror! The Cave orc cries out in pain. <3x> The Clear mushroom patch is destroyed. The Snaga Archer screams in agony. The Snaga Archer flees in terror! The Snaga screams in pain. <9x> The Snaga flees in terror! <9x> The Baby green dragon grunts with pain. The Giant salamander dies. The Hill orc cries out in pain. <11x> The Hill orc Captain grunts with pain. The Hill orc Archer grunts with pain. The Clear mushroom patch is destroyed. <3x>
Why kill things one at a time when you can kill everything all at once?
Finally, in a random corridor, we find another shop:
A potion store!
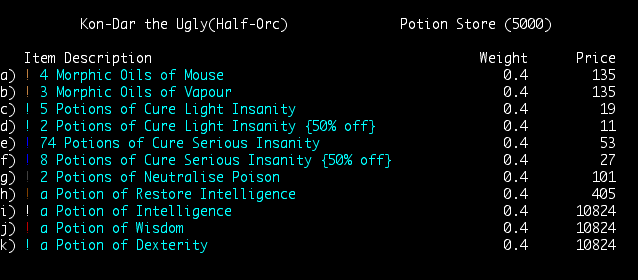
These guys sell potions that you can't get in town, most importantly being stat-gain potions, like those potions of Wisdom and Dexterity. We nab the Intelligence potion, and we should make an effort to come back here regularly for more. The Black Markets in town sometimes stock stat gain potions...but at three times the price of what this guy sells them for. More INT gains us more mana, and reduces the minimum failure rate on our spells.
Note the potions of restore sanity. Certain rare monsters can drain your sanity, making you hallucinate and mucking with certain messages (e.g. you can poke monsters in the eye instead of hitting them). The thing is, sanity doesn't recover on its own; you must drink potions to recover it. And if it hits zero, you turn into a vegetable and die. So we go ahead and buy the 8 potions of Cure Serious Insanity this guy's selling, just in case.
Finally, the Morphic Oils temporarily turn you into the listed creature, which applies various stat modifiers to you. They're mostly not that useful, for example being mouselike gives you good stealth but absolutely ruins your physical stats.
There aren't just shops in the dungeon, but also service buildings, like the Recaller here:
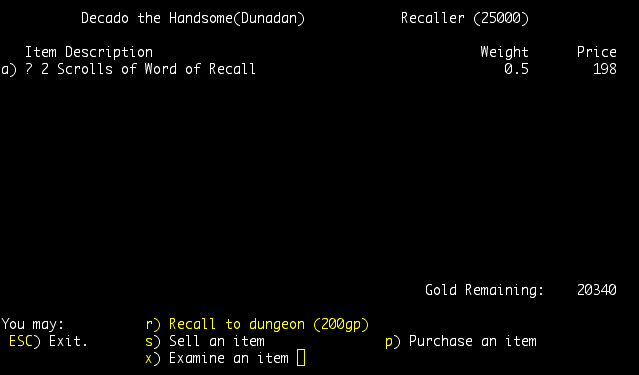
This is kind of a silly service to provide since you aren't going to be in the dungeon without a source of Word of Recall, but oh well.
Unfortunately, that appears to be it for stores. We recall back to the surface, walk back to town, drop some loot off, and nab a fireproof Book of Beginner's Cantrips from the Black Market and a scroll of *Identify* from the Alchemist, for our randart armor:

That's...not bad! Sources of Free Action (which prevents paralysis) are always good, though we don't need it quite yet.
Rather better, though, is this morningstar of Gondolin we found on the floor:
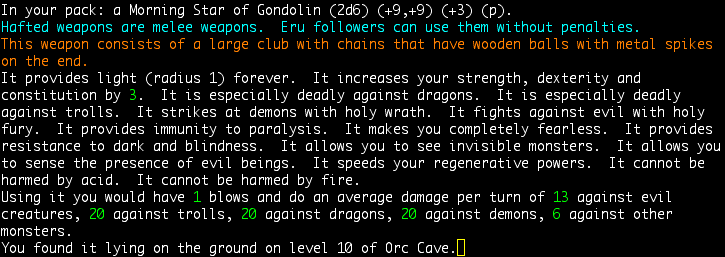
+3 to each physical stat, see invisible, regeneration, free action, protection from blindness and elemental darkness, and ESP for evil monsters. That's about as good of a stat stick as we can hope for at this stage in the game. Easily worth losing the +1 INT our Basilard of *Slay Demon* was giving us.
Compounding the good news, I finally get around to checking the new Thaumaturgy spells we have, and hey look, we can make walls now!

This is a rank-22 spell, so it has a hilariously wide radius:

The great thing about wall creation like this is that the vast majority of enemies are unable to move through walls. So we can entomb enemies using wall creation, and they'll be stuck -- they won't die, but they can't do anything until we unearth them. We can also use this spell to move towards monsters with nasty ranged attacks without them being able to pelt us with spells or breath weapons.
Moreover, as I intimated earlier, wall creation is the key to making Area spells even more broken. The trick there is that area spells fire outwards from your location, and explode either at their destination...or at the first obstruction they encounter en route. If we're surrounded by walls, then every ball from an Area spell explodes immediately, so monsters adjacent to us get hit by every one. This deals obscene damage. It's not the biggest DPS in the game (that goes to either alchemists with no lives who have farmed themselves homemade artifacts with +99 attacks, or else someone abusing wands and the Magic Device skill), but it's pretty great.
Unfortunately, this spell costs an arm and a leg and has a painful 35% failure rate, so it's not a great option right now. Those will cease to be issues later on.
We head back to the Orc Caves, nab another Potion of Intelligence from the alchemist there, and while searching for the stairs, I finally remember to start praying to Tulkas.  Tulkas loves it when you kill evil things, every orc is evil, we should be praying nonstop down here.
Down one level, we find Brodda, the Easterling:
He's just a somewhat tough melee monster. Let's ruin his day.

The wall turns into mud! <3x>

Now we cannot miss!

Brodda, the Easterling grunts with pain. <9x> Brodda, the Easterling hits you. Brodda, the Easterling misses you. Brodda, the Easterling hits you. Brodda, the Easterling misses you.
And like that, he's 70% dead. Considering that he has 240 HP, that's pretty insanely good.
One level later, we get to play the same trick against Wormtongue, Agent of Saruman.
Unfortunately, in his one turn of action, he attacked us, stole some money, and teleported away.  When he comes back, we settle for giving him a concussion with our Sound Beam and then slowly dissolving him away with Acid Bolts.
We explore a few more levels, head back to town, and buy an Elven Cloak from the Black Market. This improves our stealth, search, and luck by 3 each; nice. Elven Cloaks are also very light (only half a pound), which is helpful considering our still-noodly appendages. There isn't much armor we can afford to wear.
Oh, and as we can now see invisible, we put on Smeagol's invisibility ring. It can be an annoyance when playing as a melee character because the monsters' actions become unpredictable, but we don't care about that; we just don't want them hitting us in our precious, fragile face. It's not remotely a 100% preventative -- many enemies can see invisible and even those that can't will generally blunder towards us -- but it's still quite effective.
We return to diving through the Orc Caves as fast as possible. Realistically we belong somewhere south of dungeon level 20 right now (remember that the end of the Barrow-Downs was level 10). At level 17, we encounter a fearsome foe:
Boldor, King of the Yeeks!
Boldor, King of the Yeeks starts moving slower.
Boldor, King of the Yeeks starts moving slower.
Boldor, King of the Yeeks is dazed.
Boldor, King of the Yeeks starts moving slower. Boldor, King of the Yeeks flees in terror!
Boldor, King of the Yeeks screams in pain.
Boldor, King of the Yeeks says: 'AAAAAAAAAAAAAAAAAAAAAAAAHHHHHHH!' Boldor, King of the Yeeks dies.
Once a yeek, always a yeek. 
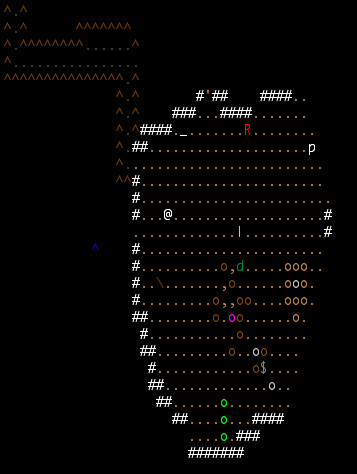
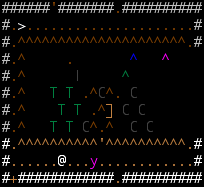
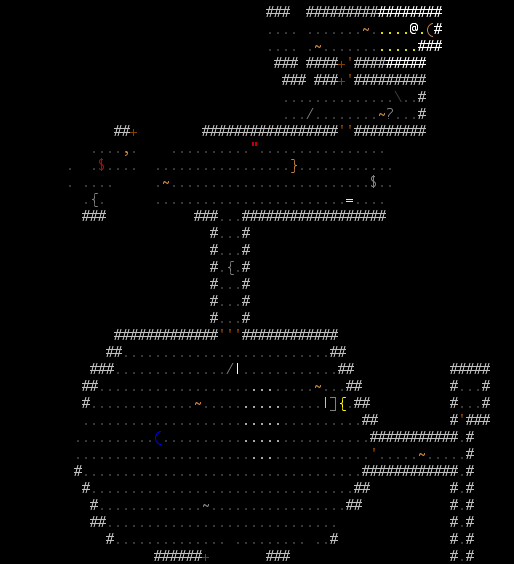
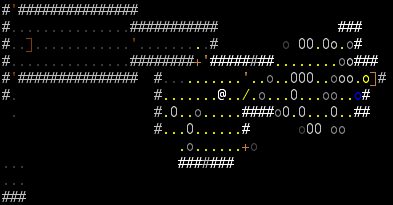
One level later, we find yet another dungeon town!

My word, that's quite the populated dungeon town. The cyan 'o's are a squad of Uruks (including a shaman, archer, and rogue in red, grey, and blue respectively); the 'O's are some Ogres with their Ogre Priest leader; the brown 'o's are Hill Orcs with their own shamans, archer, and a Hill Orc Captain in purple.
Well, they'll all die to View - Acid, but first we back up a bit, since those uruks will take some time to wear down.
Four turns later, all that's left is the Hill Orc Captain:
Now that we've driven away their clientele, let's check out those shops!
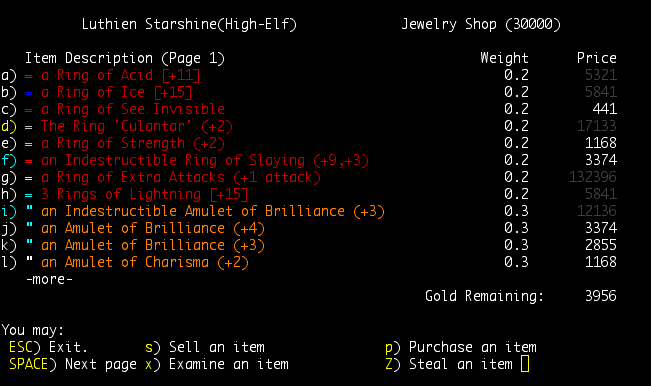
Oh my yes. Jewelery shops aren't quite the best dungeon shops out there: you can get Speed Ring Shops too, which sell nothing but Rings of Speed. But a Jewelery Shop is the next best bet. Sadly, we can't quite abuse this guy to the fullest -- we aren't dextrous enough.
See, the game allows you to steal from shops (see that Z command at the bottom?). Your chance of success depends on your Thievery skill, your DEX score, and the weight of the item in question. There's a number of problems here:
1) It's possible to achieve a 100% success rate at stealing lightweight items like rings and amulets, without any points in Thievery, just by getting a high DEX score (which anyone can do).
2) Whenever a shopkeeper runs out of inventory, they generate ex nihilo a new supply. Normally this is called "buying out" the shopkeeper. Shopkeepers aren't very bright.
3) As you can see here, shopkeepers can generate random artifacts (this one isn't anything special -- +2 STR/DEX and resist poison).
4) Speed rings in particular have very high pluses (e.g. +8 to speed is a rather bad speed ring compared to what you expect to find). These pluses translate to any other boosts applied to the item as part of the randart generation process.
Thus, if you find a speed ring shop, you can just sit there, stealing the shopkeeper's entire inventory over and over again (and then tossing it outside or just grinding it under your heel) until he comes out with a randart ring with +10 to speed, +10 extra attacks, +10 to CON, etc.
We won't be doing that, or at least not yet anyway. I want that Amulet of Brilliance (+4), which boosts both INT and WIS, but we should check the other shops first.
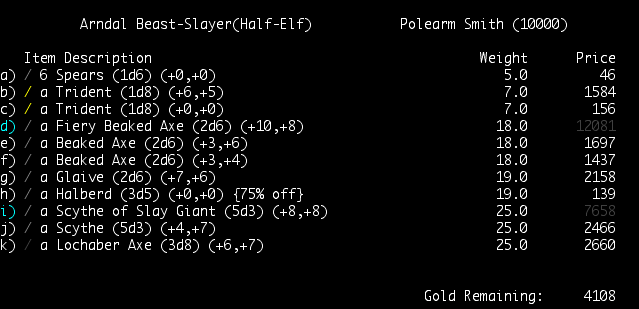
Boring, unless maybe you were playing a Polearm-Master, but why would you do that? Polearms are mostly not that great.
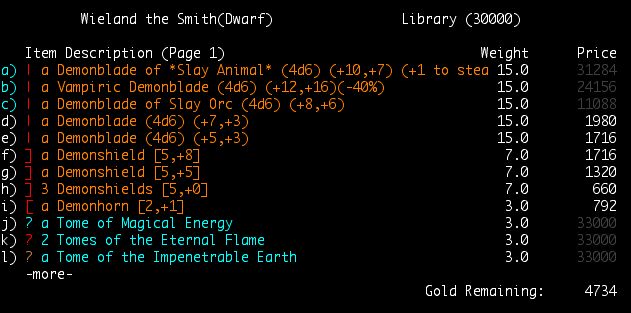
This however is much more interesting, as it can stock the spellbooks that have all of the spells for a given realm (Eternal Flame has all of the Fire realm spells, for example). All the demonic equipment is for the Demonologist class, who has to actually wield their "books" in order to cast spells from them...and the spells aren't all that great. Kind of nicely thematic, but pretty bad otherwise.
There's a Fireproof Book of Teleportation on the second page that has Phase Door, Teleport Self, and Teleport Away; we want that too.

We aren't remotely skilled at archery, so pass. That's one nice Light Crossbow though, multiplying the damage of every bolt it fires by 6. I believe ToME 2 archery has multiplicative brands, so if you combined that with, say, some Bolts of Slay Evil (which deal double damage to evil targets), you'd be doing 12x damage with each shot. That's stupidly powerful.
I mean, not as stupidly powerful as us, but it's still up there.

This is the kind of shop that could sell Boots of Speed. Boots of Jumping are kind of interesting; they can be activated periodically for a Phase Door effect, and they also give you an activatable ability to Phase Door as well (though it costs some SP). It's a cute effect but not really the weight of the armor for us.
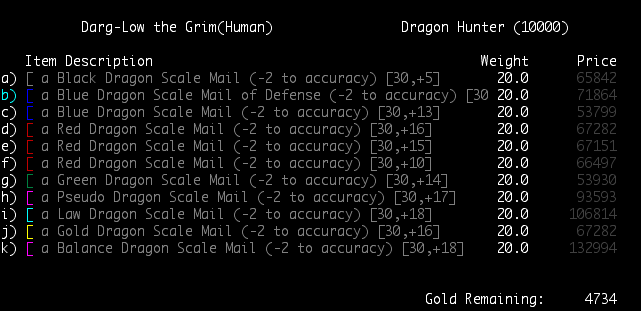
Ha, oh geeze. Dragon Scale Mail is nominally top-tier armor, except it usually starts showing up way after you've found artifacts that provide more important abilities. This is a little early...not that we can afford any of this stuff. Balance Dragon Scale Mail in particular is really nice:
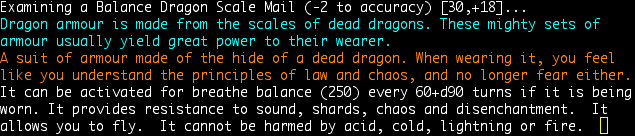
Sound, chaos, and disenchantment are all no fun to get hit by, and shards isn't all that great either. Too bad it costs 28 times as much money as we have!
Finally,
there's a general store. 
We buy the Amulet of Brilliance, which gives us 30 extra SP (to 231) and lowers our minimum failure rate for casting spells to 2%. That leaves us 23 gold short on the Fireproof Book of Teleportation, so we have to go kill some things to get the cash. 
It turns out the level as a whole is tiny, and there's two more shops: an Expensive Black Market and a Swordsmith, neither of which I bother screencapping.
We'll definitely have to remember this place for later. But for now, it's time to move on. Two levels later (level 20), a Novice Mage drops "some Multi-colored Clay", which when identified reveals itself to be Boccob's Magical Mish-Mash:

This is our first "junk artifact", or junkart. They can be activated for some effect; each effect is chosen at random for each artifact. The most useful ones activate for big healing effects or for providing food, but there's a lot of awful effects in there too (including, I believe, activating to just kill you outright), so we'll be getting this *Identified* before we try using it.
Finally, one level later:
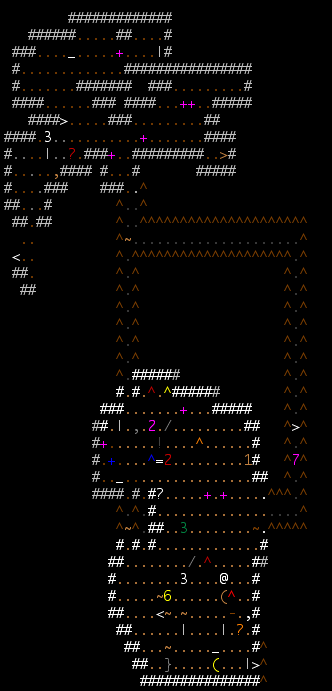
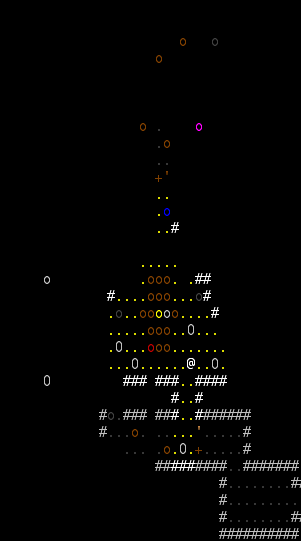
This level looks filled with evilness.

This is Deathwatch, a unique dungeon level. Everything in the level is pre-set except for monster drops; there's basically just a ton of orcs, including some orc uniques. No threat to us, especially since none of them can see invisible.
Our first unique is Lagduf the Snaga, the weakest orc unique in the game, shown here gradually being dissolved by View - Acid (he's the yellow one):
(I take this moment to rename our View - Acid spell to "Acid Rain", because I can)
Lagduf, the Snaga says: 'Wait! Spare me and I'll make you rich! Money is not a problem!' Lagduf, the Snaga dies.
Up to the northeast, in a little cubbyhole that you'd only know to check if you were manually inspecting all of the walls (most of which are made of permanent rock, but there's a single tile of granite)...
is one of the guaranteed artifacts of this level, Thalkettoth. It's nothing amazing: +3 DEX/Speed, resistance to acid and shards. But there's good odds that you'd have nothing better by this point in the game, and +3 speed is always handy. We'll keep our elven Cord Armor though, for the resistances; our HP is still awful and the elements it protects against are a lot more common than shards.
Over to the west is the second orc unique of the level, Grishnakh the Hill Orc.
All's I know is by the time we're done with him he's a puddle. That, and he drops this:
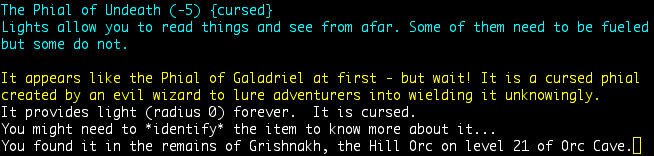
This is DarkGod trolling the player; in previous versions there was only one Phial, the Phial of Galadriel, and it was thus always safe to wield on-sight (it's a light source). The Phial of Undeath is an awful, awful item, whose only redeeming aspect is that wielding it means you don't need air any more. So if you really have to explore an airless void (like, say, in the postgame bonus dungeon) and have no other options, then this is here for you. Hooray.
In some barracks in the northwestern end of the dungeon is guaranteed artifact #2:
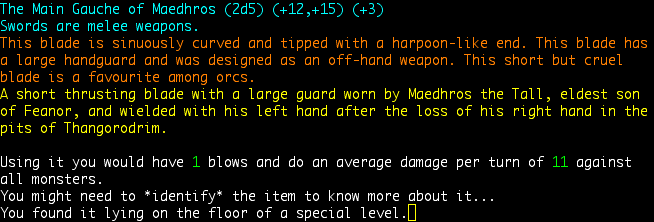
This is a very solid weapon: +3 INT/DEX/Speed, a few useful slays, free action, resistance to darkness, see invisible, and sustain DEX (against being drained e.g. by traps). A decent competitor to our Morningstar of Gondolin, really. Tough choice between the two.
Our last unique is guarding the last guaranteed artifact of the level. Golfimbul, the Hill Orc Chief, you're in our way.
We really need to invest in a pair of boots; walking barefoot through half-digested orc bits is icky.
About that artifact:
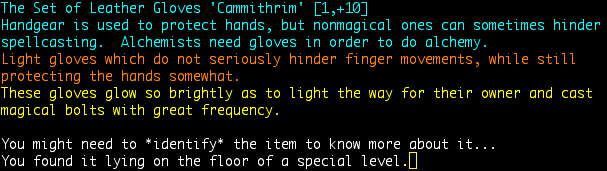
Cammithrim is an easy choice, since we have no gloves and it doesn't interfere with spellcasting. But it doesn't do much: free action, sustain CON, resistance to light and +1 light radius, and it can be activated to fire a weak magic missile. Oh well, it wasn't hard to get.
That's it for Deathwatch. It's really the #1 reason to visit the Orc Caves, as it has three good artifacts in it and there's nothing much protecting it. Even if you're a melee class, if you can survive the levels leading to Deathwatch, there's no good reason to fail Deathwatch itself. The only gotchas are knowing where Thalkettoth and Maedhros are, since they're easy to miss (Cammithrim is just sitting out in the open though). Now that we've been here, we're basically done with the Orc Caves. We could return, dive to the bottom, and kill Azog, King of the Uruk-Hai, but I'm not about to try to finish every dungeon; there's far too many of them.
Next time, we get back on track. To Lothlorien, and Mirkwood Forest!