Toggle Background Color
Encoding with MeGUI
MeGUI is a very useful tool for encoding your raw videos into various different formats for distribution. This guide will focus on encoding your video into H.264 and your audio into AAC, which is at the time of writing the most supported and popular combination.
First off, you need to download and install Avisynth, as well as grab a copy of MeGUI itself. Once you got both, open up MeGUI. MeGUI may want to update its files, if yes just let it update. After that, you'll be greeted with this:
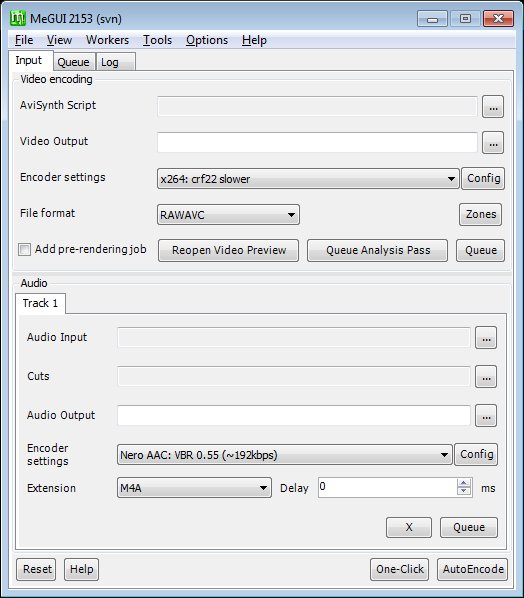
The first thing we want to do is open up the Avisynth script of the video to encode at the top, where it says "AviSynth Script". If you don't have a script yet I recommend checking out Vicas' Avisynth Tutorial. Opening a script fills out a few of the other boxes as well, such as the Video and Audio in- and output.
Now we want to configure the encoders. For video, we're gonna use x264. Select "x264: *scratchpad*" and click the Config button next to it.

You'll get a bunch of options here, but the most important ones are the Encoding Mode and the Preset, to the left.
For Encoding Mode, there's two options you'll want to look at in particular: Const. Quality and Automated 2pass. If you don't have the Show Advanced Settings checkbox selected, they're referred to as Targeting quality and Targeting filesize, respectively.
Const. Quality, also known as CRF (Constant Rate Factor), attempts to give you roughly the same quality for any video you may encode, while leaving the bitrate/filesize needed to achieve this in the air. The "Quality" option is simply a number: the higher the number, the worse the quality. For a more precise explanation just hover over the number and wait a second. Generally, you want it to be in the 20-26 range.
In this mode, the preset changes the filesize of the resulting file. The slower the preset, the smaller the resulting file, with no real quality difference, at the cost of longer encoding time. Slower is generally a good preset, though you may want to try out Slow and Very Slow to see the resulting differences in encoding time and filesize. You should never use the Placebo preset, as the tradeoff is not worth it anymore at that point, and Medium and above are only really good for quickly encoding temporary files.
As a starting point you can try CRF 22.0 with the Slower preset. If that results in a too big file, increase the CRF until the video quality becomes noticably worse.
The second encoding mode, Automated 2pass, allows you to target a specific video bitrate, or filesize-per-video-length.

That means you will always know how big your video ends up, and videos of the same length will always produce similar filesizes, but you won't know how your video will actually end up looking. It's possible you'll end up with a video that looks like garbage if you set the bitrate too low, and it's also possible you'll end up with a video that looks fantastic but is far larger than it'd have been neccessary for it to look good. Encoding in this mode is generally slower than encoding with CRF, because x264 has to do a first "analyzing" pass of your video before actually encoding it.
In this mode, the preset changes the quality of your resulting file. The slower the preset, the better the video will look, at roughly the same filesize, with the cost of longer encoding time.
Recommending a general bitrate is hard, since it'll vary a lot based on your source video, but the 1000-2000 kbps range might be a decent starting point. Possibly lower when encoding footage of early consoles such as NES or GB.
At the very bottom you see another "Preset" box, where I have selected "crf22 slower". These are MeGUI's configuration presets. They allow you to save and load your settings and quickly change between them in the main MeGUI window. To save a new preset, simply change the options to your liking, then press the "New" button near the bottom and enter a name that allows you to quickly identify those settings. For example:

Here I have adjusted the settings to CRF 21, using the Slower preset, and want to store those settings for quick selection later. So I just press New:
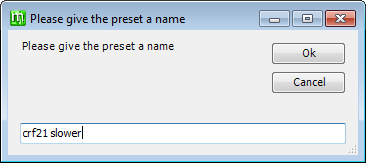
And enter a name in the window that opens.
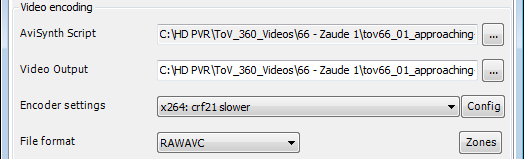
And now I can quickly switch to those settings from the main MeGUI window without even opening the x264 config window!
I personally prefer encoding with CRF for most purposes, as it's faster and I don't have to think a lot about what bitrate would be appropriate for the video I'm encoding. But targeting bitrate also has its advantages. Pick whatever you feel is more appropriate for your current video.
Once you've set up your video encoding settings, you can go to the audio encoding settings. There's a couple different options here, but encoding into AAC via Nero AAC is generally considered the best, so let's look at that. Pick "Nero AAC: *scratchpad*" and click the Config button next to it. If you don't have that, you need to download the Nero AAC Encoder; you can enter a fake email when it asks you to enter one. Copy the three executables from the win32 subfolder in that archive into MeGUI/tools/neroaacenc, create that folder if it doesn't exist, and restart MeGUI.
Nero AAC gives you less options for encoding than x264:
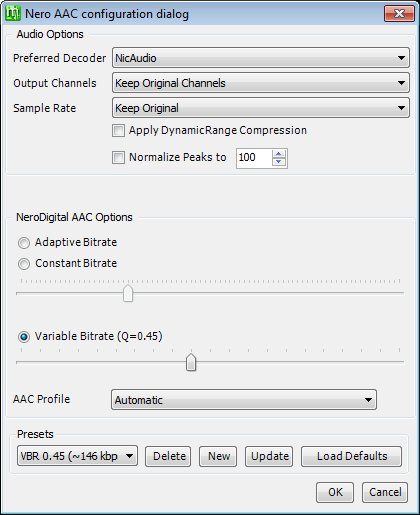
The Variable Bitrate option here seems to work rather well. I'm not sure if this is outdated, but I've found this Quality <-> average Bitrate chart. Values around 0.5 seem fine. The rest of the options you can probably leave alone or change to match my screenshot. NicAudio is a good decoder, Keep Original Channels/Sample Rate is always a good idea, and Compression and Normalization are probably things you should do yourself in Audacity rather than leaving to MeGUI.
Alright, now that your encoders are set up, there's two options to encode. Either you click the single "Queue" buttons below the video and audio sections, or you click the Autoencode button at the very bottom.

I personally prefer the single buttons since it easily allows me to reuse a video or audio encode if I end up reencoding either one or want to set up a file with multiple audio tracks, but Autoencode is fine too.
If you choose the AutoEncode option, make sure you pick the "No Target Size (use profile settings)" option!
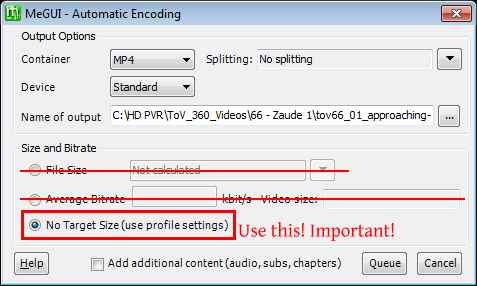
The other two options will ignore your previously set encoder settings and use something else, which is definitely not what we want.
Now, switch over to the Queue tab:
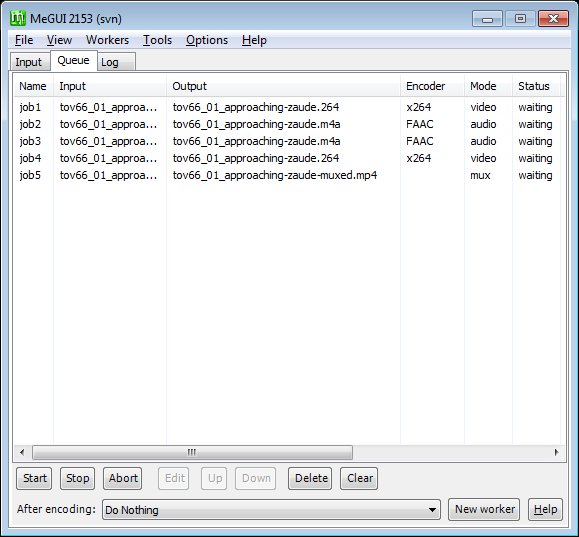
You'll see a list of all jobs you've queued up in the other tab. The first two jobs on the screenshot here are from the single Queue buttons, the other three from AutoEncode. If it looks right (ie. there's a x264 job and a Nero AAC job and maybe a mux job if you used AutoEncode), just hit the Start button at the bottom. The program will now encode!
Once it's done encoding, if you picked the AutoEncode button, you should have your resulting video. Great!
If you manually queued, you still have to mux the resulting files into a video container. Muxers can be found in the Tools menu of MeGUI:
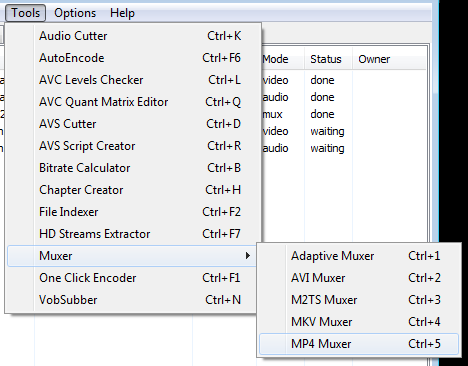
In most cases, you probably want the MP4 muxer:
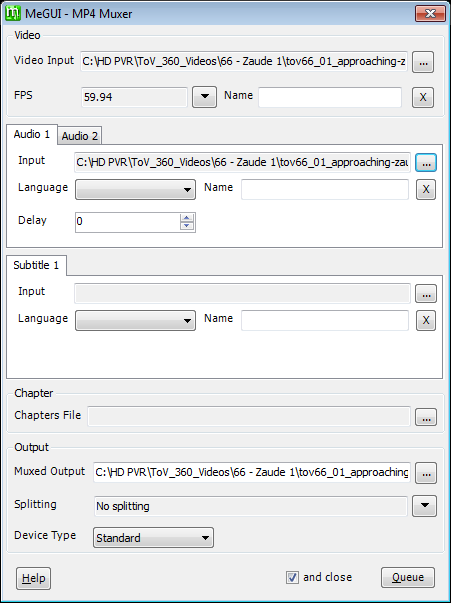
It's pretty self-explanatory. Just fill the Video Input and Audio Input with your video and audio files and hit the Queue button at the bottom. Then press the Start button in the main window's Queue section again. And that's it!
Either way, you now have a nicely encoded video you can upload to your favorite video host!