Toggle Background Color
Hi everybody, and welcome back to the 90s!
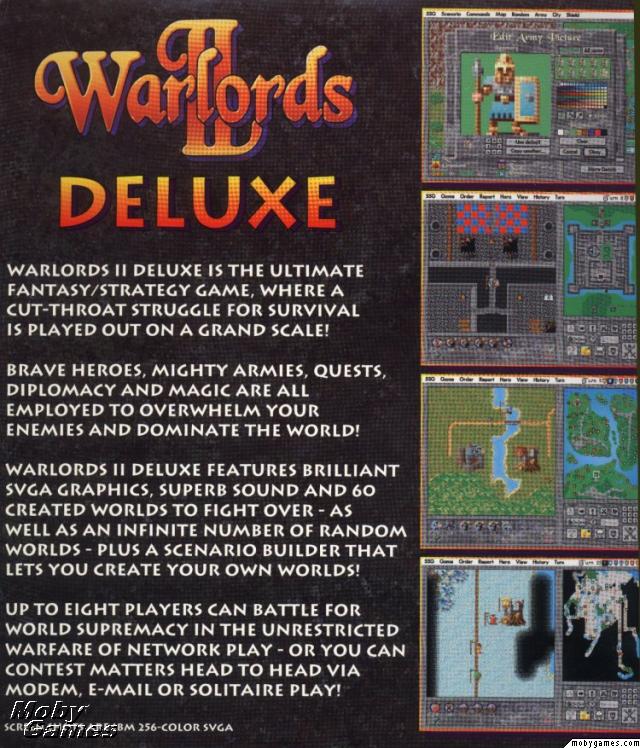
Warlords II is a turn-based strategy game that was released by SSG Interactive in 1993. It was fairly successful for a game of its type in the early 90s, so they made a new version, called Warlords II Deluxe, which they released in 1995. It was essentially Warlords II with more maps, better graphics, a couple new features, and most importantly a scenario editor, which let the community make a ton of scenarios, many of which you can still find online today.
As for the game, well, I'll let it speak for itself:
I know that answered all your questions, so let's just move on...
No but really, Warlords II Deluxe is a turn-based strategy game that revolves around control of various cities spread around a grid-based map. You use cities to raise gold and build units, and spend that gold to upkeep your armies and hire heroes. Heroes are special units who provide bonuses to other units in the same army as them, and can explore ruins, which are dotted around the map. Inside you could find gold, items, or powerful units that want to join you. Ruins and heroes can make or break a game, but the game is primarily about controlling cities. The more you get, the more powerful you are, and battles tend to happen in cities rather than open terrain, giving a bonus to the defender. You'll pick it up quickly as we go along, it's not a complex game.
What it is is a really fun game. It's from the early 90s and is built on the framework of a one-man DOS game from 1989, the original Warlords, but it's good fun and I enjoy it. I played this game a lot as a kid, in many different iterations: first the original Warlords demo on a really old Mac, which would crash after 6 turns. Then we had Warlords II Deluxe somehow, I can't remember how, but I was fairly young and played it a lot without really understanding how it worked. For me, this game is nostalgia personified, to the point that maybe five or six years ago I actually bought a CD copy from SSG, they mailed it to me, and I own a physical copy of Warlords II Deluxe which I bought about ten years after everyone else stopped caring about it. I think it's probably Abandonware now, but as I mentioned I have actually paid money for this game so I won't be helping you find it somewhere for free.
These days I'm a lot better at the game than I was when I was a child, and I play it fairly regularly as a fun distraction from other things. I feel like it's an overlooked game and I'd like to show it off for you lovely people. I will first be playing through a very short random scenario to show off the game mechanics, then there will be voting on which scenario to play after that. I have a lot of user-made scenarios that I have downloaded and collected over the years, and I like this game enough that I've even used the scenario creator to make one or two myself. Some user-made scenarios are very good and well-made, some actually use the Warlords system to try and make more complex strategic involvement (Warlords is a very simple game, as you will see), some of them are joke maps, and some of them are just terrible. We'll hopefully see a variety of scenarios, as well as some random maps, depending on how people vote.
This game I think is a perfect example of how a simple turn-based game can be really good fun. Eventually the rise of Blizzard Entertainment meant that Warlords 3 and its descendents became RTSes, which I think is a shame given their rich heritage. Some random poll I found on the internet once said that a majority of Warlords series fans said Warlords II Deluxe was the best Warlords game, and I wholeheartedly agree.
If you want more information or if I've piqued your curiosity enough that you too want to spend real world money for this game, I will refer you to this wonderful SSG website, where they provide you with information and ordering procedures to get this game from 1995, which they claim is worth over $360 when you add it all together, for only $27.00. That's only 1.35 Mass Effects! A bargain!
Anyway, without further ado, let's play Warlords II! (Deluxe)
[update links go here]
---Post Break---
Update 1
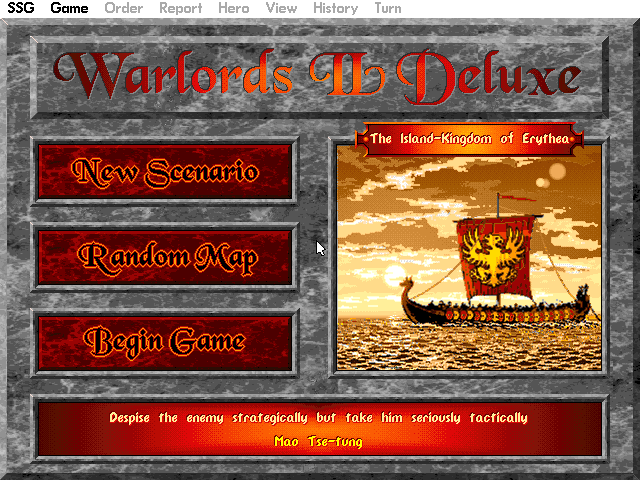
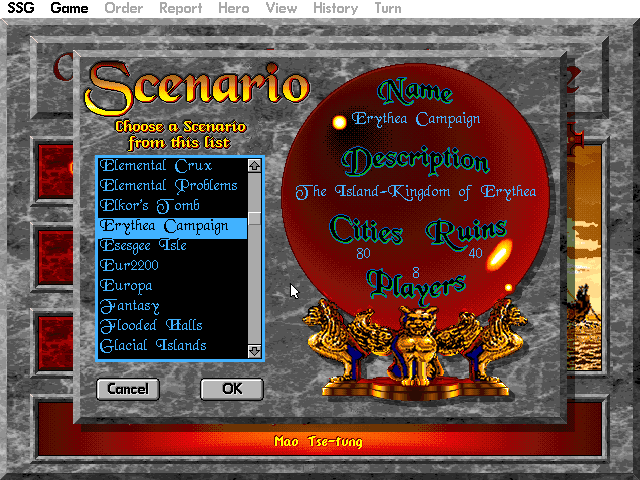
When you first load up the game, you skip the overly long and slow-paced intro and get this menu screen. You could load up a scenario from the big list, like so:
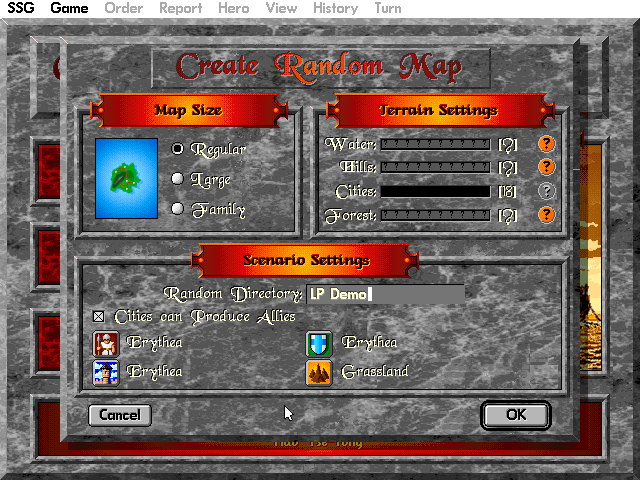
But we won't worry about that just yet. Instead we're going to create a random map. This will be a very quick game, so we want it to be small ('Regular' size), with as few cities as possible (18). When it comes to terrain (forest, hills and water) you can set them to a certain percentage of the map or just leave it random. I tend to leave it random aside from the number of cities.
Down at the bottom we can give our random map a name, such as the work of art that is 'LP Demo.' You can also choose your army set, city set, shield set and terrain set. City and shield are both just cosmetic things that decide which graphics pack the game will load. Terrain set is the same, but most of the terrain sets are absolutely hideous so we're sticking with Grassland.
Army Set is actually a big deal. It not only determines what graphics pack you will use for units, but also the unit set. Different units have different strengths and abilities, and different scenarios use different sets with radically different stats and graphics. For this one we're just going to use the default Warlords II army set, which is called Erythea after the land in which the base game is supposedly set.
Finally, there's a tickbox that says 'Cities can produce Allies.' Having this checked means when cities are randomly assigned units to produce they can include the higher-tier units in the army set, which are usually very strong, take multiple turns to build, and have special abilities. If you untick this box you can only get allies through exploring ruins or completing quests with your heroes, which makes them rarer and more potent, but also makes the game a little more boring. So we'll stick with producing allies for this game at least.
Then you get to watch an oldschool loading screen. Thrilling action!

Curiously enough, the game gives you a chance to give up and play a regular scenario now, or generate a new random world (without seeing the one you've created) by just dumping you back at the main menu. At this point your random map has been created as a full-fledged scenario in the list, so if you wanted to you could go back and play it again and again and again. We won't.
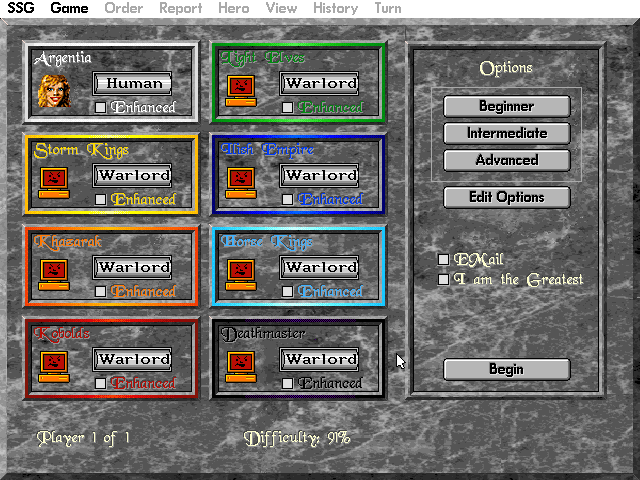
Actually loading it up, we get taken to the faction setup screen. Here you choose who you want to play as out of the eight factions. There is no functional difference between the eight factions. They always have the same colours (white, green, yellow, orange, red, light blue, dark blue, black) with randomly assigned names from a fairly small list. You choose what difficulty you want the AI opponents to be at (Warlord is the hardest), you can give them a +2 bonus in combat ('Enhanced'), and you can turn on 'I am the Greatest' mode where all the AI players hate you, declare war on you around turn 5, and won't fight each other but will instead all gang up on you.

We want to edit the settings first though. You can turn on or off a whole bunch of gameplay options. We'll run through them quickly:
Diplomacy: is very simple. You can be at peace, hostile, or war with each other player. If you turn it off, every player is always at war with everyone else.
Quests: we'll see more about this in the game itself, but suffice to say that you can play without them if you want to for some reason.
Hidden map: Gives fog of war to the game. This actually makes the game easier, because the AI is really bad at dealing with fog of war, but it can be a fun change of pace.
View Enemy Stack: lets you right click on enemy armies to see their composition.
View Production: lets you open up cities you don't control to see what they produce
Intense Combat: a fairly opaque mechanism that biases combat towards large stacks, making it so your high-strength individual units are a little less overpowered.
Quick Start: gives everyone more than one city at the start so you can get to fighting straight away.
Military Advisor: lets you right-click on enemies before battle to get some hilarious advice about how the fight will go. There's nothing quite like being told a battle will be 'as simple as butchering sleeping cattle' and then getting completely wiped out.
Random Turns: randomizes the turn order.
Neutral cities can be normal, strong or active. Under normal each one is guarded by one unit of the weakest type in the army set, making them a breeze to capture in the expansion phase. Strong gives them a stronger unit from the ones the city can produce, meaning some of them will still have really weak units and some will have stronger ones, depending on how valuable the city is. Active means they start with one strong unit and will gain more as the game goes on, making it easier to take neutral cities at the beginning of the game than the end.
Finally, razing cities is a mechanism where you completely destroy a city (surprise). You can make it so it's not even an option, or so you can only do it when you capture a city after a fight, or so you can do it anytime. Anytime is the easiest because human players are much better at strategically razing cities than the AI is. Here you can see our settings for this demo game.
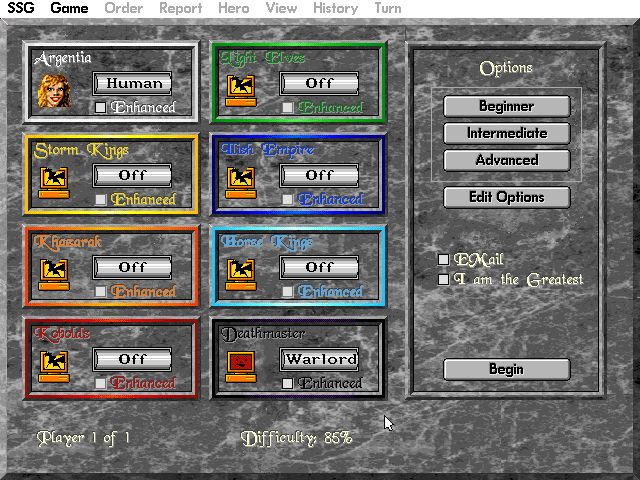
It's going to be a one-on-one deathmatch between us, white, and one AI warlord (the hardest difficulty setting), black. Considering we're named Argentia and they are Deathmaster, I guess that makes us the good guys.
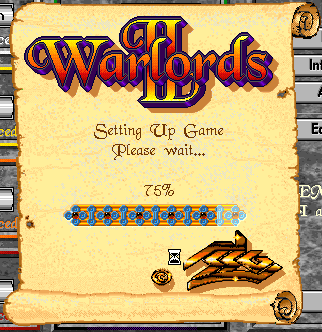
Hit begin and get another cool 90s loading screen. 
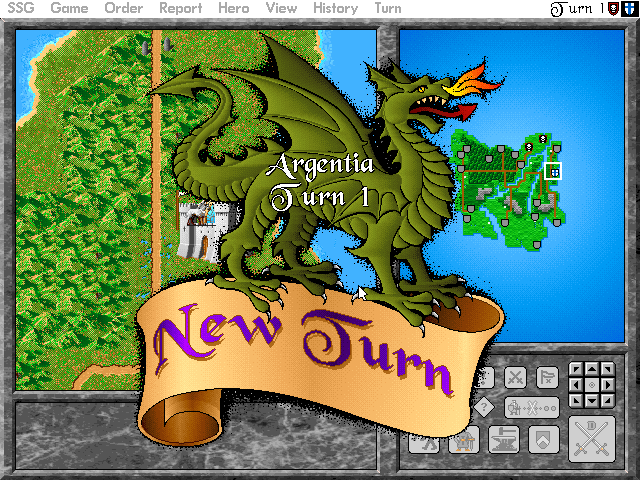
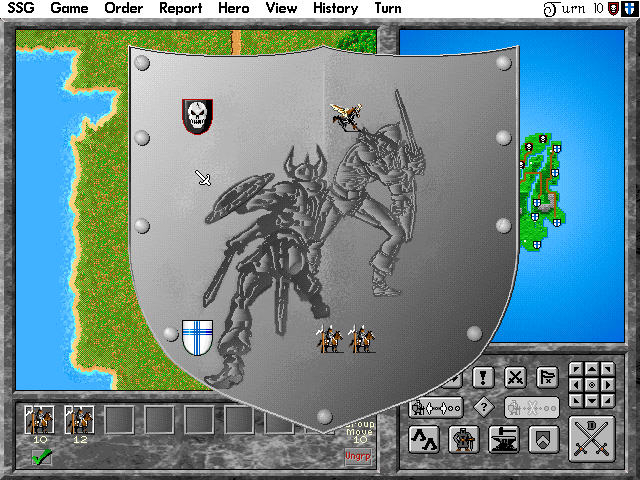
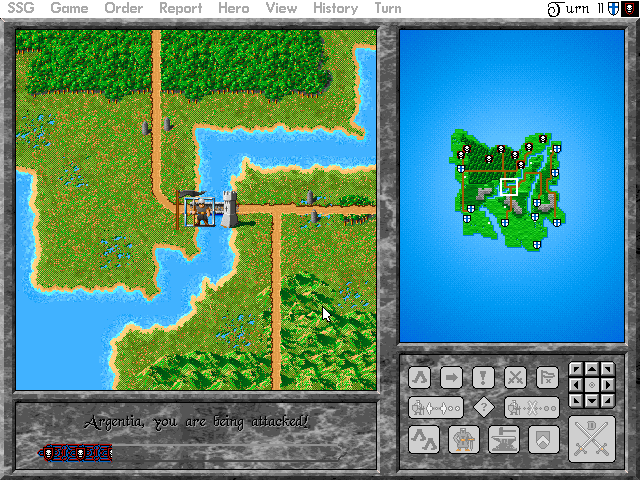
We get this bitchin' dragon telling us whenever it's our turn. First things first, you can look in the top-right hand corner and see the turn order: the AI went first, and used its turn to take a city. We will hope to do the same, so as not to get left behind.
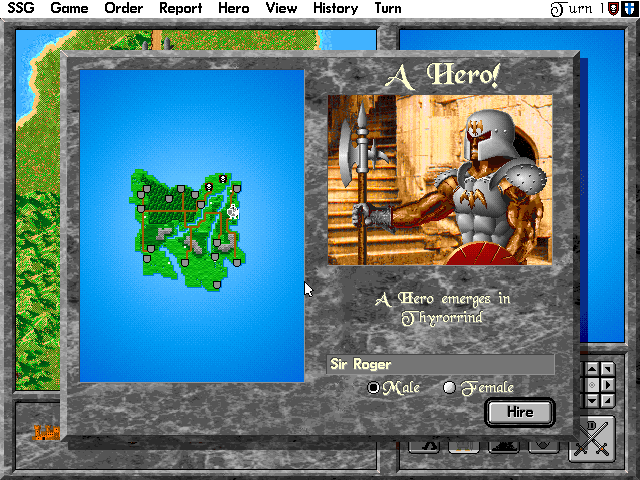
Every first turn starts this way, with a free hero in your capital city. Note that this only happens at the start of your turn, so if you start really close to another player and move before them, you can actually attack and wipe them out before they even get a hero to help defend themselves. We name him Sir Roger, and he will be our number one cool guy for the rest of this game.
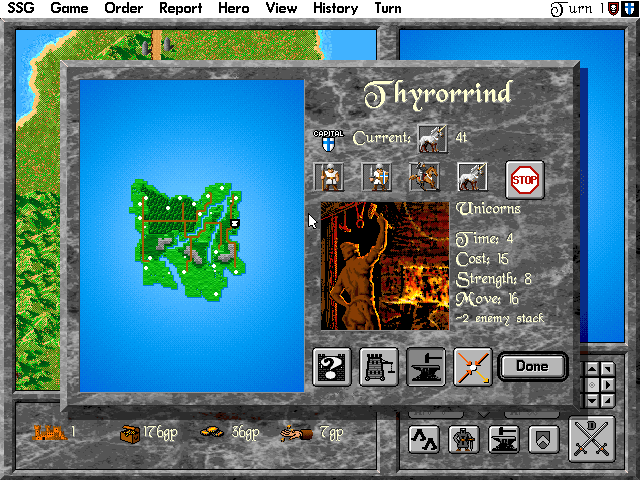
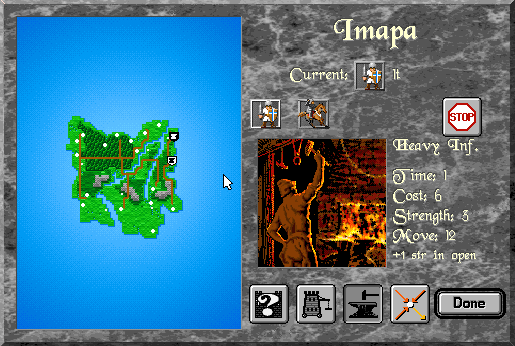
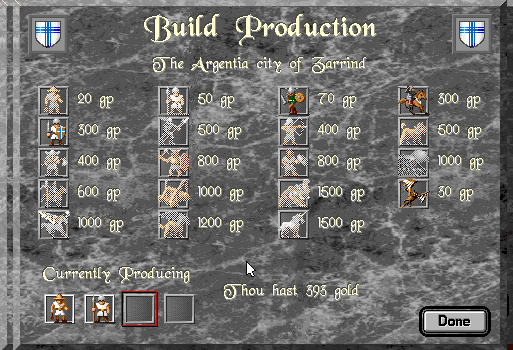
Here's our capital city, Thyrorrind ? Warlords II Deluxe has a pretty funny random city name generator and it produces semi-Conan style names a lot of the time. Here you can see the production screen, which shows the units you can build in this city. Capital cities always start with four units available to produce and will almost always have a very good one. In this case we got Unicorns, which are one of the Ally creatures I mentioned. If we had unticked the 'Cities can produce allies' box we would have some different unit here.
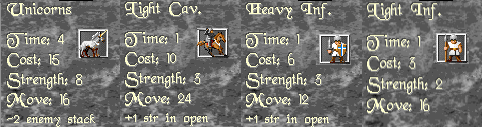
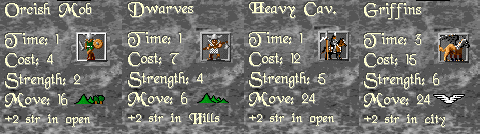
These are the four units we can build in our one city. Units in Warlords are pretty simple. I'll run down their stats:
Time: is obviously how many turns it takes to build one. So if we select a Time: 1 unit, we will get one next turn and then one every turn.
Cost: is supposed to be how much money they cost to make. Actually, due to some kind of glitch, it costs nothing to make a unit and the manual is wrong. This number has no actual relevance on the game except to tell you the unit's upkeep cost, which is half of the number here, rounded down, paid every turn. If you build a unit, send it into combat on its first turn, and it dies, you never pay any gold for it.
Strength is the unit's battle strength. Base strength ranges from 1 to 9, and with bonuses ( such as +1 Str in Open) can get as high as 14, with only +5 at most. So you could have a 1-strength unit boosted to be strength 6, or a 9-strength unit boosted to strength 14, but you could not have a 1-strength unit boosted to strength 14 or even strength 7.
Move is how far the unit can move. Different terrain has different costs. We'll get to that in a little bit.
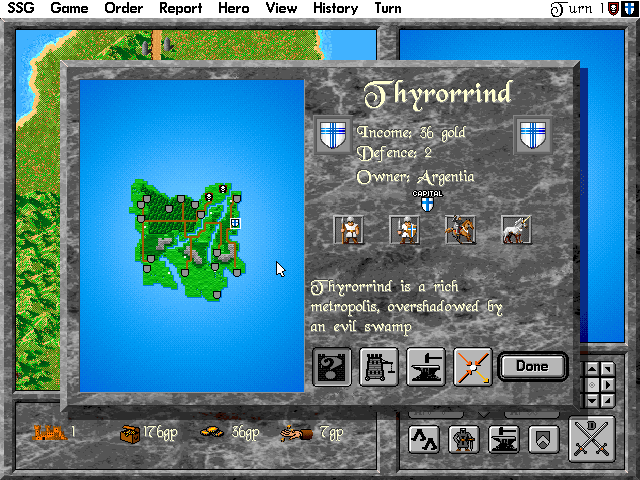
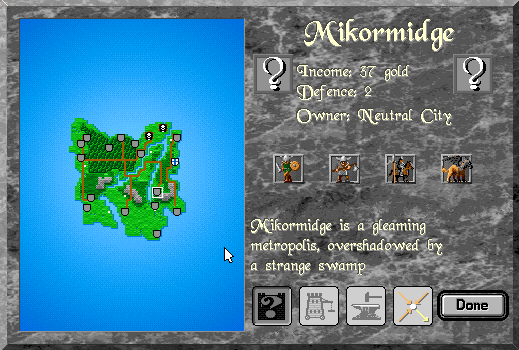
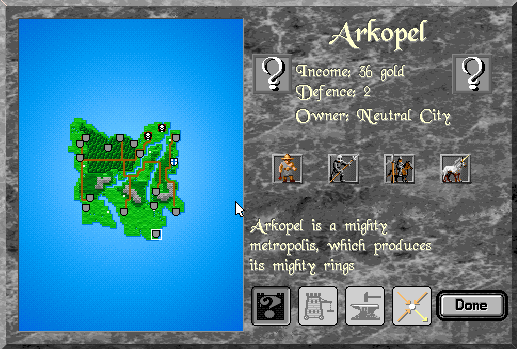
Each city also has a randomly-generated description and income. The descriptions are surprisingly coherent but rarely make any sense. Capital cities always have high incomes but other cities are mostly randomized. Some scenario designers have been clever enough to have different cities be high gold-producers and others produce good units, but most don't care enough to make it that in-depth. You can also see a number given for Defence. This is a standing strength bonus given to any unit defending the city. It is 1 for cities that produce 1 or 2 units, and 2 for cities that produce 3 or 4.
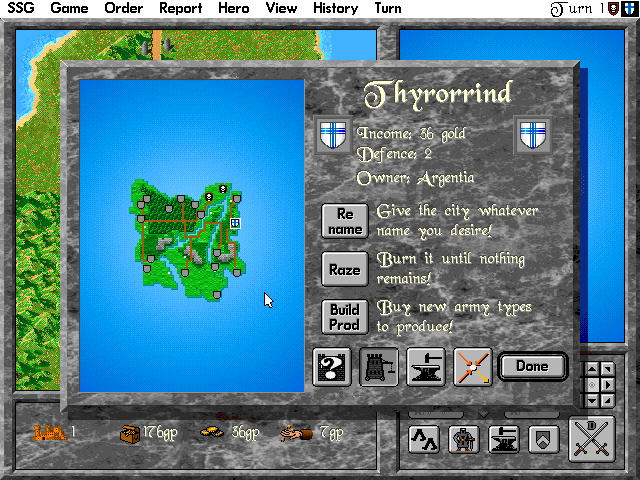
You will also see that we can rename the city, raze it, or build a new unit to produce here by spending gold. We'll cover this more later.
For now, I set it to build light cavalry. They're fast and strong enough to take neutral cities most of the time, and only take one turn.
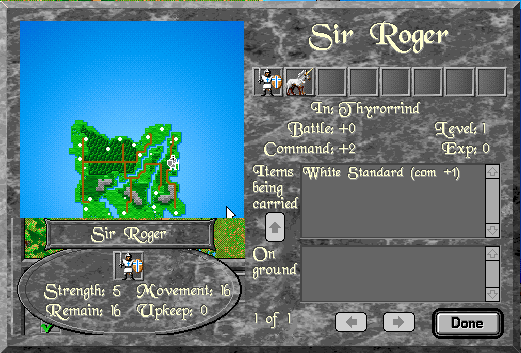
This is the hero screen, and I've pasted Sir Roger's stats into the corner. He's only strength 5 but can gain strength by increasing in level. You will also notice that heroes can carry items, and Sir Roger has started with the default white item, the White Standard, which raises his Command stat by 1, adding to his natural command of 1 to give +2 strength to any unit in the same stack as him.
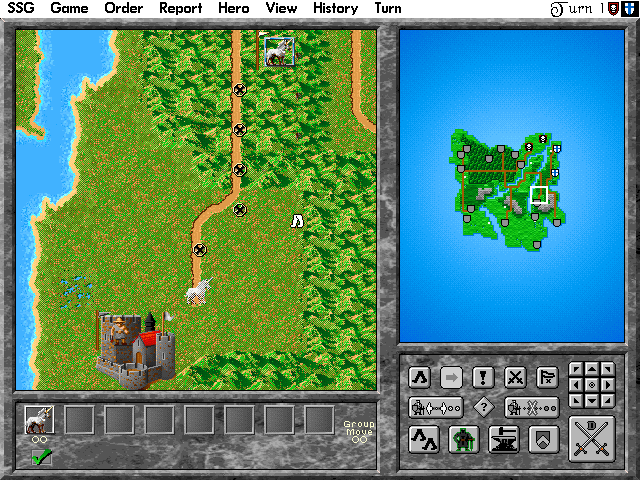
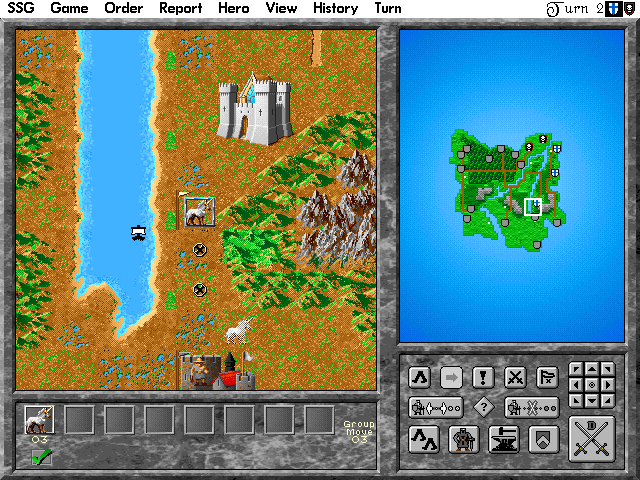
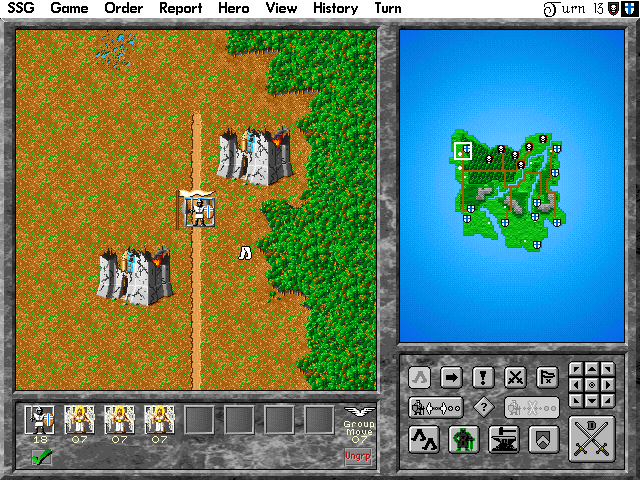
Now let's tackle the map. We're over on the right, with a river separating us from the AI and delineating a pretty clear split down the centre of the map. Obvious expansion directions are the city to the north and the cluster to the south, which black will have a hard time getting to because of the river in the way. One good thing to do is look around for cities that produce good units, and aim for them first. Here we have one that produces heavy cavalry and griffons, both of which are good units.
And here is another city that produces unicorns. We want this one, because unicorns are a great unit. So we'll be heading south to take these cities, and then sweep up and around the map to wipe out black. Easy plan.
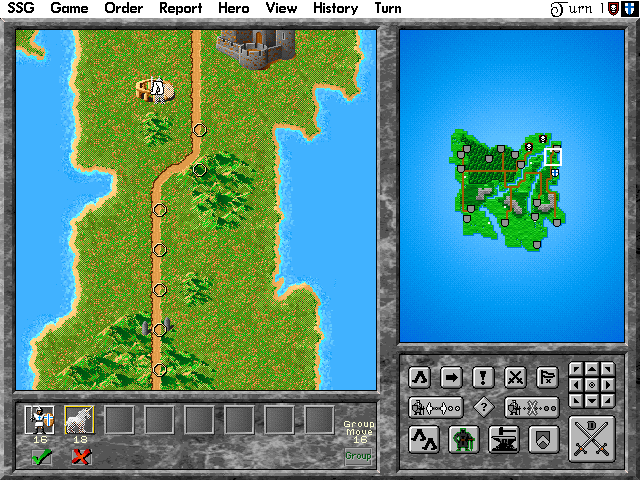
Movement is done by clicking on a square with a unit selected. Here we're moving north along a road with our hero, Sir Roger, to occupy a ruin. Roads double your movement speed because they only cost 1 move to cross, as opposed to plains which cost 2, forest which costs 4, hills which cost 6 and swamp, which I believe is 8. For this reason, it's always best to use roads when possible.

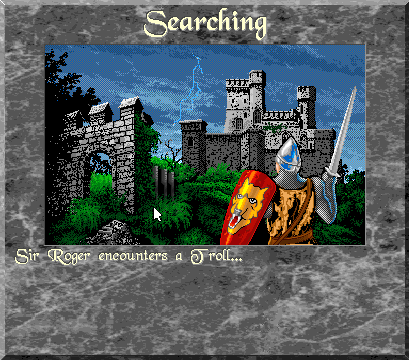
When Sir Roger reaches the ruin, he explores it. You get this screen, which shows you what you find in the ruin. You get no input over this. There is a list of monsters in the scenario files, and each of them has a strength. Essentially your hero goes in, fights the monster, and either dies or kills it. In this case...
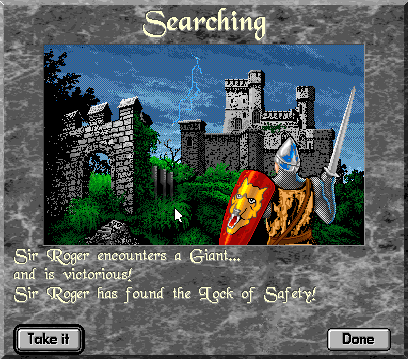
He wins, and finds an item. There are four things you can find in a ruin: items or gold, both of which are guarded by monsters; a sage, who is not guarded by monsters (we'll see one of these later), and allies, powerful creatures that will join you instantly without a fight.
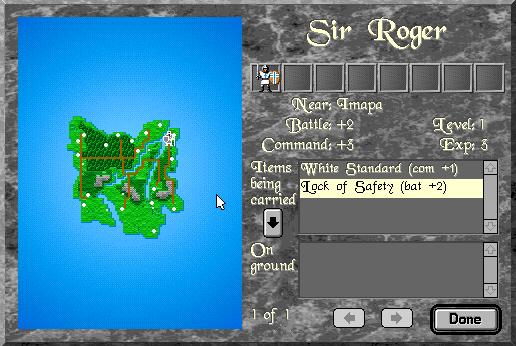
Looking at Sir Roger's character sheet, we see that the Lock of Safety give shim +2 strength in battle. This is not a terrible item, but you ideally don't want your heroes directly involved in too many battles anyway ? they're much more useful for exploring ruins and commanding armies to give them bonuses.

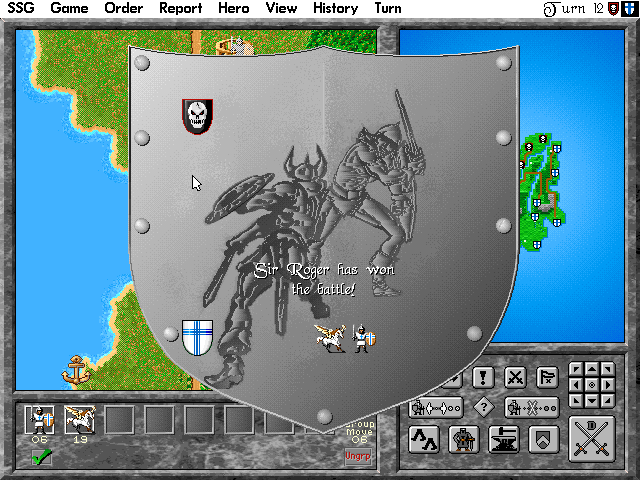
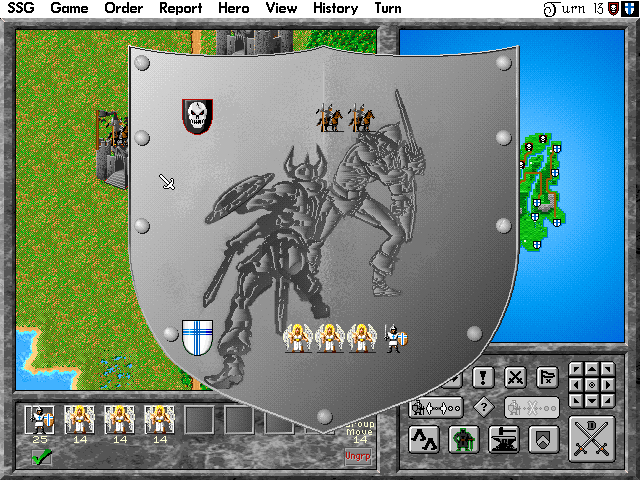
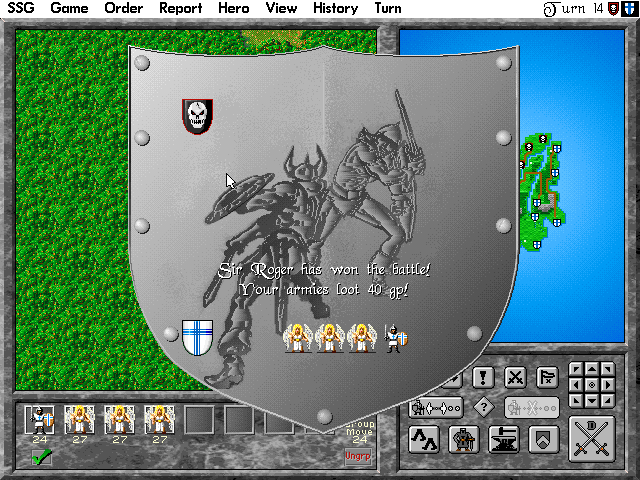
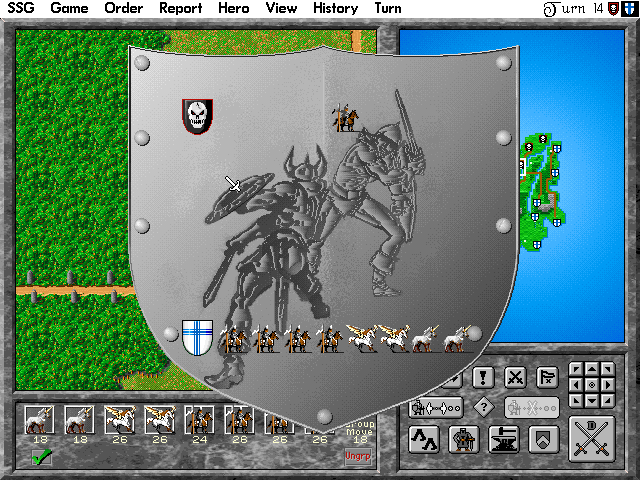
Sir Roger has enough movement left over to go attack that northern city. When you enter combat you see this screen, with the defenders lined up on top and the attackers on the bottom. You then have a series of one-on-one fights between the two units on the far left ends of the two lines, until one side is completely wiped out. There is no retreating in Warlords II. In this case we have a strength 5 hero with +2 battle against a strength 1 scout with 1 extra defence from the city.

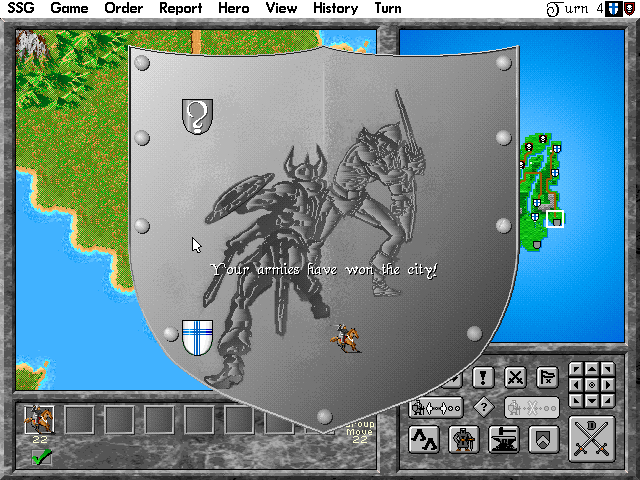
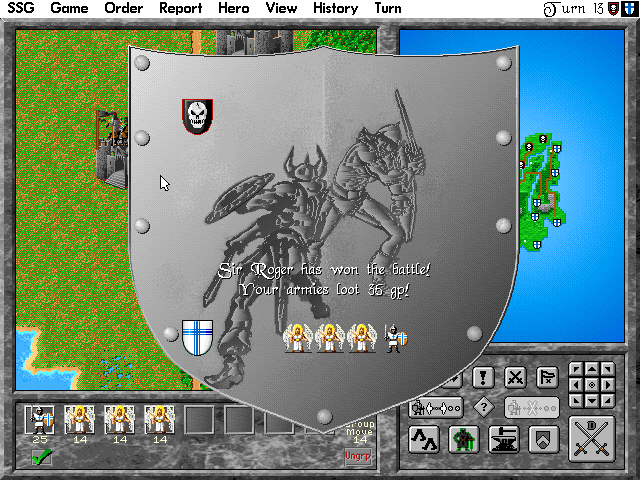
It's no contest, and we win.
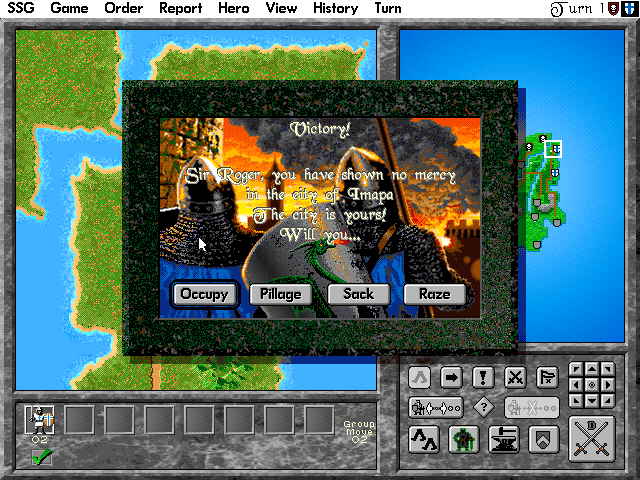
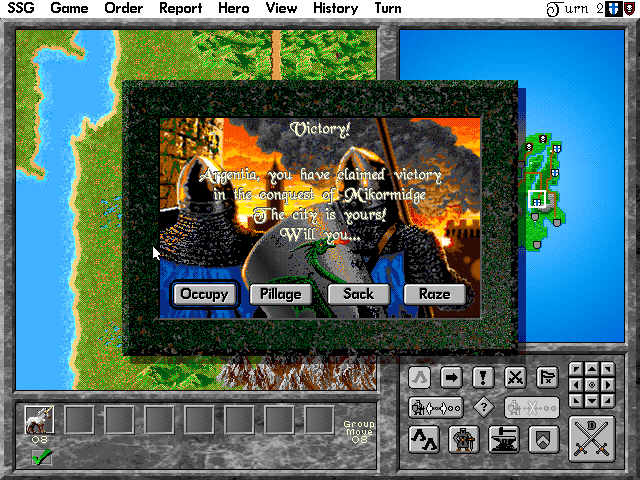
We've taken the city, and have these four options:
Occupy gives you the city undamaged, ready to be used to produce its units for you.
Pillage destroys the most valuable unit in the city and gives you an amount of gold corresponding to half its value. This can get you a lot of gold very quickly, if you don't like the unit and want to buy a different one to produce, but if you're going to do that you might as well
Sack: destroys all but the cheapest unit, and gives you half the value of all the units you destroy by doing so. This (and Pillage) can also be used to destroy defences, since reducing a city from 3 or 4 units produced to only 1 or 2 will lower its defence from 2 to 1.
Raze: destroys the city and makes everyone hate you.
We occupy it, but it's not very good. It produces heavy infantry and light cavalry, both of which are also produced in our capital. I set it to make heavy infantry, which will be used defensively to occupy it and our capital so it can get to producing unicorns quickly.
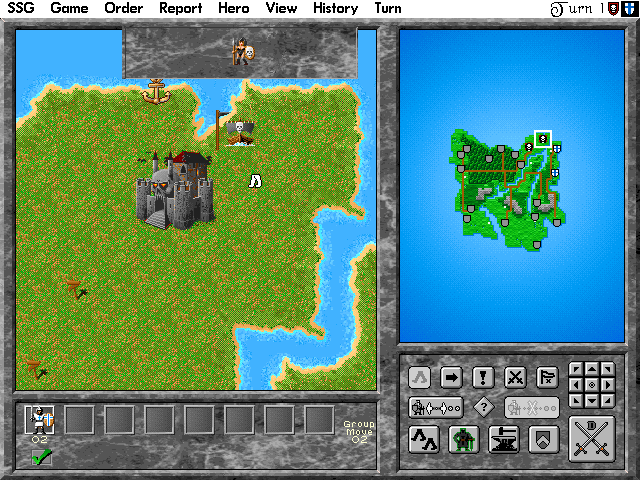
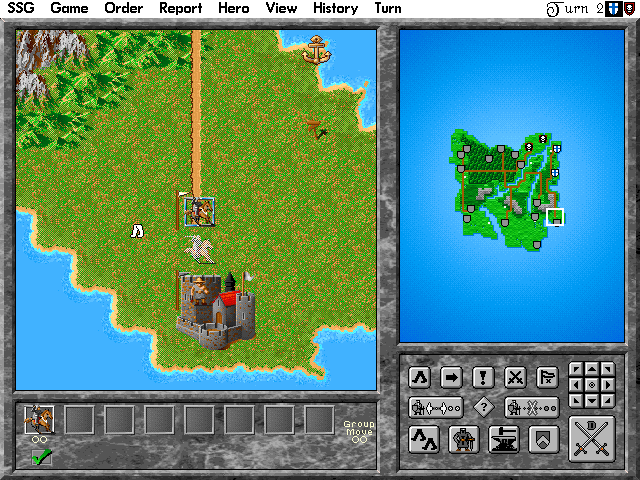
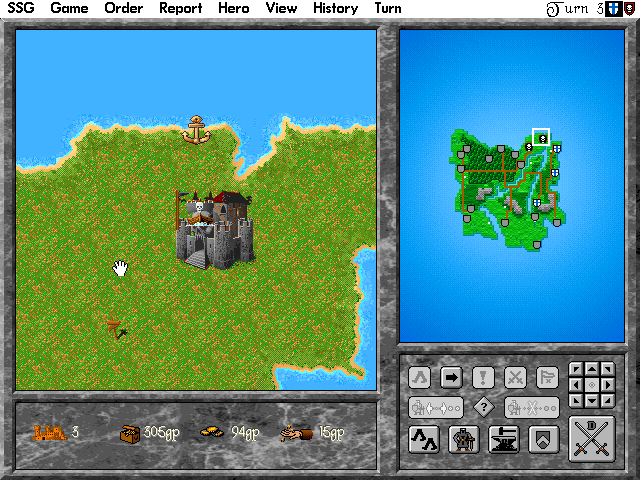
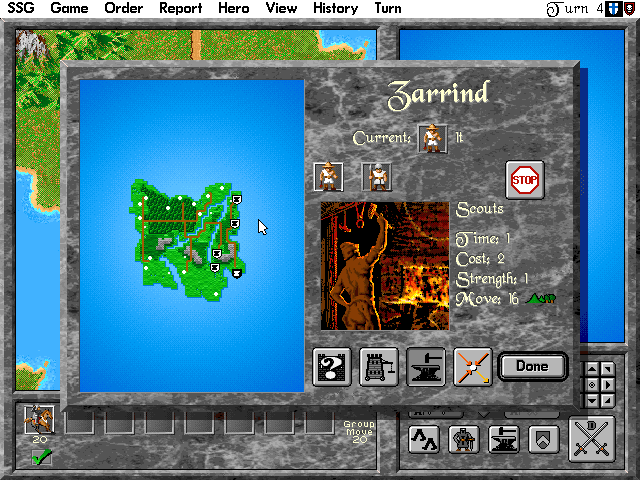
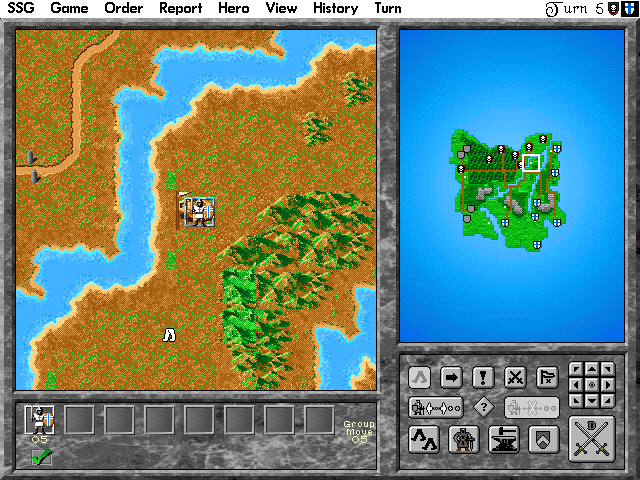
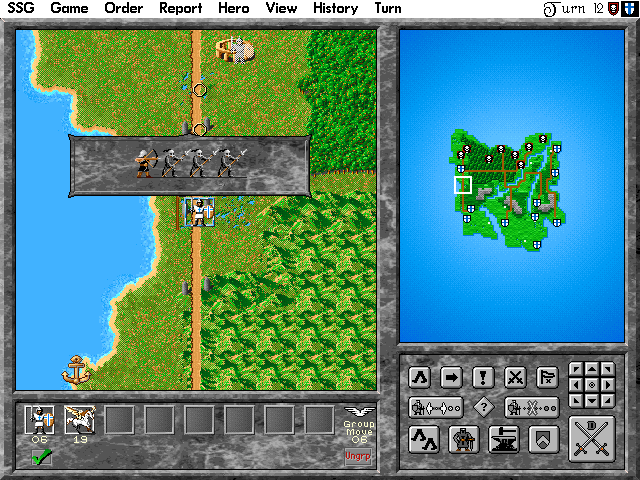
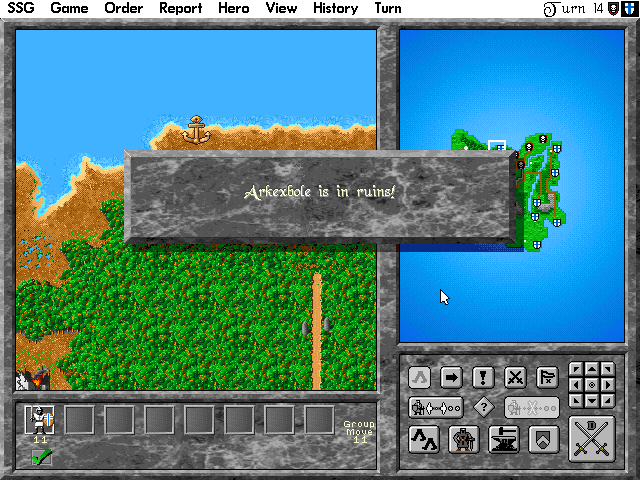
I also choose to leave Sir Roger in the city to defend it, because looking over at the AI they have put their hero in the water. You can do this from any friendly city, any harbour (the anchor symbol on a coastal tile, as in the image here) or any bridge. It costs 2 movement and uses up all your remaining movement for the turn to become a boat or to stop being one (by leaving the water onto a friendly city or bridge). So if you do this at the beginning of your turn you've wasted a turn's movement, but if you do it with only 2 movement left, it's no big deal. When a unit turns into a boat they have a strength cap of 4 (so a heavy infantry would still be strength 3, but Sir Roger or our unicorns would be limited to strength 4) and a set movement of 20. It costs 2 movement to move on a coastal tile and only 1 to move on the open sea, making oceans very similar to roads in terms of getting places fast. She could easily reach our city and take it if we leave it undefended, putting us at a pretty severe disadvantage, so Sir Roger sacrifices a couple movement points to stay and defend our new city.
Meanwhile the unicorn moves to the south to take this city. He can't quite reach it because of the hills in the way (move cost 6, remember) but he'll get there next turn.
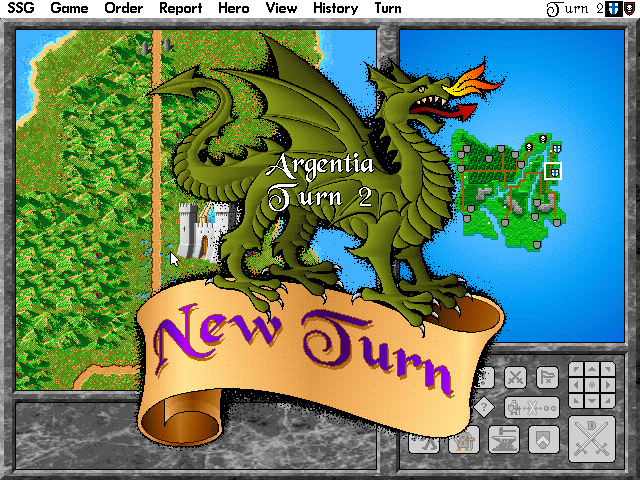
Turn 2 comes around and this time we move before the AI thanks to random turns. From now on I won't show this or talk about the turn order unless it's relevant to something. You can always see what turn it is and the move order in the top right corner of the full game screen.
Our light cavalry built in our capital is sent to this city in the south and can't quite reach it. They will attack next turn.
Our unicorn destroys the scout guarding this city and we occupy it.
This is the griffon and light cavalry city, and here are its units. You can see a feature of Warlords II in action here: randomized unit attributes.
Each city has a chance of having each unit it produces be different from the base stats. They can have 1 more or less strength, 1 more or less build time, 2 (I think) more or less cost, and 4 (I think) more or less movement. In this case the griffons take an extra turn to build (they are usually 6 strength for 2 turns) and the heavy cavalry take 1 turn less to build (they are usually 5 strength for 2 turns). Ordinarily you would be stupid to build heavy cavalry over griffons since they fly (2 movement over any terrain, still 1 on roads, and can cross mountains and water without turning into a boat) and have increased strength in cities, where the bulk of fighting takes place. But having 3 strength 5 units is better than having 1 strength 6 unit, so we set it to make heavy cavalry.
Our unicorn moves on but can't reach the next city. I also leave Sir Roger to defend the north city. Since we moved before the AI, their hero is still in the water causing the same tactical dilemma as last time.
Turn 3 rolls around and all they've really accomplished was sending their hero back into the city. This typically means I was right, that northern city was their target, but they reassessed and changed priorities. This leaves us free to continue expanding and exploring ruins with Sir Roger.
Our light cavalry attacks and loses to a scout. Embarrassing but not the end of the world, that city's no game-breaker.
Our unicorn defeats the scout in the city it was outside last turn. Nothing special there though, it just makes light and heavy infantry. I set it to building heavy infantry, which I will use to defend both it and the 1-turn cavalry city just north of it, letting the cavalry go off campaigning.

Our unicorn meanwhile moves on to the next southern city. He again can't reach it. And here are a couple useless signs. Signs can be placed on any plains tile on the map. They're used by scenario designers to add flavour. In random maps they have a few flavour texts, but mostly they're used to give vague clues to the location of cities, which is actually useful in a hidden map game, when the fog of war prevents you from just beelining to the nearest city. In situations like this though, where two signs just outside the city point us to it, they're a little pointless.
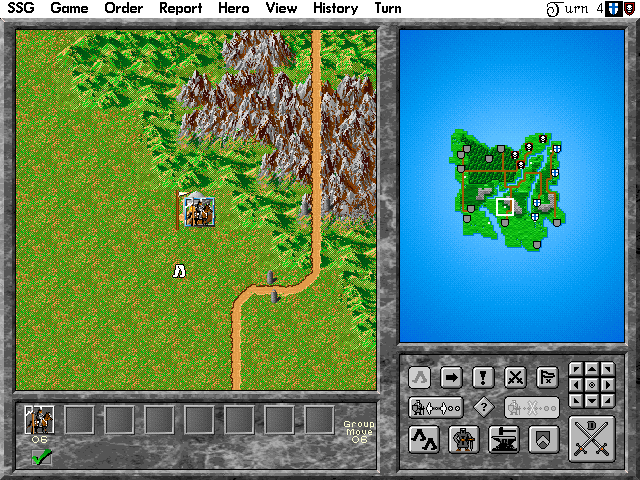
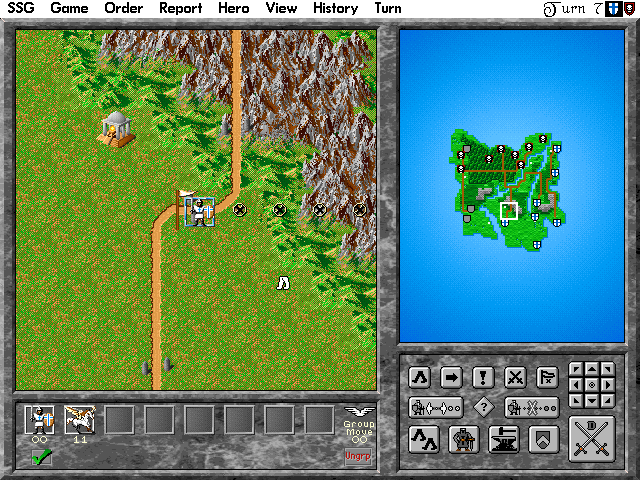
Our first heavy cavalry has moved to the west and found this temple.
Temples are like ruins, but any unit can use them. When you step on them and search, you get this message:
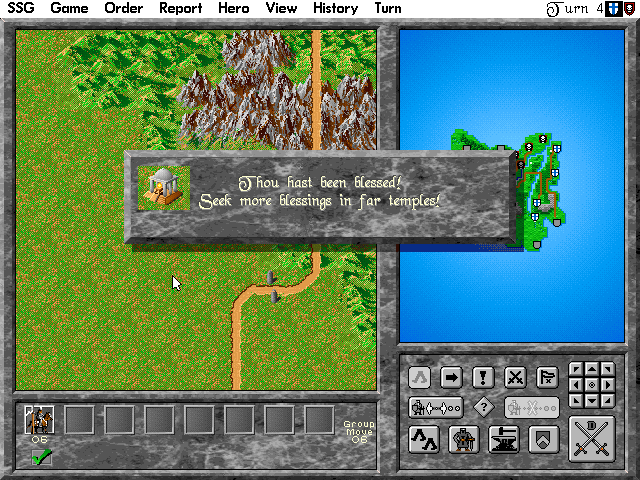
Your unit gets blessed, and receives a permanent +1 boost to base strength. So our cavalry are now base strength 6, max strength 11 instead of base 5, max 10. I also included a picture of what temples look like when a cavalry isn't standing on them.
Temples also give quests to heroes. We'll see that later.
This time our light cavalry is successful in taking that southern city.
It's terrible though. It produces scouts, the 1-turn 1-strength unit that has been defending all the neutral cities, and light infantry that take 2 turns to build instead of one. Scouts can be useful in hidden map games to, well, scout, and also because they can move through hills and forests as if they were plains, costing only 2 movement instead of 4 or 6 (that's what the little icon means). This is extra useful because when you have one unit in a stack that has that ability, it acts as a guide and the whole stack gains that ability. This is the opposite of flying. If you want a flying stack, every unit has to fly and one non-flier will tie everyone to the ground. Heroes are the only exception here ? they can fly if paired with a flying unit.
I consider buying production in this city, but can't afford anything good.
You can always spend gold to buy the ability to produce a unit. When you're rolling in gold this is pretty much the only thing to reliably spend it on. You can also use it to wreck cities, buying shitty units over top of the good ones it produces, but that's a dirty trick to use on the AI since they aren't smart enough to do it themselves. They are smart enough to buy production though, so leave them alone long enough and they'll buy good units.
You cannot buy all units. Here unicorns are the best unit you can buy production for, and they're expensive. There are units better than unicorns, but you can't buy them. You either have to find them in a city or get them from a ruin or quest.
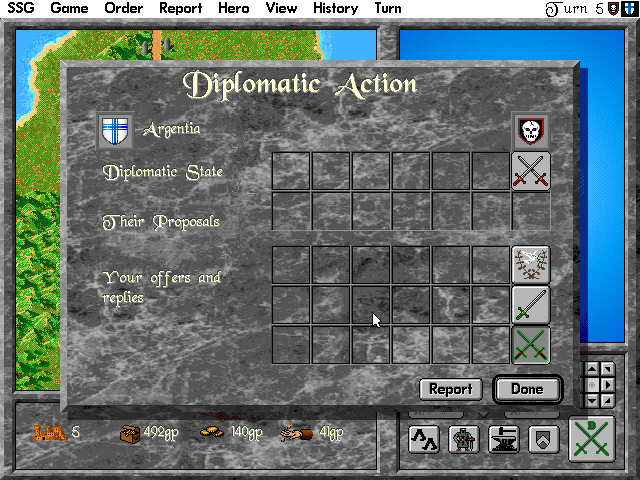
On turn 5, the AI declares war on us.
There are only 3 states to diplomacy in Warlords II. You can be at peace (the dove and olive branches), in which case attacking an enemy is considered treachery and you take a serious hit in reputation, becoming enemy number one for most AI players. You can be hostile (one sword), which means your units can attack their units and vice versa, but attacking a city will count as treachery. Or you can be at war, in which case anything goes.
You can propose a change in relations at any time, but both sides have to agree to a reduction in hostilities. If one side proposes peace and the other agrees, you're at peace, but if they still want war you're screwed.
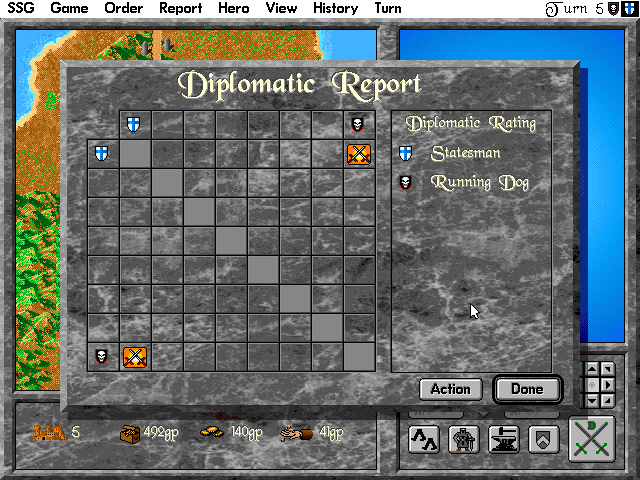
There's also a diplomatic report, that shows you who is at war with who and the various reputations, with running dog being the worst. This mostly has to do with AI calculations. Treachery and razing cities will drop you down the list very quickly, making AI players want to kill you. This screen is much more meaningful when there are more than 2 players.
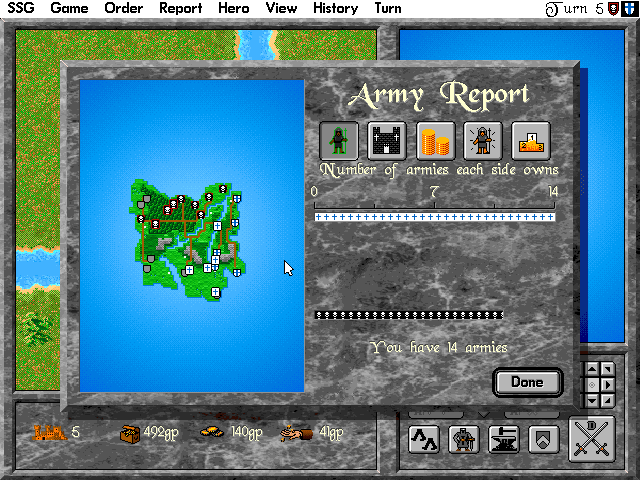
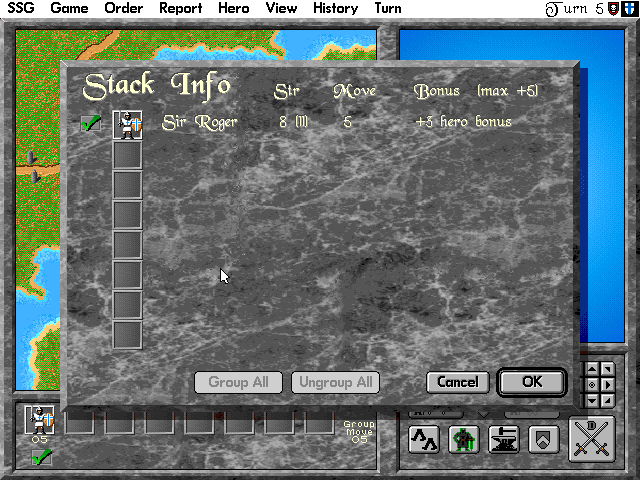
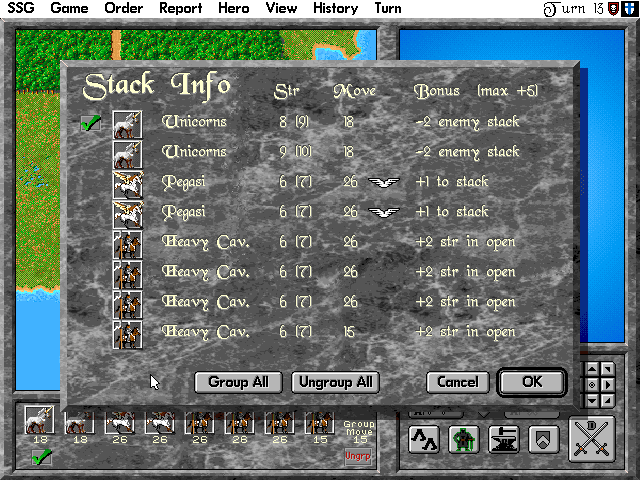
First thing to do when war is declared is to check the army screen. This screen shows you how many armies each faction has, but more importantly it shows you where they are. The rectangular shapes (the ones that look different from cities) are armies in the field. If someone is sneaking an army up on you when they declare war, you'll see it here.

Our unicorn takes that southern unicorn city easily, and it has a new unit: pikemen. We'll build a couple of these since they're a ? unit, good for quick defence just in case, and then we'll switch to building unicorns.
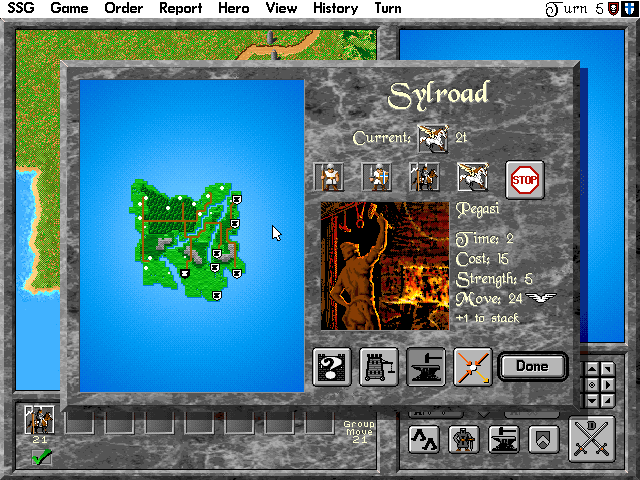
And our blessed heavy cavalry takes this city, which produces pegasi. They're a flying 2/5, which is pretty good but not great. It's a standard mid-range strength and build time, but flying is a nice touch.
Sir Roger has reached the next ruin, one close to black that I don't want them to get.
My image for the result disappeared, but he fights a troll and wins.
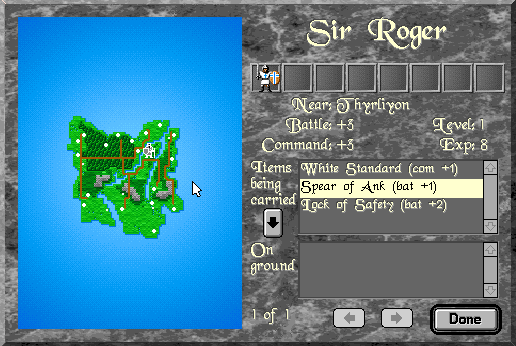
His reward is the Spear of Ank. This is the worst type of item: Battle strength +1. I won't pass it up, but there's much better rewards to get from a ruin.
Here you can see that despite still being strength 5, he is actually a strength 8 (11) unit. Why? He starts at 5, gets +3 to base strength from the battle items, then gets +3 to actual strength from his command of 3. Yes, command bonuses apply to the hero themselves as well, but to max strength not base strength.
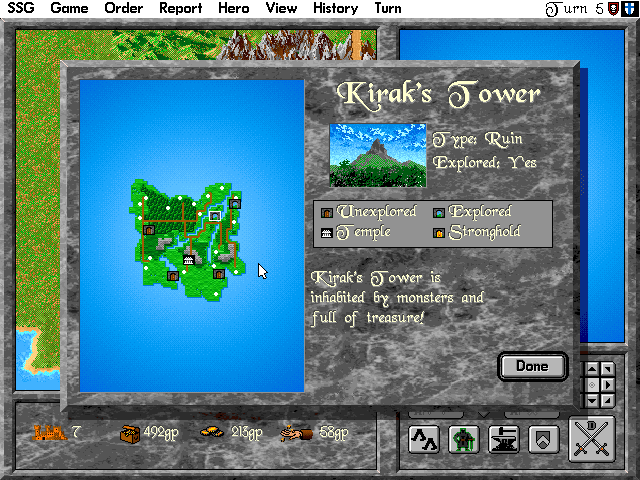
This is the ruin equivalent of the city screen. It shows where on the map they are, whether they're explored or unexplored, and gives some flavour text. This would be more interesting if the names weren't all variations on a theme (Kirak's Tower, Azol's Tower, Ruins of Kirak, Ruins of Azol, etc.) and if the text wasn't the same for every single one (X is inhabited by monsters and full of treasure). Regardless you can see the locations of the other ruins, which are sometimes hard to see on the map (they're little white dots).
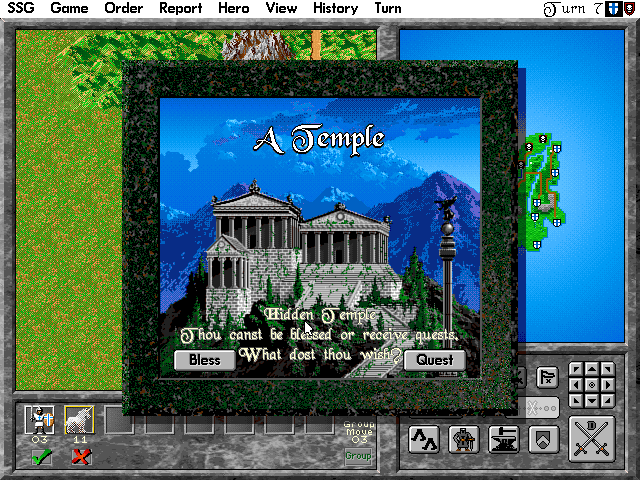
On turn 6, nothing much happens, but on turn 7 Sir Roger reaches the temple. Here he gets a bless, picking up another base strength (up to 9 with items now), and accepts a quest:
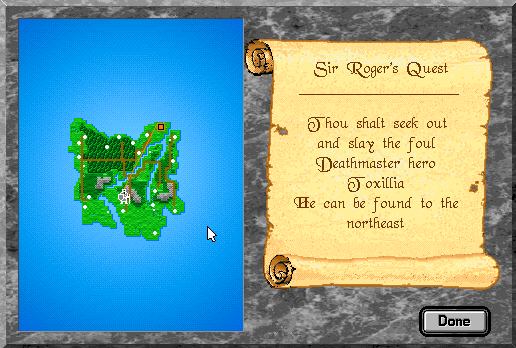
Heroes can take quests from temples. You can only have 1 quest active at a time, which means if we had another hero come to the temple he would only be eligible for a blessing, not another quest. There are a few different types of quests: for this one, we need to kill black's hero, Toxillia. If Sir Roger's stack kills him, we get a reward. If he is killed by another stack or Sir Roger dies, the quest is failed but any hero of ours can go to the temple and get another one.
Quest rewards are often ridiculous. You can get on a really good roll early game if you start close to a temple and get a couple easy quests. Similarly, if you get a quest to do something way out of your way, like kill a hero of someone completely across the map, it can basically lock you out of quests for much of the game.
We link up Sir Roger with our first (blessed) pegasus, giving him the ability to fly (note how his movement path is taking him over the mountains, which are usually impassible), and send him off to explore the ruin to the east.
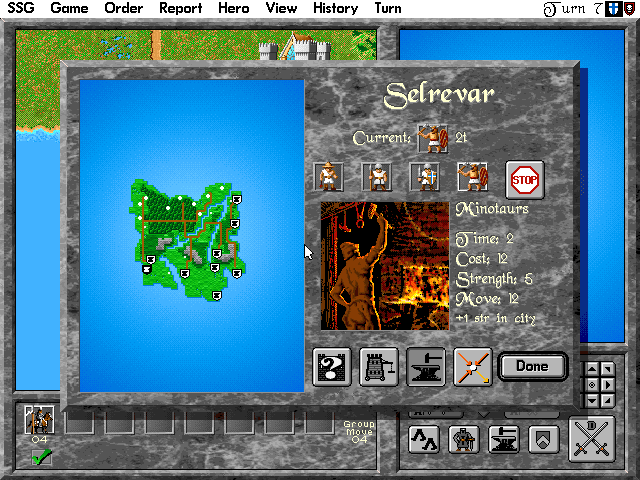
Some of our blessed cavalry reaches the southwest corner adn takes both the cities there in one turn. The northeast one has nothing new or good, and I set it to build light cavalry. The southwest one has minotaurs, another 2/5 unit that gets increased strength in cities. This is one of the best basic abilities because it applies on offence and defence and most battles revolve around cities. The downside to minotaurs is that they are slow. Because of this it's often good to use them as city defenders.
There's a unit of black's light cavalry coming down that road along the west coast, and I use my cavalry to occupy the minotaur city. Whichever one I don't occupy they will take, and I'd rather lose the one with bad production than the minotaur one.
As predicted, they take it without a fight and we've lost our first battle of the war. 
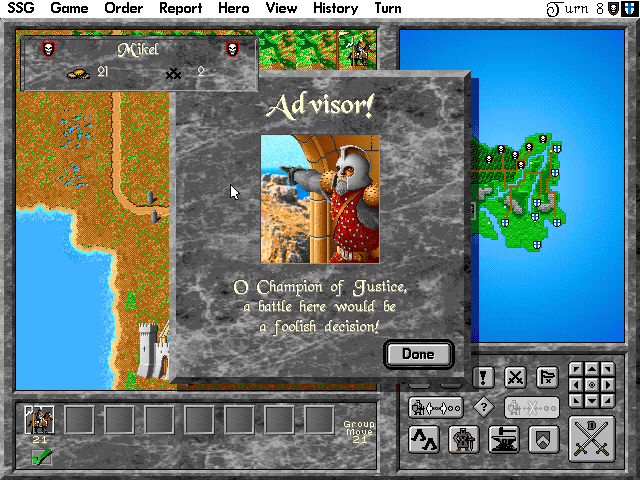
The next turn, they move before us which means they pump out another light cavalry in that city. I use the battle advisor to show you guys what he's like. With one blessed cavalry (strength 6) against two light cavalry in a defence 2 city (strength 5 each), he thinks it's a foolish decision to attack. I agree. Besides, there's another unit of blessed cavalry in the hills just northeast of the city, so next turn it will arrive, a minotaur will get produced, and we will have a much stronger force to take back the city with.

And that's just what happens. We move before them so it's still just two light cavalry defending, and we are more than a match for them. Here you can see how battles with more than 1 unit on each side line up.
Our minotaurs take out a unit of light cavalry.
Then they die.
Then we finish them off.

Then we won! I'm not going to show battles in this much detail anymore, it's kind of irrelevant. I'll mostly just show the starting and ending forces. Maybe in the future I'll make animated gifs of major battles.
I leave the two cities undefended since there's no black armies near, and send the two cavalry up the western coast road to attack black's western cities. They're the farthest from the capital and probably the weakest defended.
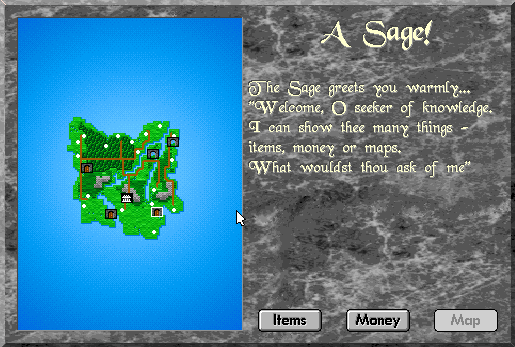
Sir Roger reaches the ruin and it's a sage. With a sage you can choose between:
Items: the sage will point you towards another ruin where something can be found. This could be an item, gold, or allies, and you get to pick which you want.
Gold: the sage just gives you some gold. This is almost always less than you would get from fighting a monster in a real ruin.
Map: Only available in Hidden Map games; the sage will reveal part of the map.
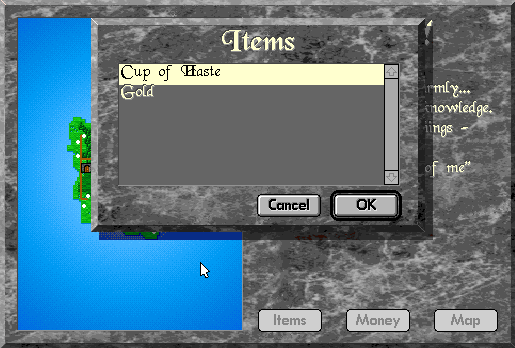
I choose items, and get a list with two choices. The Cup of Haste is one of the best items in the game, so I ask where it is.
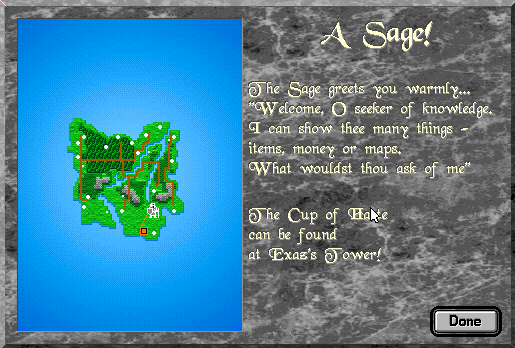
It's close. Sir Roger heads there immediately.
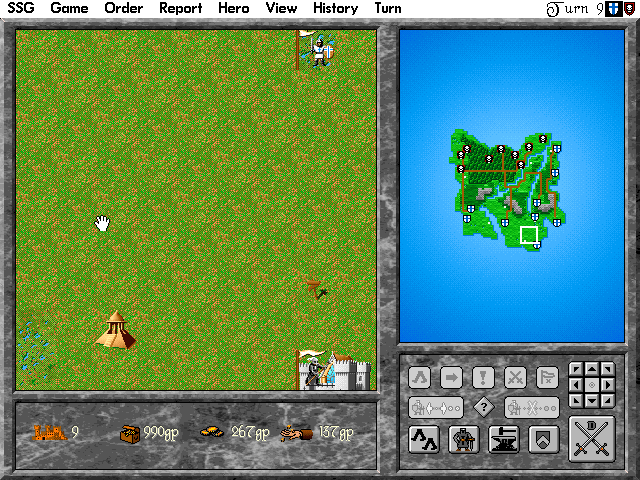
He can't quite make it this turn, but it's within sight. Ruins revealed by sages are called 'strongholds' by the game, and have a different icon. They're only available (to be seen or to be searched) once a sage has revealed one to you, and then are still only viewable and searchable by you. You can see ones the AI has revealed during the AI's turn, but you can't go to that spot and search it.
As well, sages are sometimes dicks and will reveal strongholds that are already empty because a different sage revealed it to a different hero from a different faction, who then explored it. Always be wary of sages in the endgame on large maps, because it's likely a different sage beat you to revealing that treasure you want.
The two cavalry reach a black city on the next turn and attack. It's only defended by one pegasus unit.
We lose a cavalry but take their city. I'm not confident about my ability to hold it though, and I could use some money...
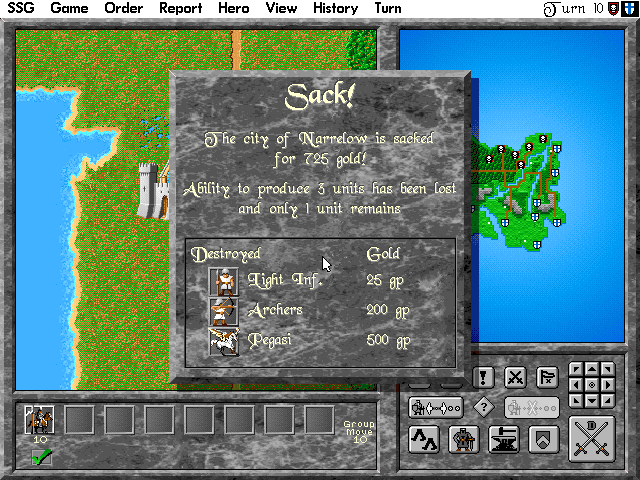
So we sack the city for 725 gold and to deny them some good unit production when they retake it. It now only produces scouts. I tell it to build some but I'm not too invested.

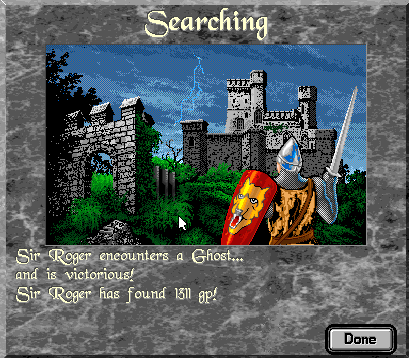
Sir Roger enters the stronghold, defeats a ghost, and takes the Cup of Haste.
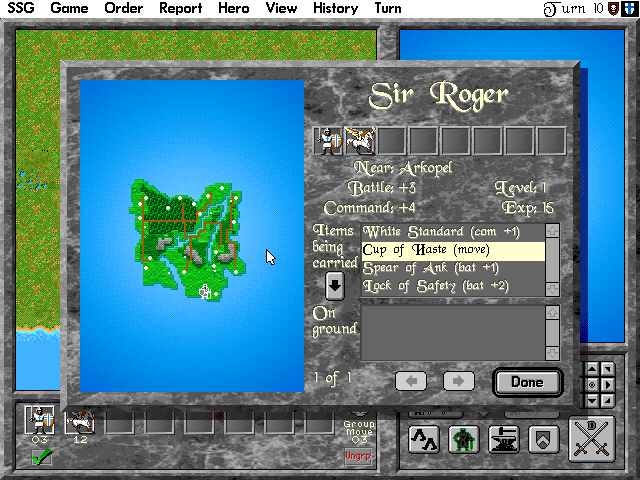
It has the 'move' special ability. This will double the movement of any units in the hero's stack at the beginning of the turn, including the hero. As you can guess, this is incredibly valuable since your armies get twice as fast.

When next turn starts, it turns out Sir Roger has gotten enough experience to go up a level!
Heroes get experience from fighting enemies, exploring ruins, and completing quests. When they get enough XP they advance in level, gaining a point of strength and a bit of extra movement. This is a little irrelevant but still nice to have.

Sweeping west, Sir Roger explores another ruin and gets a large amount of gold this time.
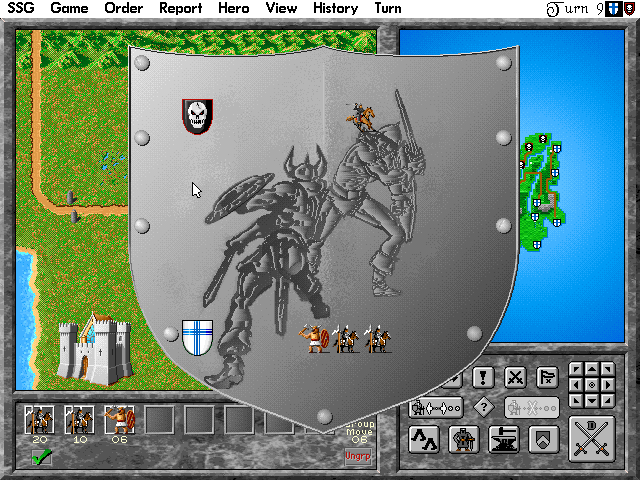
I've been massing an army on the road leading from our territory to black's, and they're fortified on a bridge. When you fortify out in the open for more than one turn, you build a tower. This has two functions: one, it gives you an extra point of defensive bonus, equivalent to being in a city. Two, it hides your stack composition from the enemy. If you look at a normal stack, you see a unit icon of its strongest unit. If you right-click on a normal stack, you can see its full composition (with the option toggled to allow this). If you look at a tower, you see a tower. If you right click on it, the game tells you it's a tower. In this case black is trying to attack us with a pretty weak army, composed of three light infantry. They don't know what forces I've mustered in the tower, and take a gamble on attacking because they'll have nothing else to do with these troops if they don't.
(note also that I've cleverly positioned the tower so they can't land boats off on my side of the bridge)

This doesn't work out so well for them. We win without losing a single unit.
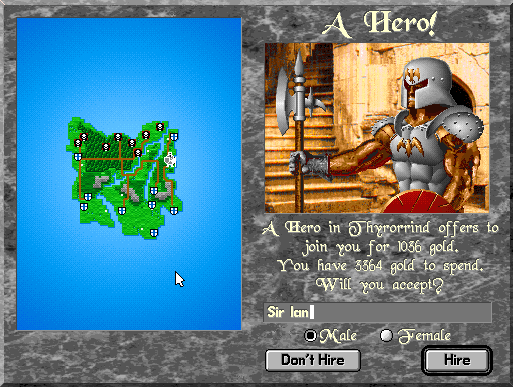
At the start of turn 12, a new hero asks to join us. This will happen periodically if you have a lot of gold. A new hero starts at level 1 with 0 XP and no items, but can transfer them from heroes in the same square ? so we could take Sir Roger, currently base strength 7 thanks to his 1 level up and his blessing, and give some battle items to another hero that can actually take advantage of them.
New heroes function just like old ones ? they can lead armies, explore ruins, do quests, everything.
They typically cost anywhere from 900-1400 gold, with one exception: if you have no heroes because you got yours killed or disbanded them or whatever, heroes will join you for around 400 gold and will show up much more often to make sure everybody can have one.
We hire him, of course. There's not much else to spend accumulated money on.
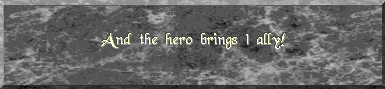
Also, new heroes bring allies with them ? powerful units chosen at random.
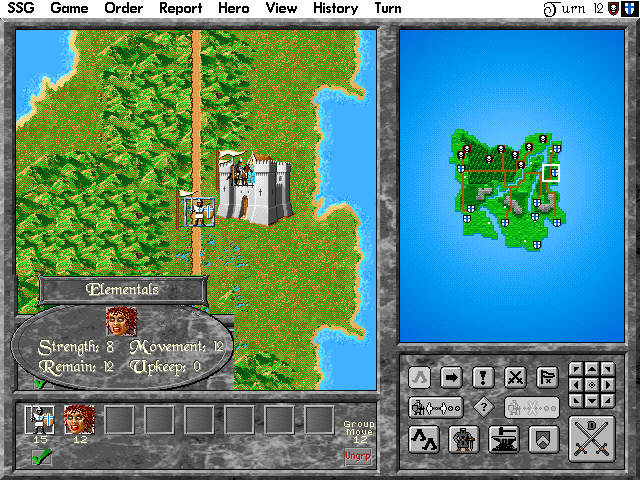
In this case he brought one elemental, a slow strength 8 unit. They're not my favourite but they're a solid unit.
Note that because heroes bring allies and if you have no hero you get heroes for cheap there's a fun exploit where if you disband your only hero then you can hire a new one quickly, get the allies for little gold, and then disband the hero again. You could do this forever to get an intermittent stream of cheap allies, but would have to suffer not having a hero to do it.
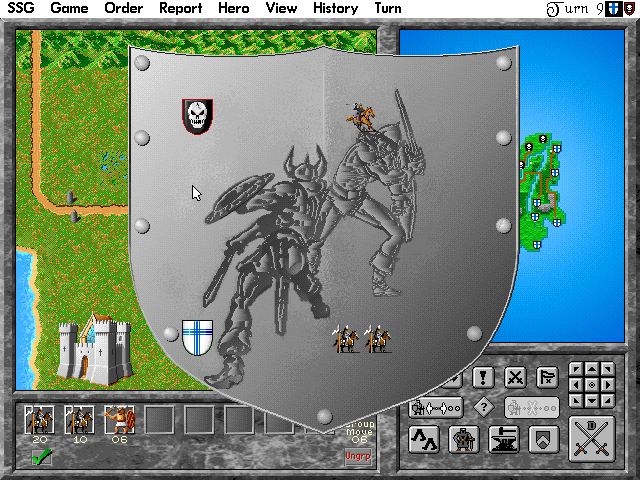
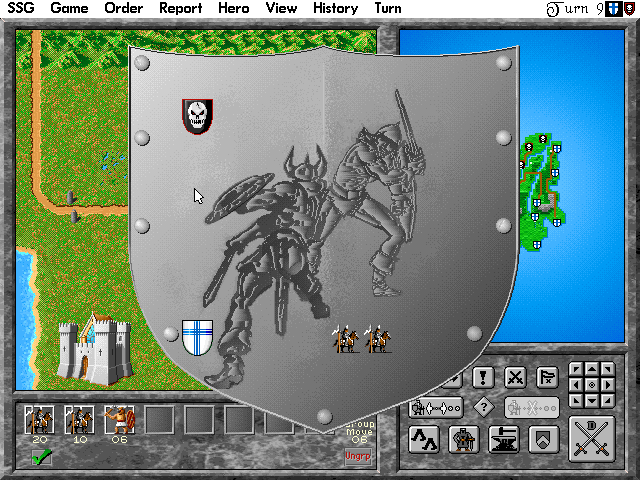
Sir Roger and his pegasus mount have reached the western edge of the board just in time to find a small invading army of black's coming down the road. One archer and 3 pikemen, all strength 4.

Needless to say, we attack.
A flawless victory!
The AI appears from the east with their hero and two pegasi to retake the city that I sacked earlier.
They're successful, but at a cost. Only Toxillia is left in the city which, remember, now only produces scouts. And Sir Roger is right nearby, with a quest to eliminate this pesky hero...
But first, he explores the last ruin on the map, killing a ghost for its gold. That ghost shouldn't even have gold - where are Scooby and the gang when you need them?
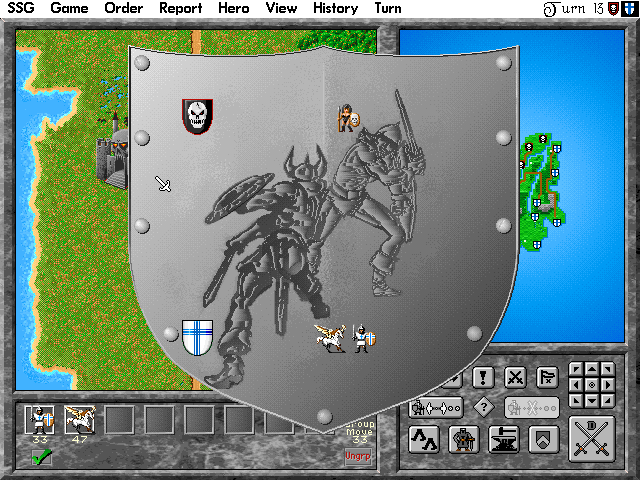
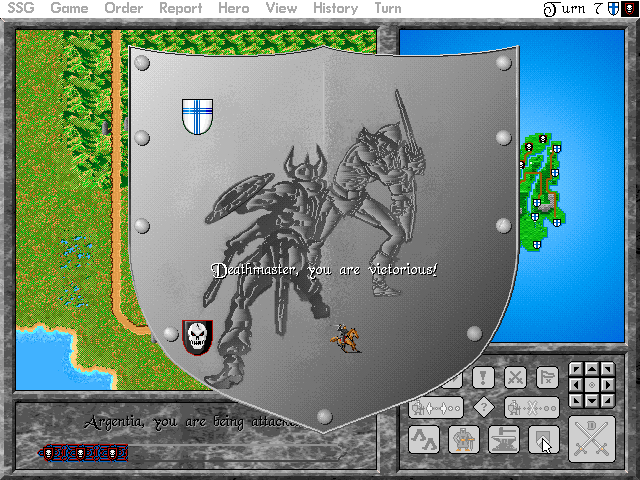
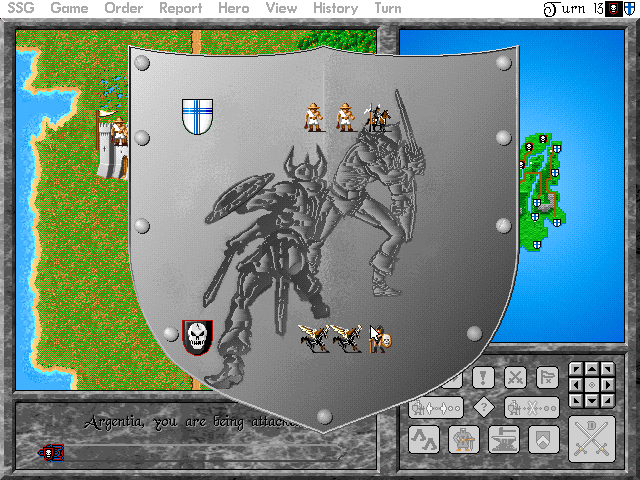
With that out of the way, Sir Roger attacks.
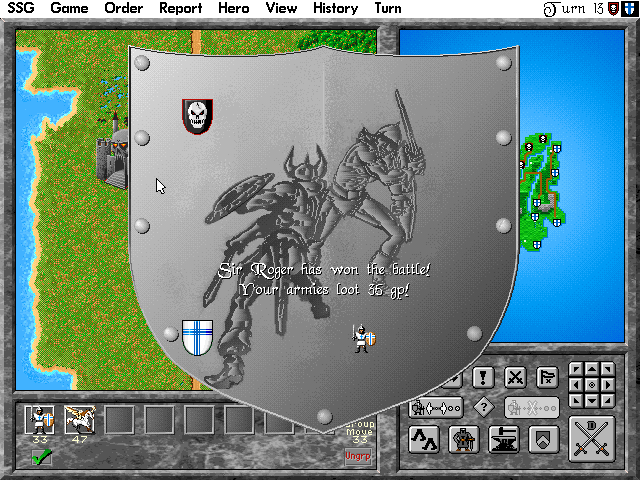
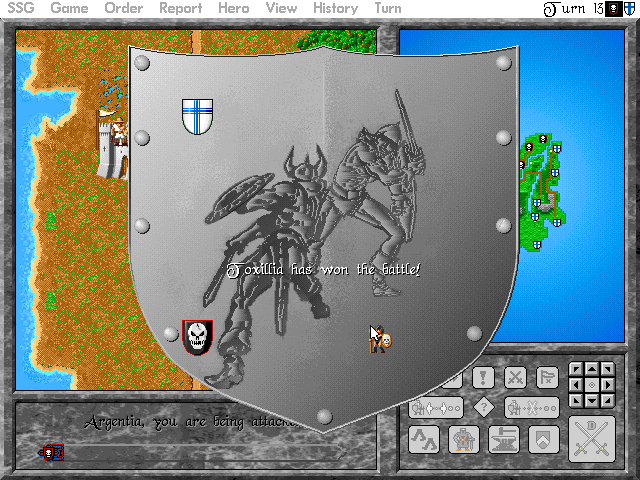
Toxillia brings down the pegasi but Sir Roger is just too strong.
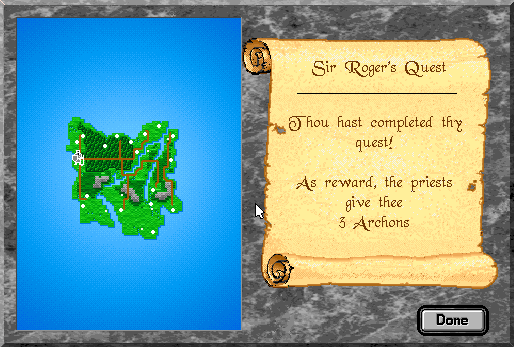
The quest is completed and we get 3 Archons. These are some really great units but we'll get to them in a moment.
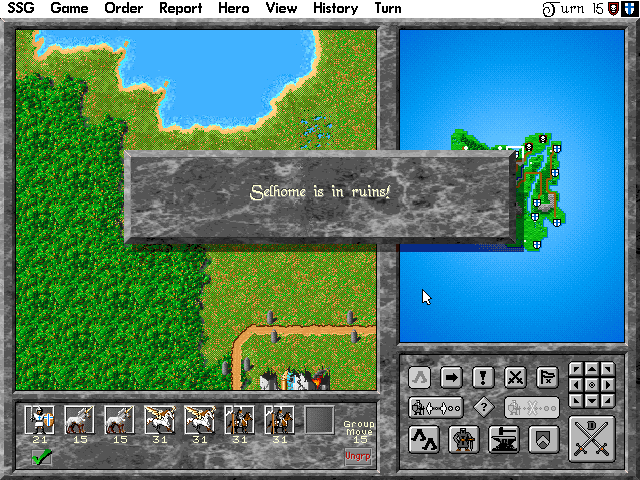
First we have to burn this city to the ground.
Razing can be a very useful tactic if you don't think you can hold a city. It's a pain in the ass to either have to wait for troops to be produced to hold it, or to leave troops behind from your invading army to hold it, or to bring up reserves to occupy it behind the main army. It's often best to just establish your own production base of cities and raze everyone else's empires to the ground.
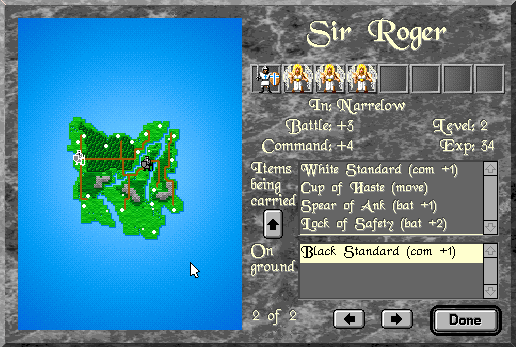
Sir Roger picks up the black standard from Toxillia's corpse, giving him Command +5. He's now strength 14 in battle, and anyone in the same stack as him gets +5 strength almost no matter what. He could take a horde of scouts into battle and beat nearly anything.
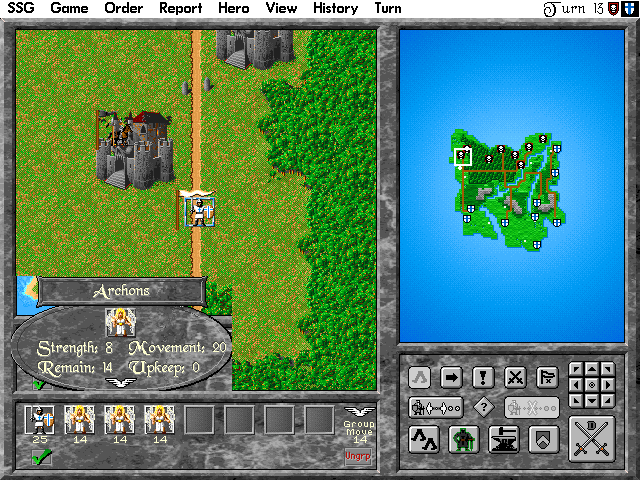
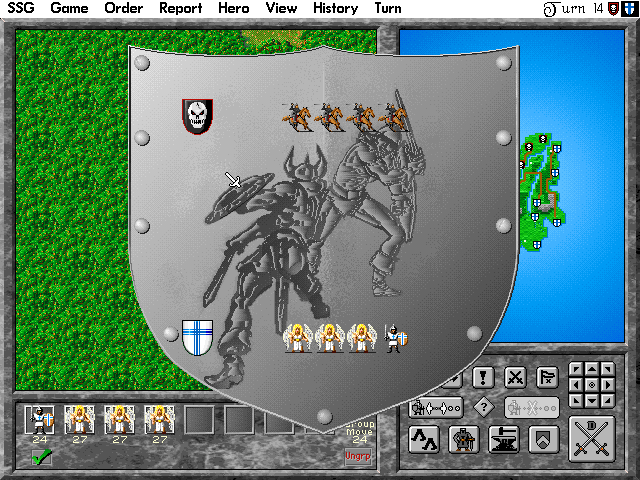
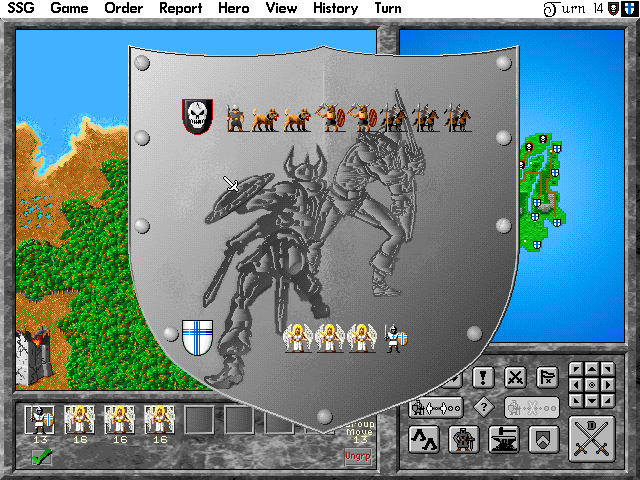
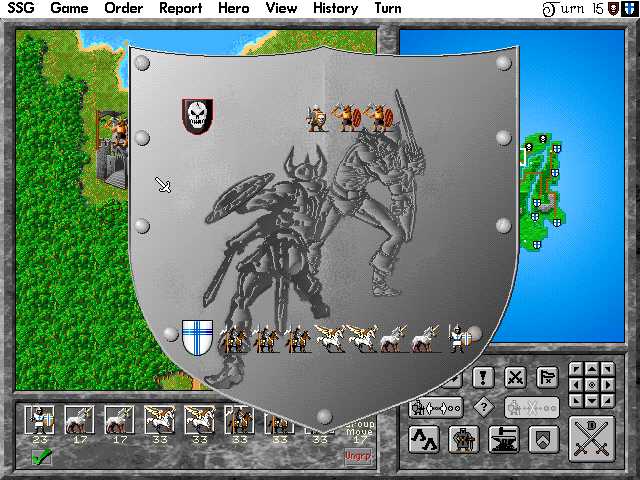
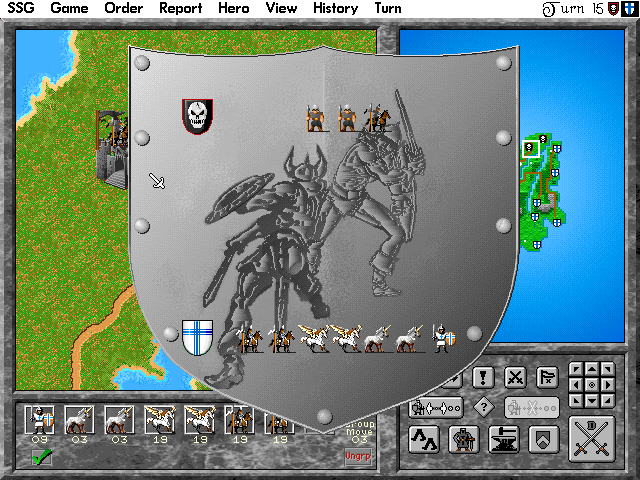
Instead he'll take three units of Archons, strength 8 flying units.
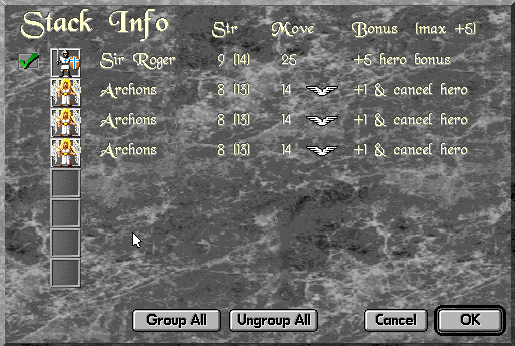
They have a nice ability too: cancel hero. This means that if there was an archon on the other side of the battle it would cancel out that +5 bonus from Sir Roger that I was just talking about. Luckily there aren't, so we're left with a stack of 3 strength 13 units and 1 strength 14 one, all with double movement to just wreck everything.
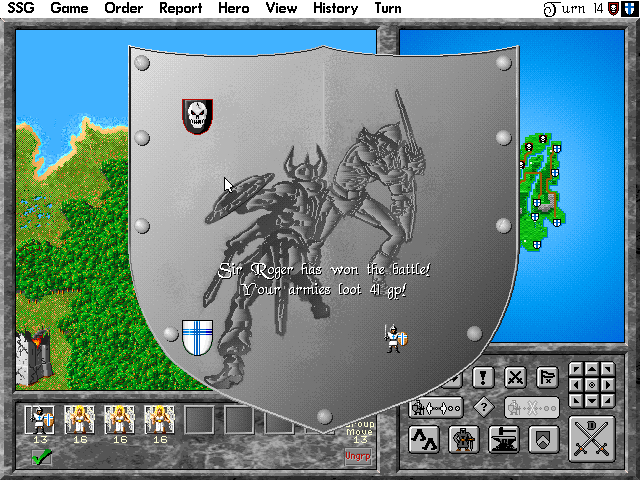
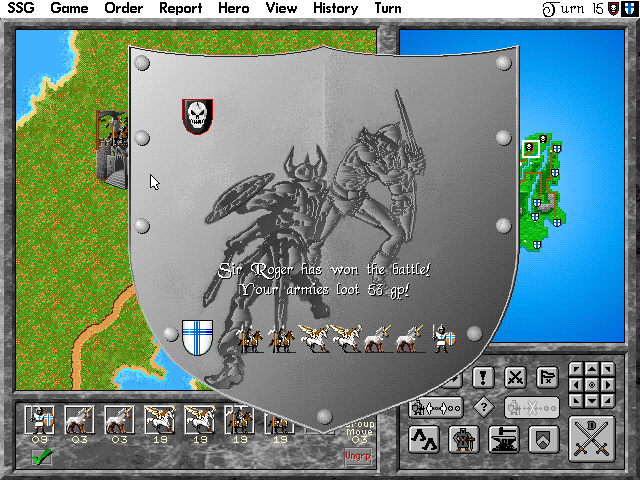
Two heavy cavalry don't stand a chance.

Two pikemen and a light infantry? No chance.

Razed cities get their own picture, while Sir Roger and his army of angels stand in the ruins.
Meanwhile, that army I've been massing on the bridge has reached its maximum size of 8 units, and is ready to invade black from the south while Sir Roger comes in from the west.

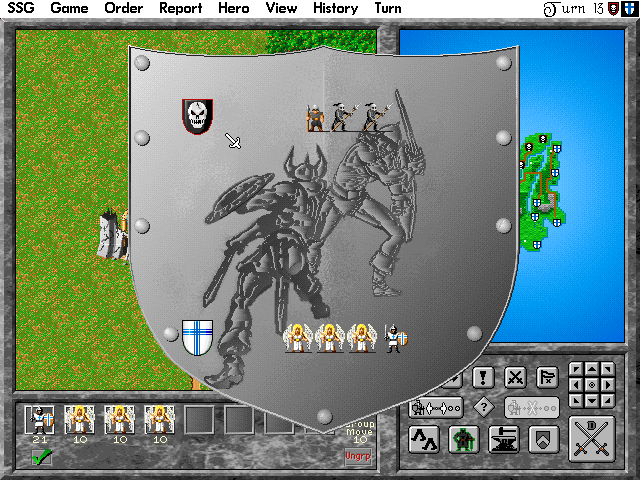
The first city they reach sends out a force to attack them God knows why

It really doesn't work out.
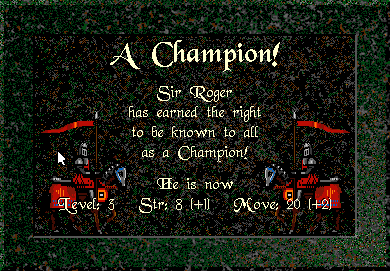
Completing that quest gave Sir Roger a ton of XP, so he's reached level 3. The highest level you can reach is level 4, but it's fairly rare because it requires a lot of XP and sheer randomness means your heroes are more likely to die doing something trying to get that XP at some point before they reach level 4.
The pain train continues.
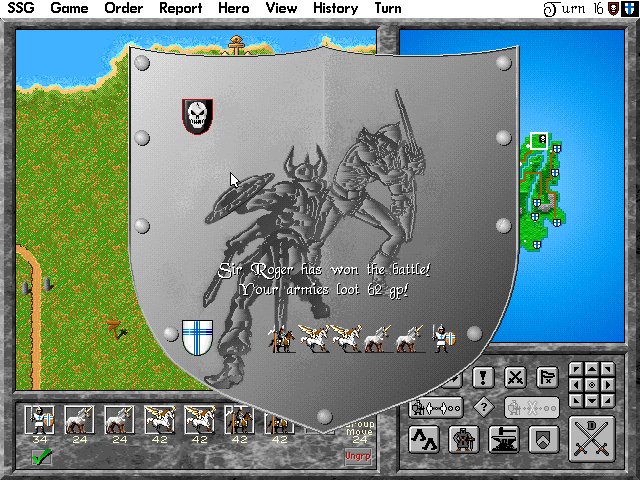
Sir Roger's army meets its match but still gets the job done.

We lost a unit here, which is actually kind of convenient. This means the stack can link up with Sir Roger seamlessly to continue the assault.

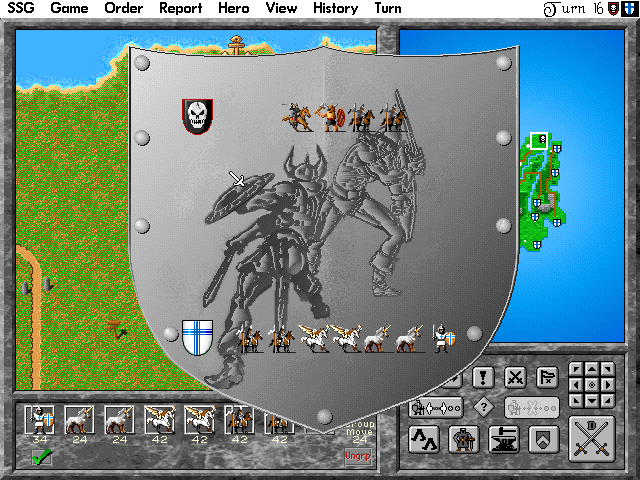
That's what happens here. With Sir Roger's command and movement bonus, this stack is pretty unstoppable given the wrecked state of black's production.

Sometimes if your units fight in battle alongside a hero they can win decorations which increase their base strength by 1. It's a nice touch.
Black is now down to just their capital city.

...and it's just out of reach. We'll get there next turn.
Pretty meagre defences for a last stand, to be honest.
We lose a unit of cavalry but nobody really cares.
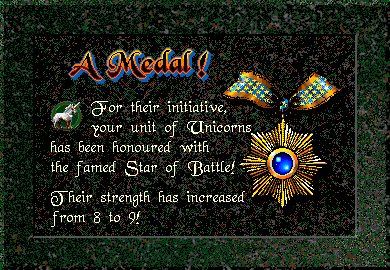
Just to add insult to injury, we grant a medal after the war is over and everyone's dead.
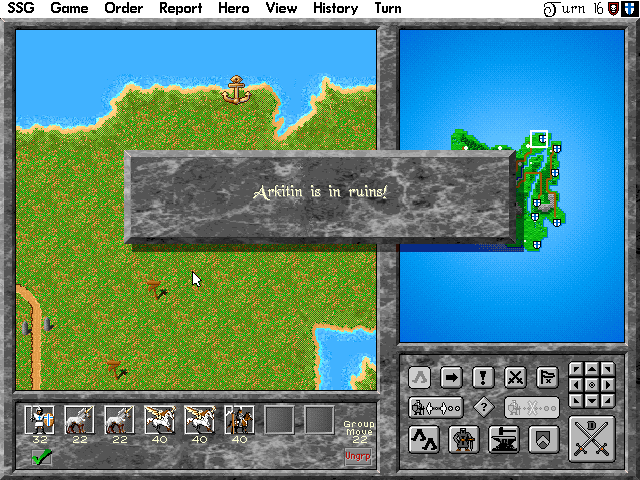
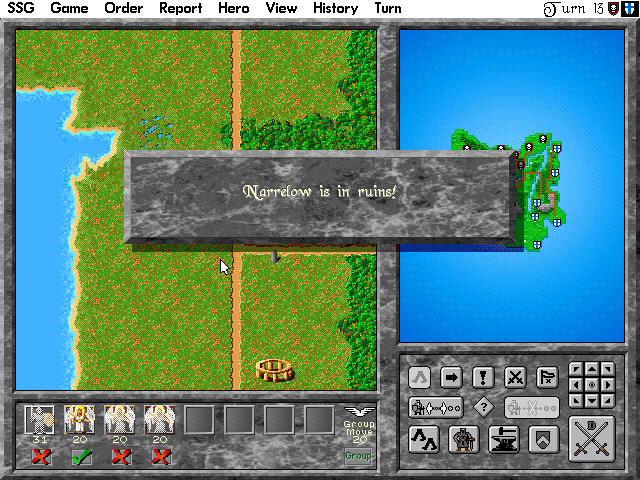
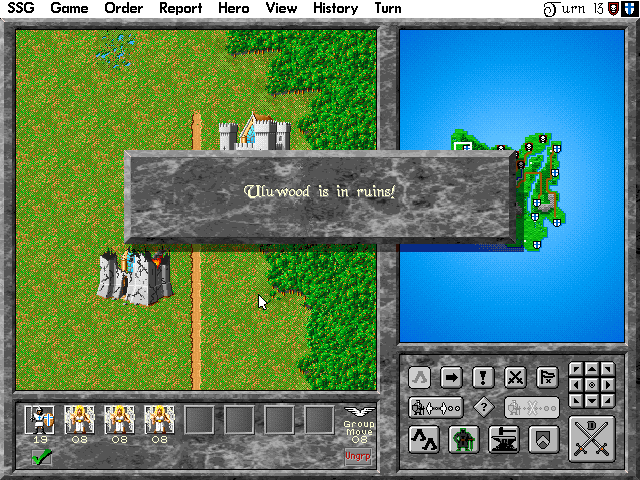
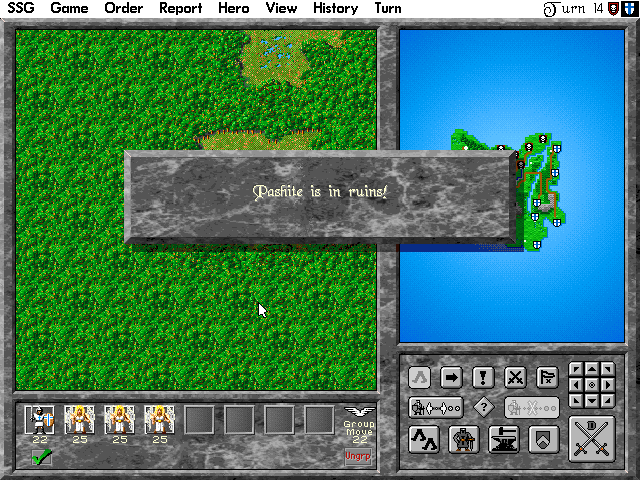
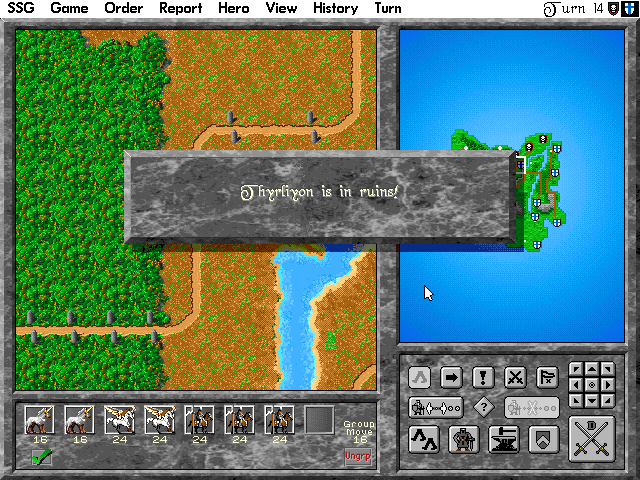
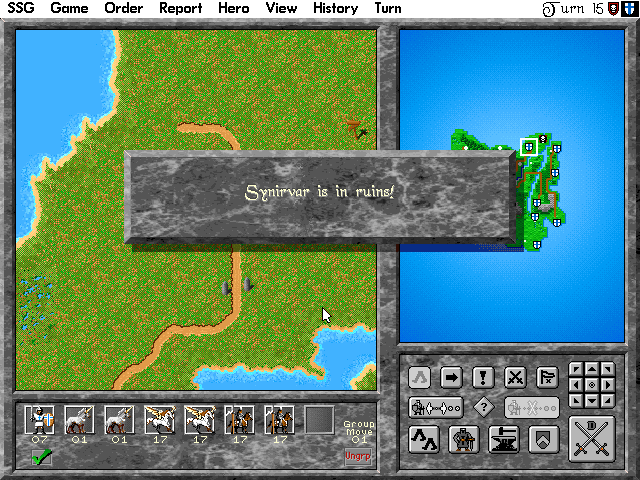
And of course, we raze their last city for good measure.
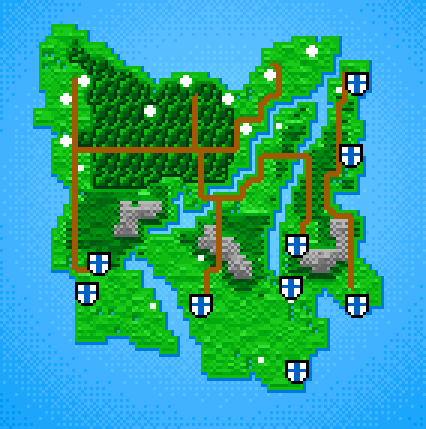
Here's the final map. We took our half of it and completely destroyed theirs. Nobody's gonna live there for a while.
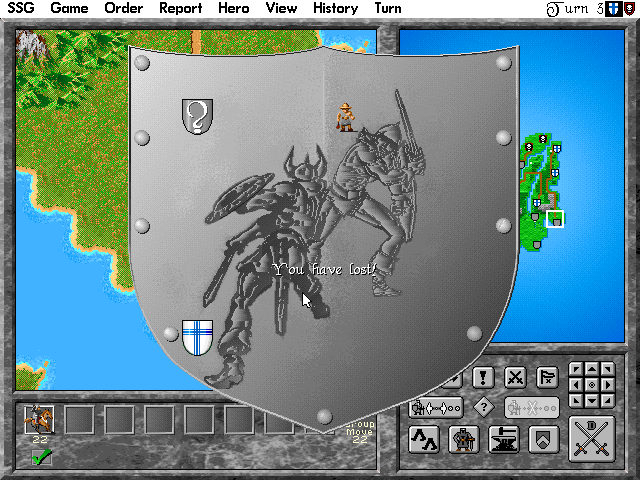
When you win you get this nice little victory screen and another movie like the slow cheesy intro. Sadly they're not on Youtube.
So that's a brief introduction to Warlords II Deluxe. Future updates will probably cover less turns at a time and be more complex because the map will be larger and there will be more enemies to fight.
Voting would go here, for what map to play next. I'm thinking of having the base Warlords II scenarios for the first vote: there's a few of them, mostly well-balanced, which use the default army set (the one we used here). This also includes the original Warlords 1 map, which was ported over to Warlords II because it's actually really well-designed and fun.