Toggle Background Color
Game Mechanics: Stats, Formulas, and Common Skills
I'll be going a bit in depth on the inner workings of Etrian Odyssey III in this update. I'll be covering what the stats do, what the Common skills are, and the formulas that are used in this game. First off, let's cover the stats.
Level: Levels are very important in the EO games since they give you so much. Each level increases how powerful your character gets stat-wise, and gives them another skill point to work with, which can give your characters a huge power spike. The actual number itself is used in some formulas, which will be covered in this update.
HP: Determines if your character is alive or not. If they run out of this, they die and can't participate in fights.
TP: This determines how much someone can use their skills. If they run out, their skills are unusable and can't be selected at all.
STR: A very simple stat. All this determines is how much damage STR based attacks will do, which is usually most physical attacks in the game, but it can include elemental and Almighty skills.
TEC: This is where things get a bit complicated. TEC is the main factor in determining how much damage TEC attacks will dish out, which includes most elemental and Almighty attacks. It also reduces the amount of damage taken from said attacks, like how VIT reduces the damage taken from STR based attacks. (For those of you that have played Pokemon RBY, yes, this operates like the Special stat.) TEC also influences your preemptive attack rate, and how often enemies will blindside you. It also has a minor effect on your accuracy and has a minor effect on how often you'll inflict and get hit by ailments. The TEC stat is also a very important factor in determining how powerful certain healing skills are.
VIT: Another simple stat. For the player, this reduces how much damage STR based attacks will deal to their party members. For enemies, this also reduces how much damage they take from TEC based attacks.
AGI: AGI determines how fast someone will act in a turn. It determines how often you'll get preemptive attacks, how often you'll get blindsided, and your chances of escaping a fight. It has a major effect on accuracy, and a minor effect on evasion. AGI also determines how much damage the Pincushion skill can dish out.
LUC: LUC influences a lot of things. It influences your escape rate, and how often you can get crits. It has a minor effect on your accuracy, but a major effect on your evasion. It also has a major effect on how often you can inflict an ailment, or avoid being hit by them.
Stat growths are static in the Etrian Odyssey series. There are some pieces of equipment you can use to give them a little boost, but the only way you can affect them permanently is to either have the character read a stat book, or have them go through Retirement. (More on that in Update 48: Retirement.) All stats cap at 99, aside from HP and TP which cap at 999.
Now that you know about the stats, let's look at the formulas they're used in. Or for these first few, the ones that don't do anything important.
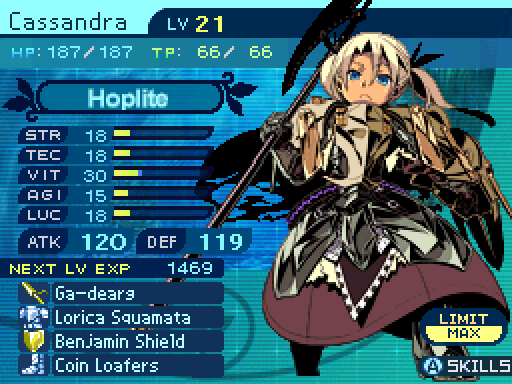
See those numbers right next to ATK and DEF? They are pure and utter nonsense. In every game except for EO1, the status screen flat out lies to you about how strong your character is. (The ATK and DEF values given in the status screen in EO1 are actually used in the formulas, and can be trusted.) These are basically estimates on how strong your characters are, which kind of worked in EO2, because the way that game determined the ATK and DEF numbers was simple. In EO3 and onwards, it barely makes a lick of sense. Especially since they don't take Attack forges into account in this game. Just see for yourself.
ATK Formula posted:
With weapon:
ATK = [(√STR) / 5 + 1.3] * Weapon ATK
Unarmed without Fist Mastery:
ATK = [(√STR) / 5 + 1.3] * (STR + LVL) / 2
Unarmed with Fist Mastery:
ATK = [(√STR) / 5 + 1.3] * (STR + LVL) * Fist Mastery Power
Now the game rounds down the numbers after its done calculating everything, no matter which formula it goes through. Oh, and here's the formula for the number next to DEF.
DEF Formula posted:
DEF = [(√VIT) / 8 + 0.8] * Total Armor Defense + VIT
It's not much better. No part of these formulas are used in the actual damage formulas. Even if these numbers weren't accurate, I'm not sure why they couldn't have kept it simple so you could have some idea of how much stronger you got instead of being just told that your character is stronger.
Now all these formulas only apply to EO3. The formulas change from game to game, which also means that how important certain stats are different depending on the game. So don't think that the same things that apply to one game, apply to another. (For example, the AGI stat in EO1 was completely worthless due to how that game handled speed and accuracy. It's much better handled in the other EO games.)
Let's check out the preemptive and blindside rates. The game calculates these the moment you get into a battle.
Preemptive Attack Rate posted:
Initial Checks:
A = (Party's average TEC + Party's average AGI) - (Enemy's average TEC + Enemy's average AGI)
If A is less than or equal to -12, B = 0
If A is between -12 and 42, B = 15 + 15 * sin(A / 20 – 0.75)
If A is greater than or equal to 42, B = 30
If the Arbalist's Ambush skill is in effect, the game performs this check:
C = B + Ambush Skill Power (Ranges from 25 to 50 depending on the skill level.)
Otherwise, this check is performed instead:
C = B
Final result:
Preemptive Rate = C + a random number from 0 to 10
So in normal circumstances, you'll have a 0 to 40% of getting a preemptive strike, or a maximum of an 80 to 90% chance if you used the Arbalist's Ambush skill. If you do get a preemptive strike, the game doesn't initiate any more checks. If you don't, then the game checks to see if your party gets blindsided.
Blindside Rate posted:
A = (Party's average TEC + Party's average AGI) - (Enemy's average TEC + Enemy's average AGI)
If A is less than or equal to -42, B = 30
If A is between -42 and 12, B = 15 - 15 * sin(A / 20 + 0.75)
If A is greater than or equal to 12, B = 0
Blindside Rate = B + a random number from 0 to 10
The blindside rate can range from 0 to 40% depending on your party's stats. If you're constantly getting blindsided, that's a sign that your party is too weak for the area, and you should probably spend some time grinding them up. Which shouldn't happen as long as you don't make it a habit to avoid every single enemy. If the blindside check fails, then the battle just starts as normal.
Speaking of battles, here's the formula that determines how often you can escape from them.
Escape Rate posted:
Initial Check:
A = (User's AGI + LUC) - (Enemy's average AGI + LUC)
If A is less than or equal to -32, then B = 0
If A is is greater than -32, but less than 10, then B = 40 + 40 * sin (A * 0.03 - 0.53)
If A is greater than or equal to 10, then B = 80
C = B + Turn Number * a random number from 5 to 10
If the Ninja's Tonsou Jutsu or the Shogun's Retreat skills get used, the game performs these checks:
B = Tonsou Jutsu or Retreat Skill Power (Ranges from 40 to 80, depending on skill level)
If C > 99, then C = 99
Otherwise this check is performed instead:
If C > 90, then C = 90
A random number from 0 to 98 is rolled for. If the number rolled is below the escape chance, the escape will succeed. The RNG is supposed to roll from 0 to 99, so this bug results in escaping being slightly easier than intended to pull off. This is not the only time such a mistake with the RNG happens within this game's code.
The escape rate is capped at a 90 out of 99 chance in most cases unless you use the escape skills, in which case the escape rate can end up being guaranteed in some cases. There was supposed to be a 1% failure rate in that case, but the RNG bug makes that impossible to happen if your escape chance is high enough. The formula basically says, as the battle goes on, it gets easier to escape. If you plug in the numbers, you may notice a bit of an oddity there. If A = 9, that would make B equal to 28. I have no idea if this was intended or just a mistake on the devs part, but at any rate, having high AGI and LUC stats is very important if you wish to run from battles. Now this formula only applies to your party. If an enemy tries to escape, they will always succeed unless they are prevented from doing so by the use of leg binds or other status effects. Now if you're in a boss fight or you happen to get cornered by an FOE, your escape attempts will always fail.
Here are the ones for accuracy. There's a lot for this one.
Accuracy Formula Breakdown posted:
Accuracy formula:
Accuracy = Base Accuracy + Ally buffs and passives + Enemy buffs and passives + HIT Forge Power
The game then performs a series of checks as it calculates accuracy. Mostly to make that the values don't get crazy high.
Initial Check:
ACC1 = Base Accuracy
If an enemy's ACC1 is greater than 200, ACC1 = 200
If an ally's ACC1 is greater than 100, ACC1 = 100
Then the game initiates this check.
2nd Check:
ACC2 = ACC1 + Ally buffs and passives + Enemy buffs and passives
If ACC2 is greater than 150, ACC2 = 150
If the attacker is Blind, then ACC2 is multiplied by 33%
Then the game moves onto the final check.
Final Check:
Accuracy = ACC2 + HIT Forge Power
If Accuracy is greater than 100, then Accuracy = 100
One of the biggest takeaways is that accuracy got a huge revamp going into 3. In previous games, any accuracy and evasion modifiers were multiplicative. This is no longer the case, as any such modifiers are now additive. What this also says is that enemies have an advantage when it comes to accuracy. Now blind will typically lower your allies' accuracy to 33%, unless they have enough passives or buffs to increase it to 49%. However, HIT forges are taken into account after the Blind check, so they can be very helpful in that regard. As for the seperate components, let's look at those.
Accuracy Formula Components posted:
Base Accuracy:
If a weapon's accuracy is not used in a skill, then A = Skill Accuracy
If a weapon's accuracy is used in a skill, then A = Weapon Accuracy + Hit Rate Modifier
Now this is where the stats of the attacker and the target come into play.
Stat Calculations:
B = {(Attacker's TEC + Attacker's LUC) / 2 + Attacker's AGI * 2} - (Target's LUC * 2 + Target's AGI)
B is then run through these checks.
Base Accuracy's Calculations:
If B is less than or equal to -139, then Base Accuracy = A - 30
If B is greater than -139, but less than 140, then Base Accuracy = A + 30 * sin(B / 100)
If B is greater than or equal to 140, then Base Accuracy = A + 30
To make sure that the final result isn't too high, the game initiates this check:
Upper Limit Check:
If an enemy's Base Accuracy is greater than 200, than Base Accuracy = 200
If an ally's Base Accuracy is greater than 100, than Base Accuracy = 100
Some skills ignore the user's weapon, so they'll use their own accuracy rating. Skills that do take into account the user's weapon apply a hit rate modifier to it. Regular attacks have no additional effect on the user's accuracy.
As for what a weapon's accuracy rating exactly is, it depends on who is attacking. If an enemy is using a "weapon", they have all have a base accuracy rating of 99%. Though this only really applies if they are using regular attacks. Any enemy skills use the skill's hit rate instead. For player units, it's a little more varied. Most weapons in this game have a base hit rate of 98%, and using skills will either add or subtract from the base hit rate (In most cases, skills subtract from it.) However, 4 weapons in the game; the Panic Fleuret, Dagger of Mercy, Stunning Knife, and Stone Songs, all have a base accuracy of 50%. Yeah... avoid those. Fists have a base accuracy of 95%, so Punch Monks will be at a slight disadvantage there, and their skills don't make up for the missing accuracy.
As for how stats affect accuracy, AGI is more important for accuracy, while LUC is more important for evasion. So your stats can either give you a +30% boost to your base accuracy, or a -30% penalty to it. Now let's look at the rest of the components in the accuracy formula.
Accuracy Formula Components posted:
Ally buffs and passives: Self explanatory. The game checks for any accuracy buffs, debuffs, and passives that influence it, and inserts that into the accuracy formula. Enemy evasion buffs and passives will subtract from this value.
Enemy buffs and passives: Same thing, only it applies to the enemy instead.
HIT Forge Power: Each HIT Forge adds +3% to the hit rate.
That's all for accuracy. Now let's look at critical hits. In most cases, crits will provide a 50% damage boost when they proc. Although there is a passive skill that affects the damage of critical hits, but I don't find it worth it. Mainly because crits will never proc when using a skill, they only proc on regular attacks. Something else of note is that starting from this game, enemies can no longer get critical hits on their regular attacks.
Critical Hit Rate posted:
Critical hit Formula:
Critical Chance = Base Crit + CRI Forge Power + A Random Number From 0 to 5
Base Crit is determined through these checks.
Critical Checks:
A = Attacker's LUC - Target's LUC
If A is less than or equal to -11, then Base Crit = 0
If A is greater than -11, but less than 42, then Base Crit = 15 + 15 * sin(A / 20 - 0.75)
If A is greater than or equal to 42, then Base Crit = 30
Each CRI Forge adds 3 points to the critical hit rate.
If the user knows Data Mining, Lady Luck, or Night Vision (and it is nighttime) their skill power is added to the critical hit rate. (1 through 10 for Data Mining, 5 through 20 for Lady Luck, or 15 through 40 for Night Vision.)
A random number from 0 to 98 is rolled for. If the number rolled is below the critical hit chance, the attack will deal a critical hit. The RNG is supposed to roll from 0 to 99, so this bug results in critical hits being slightly easier than intended to attain.
Yeah, told you that wasn't the only time the RNG bug would rear its head. So in normal conditions, you'll have a 30 out of 99 to a 35 out of 99 chance to get a critical hit, though certain skills can add more to the crit rate. Now let's actually look at the damage formula. Damage is calculated slightly differently depending on the circumstances, but the main formula follows this format.
Damage Formula posted:
Damage = (Base Hit * Stat Score * Skill Power * User's Passives * Attribute Multiplier * ATK Forge Power * Charge Power + Random Factor) * Modifiers * Crit Bonus * Sleep Bonus
If Base Hit is less than 1, then Base Hit = 1
Decimals are truncated once the game factors in the ATK Forge Power.
If damage is less than 1 after Random Factor is applied, then damage = 1
Pretty simple damage formula in terms of structure. Let's go and break it down, starting with the most important part, the Base Hit.
Base Hit posted:
If a player unit is using a STR-based attack: User's Weapon ATK - Target's VIT
If a player unit is using a TEC-based attack: User's TEC * 4 - Target's VIT
If an enemy unit is using a STR-based attack: User's STR * 3 - (Target's Armor Defense / 3)
If an enemy unit is using a TEC-based attack: User's TEC * 5 - Target's Armor Defense
The base hit is by far the most important part of dealing damage, as that's what all those fancy multipliers are applied to. And if your base hit is low, all of those boosts won't mean much, so it's important to increase that as much as possible.
For STR-based damage coming from the player, the base hit is based on the user's weapon. So it's important to upgrade the weapons of your attackers fairly often, as they'll lag behind if you don't. Granted, what counts as the user's weapon can differ in one case.
Weapon ATK posted:
If a weapon is equipped, than the attack power of that weapon is used.
If the character is unarmed and does not have any levels in Fist Mastery, then this formula is used to determine the value: (Level + STR) / 2
If the character is unarmed and does know Fist Mastery, then this formula is used to determine the value: (Level + STR) * Fist Mastery Skill Power
Namely if they're unarmed or not. And in pretty much most cases, there are very little reasons to use Fists. Fists can't be used with most skills, and you take a massive penalty to your weapon attack unless you are a Monk, so it's never worth it for non-Monks to use them.
So unless your character is a Monk, they're essentially punished for using fists. I should note that if a Monk is at level 99 and has 99 points of STR, and has maxed out Fist Mastery (which provides an 11% damage boost to all Fist attacks) they're considered to have a Weapon ATK of 219. For reference, the strongest weapon in the game has a Weapon ATK of 225. Unfortunately, Monks have a STR of 66 at level 99, so I really don't recommend using Fist Monks. But if you're using weapons, STR isn't factored in at this point. As for the other configurations of base hits...
On the player's end, TEC-based attacks will typically come from the Zodiac, as they're the magical powerhouses of this game, though they're not the only class with access to them. As I've said earlier, stats cap out at 99. So TEC-based attacks can go up to a maximum base hit of 396! However, this is counterbalanced by the fact that TEC damage attacks tend to have very low damage modifiers compared to STR-based attacks. And that there isn't really a way to buff up TEC-based damage easily in most cases. However, the Zodiac starts off with a TEC stat of 12 if you decide to recruit one. Which gives them a whooping base hit of 48 at the start of the game, when most weapons hover around 20 attack around then. This allows Zodiacs to hit really hard early, though later on they tend to start having issues due to the counterbalancing measures.
When it comes to enemies and their STR, their base hit is largely based on their STR stat, as they can't wield weapons, and it works pretty similarly to how TEC works. That being said, there's something I want to bring your attention to. Namely that armor isn't really that effective in reducing damage, since only every 3 points of defense reduces the base hit by 1. It helps yes, but VIT has a much bigger effect. What I'm saying is that while armor is important to upgrade, it's not a huge priority. Upgrade your armor every once in a while instead of at every opportunity.
As for enemy TEC, their base hit is very similar to how the player's version works, only being 25% stronger due to TEC being multiplied by 5. Armor is in full effect here, but because of how big TEC's base hit can get, it's not as effective as you'd think, as you're basically trying to stop a boulder with a wall made out of planks or something. As a result, armor isn't really too great all around in 3, and should be one of the lower priority purchases unless the armor comes with a good enough benefit.
And for the sake of completion, I'll also list out how the base hit is calculated if someone attacks their own side while under the effects of Confusion.
Confusion Base Hit posted:
Player vs. player: User's Weapon ATK - Target's VIT
Enemy vs. enemy: User's STR * 3
These are kind of bizarre and lopsided in the player's favor. If a player unit attacks their own side, they completely ignore the target's armor and VIT is factored in instead. The same as if they were fighting a monster really. This is a good thing. A class' VIT will naturally be higher than their armor since armor takes so much of a hit in the damage formula. Yes, a class' own body is stronger than their armor. Yeeeaaaahhhh, armor isn't too great in EO3.
As for enemies, if they attack their own side, their base hit deals full damage since nothing reduces its damage at all. Stat Score is still factored in as normal. Speaking of which, let's get into the rest of the damage formula.
Damage Formula Components posted:
Stat Score: This serves as a scaling factor of sorts in the damage formula, though the effect typically isn't as much as increasing your base hit or making use of damage increasing passives and ATK forges. There are 2 different formula used here depending on if the attack is STR-based or TEC-based. In the case of STR-based damage, the formula for determining it is √(User's STR / Target's VIT). Where with TEC-based damage, it's √(User's TEC / Target's TEC).
Skill Power: If a skill is used, then the game uses its skill power in the formula. But if the Pincushion skill is used, the formula AGI * 3 + Skill Power is used in place of that. If a regular attack is used, then the skill power of any weapon mastery skills are used instead.
User's Passives: Self-explanatory.
Attribute Multiplier: Simply put, this is how much damage the target takes from the attack. If a composite damage attack such as Freezing Blow (Which is Bash + Ice) is used, and the target has say, a 150% damage multiplier to Ice, but takes 75% damage from Bash, than the game uses the higher damage multiplier, so the 150% multiplier is taken into account.
ATK Forge Power: Each ATK Forge gives a 3% boost to the final damage value. These only apply to STR-based attacks.
Charge Power: If a Charge skill is used, apply its multiplier at this point.
Random Factor: A random number from 0 to 5 is added on to make it so that you don't see the same damage numbers constantly. Bizarrely enough, because this comes a little too early in the damage formula, other factors can affect this and cause bigger damage discrepancies.
Modifiers: Basically any active buffs or debuffs that affect the damage output.
Crit Bonus: If you get a critical hit, the damage is multiplied by 150%. These only affect normal attacks. If the user knows the Data Mining skill, then a value of 130% to 190% is used instead, depending on the level of that skill. Enemies cannot deal critical hits, so they can never benefit from this bonus.
Sleep Bonus: If the target is sleeping, the damage is multiplied by 150%. These only affect attacks that deal Cut, Bash, and Stab damage.
However, there is a limit to the damage, as there is a damage cap in this game. For STR-based damage from normal skills, if anything exceeds 59630 points of damage, it'll cap out at that point. For any Limit skills and any source of TEC-based damage, it caps out at 99999. No overflow will occur, it is a hard damage cap. It's possible for the player to pull this off, but that's not something that will be seen in normal gameplay. Enemies can also reach the damage cap, but there are only two instances where that's possible, and not something that will be seen when playing normally.
If you're wondering why there's a damage cap of 59630, it's actually a pun in Japanese. 59630 = ご苦労さん = "Good job."
Since we've seen everything related to damage, here's how the game checks for how battles play out. When attacking, the game first checks for the accuracy. If the attack will land, then it checks to see how much damage the attack will do, simple as that. But... how do enemies decide who to attack?
First, the targeting routines in the AI are checked. If they tell the enemy to go after anyone who falls under a specific condition, they'll attack a random party member that condition applies to. If no party member falls under that condition, then they'll just attack a random party member. However in a lot of cases, there's a specific targeting routine they follow instead. This will be marked by "Standard targeting" in my AI writeups.
Standard Targeting Routine posted:
When an enemy starts their attack, each party member is assigned a random number from 0 to 4. This is known as their aggro value.
Then the enemy decides who their preferred target is, which is determined by this bit of RNG:
75% chance to target the front row.
20% chance to target the back row.
5% chance to target an entirely random party member.
The party member with the highest amount of current HP in that row (Or the aformentioned random party member if they hit that 5% chance) gets a random number from 0 to 6 added to their aggro value.
If an aggro drawing skill is active, which are Provoke, Otori, Kagerou, or Play Possum, then the value from that skill is added to their aggro value. Provoke and Otori adds a random number from 3 to 15 to the aggro value, Kagerou adds a value from 3 to 5, and Play Possum adds a value from -20 to 0. (The maximum number is dependant on the skill's level.)
The party member with the highest aggro value will then be attacked.
They key thing to know about Etrian Odyssey games is that party members with the highest amount of current HP (It looks at the raw value, not a percentage) will be prioritized more often. So it's important to keep your defensive supports such as Hoplites topped off if you want your squishier party members to stay out of the heat often. It should also be noted that when you turn on auto battle, the game's AI will have your party members follow this routine. So they aren't just going after random enemies.
Another thing to note is that if an enemy uses an attack that hits multiple times, the targeting routine is actually active for each hit, updating dynamically as your party's HP goes down. This prevents all those hits from being concentrated on one person and just killing them off when they were perfectly healthy. Don't worry, this isn't in effect for your random multi-hit attacks. Who they go after is truly random in that case.
But enough about attacking and killing things. Let's look at healing and how that works. There are two different kinds of healing skills, fixed and TEC-based. Fixed healing is simple, an item or healing skill that falls under this will always heal for that specific number. Nothing can change that, and there's no RNG involved. However, TEC-based healing follows a different formula instead.
Healing Formula posted:
A = TEC - (Level * 0.63 + 5.28)
If A is less than or equal to -15, then B = 1
If A is greater than -15, but less than 15, than B = sin(A / 10) + 2
If A is greater than or equal to 15, than B = 3
B is then used in the 2nd part of the healing formula.
Healing Power = TEC * B * Skill Power * Form Qi Skill Power + A Random Number From 0 to 5
Prince/sses do have access to a few healing skills, so the part that factors in the boost from Form Qi is ignored in their case. But what this basically says is that if a class has a low TEC growth, their healing power actually gets weaker as they level up. Fortunately that doesn't apply to the actual healing classes. Interestingly enough, TEC-based healing doesn't apply to just HP healing, as there is one skill in the game that heals TP instead that's based off of this formula. Unlike in the first two games, healing is now centered around the TEC stat, using up to triple the TEC stat as the base that the healing multipliers get applied to. Now healing wouldn't be too great if your healers were too slow to heal up your party members, so let's look at how speed works.
Action Speed Formula posted:
Speed = AGI + Total Equipment Speed + Skill Action Speed + Priority Modifier + SPD Forge Power + A Random Number From 0 to 4 + 2000
If Speed is less than 1, then Speed = 1.
If Speed is greater than 32767, then Speed = 32767.
Each piece of equipment has a speed modifier attached to it, which I'll talk more about in a separate update. Skills all have speed modifiers as well. A lot of the Hoplite's support skills tend to have high action speeds to ensure that they go before the enemy acts in most cases, while healing skills have low action speeds to give a risk to using them. Regular attacks don't have any action speed applied to them. Each SPD Forge on a piece of equipment gives an action speed of +2. Limits do not have any action speed other than, go first or last. Speaking of which, here's how the Limit gauge works.
Limit Mechanics posted:
Limit is gained through:
Taking an action such as attacking, defending, switching places with someone else, or using an item. If the action is stopped through the use of an ailment or bind, Limit does not increase.
An ally dying. Summoned units dying (sending them away through the use of a skill does not count) counts for this.
Winning a battle.
Limit is lost through:
Resting at the inn will halve the Limit gauges of everyone who slept there. Going back to town has no effect on the party's Limit gauges.
The character that dies will have their Limit gauge halved.
Escaping from a battle halves every living party member’s Limit gauges.
The amount of Limit gained is then determined through this formula.
Limit Gain Formula:
A = 5 + A Random Number From 0 to 10 + Skill Level of Skill Used + Number of LIM Forges + Limit Boost Power
Then these checks are performed.
Limit Cap:
If A is greater than 15, then A = 15
B = A + Number of LIM Forges (This check is skipped if the user has no LIM Forges)
Limit Gain = A Random Number From A to B
LIM forges not only raise the minimum amount of Limit, they can potentially raise the maximum amount as well. However that's up to RNG and not to be relied upon. Still, they are very powerful. Without any LIM Forges, it can take from 7 to 20 turns to fully charge up a character's Limit if no one dies during a battle. But having 2 Limit Forges can potentially lower the amount of turns to fully charge the Limit gauge to 6 turns, and 5 Limit Forges can possibly lower that to 5 turns. Taking multiple actions within a turn, like the Buccaneer's Swashbuckling passive which allows them to use regular attacks up to 4 times in one turn, can raise the Limit Gauge multiple times. But multihit skills do not count as taking multiple actions. However, when a Limit is used, the Limit Gauge will not fill up for that turn, so Limits cannot be used for 2 turns in a row. At best, they can only be used every other turn. Next up is the ailment infliction formula.
Ailment Infliction Rate posted:
Ailment Score = (2 * Attacker's LUC + Attacker's TEC) - (2 * Target's LUC + Target's TEC)
If Ailment Score is less than or equal to -18, then X = Skill Accuracy
If Ailment Score is greater than -18, but less than 22, then X = [{1.17 + 0.83 * sin(0.07 * A - 0.20)} * Skill Accuracy]
If Ailment Score is greater than or equal to 22, then X = 2 * Skill Accuracy
Infliction Rate = (X + A Random Number From 0 to 9) * Target's Resistance
If the attacker is a beast, has access to Wild Mastery, and Target's Resistance is not equal to 0, add Wild Mastery's power onto Infliction Rate.
Remaster Notes:
If the difficulty is set to Basic and an enemy unit is being attacked, multiply the Infliction Rate by 1.2.
If the difficulty is set to Basic and a player unit is being attacked, multiply the Infliction Rate by 0.8.
If the difficulty is set to Picnic and an enemy unit is being attacked, multiply the Infliction Rate by 2.
If the difficulty is set to Picnic and a player unit is being attacked, multiply the Infliction Rate by 0.1.
If Infliction Rate is greater than 90, then Infliction Rate = 90
LUC and TEC actually have a very big influence on how often ailments can land. The Buccaneer's Hanging skill has a base chance of 60% chance to inflict head bind at level 10. But with enough LUC and TEC, that can cap out to a 129% chance. Which then gets knocked down to 90% thanks to a cap. If you plug in some numbers, you may notice something weird with this formula. Namely that an Ailment Score of -17 would result in a multiplier of 0.3535! Which would give a level 10 Hanging a 21 to 30% chance to land. But having an Ailment Score of -18 would make Hanging's chances of landing head bind 60 to 69%. Yeah, this is a bug and quite the mistake. This means that having much lower LUC and TEC stats than the enemy is beneficial and gives you a bigger chance of inflicting an ailment than having similar Ailment Scores. Though the formula goes back to normal if the Ailment Score is 0. Then this result is run through the target's resistances, depending on the ailment that's inflicted. Unfortunately, no matter how high you get your infliction rate, you are never guaranteed to inflict it outside of certain circumstances. I'll talk more about ailments in a later update.
Though I should also cover how recovering from ailments works.
Ailment Recovery Formula posted:
First, check how many turns it has been since the ailment has been applied. If the ailment was applied this turn, skip recovery. All stats refer to the recovering character. The stats of the ailment applier are not used at all when determining recovery.
A = LUC - (Level * 0.58 + 5.7)
B = A random number between 0 and 10
C = Turns since ailment was applied
If A is less than or equal to -10, then D = B * C
If A is greater than -10 but less than 10, then D = B * C + (sin (A * 0.14) * 20 + 20)
If A is greater than or equal to 10, then D = B * C + 40
Add the values for Waking Chakra to D. If D is greater than 80, then D = 80.
Roll a number between 0 and 99. If this number is less than D, recover from the ailment.
This formula means that no one is guaranteed to recover from a given disable on any turn. If you're particularly unlucky, it's possible for the disable to last for the whole battle. And Waking Chakra can help stack the odds in your favor, but it's not guaranteed to cause it to wear off.
With all that covered, let's talk about Common Skills. These are skills that all classes have access to, but they generally don't affect a lot. Now there are some rules of thumb to keep in mind when leveling up skills in the EO series. 1. You max them out, because the skill is at its best when mastered. 2. Put only one point into them because the skill offers so much at level 1, but their scaling is so terrible that there's no reason to level it up past that point. 3. You level it up partway because the skill stops being worth it after a certain point, or it's a prerequisite for a skill you actually want. At any rate, do not generalize and spread your skill points all over the place. Pick a role you want the character to accomplish, and stick with it. Generalizing will create a character that's terrible at everything and gets nothing done. Now most of these values aren't actually listed in the game, but thanks to people data mining the games, the scaling for the skills in the game is now known if you go and look for it. None of these Common Skills have any prerequisites and can be learned at any time.
HP Up/TP Up
Skill Type: Passive
Maximum Level: 10
Increases the user's maximum HP/TP.

Notes:
- When learning these skills or increasing their levels, only the maximum HP/TP pool is boosted. Current HP/TP is completely unaffected. The same applies to the forges.
- HP and TP Forges are applied after the boost from these skills. The game does not round down at all when accounting for the boosts from these skills or forges.
- Any direct increase to HP or TP from equipment are applied after the boost from forges have been applied.
- Cannot break the 999 HP/TP cap. Any further attempts to increase HP/TP will do nothing.
These are probably the only Common skills that I would advocate investing in. Though I wouldn't make these the number one priority, you'll want to invest in HP Up at some point as the sheer additional bulk added by HP Up helps so much with party member survivability. Especially later on! Still, 1 point gives the biggest increase, so it may be worth investing that much early on, and then increasing these skills as you see fit. Don't expect big results early on due to how small your stats are at that point.
Do note you may not need HP Up if you're bringing along defensive classes such as Hoplite or Monk. It depends on what you want, more SP to invest into important skills, or more class slots for more offensive party members. All very important tradeoffs to consider.
Just mind the 999 HP cap and see that you don't spend too much in that skill for Gladiator, Hoplite, and Yggdroid, as they have the biggest HP pools and are the most susceptible to running into that limit depending on how much you've leveled them up. For classes that burn through their TP easily, TP Up can be a nice boon for them, but TP isn't really a huge thing to worry about in this game for the most part. Take it as you see fit though, as not having to spam TP recovery so much is a nice boon.
While Yggdroids have their TP stuck at 60 even when leveling up, this skill does work with them! So it can be a way to further their TP pool if you so wish, though it'll only go up to 88 at max level.
Bandage
Skill Type: Active Field Skill
Maximum Level: 10
Restores HP to one party member. Only usable outside of battle.

Notes:
- Despite not being a form of TEC-based healing, it is affected by Form Qi.
Really terrible. Use actual healing skills or items instead. The heal falls off pretty quickly. The only use this skill has is in the early game, if you happen to lack any form of healing whatsoever.
Granted there is a bit of a cheesy thing you can do with this skill. If you have a mainclass Ninja, and they invests enough in Keburi no Sue, they can reduce the TP cost of this skill to 1. Allowing for nearly free heals in the field while not having to take a Monk subclass or something. However, this "tactic" is completely outclassed by Monarch March if you have access to that skill. But if you don't, I suppose that's something to keep in mind? Do remember that SP is a precious resource, and it'll be up to you to decide if this cheese tactic is actually worth using up however much SP you're willing to burn on this skill.
Combat Study
Skill Type: Passive
Maximum Level: 10
If the user is left behind at the guild, they will gain a portion of the experience points the active party gets from battles in the Labyrinth.

Notes:
- Has no effect if the exp was gained from a Sea Quest.
- Has no effect if the user is dead or petrified.
- Has no effect if the user is an active party member.
- Party members can level up from the usage of this skill.
Remaster Changes:
- Applies to Oceanic Quests now.
This skill is essentially leaked exp. Now this is actually a much better deal than it seems. When you win a battle, the exp is split amongst your surviving party members, so each person in a 5 man party would get a 20% share of the exp if they're all alive. So back at the Explorer's Guild, everyone who has level 10 in Combat Study would get half of that amount, which is a good deal. I highly suggest investing in this in all the party members you aren't using, since this can be a good way to save some time on grinding if you need to make any changes to your party.
Of course if you know exactly what classes you want or are just doing a replay and have everything routed out in your head already, you probably won't need this at all. Can be handy for first time players though.
Remaster Notes: Don't bother with this, it's a huge waste of SP and time spent micromanaging SP investment. If you want to grind up new party members, hell even a Farming party, just drop down to Picnic and auto battle some mobs or even certain FOEs or bosses. Picnic weakens the opposition so much it's by far the best way to grind in this version. And it has a 50% exp boost to boot!
Of course if you don't want to lower the difficulty at all to have a similar experience to the DS version, then yeah this skill works just as well as ever for prepping potential alternate party members or leveling up a farmbot team. A bit better actually, given that it works on the Oceanic bosses now.
Take/Chop/Mine
Skill Type: Passive Field Skill
Maximum Level: 10
Allows the party to gather from Take/Chop/Mine points up to a certain number of times per day.

Notes:
- Gathering attempts completely refresh at midnight, which is represented by the clock hitting 00 AM.
- Gathering attempts used up are tracked globally. So swapping in and out party members who have these skills will not refresh used up gathering attempts, though maximum gathering attempts allowed per day will change.
- When learning these skills or increasing their levels, both the maximum and current number of attempts will increase.
- Multiple instances of the same type of gathering skills stack.
- Stacks with Harvestry.
- These skills are still active even if the party members who have learned them happen to be dead or petrified.
Unlike the first two games, all the classes have access to all three types of gathering skills. With that said, there is absolutely no reason to have any of your active party members invest in these when the Farmer class exists. Not to mention that they have a much more economical version of these skills since Harvestry allows you to gather from all Item Points without having to invest in 3 different skills. Ignore these, they're completely worthless.
Remaster Notes: However, since farmbot teams are so much easier to grind up in this version, stacking these with Harvestry can make farming item points more convenient, and you won't have to spend as much time spamming Double Crop if you're looking for specific items. Just remember to spread out which Farmers get which skill, since I doubt you'll need 75 gathering attempts for each item point!