Toggle Background Color
Game Mechanics: Random Encounters, Battles, and Items
The Labyrinths in the Etrian Odyssey games are pretty carefully designed in order to give a player a tough but satisfying experience while exploring them. One way the game goes about doing this is with the random encounter and FOE system, which combines both the concepts of random and preexisting encounters, with the preexisting encounters being far more deadly.
The Random Encounter System
The way the random encounter system works is that each tile you can step on in the Labyrinth has a value of 0 to 5 assigned to them. This is known as their Danger Value. This value is then added onto a hidden counter, which is indicated by the random encounter radar turning from blue to red as it increases. When you get out of a battle or enter a new floor, the game sets a limit on the counter, ranging from 16 to 64 inclusive. When the counter surpasses that limit, you get into a battle. Skills can increase or decrease the danger values of the tiles. Troublemaker will increase the danger values, Vigilance will decrease them, and Safe Stroll will force all tiles in the Labyrinth to have a danger value of 0, making it impossible to get into battles in that case.
This ties into FOEs in that a significant portion of getting through the Labyrinth involves navigating around FOEs and avoiding them. FOEs help provide tension when you're exploring the Labyrinths since they outclass your party (Or are supposed to, but let's ignore how weak they are in this game for now). What doesn't help matters is that they can join in on random battles, so traversing their territory can be dangerous. But you shouldn't worry too much. Typically the tiles in the territories that FOEs live in have low danger values, so it's possible, but hard to get into an encounter in there most of the time. But you should make sure to reset the counter by getting into a random battle outside their territory before attempting to traverse through it.
The encounters you get into also depend on the tile you're on. This is accomplished by assigning each tile a list of possible groups of encounter formations. So a monster that's a rare encounter on one part of the floor might be a common encounter on a different part. If you're trying to hunt down a certain enemy and aren't having much luck finding them, try looking on a different part of the floor.
Starting a Battle
Once you get into a battle, the game runs a few calculations. These calculations will determine how much of an advantage your party will have when starting a battle, such as getting a preemptive attack, being blindsided by the enemies, or starting off on equal footing. The first check the game runs is seeing your party will get a preemptive attack.Preemptive Attack Rate posted:
Initial Checks:
A = (Party's average TEC + Party's average AGI) - (Enemy's average TEC + Enemy's average AGI)
If A is less than or equal to -12, B = 0
If A is between -12 and 42, B = 15 + 15 * sin(A / 20 – 0.75)
If A is greater than or equal to 42, B = 30
If the Arbalist's Ambush skill is in effect, the game performs this check:
C = B + Ambush Skill Power (Ranges from 25 to 50 depending on the skill level.)
Otherwise, this check is performed instead:
C = B
Final result:
Preemptive Rate = C + a random number from 0 to 10
So in normal circumstances, you'll have a 0 to 40% of getting a preemptive strike, or a maximum of an 80 to 90% chance if you used the Arbalist's level 5 Ambush skill. If you do get a preemptive strike, the game doesn't initiate any more checks. If you don't, then the game checks to see if your party gets blindsided. And a word of warning. Unlike in EO2, you are not guaranteed to escape from a battle even if you do get a preemptive attack. Granted with the escape rate skewed heavily in the player's favor (more on that later) that doesn't matter too much. Blindside Rate posted:
A = (Party's average TEC + Party's average AGI) - (Enemy's average TEC + Enemy's average AGI)
If A is less than or equal to -42, B = 30
If A is between -42 and 12, B = 15 + 15 * sin(A / 20 + 0.75)
If A is greater than or equal to 12, B = 0
Blindside Rate = B + a random number from 0 to 10
The blindside formula is basically an inverted version of the preemptive attack formula. The blindside rate can range from 0 to 10% or from 30% to 40% depending on your party's stats. If you're constantly getting blindsided, that's a sign that your party is too weak for the area, and you should probably spend some time grinding them up. If the blindside check fails, then the battle just starts as normal. And for those of you that have played EO2, guaranteed blindsides are thankfully gone. No encounter is flagged to always blindside you.
Now there are exceptions to these formulas. Mainly, FOEs, as they operate a bit differently. If you run into an FOE while you're face to face with them, or run into their side, or an FOE runs into your side, the game runs these formulas as normal. However, if you run into their back while facing forward, you're guaranteed to get a preemptive attack. If you run into their back while sidestepping, or walking backwards, the game just runs those formulas as normal. However, if an FOE walks into your back, you're guaranteed to be blindsided.
Another exception is boss fights. The game flat out disables these formulas when you get into one, so it is impossible to get a preemptive strike or get blindsided when starting a boss fight. The sole exception to this case is Narmer, due to the gimmick of his boss fight.
Options in Battles
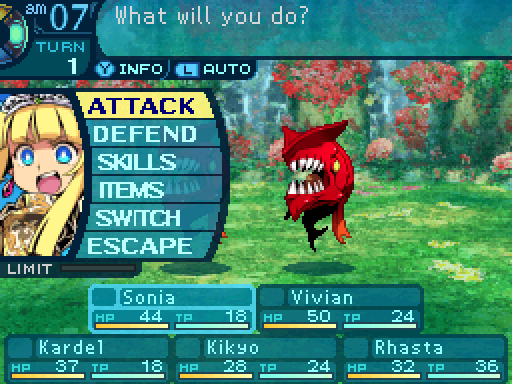
When a battle starts, you'll have some options to choose from. I'll go over each one in detail.
Attack
This action causes your character to use a regular attack that only attacks one enemy and deals 100% damage. This damage can be directly boosted through weapon masteries. There is no action speed modifier when using a regular attack. The base accuracy of a regular attack is determined by what weapon they have equipped, which will be 98% in most cases. (Everyone's starting Dagger comes with a base accuracy of 100%. Oddly enough, that's the only weapon with 100% base accuracy.) However, some weapons come with a base hit rate of 50%. Those weapons are the Panic Fleuret (Rapier), Dagger of Mercy (Knife), Stunning Knife (Knife), and the Stone Songs (Book.) All of those are weapons with an attack power of 1 and are filled with forges, so for the most part you don't have to worry about that. Regular attacks can also deal critical hits, which will deal 150% damage instead of 100%. Data Mining can increase the critical damage to 190%, but for the first 3 levels of the skills, it will actually decrease critical hit damage to 130% to 140%, so beware of that. Skills cannot deal critical hits under any condition.
Defend
This action has an action speed modifier of +9, so it's a fast action, but if your character is too slow, they'll take the full amount of damage if they were attacked before they could actually defend. Any character that chooses this action will do nothing for the current turn, but have any incoming damage reduced by 30%. This does work on all damage types. This stacks multiplicatively with other defensive boosts, such as being in the back row, or the Hoplite's Line Guard. So defending in the back row will reduce physical damage by 65%. Defending has no effect on ailments or binds.
Skills
This lets your character use a skill. For more information on a class' skills, read their Class Showcase.
Items
Next I'll be covering items that can be used in battle. Items are essentially coded in the game as skills that don't require a body part to use, nor cost TP. This means that the only a party member is unable to make use of them is if they're incapacitated through the use of Death, Petrification, Sleep, Confusion, Paralysis, or Stun. Some items used in battle do take the user's stats and passives into account because of that, so that's something to keep in mind. All healing items count as fixed healing and cannot be boosted by Form Qi. The offensive items are affected by Etheric Charge, but not Charge since none of them deal physical damage. Items can help fill any holes in your party compositions, but are not intended to be complete replacements for classes so they're weaker than skills in some cases. Still, smart usage of them will be vital in order to get through these games.
Medica
Cost: 20 en
Stats Used: N/A
Target Type: Single
Action Speed: +0
Materials Needed: Available at the beginning of the game
Need to Restock: No
Restores 80 HP to one party member.
A very basic healing item, but you'll want to stock up on these at the beginning of the game. Especially if you're not using a healer like the Prince/ss or the Monk. Though after you unlock Medica IIs, there's no reason to ever buy any more of these.
Medica II
Cost: 60 en
Stats Used: N/A
Target Type: Single
Action Speed: +0
Materials Needed: 5x Sea Beast Fur, Acquired from High Oneps in the 2nd Stratum
Need to Restock: No
Restores 160 HP to one party member.
This is a very nice upgrade to Medicas, and you can unlock these at a point where your party's HP pools gets large enough for Medicas to not do much. There is pretty much no reason to ever buy Medicas again after you unlock this, so this should be your go to single target healing item until you unlock Madoras, which are far more useful in terms of utility.
Medica III
Cost: 400 en
Stats Used: N/A
Target Type: Single
Action Speed: +0
Materials Needed: 7x Writhing Wood, Acquired from Sickwoods in the 5th Stratum
Need to Restock: No
Restores 300 HP to one party member.
At the point where you can unlock these, I don't find them as useful as Madoras. Sure those heal less, but they have far more utility in that they can heal a row. Also by this point, any healing classes in your party should be able to restore a significant amount with their skills. Although these can be useful as emergency heals. Though they'll get outclassed by Medica IVs very quickly.
Medica IV
Cost: 1000 en
Stats Used: N/A
Target Type: Single
Action Speed: +0
Materials Needed: 10x Fairy's Core, Acquired from Clioneans in the 6th Stratum
Need to Restock: No
Fully restores a party member's HP.
These are a bit situational, but function as very good emergency heals, especially if your healer happens to be busy with something else or gets incapacitated in some way. Enemies in the post-game can be very vicious if you're not careful, so these are very handy as a backup plan of sorts.
Amrita
Cost: 150 en
Stats Used: N/A
Target Type: Single
Action Speed: +0
Materials Needed: 1x Green Algae, Acquired from Take Points in the 2nd Stratum
Need to Restock: Yes
Restores 50 TP to one party member.
TP is a very vital resource to manage, so Amritas are vital to pack on every dungeon trip. Unfortunately, unlike in the first two games, you'll have to actively farm for them and keep a steady supply of them in stock if you're making heavy usage of them. And you won't unlock Amrita IIs for a long time.
Amrita II
Cost: 500 en
Stats Used: N/A
Target Type: Single
Action Speed: +0
Materials Needed: 1x Life Honey, Acquired from Take Points in the 5th Stratum
Need to Restock: Yes
Restores 100 TP to one party member.
A nice upgrade over Amritas, but you won't get these for a long time. Once you get access to these, there is pretty much no reason to use Amritas unless you're too lazy to farm for them. These should keep your party going for a good while until you unlock Amrita IIIs.
Amrita III
Cost: 2000 en
Stats Used: N/A
Target Type: Single
Action Speed: +0
Materials Needed: 1x Maiden's Wheat, Acquired from Take Points in the 6th Stratum
Need to Restock: Yes
Fully restores a party member's TP.
It'll be a long time before you can buy these in bulk, but they're absolutely worth it. Being able to just get a party member from an empty TP pool back to full is a massive boon in the postgame, since that lets you be efficient in terms of action economy, Unfortunately, they got nerfed in the following game. This was the last game where you could fully restore your TP like that.
Hamao
Cost: 300 en
Stats Used: N/A
Target Type: Single
Action Speed: +0
Materials Needed: 1x Moss Strawberry, Acquired from Take Points in the 3rd Stratum
Need to Restock: Yes
Restores 50 HP and 25 TP to one party member.
Hamaos have been repeatedly getting nerfed ever since the first game (Kind of understandable, since they were far more powerful in the first game), and now they're practically undesirable. Those restoration values wouldn't be too bad for the earlygame, even though it would be situational. The problem is that you can only buy these in bulk when you get to the 3rd Stratum, long after they stop being useful. The few you find in the earlygame could be slightly handy though.
Hamao II
Cost: 300 en
Stats Used: N/A
Target Type: Single
Action Speed: +0
Materials Needed: 1x Hogweed Oil, Acquired from Take Points in the 6th Stratum
Need to Restock: Yes
Restores 100 HP and 50 TP to one party member.
Once again, an item that is horribly outclassed by the time you can actually buy them. Medica IVs and Amrita IIIs do so much more. And there is no Hamao III. This is as good as this series of items gets.
Nectar
Cost: 50 en
Stats Used: N/A
Target Type: Single
Action Speed: +0
Materials Needed: 1x Small, Acquired from Take Points in the 1st Stratum
Need to Restock: Yes
Revives one party member and restores 20 HP.
It's absolutely vital to pack a few of these on every Labyrinth trip. However these items got a massive indirect nerf and are far more risky to use in this game. Unlike the first two games, enemies got an upgrade to their AI and no longer play by your rules. Unlike your party, the enemy decides which target to attack the moment it's their turn to attack, meaning that they can attack party members that were recently revived (This was only possible in the first two games if a party member got killed and revived in the same turn before it was the enemy's turn to attack.) And you can't use Bodyguard on dead party members, so you really have to assess when it's the best possible time to use Nectars.
Nectar II
Cost: 300 en
Stats Used: N/A
Target Type: Single
Action Speed: +0
Materials Needed: 1x Crabapple, Acquired from Take Points in the 4th Stratum
Need to Restock: Yes
Revives one party member and restores 100 HP.
A much stronger upgrade over Nectars since these don't them quite on the brink of death. Once you can buy these, there aren't any reasons to use Nectars. This is as strong as Nectars get. For any of you that have played EO2, there aren't any AOE versions of these items. Those were proven to be too strong since they could single-handedly save your party from a game over, which is why they have never reappeared in the series.
Madora
Cost: 400 en
Stats Used: N/A
Target Type: Row
Action Speed: +0
Materials Needed: 1x Flame Fruit, Acquired from Take Points in the 3rd Stratum
Need to Restock: Yes
Restores 150 HP to a row.
Somas got kicked out and reworked into Madoras. For one thing, they now provide fixed healing, so passives that boost healing no longer affect them. And they only affect a row instead of being AOEs. However in exchange for that, Madoras heal more than Somas did in the first two games. Those changes didn't do much to nerf Madoras into the ground, so they're fantastic healing items during the midgame and postgame. Sure, row healing isn't as good as AOE healing in terms of utility, but it's still better than single target healing. I would recommend skipping out on Medicas for these. You really should make sure to have a good stock of these in the store. They'll last you for a long time.
Madora II
Cost: 5000 en
Stats Used: N/A
Target Type: Row
Action Speed: +0
Materials Needed: 1x Ambrosia, Acquired from Take Points in the 6th Stratum
Need to Restock: Yes
Restores 300 HP to a row.
A very nice upgrade to Madoras, and the strongest version of them. They don't heal as much as Medica IVs, but they're a nice little emergency item to have in case you need to get your party back up and running quickly.
Theriaca A
Cost: 100 en
Stats Used: N/A
Target Type: Single
Action Speed: +0
Materials Needed: 1x King Core, Acquired from King Starfish in the 2nd Stratum
Need to Restock: No
Dispels all binds from one party member.
Binds can hinder your party, so you're going to want to pack a few of these on explorations just in case. But for a few specific boss fights, you'll want to pack a lot of these, especially if your party doesn't have anyone who knows Refresh. Oh and for those of you that have played EO2, the AOE versions of these items aren't in this game. Or any future EO game for that matter.
Theriaca B
Cost: 30 en
Stats Used: N/A
Target Type: Single
Action Speed: +0
Materials Needed: 1x Anra Fruit, Acquired from Take Points in the 1st Stratum
Need to Restock: Yes
Dispels an ailment on one party member.
I would say that these are more vital than Theriaca As, as while binds can merely inconvenience your party, ailments can flat out cause a party wipe and are far more dangerous. These are the only way to cure Petrification out in the Labyinth, aside from using Refresh. Beware, unlike Theriaca As, these items must be restocked. And again, for those of you that have played EO2, the AOE version only existed in that game.
Metopon
Cost: 1000 en
Stats Used: N/A
Target Type: Single
Action Speed: -3
Materials Needed: 1x Mint, Acquired from Take Points in the 5th Stratum
Need to Restock: No
Dispels all buffs on an enemy.
The only reason to use these is if you don't have anyone who knows Ad Nihilo. They're extremely situational and not worth carrying around most of the time since most enemies can't buff themselves, or apply buffs that are worth using up a turn to get rid of. However, in the situations it's useful for, Metopons are very useful when the enemy in question has very strong buffs you want to dispel ASAP.
Unihorn
Cost: 500 en
Stats Used: N/A
Target Type: AOE
Action Speed: -3
Materials Needed: 1x Hyacinth Petal, Acquired from Take Points in the 4th Stratum
Need to Restock: No
Dispels all debuffs on the party.
Even more situational than Metopons. Enemies rarely debuff you, and most of the time the debuff isn't worth using up a turn to get rid of. Especially when it can be applied again so easily.
Bravant
Cost: 300 en
Stats Used: N/A
Target Type: Single
Action Speed: -6
Materials Needed: 5x Monster Bone, Acquired from Sauroposeidons in the 4th Stratum
Need to Restock: No
Increases one person's physical damage output by 45% for 4 turns.
Bravants are very handy consumables to have, especially since it's unlikely for most parties to have access to 3 different skills that provide damage buffs. It's just as strong as most physical damage buffs at max level (Berserker Vow is the only damage buff that gives a damage boost beyond 45%.)
Stonard
Cost: 150 en
Stats Used: N/A
Target Type: Single
Action Speed: -6
Materials Needed: 3x Predatory Fang, Acquired from Stegosauruses in the 3rd Stratum
Need to Restock: No
Increases one person's physical defense by 45% for 4 turns.
A situational defensive item. Ideally you would want defensive buffs to affect more than one person if you're using them. They're not a terrible item to make use of, but you would probably be better off using something else.
Fire Mist/Ice Mist/Volt Mist
Cost: 150 en
Stats Used: N/A
Target Type: Everyone
Action Speed: +0
Materials Needed: 1x Scarlet Sage, Acquired from Take Points in the 3rd Stratum
Need to Restock: Yes
Decreases the amount of Fire/Ice/Volt damage everyone on the battlefield, ally and enemy, takes by 50% for 4 turns. This amount is subtracted from a target's damage multipliers. If an enemy takes 200% damage from Fire attacks, they will take 150% damage from Fire attacks after the Fire Mist is put into effect.
After everyone overused Mists in EO2 to mitigate damage from bosses and the like, Atlus saw fit to nerf them by making it so that they affect everyone, enemies included. This means that you'll have to be more careful with how you use them. Though they can make a nice substitute for a Hoplite's Antielemental skills if you don't have them. Though mind you, there are situations where these will not be enough to protect your party.
Cut Mist/Bash Mist/Stab Mist
Cost: 300 en
Stats Used: N/A
Target Type: Everyone
Action Speed: +0
Materials Needed: 1x Aloe, Acquired from Take Points in the 5th Stratum
Need to Restock: Yes
Decreases the amount of Slash/Strike/Pierce damage everyone on the battlefield, ally and enemy, takes by 50% for 4 turns. This amount is subtracted from a target's damage multipliers. If an enemy takes 200% damage from Slash attacks, they will take 150% damage from Slash attacks after the Cut Mist is put into effect.
These are even more situational considering how physical damage is preferred for a party to make use of over elemental damage. Not to mention that physical damage isn't as deadly as elemental damage since all enemy physical attacks use the STR stat, and their elemental attacks all use the TEC stat. And typically enemies have access to more than one physical damage type.
Blaze Oil/Freeze Oil/Shock Oil
Cost: 75 en
Stats Used: N/A
Target Type: Single
Action Speed: -6
Materials Needed: 1x Hibiscus, Acquired from Take Points in the 1st Stratum
Need to Restock: Yes
Imbues an ally's weapon with Fire/Ice/Volt, adding that element onto their normal attacks for 4 turns. Does not affect their skills.
The only reason to make use of these is if you're using a Chaser party, or are trying to get an enemy's conditional drop which involves killing them with an element they're weak to. These items are terrible, don't use them otherwise.
Fire Jar/Ice Jar/Volt Jar
Cost: 100 en
Stats Used: TEC
Target Type: Single
Action Speed: -9
Materials Needed: 1x Narcissus, Acquired from Take Points in the 2nd Stratum
Need to Restock: Yes
Deals 60% Fire/Ice/Volt damage to a single target. Has a hit rate of 98%.
These are strong as a level 6 Elemental Star. Oh and since items are essentially coded as skills, that means that these work with both Singularity and Etheric Charge, which is something to keep in mind. Of course that begs the question if you have enough room in your inventory to keep a constant supply of these, and if you're willing to constantly farm for damage items.
Flame Jar/Frost Jar/Storm Jar
Cost: 500 en
Stats Used: TEC
Target Type: AOE
Action Speed: -9
Materials Needed: 1x Waterlily Leaf, Acquired from Take Points in the 4th Stratum
Need to Restock: Yes
Deals 70% Fire/Ice/Volt damage to all enemies. Has a hit rate of 95%.
For the record, these are stronger than a level 10 Binary Elemental, which only deals 55% damage at max level, and it's slightly faster than using one, though it's slightly less accurate. Like with the single target jars, these also work with Singularity and Etheric Charge. However, they deals less damage than a level 9 Elemental star, so don't bother with these if you have one of those maxed out and are only planning on using these for bosses. Otherwise, they can be a nice source of elemental damage but again, that begs the question if you have enough room in your inventory to keep a constant supply of these.
Poison Gas
Cost: 100 en
Stats Used: TEC, LUC
Target Type: AOE
Action Speed: -6
Materials Needed: 15x Poison Tail, Acquired from Great Platypuses in the 1st Stratum
Need to Restock: No
Attempts to inflict Poison on all enemies. Has a 40% chance of succeeding. Due to an oversight in the code, there is no data for how much Poison damage it should deal (the code was copy and pasted throughout all the Gas items), and ends up dealing 0 base Poison damage.
If you're attempting to go for a Poison conditional drop, don't bother with using these things. There's only one enemy that has that conditional, and you acquire the drop by killing them with Poison damage, not while they're Poisoned. Unless you really think you can cause them to die from 1 to 10 points of Poison damage, use an actual Poison skill instead. That oversight did at least get corrected in the next game, though they're still not worth using.
Stun Gas
Cost: 200 en
Stats Used: TEC, LUC
Target Type: AOE
Action Speed: -6
Materials Needed: 1x Red Fragment, Acquired from Guardian Ants in the 3rd Stratum
Need to Restock: No
Attempts to inflict Paralysis on all enemies. Has a 40% chance of succeeding.
Paralysis isn't really a great ailment to make use of, and ailments are at their weakest in this game. No enemy in this game has a kill while Paralyzed conditional drop, so you don't even need them for that. It can be nice in random battles I suppose, but most random encounters aren't really a threat to warrant such a measure.
Blind Gas
Cost: 150 en
Stats Used: TEC, LUC
Target Type: Single
Action Speed: -6
Materials Needed: 1x Ebony Liver, Acquired from Whorled Puffers in the 2nd Stratum
Need to Restock: No
Attempts to inflict Blind on all enemies. Has a 40% chance of succeeding.
Blind is one of the easier ailments to land, and a boss' conditional drop does require them to be Blind when killed. Unfortunately, Blind isn't that great of an ailment to make use of either, so it's hard to recommend keeping a few of these around in your inventory.
Sleep Gas
Cost: 300 en
Stats Used: TEC, LUC
Target Type: AOE
Action Speed: -6
Materials Needed: 1x Dryad Liquid, Acquired from Otherspawns in the 4th Stratum
Need to Restock: No
Attempts to inflict Sleep on all enemies. Has a 40% chance of succeeding.
A nice crowd control item, since Sleep will disable all enemies until it wears off or you attack the enemy. Don't bother with this in FOE and boss fights since it won't do much in most cases.
Curse Gas
Cost: 800 en
Stats Used: TEC, LUC
Target Type: AOE
Action Speed: -6
Materials Needed: 1x White Fox Fur, Acquired from White Foxes in the 5th Stratum
Need to Restock: No
Attempts to inflict Curse on all enemies. Has a 40% chance of succeeding.
Curse is one of the worst ailments for the player to make use of. Unfortunately, the only skill that can inflict Curse is the Monk's Darkness Fist, so if you're trying to go for conditional drops that require you to kill the target with Curse damage this is your only other option for inflicting it. Outside of those situations, this item is practically worthless.
Addle Gas
Cost: 800 en
Stats Used: TEC, LUC
Target Type: AOE
Action Speed: -6
Materials Needed: 5x Dawn Thorn, Acquired from Rotten Fruits in the 5th Stratum
Need to Restock: No
Attempts to inflict Confusion on all enemies. Has a 40% chance of succeeding.
Confusion is one of the most powerful ailments in the game, so this can be a great form of crowd control in random encounters if you need to do that.
Formaldehyde
Cost: 500 en
Stats Used: N/A
Target Type: AOE
Action Speed: +0
Materials Needed: 1x Atrocity Sigh, Acquired from Dreamsmashers in the 6th Stratum
Need to Restock: Yes
When used, any enemy killed afterward on the current turn will be forced to drop all their items. This includes conditional drops, even if the player did not qualify for them. The effect is not retroactive.
A new item introduced in this game, and it's a very handy one. You won't be able to buy these until the 6th Stratum, so use them wisely until then. This will let you bypass the more annoying conditions for conditional drops, but you have to time it right so that you kill the enemy on the same turn as you use this, so have your fastest character use this to ensure that this will take effect.
Switch
This option didn't exist in the first game, but it was introduced in the second game. However, all it did there was switch the rows. Here, your character can switch positions with another one, but it will use up their turn. This action has no action speed modifier. The only time this will really see use is if your front row dies and your back row is sent to the front as a result. There's not really a need to reposition your characters outside of that scenario.
Escape
And finally there's escaping. If a battle is too tough for you, or if you don't want to fight, you can escape from it to end it prematurely. However, you won't get any exp or item drops if you do this. Escaping does not have an action speed modifier. When a character attempts to escape, the game uses this formula to see if they're successful. Escape Rate posted:
Initial Check:
A = (User's AGI + LUC) - (Enemy's average AGI + LUC)
If A is less than or equal to -32, then B = 0
If A is is greater than -32, but less than 10, then B = 40 + 40 * sin (A * 0.03 - 0.57)
If A is greater than or equal to 10, then B = 80
C = B + Turn Number * a random number from 5 to 10
If the Ninja's Tonsou Jutsu or the Shogun's Retreat skills get used, the game performs these checks:
B = Tonsou Jutsu or Retreat Skill Power (Ranges from 40 to 80, depending on skill level)
If C > 99, then C = 99
Otherwise this check is performed instead:
If C > 90, then C = 90
A random number from 0 to 98 is rolled for. If the number rolled is below the escape chance, the escape will succeed. The RNG is supposed to roll from 0 to 99, so this bug results in escaping being slightly easier than intended to pull off.
The escape rate is capped at 90 out of 99 in most cases unless you use the Tonsou Jutsu or Retreat skills, in which case the escape rate can end up being guaranteed. The funny thing is there was supposed to be a 1% failure rate in that case, but the RNG bug snuffs that out of existence. The formula basically says, as the battle goes on, it gets easier to escape. If you plug in the numbers, you may notice a bit of an oddity there. If A = 9, that would make B equal to 28. I have no idea if this was intended or just a mistake on the devs part, but at any rate, having high AGI and LUC stats is very important if you wish to run from battles. Now this formula only applies to your party. If an enemy tries to escape, they will always succeed unless they are prevented from doing so by the use of leg binds or other status effects. Now if you're in a boss fight or you happen to get cornered by an FOE, your escape attempts will always fail.
So if you want to escape from a battle, you'll have a bigger chance of doing so if you have fast and lucky characters in the party.