Toggle Background Color
Class Showcase: Gladiator
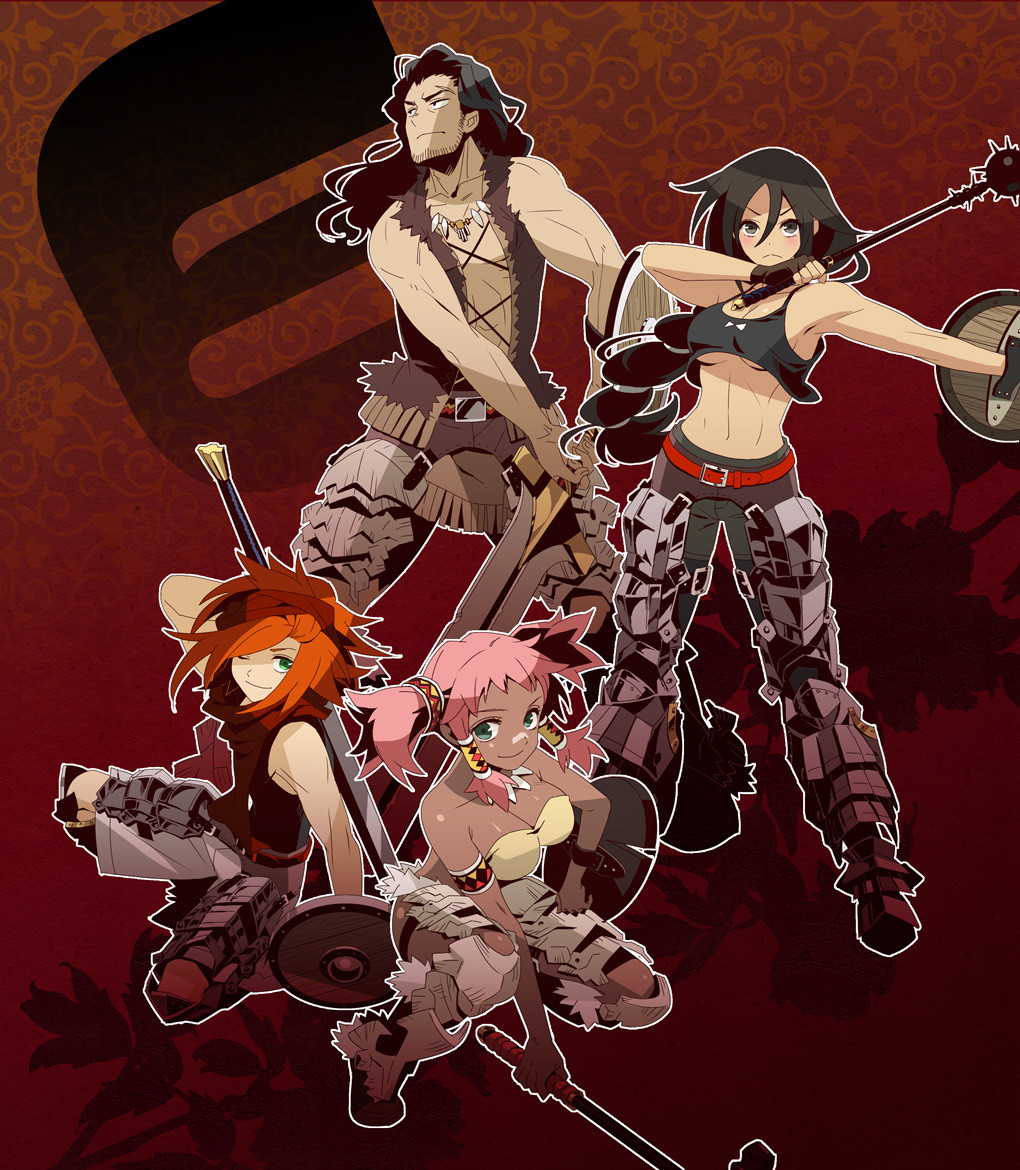
Originally known as Warriors in Japan, Gladiators are an all around durable attacker. They're kind of jack of all trades generalist sort of class. If you played the first two games, they're comparable to Landsknechts.
Gladiators are basically the safe choice for a class. They deal good amounts of damage, they're one of the most durable classes in the game, so death doesn't come to them as easily as they will other classes. They can fit into most party setups if you're having trouble coming up with one.
Or at least, that was the intent.
The reality is far different. For one thing, Gladiators aren't just a jack of all trades sort of class. If you look at all the classes without taking subclassing into account, they're pretty much the best damage dealer in the game. This is because they have a few key abilities which are vital to their high damage output. In fact, those abilities are why they're the most popular choice for a subclass for physical attackers. It's a pretty big issue in EO3's class balance, because having the physical attacking classes sub Gladiator pretty much gets rid of what made them stand out from each other, and just turns them into different flavors of Gladiators. No other choice really compares to what a Gladiator has to offer.
And then there's the actual Gladiator class themselves. They can be turned into the most broken class in the game through the use of subclassing. Side with Armoroad and have them use Shogun as a subclass, and have them learn Warrior Might. With the right party setup, that skill can annihilate everything in the game, including every single boss in the post-game. For more information on that tactic, please look at the Shogun Showcase.
If you don't wish to utterly break the game with Warrior Might, Gladiators are still strong on their own. They're strong attackers, and they can fit into most party compositions easily. Though they won't hit as hard as some other classes can, you can't really go wrong with having one in the party.
Equipment:
Weapons: Swords, Clubs, Daggers, and Books.
Armor: Light Armor, Clothes, Helmets, Gloves, Boots, and Accessories.
Stats
Level 1
HP: 47
TP: 19
STR: 10
VIT: 7
AGI: 4
LUC: 3
TEC: 3
Level 35
HP: 265
TP: 73
STR: 37
VIT: 33
AGI: 22
LUC: 21
TEC: 17
Level 70
HP: 489
TP: 129
STR: 64
VIT: 59
AGI: 40
LUC: 40
TEC: 32
Level 99
HP: 628
TP: 164
STR: 81
VIT: 76
AGI: 51
LUC: 51
TEC: 41
As you can see, Gladiators are very durable. They have the 2nd highest HP pool in the game, and a decently high VIT stat, so they don't fall to physical attacks easily. They also have the 3rd highest STR stat, so they're great at dishing out physical damage as well. However, it's not all sunshine and rainbows for them. For one thing, they have the 3rd lowest TP pool (2nd if you don't count the Yggdroid), so they can't cast their skills that often without having to refill their TP pool. They're also not really that fast, and they have the 2nd lowest TEC stat in the game, meaning that elemental attacks will deal far more damage to them. And their LUC is also pretty low, meaning that ailments can land on them more easily. Oh, and since AGI, LUC, and TEC are their worst stats, this actually means that Gladiators have a bit of an accuracy problem. They're prone to missing their attacks more often than other classes, and they can't dodge attacks that well either. So if you're wondering why your Gladiator tends to whiff fairly often, now you know.
Endless Battle
Skill Type: Class Skill
Maximum Level: 10
Stats Used: N/A
Prerequisites: N/A
This Class Skill passively increases the amount of Slash, Strike, Pierce damage the Gladiator deals. Higher levels increases the damage boost that this skill provides. Has no effect on elemental damage.
1: 3% damage boost.
2: 5% damage boost.
3: 7% damage boost.
4: 9% damage boost.
5: 11% damage boost.
6: 13% damage boost.
7: 16% damage boost.
8: 19% damage boost.
9: 22% damage boost.
10: 25% damage boost.
It's a free boost to the Gladiator's damage output, so you should max this out. Maybe it shouldn't be the first skill you max out, but it should be mastered eventually. It's not like the Gladiator has that many important skills they need.
Sword Mastery/Club Mastery
Skill Type: Passive
Maximum Level: 10
Stats Used: N/A
Prerequisites: N/A
This weapon mastery skill increases the damage output of regular attacks when using a Sword/Xlub. Higher levels increase the damage output. Does not affect skills.
If the user cannot equip Swords/Clubs normally, this skill enables them to do so.
1: 2% damage boost.
2: 3% damage boost.
3: 4% damage boost.
4: 5% damage boost.
5: 6% damage boost.
6: 7% damage boost.
7: 8% damage boost.
8: 9% damage boost.
9: 10% damage boost.
10: 11% damage boost.
Okay, let me tell you something really important about weapon mastery skills in this game. In the first two games, they gave a damage boost to all skills that made use of those weapons. This is no longer the case in this game. Instead, they only give a damage boost to regular attacks. And it's a pretty minuscule boost too, so they're nothing but point sinks.
As for which skill branch to invest in, here's the rundown on both. The Club skill tree is more single target and disable oriented, but its ultimate damage skill is much worse than the Sword skill branch's ultimate damage skill. Where the Sword skill tree is more multi-target oriented at the lack of any utility. I personally recommend going with the Sword skill tree simply because its ultimate damage skill is the better of the two. And the Gladiator's low LUC and TEC stats means that the disables from the Club skill tree won't actually disable the enemies most of the time.
Of course if you're going the Warrior Might route, don't bother with either.
Stun Attack
Skill Type: Passive
Maximum Level: 10
Stats Used: LUC, TEC
Prerequisites: White Flame – Level 3
This passive gives the Gladiator's regular attacks a chance to inflict Stun. Higher levels increases the infliction rate. Does not affect skills.
1: 20% infliction rate.
2: 23% infliction rate.
3: 27% infliction rate.
4: 31% infliction rate.
5: 35% infliction rate.
6: 39% infliction rate.
7: 43% infliction rate.
8: 47% infliction rate.
9: 51% infliction rate.
10: 55% infliction rate.
Stun is one of the worst things to try to inflict on an enemy. And the Gladiator is one of the worst candidates to have inflict Stun, what with their terrible LUC and TEC stats, and the fact that they should be killing things, not disabling them. Also, you have to use a regular attack in order to take advantage of this, and regular attacks are really awful to use in the series. Ignore this.
Wild Swings
Skill Type: Passive
Maximum Level: 10
Stats Used: N/A
Prerequisites: Sword Mastery – Level 5, Club Mastery – Level 5
Whenever the Gladiator uses a single target attack, they have a chance to attack any enemies adjacent to their target. Higher levels increase the activation rate.
1: 30% activation rate.
2: 32% activation rate.
3: 34% activation rate.
4: 36% activation rate.
5: 38% activation rate.
6: 42% activation rate.
7: 46% activation rate.
8: 50% activation rate.
9: 55% activation rate.
10: 60% activation rate.
Notes:
-The extra attacks are not actually splash attacks, so they suffer no damage reduction.
-LUC and TEC cannot influence the activation rate.
-The game checks to see if the ability activates on the left side of the target before it checks for the right side.
-If the user has learned the Double Action skill, the game checks for a Double Action activation before checking for Wild Swings.
-Only activates once for each side on multi-hit attacks.
-Only affects single target skills. AOEs, random target skills, and Chasers will not cause this skill to activate, even if they only affect one enemy.
-Regular attacks and animal summons are not affected by this.
-Each activation counts as a separate action, increasing Limit gain and triggering certain passives.
It's a neat passive. It essentially adds splash damage to single target skills. Not much use if your Gladiator is using Swords, but it could be handy for certain club skills. It's more useful as a subclass ability, since there are other classes that can make good use of this skill.
Avenger
Skill Type: Passive
Maximum Level: 10
Stats Used: N/A
Prerequisites: Berserker Vow – Level 1
Whenever an ally dies, the Gladiator recovers a certain amount of HP. Higher levels increase the amount of HP restored.
1: Restores 50 HP.
2: Restores 60 HP.
3: Restores 70 HP.
4: Restores 80 HP.
5: Restores 90 HP.
6: Restores 100 HP.
7: Restores 120 HP.
8: Restores 140 HP.
9: Restores 160 HP.
10: Restores 200 HP.
It's a pretty gimmicky passive. Gladiators are already pretty tanky, and this isn't a reliable form of healing. The only reason to take this skill is because it's a prerequisite to Charge.
Break
Skill Type: Active
Maximum Level: 10
Equipment Needed: Sword
Body Part: Arm
Stats Used: STR
Target Type: Single
Action Speed: +0
Prerequisites: Sword Mastery – Level 1
The Gladiator strikes at an enemy with their sword, dealing Slash damage. Increasing the skill level increases the damage output and hit rate.
1: Deals 130% damage. Has a Hit Rate of 98. Costs 4 TP.
2: Deals 132% damage. Has a Hit Rate of 98. Costs 4 TP.
3: Deals 134% damage. Has a Hit Rate of 98. Costs 5 TP.
4: Deals 136% damage. Has a Hit Rate of 98. Costs 5 TP.
5: Deals 138% damage. Has a Hit Rate of 98. Costs 6 TP.
6: Deals 143% damage. Has a Hit Rate of 99. Costs 6 TP.
7: Deals 148% damage. Has a Hit Rate of 99. Costs 7 TP.
8: Deals 153% damage. Has a Hit Rate of 100. Costs 7 TP.
9: Deals 158% damage. Has a Hit Rate of 100. Costs 8 TP.
10: Deals 165% damage. Has a Hit Rate of 101. Costs 8 TP.
It's an incredibly basic damage skill. And not one I would take, even in the early game. It doesn't deal that much damage, and isn't even a prerequisite to any good skills.
Rush
Skill Type: Active
Maximum Level: 10
Equipment Needed: Sword
Body Part: Arm
Stats Used: STR
Target Type: Multi
Action Speed: +0
Prerequisites: Sword Mastery – Level 1
The Gladiator randomly attacks multiple enemies at once, dealing Slash damage to their victims. Increasing the skill level increases the damage output, hit rate, and number of attacks. The Gladiator cannot attack the same enemy more than once with this skill.
1: Hits 2 to 3 times. Deals 105% damage per hit. Has a Hit Rate of 94. Costs 7 TP.
2: Hits 2 to 3 times. Deals 108% damage per hit. Has a Hit Rate of 94. Costs 7 TP.
3: Hits 2 to 4 times. Deals 111% damage per hit. Has a Hit Rate of 95. Costs 8 TP.
4: Hits 2 to 4 times. Deals 114% damage per hit. Has a Hit Rate of 95. Costs 8 TP.
5: Hits 2 to 4 times. Deals 117% damage per hit. Has a Hit Rate of 96. Costs 9 TP.
6: Hits 2 to 5 times. Deals 120% damage per hit. Has a Hit Rate of 96. Costs 9 TP.
7: Hits 2 to 5 times. Deals 123% damage per hit. Has a Hit Rate of 97. Costs 10 TP.
8: Hits 2 to 5 times. Deals 127% damage per hit. Has a Hit Rate of 97. Costs 10 TP.
9: Hits 2 to 6 times. Deals 131% damage per hit. Has a Hit Rate of 98. Costs 11 TP.
10: Hits 3 to 6 times. Deals 135% damage per hit. Has a Hit Rate of 98. Costs 12 TP.
If you've played the first two EO games, this is like the Landsknecht's Allslash skill. (Also known as Falcon Slash) Though this version isn't that great. It has a low damage output and isn't really spectacular for mob clearing. In fact, the Gladiator has an actual AOE skill that deals more damage than this, though it costs more TP. The only reason to take this skill is because it's a prerequisite for a much better one.
Bind Cut
Skill Type: Active
Maximum Level: 10
Equipment Needed: Sword
Body Part: Arm
Stats Used: STR
Target Type: Single
Action Speed: +0
Prerequisites: Sword Mastery – Level 3, Break – Level 1
The Gladiator attacks a single enemy, dealing Slash damage. If the enemy has a bind of any kind on them, the damage of the attack is increased. The damage bonus does not apply to ailments. Multiple binds do not increase the damage further. Higher levels increases the damage output and hit rate.
1: Has a base damage of 140%. Deals 240% damage if the target has a bind. Has a Hit Rate of 94. Costs 8 TP.
2: Has a base damage of 143%. Deals 291% damage if the target has a bind. Has a Hit Rate of 94. Costs 8 TP.
3: Has a base damage of 146%. Deals 303% damage if the target has a bind. Has a Hit Rate of 95. Costs 9 TP.
4: Has a base damage of 152%. Deals 315% damage if the target has a bind. Has a Hit Rate of 95. Costs 9 TP.
5: Has a base damage of 155%. Deals 328% damage if the target has a bind. Has a Hit Rate of 96. Costs 10 TP.
6: Has a base damage of 160%. Deals 341% damage if the target has a bind. Has a Hit Rate of 96. Costs 10 TP.
7: Has a base damage of 165%. Deals 360% damage if the target has a bind. Has a Hit Rate of 97. Costs 11 TP.
8: Has a base damage of 170%. Deals 379% damage if the target has a bind. Has a Hit Rate of 97. Costs 11 TP.
9: Has a base damage of 175%. Deals 399% damage if the target has a bind. Has a Hit Rate of 98. Costs 12 TP.
10: Has a base damage of 180%. Deals 420% damage if the target has a bind. Has a Hit Rate of 98. Costs 12 TP.
This is one of the Gladiator's better damage skills, if you have means of inflicting binds on your targets. If not, this isn't that great. The Gladiator has no means of inflicting binds themselves without a subclass, since Arm Breaker is on the Club skill tree. And even then, this isn't a reliable source of damage, since ailments are not really that good in this game. I suggest you ignore this.
Rampage
Skill Type: Active
Maximum Level: 10
Equipment Needed: Sword
Body Part: Arm
Stats Used: STR
Target Type: AOE
Action Speed: +3
Prerequisites: Sword Mastery – Level 7
This skill has the Gladiator attack every enemy on the field, dealing Slash damage to all. Higher levels increase the damage output and hit rate.
1: Deals 110% damage. Has a Hit Rate of 89. Costs 12 TP.
2: Deals 113% damage. Has a Hit Rate of 90. Costs 12 TP.
3: Deals 116% damage. Has a Hit Rate of 91. Costs 13 TP.
4: Deals 119% damage. Has a Hit Rate of 92. Costs 13 TP.
5: Deals 122% damage. Has a Hit Rate of 93. Costs 14 TP.
6: Deals 125% damage. Has a Hit Rate of 94. Costs 14 TP.
7: Deals 128% damage. Has a Hit Rate of 95. Costs 15 TP.
8: Deals 131% damage. Has a Hit Rate of 96. Costs 16 TP.
9: Deals 135% damage. Has a Hit Rate of 97. Costs 17 TP.
10: Deals 140% damage. Has a Hit Rate of 98. Costs 18 TP.
If you want the Gladiator to have a good way to deal with random encounters, try this skill. It deals more damage than Rush, and actually goes for every single enemy. Though it does cost more TP. It isn't a must have skill, but it is a nice option to have.
Blade Rave
Skill Type: Active
Maximum Level: 10
Equipment Needed: Sword
Body Part: Arm
Stats Used: STR
Target Type: Random
Action Speed: +9
Prerequisites: Sword Mastery – Level 10, Rush – Level 5
The Gladiator attacks enemies randomly, dealing Slash damage to them. Higher levels increase the number of hits, the damage output, and the hit rate.
1: Hits 3 times. Deals 80% damage per hit. Has a Hit Rate of 89. Costs 13 TP.
2: Hits 3 times. Deals 82% damage per hit. Has a Hit Rate of 90. Costs 14 TP.
3: Hits 3 times. Deals 84% damage per hit. Has a Hit Rate of 91. Costs 15 TP.
4: Hits 3 to 4 times. Deals 84% damage per hit. Has a Hit Rate of 92. Costs 17 TP.
5: Hits 3 to 4 times. Deals 86% damage per hit. Has a Hit Rate of 93. Costs 18 TP.
6: Hits 3 to 4 times. Deals 88% damage per hit. Has a Hit Rate of 94. Costs 19 TP.
7: Hits 3 to 5 times. Deals 88% damage per hit. Has a Hit Rate of 95. Costs 22 TP.
8: Hits 3 to 5 times. Deals 90% damage per hit. Has a Hit Rate of 96. Costs 23 TP.
9: Hits 3 to 5 times. Deals 92% damage per hit. Has a Hit Rate of 97. Costs 24 TP.
10: Hits 4 to 5 times. Deals 95% damage per hit. Has a Hit Rate of 98. Costs 27 TP.
Without a question, this is the Gladiator's best damage skill. It's a random target skill, so if there's only one enemy left in the battle, all those hits will land on that enemy. Its average damage output is 427.5%, and not many of the Gladiator's other skills can compare to it. The equivalent skill in the Club skill branch has a whole bunch of problems associated with it, like more inconsistent damage and a huge accuracy penalty. Blade Rave is much less of a hassle to use in comparison. If you're not having your Gladiator break open the game with Warrior Might, this is what you want them to have.
Crushing Blow
Skill Type: Active
Maximum Level: 10
Equipment Needed: Club
Body Part: Arm
Stats Used: STR, LUC, TEC
Target Type: Single
Action Speed: -6
Prerequisites: Club Mastery – Level 1
The Gladiator smashes in the head of a single target, dealing Strike damage and has attempts to inflict Confusion in the process. Higher levels increase the damage output, infliction rate, and hit rate.
1: Deals 135% damage. 25% infliction rate. Has a Hit Rate of 96. Costs 4 TP.
2: Deals 137% damage. 27% infliction rate. Has a Hit Rate of 96. Costs 4 TP.
3: Deals 139% damage. 29% infliction rate. Has a Hit Rate of 96. Costs 5 TP.
4: Deals 141% damage. 31% infliction rate. Has a Hit Rate of 96. Costs 5 TP.
5: Deals 143% damage. 34% infliction rate. Has a Hit Rate of 97. Costs 6 TP.
6: Deals 145% damage. 37% infliction rate. Has a Hit Rate of 97. Costs 6 TP.
7: Deals 147% damage. 40% infliction rate. Has a Hit Rate of 97. Costs 7 TP.
8: Deals 149% damage. 43% infliction rate. Has a Hit Rate of 97. Costs 7 TP.
9: Deals 152% damage. 46% infliction rate. Has a Hit Rate of 98. Costs 8 TP.
10: Deals 155% damage. 50% infliction rate. Has a Hit Rate of 98. Costs 8 TP.
It's a very basic damage skill, but it does have the perk of inflicting Confusion. The damage output is mediocre, so the Confusion is the real selling point. But the problem with this skill is that the Gladiator has terrible LUC and TEC stats, so the chances that they'll actually inflict Confusion on the things that matter are kind of slim. And you want your Gladiators killing things, not disabling them. Besides, ailments aren't too great in this game anyways. The only reason to take this is to get the skill it unlocks, which has its uses.
Arm Breaker
Skill Type: Active
Maximum Level: 10
Equipment Needed: Club
Body Part: Arm
Stats Used: STR, LUC, TEC
Target Type: Single
Action Speed: -3
Prerequisites: Club Mastery – Level 3
The Gladiator attacks a single target, attempting to break their arms. Dealing Strike damage and attempts to bind the target's arms in the process. Higher levels increase the damage output, infliction rate, and hit rate.
1: Deals 150% damage. 40% infliction rate. Has a Hit Rate of 94. Costs 6 TP.
2: Deals 152% damage. 42% infliction rate. Has a Hit Rate of 94. Costs 6 TP.
3: Deals 154% damage. 44% infliction rate. Has a Hit Rate of 95. Costs 7 TP.
4: Deals 156% damage. 46% infliction rate. Has a Hit Rate of 95. Costs 7 TP.
5: Deals 158% damage. 48% infliction rate. Has a Hit Rate of 96. Costs 8 TP.
6: Deals 160% damage. 50% infliction rate. Has a Hit Rate of 96. Costs 8 TP.
7: Deals 166% damage. 52% infliction rate. Has a Hit Rate of 97. Costs 9 TP.
8: Deals 172% damage. 54% infliction rate. Has a Hit Rate of 97. Costs 9 TP.
9: Deals 178% damage. 56% infliction rate. Has a Hit Rate of 98. Costs 10 TP.
10: Deals 185% damage. 60% infliction rate. Has a Hit Rate of 98. Costs 10 TP.
Well it deals more damage than Crushing Blow. There's still the issue of the Gladiator not having good enough LUC and TEC for this to be a reliable disable. And there's the issue of ailments not being that useful in this game. Granted the Gladiator is one of the few sources of Arm binds, so if you're that desperate to use them, this is an option.
Freezing Blow
Skill Type: Active
Maximum Level: 10
Equipment Needed: Club
Body Part: Arm
Stats Used: STR
Target Type: Single
Action Speed: -9
Prerequisites: Club Mastery – Level 3, Crushing Blow – Level 5
The Gladiator swings their club, clad in cold air, at a single target, dealing Ice/Strike damage. Higher levels increase the damage output and hit rate.
1: Deals 150% damage. Has a Hit Rate of 94. Costs 8 TP.
2: Deals 155% damage. Has a Hit Rate of 94. Costs 8 TP.
3: Deals 160% damage. Has a Hit Rate of 95. Costs 9 TP.
4: Deals 165% damage. Has a Hit Rate of 95. Costs 9 TP.
5: Deals 170% damage. Has a Hit Rate of 96. Costs 10 TP.
6: Deals 175% damage. Has a Hit Rate of 96. Costs 10 TP.
7: Deals 180% damage. Has a Hit Rate of 97. Costs 11 TP.
8: Deals 185% damage. Has a Hit Rate of 97. Costs 11 TP.
9: Deals 190% damage. Has a Hit Rate of 98. Costs 12 TP.
10: Deals 200% damage. Has a Hit Rate of 98. Costs 12 TP.
Well it's one of the few elemental skills in the game that run off the STR stat. It's not too great by itself, but if you have your Gladiator sub Zodiac, they can take advantage of this skill with Singularity and Etheric Charge. Though that combo is a bit of a one trick pony, since it's only effective on enemies that are weak to Ice or Strike damage. Otherwise, it's kind of mediocre. Still, something to keep in mind.
Two Misses Nine Smashes
Skill Type: Active
Maximum Level: 10
Equipment Needed: Club
Body Part: Arm
Stats Used: STR
Target Type: Single
Action Speed: -5
Prerequisites: Club Mastery – Level 10, Arm Breaker – Level 5
The Gladiator swings wildly at a single target, attempting to attack them multiple times and deals Strike damage in the process. Incredibly inaccurate. Increases the skill level increases the number of hits and damage output, but decreases the accuracy of the skill.
1: Hits 2 to 5 times. Deals 80% damage per hit. Has a Hit Rate of 69. Costs 10 TP.
2: Hits 2 to 5 times. Deals 82% damage per hit. Has a Hit Rate of 69. Costs 11 TP.
3: Hits 2 to 5 times. Deals 84% damage per hit. Has a Hit Rate of 69. Costs 12 TP.
4: Hits 2 to 6 times. Deals 84% damage per hit. Hit Rate decreases to 59. Costs 14 TP.
5: Hits 2 to 6 times. Deals 86% damage per hit. Has a Hit Rate of 59. Costs 15 TP.
6: Hits 2 to 7 times. Deals 86% damage per hit. Has a Hit Rate of 59. Costs 17 TP.
7: Hits 2 to 7 times. Deals 88% damage per hit. Has a Hit Rate of 59. Costs 18 TP.
8: Hits 2 to 8 times. Deals 88% damage per hit. Hit Rate decreases to 44. Costs 20 TP.
9: Hits 2 to 8 times. Deals 90% damage per hit. Has a Hit Rate of 44. Costs 22 TP.
10: Hits 2 to 9 times. Deals 90% damage per hit. Has a Hit Rate of 44. Costs 25 TP.
Oh boy. If you want a give an example of a newbie trap skill, Nine Smashes is a perfect one to give. Now the game doesn't tell you much about this skill (Or any of the skills, really) so the in-game description may make it sound better than it seems. The game doesn't tell you the exact numbers on it, so you might underestimate just how inaccurate the skill really is. First things first, accuracy isn't a percentage, it's just a value. So no, a level 10 version isn't a 44% chance to land each hit. In fact, it's much lower. Remember that the Gladiator has low AGI, LUC, and TEC stats, which determine how accurate their attacks are. And even with skills that have a high hit rate, they tend to whiff their attacks. So often will they whiff with a level 10 version of Nine Smashes? Well, if the Gladiator is at an appropriate level when they face a boss or an FOE, each hit of Nine Smashes would have around a 26.3% to a 33.4% chance of landing. Yeah, it's that low.
While the average damage output of the skill is 495%, that's only if all the hits on the skill land every single time. With the accuracy penalty? That damage plummets straight down to around 155%. Yikes. Now you can mitigate the accuracy penalty through the use of the Arbalist's Proper Form skill, equipment, or using books to raise their stats to max. Although I should warn you that even with 99 AGI, LUC, and TEC, Nine Smashes Accuracy will cap out at 74%, assuming their target doesn't have AGI, LUC, and TEC stats as high as that. Still not that great. Though some people opt to leave the skill at level 7, since level 8 is when the accuracy drops big time. Though that would only get you an average damage output of 396%, assuming every hit lands every time. Still, in that case, other means of boosting accuracy can make up for the lower hit rate. You can also use ailments such as Panic, or Leg Binds to ensure that the target can't avoid any of the hits, but I've said before that ailments just aren't reliable.
Even then, the damage output is still inconsistent. The minimum number of hits will never increase, no matter how many skill points you put into Nine Smashes. You can't control how many hits will happen, so you might end up rolling 2 hits several times in a row. All of which miss. There's a reason why some people gave this skill the nickname of "Two Misses."
The point is, don't bother with Nine Smashes. It's a bad skill. You can try to make it work, but there are just too many hoops to jump through for a skill that may or may not deal a lot of damage. Just stick with Blade Rave. It's more consistent in damage, and isn't as much of a hassle to use.
Berserker Vow
Skill Type: Active
Maximum Level: 10
Equipment Needed: N/A
Body Part: Head
Stats Used: HP
Target Type: Self
Action Speed: +6
Prerequisites: N/A
The Gladiator sacrifices a certain amount of their current HP to gain a massive boost to their physical damage for 4 turns. Increasing the skill level increases the damage boost, but also increases the amount of HP lost. HP loss is based on current health, not maximum. The HP loss cannot kill the Gladiator. Has no effect on elemental damage. The TP cost is fixed at 2 for all levels.
1: 30% attack increase. Costs 30% of the user's current HP.
2: 36% attack increase. Costs 35% of the user's current HP.
3: 42% attack increase. Costs 45% of the user's current HP.
4: 48% attack increase. Costs 50% of the user's current HP.
5: 54% attack increase. Costs 55% of the user's current HP.
6: 60% attack increase. Costs 60% of the user's current HP.
7: 67% attack increase. Costs 65% of the user's current HP.
8: 74% attack increase. Costs 70% of the user's current HP.
9: 82% attack increase. Costs 80% of the user's current HP.
10: 90% attack increase. Costs 90% of the user's current HP.
If you're looking at that HP cost and think that this is a skill you need to not invest too much into or ignore entirely, let me tell you that you're dead wrong on that. You always max this out, since this is one of the Gladiator's best skills. It is the strongest damage buff in the game, and one of the main reasons that physical attackers tend to have Gladiator as their subclass. Most damage buffs can only give a 45% damage boost at most. Berserker Vow is the only buff in the game that goes beyond that. It's worth the risk of losing most of your HP to get that strong of a buff. Actually speaking of risks, there isn't actually much of it associated with this skill. The HP loss may seem intimidating, but it really isn't. If you know how certain enemies and bosses act, and your party is capable of creating safe turns, you can use Berserker Vow on said turns risk free. Or just have a Hoplite Bodyguard whoever is using that skill. Point is, this skill is definitely worth getting and maxing out.
White Flame
Skill Type: Active
Maximum Level: 5
Equipment Needed: N/A
Body Part: Head
Stats Used: N/A
Target Type: Self
Action Speed: +6
Prerequisites: Berserker Vow – Level 5
This skill places a buff on the Gladiator that gives them immunity to ailments for 4 turns. Increasing the skill level only decreases the TP cost. Has no effect on binds, Instant Death, or Stuns.
1: Costs 12 TP.
2: Costs 10 TP.
3: Costs 8 TP.
4: Costs 6 TP.
5: Costs 3 TP.
Not a fan of this skill. Unlike the Prince/ss' Prevent Order, this skill only wears off if it gets forcibly dispelled or if the buff timer runs out. It doesn't wear off if it blocks an ailment, so for 4 turns, the Gladiator can't be inflicted with them. No matter how many times the enemy tries to. The problem is that this skill is kind of a waste of a buff slot and a turn. You want your Gladiator to set up using Berserker Vow and/or Charge, and this takes time away from that. I suggest ignoring this skill. Though it could be more useful on a support class.
Charge
Skill Type: Active
Maximum Level: 5
Equipment Needed: N/A
Body Part: Arm
Stats Used: N/A
Target Type: Self
Action Speed: -100
Prerequisites: Avenger – Level 3, Wolf Howl – Level 3
This skill has the Gladiator spend the current turn charging up, which gives a damage boost to any Slash, Pierce, or Strike attacks used on the next turn. Does not work with Elemental attacks unless they are composite Physical/Elemental attacks. Does not work with Almighty attacks. The charge is wasted if skills or attacks that don't dealphysical damage are used. Higher levels increase the damage boost.
1: Increases damage by 210%. Costs 2 TP.
2: Increases damage by 220%. Costs 3 TP.
3: Increases damage by 230%. Costs 4 TP.
4: Increases damage by 240%. Costs 5 TP.
5: Increases damage by 260%. Costs 6 TP.
If you're wondering why charge skills got a massive nerf in the later Etrian Odyssey games, blame this skill and the Zodiac's Etheric Charge. At max level it increases the Gladiator's damage output by 30%. Meaning that there's no reason to not just spam this every other turn. Aside from reapplying Berserker Vow. This also one of the skills that makes Gladiator incredibly desirable as a subclass, since it's yet another damage boost this provides physical attackers. This is probably one of the skills you want maxed out as soon as possible. It works nicely with they physical Limits you have access to early on in the game.
Wolf Howl
Skill Type: Active
Maximum Level: 10
Equipment Needed: N/A
Body Part: Head
Stats Used: N/A
Target Type: AOE
Action Speed: +3
Prerequisites: N/A
The Gladiator howls at all enemies, catching them off guard and lowers their defenses for 4 turns. If the targets have ailment, their defenses are reduced even further. Higher levels increase the defense reduction. The bonus defense reduction does not apply if the targets only have binds and/or are stunned. Affects all damage types, including Almighty.
1: Reduces defense by 10%. Defense is reduced by 26% if the target has an ailment. Costs 7 TP.
2: Reduces defense by 11%. Defense is reduced by 29% if the target has an ailment. Costs 7 TP.
3: Reduces defense by 11%. Defense is reduced by 32% if the target has an ailment. Costs 7 TP.
4: Reduces defense by 12%. Defense is reduced by 35% if the target has an ailment. Costs 8 TP.
5: Reduces defense by 12%. Defense is reduced by 38% if the target has an ailment. Costs 8 TP.
6: Reduces defense by 13%. Defense is reduced by 41% if the target has an ailment. Costs 8 TP.
7: Reduces defense by 13%. Defense is reduced by 44% if the target has an ailment. Costs 8 TP.
8: Reduces defense by 14%. Defense is reduced by 47% if the target has an ailment. Costs 9 TP.
9: Reduces defense by 14%. Defense is reduced by 51% if the target has an ailment. Costs 9 TP.
10: Reduces defense by 15%. Defense is reduced by 55% if the target has an ailment. Costs 10 TP.
This skill isn't really that great. First of all, it's a support skill on a damage dealer, and not a good one at that. You want your Gladiator to be the one killing enemies, not being the one making them easier to kill. Secondly, the defense reduction is miniscule unless you make use of ailments. And like I've said before, ailments aren't that great in this game. It could be okay on a support class, but outside of that, take this only so you can unlock Charge.
Subclasses:
Prince/ss:
Why do you want to turn your Gladiator into a support? Especially with that incredibly tiny TP pool of theirs? None of the Prince/ss' abilities work that well with a Gladiator. Just use an actual Prince/ss if you want access to their skills.
Hoplite:
Not sure what you want here, because the Hoplite's damage skills aren't really worth it unless you really want to run a back row Gladiator. And despite Gladiators being durable, you want an actual Hoplite to function as your tank.
Buccaneer:
Limit Boost is a nice passive, and I guess there's Eagle Eye. But this class honestly doesn't have much to offer a Gladiator.
Unless you're willing to farm up a ton of Speed Books for yours, in which case they can take Pincushion, and deal more damage than a Buccaneer could ever hope to dream of. This is because the Gladiator's Class Skill provides a 25% damage boost, while the Buccaneer's just provides TP recovery. So if you're that dedicated, you can just turn your Gladiator into a much better Buccaneer.
Ninja:
Well this is one class that has a lot to offer a Gladiator. While most classes like to sub Gladiator to get an extra damage boost, Gladiators, well, they can't really do that. Their only real option for a damage boost is Bunshin, which essentially doubles their damage output. Though if you already have another Bunshin user, you may want to go with something else.
You could try a cheese build and try taking advantage of Tagen Battou. With Berserker Vow and Charge, you could do a lot of damage with it, wiping out pretty much anything in the game with it. The problem with that setup is that you have to be running a solo Gladiator or a very small party, which isn't great for dungeon crawls.
Monk:
You could try turning your Gladiator into a Punch Monk. They do have the stats for that. Waking Chakra might be a nice boon for them. But honestly there are better subclasses you could go with.
Zodiac:
Well this can be a nice choice for a subclass if you intend on making use of Freezing Blow, as Etheric Charge does work with it. And Singularity gives a nice damage boost if the enemy in question is weak to Ice or Strike. The downside of this is that this setup is a one trick pony. You're basically hoping that the enemies you're fighting are either weak to Ice or Strike damage. While that build works fantastically in those cases, outside of that the Etheric Charge + Freezing Blow combo is kind of mediocre. It could be something to make use of in certain situations, so it's not useless or anything.
Now if you're completely crazy, you could try farming up a lot of Intelligence Books to max out their TEC stat, since Endless Battle does give a 25% damage boost to Meteor. But I really wouldn't recommend that unless you want to clown around.
Wildling:
Can't think of a useful subclass? Get this for Primal Drums. Though I'm not sure if it's a good idea to have your Gladiator cast that skill. Animals don't work that well with them. Unless you want your Gladiator to summon lions or tigers, which are the only animals their stats would work well with. Even then, you would be better off with a Bunshin clone. Especially since Gladiators don't have access to Beast Soul.
Arbalist:
I guess if you really wanted to, you could give your Gladiator Front Mortar. Mind you, an Arbalist is actually better at that job. In fact, Arbalist/Gladiator is a stronger subclass than Gladiator/Anything (Except Ninja. And Shogun. Nothing outclasses Gladiator/Shogun.) Proper Form is actually a really good passive for them to take, since Gladiators don't have great accuracy with their skills. It could help with Nine Smashes if you're intent on taking that skill, but it won't completely offset the accuracy loss.
Farmer:
...Really? Like okay, Persistence can be a neat passive, but they really don't have anything of value to offer to a Gladiator. If you want someone to operate as a field support, use a class that actually has a decently sized TP pool.
Shogun:
Here it is, the most powerful Class/Subclass combination in the game. Gladiator/Shogun is pretty much the best damage dealer. No other class can compare to it in terms of effectiveness. The main reason is because the Shogun has an ability called Warrior Might, which is a Chaser skill that will always chase attacks. Party setups were created to maximize that skill's damage output. As for why Gladiator is the main candidate for it? It's because they have access to Endless Battle and Berserker Vow, which provides a real nice damage boost for it. And Warrior Might also applies a defense penalty when used, which the Gladiator won't care much about since they're so naturally durable. If you want to utterly break the game, this is the subclass to go with. Otherwise, go with something else if you wish to have mercy.
Gladiators are pretty much the most overpowered and dominant class in the game. As a subclass, it's pretty much the best option for pretty much every physical attacking class in the game. As for the class itself, it can deal so much damage with a Shogun subclass, that everything is pretty much annihilated within 2 turns. Though even without a Shogun subclass, they're a decent class on their own, and a safe choice to go with if you're having trouble coming up with your party composition.