Toggle Background Color
Class Showcase: Shogun
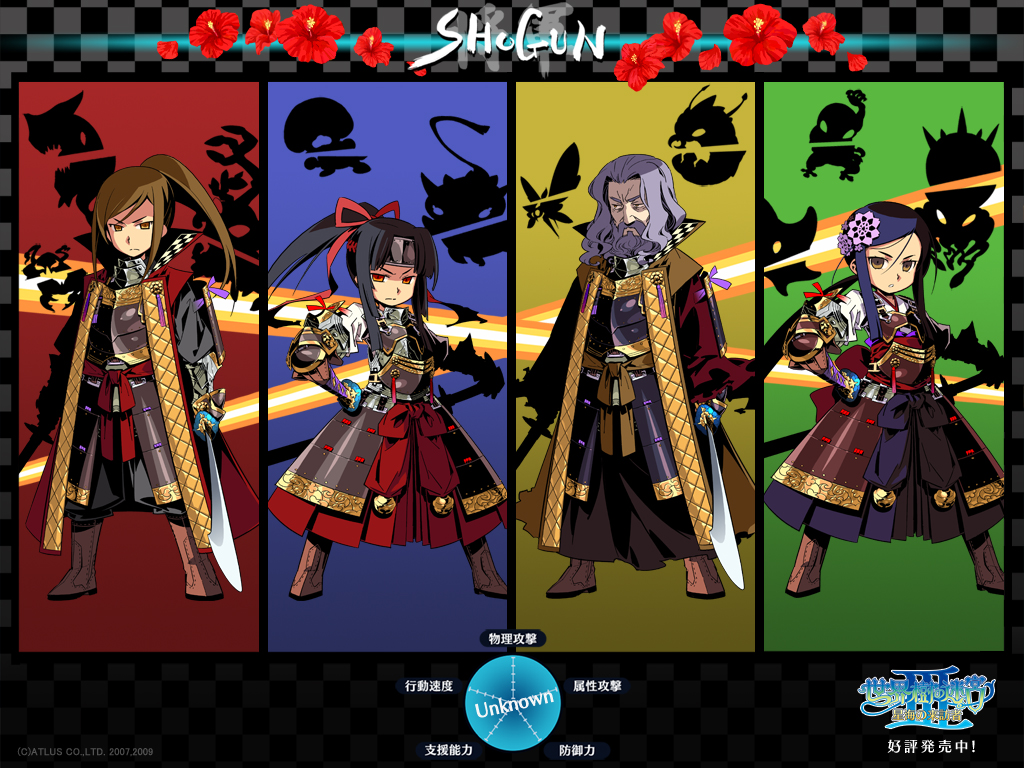
Sorry, but Makita didn't make any group pictures for the unlockable classes, so you'll have to make do with the official art.
No name changes here, they're known as Shoguns in Japan as well. They're one of the two unlockable classes in this game, and you unlock these in the 4th Stratum after siding with Armoroad in the 3rd Stratum. Some people like to compare them to Ronin from the first two games, but in all honesty, the two classes play very differently. Ronin are pretty much a pure offensive force, while Shoguns are a mix of offense and support. They're a commanding force in battle while participating in fights themselves.
Now mind you Shoguns are even more fragile than Ronin due to their choice in armor. They're essentially glass, no, paper cannons. They have some unique offensive abilities, and the class is essentially themed around being a blood thirsty commander. They can be built as an offensive class or a support, or even both if you so choose. A unique class, all things considered, but not much stands out about them.
Well there is one ability that stands out. One very infamous strategy that most people who have played the game are familiar with. They have an ability called Warrior Might, which is quite frankly, the single most overpowered ability in the game. With the right party setup, it can take down all the bosses in the game in 2 turns. This is not an exaggeration. Now you don't need a Shogun in the party, so you can get through the entire game without ever touching Warrior Might. For more details on that ability and how to make the best of it to your ability, read the Warrior Might section.
Like the Ninja, because this is a Japanese themed class, some of the skill names went untranslated. Because of thematic reasons or something. So I'll be translating them like before. And just warning you again, these translations were fetched from the dark bowels of the internet, so they might be inaccurate. Once again, feel free to correct me if you want.
Equipment:
Weapons: Katanas, Daggers, and Books.
Armor: Clothes, Gloves, Boots, and Accessories.
Stats
Level 1
HP: 40
TP: 21
STR: 8
VIT: 3
AGI: 9
LUC: 6
TEC: 5
Level 35
HP: 196
TP: 89
STR: 32
VIT: 22
AGI: 34
LUC: 21
TEC: 25
Level 70
HP: 357
TP: 159
STR: 58
VIT: 41
AGI: 60
LUC: 37
TEC: 46
Level 99
HP: 457
TP: 203
STR: 73
VIT: 53
AGI: 76
LUC: 47
TEC: 59
Statwise, Shoguns are very fragile. They don't have stellar VIT and TEC stats, and they can't wear Heavy or Light armor. Combined with their sub par HP pool, and you're looking at a glass, no, paper canon. They're fairly speedy at least with their decent AGI stat, and their STR is decent enough that they make for good physical attackers. Their poor LUC and TEC makes them really susceptible to ailments.
Second Sword
Skill Type: Class Skill
Maximum Level: 10
Stats Used: N/A
Prerequisites: N/A
This Class Skill enables the Shogun to equip two weapons at once, and lets them attack twice with both hands when using a regular attack. The offhand attack will deal less damage than the initial attack. Increasing the level of this skill only increases the damage the offhand attack does during regular attacks.
1: Enables the use of dual-wielding. Offhand attack deals 20% damage.
2: Offhand attack deals 23% damage.
3: Offhand attack deals 26% damage.
4: Offhand attack deals 29% damage.
5: Offhand attack deals 32% damage.
6: Offhand attack deals 35% damage.
7: Offhand attack deals 38% damage.
8: Offhand attack deals 41% damage.
9: Offhand attack deals 45% damage.
10: Offhand attack deals 50% damage.
Notes:
-Enables the Shogun to equip weapons in the 2nd equipment slot.
-There are no restrictions on what weapons can be equipped in the 2nd slot.
-Second Sword skill levels do not affect the damage output of skills.
-Enables Swashbuckling to activate up to 7 times, meaning that the Shogun can get up to 9 hits when using regular attacks. More details on this can be found in the Buccaneer section of the subclass
-Only the attack power and attributes of the weapon in the first slot are factored into the damage formula.
-If a Gun or a Crossbow is equipped in the first slot, any skills that are normally melee attacks will become ranged attacks.
-Stat, SPD, CRI, HIT, and LIM forges always applies to the Shogun, no matter which weapon they're on.
-Ailment and elemental forges only apply to the weapon they're on.
-Enables 5-Ring Sword to hit up to 10 times.
-If either of the first two equipment slots are empty, the Shogun will use their fists to attack.
-Yes, they can dual wield fists.
Second Sword is a bit of an unusual passive in that it allows the Shogun to dual wield. This actually doesn't increase the damage of their skills, so taking more than one point in this is a bit of a waste. However, dual-wielding does open up some opportunities to do some neat things. Since only the attack power of the weapon in the first slot is taken into consideration when making attacks, you could equip a weaker weapon in the 2nd slot, and use skills that involve that weapon and have them be as powerful as the weapon you've equipped in the first slot. Second Sword does have one important aspect to it that doesn't make people pass up the skill entirely. It makes Swashbuckling hit up to 9 times, which is great when the Buccaneer’s Limit Boost passive gets taken into consideration. But it also synergizes well with Warrior Might. For more details on Swashbuckling and how it interacts with Second Sword, read the Buccaneer section later on.
Katana Mastery
Skill Type: Passive
Maximum Level: 10
Stats Used: N/A
Prerequisites: N/A
This weapon mastery skill increases the damage output of regular attacks when using a Katana. Higher levels increase the damage output. Does not affect skills.
If the user cannot equip Katanas normally, this skill enables them to do so.
1: 2% damage boost.
2: 3% damage boost.
3: 4% damage boost.
4: 5% damage boost.
5: 6% damage boost.
6: 7% damage boost.
7: 8% damage boost.
8: 9% damage boost.
9: 10% damage boost.
10: 11% damage boost.
You know the drill by now, don't invest in this more than you need to.
Endure
Skill Type: Passive
Maximum Level: 5
Stats Used: N/A
Prerequisites: N/A
Once per battle, this ability has a chance to let the Shogun survive a killing blow, leaving them at 1 HP. Increasing the skill level increases the activation rate. Does not work against Instant Death.
1: 40% activation rate.
2: 50% activation rate.
3: 60% activation rate.
4: 70% activation rate.
5: 80% activation rate.
You really should max this out, since Shoguns are one of the most fragile classes in the game, and anything that lets them live longer in battles will help them out greatly.
Bloody Lance
Skill Type: Passive
Maximum Level: 5
Stats Used: N/A
Prerequisites: Endure – Level 3
Whenever the Shogun kills an enemy or ally, they get more bloodthirsty, gaining a permanent attack boost that is only lost upon the end of the battle or death. The attack boost is capped at 500%. Increasing the level increases the damage boost. Affects all damage types, including Almighty.
1: Increases attack power by 10%.
2: Increases attack power by 13%.
3: Increases attack power by 16%.
4: Increases attack power by 19%.
5: Increases attack power by 22%.
6: Increases attack power by 25%.
7: Increases attack power by 28%.
8: Increases attack power by 31%.
9: Increases attack power by 35%.
10: Increases attack power by 40%.
This isn't a buff, so it can't be dispelled. However, the damage boost will go away once the battle ends or the Shogun dies. Also in order to get the damage, boost, the Shogun needs to kill something. So against FOEs, or bosses, most of which don't have helpers, this skill doesn't really help that much. However, this skill does give a damage boost if a Shogun manages to kill an ally. One of their skills lets them do so, and you could theoretically have that skill activate repeatedly to give the Shogun a huge damage boost with Bloody Lance.
Morale Boost
Skill Type: Passive
Maximum Level: 10
Stats Used: N/A
Prerequisites: N/A
Whenever the Shogun is revived, all allies recover HP. The higher the skill level, the more HP gets restored.
1: Restores 10 HP.
2: Restores 20 HP.
3: Restores 30 HP.
4: Restores 40 HP.
5: Restores 50 HP.
6: Restores 60 HP.
7: Restores 70 HP.
8: Restores 80 HP.
9: Restores 90 HP.
10: Restores 100 HP.
Eh, kind of a gimmicky passive, and not something to rely on for healing. It is needed to unlock a few skills, so unless you want those, you might want to just ignore this.
Kaishaku (Mercy Kill)
Skill Type: Passive
Maximum Level: 5
Stats Used: N/A
Prerequisites: Morale Boost – Level 1, Endure – Level 1
Whenever an enemy or ally falls under a certain HP threshold, the Shogun has a chance of instantly killing them once they get targeted. Ignores Instant Death resistances, but not immunities. Increasing the skill level increases the activation rate, and the threshold that this skill will activate at. Shoguns cannot kill themselves with this passive, but they can kill their own Bunshin clones.
1: 30% activation rate once the target falls below 10% HP.
2: 35% activation rate once the target falls below 11% HP.
3: 40% activation rate once the target falls below 12% HP.
4: 50% activation rate once the target falls below 13% HP.
5: 60% activation rate once the target falls below 15% HP.
Just a little warning, targeted means whenever another skill or item affects them. So a Hoplite using one of their defensive skills can cause the Shogun to attempt to kill whoever happens to be running low on HP, though if the Hoplite is using Bodyguard, they'll try to kill the Hoplite instead. So at any rate, this is a pretty risky passive to go for. It's essentially a global HP drop against nearly everything in the game. If you're familiar with the Climax ability from the first two games, this is essentially a massively nerfed version of it. I personally don't like it since enemies that are at 15% are usually about to die, while allies that are at that threshold can still be saved, and Kaishaku robs you of that opportunity. However, it can be a good way to get Bloody Lance to kick in, and it does work on bosses. Whether you take this skill or not is up to you, but thankfully it's not a prerequisite for anything.
 Clarste had this to say about what Kaishaku is:
Clarste posted:
To explain more clearly what this is, when a samurai commits seppuku they're supposed to slash their own belly and bleed to death. But that's kind of a relatively slow and painful way to die, so traditionally they'd ask their buddy to stand behind them and chop their heads off after they made the cut, to end their suffering after they'd already shown their resolve. Or, to be more cynical, to make sure they don't have any second thoughts. Anyway, the Shogun is the guy standing behind you with a sword, ready to kill you.
Hilt Strike
Skill Type: Active
Maximum Level: 10
Equipment Needed: Katana
Body Part: Arm
Stats Used: STR, LUC, TEC
Target Type: Single
Action Speed: Varies
Prerequisites: Katana Mastery – Level 1
A single target Strike attack that has a chance to inflict Stun. Higher levels increase the damage dealt, infliction rate, accuracy, and action speed.
1: Deals 130% damage. 30% infliction rate. Has a Hit Rate of 94. Has an Action Speed of +3. Costs 8 TP.
2: Deals 133% damage. 32% infliction rate. Has a Hit Rate of 95. Has an Action Speed of +3. Costs 8 TP.
3: Deals 136% damage. 34% infliction rate. Has a Hit Rate of 96. Has an Action Speed of +3. Costs 9 TP.
4: Deals 139% damage. 36% infliction rate. Has a Hit Rate of 97. Has an Action Speed of +3. Costs 9 TP.
5: Deals 142% damage. 38% infliction rate. Has a Hit Rate of 98. Has an Action Speed of +3. Costs 10 TP.
6: Deals 145% damage. 40% infliction rate. Has a Hit Rate of 99. Has an Action Speed of +5. Costs 10 TP.
7: Deals 150% damage. 42% infliction rate. Has a Hit Rate of 99. Has an Action Speed of +5. Costs 11 TP.
8: Deals 155% damage. 44% infliction rate. Has a Hit Rate of 99. Has an Action Speed of +5. Costs 11 TP.
9: Deals 165% damage. 46% infliction rate. Has a Hit Rate of 99. Has an Action Speed of +5. Costs 12 TP.
10: Deals 165% damage. 50% infliction rate. Has a Hit Rate of 99. Has an Action Speed of +5. Costs 12 TP.
A very basic and weak damage skill. Not really worth it. While the Shogun is plenty fast, their LUC and TEC stats are really lackluster, so the Stun probably won't proc most of the time in big fights. The Shogun also has far better things to do than attempting to Stun enemies, so I advise skipping this.
Myoujou/Magatoki (Morning Star/Wicked Time)
Skill Type: Active
Maximum Level: 10
Equipment Needed: Katana
Body Part: Arm
Stats Used: STR
Target Type: Random
Action Speed: +3
Prerequisites: Katana Mastery – Level 5
The Shogun hits enemies on the field a random amount of times, dealing Slash damage in the process. If used during the daytime (7 AM to 6 PM)/nighttime (7 PM to 6 AM), the damage output increases. Higher levels of the skill increase the number of hits, damage output, and hit rate.
1: Hits 2 to 3 times. Deals 80% damage per hit. Increases to 104% during the day/night. Has a Hit Rate of 89. Costs 11 TP.
2: Hits 2 to 3 times. Deals 82% damage per hit. Increases to 109% during the day/night. Has a Hit Rate of 90. Costs 12 TP.
3: Hits 2 to 3 times. Deals 84% damage per hit. Increases to 114% during the day/night. Has a Hit Rate of 91. Costs 13 TP.
4: Hits 2 to 3 times. Deals 86% damage per hit. Increases to 119% during the day/night. Has a Hit Rate of 92. Costs 14 TP.
5: Hits 2 to 3 times. Deals 88% damage per hit. Increases to 124% during the day/night. Has a Hit Rate of 93. Costs 15 TP.
6: Hits 2 to 4 times. Deals 90% damage per hit. Increases to 127% during the day/night. Has a Hit Rate of 94. Costs 17 TP.
7: Hits 2 to 4 times. Deals 92% damage per hit. Increases to 133% during the day/night. Has a Hit Rate of 95. Costs 18 TP.
8: Hits 2 to 4 times. Deals 94% damage per hit. Increases to 139% during the day/night. Has a Hit Rate of 96. Costs 19 TP.
9: Hits 2 to 4 times. Deals 97% damage per hit. Increases to 143% during the day/night. Has a Hit Rate of 97. Costs 21 TP.
10: Hits 2 to 4 times. Deals 100% damage per hit. Increases to 150% during the day/night. Has a Hit Rate of 98. Costs 23 TP.
Here's one of the Shogun's main damage skills. They're a bit gimmicky in that you need to use them at certain times of day in order to have them deal more damage. You could max out both skills to get around that, but that's a pretty big skill point investment. At any rate, at level 10, they deal an average of 300% or 450% damage depending on when you use them. Their average damage output is less than 5-Ring Sword's, but their damage is more consistent. Whether you take these or that skill instead is up to you. But if you're planning on making a Warrior Might party, you should ignore this.
5-Ring Sword
Skill Type: Active
Maximum Level: 10
Equipment Needed: Katana
Body Part: Arm
Stats Used: STR
Target Type: Random
Action Speed: +3
Prerequisites: Katana Mastery – Level 10, Daifuhensha – Level 3
The Shogun hits enemies on the field a random amount of times, dealing Slash damage in the process. If the Shogun has 2 weapons equipped, then the maximum number of hits doubles. Higher levels of the skill increase the number of hits, damage output, and hit rate.
1: Hits 2 to 3 times. Hits 2 to 6 times if dual wielding. Deals 70% damage per hit. Has a Hit Rate of 89. Costs 15 TP.
2: Hits 2 to 3 times. Hits 2 to 6 times if dual wielding. Deals 72% damage per hit. Has a Hit Rate of 90. Costs 16 TP.
3: Hits 2 to 3 times. Hits 2 to 6 times if dual wielding. Deals 74% damage per hit. Has a Hit Rate of 91. Costs 17 TP.
4: Hits 2 to 3 times. Hits 2 to 6 times if dual wielding. Deals 76% damage per hit. Has a Hit Rate of 92. Costs 18 TP.
5: Hits 2 to 4 times. Hits 2 to 8 times if dual wielding. Deals 78% damage per hit. Has a Hit Rate of 93. Costs 20 TP.
6: Hits 2 to 4 times. Hits 2 to 8 times if dual wielding. Deals 80% damage per hit. Has a Hit Rate of 94. Costs 22 TP.
7: Hits 2 to 4 times. Hits 2 to 8 times if dual wielding. Deals 82% damage per hit. Has a Hit Rate of 95. Costs 24 TP.
8: Hits 2 to 4 times. Hits 2 to 8 times if dual wielding. Deals 84% damage per hit. Has a Hit Rate of 96. Costs 26 TP.
9: Hits 2 to 5 times. Hits 2 to 10 times if dual wielding. Deals 86% damage per hit. Has a Hit Rate of 97. Costs 28 TP.
10: Hits 2 to 5 times. Hits 2 to 10 times if dual wielding. Deals 90% damage per hit. Has a Hit Rate of 98. Costs 30 TP.
Probably the Shogun's best damage skill, if we aren't counting Warrior Might. At level 10, it deals 540% damage on average, which is higher than Myoujou's and Magatoki's average damage output. But the damage is a lot more inconsistent here. It's worth noting that since this skill requires the user to be dual wielding, and the only class that can do so is the Shogun, it's useless on another class. Whether you have your Shogun take this is up to you, but if you're using one for Warrior Might ammo, you should probably ignore this.
Unified Spirit
Skill Type: Active
Maximum Level: 5
Equipment Needed: N/A
Body Part: Head
Stats Used: N/A
Target Type: Self
Action Speed: +6
Prerequisites: Endure – Level 3
Places a buff that prevents the Shogun from being hit with binds for 4 turns. Unlike Prevent Order, the buff is not dispelled if it blocks a bind. Increasing the skill level only decreases the TP cost.
1: Costs 12 TP.
2: Costs 10 TP.
3: Costs 8 TP.
4: Costs 6 TP.
5: Costs 4 TP.
Ehh, I guess if you really want it? It can be handy, but a Shogun has better things to do other than preventing themselves from being bound. Could be more useful on a support class. It is a prerequisite to their best damage skill, so that's something to keep in mind.
Daifuhensha (Great Militarist)
Skill Type: Active
Maximum Level: 10
Equipment Needed: N/A
Body Part: Head
Stats Used: N/A
Target Type: Self
Action Speed: +6
Prerequisites: Endure – Level 5
The Shogun strikes a pose, which causes their physical attack and defense to increase for 4 turns, but also causes enemies to target them more often. The provoke component acts exactly like Provoke and Otori, and the buff will overwrite them if the chosen ally has those buffs in place. Higher skill levels increases the damage boost, damage reduction, and maximum aggro rate. Does not affect elemental or Almighty damage.
1: 15% attack increase. 15% damage reduction. Maximum aggro value of 5. Costs 10 TP.
2: 18% attack increase. 17% damage reduction. Maximum aggro value of 6. Costs 11 TP.
3: 21% attack increase. 19% damage reduction. Maximum aggro value of 7. Costs 12 TP.
4: 24% attack increase. 22% damage reduction. Maximum aggro value of 8. Costs 13 TP.
5: 27% attack increase. 25% damage reduction. Maximum aggro value of 9. Costs 14 TP.
6: 30% attack increase. 28% damage reduction. Maximum aggro value of 10. Costs 15 TP.
7: 33% attack increase. 31% damage reduction. Maximum aggro value of 11. Costs 16 TP.
8: 37% attack increase. 34% damage reduction. Maximum aggro value of 12. Costs 17 TP.
9: 41% attack increase. 37% damage reduction. Maximum aggro value of 13. Costs 18 TP.
10: 45% attack increase. 40% damage reduction. Maximum aggro value of 15. Costs 20 TP.
This skill is a double-edged sword. While the attack boost and damage reduction are nice, it also causes enemies to target the Shogun more often, which probably isn't what you want. On other offensive classes, this could be a worthwhile skill. Especially on Gladiators, who are durable enough to not really care about being attacked more often.
Fore Honor
Skill Type: Active
Maximum Level: 10
Equipment Needed: N/A
Body Part: Head
Stats Used: N/A
Target Type: Single
Action Speed: +6
Prerequisites: Morale Boost – Level 3
The Shogun appoints themselves or someone else to be the vanguard, increasing their damage output, and increasing their action speed by +5000, but also lowers their defense for 4 turns. Higher levels increase the damage boost, but also increases how much damage the chosen ally takes. Affects all damage types, including Almighty. Overwrites Rear Dignity if that buff is already in place.
1: 10% attack increase. Increases damage taken by 20%. Costs 8 TP.
2: 12% attack increase. Increases damage taken by 23%. Costs 8 TP.
3: 14% attack increase. Increases damage taken by 26%. Costs 9 TP.
4: 17% attack increase. Increases damage taken by 29%. Costs 10 TP.
5: 20% attack increase. Increases damage taken by 32%. Costs 11 TP.
6: 23% attack increase. Increases damage taken by 35%. Costs 12 TP.
7: 26% attack increase. Increases damage taken by 38%. Costs 13 TP.
8: 29% attack increase. Increases damage taken by 42%. Costs 14 TP.
9: 32% attack increase. Increases damage taken by 46%. Costs 15 TP.
10: 35% attack increase. Increases damage taken by 50%. Costs 16 TP.
So this is a pretty interesting skill. It's a turn order skill, but it's a buff instead of a one time thing. Also unlike Knighthood, it isn't bugged, so you don't have to worry about casting it on the wrong slot. Another interesting aspect about it is that it increases the damage of all damage types, making it one of the few ways to increase elemental and Almighty damage in the game. However, it also lowers the target's defense to all damage types, so be careful about that.
Rear Dignity
Skill Type: Active
Maximum Level: 10
Equipment Needed: N/A
Body Part: Head
Stats Used: N/A
Target Type: Single
Action Speed: -1030
Prerequisites: Morale Boost – Level 3
The Shogun appoints themselves or someone else to be the rear guard, increasing their defense, but also lowers their damage output, and lowers their action speed by -10000 for 4 turns. Higher levels increase the defense boost, but also decreases how much damage the chosen ally deals. Affects all damage types, including Almighty. Overwrites Fore Honor if that buff is already in place.
1: 20% damage reduction. Lowers attack by 20%. Costs 8 TP.
2: 23% damage reduction. Lowers attack by 22%. Costs 8 TP.
3: 27% damage reduction. Lowers attack by 24%. Costs 9 TP.
4: 31% damage reduction. Lowers attack by 26%. Costs 10 TP.
5: 35% damage reduction. Lowers attack by 28%. Costs 11 TP.
6: 39% damage reduction. Lowers attack by 30%. Costs 12 TP.
7: 43% damage reduction. Lowers attack by 32%. Costs 13 TP.
8: 47% damage reduction. Lowers attack by 34%. Costs 14 TP.
9: 51% damage reduction. Lowers attack by 36%. Costs 15 TP.
10: 55% damage reduction. Lowers attack by 40%. Costs 16 TP.
Well this is kind of a weird defensive skill. Like with Fore Honor, this does affect all damage types when dealing and taking damage. But it's not really that useful. I mean having an ally act last isn't really that great of an idea. And while doing something like increasing your Hoplite's defenses is nice, it makes their defensive skills useless because they can't first during the turn.
There is one other aspect of the skill that could make this worth using. For one thing, Rear Dignity is bugged. In fact, it has the exact same bug that Knighthood has. Except instead of Knighthood granting the enemy a huge boost to their action speed, Rear Dignity flat out makes the enemy move last. But only on the turn this skill gets casted. Otherwise this skill works normally. That can be handy to take advantage of in certain fights, but I doubt you'd want your Shogun casting this repeatedly instead of attacking. Of course another class could take advantage of this for them.
Ambush Stance
Skill Type: Active
Maximum Level: 10
Equipment Needed: N/A
Body Part: Arm
Stats Used: STR
Target Type: Row
Action Speed: +3
Prerequisites: Fore Honor – Level 3, Rear Dignity – Level 3
The Shogun commands a row to assume a battle formation, causing them make a counterattack when they take damage for the current turn. The target's stats, passives, and weapon properties, such as forges, are taken into consideration when they make the counterattack. If Charge or Etheric Charge was cast, it will be used up on the counterattack. Etheric Charge's damage boost only applies if elemental forges were on the weapon. Higher levels increase the counterattack damage and accuracy. If the target has their arms bound, they cannot make a counterattack.
1: Deals 100% damage. Has a Hit Rate of 89. Costs 10 TP.
2: Deals 103% damage. Has a Hit Rate of 90. Costs 10 TP.
3: Deals 106% damage. Has a Hit Rate of 91. Costs 11 TP.
4: Deals 109% damage. Has a Hit Rate of 92. Costs 12 TP.
5: Deals 112% damage. Has a Hit Rate of 93. Costs 13 TP.
6: Deals 115% damage. Has a Hit Rate of 94. Costs 14 TP.
7: Deals 118% damage. Has a Hit Rate of 95. Costs 15 TP.
8: Deals 122% damage. Has a Hit Rate of 96. Costs 16 TP.
9: Deals 126% damage. Has a Hit Rate of 97. Costs 17 TP.
10: Deals 130% damage. Has a Hit Rate of 98. Costs 18 TP.
Honestly, this is a pretty gimmicky skill. Aside from a skill that increases someone's aggro value, there's no real way to control who does the couterattacks. It's a way to get extra damage in, but there's better skills for that. And supports aren't likely to do much damage since a lot of support classes have low STR stats.
Warrior Might
Skill Type: Active
Maximum Level: 10
Equipment Needed: N/A
Body Part: Leg
Stats Used: STR
Target Type: Chaser
Action Speed: +60
Prerequisites: Unified Spirit – Level 3, Bloody Lance – Level 3
The Shogun lowers their defenses in order to chase the attacks of their allies. Every hit an ally makes will always be chased. When the Shogun chases an attack, their weapon properties, such as forges, are taken into consideration. Higher levels increases the chase damage and accuracy, but also increases the amount of damage they take.
1: Deals 85% damage per chase. Has a Hit Rate of 94. Increases damage taken by 50%. Costs 10 TP.
2: Deals 93% damage per chase. Has a Hit Rate of 94. Increases damage taken by 58%. Costs 11 TP.
3: Deals 102% damage per chase. Has a Hit Rate of 95. Increases damage taken by 66%. Costs 12 TP.
4: Deals 111% damage per chase. Has a Hit Rate of 95. Increases damage taken by 74%. Costs 13 TP.
5: Deals 120% damage per chase. Has a Hit Rate of 96. Increases damage taken by 82%. Costs 14 TP.
6: Deals 129% damage per chase. Has a Hit Rate of 96. Increases damage taken by 90%. Costs 16 TP.
7: Deals 138% damage per chase. Has a Hit Rate of 97. Increases damage taken by 98%. Costs 18 TP.
8: Deals 147% damage per chase. Has a Hit Rate of 97. Increases damage taken by 107%. Costs 20 TP.
9: Deals 156% damage per chase. Has a Hit Rate of 98. Increases damage taken by 116%. Costs 22 TP.
10: Deals 165% damage per chase. Has a Hit Rate of 98. Increases damage taken by 125%. Costs 24 TP.
Oh boy. If you wondered what would happen if Chaser skills could activate forever, you would get this skill. Say hello to the single most overpowered skill in the game, and the reason most people ally with Armoroad. This skill (and how bad the Buccaneer's Chasers are) are pretty much the reason Chasers got replaced with Links in EO4. It deals slightly less damage than the Buccaneer's Chasers, and it can activate way more often at the cost of dropping the Shogun's defenses big time. Naturally, such a skill could deal a large amount of damage if there were lots of attacks to chase. However, multihit skills won't cause a chase for each hit, but multiple actions taken through say, Swashbuckling, will trigger a chase for each hit. So people came up with a party to maximize this skill's damage potential. The party is as follows:
Gladiator/Shogun, Hoplite/Whatever, Shogun/Buccaneer, Shogun/Buccaneer, Monk/Prince.
The Gladiator/Shogun is the main user of Warrior Might. Why not a Shogun? Well the Gladiator is one of the most durable classes in the game, and they come with Endless Battle, which increases Warrior Might's damage. Oh, and before you get your hopes up, Charge does not work with this. They're basically the safest choice for a Warrior Might user, though some people prefer using an Arbalist/Shogun. One reason being is because of their higher STR stat.
If you're curious on how much damage each class offers, let's do some math.
Gladiators come with Endless Battle, and Berserker's Vow. Which are 1.25 and 1.9 multipliers. And other physical attack boosts are 1.45 multipliers so it would come out to 1.25 * 1.9 * 1.45 * 1.45 = 4.993.
For Arbalists, they come with Giant Kill, but don't have access to Berserker's Vow, so they're stuck with a 3rd 1.45 multiplier. This would come out to 1.55 * 1.45 * 1.45 * 1.45 = 4.725. So it's not that big a difference between damage, if you don't take STR into consideration.
As for how that party factors in, A Shogun with Second Sword can hit an enemy up to 9 times if they have Swashbuckling at level 10. And 2 Shogun Buccaneers can get up to 18 hits, which would mean 18 chases. However, Limit skills can also be chased, and there's at least one that's incorporated into Warrior Might setups, so that's another hit, bringing the total up to 19. If the Hoplite and Monk decide to poke at the enemy, that's another 2 hits, bringing the total up to 21. So if a level 10 Warrior Might does a total of 21 chases, that would essentially be a 3465% damage skill. That's pretty absurd, and that's not taking in the factors from the buffs. If we take that 4.993 multiplier from earlier, that would turn Warrior Might into a 17300% damage skill. That's utterly ridiculous, and pretty much almost nothing in the game will survive that.
Essentially, you annihilate everything through the power of math, since nothing in the game, not even any of the post-game bosses, can stand up to that much math.
Fusillade (Salvo)/Blitz Command
Skill Type: Active
Maximum Level: 10
Equipment Needed: N/A
Body Part: Arm
Stats Used: STR
Target Type: Single
Action Speed: +13/+3
Prerequisites: Morale Boost – Level 5/Fusillade – Level 3
Fusillade has the Shogun command everyone who has a Gun or a Crossbow equipped to open fire on the enemy. The Shogun themselves will not attack, even if they have those weapons equipped. When an ally attacks, their stats, passives, and weapon properties, such as forges, are taken into consideration. If Charge or Etheric Charge was cast, it will be used up on the attack. Etheric Charge's damage boost only applies if elemental forges were on the weapon. Higher levels increase the damage output and accuracy. If the target has their arms bound, they cannot attack. This skill will do nothing if no one in the party is wielding a Gun or a Crossbow.
Blitz Command has the Shogun command everyone to attack the enemy. The Shogun themselves will participate in the attack. When an ally attacks, their stats, passives, and weapon properties, such as forges, are taken into consideration. If Charge or Etheric Charge was cast, it will be used up on the attack. Etheric Charge's damage boost only applies if elemental forges were on the weapon. Higher levels increase the damage output and accuracy. If the target has their arms bound, they cannot attack. The damage and accuracy scaling for Blitz Command is the exact same as Fusillade's. Only the TP costs are different between the two skills.
1: Deals 100% damage. Has a Hit Rate of 89. Costs 8/14 TP.
2: Deals 104% damage. Has a Hit Rate of 90. Costs 8/15 TP.
3: Deals 108% damage. Has a Hit Rate of 91. Costs 9/16 TP.
4: Deals 112% damage. Has a Hit Rate of 92. Costs 9/17 TP.
5: Deals 116% damage. Has a Hit Rate of 93. Costs 10/18 TP.
6: Deals 120% damage. Has a Hit Rate of 94. Costs 11/19 TP.
7: Deals 125% damage. Has a Hit Rate of 95. Costs 12/20 TP.
8: Deals 130% damage. Has a Hit Rate of 96. Costs 13/22 TP.
9: Deals 135% damage. Has a Hit Rate of 97. Costs 14/24 TP.
10: Deals 140% damage. Has a Hit Rate of 98. Costs 15/26 TP.
Fusillade is kind of useless unless your entire party has a Gun or Crossbow in their hand. Even then this is just a gimmicky ability. I recommend ignoring it.
Blitz Command is essentially a better version of Fusillade, since it commands everyone to attack. Still, it's not too great unless everyone in the party are damage dealers, as it's unlikely that supports will deal much damage. I only recommend taking this if your Shogun is mainly a support.
Retreat
Skill Type: Active
Maximum Level: 5
Equipment Needed: N/A
Body Part: Leg
Stats Used: AGI, LUC
Target Type: N/A
Action Speed: +30
Prerequisites: N/A
This skill has the Shogun attempt to escape from battle with their allies. Higher levels increase the escape rate.
1: 40% escape rate. Costs 5 TP.
2: 50% escape rate. Costs 5 TP.
3: 60% escape rate. Costs 5 TP.
4: 70% escape rate. Costs 5 TP.
5: 80% escape rate. Costs 5 TP.
Kind of redundant and unnecessary. If the escape rates weren't so skewed in the player's favor, this could be a helpful ability. But as it stands, you really don't need this. It does let you escape from FOEs if you get cornered, but you really shouldn't be letting that happen.
Subclasses:
Prince/ss:
If you want to stick your Shogun into a support role, you could make them into a Prince/ss. But honestly, the combination would be better the other way around, since Prince/sses are much more durable, and have a bigger TP pool.
Gladiator:
If you want to make your Shogun into a straight damage dealer, this is the best sub for them. Berserker's Vow and Charge can make 5-Ring Sword or Myoujou/Magatoki deal a lot of damage if you role a good amount of hits. While Charge won't work on Warrior Might, Berserker's Vow will. Although in all honesty, if you're gonna make use of Warrior Might, the combination is much better the other way around. Gladiators are much more durable and don't mind the defense drop nearly as much as a Shogun would.
Hoplite:
Well their defensive kit could give the Shogun more survivability, since Parry and Magic Parry. And since Spears are ranged weapons, this subclass enables Shoguns to attack from the back row, which adds to their survivability.
Buccaneer:
This is pretty much the most popular choice for a subclass if you want to stick your Shogun into a support role. Swashbuckling makes them great fuel for Warrior Might, and it synergizes greatly with Limit Boost. If the Shogun gets at least 7 hits, their Limit Gauge will fill up in one turn. And Eagle Eye is a handy support ability to have. As for how Swashbuckling interacts with Second Sword, these are pretty much your exact chances on getting these hits if Swashbuckling is at level 10.
2 hits: 40.96%
3 hits: 24.29%
4 hits: 15.93%
5 hits: 7.64%
6 hits: 3.44%
7 hits: 1.49%
8 hits: 0.62%
9 hits: 0.43%
So on average, you'll get 3.122 hits with Second Sword and Swashbuckling. Buccaneers also give Shoguns the ability to wield Guns, enabling them to use Katana skills from the back row without any damage penalties, so that's another perk of the class.
Ninja:
Thanks to Second Sword, Shoguns are able to use the Ninja's damage skills without suffering the downsides of using a Dagger. Which allows their damage skills like Tagen Battou to hit a lot harder than it normally does.
Monk:
Shoguns are terrible healers thanks to their low TEC and TP pools. But Second Sword does allow them to use fist skills with a Katana. Ascetic Deeds adds a bit more survivability to the Shogun.
Zodiac:
Singularity does work with Warrior Might, which increases its damage output even more. But otherwise, this class doesn't have much to offer them.
Wildling:
Well there's Primal Drums. That's always useful. But as a summoner? Yeah, Shoguns really aren't the best class for that, especially since their LUC and TEC stats are not ideal for inflicting ailments.
Arbalist:
This subclass can enable Shoguns to use ranged Katana attacks from the back row, thanks to Second Sword. So it can be a good way to add to their survivability.
Farmer:
You must really want Persistence or field skills. Come on, you can do better.
Shoguns are a bit of an odd class, being a mix of offense and support and having really fragile defenses. However, they are capable of breaking the game wide open if you wish to do so. And even if you ignore their game breaking ability, they're still a force to be reckoned with, whether they're a damage dealer or a support.