Toggle Background Color
Update 4: Cartography
 I used to like cats a lot before I came here. Now, I'm not so sure.


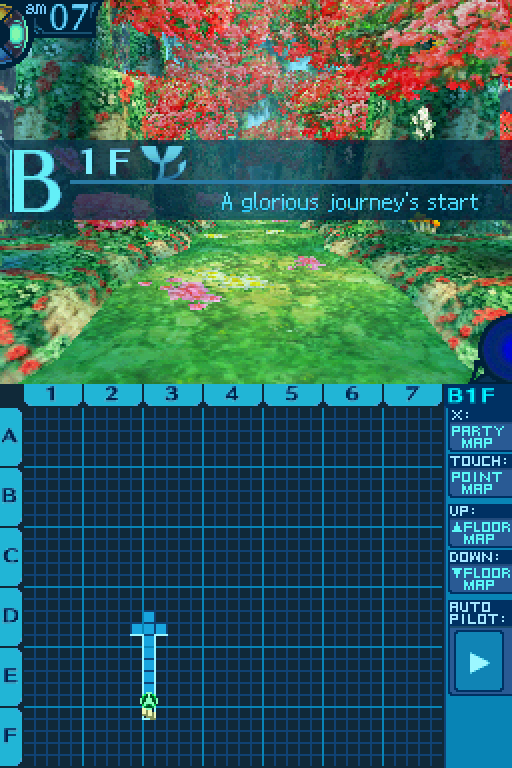
Welcome to the Labyrinth. We'll be spending a lot of time here.
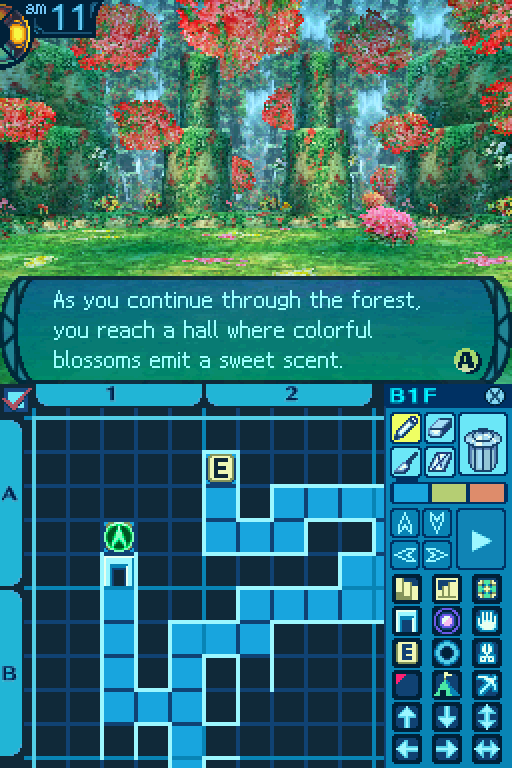
Though many explorers have lost their lives in its halls, it is surprisingly beautiful. The breathtaking flowers here are enough to make you feel as if you are simply out for a nature walk. But you mustn’t let your guard slip even for a moment! Go forth and explore, always remembering that this forest is fundamentally a dangerous place.
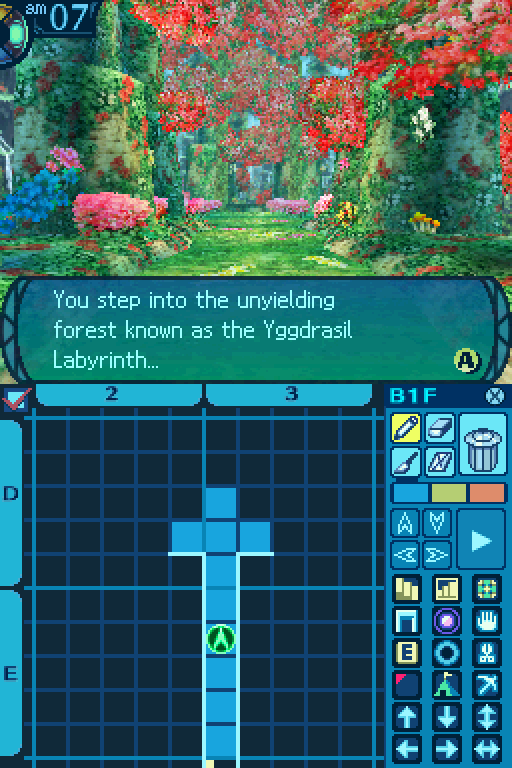
 Ahhh... So this is the Yggdrasil Labyrinth.
 Quite the beautiful place. It almost makes you forget that a lot of people have died here.
 Ha! But that won't happen to us, right?
 As long as we stay cautious.
I'll try not to let anything happen to you.
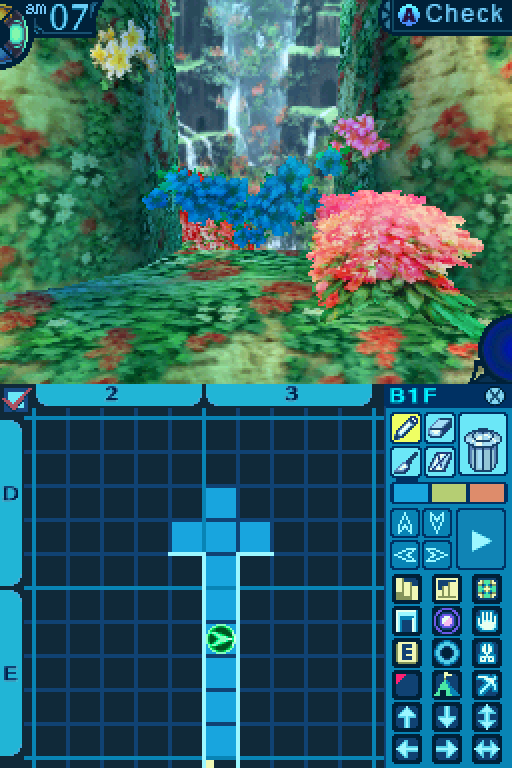
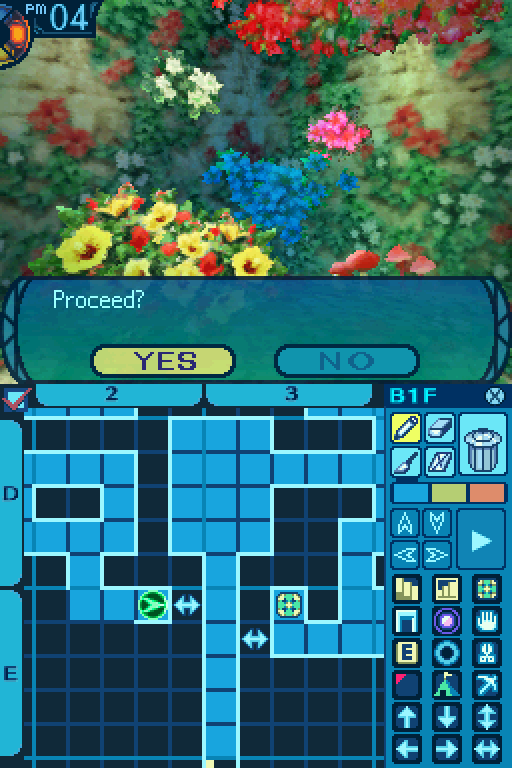
What pretty flowers. Oh? What have we here?
Huh? What'd you find?
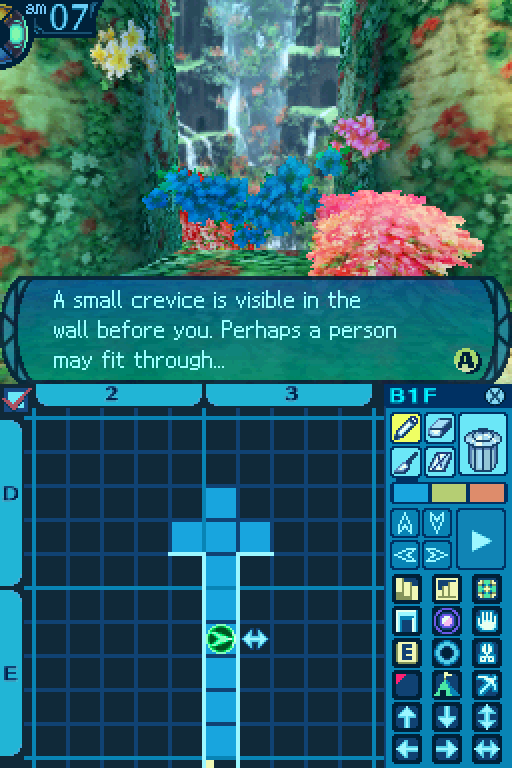
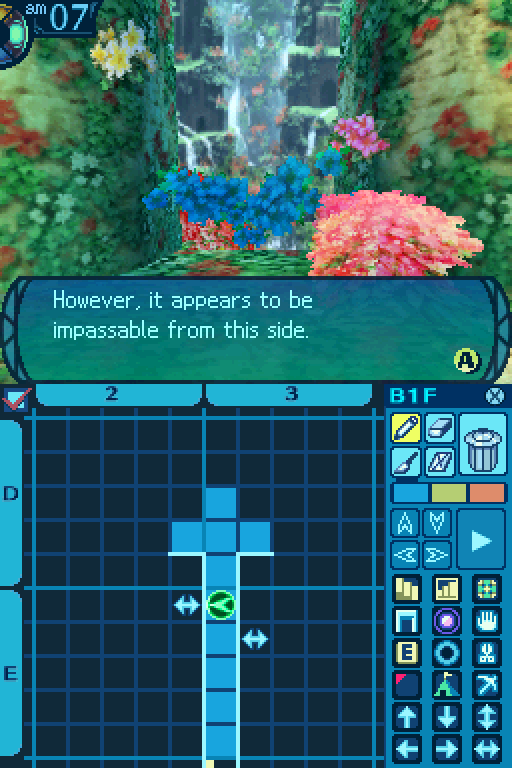
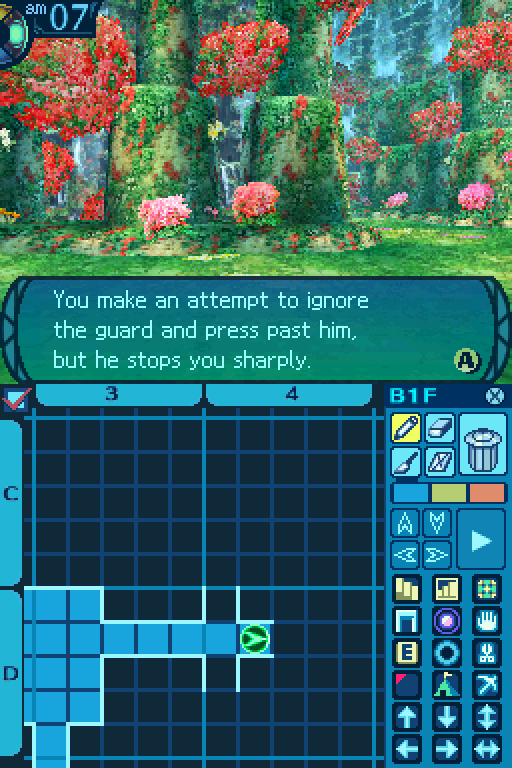
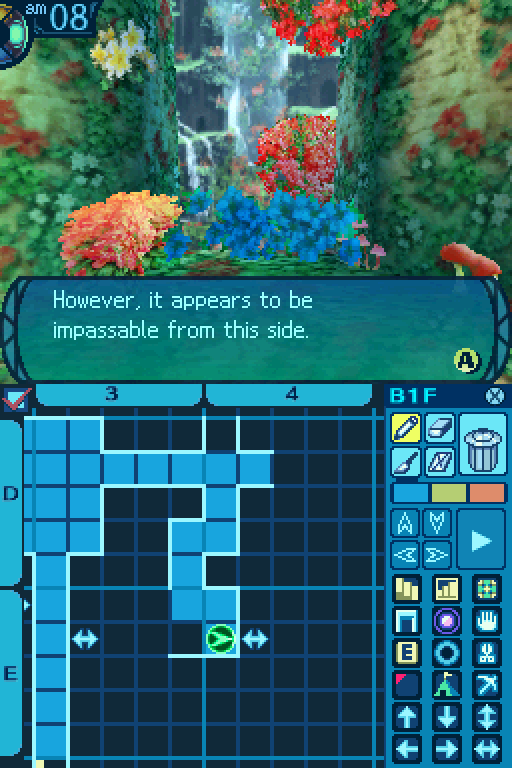
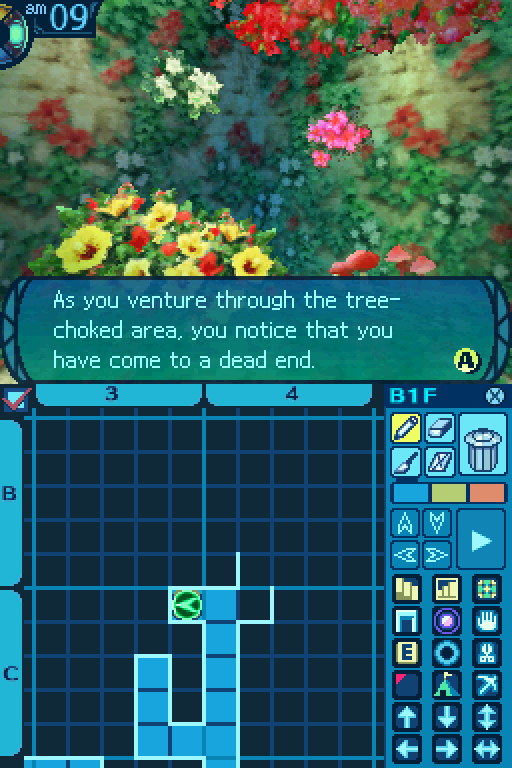
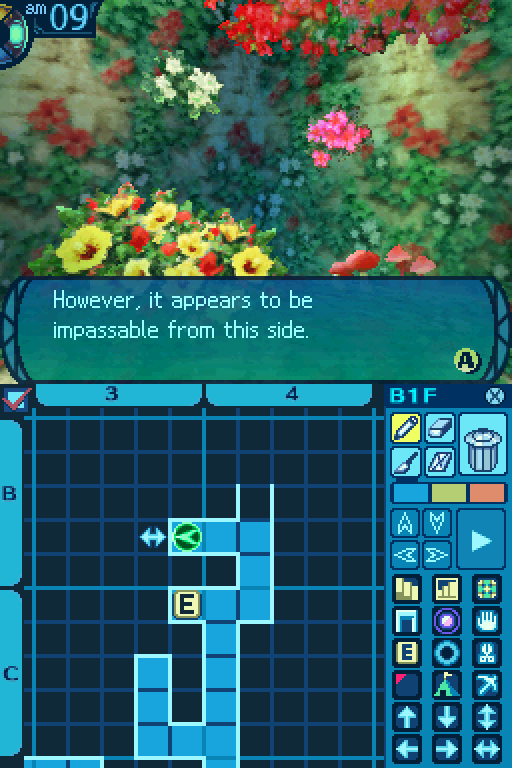
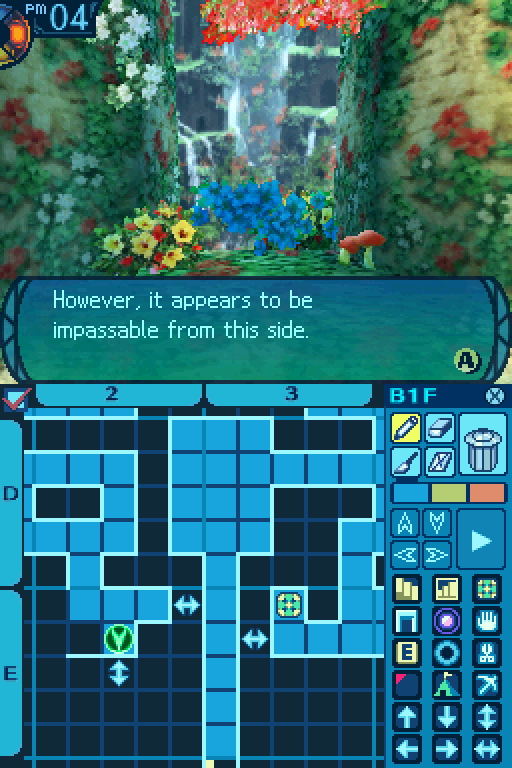
However, it appears to be impassable from this side.
Looks like there's a crack in the wall. But, I don't think we can fit.
I suppose we better mark this place down. Perhaps we'll be able to open up the way from the other side.
Wha?
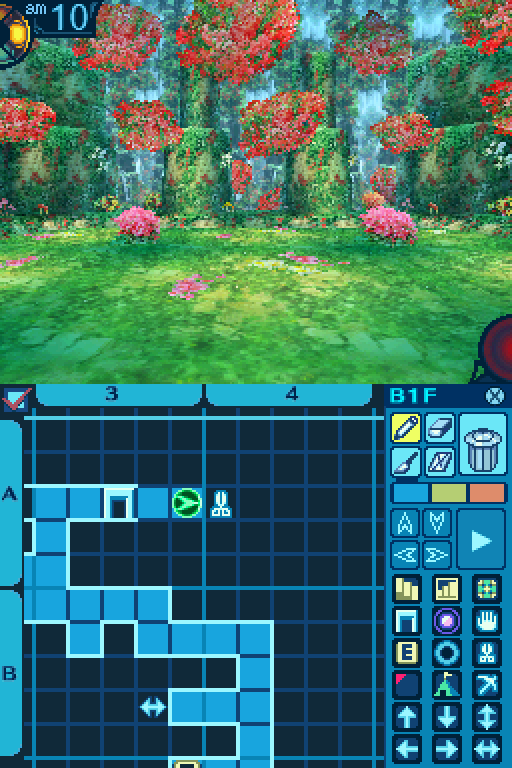
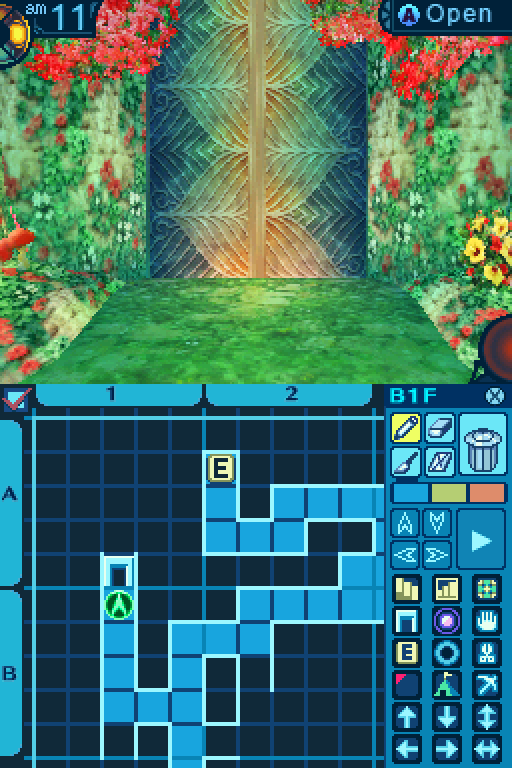
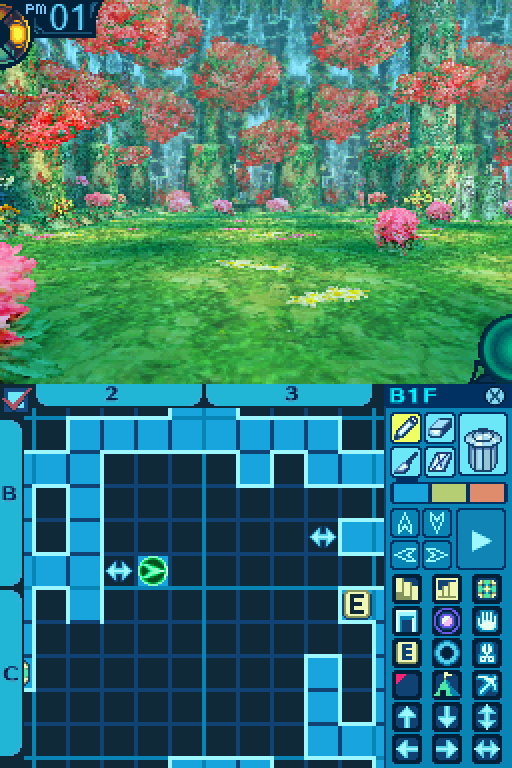
Some walls within the Labyrinth are hiding shortcuts. Most of the time they're inaccessible, and you have to go to the other side of the wall to open them up. The game is kind enough to mark them with those blue flowers, instead of having to check every single wall.
Here's another shortcut we can't access.
Now, I'd like to bring your attention to that blue orb in the bottom-right corner. It was a dark blue before, but now it's a light blue.
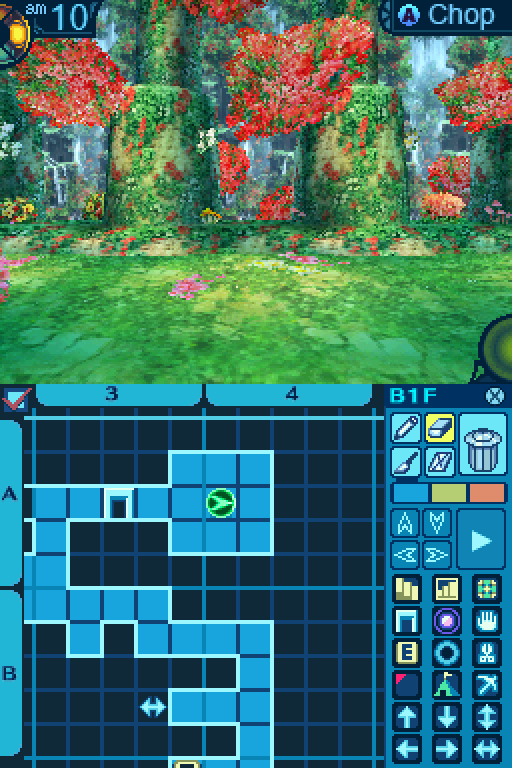
It's green now. What that orb does is to warn you that you're about to get into a fight, as Etrian Odyssey uses a random battle system.
Once it's red, the game warns you that you're about to go into battle.

Like so.
Look out!
GAH!


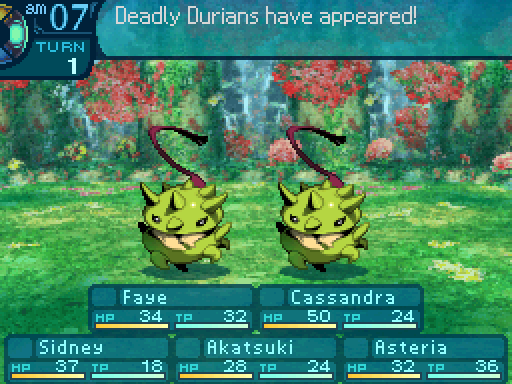

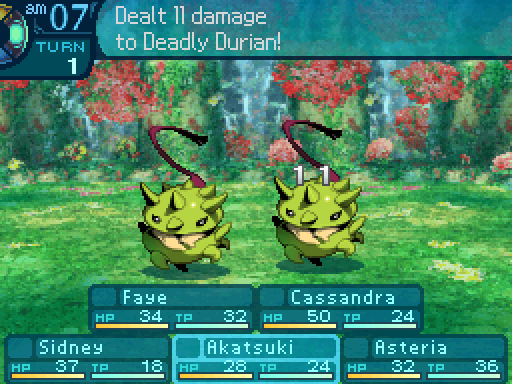
Deadly Durian
Level: 2
HP: 48
STR: 4
TEC: 7
VIT: 5
AGI: 6
LUC: 12
Attack Type: Pierce
Exp: 48
Item Drops:
-Drop 1: Green Thorn - 50% Drop Rate. 1 needed for Markiri (Knife.) 6 needed for Hairband (Helm.) 15 needed for Blind Mask (Accessory.)
--Thorn on a monster's head that mimicks a fruit.
-Drop 2: N/A
-Gold: N/A
Description: A fruit monster with a uniquely pungent smell. Its thorns temporarily rob victims of sight.
Damage Resistances: Slash: 75% Strike: 75% Pierce: 75% Fire: 125% Ice: 125% Volt: 125%
Ailment Resistances: Sleep: 100% Confusion: 100% Plague: 25% Poison: 100% Blind: 25% Curse: 100% Paralysis: 100%
Bind Resistances: Head: 100% Arm: 100% Leg: 100%
Other Resistances: Death: 100% Petrification: 100% Stun: 100%
Skills:
Thorn: Uses the Head. Has a 70% chance of inflicting Blind on one party member. Has an action speed modifier of +5.
Decay Breath: ???
Deadly Durians are a soft lesson in diversifying your damage types. They have a minor resistance to physical damage, and their offenses are incredibly weak. Elementals take them down easily, but you don't really need them. Thorn is a complete non-issue, and just serves as a warning that enemies can inflict ailments too. As for that 2nd skill, don't worry about it for now.
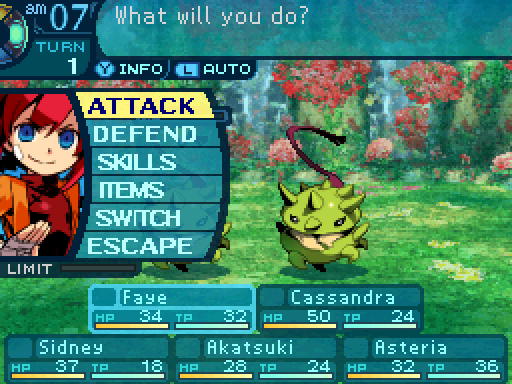
Let's bash some heads in!
Don't be reckless, everyone!

Ooh! Is this the part where I get to shoot stuff?

Hello there. I am Akatsuki. Pleased to meet you.
...What are you doing?
It is customary for a Ninja and his opponent to politely greet each other... before one kills the other!
But... fruit can't talk. I don't think they can greet you back.
Then they are dishonorable fruit, and must die!
How do meteorologists say hi?
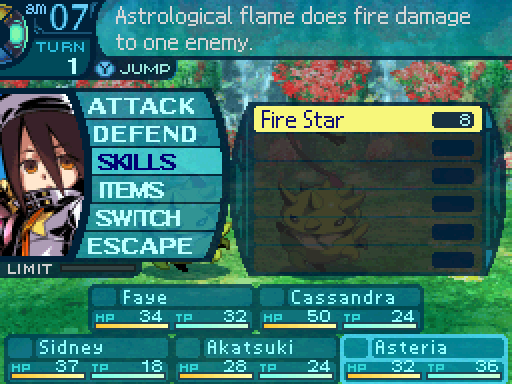
Having everyone attack except for Asteria, who's gonna roast up the enemies.

YEEEART!
Knives deal Slash damage.

Smashy smashy!

Clubs deal Strike damage.

Ready... Aim... FIRE!
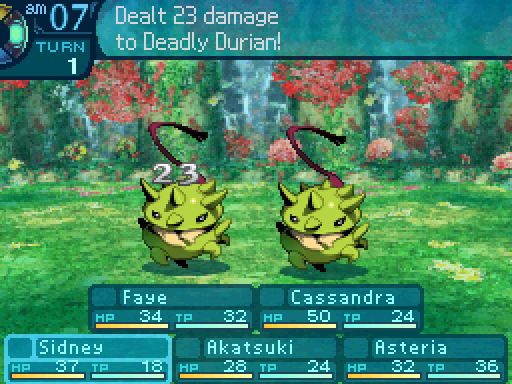
Crossbows deal Pierce damage. Also, take note of Sidney's and Faye's damage outputs. Both of them are my best physical damage dealers at the moment.

Ow!

I am under attack!


What?
Spears deal Pierce damage.
With a heat wave! Aha! Ahahahaha!


Boooooooo.
Wow, tough cloud.
...I hate you.
Unfortunately, TEC attacks can also miss. For the record, tomes deal Strike damage.

Eventually, we win.
Ha! Man, is that all this place has got?
I would not be so foolish as to assume that those are the only creatures that live here.

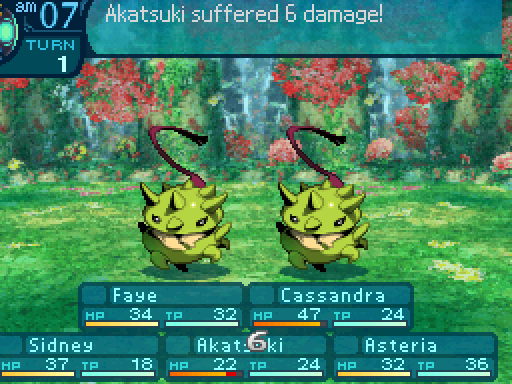
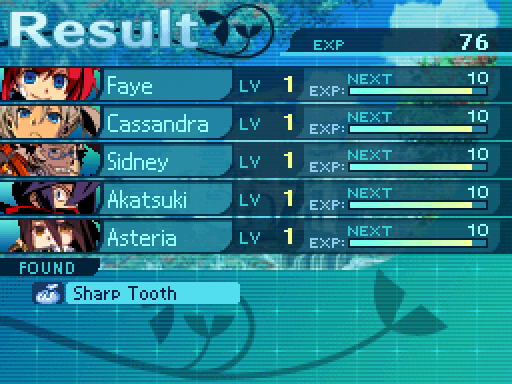
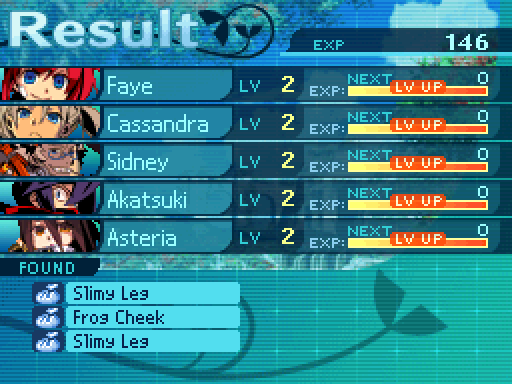
We get item drops, along with exp. Don't expect those exp bars to stay synced for long. If you're the kind of person that gets bothered by desynced exp bars and are playing along, I'm gonna warn you right now. No matter how hard you try, you can't avoid them desyncing in this game. Well technically you can, but that would involve skipping out on a huge part of the game.
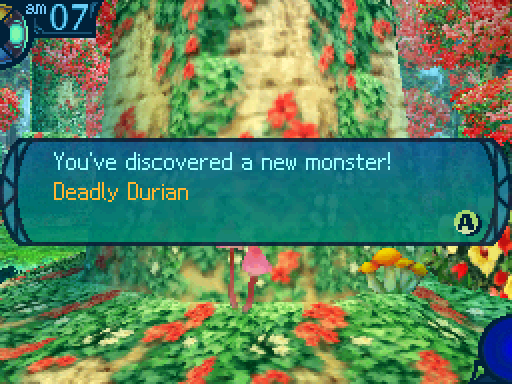
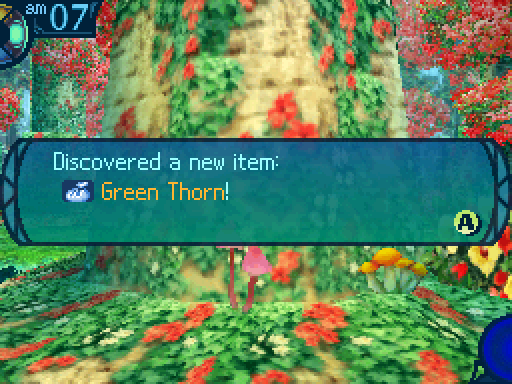
If you discover a new enemy or item, these notices pop up. This is the only time I'll be showing them.

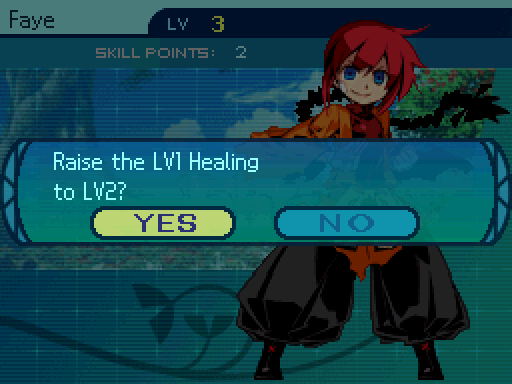
As you have some skill at adventuring, some 3 Skill Points should be available to you. To spend them on skills useful in the Labyrinth, open the Main Menu with the Y Button. Select Custom to allocate these skill points. Combat, healing, and protective skills will all be essential to survival during your journeys. You may already be aware of this, in which case this advice is happily unnecessary. If so, then hesitate no longer to begin your adventure in this lush, green forest!
A nice reminder if you didn't do so already.

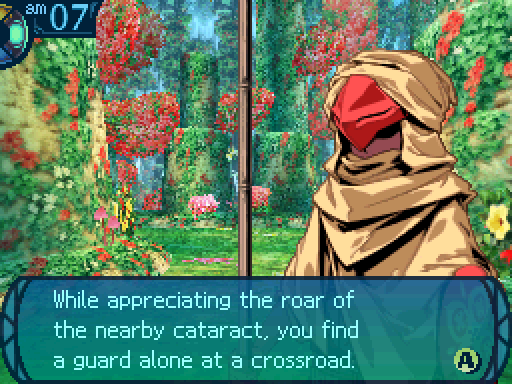
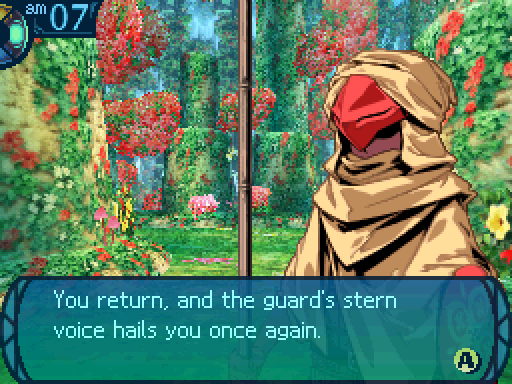
 I heard there’d be newcomers to the Guild coming. Welcome to the Yggdrasil Labyrinth.
The guard greets you cheerfully, and then motions toward the unmarked map you hold.
I’m sure they told you at the Senatus, but your first task is to map this floor. Mine, meanwhile, is to instruct beginners such as yourselves in the cartographic arts.
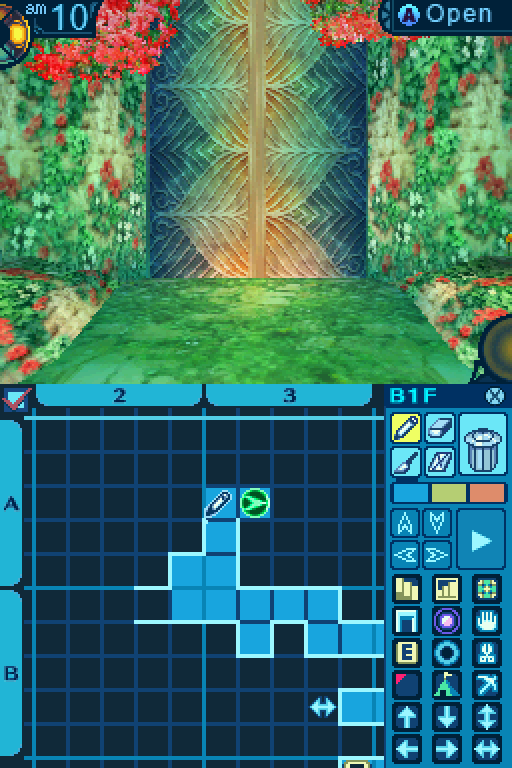
Upon saying this, the guard explained slowly and plainly to you how to draw a map...
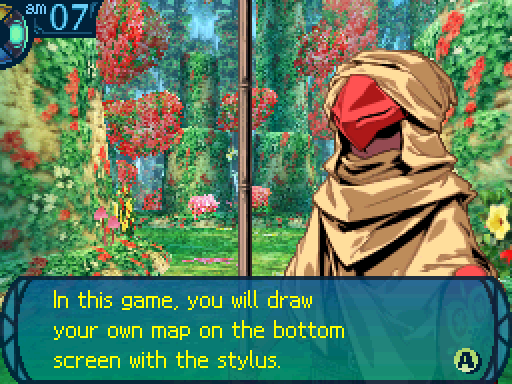
Keep careful and accurate notes on the dungeon’s layout as you explore it.


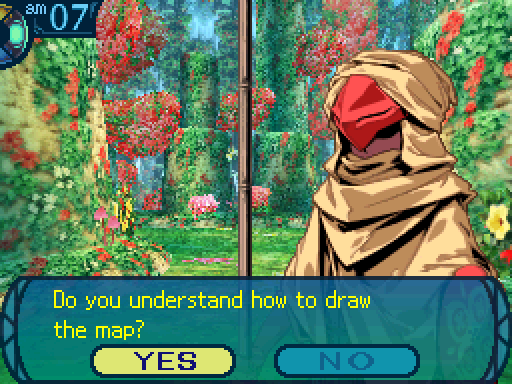
Saying no just repeats the tutorial.
That concludes your cartography lesson. Draw your map thus, then show me your finished work.
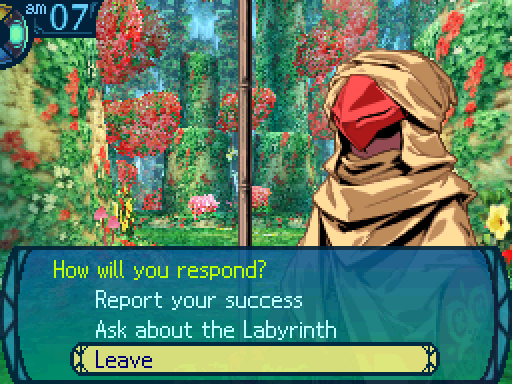
The guard then steps back, as if to indicate that his duty has been discharged. You may do as the guard says and venture forth to complete your map, or stay and question him.
Pfft, screw that. Let's just go on ahead.
Is your map complete? Show me that I might examine it.
Um. Yes?
The guard’s severe expression is unwavering as he pores over your map with a critical eye.
...No, no. This will never do. You’ve much more to chart.
It appears you won’t be passing this way yet. You must redouble your efforts to map the area.
We can also talk to him again.

Some questions come to mind, and you hesitate whether to ask them or leave him be.

Hey, we're done! You can let us pass now.

You present the parchment with your map on it and inform the guard your task is complete. The guard pores over your map with a critical eye and responds in a stern voice:
...No, no, this won’t do either. Try harder before you come to me again.
...It seems your map is not yet complete. You must continue your search through the Labyrinth before your mission is finished.

There's something I've been wondering about. Where did this Labyrinth come from?
The guard turns his head this way and that before answering your question.
...It’s said that this Labyrinth was created following the Calamity over 100 years ago. Many were wounded, and the old city was destroyed. Everything suffered that day. Ironic, no, that we use the Labyrinth formed by the Calamity to restore the Ocean City...
After speaking his piece, the guard sighs and continues.
...And that is the sum of our knowledge. We still have no inkling of what lies deeper. I hope that explorers like yourselves will one day master that mystery.
The guard then falls silent, as a man who has said all there is to say. You may continue to engage the guard in conversation or leave this spot.
You decide to leave the guard to his post.
Time's a wastin'! Let's get that map done! Which way should we go?
How about south?
Another shortcut we won't open for a while.

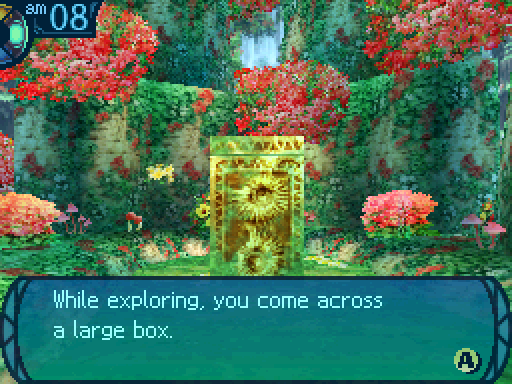

Ooh, a treasure chest! Wonder what's in here!
Quit wondering, and just open it!
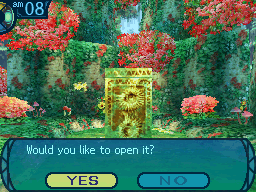
So here's another convenient change EO3 made. The game will actually show you if the chest is empty. Earlier games didn't do this, so the only way to know if you already took what was inside a chest was to check it again.
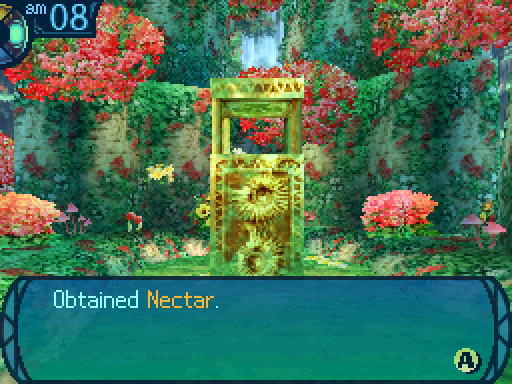
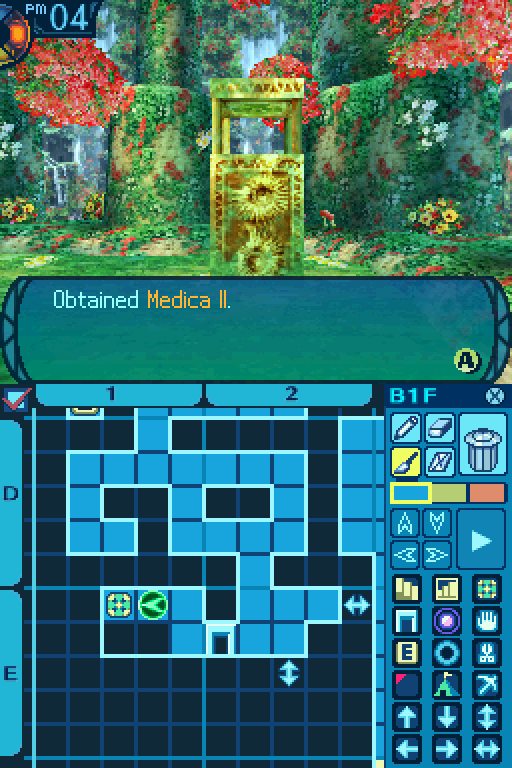
Oh! Now this will come in handy!
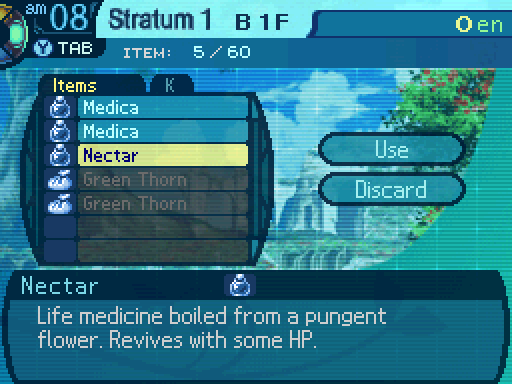
Nectars are very powerful consumables, since they can revive the dead. They'll bring a party member back to life at 20 HP.


If I just push this aside... There!

And presto! The shortcut can now be used from this side.
Why couldn't we have just done that from the this side in the first place?
I dunno. Magic?
Feh. Preposterous.

Oh hey, two new enemies.

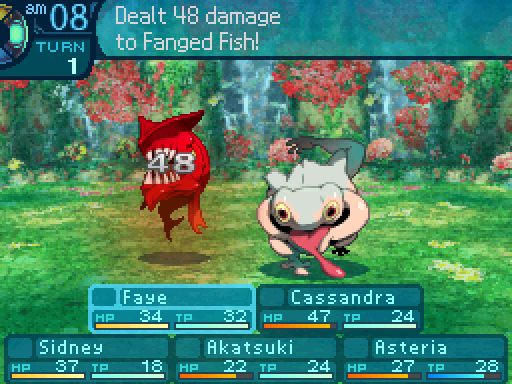
Fanged Fish
Level: 1
HP: 40
STR: 5
TEC: 7
VIT: 3
AGI: 11
LUC: 5
Attack Type: Slash
Exp: 38
Item Drops:
-Drop 1: Red Scale - 50% Drop Rate. 1 needed for Scale Jerkin (Clothes.) 10 needed for Fortune Book (Tome.)
--Hard scale that covers the Fanged Fish's body.
-Drop 2: Sharp Tooth - 10% Drop Rate. 1 needed for Kopis (Sword.)
--Long tooth that always finds its target.
-Gold Drop: N/A
Description: This river fish is no threat singly, but a school of them is cause for concern.
Damage Resistances: Slash: 100% Strike: 125% Pierce: 100% Fire: 100% Ice: 100% Volt: 100%
Ailment Resistances: Sleep: 100% Confusion: 100% Plague: 100% Poison: 100% Blind: 50% Curse: 100% Paralysis: 122%
Bind Resistances: Head: 100% Arm: 100% Leg: 100%
Other Resistances: Death: 100% Petrification: 100% Stun: 100%
Skills:
Sharp Fang: Uses the Head. Deals 130% STR-based Slash damage to one party member. Has a hit rate of 99%. Has an action speed modifier of -5.
Ferocious Fish: ???
You've seen these things in my combat tutorial. They're just weak trash enemies that are just there to help you get used to the battle system. As for their 2nd skill, don't worry about it for now.

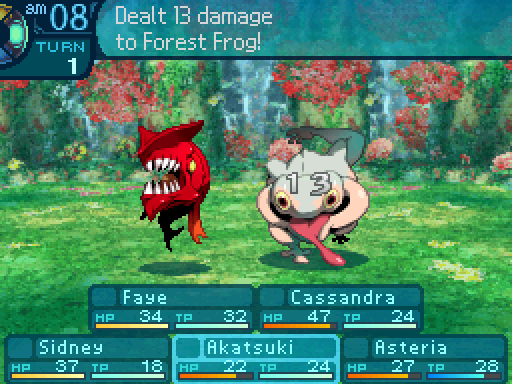
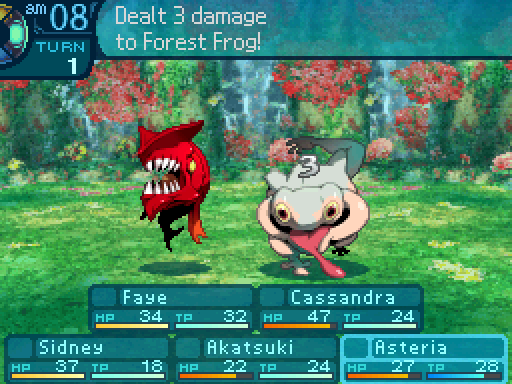
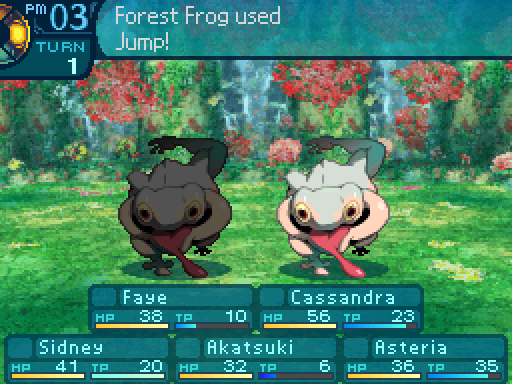
Forest Frog
Level: 3
HP: 72
STR: 6
TEC: 7
VIT: 5
AGI: 7
LUC: 11
Attack Type: Strike
Exp: 73
Item Drops:
-Drop 1: Slimy Leg - 45% Drop Rate. 1 needed for Strap Shoes (Boots.) 3 needed for the quest Butterfly Bistro's new menu.
--A leg completely covered in frog mucus.
-Drop 2: Frog Cheek - 15% Drop Rate. 1 needed for Tent (Item.) 2 needed for Intellect Book (Tome.) 5 needed for Life Belt (Accessory.) 1 needed for the quest Butterfly Bistro's new menu.
--Can stretch to 10 times its original size.
-Gold Drop: N/A
Description: A large frog that uses its powerful leaps to pounce on enemies. It poses little threat.
Damage Resistances: Slash: 100% Strike: 100% Pierce: 100% Fire: 100% Ice: 150% Volt: 100%
Ailment Resistances: Sleep: 100% Confusion: 100% Plague: 100% Poison: 100% Blind:100% Curse: 100% Paralysis: 150%
Bind Resistances: Head: 100% Arm: 100% Leg: 100%
Other Resistances: Death: 100% Petrification: 100% Stun: 100%
Skills:
Jump: Uses the Legs. Deals 120% STR-based Pierce damage to one party member. Has a hit rate of 99%. Has an action speed modifier of -5.
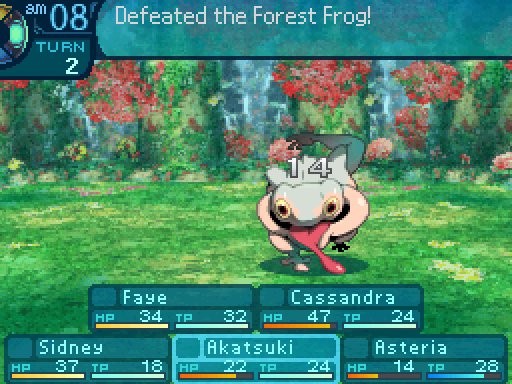
These guys are a slight step above the other enemies in that they have more HP. Otherwise, they're still trash mobs, and are just here to help you get used to the battle system.
Easy peasy.
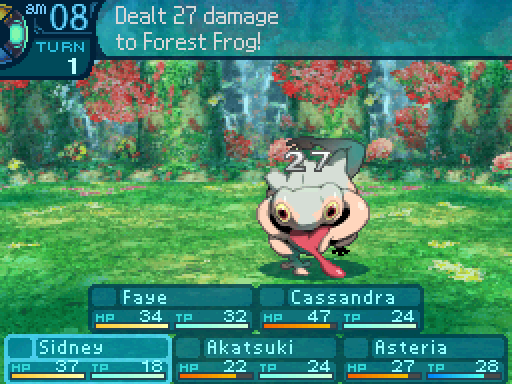
Like I said, Sidney and Faye are currently my best physical damage dealers right now, although that won't last in Faye's case.

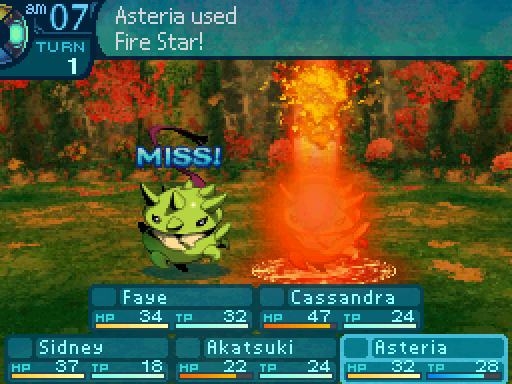
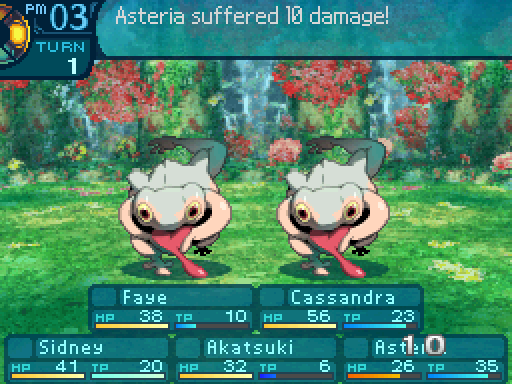
I wanna draw your attention to the starburst shape over Asteria's text box. That indicates that she's taking Pierce damage, which is a nice change EO3 made. If you take damage from a physical damage skill, the game will give you a visual indicator of which type of damage they took. While EO1 and 2 did this, they only gave a visual indicator if you took elemental damage, physical damage types weren't given the same treatment. However, you'll only see those indicators if the enemy tries to use a skill on you. If they use regular attacks, they'll all show the same overlay over a textbox, even though the damage type of regular attacks differ from enemy to enemy. Hence the Attack Type section in the bios.

Sayonara!


Why do we have to make a map of the place? What kind of dumb test is that?
Hmmm... Ah! Think about it! Aside from copying one off of another explorer, and gooood luck with that, what's the best way to make a map?
...Ohhhh, I get it. They wanna see if we can survive in here, right?
Yep! But this test has been easy peasy so far. All the monsters here are pretty harmless. Hey, what's this?
You find an old sign in front of the wall of trees, written in large print:
Only explorers who are careful to examine their full surroundings will be able to continue forth.
Someone probably made that sign for people like us.
You surmise that the sign, which contains elementary advice, was written for novice explorers. You tip your cap to its wisdom before returning to your investigation.
While the blue flowers mark shortcuts, not all of them will be marked, so be careful about that.
I'm only showing you this to show you that I haven't reached level 2 yet.
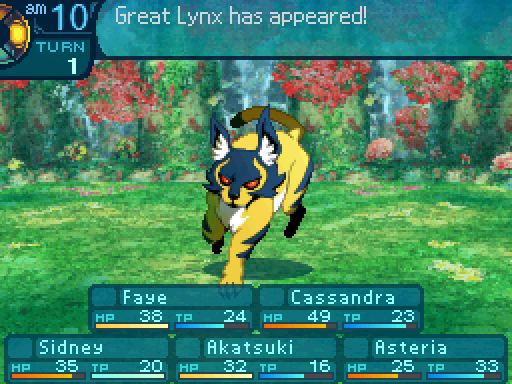
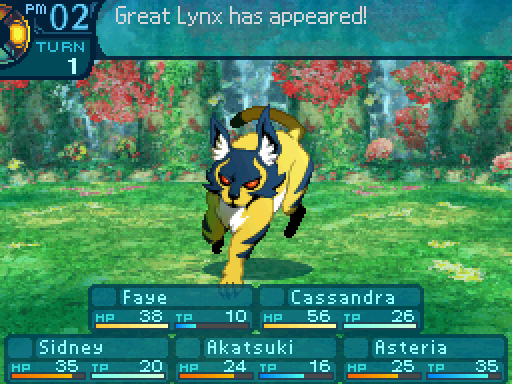
Oh, and just a warning. The tile I'm standing on right now is the last safe spot in this area. If you haven't done so already, I highly advise reaching level 2 before going any further. As for why the next area is dangerous...
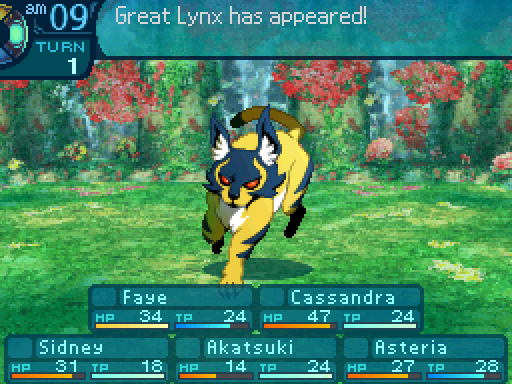
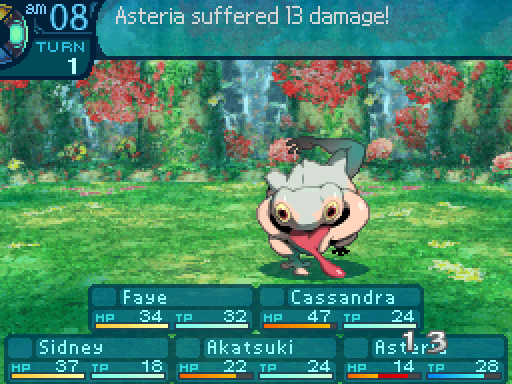
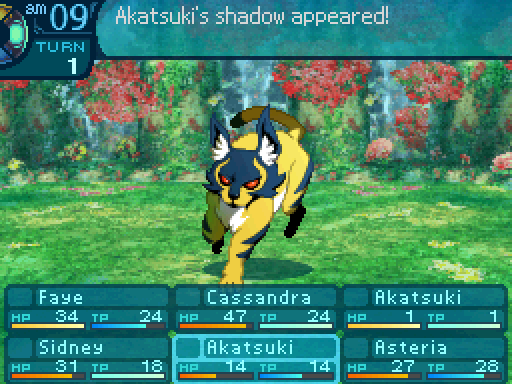
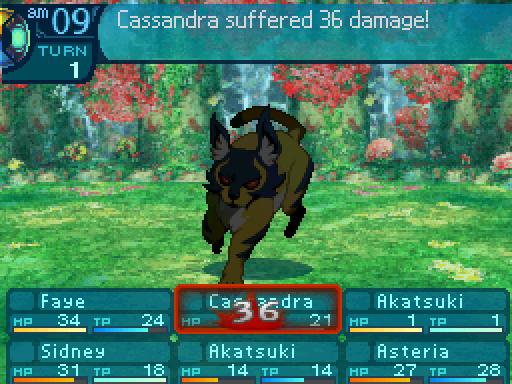
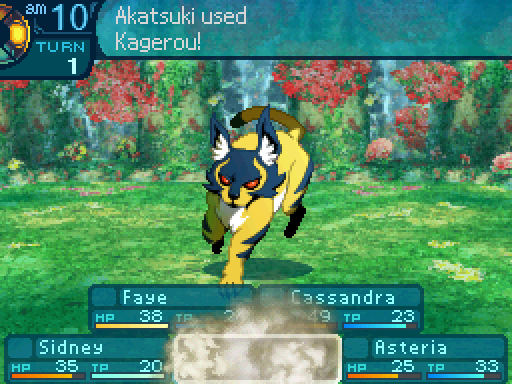
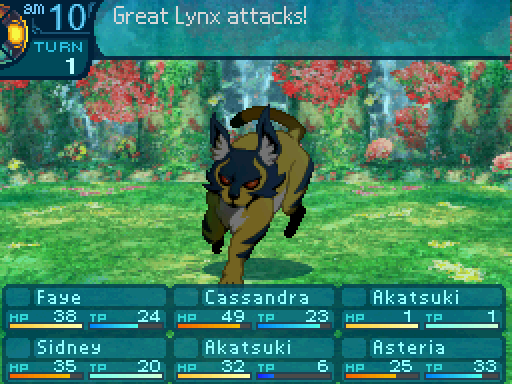
Because you start encountering these enemies after that point. I was hoping not to run into this thing this early. 

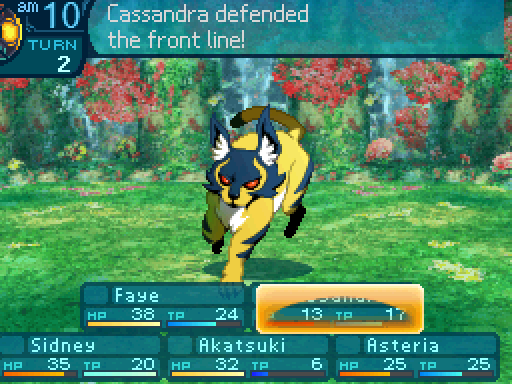
Great Lynx
Level: 4
HP: 114
STR: 13
TEC: 10
VIT: 6
AGI: 10
LUC: 10
Attack Type: Slash
Exp: 181
Item Drops:
-Drop 1: Mountain Claw - 70% Drop Rate. 1 needed for Tetsukiyari (Spear) and Tent (Item.)
--Long, sharp talon for inflicting severe wounds.
-Drop 2: N/A
-Gold: N/A
Description: Overall responsible for the most novice explorer deaths. Skilled explorers need not fear it.
Damage Resistances: Slash: 100% Strike: 100% Pierce: 100% Fire: 150% Ice: 100% Volt: 100%
Ailment Resistances: Sleep: 100% Confusion: 100% Plague: 100% Poison: 100% Blind: 25% Curse: 100% Paralysis: 100%
Bind Resistances: Head: 100% Arm: 100% Leg: 100%
Other Resistances: Death: 100% Petrification: 100% Stun: 100%
Skills:
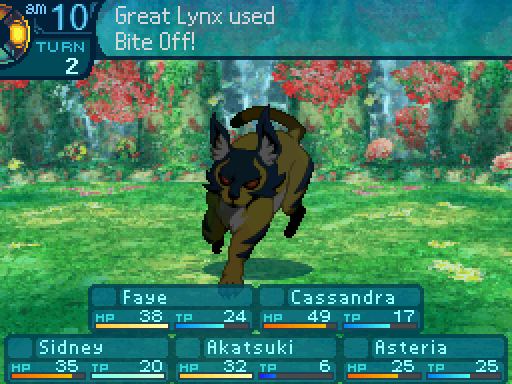
Bite Off: Uses the Head. Deals 150% STR-based Strike damage to one party member. Has a hit rate of 99%. Has an action speed modifier of +0.
Before deciding to stay and fight this enemy, please answer the following series of questions:
Are you level 1? If so, then RUN, YOU FOOL!
Are you level 2? If so, then answer the next question.
-Do you have a Hoplite? If no (You fool), then answer the next question.
--Are your Limits fully charged and ready to go? If no, then RUN, YOU FOOL!
Are you level 3? If so, then you can probably take it. Just be careful.
The Great Lynx is an infamous enemy among the people who have played this game. Compare the stats of this thing to the earlier enemies. Yes, way more HP and STR than those 3 trash mobs. This enemy is strong enough to one shot several classes, with both its regular attack and Bite Off. It can also cause a party wipe if you're not careful. Oh, and note the 25% Blind resistance. In case you thought about giving your Buccaneer Lights Out to deal with it, it won't help much. A level 1 Buccaneer using a level 1 Lights out would only have a 6% chance of inflicting Blind. Really, the Great Lynx is only a threat if you're at a low level. Your party is weak and has no tools to really deal with anything. Once your party gets stronger, this thing won't be so scary anymore.
Heh, another monster waiting to get its head smashed in?
I would be careful, Faye. It looks much tougher than the ones we've faced so far.
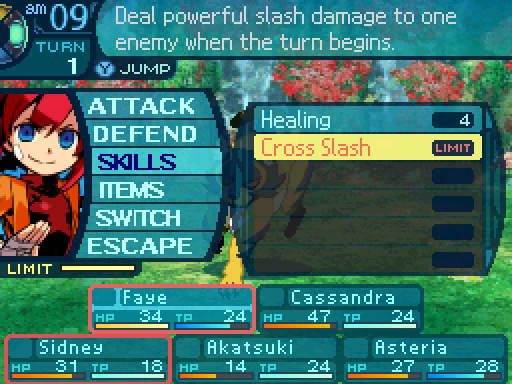
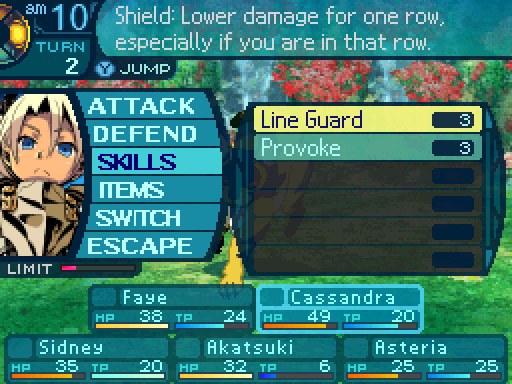
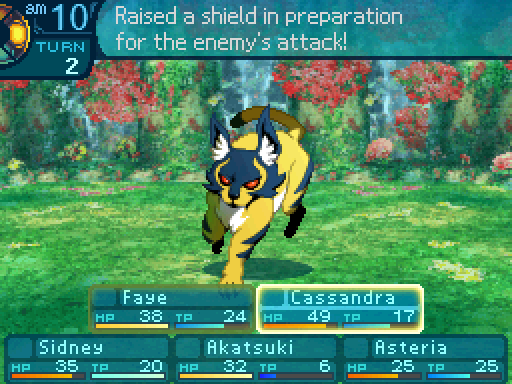
Normally I would run away in these circumstances, but my Limit gauges are full. When they're full, you can select the Limit skill from the skill menu.
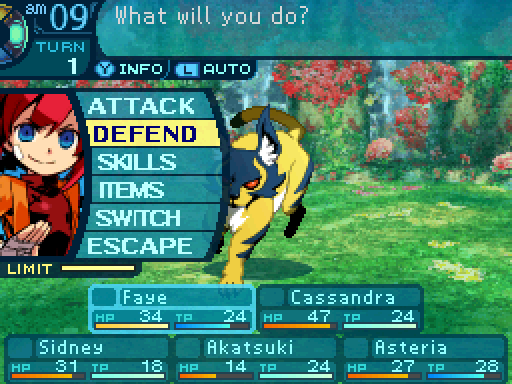
But I don't want Faye using it, so I have her defend, even though it won't help at all. The Great Lynx can still one shot her. What Defend does is reduce the damage of all attacks by 30%. However, unlike in EO2, it no longer works against disables. Which is something to be mindful of. That functionality wouldn't be reimplemented until EOU.

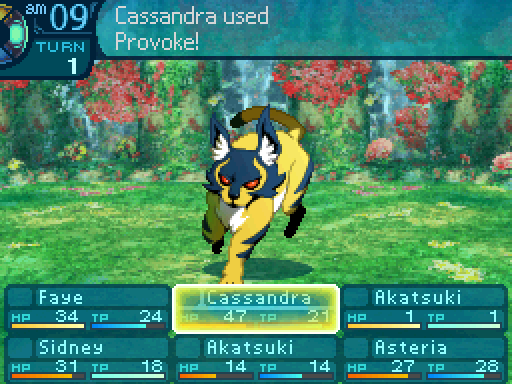
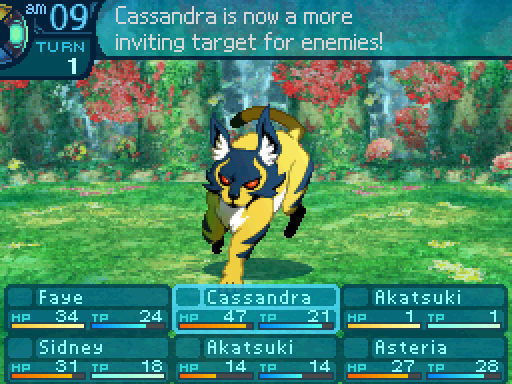
I have Cassandra Provoke so no one else dies. What it does is place a 4-turn buff on her that makes enemies likely to target her. But while she can take a regular hit, if the Great Lynx decides to bite her face off, she'll die.

Hey Faye! Wanna try out those Limit thingies the Guildmaster gave us?
Sure, let's go for it!
On the other hand, I want Sidney to use the Limit. The person that initiates the Limit does matter. The Limit does take their passives and buffs into account, so if Sidney uses it, Cross Slash gets the damage boost from Giant Kill. The damage boost from Giant Kill won't apply if Faye uses it.
Limits don't use up a turn, so I can have Sidney do something else. In his case, just using a regular attack.
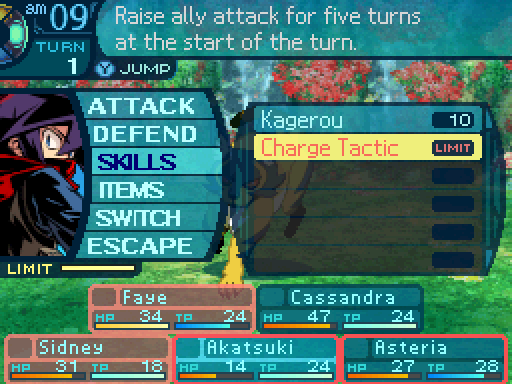
I also want to boost Cross Slash's damage first with this limit.

I'm gonna have Akatsuki send out a decoy in the hopes of diverting the Great Lynx's attention from the rest of the party.
Ah, but before you do so... Ready?
Ready!

ATAAAAAAACK!
Charge Tactic boosts the damage output of all damage types, including Almighty damage (which is this game's neutral damage type), by 25% for 6 turns.

Slice and dice!
Oh, and that's a real nice amount of damage. Cross Slash deals 230% Slash damage to a single target at the beginning of the turn. How attack limits operate is that they take the STR stat of all the people that have equipped the limit and their weapon attack power and average them out. So the classes that equip the limits also matter, even if they're not the ones you're having initiate them.

You're ugly! And... you smell bad?
Really?

This is worse than being hit by fruit! Stop!
Fortunately, the Great Lynx decided to use a regular attack. Another change this game made is that enemies can no longer deal critical hits, so you don't have to worry about those anymore. Just their skills.
So, now I'll talk about how the enemy targeting system works because it's pretty convoluted. Some attacks follow specific targeting rules, but most attacks in the game decide to attack a random target. How this works is that when an enemy starts an attack, each party member is assigned an Aggro Value. This number ranges from 0 to 4. Now at this point, the enemy can decide to target the front row, or the back row. The chances for which row it wants to attack are different from enemy to enemy. Typically most enemies prefer attacking the front row. Once it decides on which row to attack, the enemy's preferred target will always be the character with the highest amount of HP. Said character will now have a random number from 0 to 6 added to their aggro value. After this is done, the attack will always target the character with the highest aggro value. So typically the character will the highest amount of HP in the front row will be the one that gets attacked in most situations.
How Provoke factors into this is that as long as the buff stays in effect, a random number ranging from 3 to the Provoke value is added to that character's aggro value. In Cassandra's case, Provoke is level 1, so it has a max aggro value of 5. Which means that a random number ranging from 3 to 5 will be added to the aggro value. The minimum value cannot be raised, so Provoke won't always cause a target to attack them, even at level 10. But it's still a handy skill.
There are also a few skills that act as an anti-Provoke, where they place a buff on a character to make them less likely to be attacked. In Alice's case, she has Play Possum, and at level 1 it has a max anti-provoke value of 5. As long as she has the buff on her, a random number from 0 to 5 would be subtracted from her Aggro Value each time the enemy attacks. Once again, the minimum value can't be raised, no matter how much you level up the skill.


If you weren't so damned dead, I'd shoot you again.
And it goes down without any casualties! 

Woo hoo! I feel stronger!
How many levels was that?
One.
Level ups for everyone! They're great.

Level ups provide an increase to stats, standard RPG stuff. But each level up also provides another skill point to spend somewhere. I actually hold off on leveling up anything for Faye, since I want to level up Healing. But I'm still using that skill heavily, the TP cost increase would make Faye run out of TP faster.
I'll protect you all!
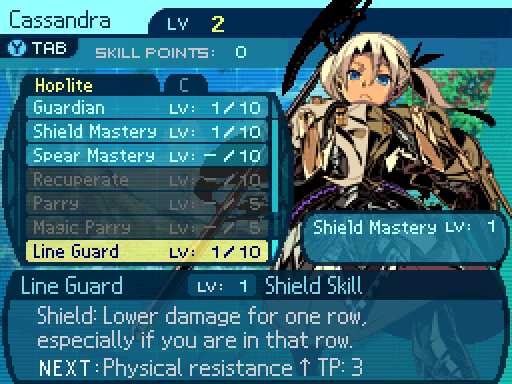
Cassandra learned a very important skill. Line Guard reduces the amount of physical damage a row takes, and the damage is reduced even further if the Hoplite casts it on their own row. At level 1, if a Hoplite casts it on a row they're not in, any physical damage taken would get reduced by 10%. However, if they do cast it on their own row, the damage would get reduced by 23%. Very handy, and it's the skill you want to max out first since enemies like throwing physical attacks around.
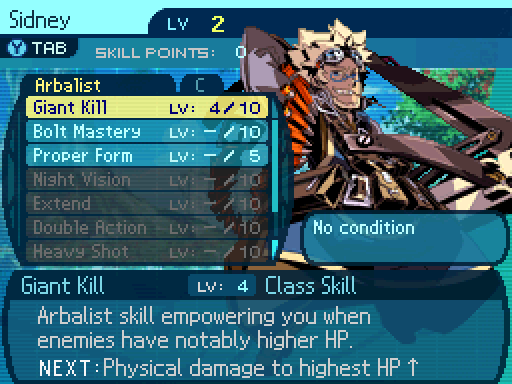
Sidney levels up Giant Kill to 4, which gives him a 31% damage boost.

Stay where you are!
I have Akatsuki learn how to use Kagenui, which is a 140% damage skill that has a 33% chance to inflict leg binds.

Through rain, snow, or sleet, I'll still take them down!
Ice Star is just an Ice version of Fire Star.
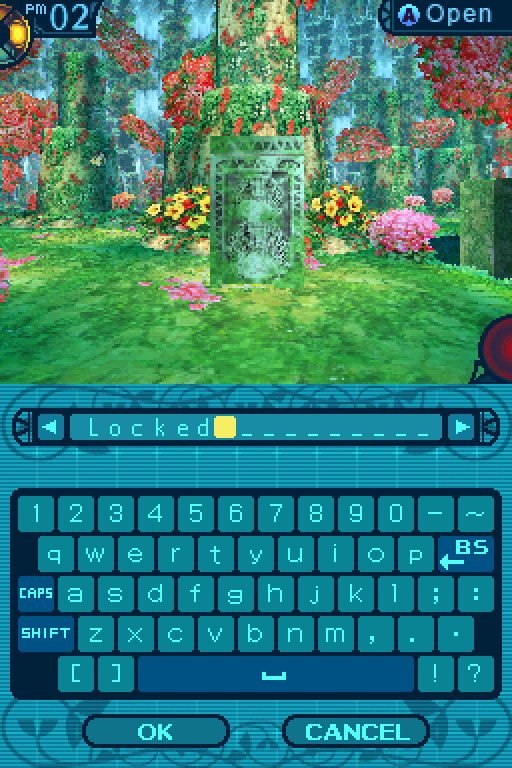
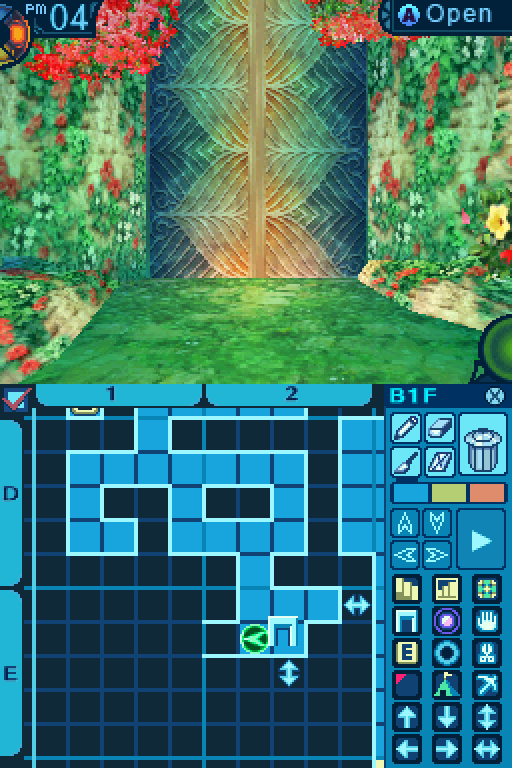
Here's a door.
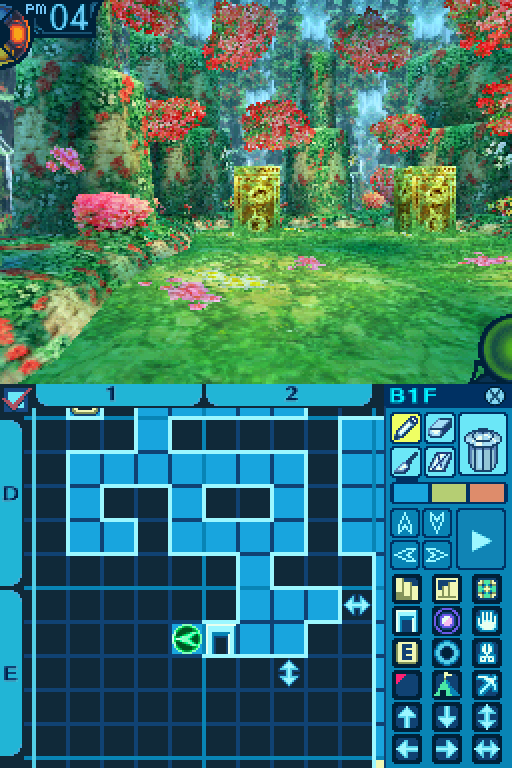
Hmm, this looks like a good place to gather materials from. We would just need to chop some of these trees down. And then we could sell them to the store.
That's a great idea and all, but there's one problem.

What a dilemma.
Perhaps we could hire a Farmer to help us with tasks like that.
These are the item points I was talking about. Without the right gather skill, or a Farmer's Harvestry, we can't get any items from these.
A4 Chop Point:
Supple Branch: 50% Gather Rate. 1 needed for Life Belt (Accessory.) 5 needed for Pike (Spear.)
-A piece of wood that doesn't easily snap.
Soft Bark: 50% Gather Rate. 1 needed for Main Gauche (Knife.) 5 needed for Lance (Spear.)
-Bark that can be easily shaped for a variety of uses.
Palm Trunk: Rare. 1 needed for Crushing Club (Club.) 3 needed for Flame Lance (Gun.)
-Sturdy timber commonly seen in the south.
Common Gather Periods: 1 to 8.
Rare Gather Periods: 1 to 5.
Here's what we can get from this Chop Point. We have a 50% chance of getting either Supple Branches or Soft Bark. As for the Palm Trunk and the gather periods thing, I'll explain that later once it becomes relevant.
Another one!?

I shall not fall!
Indomitable provides the user with an endure effect. If they take a blow that would normally kill them, they are left at 1 HP instead. It's very handy, but it doesn't work against Poison, Instant Death, or Petrification, so keep that in mind.
Perhaps my illusions shall come in handy here. BEHOLD!

...Dude. That's a cardboard cutout of yourself. THAT YOU COLORED IN WITH CRAYON!
It is my masterfully crafted illusion. 
Do you really think that something like that would-


How.
It looks as though the monsters around here aren't too intelligent.
Here's also something I want to bring up. Akatsuki summoned a decoy, but the Great Lynx attacked it on the same turn. EO3 made a massive change to the enemy AI and battle engine. In the first two games, enemies couldn't react to your actions instantly, so if you did something to tick them off, you would only see the effects the next turn. In this game, enemies can directly react to some of your actions, and some can even "change their minds" right as the turn starts on what they want to do. So using Provoke would actually apply the effect on the same turn it was casted, where in the first two games, you would have to wait until the next turn for the effects to kick in.
This resulted in a very big change to the overall battle pacing in the series. Basically actions in the first two games were decided at the start of the turn, and enemies loved to pile on the party member with the highest HP most of the time. Resulting in that poor party member getting ganged up on for that turn. Starting from this game onward, enemies mostly decide who to attack the moment it's their turn instead of doing so at the turn's start. This also results in damage being more dispersed across your party, giving some breathing room to the player in that regard. However, it also opens up such situations where enemies can do stuff like killing someone that you just revived with a single target attack. Where in the previous games, that was only possible if that was their original target and the party member died and then got revived within the same turn. But overall, this change basically allows enemies to focus on your party in general instead of the person who happened to have the highest HP at the start of the turn.
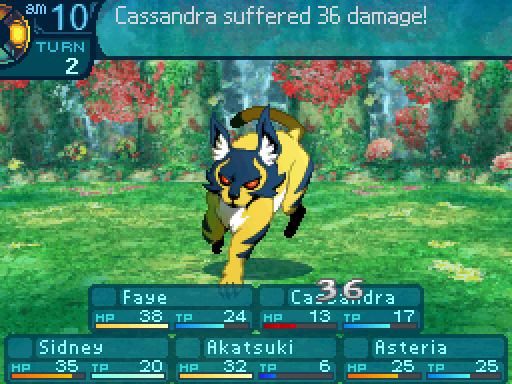
Okay, that still hurts. Just not as much.
Thankfully, Line Guard let her survive Bite Off, although defending would have done the same thing. I mainly used it in case the Great Lynx went for Faye.
Either way, I got lucky with this Great Lynx too.

Gentle sunlight shines through the leaves and you hear the chirping of birds. It’s so peaceful here... You don’t sense any monsters around... This spot seems ideal to take a rest. But continuing your exploration seems more important than resting here, so you take your leave.
Remember this spot for later.
Handy, because I'm running low on these right now.
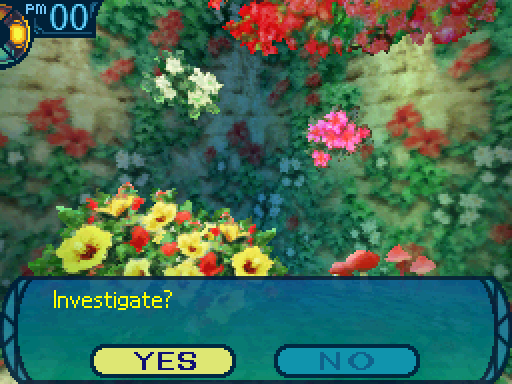
The peculiar flowers sway in the wind... their sweet fragrance grows more alluring... You consider resting here to more fully enjoy the flowers’ scent.

Say, you all wanna take a break? We've been in here for a while.
Yes, I really could use one myself.
You rest your weary muscles, the beautiful flowers and their sweet aroma all around you...
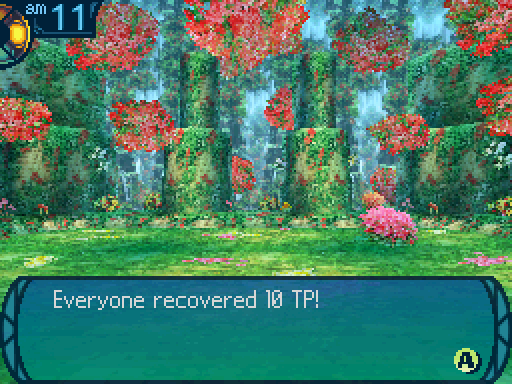
Now fully rested, you resume your exploration of the Labyrinth.
What happened there was an event. There are a couple of spots where you can choose from some options, and depending on what you choose, something good or bad can happen. In my case, some TP recovery. You need to be careful and decide if it's worth taking a certain option or not in certain events. Now if you say no, this text gets displayed.
You hurry to leave the flowers and their cloying scent behind, concerned for some hidden danger.
Keep in mind that while rejecting an event can prevent both good and bad things from happening, sometimes rejecting an event is a trap and causes a bad thing to happen.

The footprints lead east, where you can hear something like an animal’s cry beyond the bushes.
Saying no has this happen.
Wary of the situation, you decide to leave without a careful investigation of the area.
But if we say yes:
As you carefully peer into the bushes, you find an animal caught in a hanging snare. You hear the cries of its brethren all around, as if in response to its piteous wailing...
Oh dear. It seems to be in a bad predicament.

If we say no, this happens:
Thinking that this is clearly some hunter’s trap, you decide not to touch it and leave this area.
If we say yes:
I will cut it down... There!
Nice!
After you cut the rope with a knife and remove the trap, the animal nimbly jumps down. The animal is still young; once it is freed, two of its kind that seem to be its parents emerge. You freeze... You can see that your luck is about to be put to the test! If your luck fails, the beasts will misinterpret your kindness and attack!
Whoa whoa whoa! We were just trying to free your kid! We don't mean any harm!
Who knows if they'll see it that way.
At this point, one of two things can happen.
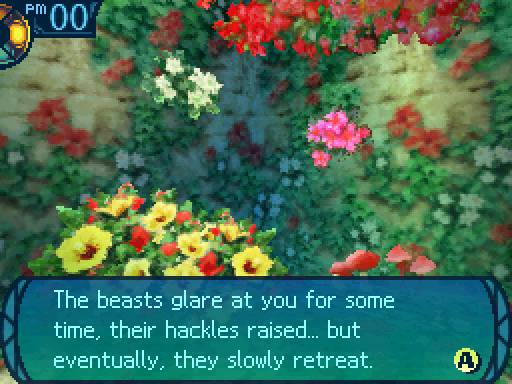
They seem to have understood your actions were meant in kindness. You watch the animals go as they protect their young before resuming your exploration.
Phew! I thought they were about to attack us.
And this is actually the outcome I didn't want. There's another outcome here, and the music changes to the following as it happens:


The beasts glare at you and begin to growl. It seems they’ve perceived you as a threat...! Your goodwill was misunderstood and now you must fight the beasts who stand ready to pounce!
At this point, you would get into a fight with 3 Great Platypi, which are monsters from the 2nd floor. Yes, three. Apparently the kid joins in on the fight as well. Ungrateful little critter. Anyways, I wanted that to happen because the party was in top condition and had their Limit gauges full, so the fight would have just been free exp. Oh well. As for how that event can play out, when it said your luck was being tested, it meant that in more ways than one. The event checks for the party member with the highest LUC stat and then rolls for a random number between 0 and 25. If said party member's LUC stat is equal to or higher than the rolled number, you'll avoid the battle. If not, you'll have to face 3 ungrateful Great Platypi. Of course if your highest LUC stat is at least 25, you'll always avoid the battle. But that's infeasible to pull off right at the beginning of the game.

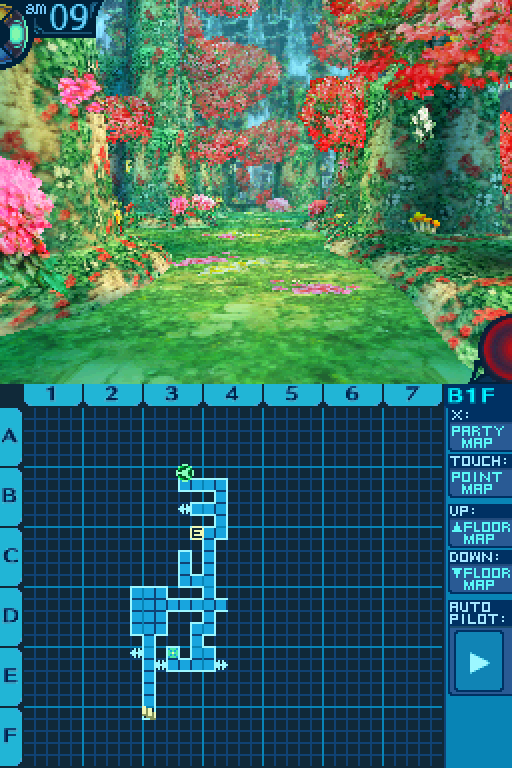
Some shortcuts you can go through immediately when you first encounter them.


Amritas are very handy consumables, restoring 50 TP to one person. Now I normally don't advocate hoarding, but I advise you to hold onto the Amrita for as long as you can, until you can buy them in stores.

Rats.
I wonder if we can find a key to these chests.
And some chests are locked for now.
I mark these chests with a little memo. Oh by the way, you want to be careful in this area.
Because this place is Great Lynx central.

GO AWAY!

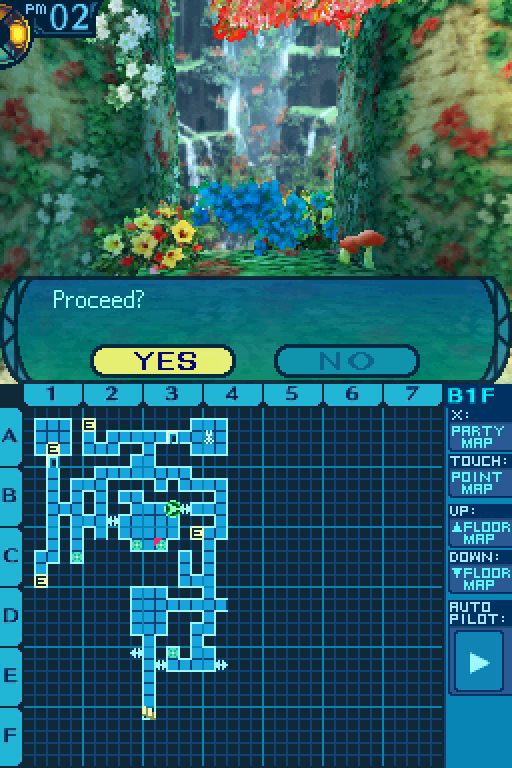
And a shortcut out.

As you gaze upon the waterfall in this relatively clear area, a cool breeze washes over you. It might feel nice to rest here for a while, you reflect...

If you say no:
However soothing your surroundings may be, you feel it is too risky to stay in one place for long.
If you say yes:
You decide your current pace is overtaxing and it would be best to take a brief respite here. After all, the air is so clear that you can feel your strength replenishing just standing here. Mind and body both refreshed, you resume your journey.

Another little recovery event.
How soothing.
AAAAHHHH!
What the!? We're under attack!


And here's something that can happen while walking around. You can get blindsided by monsters (Which the game visually indicates with those red leaves particle effects.) That means they get a free turn to do whatever they want. Now if you've played EO2, don't worry. The game doesn't do guaranteed blindsides for certain random encounters anymore.
If we were at a lower level, that might have been troublesome. Anyways, that fight gave my party enough exp to level up.
The healing power is now 75%.


Leveling up Healing to 2 unlocks these skills.
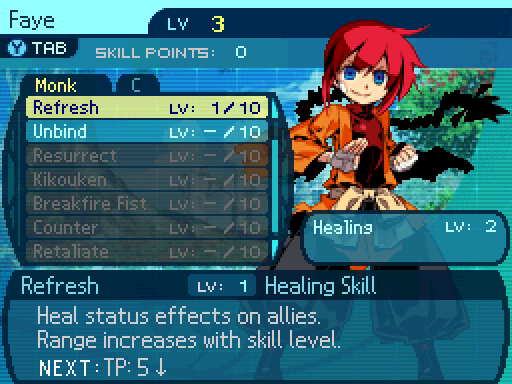
Freshen up!
I take this one. Refresh dispels all kinds of status ailments on a single target.
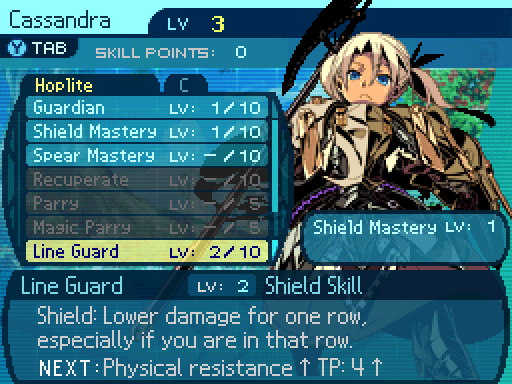
Damage reduction on the Hoplite's row is 26%. Otherwise, it only provides an 11% reduction.

Damage bonus is now 35%.
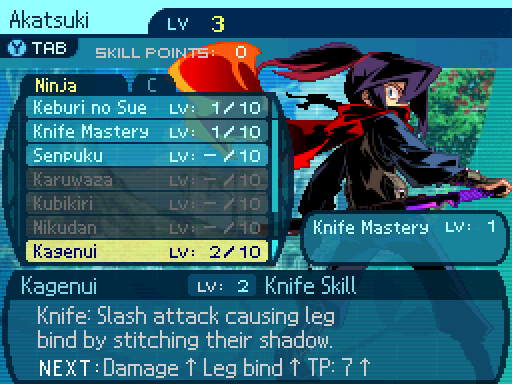
Kagenui now deals 145% damage with a 36% chance to inflict leg bind.

Zaaaaaaap!
Provides a 2% damage bonus to Volt spells.

And here's a shortcut back to the beginning.
Here's another that's inaccessible for now.

Restores 160 HP to one person.

Any bit of money is nice at this point.

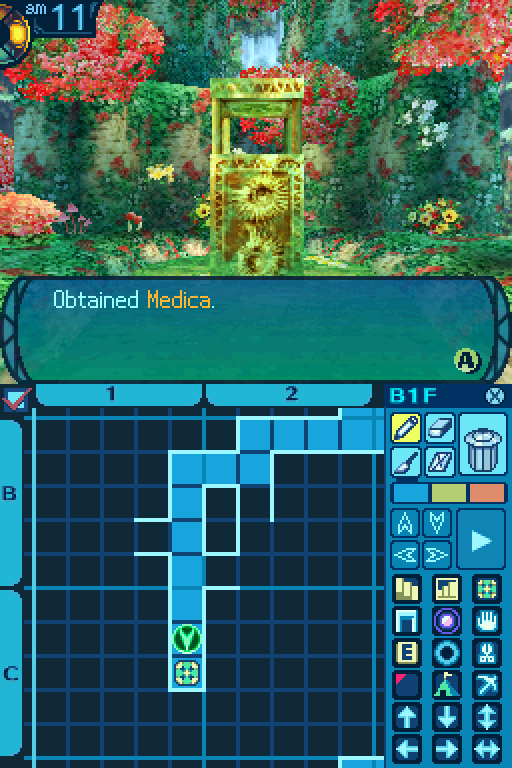
And we've finished our map!
I think we got everything. Let's go back to that guard and show him our map!