Toggle Background Color
Update 7: Meregho Saeno
 That bird just learned the hard way that ice isn't always nice.
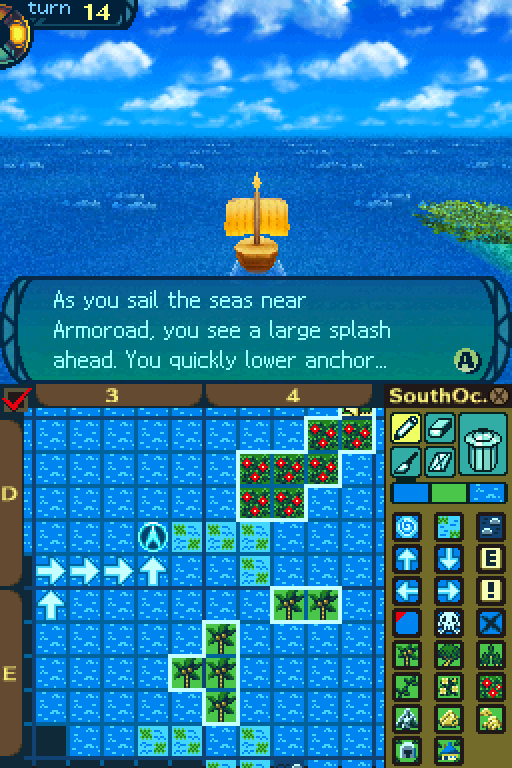
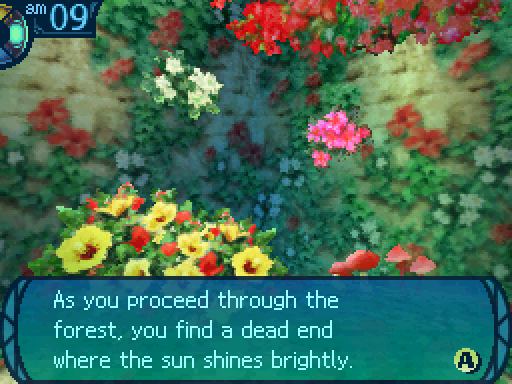
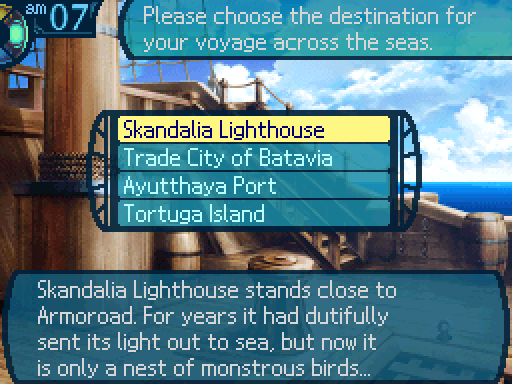
This spot is to the west of Armoroad.
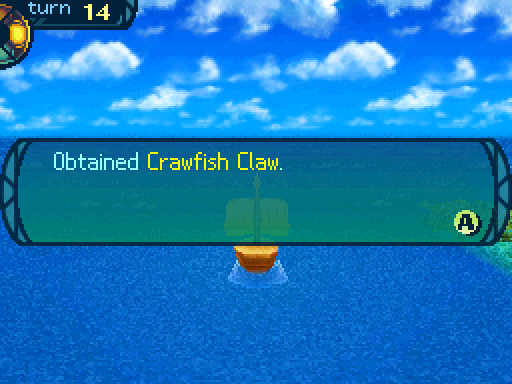
Looking closely, you can see a fish easily larger then your ship battling a crawfish-like creature! The crawfish has the fish in one of its giant claws, but the fish is thrashing about wildly! However, lacking the means to escape the crawfish’s viselike grip, the fish falls lifeless. The crawfish pulls its prey into the deep and disappears. Where it once was, you spot something... In the crimson-stained waters, you find a Crawfish Claw, likely knocked off during the struggle. If you wish, you can pull the Crawfish Claw aboard and take it with you.


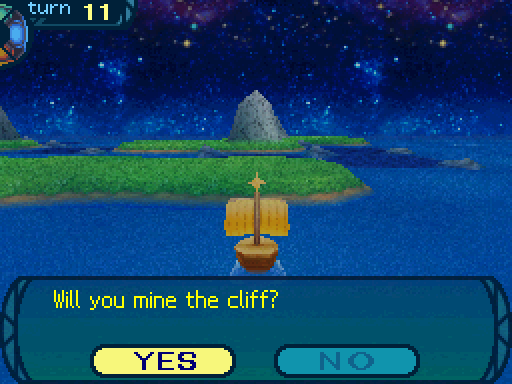
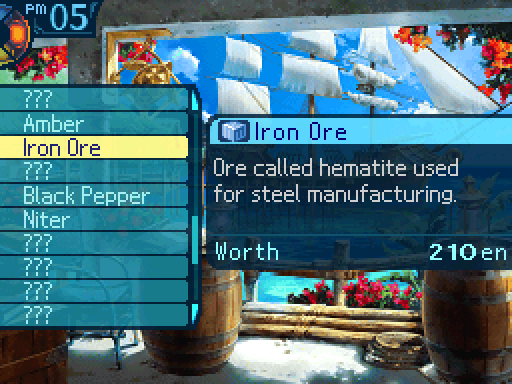
There are holes dug into the rock, obviously created by the hand of man. There may be some kind of ore left for you to mine, but it’s possible nothing remains. You are free to attempt to mine the cliff before you if you wish.
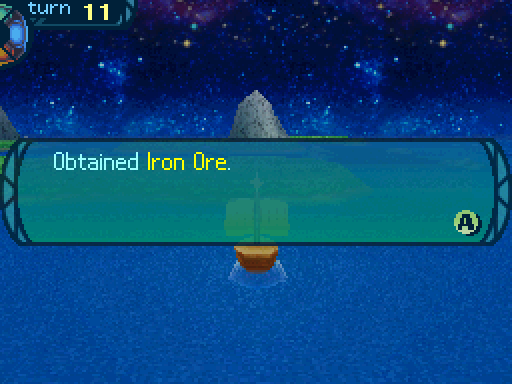
After several hours of labor, you stop as your pickaxe strikes something in the rock. You inspect the area you were digging at and see a spot with a metallic glint. You chip away at the stone and find a layer of Iron Ore. You store the Iron Ore you mined onto the ship and set sail from this area.
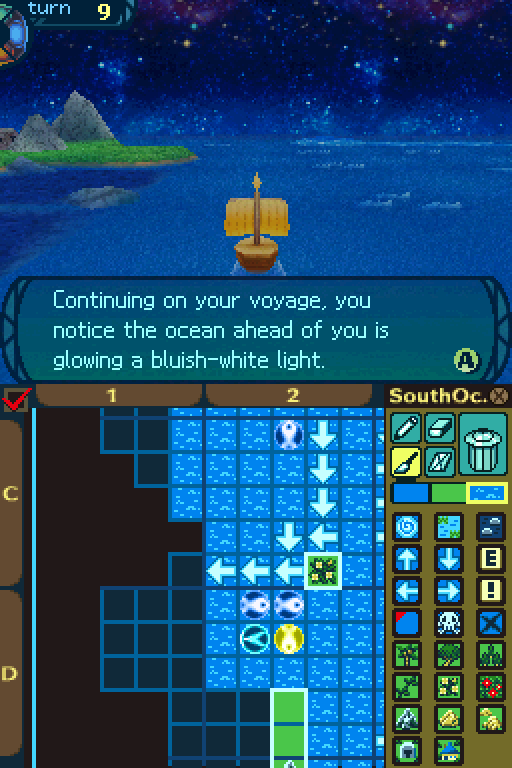
What's that glow over there?
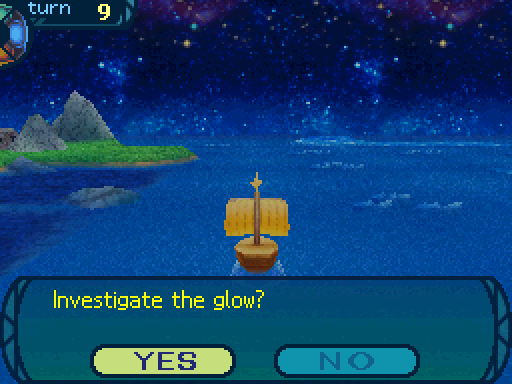
The lit area, about the length of ten of your ship, bobs eerily on the waves... It may be moving... It does not appear to be alive, but if it is, its size could make it a threat. You’re unsure whether you should dive in and investigate the glow or play it safe and leave.
 I'll check it out! Go ahead and lower me!
 Be careful, Faye...
You lower Faye on a rope into the sea... Faye closes in on the glow and sees that it genuinely is something glowing under the sea. Picking it up, Faye observes that it is jelly-like and does not seem to be dangerous. But as Faye attempts to investigate further, the glowing objects sink into the ocean... Once Faye is back on board, you notice jellyfish-like things on Faye’s arms.
 Uh, Faye? Your arms.
Wha- AAAHH! Get em off!
Oh, I believe those are Light Salps. Hold still, Faye.
You have heard tales of Light Salps, creatures akin to jellyfish that live in these waters. It seems the glow that you just witnessed was a colony of these light salps.


You have a 40% chance of succeeding at this event and getting the Light Salps. Otherwise, they'll escape and you get nothing. If that happens, you can come back to this spot on your next sailing attempt. However, the event will only have a 20% chance of popping up again. Because screw you.
Down here is another event.
You would like to get closer to see it, but the waves are so rough you can barely keep steady. The ship creaks ominously as the tall waves crash against the hull, and you tremble! You can gather your courage and approach the rocks, or turn away and avoid the risk of crashing.

Scott! Can you get us closer?
 Lemme see... I think I can, but it's gonna be a rocky ride!
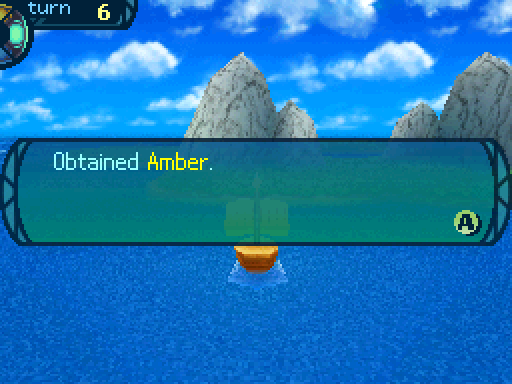
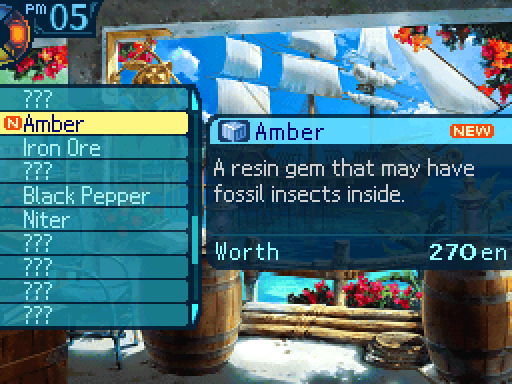
You take hold of the wheel and brave the angry waves, getting closer to the rocks. You can see the glow is coming from some Amber embedded within the stone. You carefully chip away at the surrounding rock and remove the Amber. This giant chunk of Amber will surely fetch a high price if you take it back to Armoroad! You carefully stow the Amber in the hold and set sail for your next destination.

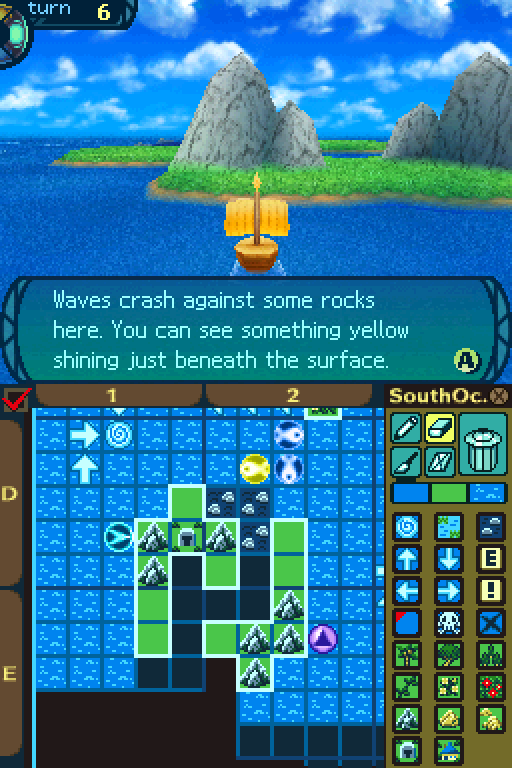
What is that strange boulder that seems so incongruous with its surroundings...? You seriously consider taking time out to investigate it.
If you go back to the Harbormaster at this point, he'll have this to say:
 Welcome back, everyone. So you discovered Tortuga Island. They say that was once a gathering place for pirates. It so happens there’s a deep cave on that island. If I were you, I’d go take a closer look. Just be careful. There are a lot of dangerous reefs in the area that might give you trouble.
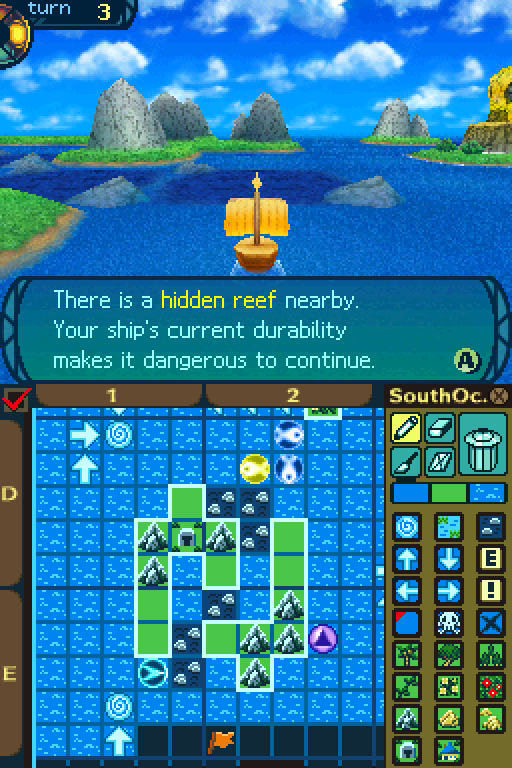
Also, like seaweed, we cannot go through hidden reefs.


The route I took to get here.
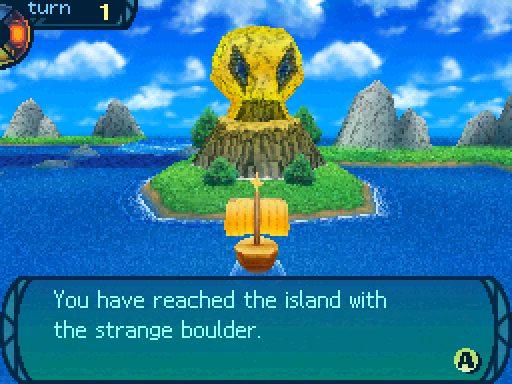
Looking at the boulder from this angle, you can tell there is an unnatural hollow inside of it. You would like to explore further, but it is dangerous to jump into the unknown when low on food. You decide to settle for charting the route here for now and return to Armoroad to report.

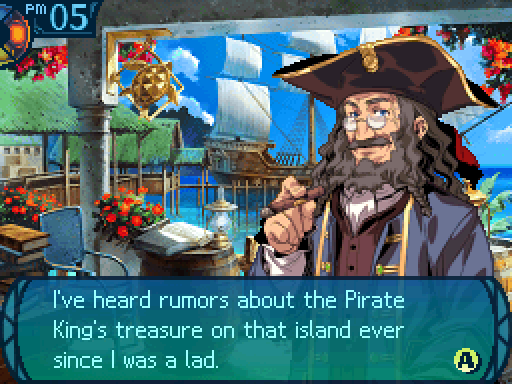
I’ve heard rumors about the Pirate King’s treasure on that island ever since I was a lad. I thought they were just stories, but now that you’ve found the cave, maybe there’s more to it than that. If the opportunity arises, maybe it would be a good idea to send in the marines to investigate... ...But it would make more sense if you searched there first. Give it a shot if you get a chance.

No ship part this time.
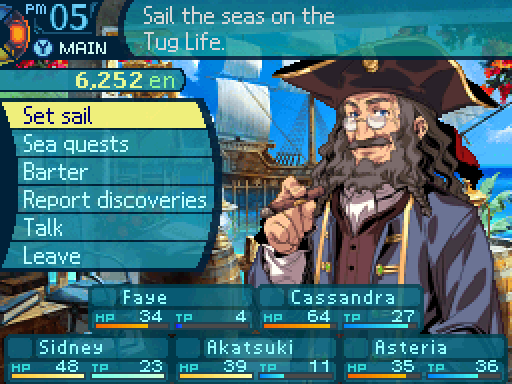
But our Guild is now rich. Not filthy rich, but this will hold us over for the 1st Stratum. Now I'll do other stuff other than exploring the sea. I haven't gotten everything possible since I've missed some items, but I can come back for those later.


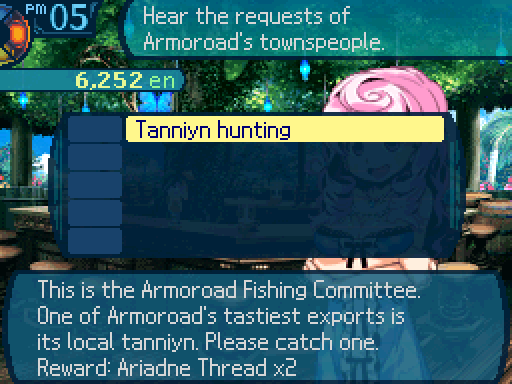
More fishing? Sure, why not?
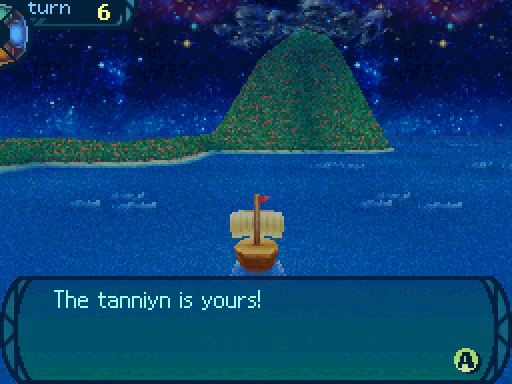
 You're going to accept this request? It was put up there by the city's fishing committee. It is sounding straightforward. Go out on a voyage and catch a tanniyn. Simple, yes? The committee wants the tanniyn to be from local waters, so catch one near Armoroad. That is all you are having to do! The deep blue sea calls you! Do not keep her waiting! Oh, I am being all excitable about this! Get out of here so I can calm down!

The game forces a Tanniyn spawn near Armoroad. Other Tanniyns do not count for this quest.

This one didn't put up much of a fight.
Hey, makes our jobs easier.
It's really easy, and this quest is more of a minor tutorial on Tanniyn hunting.
All you need to do now is return to the city and report back to the bar.

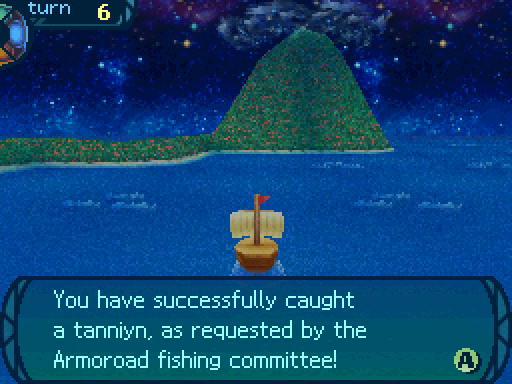
Welcome back! It is good to be seeing you once more! The fishing committee sent the word to me. Well done, as always. I cannot believe you caught a tanniyn! That makes you experts in the ways of fishing! The way of the fisher is long and arduous! Do not give up! Go on to greater fishy glory! Well, here is the reward for this request. Come any time, explor--I mean, fishers!
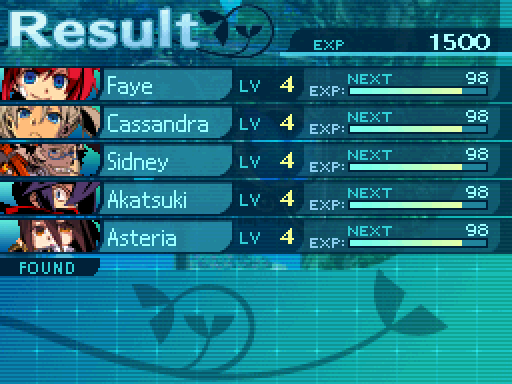
And despite the quest being really easy, it gives us the same amount of exp the map making mission gave us. Since the party's so close to a level up, I'll finish up the other quest.


Remember that spot I talked about earlier? This is where you need to go to complete the quest, however it has to be daytime so you can complete the quest. Otherwise, you can't check this tile and you'll have to wait until morning.
You suddenly recall the request you accepted about finding a place to sunbathe safely. Since you sense there are no monsters nearby, this would be a perfect place for sunbathing. You can return to the bar and report your findings whenever you feel like it.
You sure that guy won't get his face bit off by those huge cats?
Positive! It seems unlikely that monsters will tread into this territory. He has nothing to worry about.
Except for his job.
Well there is that.
Psst! Guys! Look at this! I see some frogs over there. But I don't think they see us. Why don't we-
AAAAAAHHHHH! 
Let's see how you like having a taste of your own medicine, you sneaky little amphibians!
Sometimes you'll get a preemptive strike when you get into battle, which has a visual indicator of green leaves moving outwards. Like blindsides, your party will get a free turn to wail on their enemies.
Nothing interesting really happened aside from getting a preemptive strike. All the monsters, Great Lynx included, are just cannon fodder for the team now.

Ah, you are back, and alive, too! This is good! So, you have found a safe place for Bill to sunbathe in? He will be happy to hear it! If he gets fired for napping when he is supposed to be working, it is not my concern. Well... Regardless, here is the reward. I look forward to further dealings with you!

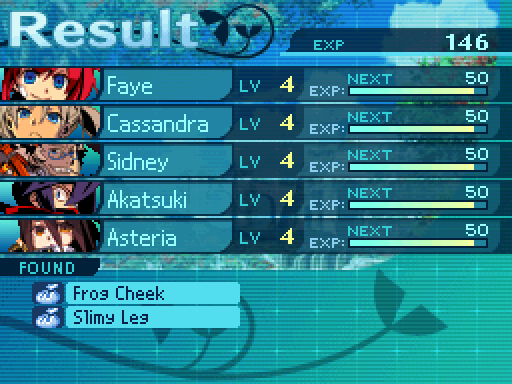
And that quest was enough to give the party a level up! Take one last look at this screen, because that's the last time you'll see all 5 members having synced exp bars.

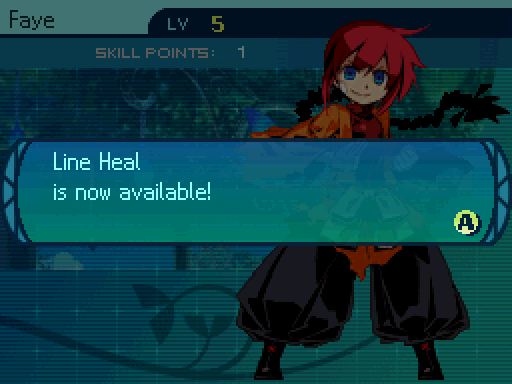
I level up Healing to 4 to unlock Line Heal. It heals a row, but the healing power is lower than Healing. Healing now has a heal power of 85%. I won't be putting anymore points into the skill.
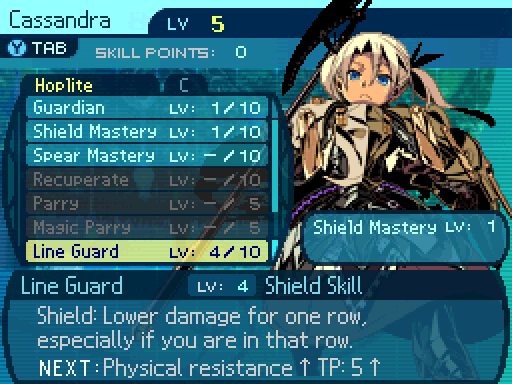
Line Guard now reduces physical damage dealt to the Hoplite's own row by 31%. Otherwise, it reduces the damage dealt by 13%.
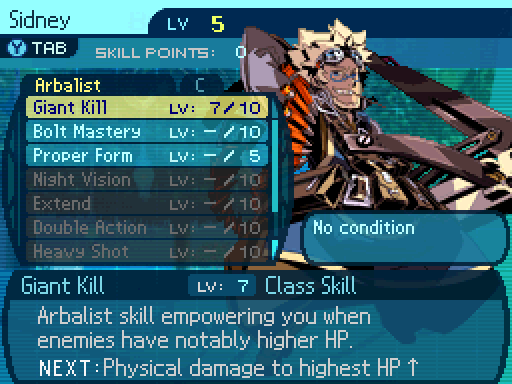
Giant Kill now boosts the Arbalist's damage by 43%.
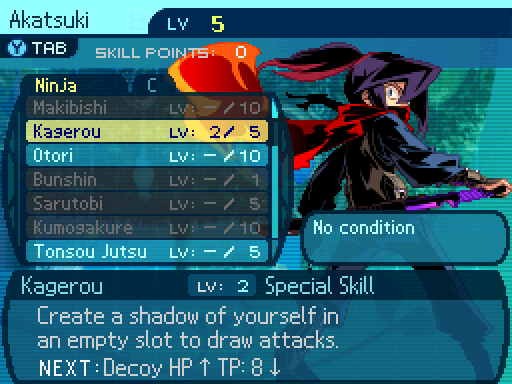
I'm not leveling up Kagenui at the moment. Instead I want to go for a different skill, which requires 3 points in Kagerou. Leveling up Kagerou makes the decoy more durable and lowers the TP cost of the skill. At this point, the decoy now has 10 HP and TP and costs 9 TP to cast. Do not max out this skill, because it is worthless past the early-game. You only want it to unlock Otori and Bunshin.
A relaxing wave of energy.
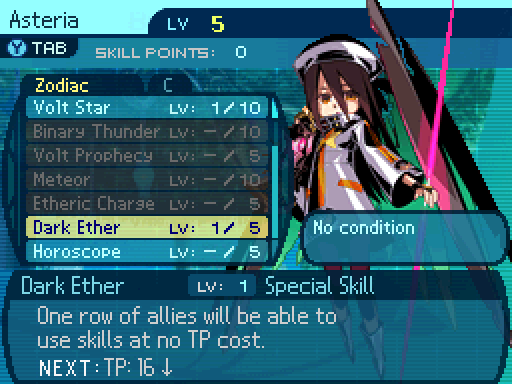
Dark Ether is a very powerful support skill. What it does is stop a row from using up any TP when they use any skills. So if Faye tries to use Healing, which normally costs 7 TP at this point, she'll still cast it, but she won't spend any TP while she heals someone. Very handy, and this skill has an action speed modifier of +30, so most of the time it'll go before your allies make a move. All leveling this skill up does is lower the TP cost, which can be handy because spamming this skill can run the Zodiac dry. But there is an actual reason to level it up other than using up less TP.
Because maxing out Dark Ether unlocks 2 very powerful skills. I'll be going for this one first, because it's a free damage boost to the Zodiac, while the other skill costs TP to use.
Now, here's a little warning. Before you get to the end of the 1st Stratum, you want to make sure that someone in your party knows an AOE damage move. It doesn't matter how strong it is or what element, just that it hits all enemies. Either that, or a Ninja that knows the Bunshin skill. Kagerou will not cut it. Anyways, with that said, let's tackle the Sea Quests.
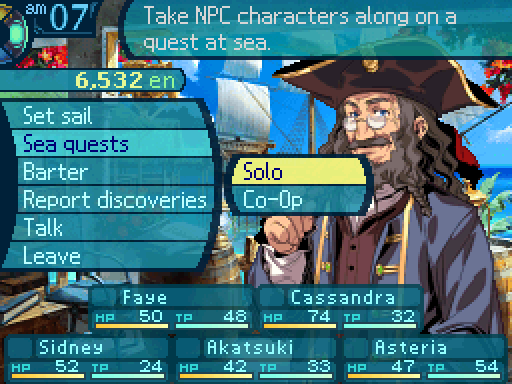
At the port, you have the option of selecting either Solo or Co-op. Sadly, the latter will not be seen in action.
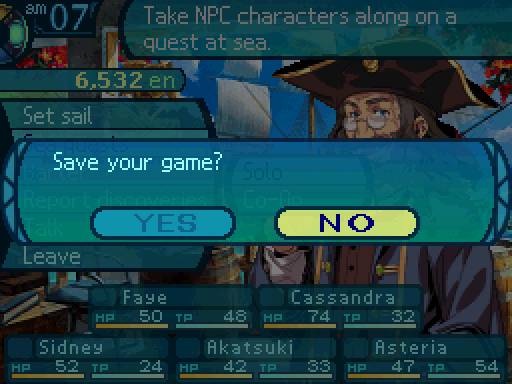
You'll be asked to save your game, which is convenient in case you wipe. You don't have to save while doing solo, but you do have to before you start up co-op.
Each major landmark you reach will have some Sea Quests available.
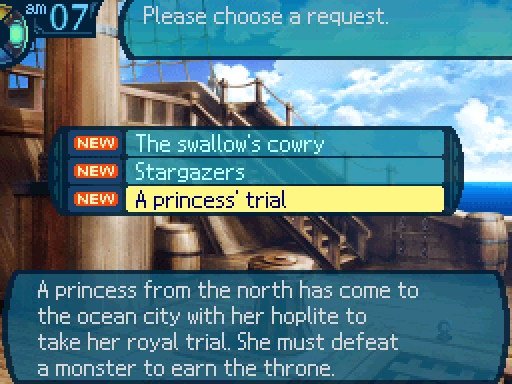
There's 4 Sea Quests to choose from at each landmark, but the 4th one isn't accessible in single player, while all 4 are accessible in co-op. You can repeat Sea Quests as many times as you want. There are some restrictions you have to fight under while doing Sea Quests. For one, you have to fight with AI controlled NPCs, and they do take up party slots, so you can't use your full party for these. I'll be doing this one first.
There's a short blurb on why these NPCs are fighting with you, or why they're heading toward this location (and end up fighting with you).

After accepting, you need to set up your party. Each Sea Quest has a different number of NPCs to work with. The 1st Sea Quest on the list has you working with 1, the 2nd has you fighting alongside 2, the 3rd Sea Quest has you fighting with 3, and the 4th Sea Quest doesn't have any NPCs to fight with. But that's only available in Co-op.
I'll be going over a detailed breakdown of what each NPC has going for them. For the record, any stats that are listed take already into account the NPC's equipment and any passive boosts they may have.
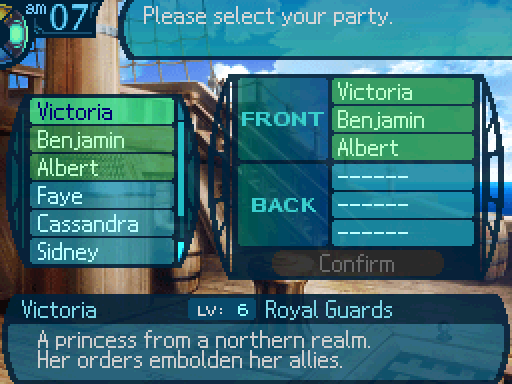
Victoria
Class: Princess
Stats:
- Level: 6
- HP: 75
- TP: 37
- STR: 9
- TEC: 9
- VIT: 11
- AGI: 9
- LUC: 10
Equipment:
- Shortsword - Sword, 21 Attack.
- Feather Armor - Light Armor, 16 Defense.
- Buckler - Shield, 8 Defense.
- Straw Hat - Helm, 5 Defense.
Skillset:
- HP Up: Level 1 - Increases max HP by 10%.
- TP Up: Level 1 - Increases max TP by 10%.
- Royal Lineage: Level 3 - Restores 3 TP when receiving a buff.
- Royal Veil: Level 2 - Party recovers 7 HP at the end of the turn as long as user's HP is full.
- Reinforce: Level 1 - Restores 6 HP to targets that receive buffs.
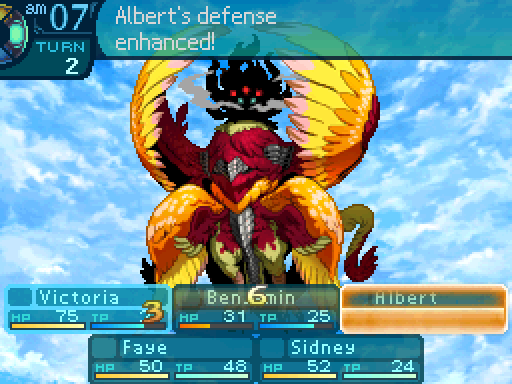
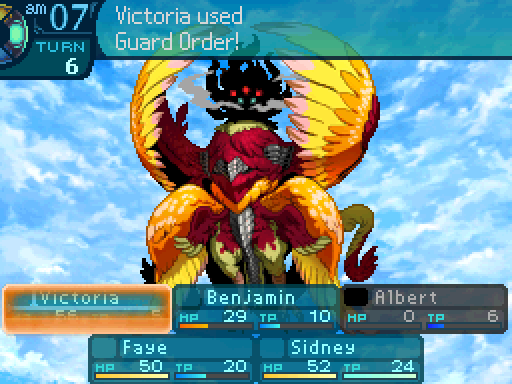
- Attack Order: Level 1 - 8 TP. Increases a row's physical power by 20% for 4 turns.
- Guard Order: Level 1 - 8 TP. Increases a row's physical defense by 20% for 4 turns.
- Prevent Order: Level 1 - 12 TP. Prevents ailments from hitting a row for 4 turns.
Supplies:
- 3 Medicas. Restores 80 HP to one party member.
- 1 Amrita. Restores 50 TP to one party member.
Each NPC has a specific skillset they'll use, and they bring some of their own items. So you don't have to worry about them using your items without permission. Also, you may have noticed that Victoria has a completely impossible skillset. Yeah, sometimes the NPCs cheat, but they're on your side. Victoria will work on buffing her own row. Don't expect her to help your row out. But Royal Veil helps out the whole party, so try to keep her HP topped off.

Benjamin
Class: Hoplite
Stats:
- Level: 4
- HP: 74
- TP: 33
- STR: 9
- TEC: 8
- VIT: 14
- AGI: 5
- LUC: 7
Equipment:
- Short Spear - Spear, 20 Attack.
- Feather Armor - Light Armor, 16 Defense.
- Buckler - Shield, 8 Defense.
- Straw Hat - Helm, 5 Defense.
Skillset:
- HP Up: Level 1 - Increases max HP by 10%.
- TP Up: Level 1 - Increases max TP by 10%.
- Guardian: Level 1 - Increases physical defense by 10%.
- Shield Mastery: Level 1 - Increases physical defense by 1% while having a Shield equipped.
- Recuperate: Level 1 - Restores 10 HP when defending.
- Bodyguard: Level 1 - 4 TP. Takes damage in someone else's place. Reduces physical damage by 30%.
- Provoke: Level 1 - 3 TP. Increases max aggro by 5.
Supplies:
- 1 Amrita. Restores 50 TP to one party member.
Unlike Victoria, Benjamin will help out your party if he feels like they're in danger. He won't use Bodyguard if his HP is too low, and instead opts to defend, so it's important to keep his HP topped off.
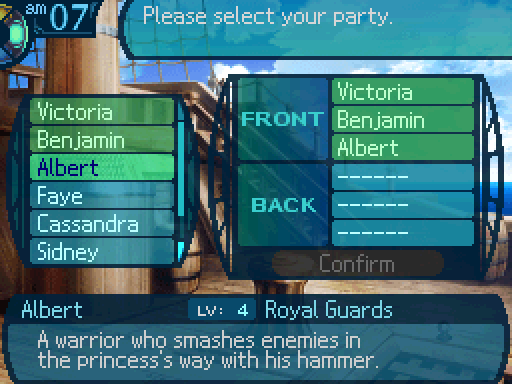
Albert
Class: Gladiator
Stats:
- Level: 4
- HP: 72
- TP: 26
- STR: 13
- TEC: 4
- VIT: 9
- AGI: 6
- LUC: 5
Equipment:
- Spiked Club - Club, 32 Attack, +3% Hit Rate.
- Feather Armor - Light Armor, 16 Defense.
- Bark Gloves - Gloves, 4 Defense.
- Shuro's Sandals - Boots, 2 Defense, +1 STR.
Skillset:
- HP Up: Level 1 - Increases max HP by 10%.
- TP Up: Level 1 - Increases max TP by 10%.
- Endless Battle: Level 2 - Increases physical attack by 5%.
- Club Mastery: Level 2 - Increases normal attack damage by 3% when using a Club.
- Crushing Blow: Level 1 - 4 TP. Deals 135% Strike damage to one enemy. 25% chance to inflict Confusion.
- Wolf Howl: Level 1 - 7 TP. Lowers all enemies defenses by 10% for 4 turns. 26% if they have an ailment.
Supplies:
- 1 Amrita. Restores 50 TP to one party member.
All Albert will do is deal damage. He'll just spam Crushing Blow most of the time, and won't use Wolf Howl unless he inflicts Confusion on the enemy, or someone else hits it with an ailment.

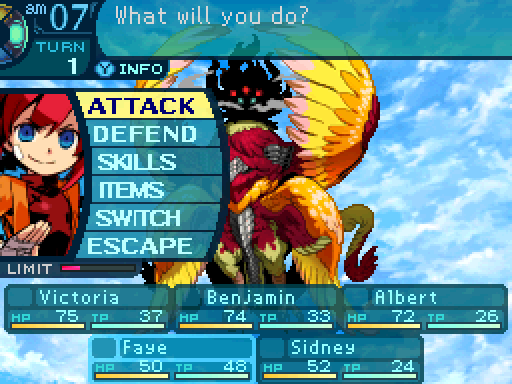
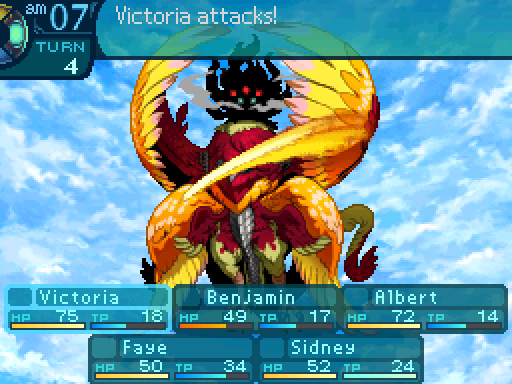
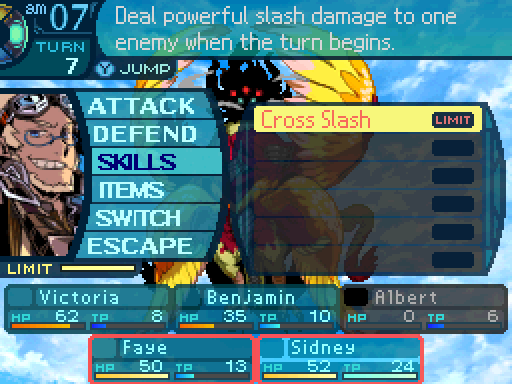
This is the party I'll be going with.
And from here you can set up your Limits. Here's another restriction, NPCs can't be equipped with Limits, nor do they bring some to use themselves, so you're coming into these fights with a pretty big handicap. But enough of that, time to take down that bird.

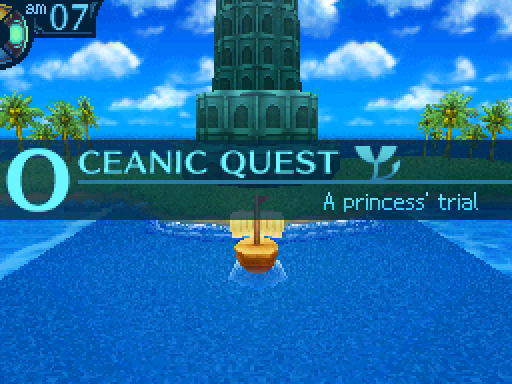

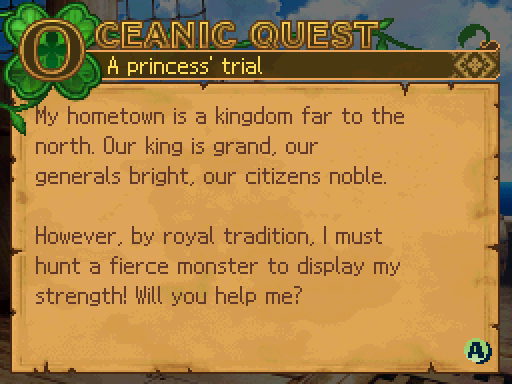
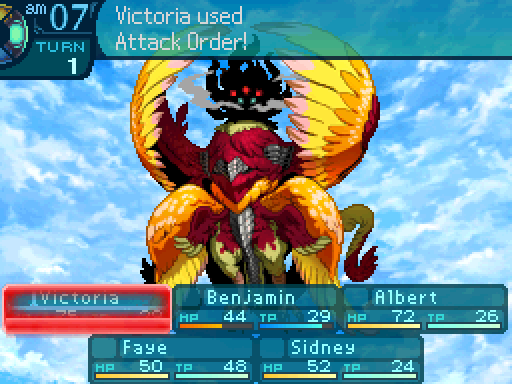
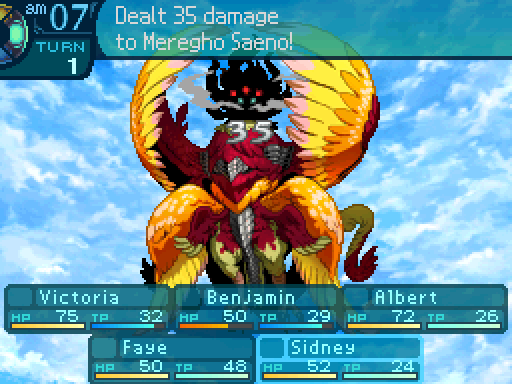
Atop the lighthouse, the bird monster spreads its wings and adopts a menacing stance! The client’s vassals quickly step before the princess, forming a defensive phalanx before her!
For the good of Armoroad, you'll leave this lighthouse! Especially if you know what's good for you! ...Mmm, I don't think it's listening.
Then are ya ready to take it down, Faye?
Do you really have to ask? Let's go!
In response, you draw your weapons as well! The princess’s valiant command echoes over the commotion and the battle ensues!

Video: Meregho Saeno


I really suggest you click on that link, since it's probably one of the best tracks in the game. It's not my personal favorite track, but The End of Raging Waves is a really great song. Also, it got a pretty rocking remix in EO4!
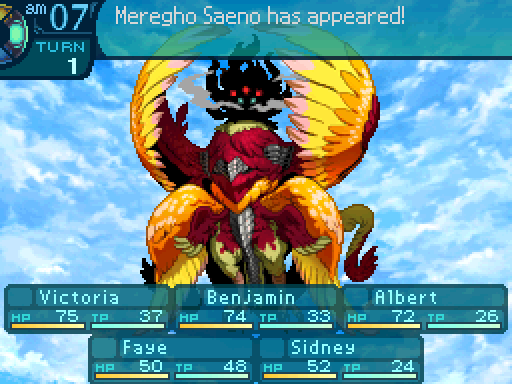

Meregho Saeno
Level: 8
HP: 736
STR: 14
TEC: 13
VIT: 11
AGI: 26
LUC: 14
Attack Type: Pierce
Exp: 1989
Item Drops:
-Normal: Slashing Nail - 100% Drop Rate. 1 needed for Cirius's Blade (Sword. Must be restocked.)
--Used for a single, desperate strike before escaping.
-Gold: Eastern Nest - Kill while arms are bound. 100% Drop Rate. Prevents normal drops. 1 needed for Boldrons (Gloves. Must be restocked.)
--Made from the branches of a rare, ancient tree.
Description: A monster bird that rests on Skandalia Lighthouse. It has troubled research teams for many years.
Damage Resistances: Slash: 100% Strike: 100% Pierce: 150% Fire: 100% Ice: 150% Volt: 50%
Ailment Resistances: Sleep: 10% Confusion: 10% Plague: 20% Poison: 20% Blind: 40% Curse: 10% Paralysis: 10%
Bind Resistances: Head: 25% Arm: 25% Leg: 25%
Other Resistances: Death: LR - 50% Petrification: LR - 50% Stun: 10%
Skills:
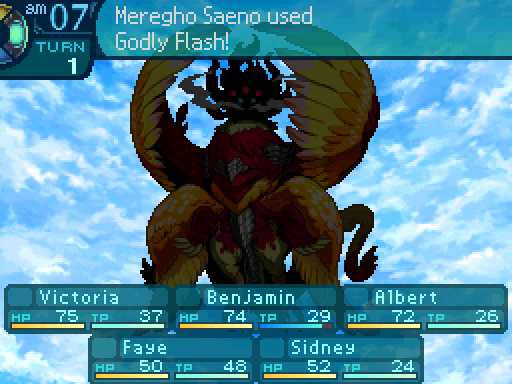
Godly Flash: Uses the Arms. Deals 150% STR-based Slash damage to one party member. Has a hit rate of 99%. Has an action speed modifier of +0.
Thunder Feather: Uses the Head. Deals 50% TEC-based Volt damage to one row. Has a hit rate of 99%. Has an action speed modifier of +0.
Something to keep in mind is that whenever an enemy uses an elemental attack, it usually runs off of the TEC stat, so that 50% modifier does not mean Thunder Feather deals a low amount of damage at all. I really can't give any exact strategies for this boss, or any of the Sea Quest boss fights since the tactics you have to employ differ from Sea Quest to Sea Quest. You either have to have your party do the heavy lifting and the NPCs will support you, or it'll be the other way around, where your party has to support the NPCs. This quest is the latter. You want to bring some firepower, but you also want to keep the NPCs alive for as long as you can.

Nothing much we can do at the moment but attack. We can switch spots with the NPCs, but Faye and Sidney will not survive in the front row.
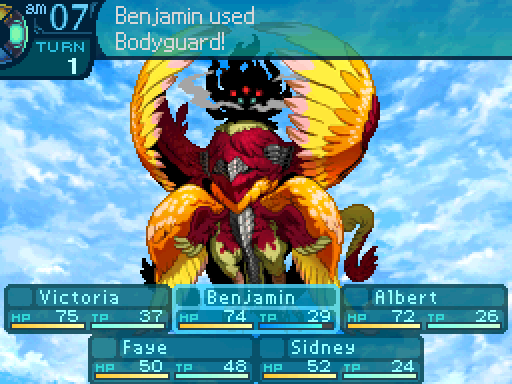
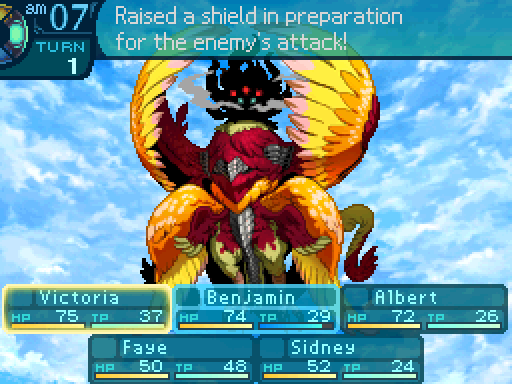
Bodyguard is an ability that has the Hoplite take damage in another party member's place, which is an absolutely fantastic ability.


Huh. I wonder if Cassie could learn how to do that.
Remember what I said a few updates ago about the AI cheating? This also applies to your AI controlled party members. Benjamin will always use Bodyguard on a character that will be attacked, including your party members. But like I said before, Benjamin only uses that ability when he has enough HP.
Attack Order boosts damage output of a row's physical attacks for 4 turns. Oh, and Victoria has a passive that heals everyone that she buffs. Handy, since she's the only source of healing in her party, so it's essential to keep her alive.

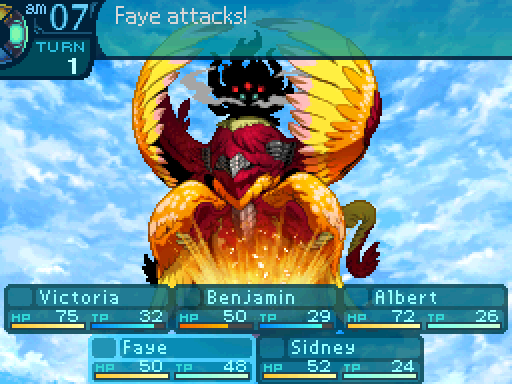
Ugh! I can't do much from back here!
Why don't ya work on keeping all of us alive, and I'll handle the firepower?
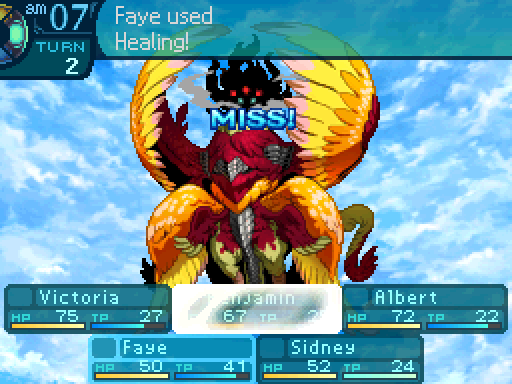
Melee attacks have a 50% damage penalty applied to them when used from the back row. I only had Faye attack because I didn't want her to use up any TP just yet.
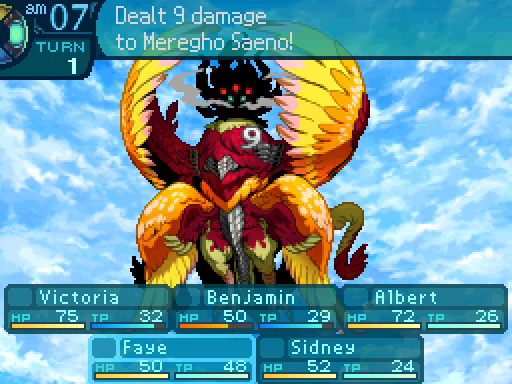
Pegged it!


Somehow I feel good just by being near her.
Same here.
Royal Veil in action. As long as Victoria's HP is full, the entire party will be healed by 7 HP at the end of the turn.
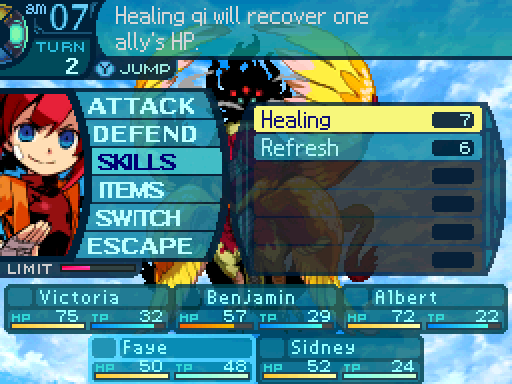
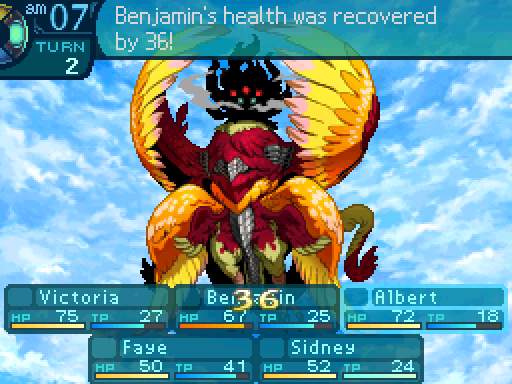
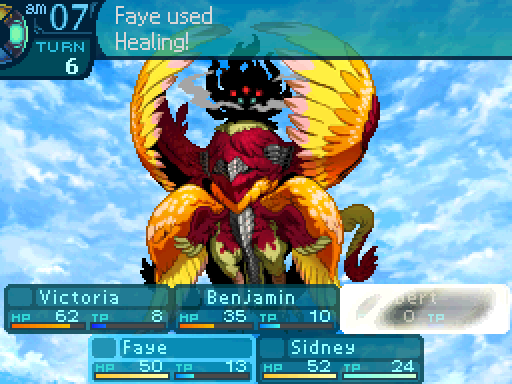
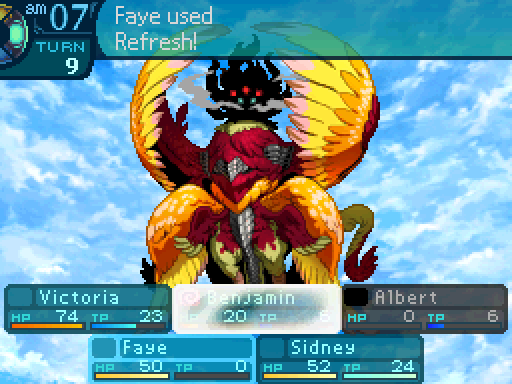
Now I'm gonna have Faye on healing duty to make sure Benjamin can keep using Bodyguard, and that Royal Veil will always kick in at the end of the turn.

Guard Order increases a row's defense against physical attacks for 4 turns. Defense buffs are denoted by an orange overlay.

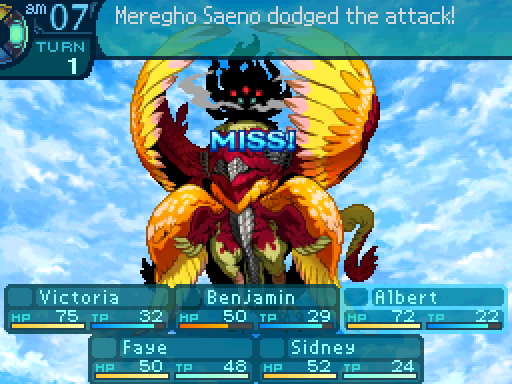
What!? I never miss!
There there, Sid. It'll be okay.
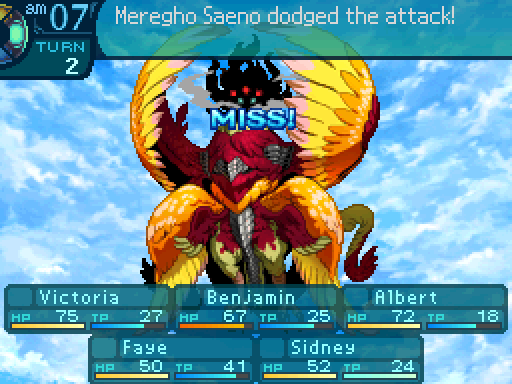
Unfortunately, Meregho Saeno has a really high AGI stat, which means it'll avoid our attacks fairly often.
Purification!


Prevent Order blocks a Status Ailment from hitting a party member for 4 turns. Once it blocks an ailment, the buff will immediately be dispelled, so it has to be recasted in order to protect that party member. As for why Victoria's using this, you'll see later.


Crushing blow deals a decent amount of damage. But don't ever expect Albert to actually confuse the thing. Because of Albert's low stats and Meregho Saeno's resistances, Crushing Blow only has a 2% or 3% chance to inflict Confusion.

Once Victoria has all her buffs set up, she'll just start attacking. She won't even use them on your row. Thanks for the help.
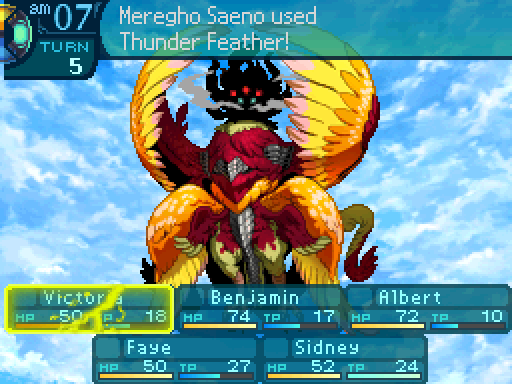
This is Meregho Saeno's other attack, and not something you want to see often. Oh, and Volt attacks are visually indicated by that yellow lightning overlay.
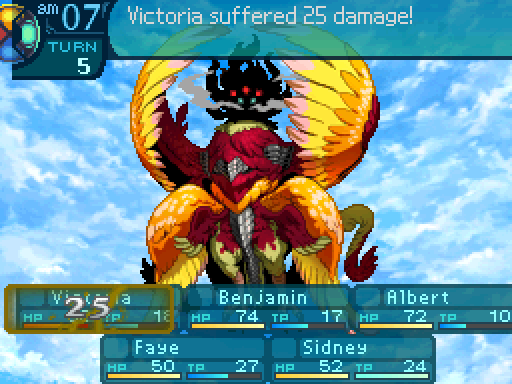
Yeah, deals a huge amount of damage to the row.
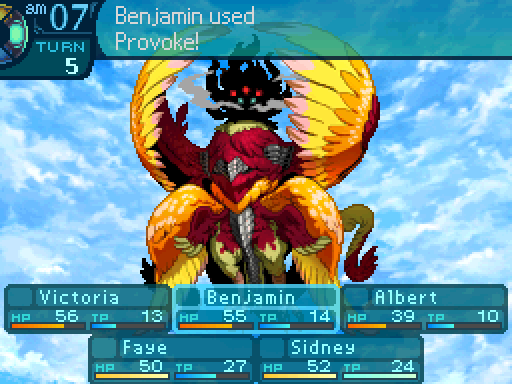
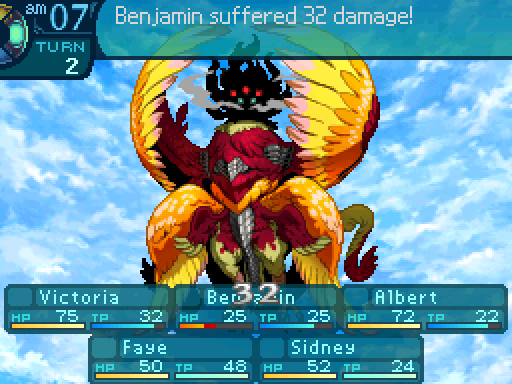
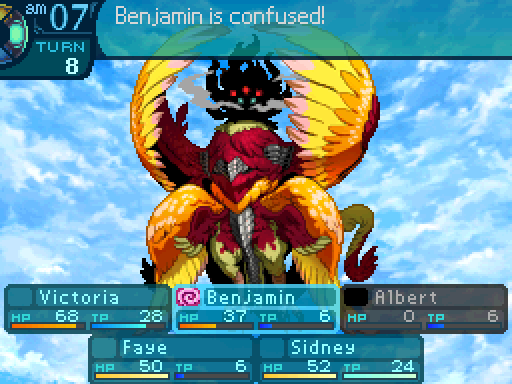
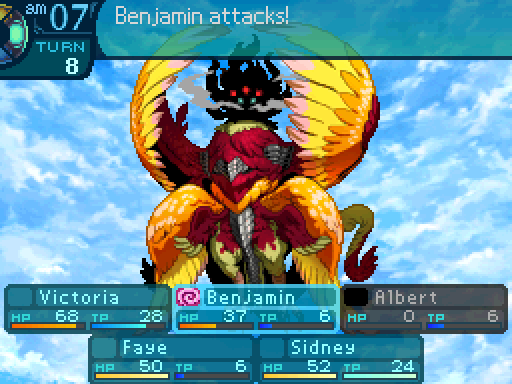
And Benjamin didn't use Bodyguard there because he wanted to Provoke it. Even though his AI cheats and knows who to use Bodyguard on.


Oh crap! I was too slow!
Is he gonna be alright?
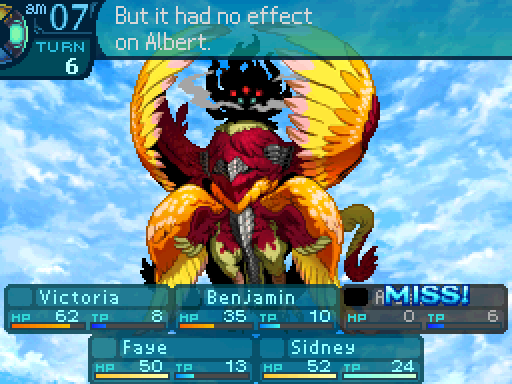
And here's the first death in the LP, although it wasn't any of the Guild members that bit it. So yeah, when someone dies, buffs and healing have no effect on them, and they can't do anything until they're revived. I do have a revival item, but I only have one, and I don't want to use it up right now.
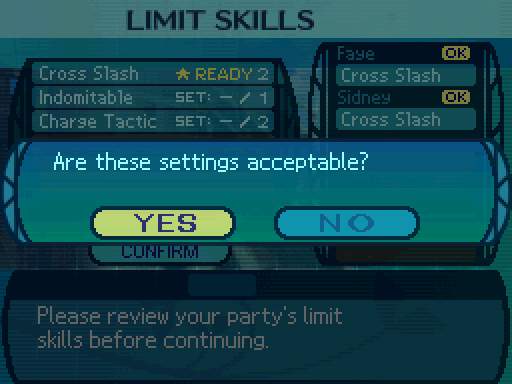
At this point, Sidney's Limit gauge filled up.
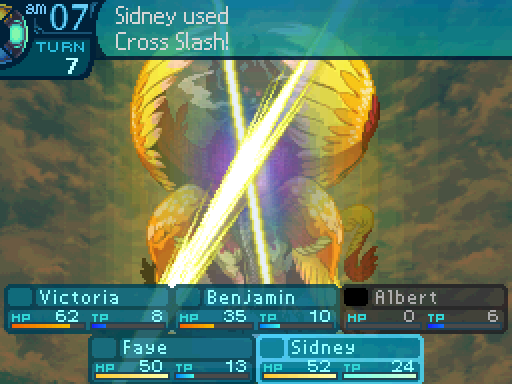
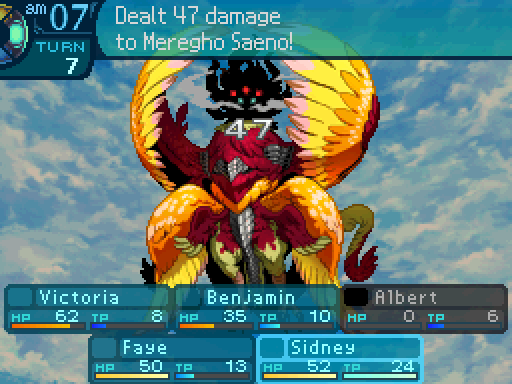
Cut you down to size!

Like I said before, NPCs have their own items to use up in case things start getting hairy. If they run out, your party is probably too weak because the fight lasted for too long.

And this is where the fight starts getting more difficult.
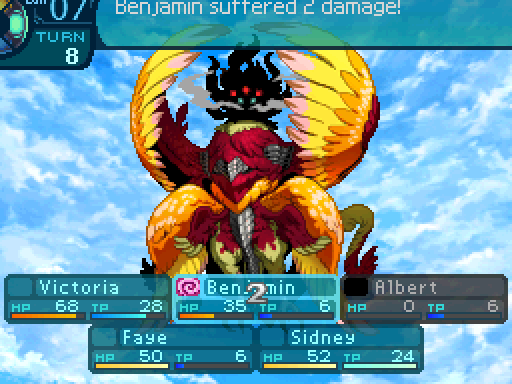
Because once Meregho Saeno gets down to 50% of its HP, it starts using this move. Slash attacks are visually indicated by a diagonal line.
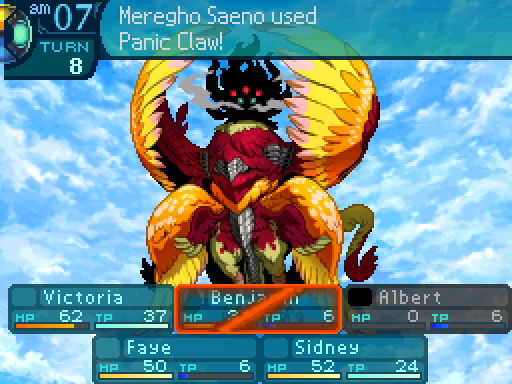
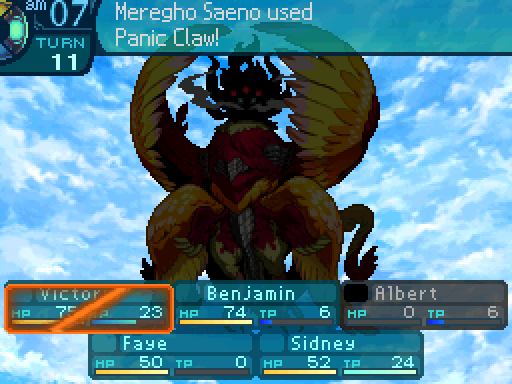
Panic Claw: Uses the Arms. Deals 80% STR-based Slash damage to one party member and has a 60% chance to inflict Confusion. Has a hit rate of 99%. Has an action speed modifier of +3.
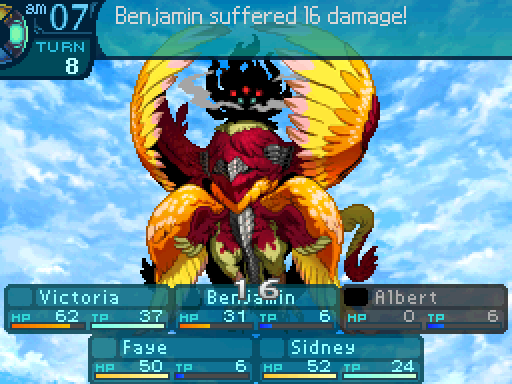
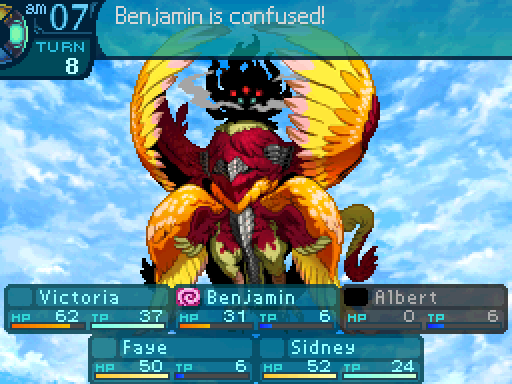
The damage itself isn't too much, but the Confusion component is what you really need to worry about. Confusion (known as Panic in the later games) is the most deadly ailment in the game because anyone who gets inflicted with it will just attack anyone randomly. You have absolutely no control over anyone that's confused, so they can't even use items or skills at all. And as a kicker, they can't dodge any attacks, which can be awful in certain situations.
Okay, not good! What do we do!?
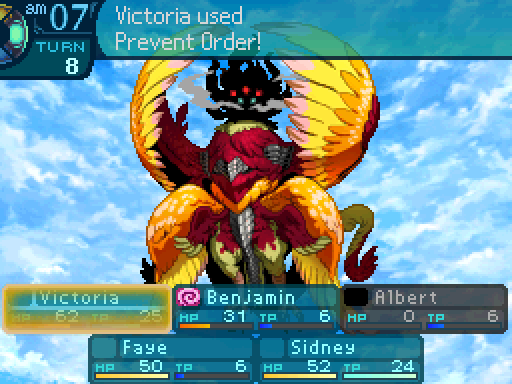
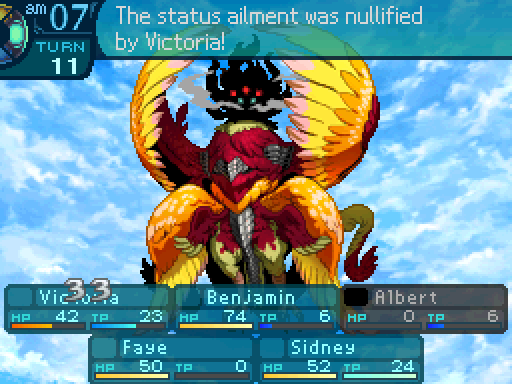
This is why Victoria was casting Prevent Order earlier. Unfortunately, she cast it too late and it only prevents ailments, it doesn't dispel them.

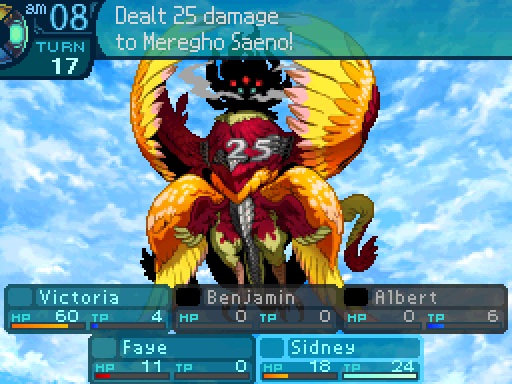
Pow pow! Nailed him where it hurts!
Crits give a 50% boost to damage, but they only affect regular attacks, not skills.

Don't worry, I got this.

Hey, calm down. We're your allies, not your enemies.
Prevent Order in action.
Crap! Sorry, Victoria!
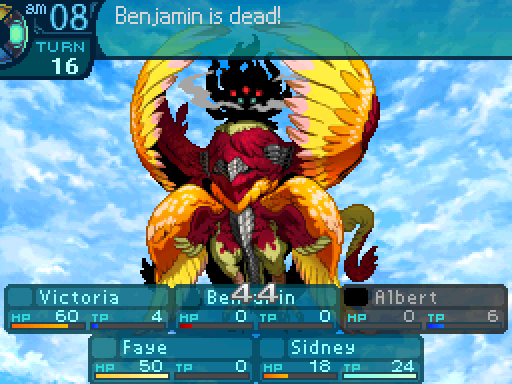
Benjamin died here, but that's actually a good thing for me.
Scram, birdbrain!


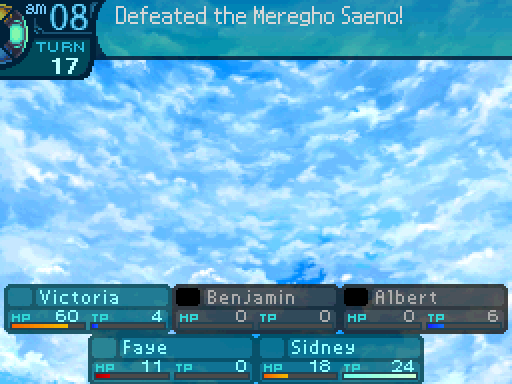
Now, something to know is that the exp isn't split among just Faye and Sidney. For balancing reasons, it's actually split among the NPCs too, even though they can't make use of it. So if everyone's alive at the end, each of your party members only get 20% of the share. However, since Benjamin and Albert were dead at the end of the fight, Faye and Sidney actually get 33% of the cut.

As you confirm that the sea has swallowed the beast, the princess rewards you all with her smile. To report your victory, you leave the lighthouse and set sail.
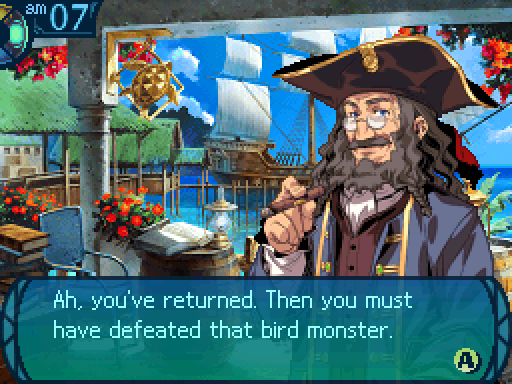
Thanks to you, the marines can continue investigating that lighthouse without fear. If all goes well, the lighthouse will be on its way to serving its purpose soon! Well done, everyone! ...Oh by the way, this was found on one of the previous investigations. I’d like you to have it.


When you beat a Sea Boss for the first time, you'll always be rewarded with a Limit. Afterwards, each Sea Quest will give you a piece of equipment. However, this means that the Sea Quest you cleared first has to be beaten again to get its equipment reward, so let's go do that.


The fight went a lot better, and no one died this time. Sidney and Faye got a level up.
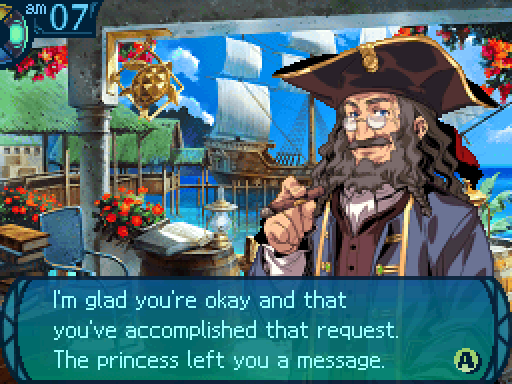

Quite a valiant princess, eh? But I guess she’ll be leading a kingdom someday. She’ll need her energy. Oh, her vassals asked me to give this to you. They hoped you’d be able to make use of it.
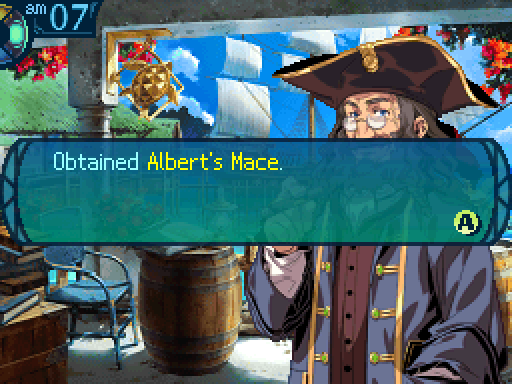
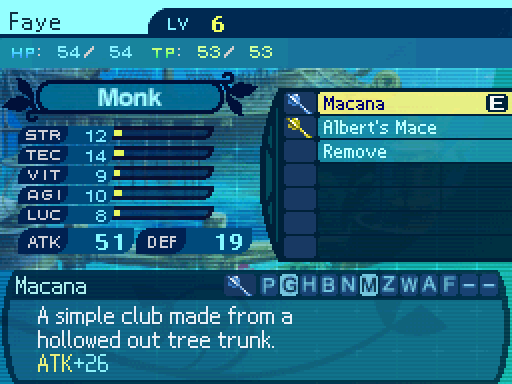

Albert's Mace is a nice upgrade over the initial mace, coming with 2 Ice forges. Each elemental forge provides an extra 10% boost to regular attack damage. I'll go more into specifics once we find an elemental forge hammer. Now here's something I wanna bring up. Those numbers next to ATK and DEF? Complete and utter nonsense. Those numbers aren't used in any formulas at all, and are just an estimate of how much damage you'll do and take. Except the Defense “stat” is completely meaningless due to how armor is used in calculations in this game, and the Attack “stat” does not take weapon forges into account at all. One last bit of nonsense, Albert's Mace just has 4 more points of attack than Faye's initial mace, but the game is telling us that it increases her attack “stat” by 8 points. What's up with that? Oh, it's just an arbitrary amount, there's no real pattern to it. The only reliable numbers are the ones that are actually on the equipment themselves.
Now if you already got Albert's Mace, the Harbormaster's last line changes to this:
...You all truly outdid yourselves on this request. I hope you keep up the good work.
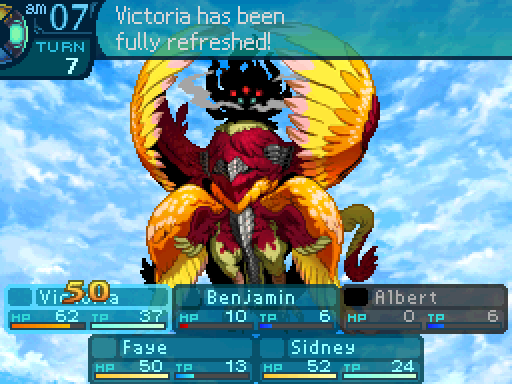
One last thing to note. When you complete a Sea Quest, everyone that participated gets a full heal in regards to HP and TP.