Toggle Background Color
Update 16: Preparing for the 1st Boss
Let's check up on how the guild is doing, and go over how to properly prepare for the first Stratum boss of the game.

 Tomorrow's the big day! Now, who should be responsible for hunting down a catfish?

Refresh now affects a row.
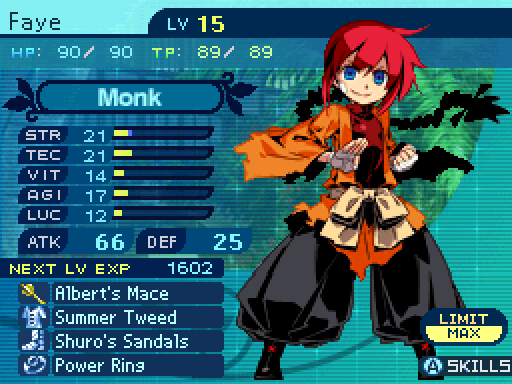
If you're bringing along a Monk, you should probably have some points into Line Heal, and I recommend leveling up Refresh to the point where it heals a row. (Level 4)
 I hope Faye chooses wisely. We need people that can work well with each other.
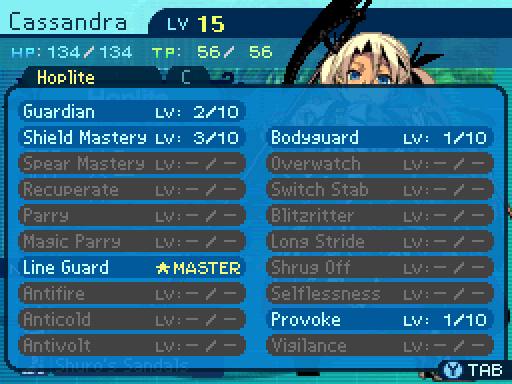
Guardian reduces physical damage by 13%.
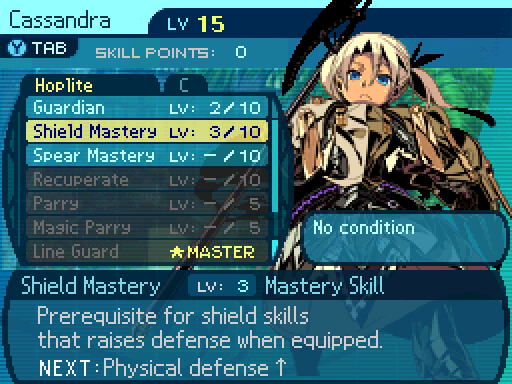
While Shield Mastery reduces it by a mere 3%.

I'll protect you, no matter what the cost.
But leveling up Shield Mastery to 3 unlocks this skill. Bodyguard is an absolute must have for a Hoplite. The Hoplite can choose who they want to protect, and any attacks that head to that character's way will hit the Hoplite instead. The skill actually reduces any physical damage taken by a certain amount, in this case by 30%, and maxes out at 60% by level 10. Leveling up the skill increases the damage reduction, but the fact that you can completely prevent certain party members from taking damage is the important part. So this is either a skill you leave at level 1 or max out, it's up to you. It can combo extremely well with Berserker's Vow, essentially making it completely safe for the Gladiator to sacrifice their HP. There is a minor bug with the skill that will almost never come into play. Bodyguard protects the slot, not the actual character. This only comes into play if you use the Switch function, so it doesn't matter too much.
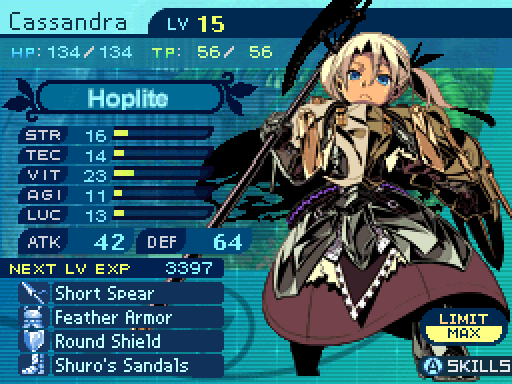
Hoplites are a good class to bring along since Line Guard and Bodyguard are good for protection. I recommend that your Hoplite also has a point in Provoke to take the heat off of everyone else.


 That catfish'll be dead in a few seconds if I come along!
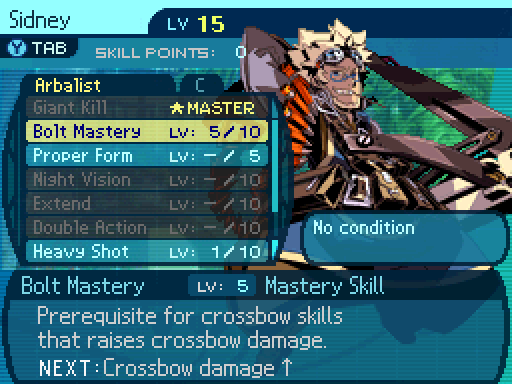
Bolt Mastery is now level 5.
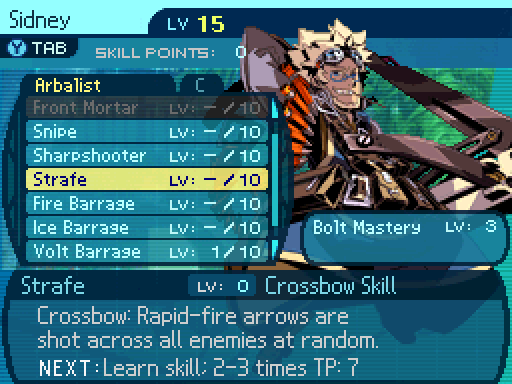
Leveling it up to 3 unlocked this skill. Strafe is a skill that hits enemies randomly, but it can't hit the same enemy twice, so it's meant for clearing out random encounters. This is a terrible skill. It's not an actual AOE, which the Arbalist has, and the damage is pathetic ranging from 100% to 125% from levels 1 through 10. It does hit from 3 to 5 times at max level, but that's a small comfort.
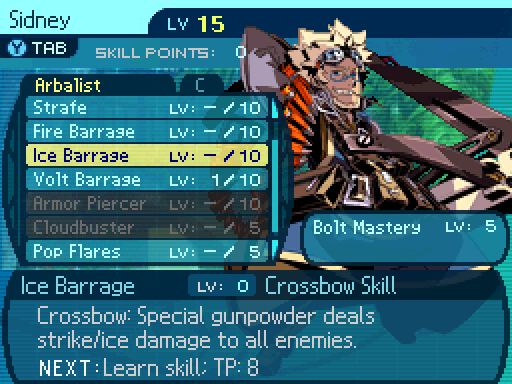

This should make things electrifying.
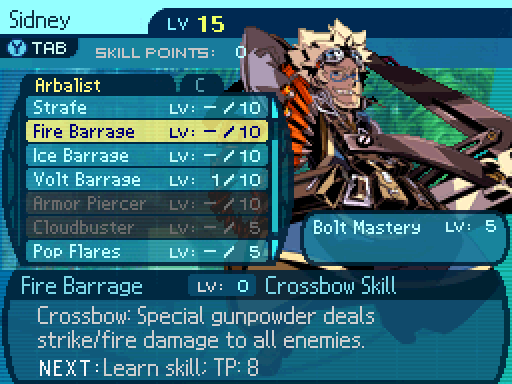
These are the Arbalist's actual AOEs. And contrary to what the descriptions say, these deal Pierce + Elemental damage. You want one of these skills for the boss, it doesn't matter which. These skills are great for dealing with random encounters thanks to their elemental attributes. As for these skills, put a single point into each of them and never touch them again. These skills scale horribly, dealing 80% to 125% damage from levels 1 through 10. There is only one situation where I would advocate maxing these, and even then I think it's a bad idea.
Arbalists are a great class to bring along because they bring a lot of physical damage to the table, and have access to AOE damage skills.


 I must admit that this is an odd task, but we must honor their wishes.
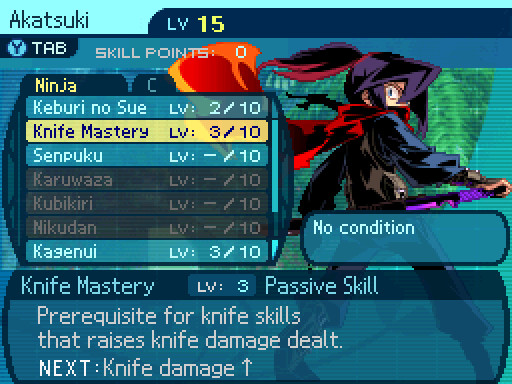
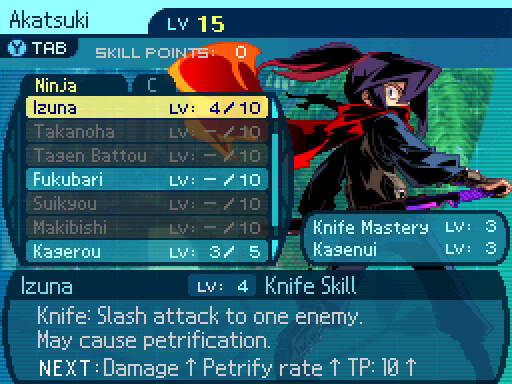
Knife Mastery is now level 3.
Shhh. Statues don't speak.
And since Kagenui is level 3, Izuna is unlocked. What this skill does is it deals a decent amount of damage and has a chance to Petrify an enemy. What Petrification does is that whoever gets inflicted with it won't be able to act until the ailment is dispelled. Petrified allies can still take damage, and will still gain exp if they're alive at the end of the battle, but it's the only ailment that persists outside of battle, it never wears off on its own. And because of that, if your entire party is petrified, it counts as a game over. However, since enemies can't dispel ailments, Petrification just counts as another form of instant death, and it's nearly impossible to inflict it on bosses. Despite that, I just had him learn it so he could use a real damage skill, and it does work on FOEs. At level 4 Izuna deals 161% damage and has a 31% chance to inflict Petrification.
Ninjas can actually eliminate the need for an AOE damage move thanks to Bunshin. And having an extra party member to do whatever is always useful.


 Any fin is possible if you don't trout yourself!
Zodiacs are one of the best damage dealers to bring to the fight, as long as they know Volt Star. They also have access to AOE damage skills if you've skilled them that way.
 Pfft, unreasonable task. How hard could it be to take down this “Narmer?”
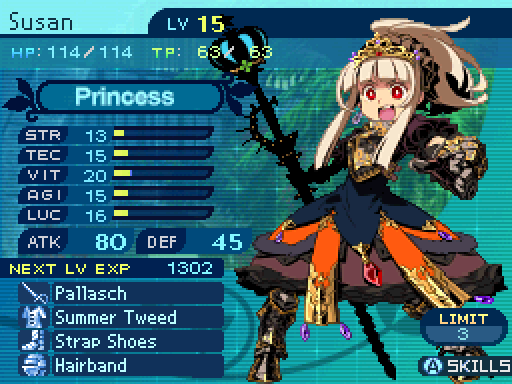
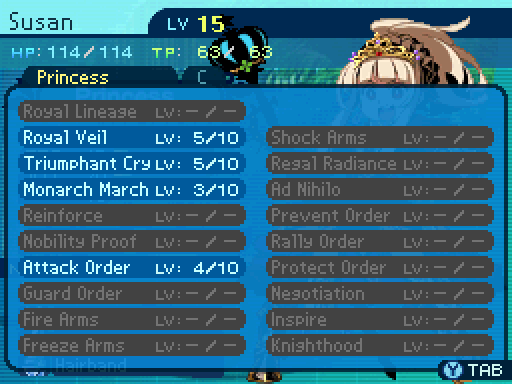
Princesses can help your party take down the boss with their buffs. Both Attack Order and Guard Order can be helpful in the fight, although Guard Order won't work on one of its attacks. If yours has Prevent Order, that could come in handy, but I don't think it's necessary to do that.


 I wonder how tough this catfish is. Can't wait to see for myself.
Gladiators are also decent damage dealers, and they can charge up their physical attacks and Limits to deal a lot of damage. They do have access to an AOE skill, but the skill is pretty awful, and I wouldn't recommend getting it just for this fight.


 Come all you young sailor men, listen to me. I'll sing you a song of the fish in the sea.~

Hanging now deals 236% damage and has a 58% chance to inflict Head bind.
Buccaneers don't have a lot going for them at this point in the game, but they can provide some utility with Eagle Eye and lower the boss' physical defenses if you have that for them.
 I guess I can't make friends with the catfish. Oh well.
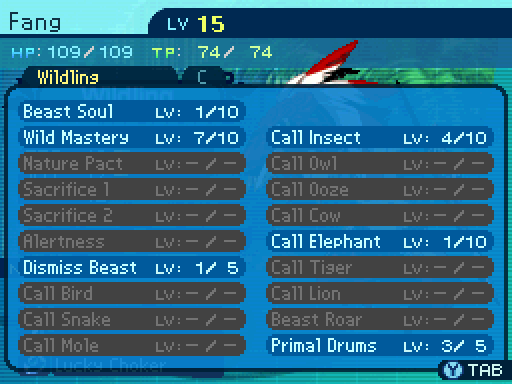
Wildlings can be a mixed bag depending on how you skilled them. They do have a AOE damage move, so they can be helpful for the fight, but the boss is pretty resistant to ailments, meaning that they'll run out of things to do fast. At least Primal Drums is a really good utility skill.

 I hope I won't bring the guild down if I come along.
I don't know what you're expecting to accomplish by bringing a Farmer to the fight.
Anyways, here's a bit of info on the boss, and some tips.
Stratum 1 Boss
HP: 3281
AT: 20
DF: 16
Weakness: Volt
Resistance: N/A
Absolute must haves:
-Any Amritas you've saved up will come in very handy here, since this fight could last a while depending on your team composition.
-Tents. Maybe two of them. This may sound like strange advice, but just trust me on this.
-Any ways to dispel ailments, whether it's through a Monk's Refresh or Therica Bs.
Highly recommended, but not required:
-Any form of Volt damage will make the fight go by faster.
-AOE damage moves or a Bunshin Ninja will make the fight easier on yourself, but aren't required as long as you have a good memory.
Just don't:
-Using up that Formaldehyde on the first boss. Its conditional drop is an easy one to get as long as you come back for it later. Save the Formaldehyde for the actually tough drops.
-Trying to even get the conditional drop. If you qualify for the conditional drop, the game will prevent you from getting the regular drop. Boss conditionals tend to unlock postgame equipment that you can't afford, while their regular drops unlocks a decent piece of equipment for one of your classes. The boss conditionals do sell for a decent amount, but as long as you play smart you shouldn't have too many money troubles. Also, bosses don't respawn until you reach the final floor of the next Stratum, so you can't even farm for them. And by the time they respawn, the equipment you unlock from their regular drops will be outclassed.
With that in mind, vote for up to 3 characters to come along for the fight. Votes must be bolded.