Toggle Background Color
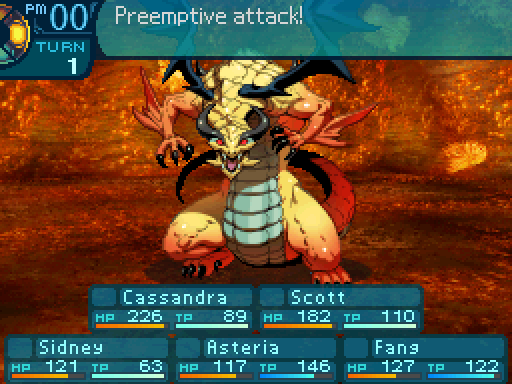
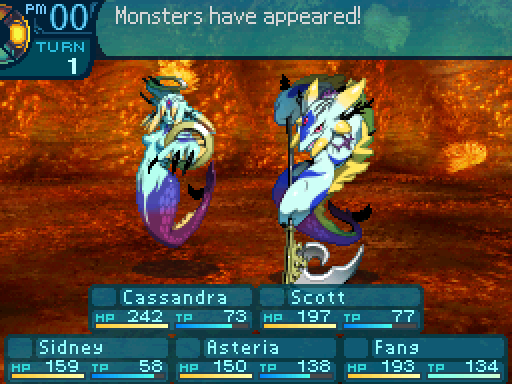
Update 35: The Deep Ones

 We'll take these, and several bottles of your finest medicine.

 Your patronage is appreciated.
 I see those Ental signs in your eyes, lady.
Don't you have a Labyrinth that you should be exploring?


 Okay! Time to try out these new shoes!
 It feels so good to have feet again!
Yeah, Faye's a miracle worker when it comes to healing.

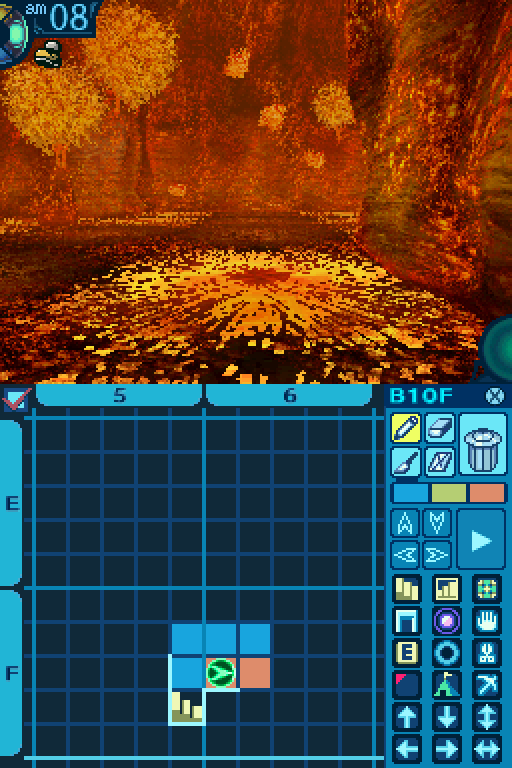
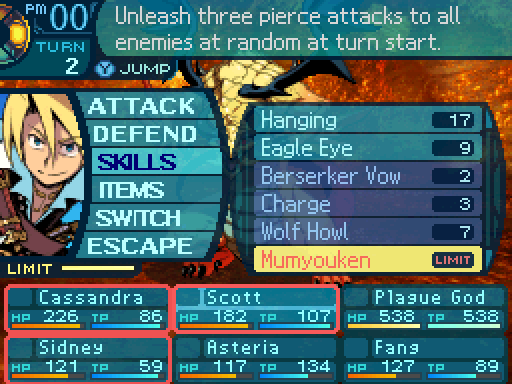
That shoe icon that appeared in the top left corner signifies that we can ignore damage and mud tiles as long as it's still on the screen.
Hey, they actually work!
 Okay, now can you people stop whining about the floor?
There shouldn't be any more reason to complain now that we have these.
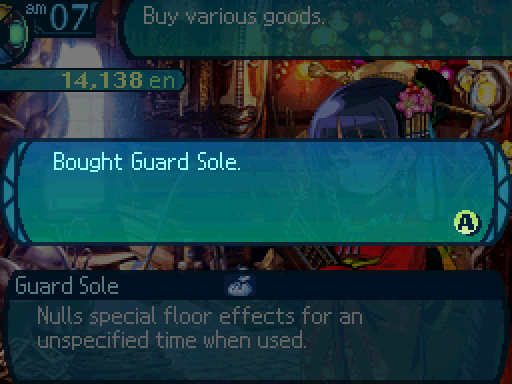
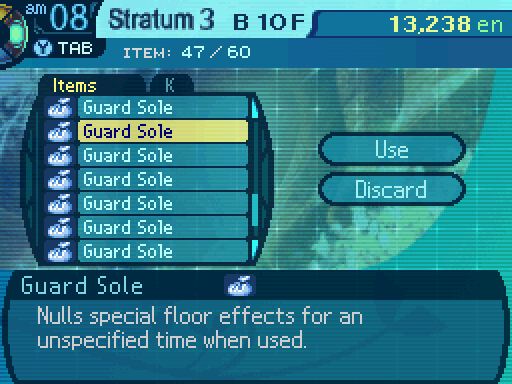
Unfortunately, there's one problem with Guard Soles.
Hey, what happened to our feet protectors!?
Must have been a faulty set. Let's put on some more.

Huh. There's a sheet of paper with one of these shoes. It says, these Guard Soles only last for...

I think we just got ripped off big time.
Well at least we bought several of them.
Yeah, Guard Soles act like a level 1 Rain or Shine, so you have to use them wisely.


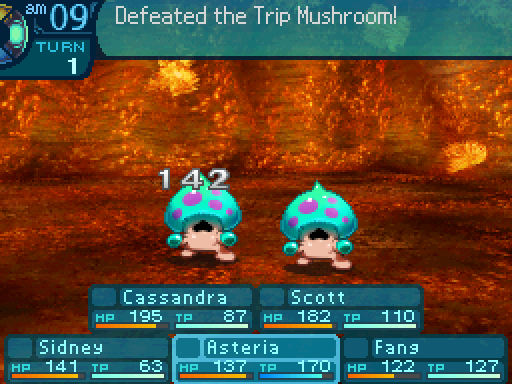
Trip Mushroom
HP: 332
TP: 101
STR: 24
VIT: 24
AGI: 22
LUC: 32
TEC: 28
Attack Type: Strike
Exp: 939
Item Drops:
-Drop 1: Muddle Hypha - 35% Drop Rate. 1 needed for Roundel Dagger (Dagger. Must be restocked.) 2 needed for Hard Gloves (Gloves.)
--Saps the consciousness of its unwitting victims.
-Drop 2: Umbrella Lump - 10% Drop Rate. 1 needed for Aketon (Light Armor.) 2 needed for Caresche (Helmet.) 3 needed for Shashqa (Sword.) 5 needed for Panic Guard (Accessory.)
--Umbrella that looks light, but cannot be easily lifted.
-Gold: N/A
Description: A mushroom that walks the forest on pseudopods. Inhaling its spores can cause unconsciousness.
Damage Resistances: Slash: 100% Strike: 100% Pierce: 100% Fire: 150% Ice: 100% Volt: 100%
Ailment Resistances: Sleep: 100% Confusion: 25% Plague: 100% Poison: 100% Blind: 100% Curse: 100% Paralysis: 100%
Bind Resistances: Head: 100% Arm: 100% Leg: 100%
Other Resistances: Death: 100% Petrification: 100% Stun: 100%
Skills:
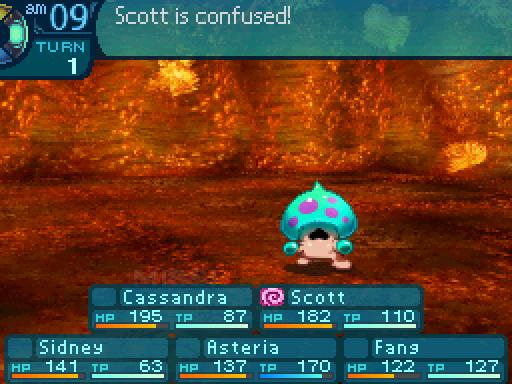
Panic Spores: Uses the Head. Attempts to inflict Confusion on a row, and has a 30% chance of succeeding.
Trip Mushrooms should be killed immediately whenever you see them in battle. Confusion is one of the worst ailments to be inflicted with, and they love casting this on the front row. Fortunately they aren't like the Venomshrooms, and don't have a skill they cast when they die.

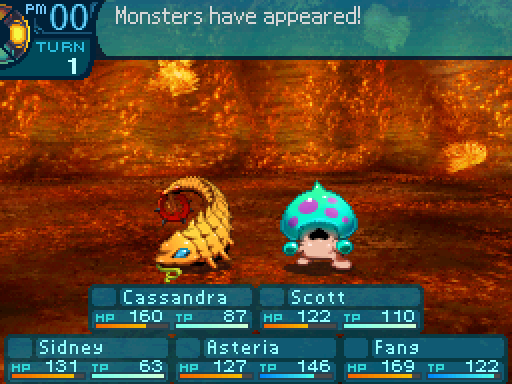
Open fire!

Sorry, but there wasn't mushroom in this Stratum for the both of us.

Oh my god, why am I holding a sword!?


The last thing you want is your entire front line incapacitated.
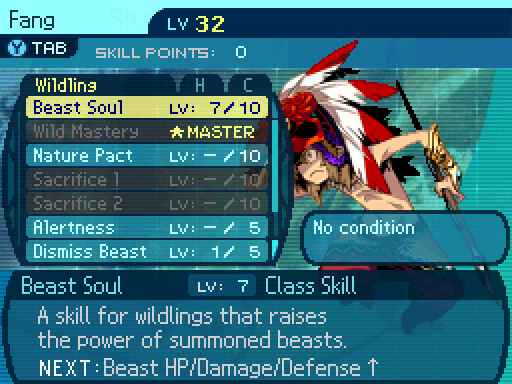
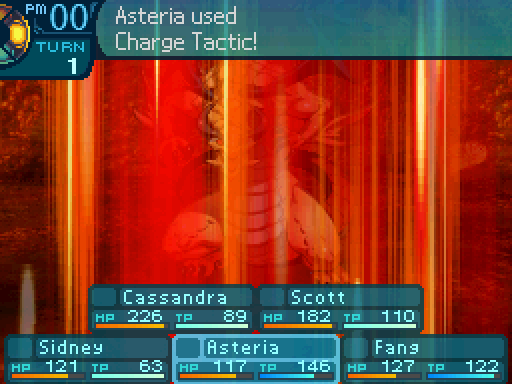
Beast Soul increases Fang's animals' HP by 35%, their attack by 56%, and their defense by 35%.


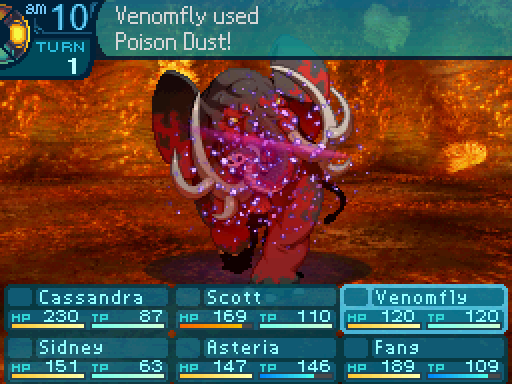
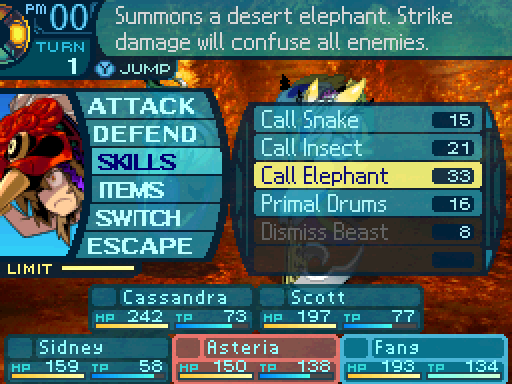
Cave Elephant
HP: 718
TP: 104
STR: 34
VIT: 33
AGI: 23
LUC: 27
TEC: 28
Attack Type: Pierce
Exp: 2154
Item Drops:
-Drop 1: Red Tusk - 85% Drop Rate. 1 needed for Elephant Gun (Gun) and Adama Armor (Heavy Armor. Must be restocked.) 3 needed for Idaten Book (Book.) 1 needed for the quest Messages from aeons past II.
--Ancient elephant’s tusk used to gore trespassers.
-Drop 2: N/A
-Gold: N/A
Description: An ancient elephant that survived through natural selection. Its charge is fearsome to behold.
Damage Resistances: Slash: 100% Strike: 100% Pierce: 75% Fire: 100% Ice: 75% Volt: 150%
Ailment Resistances: Sleep: 100% Confusion: 100% Plague: 100% Poison: 122% Blind: 100% Curse: 100% Paralysis: 122%
Bind Resistances: Head: 100% Arm: 100% Leg: 100%
Other Resistances: Death: 100% Petrification: 100% Stun: 100%
Skills:
Withering Glare: Uses the Head. Lowers the physical defenses of the entire party by 40% for 4 turns.
Charge In: Uses the Legs. Deals 110% Strike damage to the entire party.
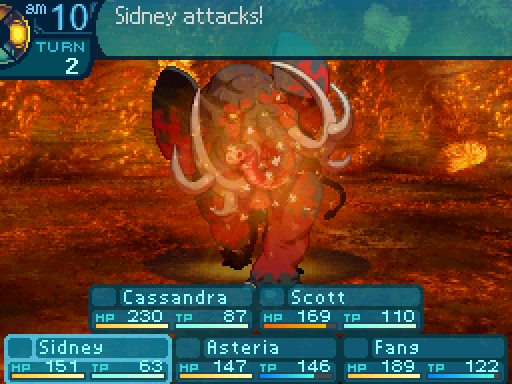
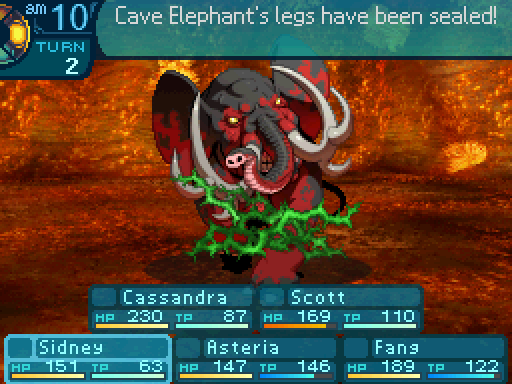
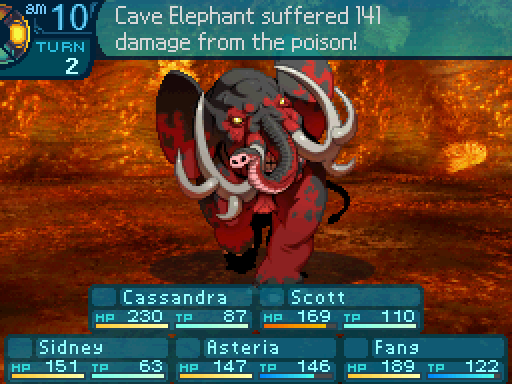
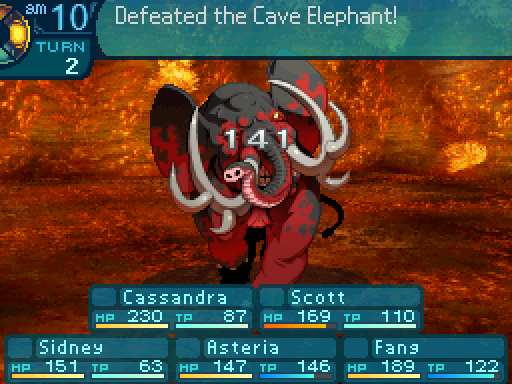
And here's the strongest enemy on this floor, in case those Stegosauruses weren't enough for you. They lower your party's defenses and then hits everyone hard with Charge In. If you don't have Volt attacks, you'll be in for a rough time. Though ailments and binds, especially Paralysis, work wonders on it.

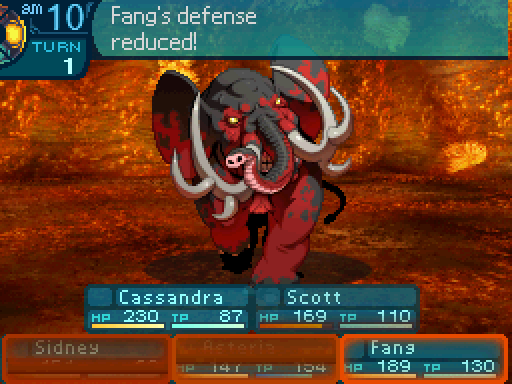
It loves to cast Withering Glare on the first turn. Try to capitalize on that.
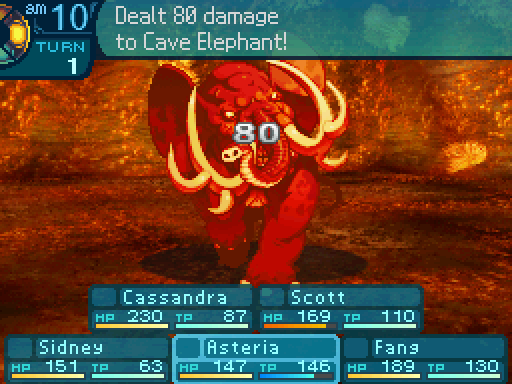
Also used the completely wrong element on it. Agh.
Get him, Mr. Butterfly!
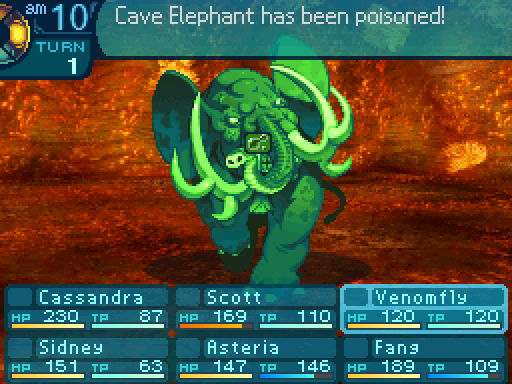


It's also super susceptible to Poison, if you have a good way to inflict that.

You're not going anywhere!
Also got really lucky with the Leg Bind Forges proccing on that hit.

It's a matter of having the right tools for the situation. If you don't have a good way to deal with them, well there's no shame in running.

D6 Chop Point:
Trileaf Stalk: 30% Gather Rate. 1 needed for Spear-thrower (Crossbow) and Langyabang (Mace.) 10 needed for Nirili (Mace.)
-It has sharp thorns normally found in hedges.
Pagoda Branch: 70% Gather Rate. 1 needed for Goudendag (Mace.) 3 needed for Hayakaze (Spear. Must be restocked.)
-Known for its resilient, egg-shaped leaves.
Poinciana Pod: Rare. 1 needed for Critical Belt (Accessory.) 3 needed for Idaten Book (Book.) 5 needed for Fire Cannon (Gun.)
-Pod that grows into a sword-shaped shoot with a sharp tip.
Common Gather Periods: 2 to 12.
Rare Gather Periods: 1 to 5.

Holy moly, there's a lotta dragons in here!
They must be the ones laying those eggs.
I don't think they noticed us. Maybe we can go past the-
Incoming!


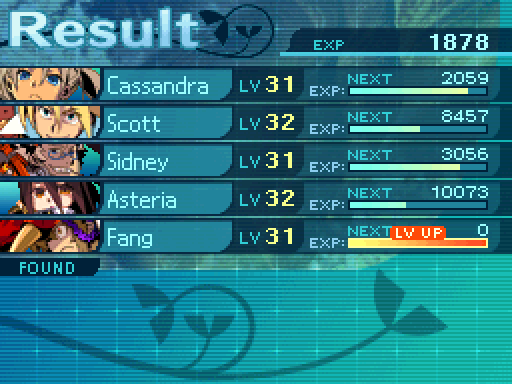
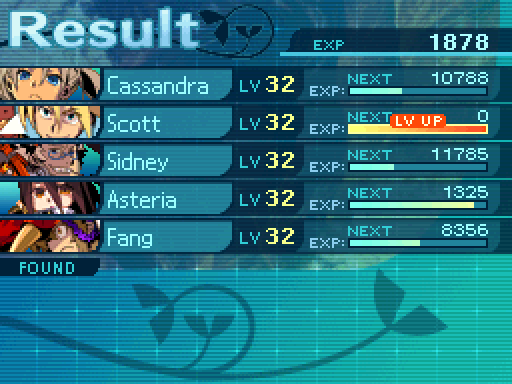
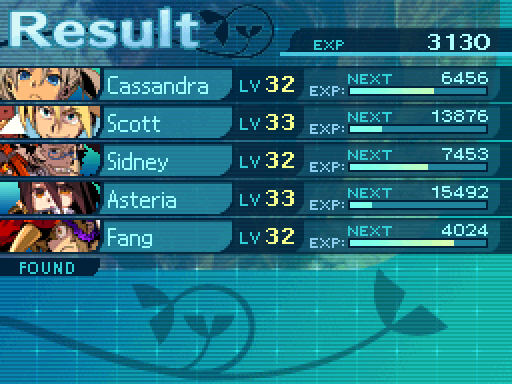
Got a level up out of that fight.

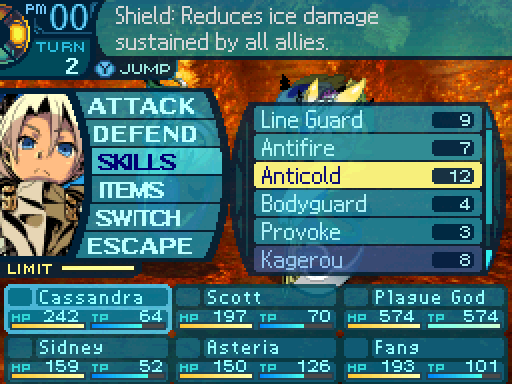
Anticold reduces the damage taken from Ice attacks by 55%. At this rate, Cassandra should max out this skill before I really need it.

Hey, I think those dragons are looking at us now.
Looks like they moved from their original spots too. I guess the ruckus from our fight must've gotten their attention.

The FOEs will face a random direction every turn, so if you can time it right, you can get behind them and get a preemptive strike.
Gah! Forgot to put on a new pair of shoes!
Oh, and another engine change that serves as a screw you to the player. If you get into a battle on a damage tile, you'll take damage before getting into a battle.


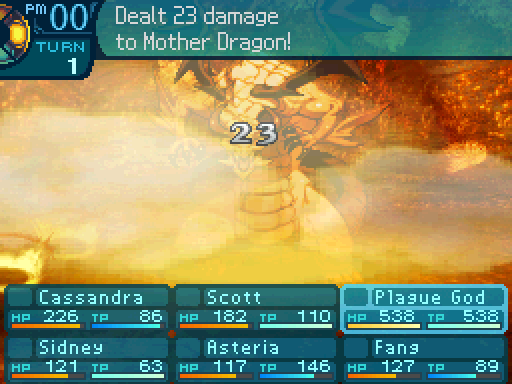
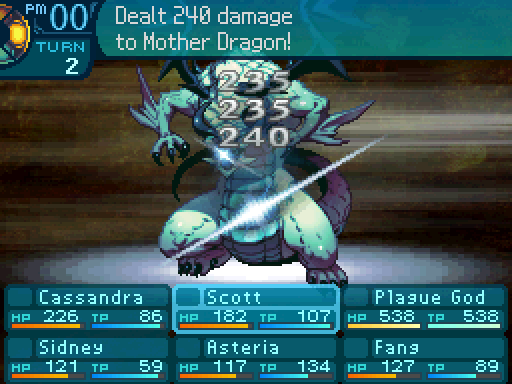
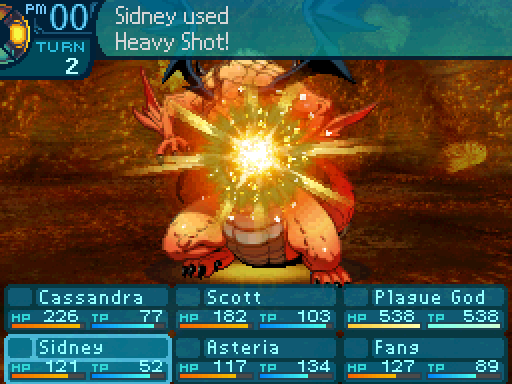
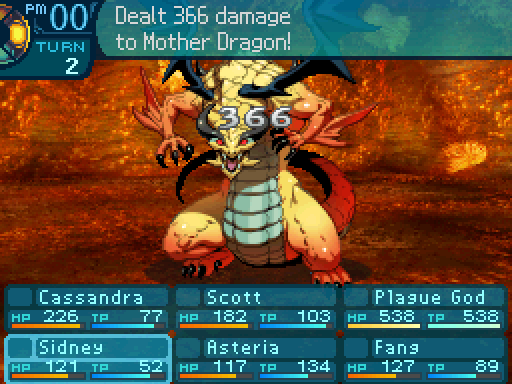
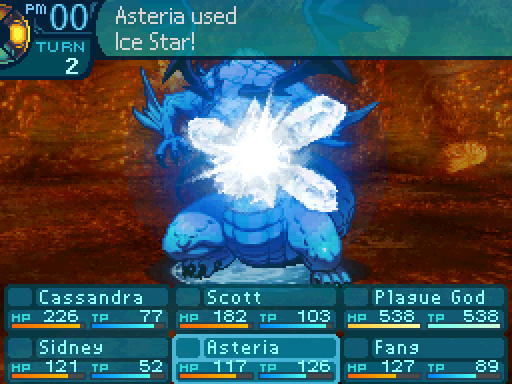
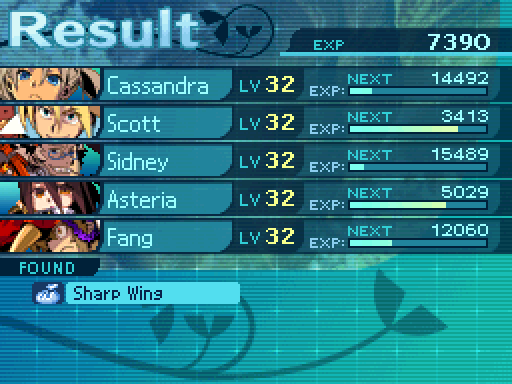
Mother Dragon
Behavior: Immobile during the night. Will attempt to ambush the party if they get into a battle during the day. Can fly over lava tiles.
Aggressive: Yes if it's daytime. No if it's nighttime.
HP: 1840
TP: 532
STR: 42
VIT: 39
AGI: 29
LUC: 29
TEC: 41
Attack Type: Slash
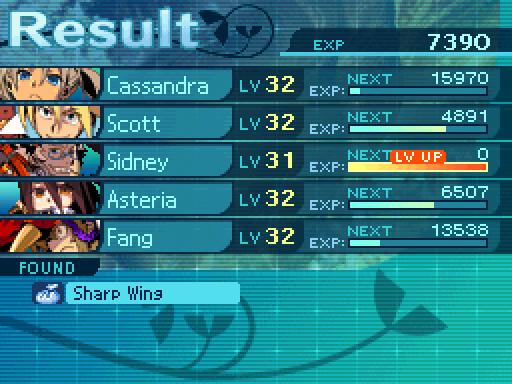
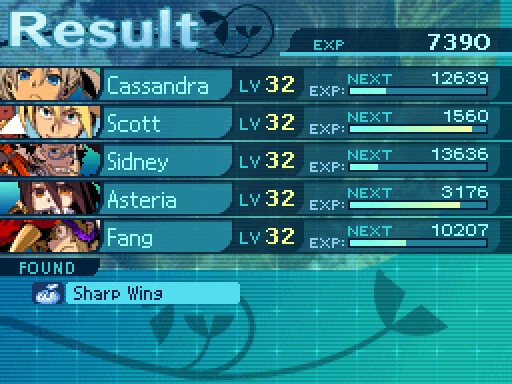
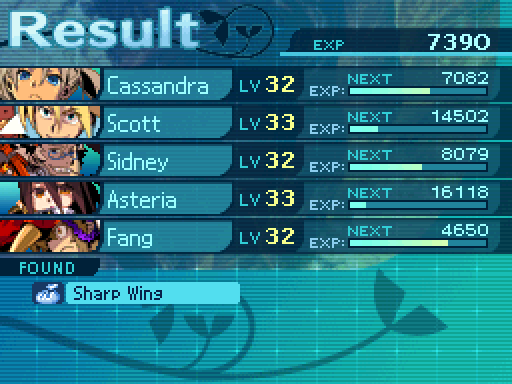
Exp: 7390
Item Drops:
-Drop 1: Sharp Wing - 65% Drop Rate. 1 needed for Macabuin (Sword. Must be restocked.)
--Wing that can fell trees by merely brushing past them.
-Drop 2: N/A
-Gold: Mother's Horn - Kill with Petrify. 90% Drop Rate. 1 needed for Nenekirimaru (Katana. Must be restocked.)
--Dragon’s horn robust enough to shatter whole boulders.
Description: A fire dragon that came to the caves to lay its eggs. Its superheated breath is quite fearsome.
Damage Resistances: Slash: 100% Strike: 100% Pierce: 100% Fire: 75% Ice: 125% Volt: 75%
Ailment Resistances: Sleep: 10% Confusion: 10% Plague: 10% Poison: 10% Blind: 10% Curse: 50% Paralysis: 10%
Bind Resistances: Head: 25% Arm: 25% Leg: 25%
Other Resistances: Death: 10% Petrification: 20% Stun: 50%
Skills:
Roar: Uses the Head. Attempts to inflict Head Bind on the entire party, and has a 50% chance of succeeding.
Lullaby of Rest: Uses the Head. Attempts to inflict Sleep on the entire party, and has a 30% chance of succeeding.
Blast Assault: Uses the Head. Deals 60% Fire damage to the entire party.
Yes the sprite is cut off like that in the game files. It was just too tall for the screen.
Right, so these things. Ice attacks are your best bet for dealing with them. Head binds don't have much of a chance of going through, but if you manage to land one, you can completely shut them down. Mother Dragons are dangerous because not only do they hit hard, they can lock down your party. Lullaby of Rest doesn't get used until the Mother Dragon gets below 67% of her HP, but Roar is still pretty threatening. It can shut down your support classes, and the TEC penalty from the Head bind increases Blast Assault's damage. I hope you have a way to reduce or nullify damage from Fire attacks.


Just setting up here.
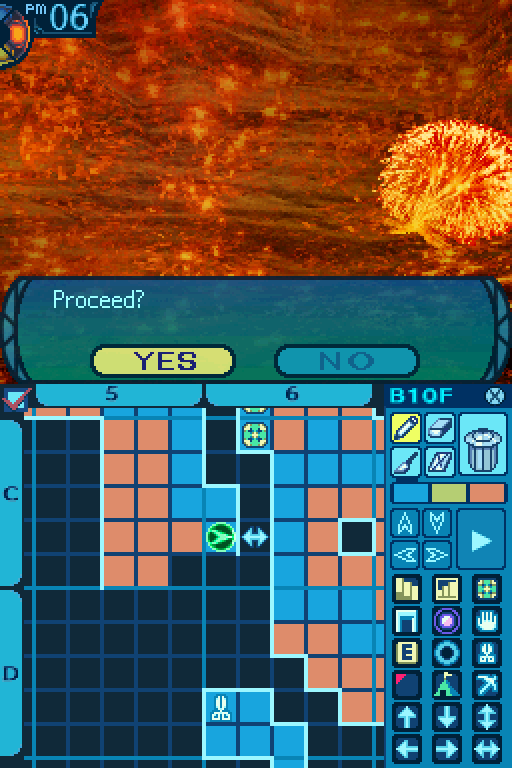
Proceed!
We smashed open a bunch of eggs and killed a few of your kids. I hope you weren't fond of them.
Why would you tell her that!?
Please help us! I think Cassandra made her really mad!
Unfortunately, I didn't Confuse the Mother Dragon.
Well slaying a dragon wouldn't do us any harm.~
So we'll roooll the old chariot along!~
An' we'll all hang on behind!~


Time to let loose.
Here's a blade in your eye! And your head! And your body!

I'm just tricky like that.
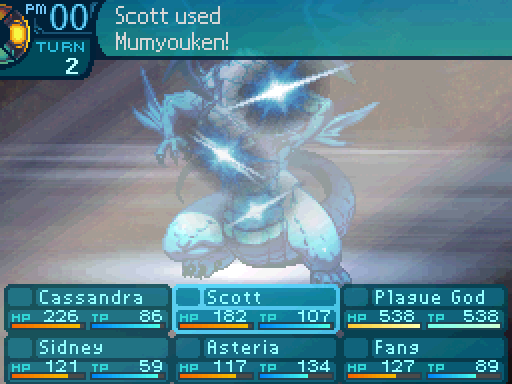
I'm demonstrating that Trickster will activate, even on Limit skills. Considering that a few of a Buccaneer's skills also let them fire off Limits sooner than other classes could, that essentially lets them have infinite or near infinite TP if you build one in such a way.


Looks like the scales were tipped in our favor.
Awww, I didn't get to play my drums. 
Maybe later, Fang.
You really want to end fights with Mother Dragons fast. Not only does that mean you don't have to deal with their ailments that often, but the other Mother Dragons in the room will try to join in on your fight if you take too long. You could try Petrifying them with a Ninja, since that also nets you their Gold Drop, but you'll have an 18% to 19% chance at best of pulling that off.
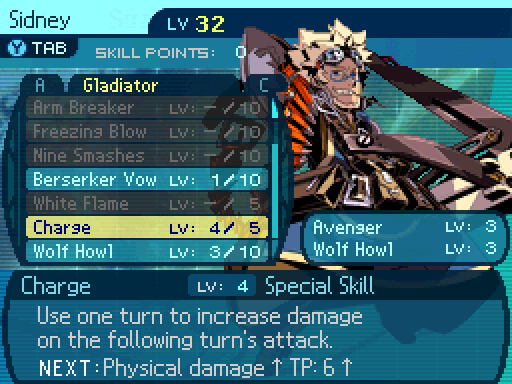
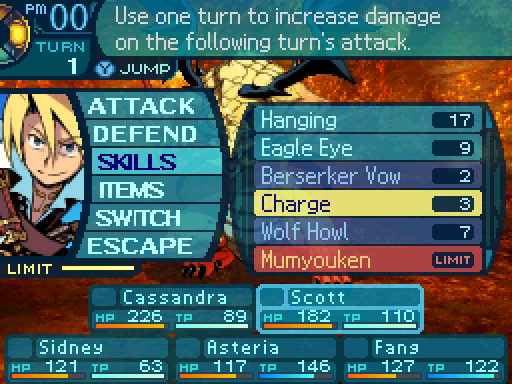
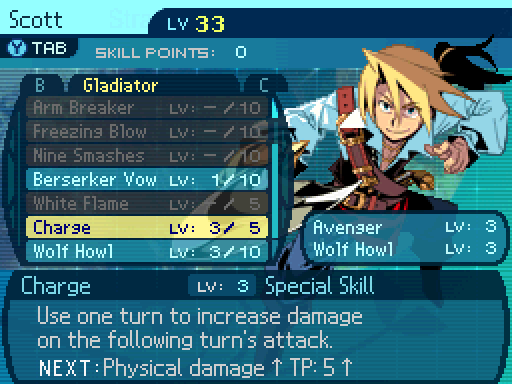
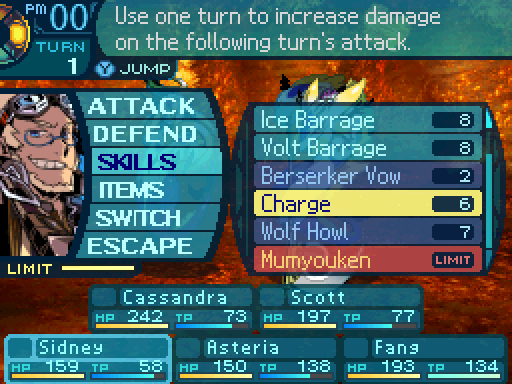
Once Charge is maxed out, I'll start working on Front Mortar. And maybe placing Sidney in the front lines once I do that.
Gonna kill all the FOEs in the room so I can get that sweet sweet exp. Also to make navigating this room easier on future visits.

Not all the Mother Dragons went down that easily, so I went back to town to restock on supplies.


The equipment I unlocked on this trip, though there's nothing of note here.
Ahhhh... Fighting all those dragons made me tired. Can I take a nap?
I think we could all use a break from that.
I take a rest at the inn and go back to the Labyrinth at night.

Not a great forge to make use of. After a certain point, ATK forges will increase your damage more than a STR forge will.
Now there's normally a Mother Dragon parked in front of this chest, but I happened to kill it earlier. In order to get to the chest, you'll either have to do that, or get into a battle to get it to move out of the way during the day. If it's night? You'll have to kill it.
TEC forges are nice, since ATK forges can't boost TEC damage.
More levels, more power.

Looks like this dragon is taking a little nap.
So those worms aren't the only ones that need to sleep at night.
Mother Dragons are completely immobile at night. They won't turn at all, and won't even try to join in on your battles. So navigating this Stratum at night is a good way to avoid FOE encounters.

Or you can use it to get easy preemptive strikes on all of them. When their back isn't pinned against a wall, anyway.

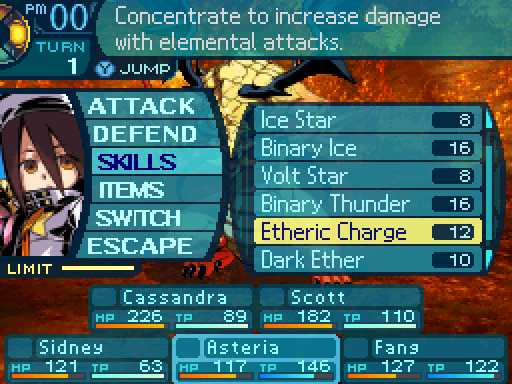
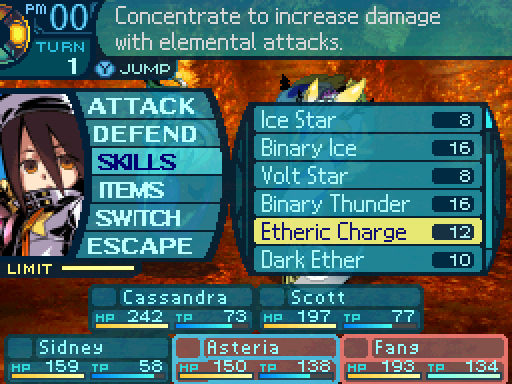
Ether Mastery gives an 8% boost to Elemental damage.
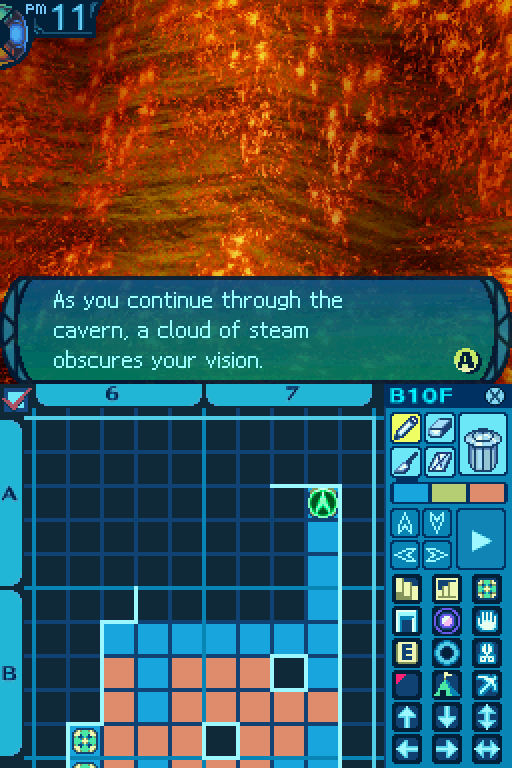
I can't see anything!
Ah. It seems we stumbled upon a hot spring.
Didn't one of our clients want to know more about these things or something?
You approach the steam and see hot water pouring from a rock. It seems to be a hot spring. You decide to sit here and investigate the spring for the request you accepted.
Might as well take a little dip and give it a try while we're jotting down notes. Ahh... How refreshing!
Um, Scott? You're supposed to take your clothes off before you go into a hot spring.
Eh, I'm used to it. Had a couple of nasty overboard incidents during my pirating days.
The warm water is just the right temperature to cure your exhaustion... You write down the effects of this hot spring and its coordinates. You can go back to the bar to report in, or try finding more spring sources elsewhere.
If you're not on that quest, this hot spring will actually heal your entire party for 50 HP.

And here's the last Mother Dragon in the room.
And with that Mother Dragon dead, Guild Tidehunt has orphaned several baby dragons, and disrupted the flow of the Labyrinth's ecosystem.
Eh, they'll be back in 7 days.
I'm fairly certain those weren't the only ones in the area.
Aw, did we have to kill them? I think we made all their babies sad.
They were wild animals who wanted to kill us. It was us or them, Fang.
Oh great.

Oh that's just disgusting!
Ha ha! That's cool! Can you do that again?
How about no?

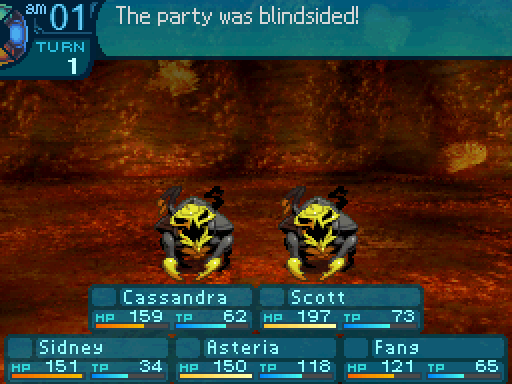
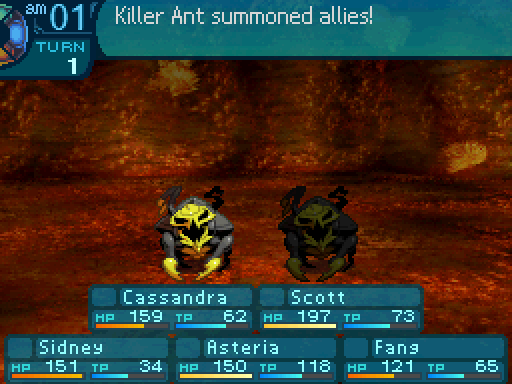
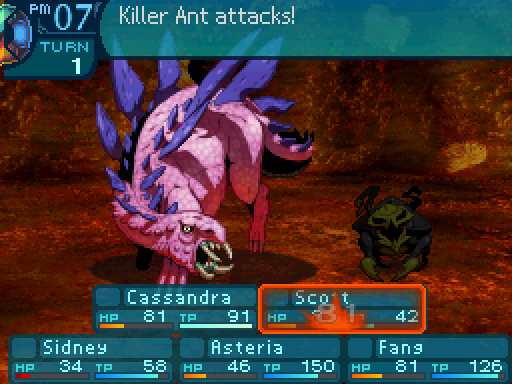
Killer Ant
HP: 293
TP: 102
STR: 30
VIT: 19
AGI: 26
LUC: 26
TEC: 24
Attack Type: Strike
Exp: 771
Item Drops:
-Drop 1: Black Fragment - 30% Drop Rate. 1 needed for Epee (Rapier.) 4 needed for Caresche (Helmet.) 5 needed for Beast Bell (Item) and Backsword (Rapier.)
--Piece of an ant’s black bone that contains a unique iron.
-Drop 2: N/A
-Gold: N/A
Description: An ant that nests in dry areas. When it finds enemies, it binds them in place for the kill.
Damage Resistances: Slash: 100% Strike: 100% Pierce: 100% Fire: 150% Ice: 100% Volt: 100%
Ailment Resistances: Sleep: 100% Confusion: 100% Plague: 100% Poison: 50% Blind: 100% Curse: 100% Paralysis: 50%
Bind Resistances: Head: 100% Arm: 122% Leg: 100%
Other Resistances: Death: 100% Petrification: 100% Stun: 100%
Skills:
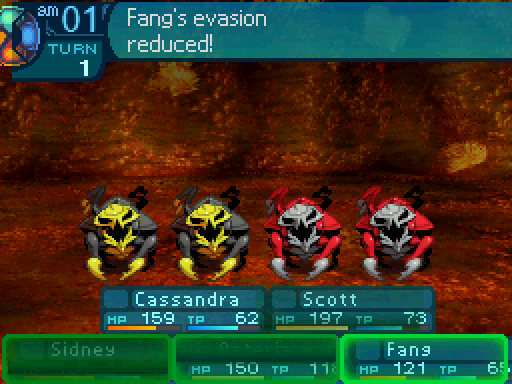
Sticky Acid: Uses the Head. Lowers the entire party's evasion by 50 for 4 turns.
Summon: Does not use a body part. Summons 2 Guardian Ants.
So these are the regular enemy versions of the Pomona Takers. The main difference is that they can summon Guardian Ants. They'll do that if they blindside you, if you don't kill them fast enough, or if they're alone. They'll only summon other ants once. Speaking of the Guardian Ants...

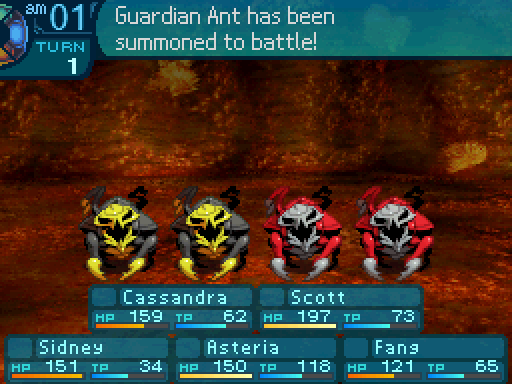
Guardian Ant
HP: 322
TP: 103
STR: 26
VIT: 25
AGI: 22
LUC: 26
TEC: 29
Attack Type: Strike
Exp: 794
Item Drops:
-Drop 1: Red Fragment - 30% Drop Rate. 1 needed for Spear-thrower (Crossbow), Jackboots (Boots), and Stun Gas (Item.)
--Ant’s bone fragment that has hardened and turned red.
-Drop 2: Sturdy Timber - 20% Drop Rate. See 2nd Stratum Chop Point info for more details.
-Gold: N/A
Description: An ant that nests in dry areas. When it finds enemies, it makes a fort and awaits backup.
Damage Resistances: Slash: 100% Strike: 100% Pierce: 100% Fire: 150% Ice: 100% Volt: 100%
Ailment Resistances: Sleep: 100% Confusion: 100% Plague: 100% Poison: 50% Blind: 100% Curse: 100% Paralysis: 50%
Bind Resistances: Head: 100% Arm: 122% Leg: 100%
Other Resistances: Death: 100% Petrification: 100% Stun: 100%
Skills:
Defend Stance: Uses the Legs. Increases all enemies' physical defenses by 30% for 4 turns.
Summon: Does not use a body part. Summons 2 Killer Ants.
And the Guardian Ants are the more defensive versions of the Killer Ants. Instead of lowering your party's evasion, they'll increase their allies' defenses. Take them out quick if they haven't used Defend Stance or summoned Killer Ants. Otherwise, save them for last, since they're not really a threat in most cases. They can also summon 2 Killer Ants if they blindside you, you take too long to kill them, or if they're alone. But they can only do that once.
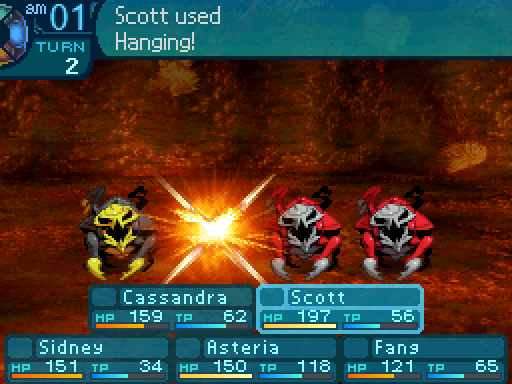
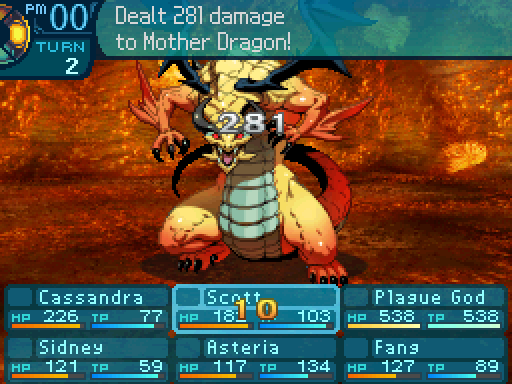
By the way, Scott can one shot most enemies in the Stratum with Hanging. The power of the Jolly Roger!
Not much to these enemies. The Killer Ants are the damage dealers, while Guardian Ants are the supports.
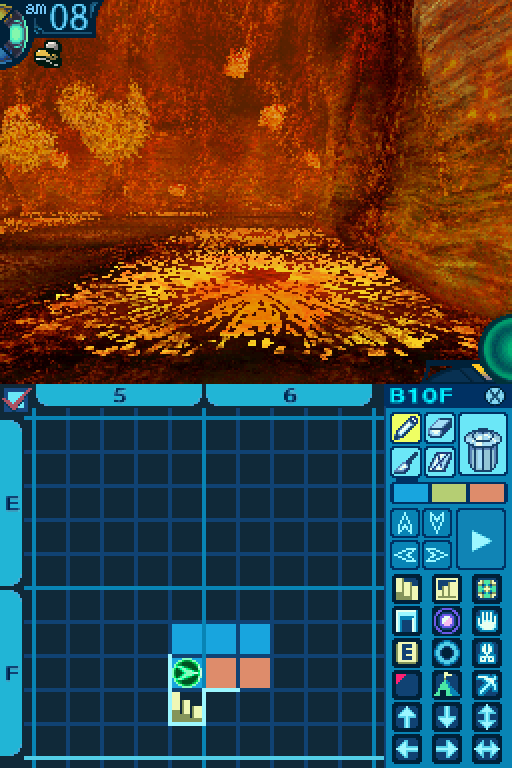
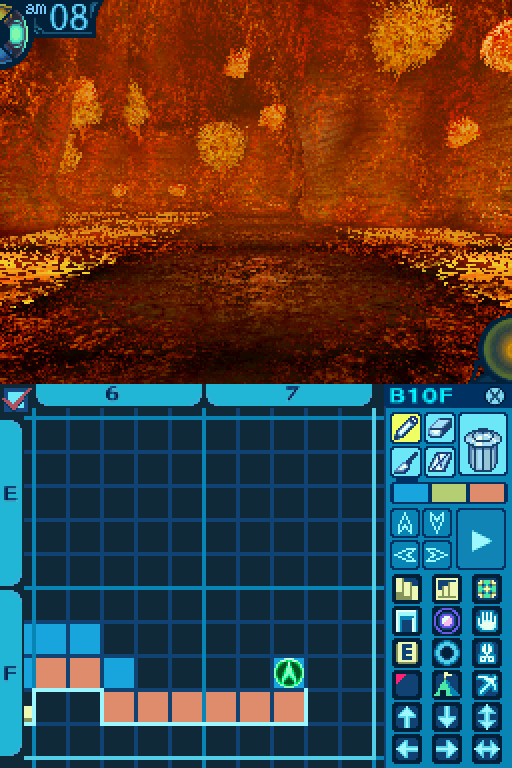
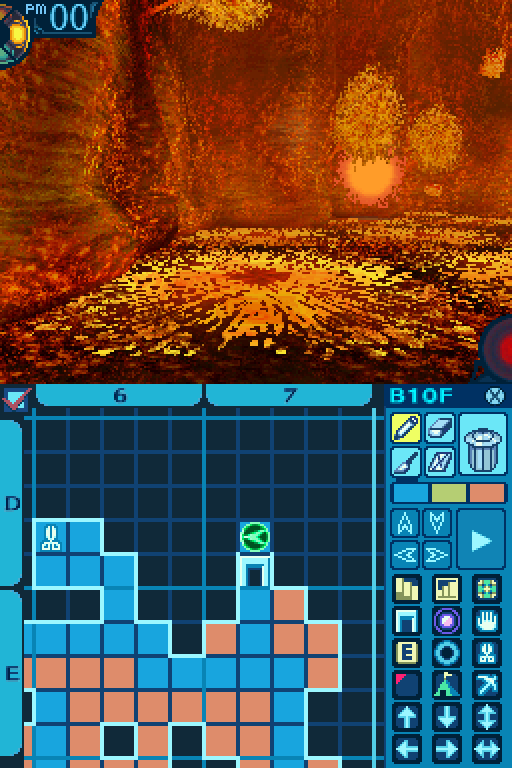
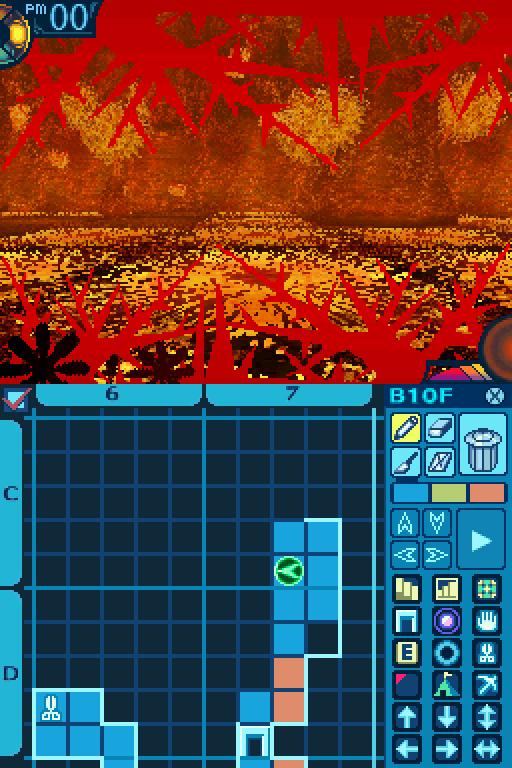
More damage tiles in this corridor. Good thing I bought all those Madoras and Guard Soles.
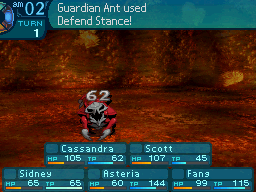
Defend Stance in action. Whenever an enemy uses an AOE buff, that animation will play.

Hey, a 2nd hot spring!
Time for another dip!
You approach the steam and see hot water pouring from a rock. It seems to be a hot spring. You decide to sit here and investigate the spring for the request you accepted. The warm water is just the right temperature to cure your exhaustion... You write down the effects of this second hot spring and its coordinates. You can go back to the bar to report in, or try finding more spring sources elsewhere.
The 2nd hot spring for that quest. This one restores 50 TP if you're not doing that quest.
Man overboard!
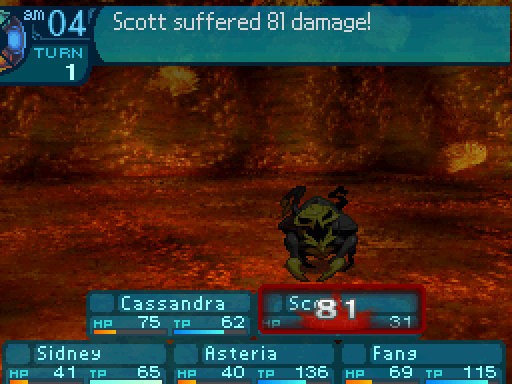
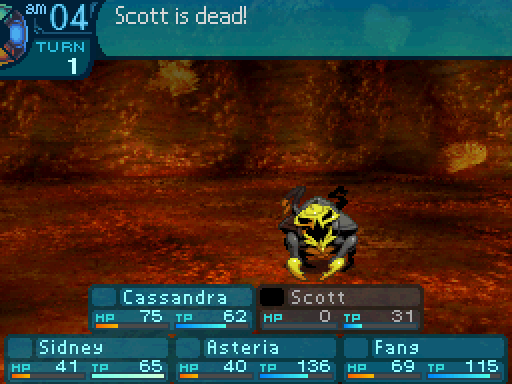
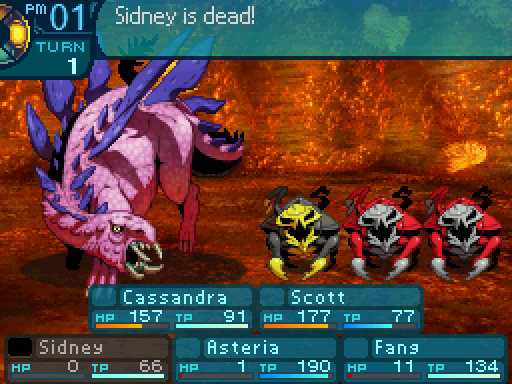
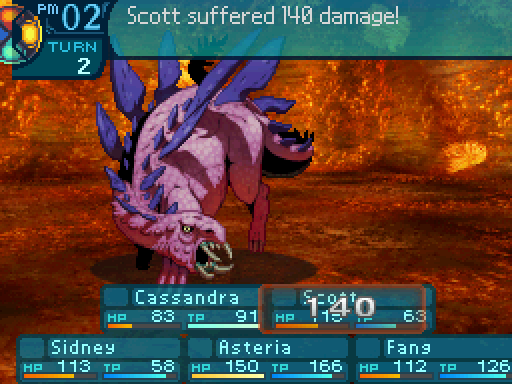
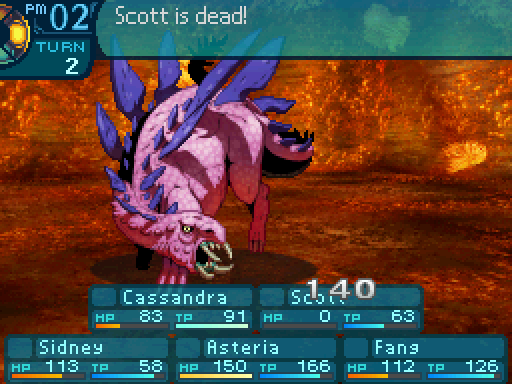
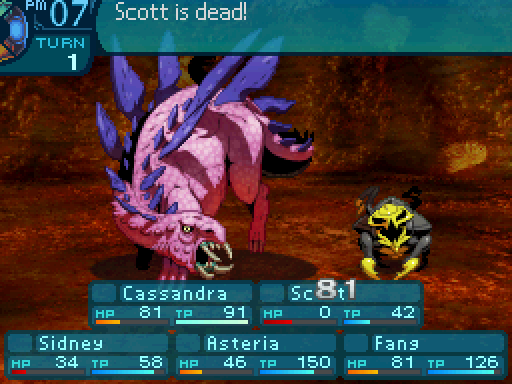
Unfortunately, walking on all those damage tiles left Scott at low HP. So the Killer Ant one shot him.
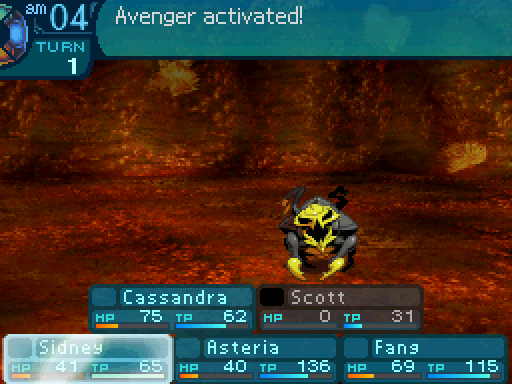
Don't worry Scott! I'll avenge, ya!
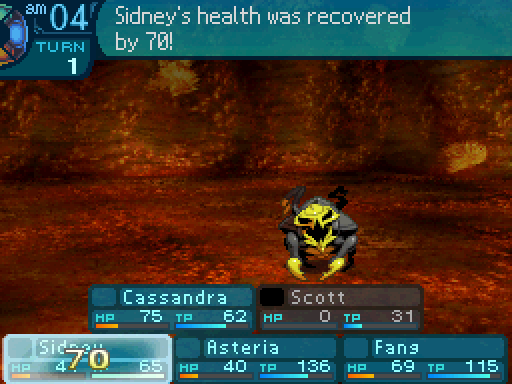
And here's Avenger activating. I suppose there might be a few situations where it comes in handy.

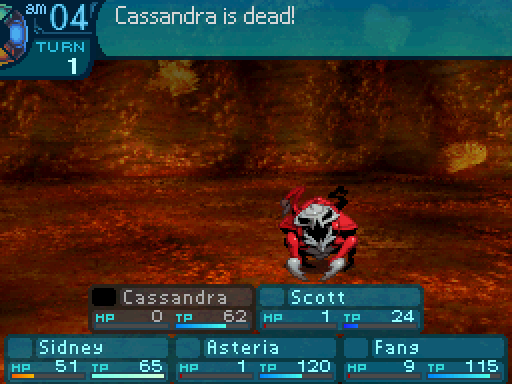
That was completely and utterly humiliating.
And I didn't learn my lesson, because the same thing happened later with Cassandra. Yeah, you'd have to be really careless to let your Hoplite of all classes to die like that.
And here's the last hot spring needed for the quest.
You approach the steam and see hot water pouring from a rock. It seems to be a hot spring. You decide to sit here and investigate the spring for the request you accepted. The warm water is just the right temperature to cure your exhaustion... You write down the effects of this third hot spring and its coordinates. This should be more than enough. All that’s left is to turn your report in to the bar.
That should be more than enough for Ottie!
Ah, that was a relaxing soak. I hope my armor won't rust from the water.
Finding all 3 hot springs will net you the maximum reward. Oh and if you're not on the quest, one of your characters will lose 50 HP because this hot spring is too hot. I go back to town to hand in my quest report.


Stun Gas has a chance to inflict Paralysis, not Stun, on all enemies. Not that useful, to be honest.

 Welcome back! Did you find the source for the hot springs? Fantastic!
She has a couple of different things to say, depending on how many hot springs you found. If you only found 1:
Hmm... So the hot springs are in the Labyrinth, too. Do you think they’re safe to bathe in?
If you found 2 of them:
Wow, you found two sources!? I’m sure Ottie will be pleased!
If you found all 3:
Wow, you found three sources!? I bet Ottie’s gonna be really pleased about that! Say... Have you ever tried the hot springs here in Armoroad? There is a famous resort here. The springs are popular among explorers, too! I love the hot springs! Nothing is beating a good hot bath after I close the bar! You should relax it back and kick in the hot springs once in a while, too! Well, here is your reward. Nicely done!

You only get 2000en if you only found 1, and 2500en if you found 2.
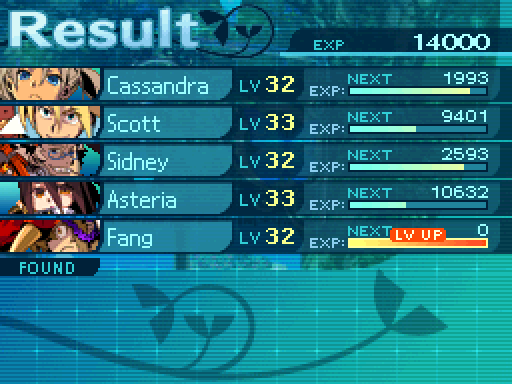
And a level up for Fang.
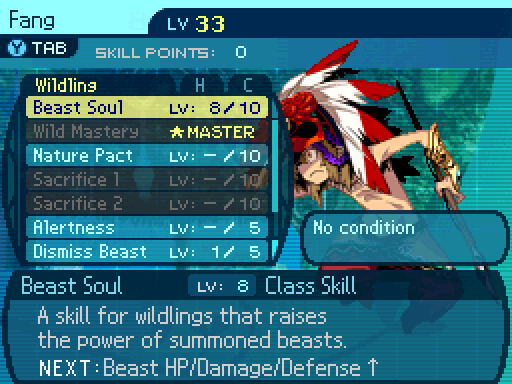
Beast Soul gives Fang's animals a 40% HP increase, a 62% ATK increase, and a 40% DEF increase.
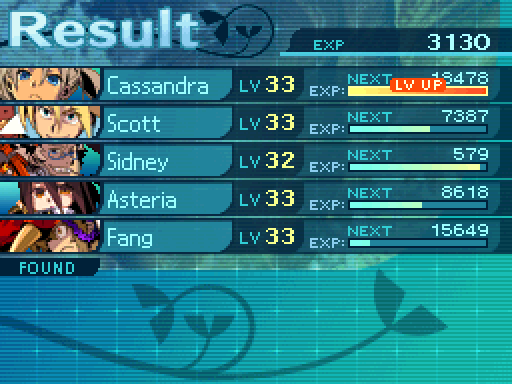
Back in the Labyrinth, Cassandra gets a very important level up.

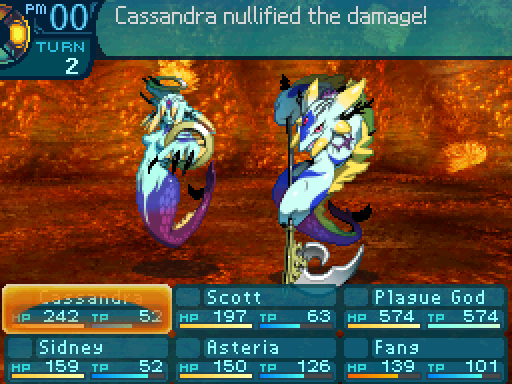
Because now Anticold completely nullifies Ice attacks. No one in the party will take damage from them for the turn, and if the attack had a secondary effect, like inflicting an ailment, the secondary effect will also be nullified. The Anti skills are very strong once maxed out, and are some of the best defensive skills in the game. No wonder they got removed in EO4.

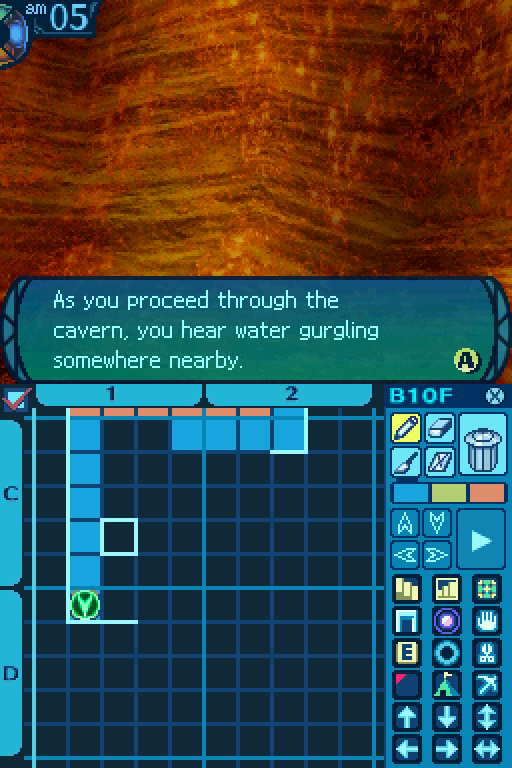
Man, I really hope there's not much more magma that we have to walk through.

Oh my.
Oh quit your whining. We bought all those Guard Soles for a reason.


Now that Charge is maxed out, I'm gonna work on maxing out Front Mortar. We're gonna be seeing some big damage numbers soon enough! 
D3 Chop Point:
Trileaf Stalk: 50% Gather Rate.
Pagoda Branch: 50% Gather Rate.
Poinciana Pod: Rare.
Common Gather Periods: 2 to 12.
Rare Gather Periods: 1 to 5.

Aw, shiiii-oooot.

Don't think you'll get away with taking down my fellow crew mates!

*blub blub blub*
Pictured: The result of those damage tiles lowering my party's HP enough for the enemies to kill my party members easily, and me being too lazy to heal up.
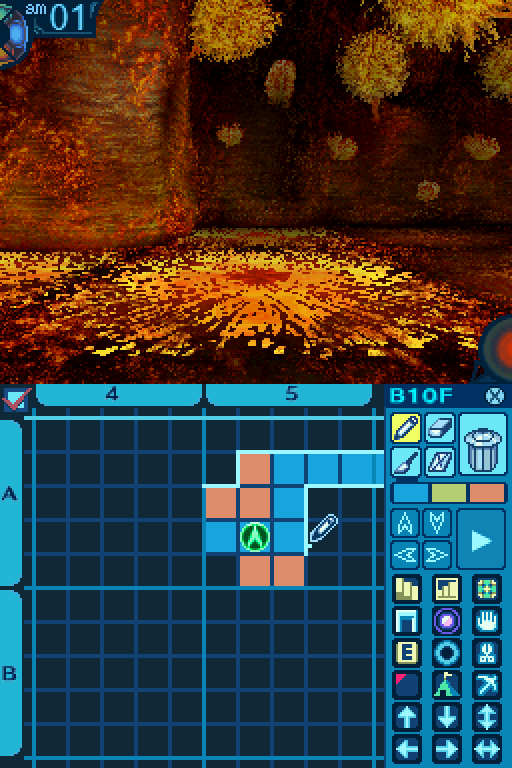
This is a pretty big room with lots of damage tiles.
And now we won't have to walk all the way around just to get back to this room.
Bury me at sea...
Really, Scott? Really?

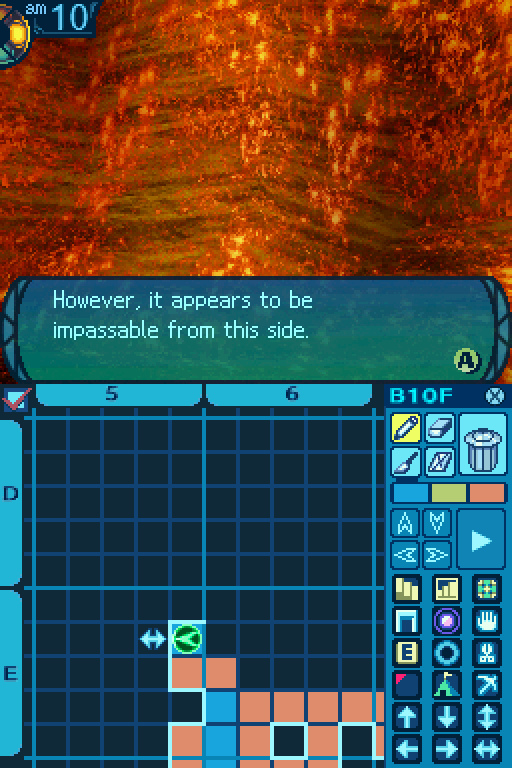
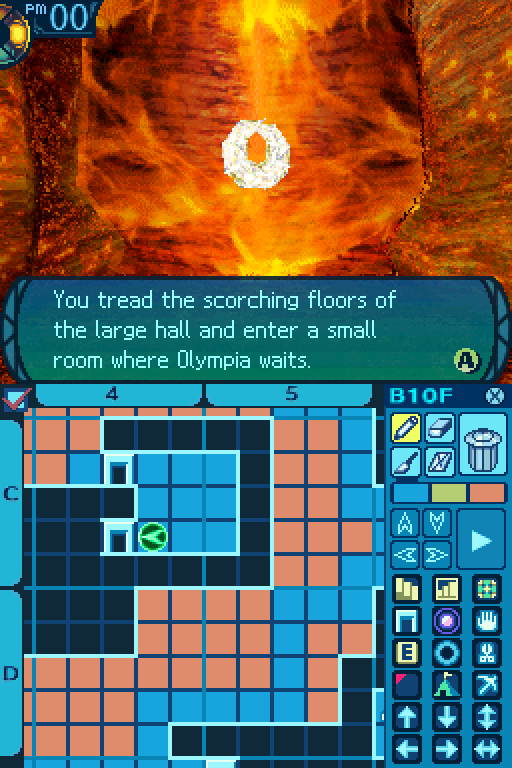
Olympia points out a rocky wall to the north beyond the scorching ground.
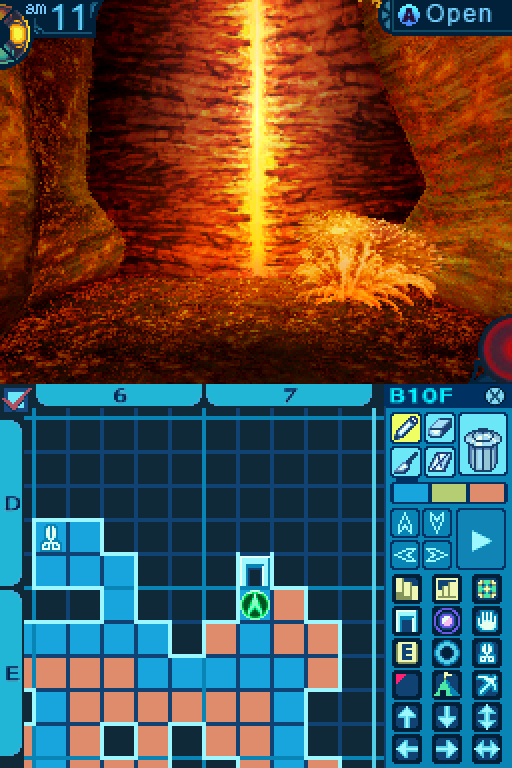
 The room in the center of this path is the Hall of Conviction, your destination. Proceed.

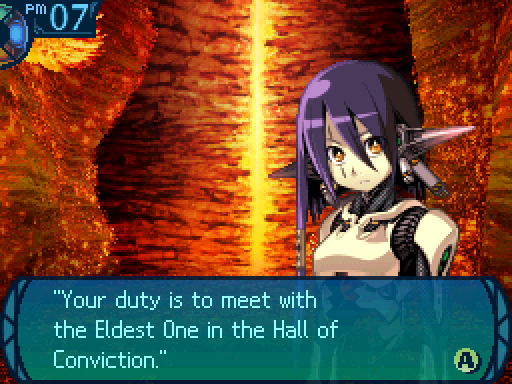
It seems that your first priority should be to meet with the Eldest One of the Deep Ones.
Um, thanks. I guess.

Okay, now let's get on with the mission.

Wait no screw that, there's a Pasaran to be killed!

Ugh, never mind. It's pretty much gone.
Video: The Deep Ones

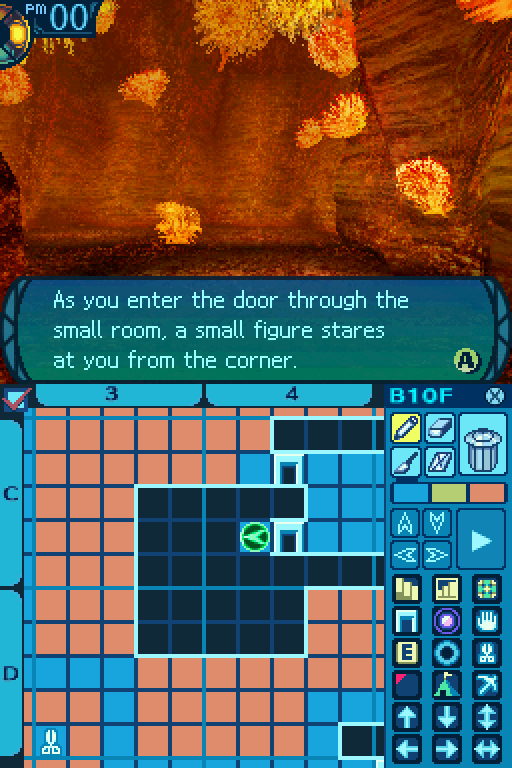
Olympia points to the door behind you and moves on. It seems the intense heat affects her little.
Beyond this special door is the Hall of Conviction and the Deep One. Have a care.
Olympia then produces a key and uses it to open the door before you.


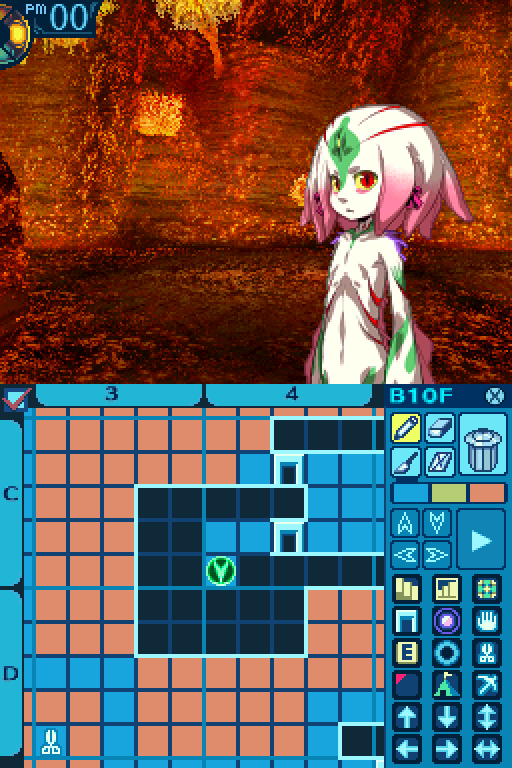
It appears human, yet aspects of it are clearly other. It looks somewhat like a young boy, but its crimson eyes glow eerily as they gaze at you.
What the hell is that thing?
I guess that's the Deep One they were talking about.
Huh?


Behind me! Now!
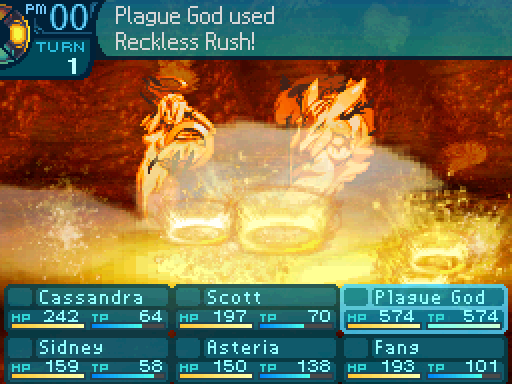
And we've got a mini-boss here. It's also a pretty tough one if you don't know how to deal with them.

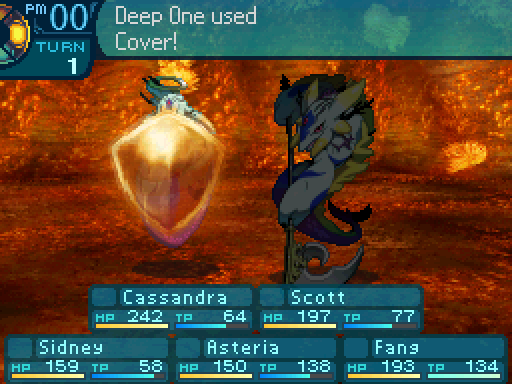
Deep One
HP: 1738
TP: 152
STR: 35
VIT: 34
AGI: 26
LUC:27
TEC: 30
Attack Type: Slash
Exp: 3617
Item Drops: N/A
Description: N/A
Damage Resistances: Slash: 50% Strike: 50% Pierce: 50% Fire: 150% Ice: 150% Volt: 150%
Ailment Resistances: Sleep: 122% Confusion: 50% Plague: 50% Poison: 50% Blind: 122% Curse: 50% Paralysis: 122%
Bind Resistances: Head: 50% Arm: 50% Leg: 50%
Other Resistances: Death: 1% Petrification: 1% Stun: 50%
Skills:
Cover: Does not use a body part. Protects an ally and takes damage in their place. Has an action speed of +20.
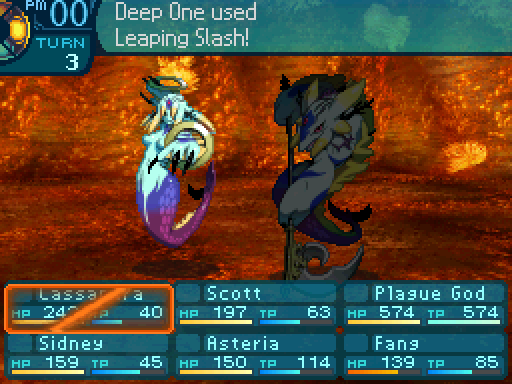
Leaping Slash: Uses the Arms. Deals 80% Slash damage to the front row.
Crystal Edge: Uses the Legs. Chaser skill. Deals 80% Slash damage to anyone that got hit by an Ice attack. Has an action speed of +60.
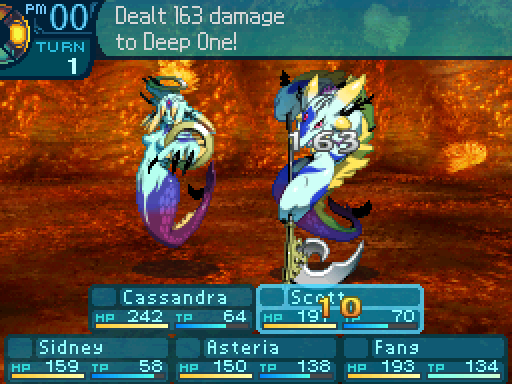
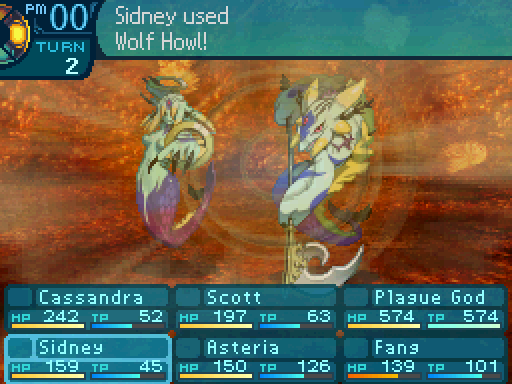
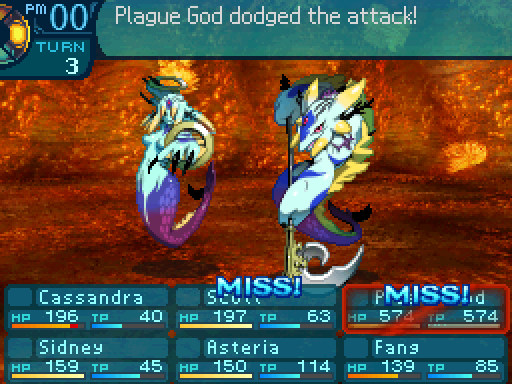
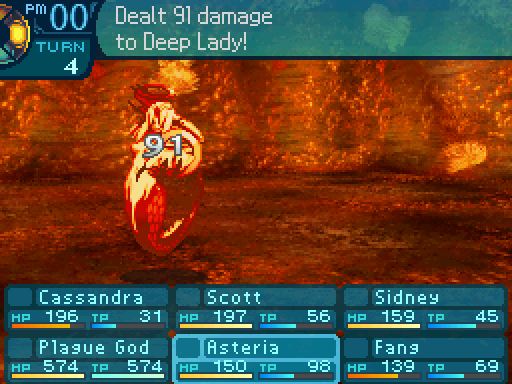
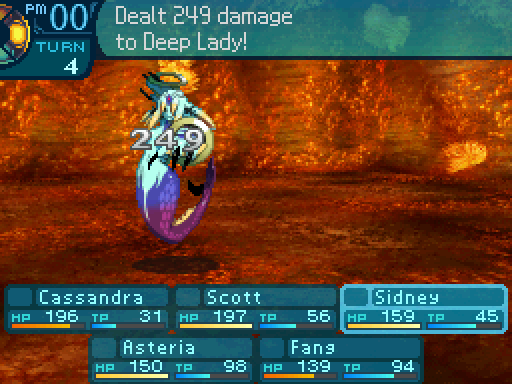
The Deep One is a physical attacker and is resistant to physical attacks himself. He'll work together with the Deep Lady to give your party a hard time. Cover will have him take all damage in the Deep Lady's place, and Leaping Slash hits pretty hard. Sleep, Blind, and Paralysis can be used to deal with him, and hopefully make him a lot less threatening.
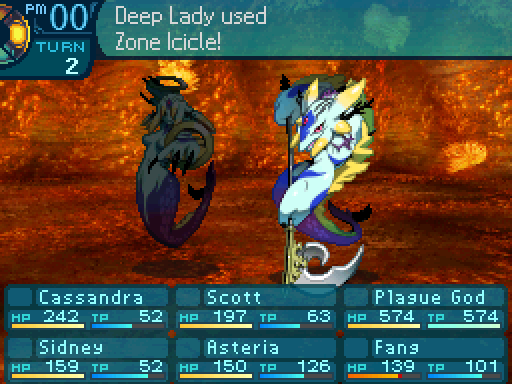
There's a little mistranslation in the fight. When the Deep One gets ready to use Crystal Edge, the game says it's preparing a counterattack. That's not the case. It's a chaser skill and he's waiting for the Deep Lady to pelt your party with an Ice attack. If you don't deal with the Deep Lady's Zone Icicle skill properly, this skill can finish your party off, or leave them really low. Speaking of the Deep Lady...

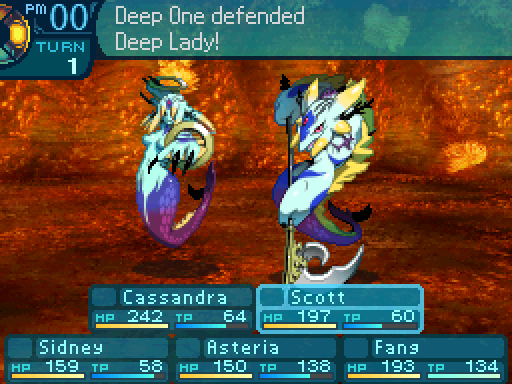
Deep Lady
HP: 2208
TP: 152
STR: 32
VIT: 31
AGI: 23
LUC: 25
TEC: 34
Attack Type: Pierce
Exp: 3602
Item Drops: N/A
Description: N/A
Damage Resistances: Slash: 100% Strike: 100% Pierce: 100% Fire: 50% Ice: 50% Volt: 50%
Ailment Resistances: Sleep: 50% Confusion: 50% Plague: 50% Poison: 50% Blind: 50% Curse: 50% Paralysis: 50%
Bind Resistances: Head: 122% Arm: 122% Leg: 122%
Other Resistances: Death: 1% Petrification: 1% Stun: 122%
Skills:
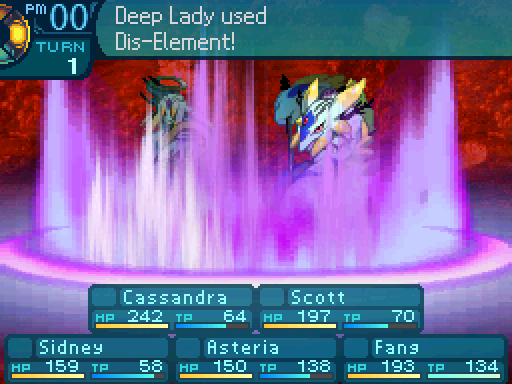
Dis-element: Uses the Head. Increases all enemies' resistances to elemental attacks by 50% for 4 turns.
Zone Icicle: Uses the Head. Deals 50% Ice damage to the entire party.
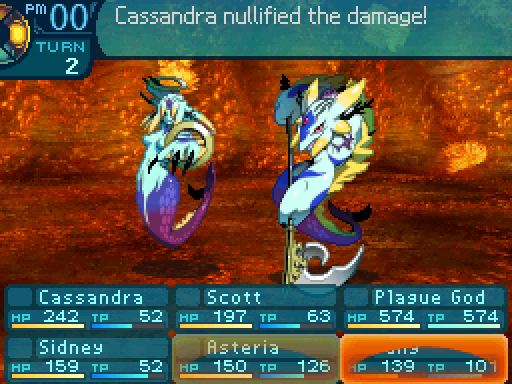
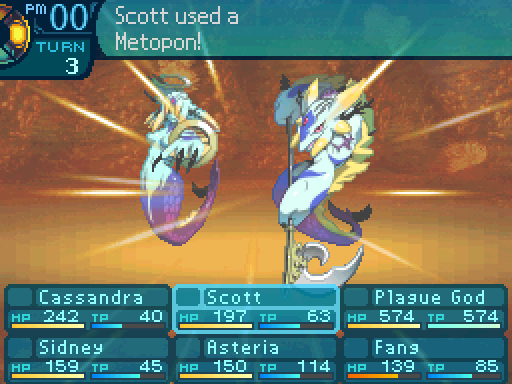
The Deep Lady will always cast Dis-element on the first turn, eliminating the Deep One's elemental weakness, and making the Deep Lady immune to elemental attacks. Yes, this prevents Singularity from activating, so you want to get rid of the buff with Ad Nihilo, or a Metapon. She'll recast the skill every 3 turns. This makes Cover extra annoying to deal with, since the Deep One won't be taking that much damage from elemental attacks, and prevent you from getting to the Deep Lady. Zone Icicle hits hard, and the Deep One will try to use Crystal Edge to capitalize on it. If you block Zone Icicle with a max level Anticold, Crystal Edge will still activate and hit everyone. But if you block it with Ice Prophecy, Crystal Edge won't activate at all. If you manage to head bind the Deep Lady, which is easy to pull of since she's super susceptible to them, she'll be completely shut down.
If you're wondering why neither of them have descriptions, these enemies don't get registered in the Monster Codex for some reason.


A lot of my decisions here were really dumb, for reasons you'll see in a bit.
Let's go!

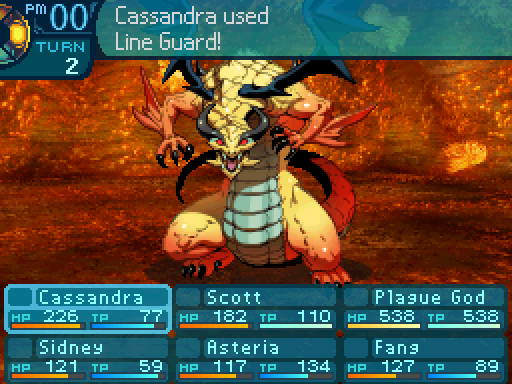
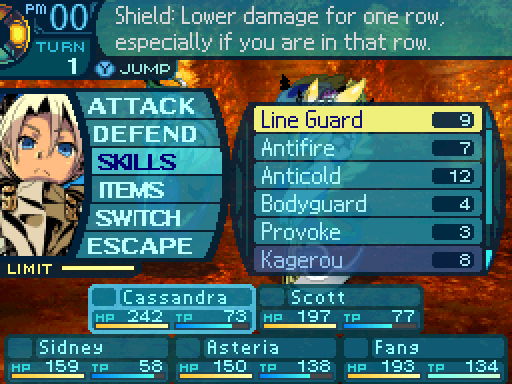
Line Guard turned out to be completely unnecessary.
Because I forgot that the Deep One always casts cover on the first turn.

Wha!? That wasn't meant for you!
Fascinating. So they're intelligent enough to protect others when necessary.
Ah, it was still worth a shot.
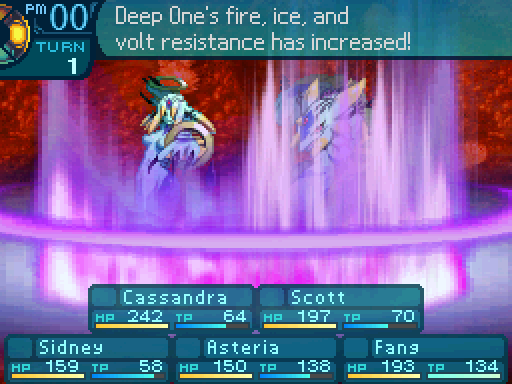
And now elemental attacks won't do much.
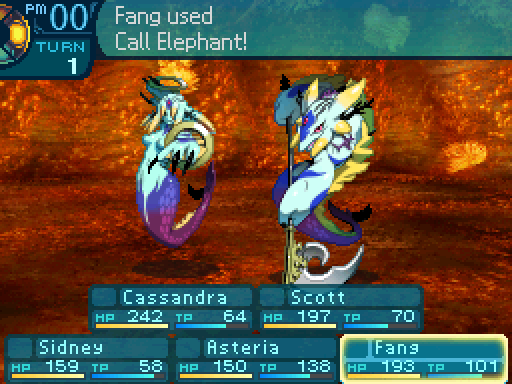
Charge into them!
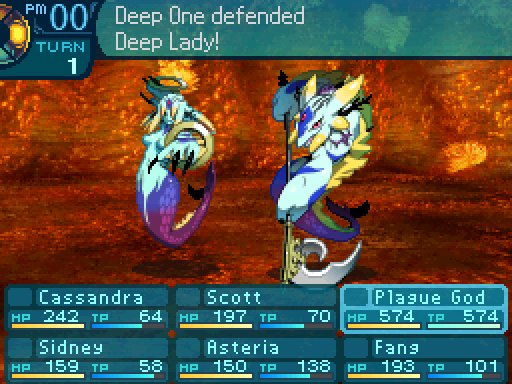
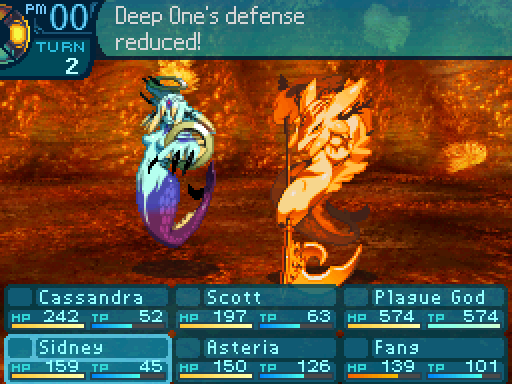
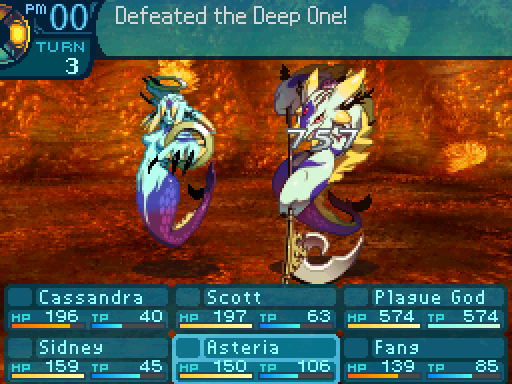
However, Cover was a big mistake on the Deep One's part.

Because he gave the elephant 2 chances to inflict Confusion on it. Now he can't cooperate with the Deep Lady at all, making the fight a lot easier.
Nice going, Fang!
I've got my eyes on ya.
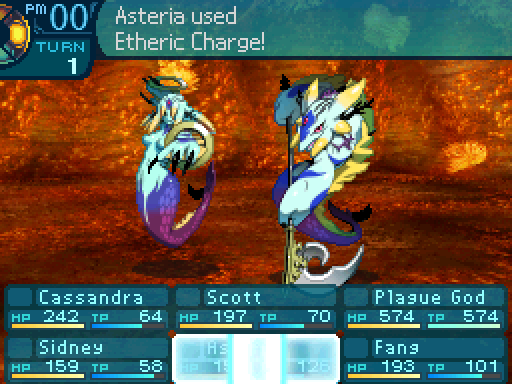
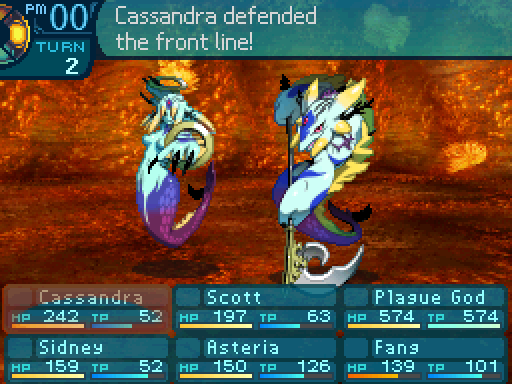
I don't really care about the Deep One's physical attacks, so I have Cassandra get ready to block Zone Icicle.


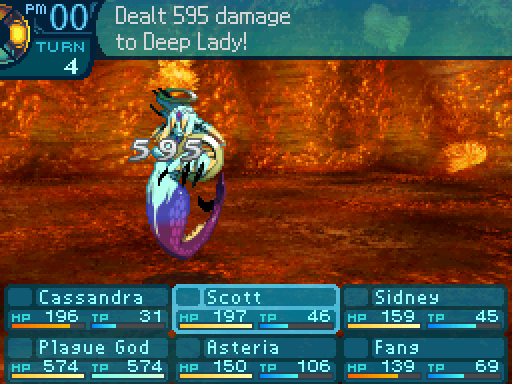
Shishkebabed!


That was a good amount of damage, but I was mainly hoping to Head bind her.
Your icy magic cannot bypass my shield.

Well it turns out the Head bind wasn't necessary, because the elephant managed to confuse her.
Roar.
Try to control yourself, Sidney.
Not the effect I was hoping for. I was hoping it would dispel the buff, but since they're confused, it should increase the damage of the party's physical attacks by a lot.

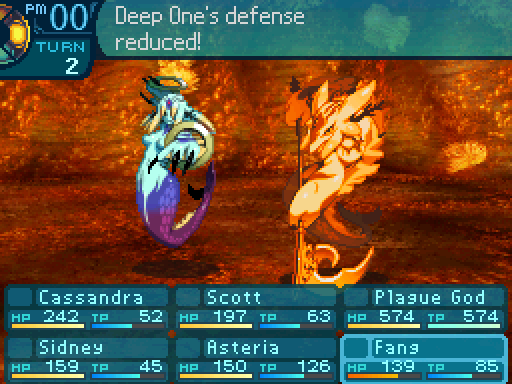
OOGA BOOGA! 
Especially when Primal Drums gets stacked on top of that.
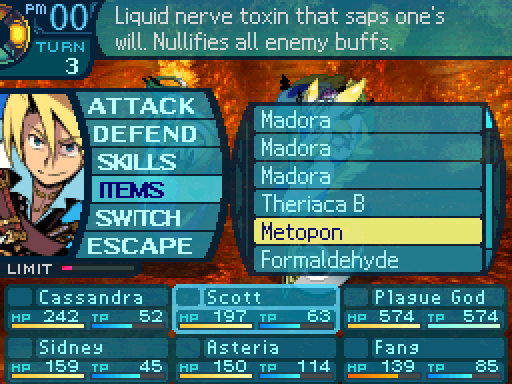
Gonna dispel that resistance buff.

Go away voodoo magic! Or whatever.

Not so tough without your ally's magic spells, hmm?
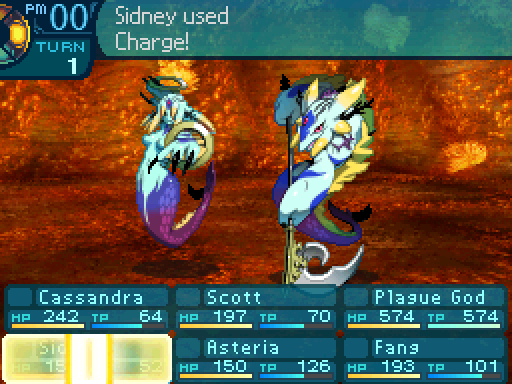
I originally planned on having Sidney make use of Front Mortar in this fight, but I decided against it.

Silence!


Geez, I didn't expect to get into a tussle.


Don't think you're out of the woods yet once you beat them.
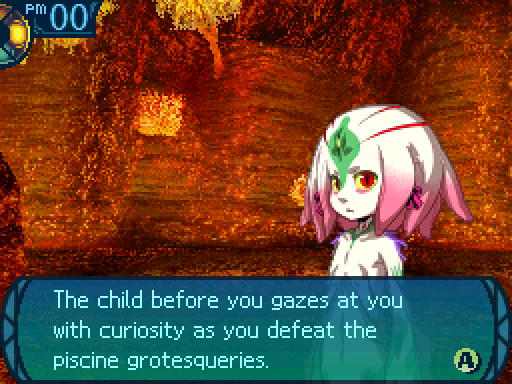
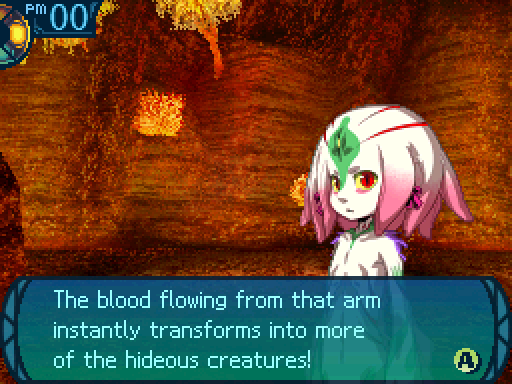
Its eyes are filled with joy and wonder; it is clear that it takes delight in your presence. Despite its rapt expression, you wonder when its blood and flesh will again become monsters... You are not quite sure whether to draw arms and attack, or attempt to parley with it.
Ready to see a real dick move?
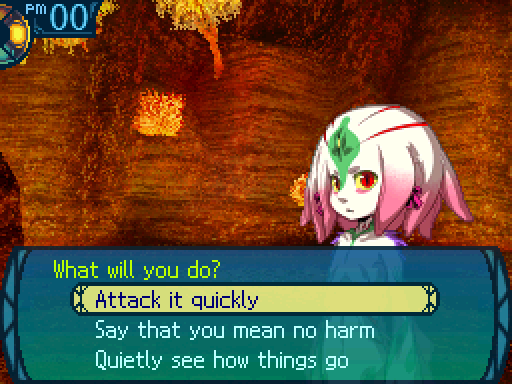
The 2nd and 3rd options will advance the plot. But if you pick the 1st option, or accidentally picked it by mashing through the text...
Let's kill it while we have the chance!
Sidney, I don't think that's a good idea!
 Trapt beneath the Ground as I am, 'tis to be expected that my Power is diminisht.
As you draw near, weapons at the ready, the child sighs while swinging one of its hands.
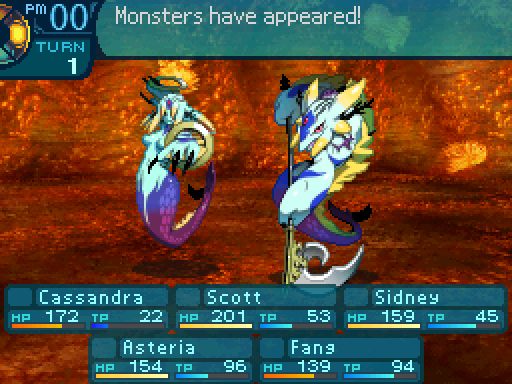
You have got to be kidding me.
Yeah that's right. You get into the exact same fight again! I hope you didn't have too much trouble with them in the first fight!