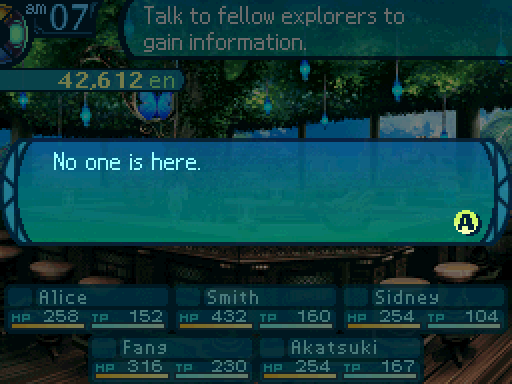
Toggle Background Color
Update 87: Slip Sliding Away
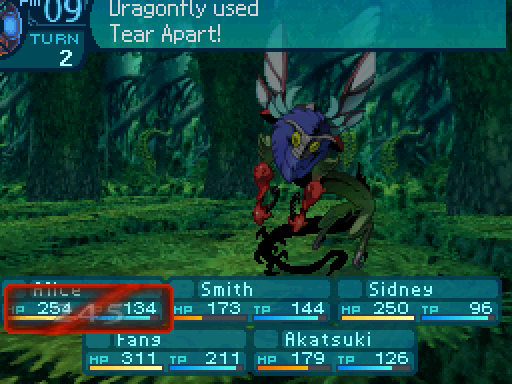
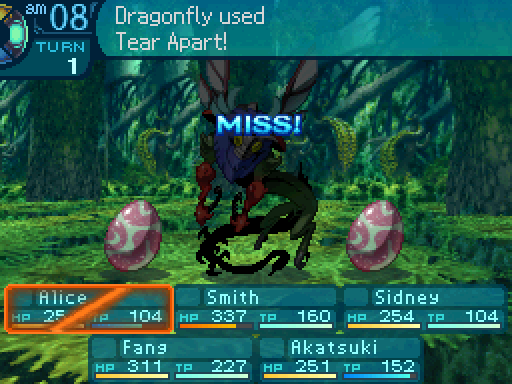
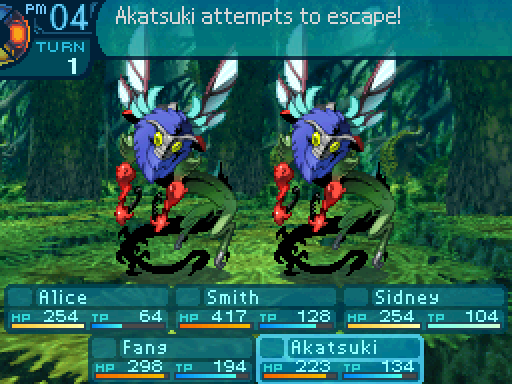
 I. Hate. Dragonflies.

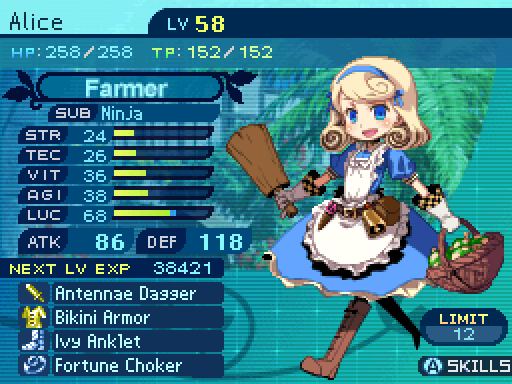
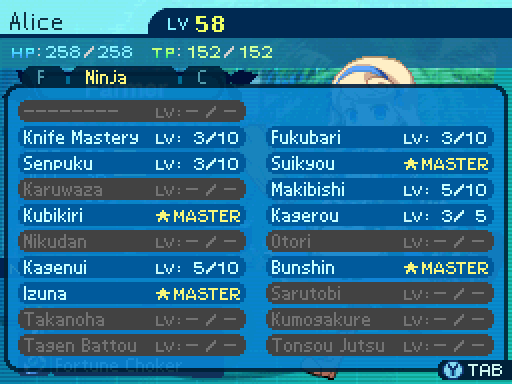
I remember to spend Alice’s skill point from the last update. I level up Kagenui. There’s a reason I’m doing this now.
 Urk! Th-that was close.
 I’m gonna have to defrag that in the morning...
How the hell are they so tough anyway...?
 We must flee for the hills at once!
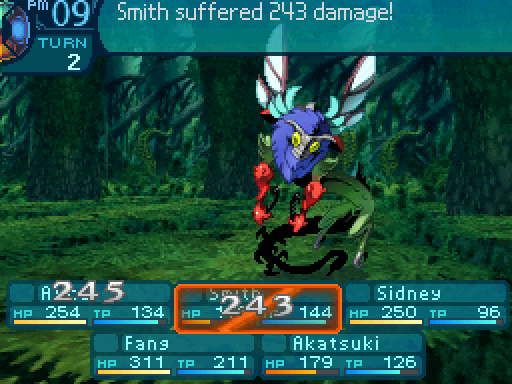
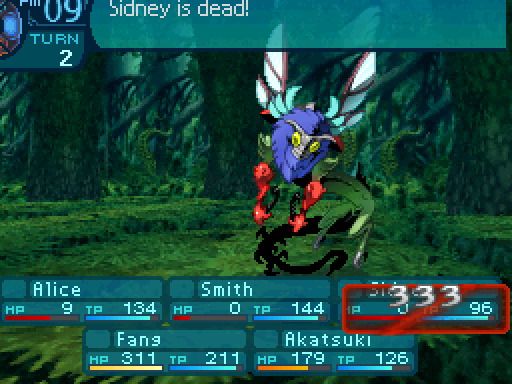
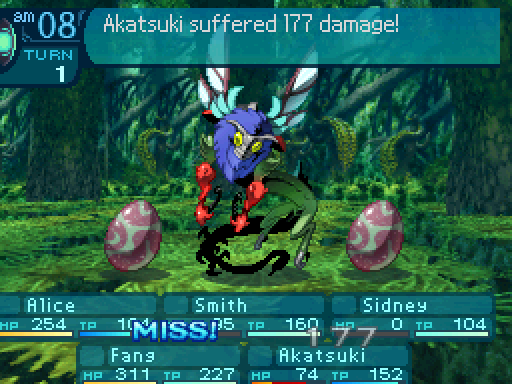
Off to a great start. Dragonflies are jerks. Since this party is made up of squishies, they can pretty much one-shot everyone. I mean they even nearly took out Akatsuki (though I’m not quite sure on how Alice survived there, since she’s just as squishy as everyone else.)

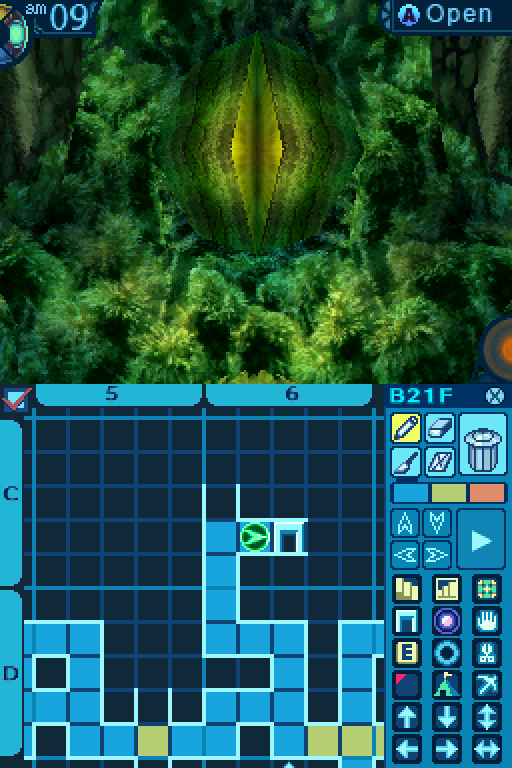
Anyways, from where we left off in the last update, you want to north until you hit a wall.

Then do the same thing while heading east.

Uhh...

Hee hee. Looks like the student, has surpassed the master.
Ah, yes. Well done, Miss Alice.
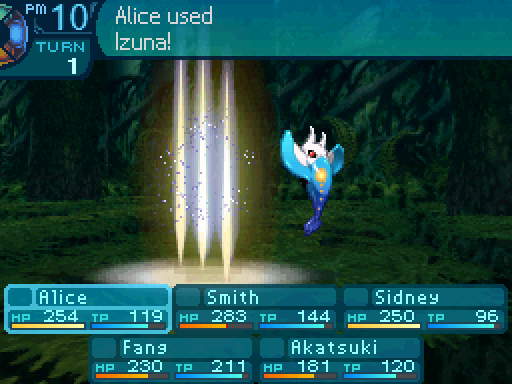
Incidentally, Akatsuki really isn’t getting that many Izuna procs. On the other hand, Alice has been landing them pretty much every time she uses it. Akatsuki may actually be dealing more damage, but Alice is actually killing things.
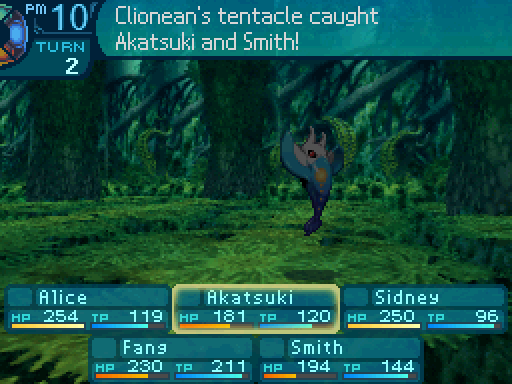
Hey, what the-!? Hands off the bod, buddy!
Release me at once!
I suddenly feel a lot more vulnerable.
Ugh, great. I don’t even have long-range rockets installed in my fists yet.
 Can’t you two just walk back to where you used to be?
I’d love to do that, but walking all the way back there is such a pain in my metal end!
We would just be wasting valuable time doing such a thing instead of fighting.
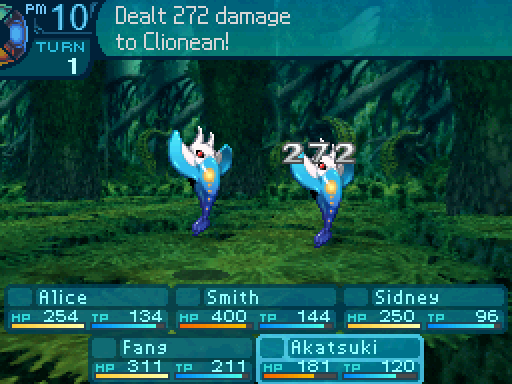
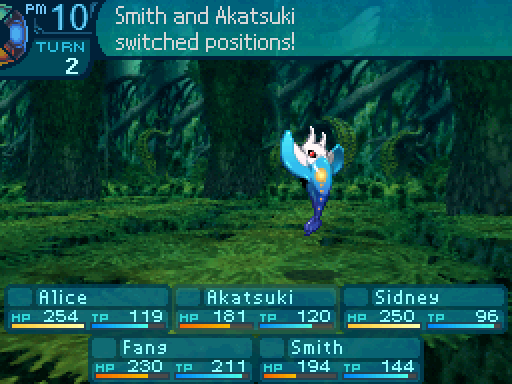
And there’s the Clionean’s Change skill in action. Really annoying to deal with, especially since Switching takes up a turn in this game.

Moving on, from where we were before, you want to walk down to this tile.
And from there, you can open up this shortcut, and skip all that on future treks.

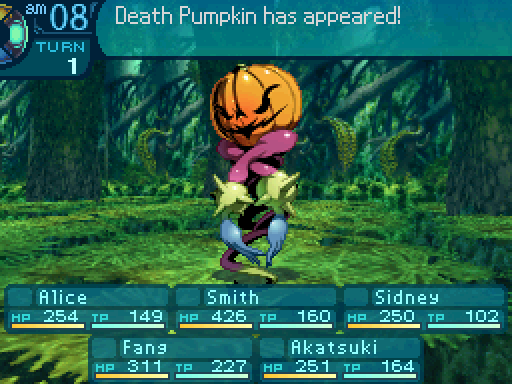
And here’s the last new enemy on this floor.

Death Pumpkin
Level: 60
HP: 1430
STR: 62
VIT: 54
AGI: 47
LUC: 46
TEC: 53
Attack Type: Pierce
Exp: 4555
Item Drops:
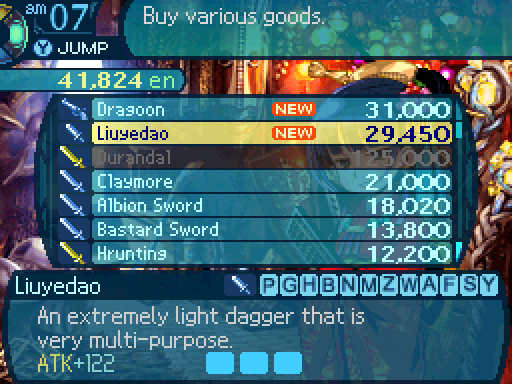
-Drop 1: Thorny Bone - 55% Drop Rate. 1 needed for Liuyedao (Knife.) 3 needed for High Jacquard (Clothes.)
--Cut from the body of a ghostly pumpkin.
-Drop 2: Pale Bone - 10% Drop Rate. 1 needed for Stun Seal (Accessory.)
--Touching this piece of a ghost pumpkin’s head is chilling.
-Gold: N/A
Description: An eerie vegetable given life by the grudges of those who died within the Labyrinth.
Damage Resistances: Slash: 75% Strike: 75% Pierce: 75% Fire: 100% Ice: 100% Volt: 100%
Ailment Resistances: Sleep: 100% Confusion: 100% Plague: 100% Poison: 100% Blind: 150% Curse: 100% Paralysis: 100%
Bind Resistances: Head: 10% Arm: 10% Leg: 10%
Other Resistances: Death: 50% Petrification: 50% Stun: 25%
Skills:
Violent Vines: Uses the Arms. Deals 180% Pierce damage to the entire party. Has an action speed of -5. Has an accuracy of 10.
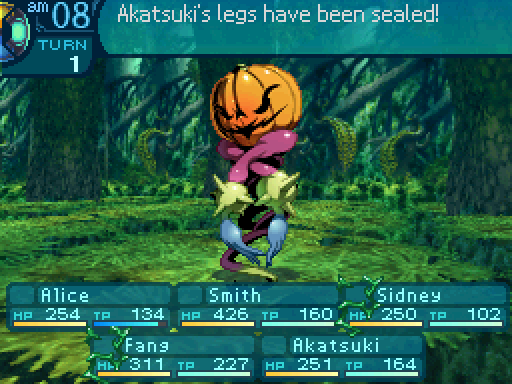
Tangling Vines: Uses the Legs. Attempts to bind the legs of the entire party, and has a 90% chance of succeeding. Has an action speed of -5.
Halloween: ???
The Death Pumpkin is a member of the Pumpkin Trio, 3 recurring enemies in the Etrian Odyssey series. Though the Death Pumpkin is more commonly known as the Hexgourd. They weren’t in every EO game, as their debut was in EO2, where they were all FOEs. Then they all got demoted to post-game random encounters in this game. Oddly enough, it went from the strongest member of the pumpkin trio to the weakest one after EO2.
As for its incarnation in this game, Violent Vines is a dangerous move. It’ll pretty much kill most classes it hits. Its accuracy is low, but the Death Pumpkin won’t bother using it until someone gets their legs bound. And Tangling Vines has a really high chance of ensuring that happens.
I should have known that wouldn’t have worked.
It’s a particularly dangerous enemy for this team, as Alice and Akatsuki can’t assassinate it easily.

I’m stuck!
Somebody get us some shears, pronto!
Miss Alice, I don’t suppose you have any on you?
S-sorry, I left them behind at the inn.

But it doesn’t look like you’ll need them.
And Alice pulled through with that Petrification before it was too late.

Sidney got a level up from that battle, and is trying to get Double Action back.
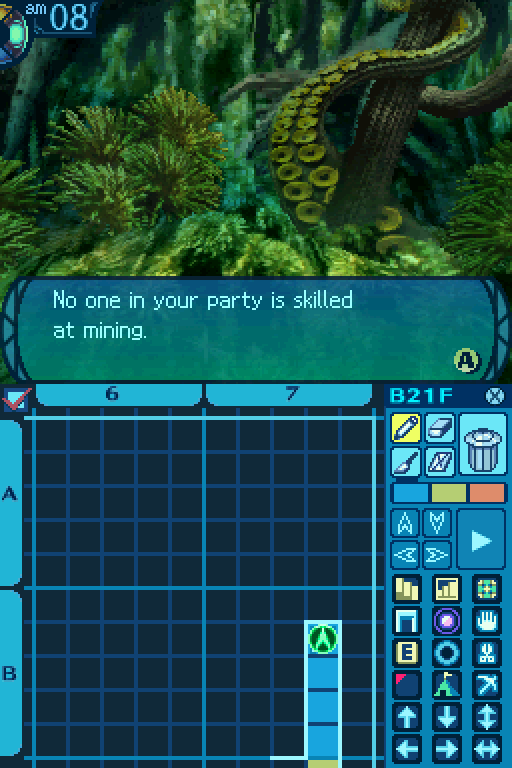
B7 Mine Point:
Star Sapphire: 60% Gather Rate.
Perlite: 40% Gather Rate.
Zircon: Rare.
Common Gather Periods: 3 to 18.
Rare Gather Periods: 1 to 4.
There’s the other Mine point on this floor.
Lousy stupid dragonflies...
Unfortunately, since Dragonflies have a 50% resistance to Petrification, Alice can’t kill them so easily.


Can we take a break? Pleeeeease?
After what those bugs did to me, I could really use one of those right now.
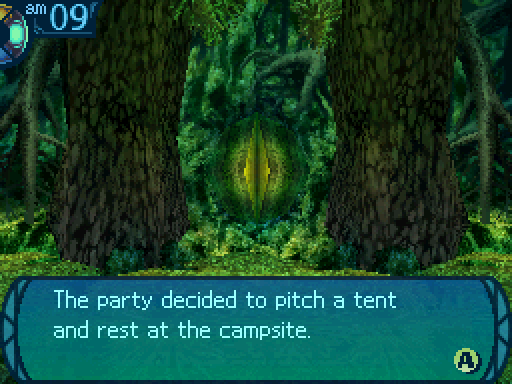
I opt to use a tent here.
Miss Alice... are you really leaving after all this is over?
I’m sorry Akatsuki, but I really have to get back home. There are people probably wondering where I’ve gone.
Ah, I see...
Mmm, but maybe... You could... I dunno... come back with me?
Uh, I... really? You’re saying I can do that? Um wait, I mean, I would have to think about it. I don’t know if I can really leave Faye all by hersel- OW! What’s wrong with you, Sidney!?
Whoops! Sorry bout that. There were pebbles jammed in my crossbow, and I had to clean them out.
...By firing your bow?
Hey, it worked, didn’t it? Didn’t mean to hit Akatsuki, but hey, what can ya do? Lemme just take a look him for a second to make sure it’s not a serious wound. Akatsuki, what the hell are ya doin’? Are ya really gonna pass up an opportunity like that?
Well, I mean... you and me, Faye, Cassandra, and Asteria have been together since we all met. I don’t know if I can just leave you all like that.
Don’t give me that bull honky. Ya seriously don’t think we’re all gonna be together forever, right? Life doesn’t work that way, kid, and ya know it.
But...
What, are ya just shy or somethin’? Whatever. We’ll talk about this later. Mm, yep! He’s all fine. Oh, look at the time, we really gotta get movin’!
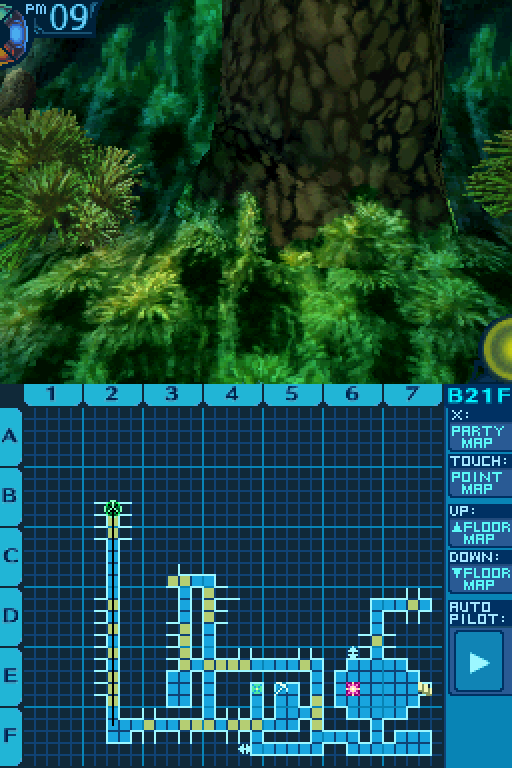
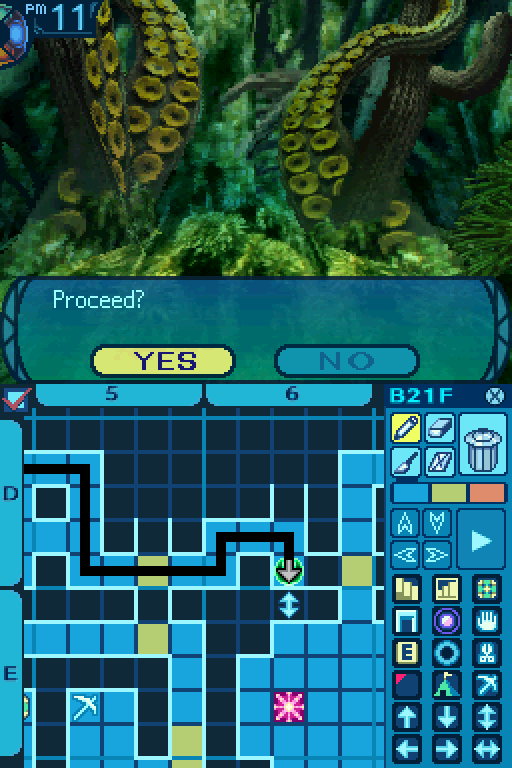
Alright, for the next part of the route, we’re gonna start from this set of slippery tiles here.

Move to the tile above the slippery tiles, then head east to the wall, south to the wall, and then west to the wall to do a little loop around.

Then head south to the wall, and west to the wall again.

Then north to the wall, and then west to the wall.
Oh, and there’s another Vampire Tree spawn point. I’m honestly not sure where all those are, so you’ll just have to be careful where you fight. I believe there’s like 8 different spawn points on this floor from what I could read of the map files anyway.

From the last tile, just follow the path to this point.
AAAAAHHHHHHHHH!
Sidney. They’re just bugs.
Easy for you to say, miss dodges-a-lot. Seriously, Akatsuki, what did you even teach that kid!?
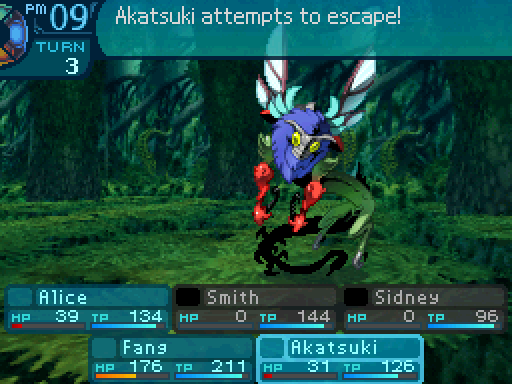
Uh, we should probably just get out of here.
Okay, no. I’m not dealing with 2 of those things.
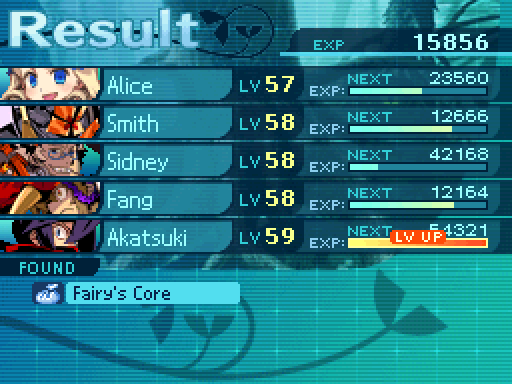
Akatsuki got a level up after another battle.
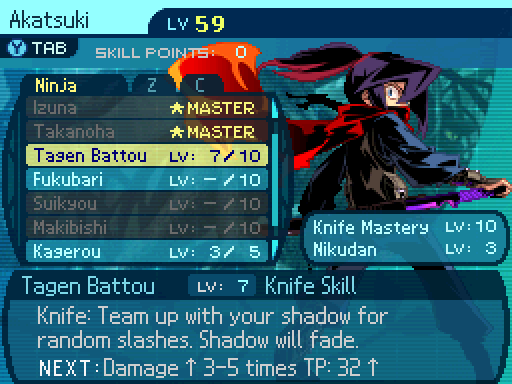
Tagen Battou has a base damage of 66%, a skill multiplier of 106%, and the maximum number of hits got increased to 5.
From that last tile, head east 2 tiles, north to the wall, east to the wall, and south to the wall.

Then go west to the wall, and south to the wall.

Then go east to the wall, and south to the wall.

Go east to unlock another shortcut.
And finally, go north to reach the stairs! Uh, whoa. That map is looking a little messy. We’re not done with this floor yet, so let’s fix that.
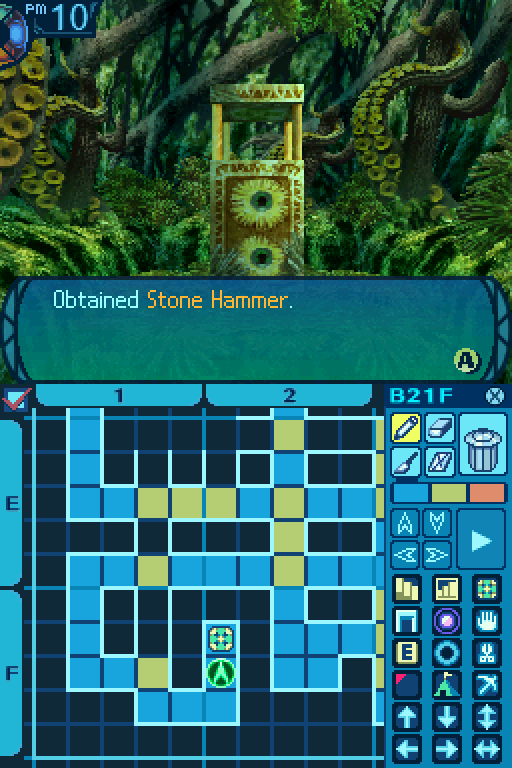
There are a couple of treasures strewn about on the floor.
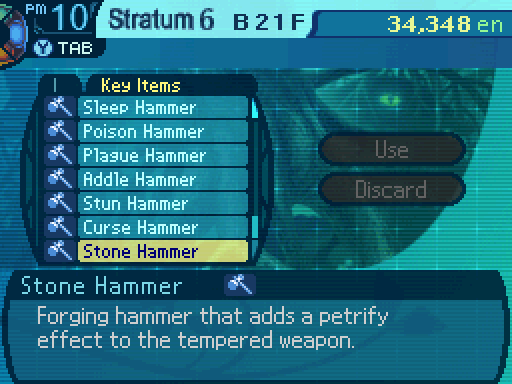
The Stone Hammer gives us access to Petrify forges at last. Unlike most ailment forges, they provide a 4% chance to activate their effect on the first forge, and a 2% chance for every subsequent forge.

Oh, and if you wanted to know how hard Violent Vines hits...


I really wish Miss Cassandra was here...
Same here...
It hits very hard.

I’m lost, like gears in the rain...
And this just took a turn for the ugly.
Alice, are we gonna die?

No.
Oh, never mind. Alice coming through with a clutch Izuna.

At least Fang got a level up out of that disaster of a battle.
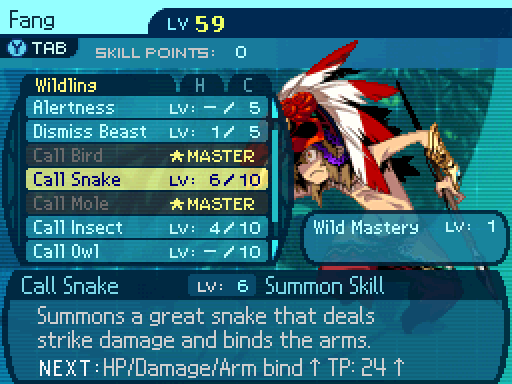
Call Snake is getting stronger. At this point, I went back to town to heal up my party members and to see if I unlocked anything new at Edie’s shop.


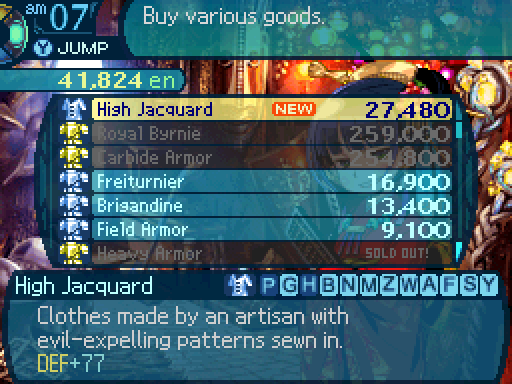
Nothing really interesting aside from some standard equipment upgrades. Though that Knife should illustrate how far ahead Akatsuki is ahead of the curve, since his ultimate weapon has a lot more attack than that. Anyways, back to treasure hunting.


A nice defensive upgrade for Cassandra, though she really doesn’t care about the STR boost.
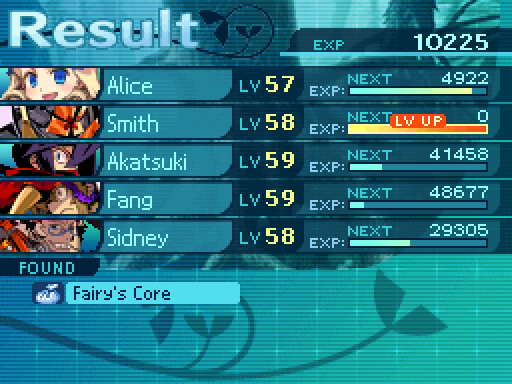
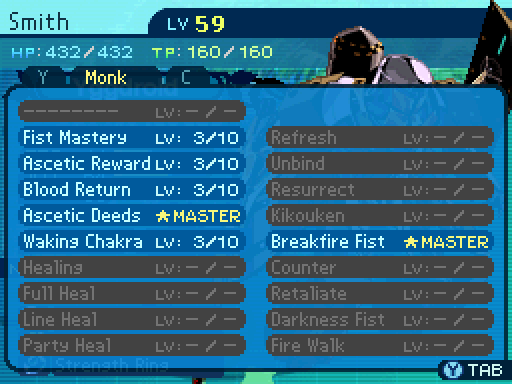
And now Smith got a level up.

Ascetic Deeds now heals Smith for 90 HP every time he casts a skill. So now it cancels out Overheat entirely. At least, until I max Overheat out, anyway.


Alice gets another level up and keeps on leveling up Kagenui.
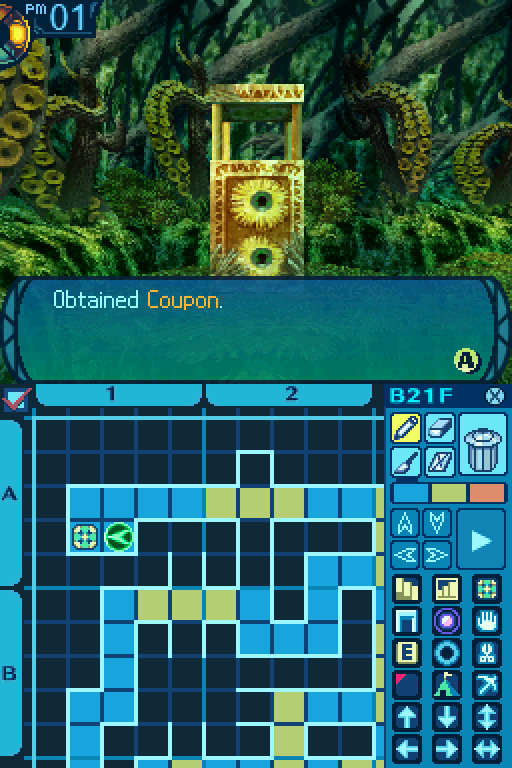
The chest in the upper left corner holds a Coupon for us. It’ll be coming in handy very soon.


There’s a secret passage in this area that leads to a Speed Book. I refrain from using this one up, as there’s not really anyone in the party that can benefit from it.
Incidentally, Pasarans do spawn in the 6th Stratum. They’re all Blue Pasarans. If you want to go after them, don’t do that just yet. There’s a much better way to hunt them down later.
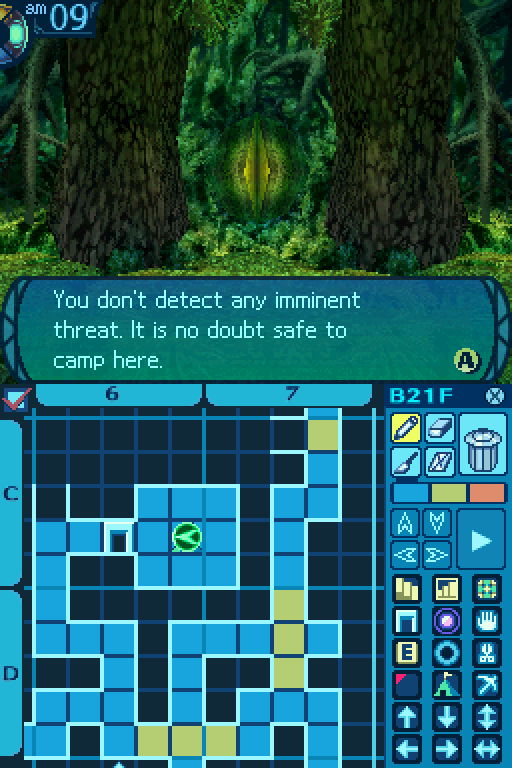
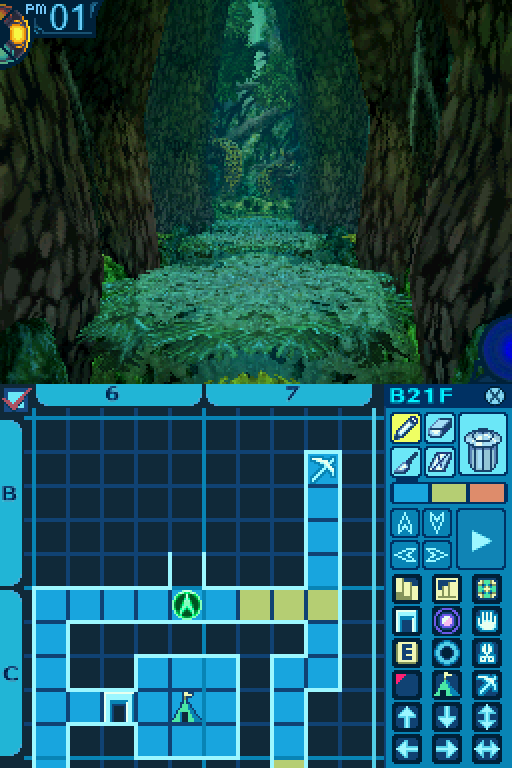
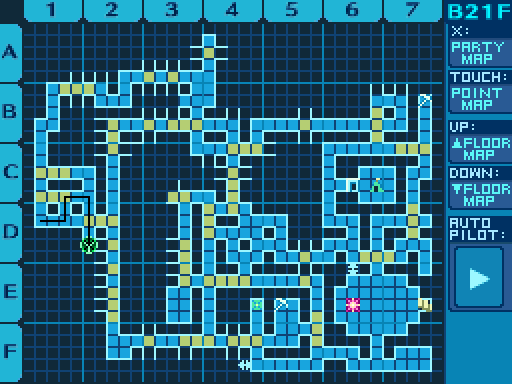
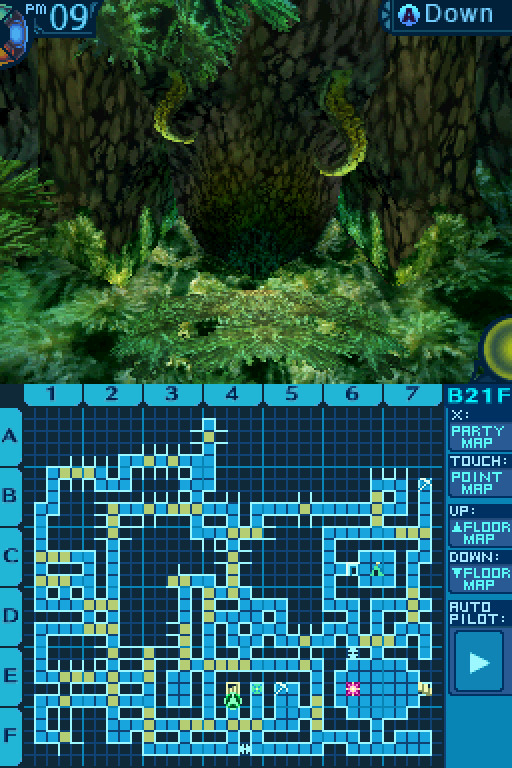
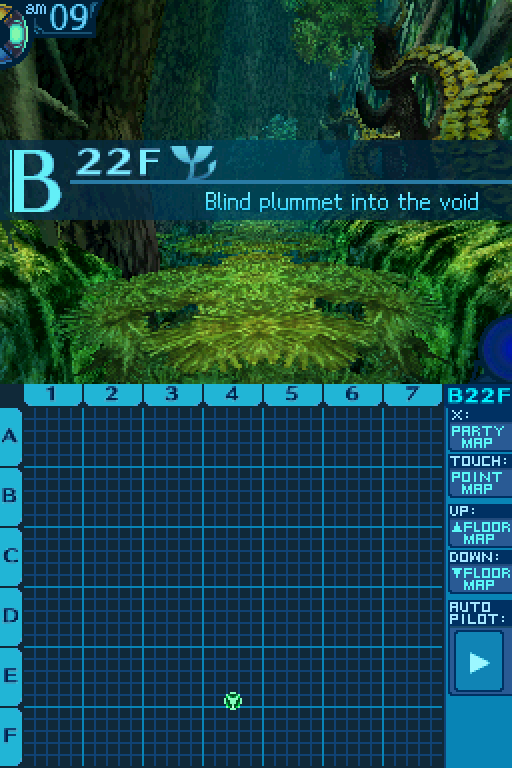
But that’s all the treasure chests on this floor. So now the map is complete! Yes, that is the 21st floor. It’s a massive sliding puzzle maze, and it is a pain in the butt to get through if you have no idea what the floor looks like. You pretty much have to pick paths at random, hoping to find the one that will get you forward. And for the record, this is one of the easiest floors to get through in the 6th Stratum.
Also I know those directions were hard to follow, because even following directions, I still get lost in this place since this place is a complete maze and the path itself is pretty convoluted. So here’s a map to take you to the stairs right away if you need it.
New floor, so that means it’s time to go back to town.


 And you’re going on an adventure to do something about it, right?
Indeed. Though,i t won’t be an easy journey.
Well, I wanna do whatever I can to help! If you need me, come holler!

 And it’s all thanks to you.
Huh?
Don’t you see...? A group of skilled explorers is trying to end the war with the Deep Ones on the Senatus’ orders. Said explorers form the strongest guild in Armoroad now; admired far and wide. Now then... Where do such mighty explorers go to prepare for their forays into the Labyrinth...? The answer is obvious. The stream of people yields the fishes of wealth! And this stream has no bed! That is why I continue to encourage your courageous exploits!
Do ya ever have anything in yer eyes other than ental signs?
I unlocked some more items by selling the stuff I had. Let’s take a look at them.

Standard armor upgrade, whatever. But more importantly...
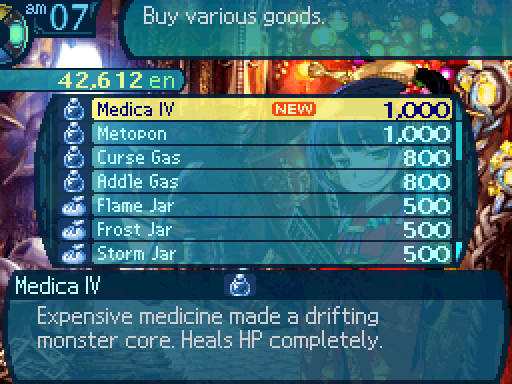
I unlocked this beauty. Medica IVs fully heal your party members, and now I can buy them whenever I want. No reason to stick with Medica IIIs anymore, other than money.
It’s a pain in the gears to go through, I’ll say.
Too many dragonflies.
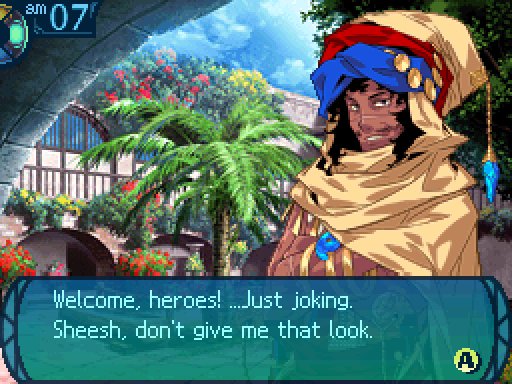
 You might be the strongest in Armoroad now, but you can’t let your guard slip down there! Please talk to all the other people here. They’ve been watching over you all this time. ...... Hey! That includes me, too! Haven’t I been watching over you the most!?
Other people?
Sure, whatever you say, Missy.
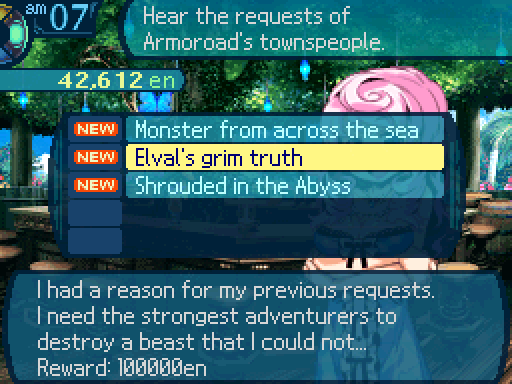
Anyways, I think it’s time to take on one of the post-game quests at last. This is the one I’ll be starting with, since there was a vote for that one.
Wait, wha? Those contests actually had a point to them?
You guys! You guys! I am not believing this! All of Elval’s contests were a setup! That geezer apparently fought a monster called a Kraken with his best friend years ago. They weren’t strong enough to defeat it. All they could do was trap it in the Abyssal Shrine. The friend is dead already... His one regret is never defeating the Kraken. So, Elval sacrificed his riches to find skilled adventurers to make that wish come true. It seems that the Kraken appears on B13F, but nobody else has seen it... Everyone thinks this is part of some larger ruse... Not me! I think Elval’s being truthy! You are the only ones who can grant a dead man’s last wish! Do it for him! I beg you! You overcame both his fighting and harvesting challenges... I know you can do this! Now, fire yourselves up and head out to B13F, explorers!


 It kills me that 20 floors of that madness weren’t enough for you and you’re going even deeper. You explorers really are fools. Though there was a time when I was just as big a fool myself... They called me the Swordmaster of Dust back then. Seeing you folks in action reminds me of those days.


 It’s amazing that such normal, young people who visit me at my oceanside perch are... ...Well, I suppose this is where your true strength lies, after all. I hope you’ll continue your adventures... But more than that, keep doing what makes you unique.


 But if you can’t win your way by reason and logic, you’ll have to do so by guesswork.
Yeah, that’s pretty much how you have to get through the 6th Stratum. There isn’t too much logic involved, in all honesty.
That sounds annoying.
Don’t worry... I’m here to help you. We’ve come this far; we act as one body and mind now.
Snrk. Man, did she really just say that?
...What’s that snickering for!? This is no time to be infantile! Honestly...


 You’ve been wandering around much deeper underground than the Deep City, haven’t you?
What makes you ask such a question?
There’s been a lot of earthquakes here lately... They started when you reached that new Stratum. ...You’re not doing anything dangerous there, are you?
Well, something like that...


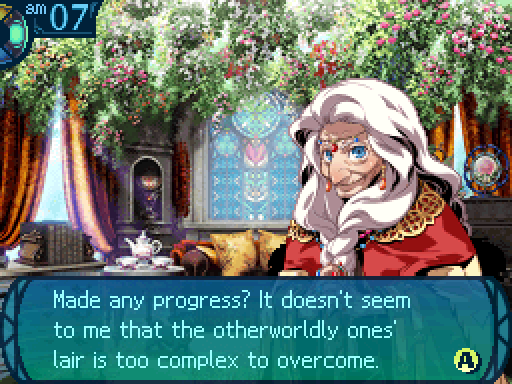
 If the Abyssal King was here, I am sure he would have praised your deeds.
And now, let’s move onto the party votes for the Kraken fight. Unfortunately, a lot of the post-game bosses are rather restrictive on party compositions due to what they demand. Let’s take a look at the boss in question.
Kraken
HP: 30000
AT: 80
DF: 75
Weakness: Everything
Resistance: N/A
Yeah, those stats are far higher than the Progenitor’s, so we have to bring our A-game here.
I normally don’t do this, since I don’t really like to overload the audience with numbers when it comes time to voting. But I’m going to list out the disable resistances of the boss as well, to give you a better idea of what we’re up against.

Uhh, wow. Those are pretty low. Maybe Kraken is some sort of weird exception, and the other bosses have higher-

...Oh. Yeah, welcome to the post-game. Were you somehow making good use of ailments before? Guess what, that’s not a viable strategy anymore. Wildlings go from a questionably useful class to nearly useless in the post-game. They can only inflict each given disable once on a post-game boss. And their chances for doing so are really low. Since boss fights last for so long in EO3, parties can’t really capitalize on them all that much. So a Wildling’s animals essentially become a glorified meatshield, and all the Wildling can do is pretty much spam Primal Drums, leaving them with little to do in boss fights.
Except for the Kraken. Which is one of the few fights you really want one for due to their crippling weakness to leg binds. Why would you want to leg bind them? Why don’t we take a look at its skillset...
Death Tentacle: Uses the Legs. Randomly hits the party 10 times, dealing very heavy Pierce damage per hit. Very slow to come out. Very unlikely to miss.
Squid Press: Uses the Legs. Deals extremely high Strike damage to the entire party. Very slow to come out. Unlikely to miss.
Tidal Wave: Uses the Legs. Deals extremely high Ice damage to the entire party. Slow to come out. Extremely unlikely to miss.
Restoration: Uses the Legs. Heals Kraken for 15000 HP. Very slow to come out.
Yeah, as you can clearly see, Kraken is a nasty piece of work, though all of its skills use the legs. So the fight against it basically boils down to lockdown or die. All of its attacks deal way too much damage, and can pretty much one-shot the party due to its extremely high stats. Not only that, it can decide to give you the middle finger and heal itself for a lot of HP when you’re about to kill it.
Though, due to the built in easy mode, it’s considered to be the easiest post-game boss to take down. So what’s the catch? Well, killing it while its legs are bound will net you its conditional drop... which is actually worth less than its normal drop. That’s because its normal drop is the actual conditional drop, as you have to beat Kraken the hard way, or just wait for the leg bind to wear off before finishing it off. (Presumably they didn’t want to make an exclusive flag for killing while not leg bound, which is why it’s handled so oddly on a technical level. Not that a normal player will ever know that.) Or just use a Formaldehyde or Lucky Hammer and bypass all that. Mind you, both drops do unlock strong weapons, so you’re gonna wanna go for both of them, at the very least.
Easy Mode:


Since Fang is a Wildling, he’ll have the easiest time locking down Kraken and preventing it from doing anything. Primal Drums is also excellent for enabling the party to murder it faster.

Alice has very little to offer outside of leg binds. At the very least, she’s slightly better at the job than Akatsuki.
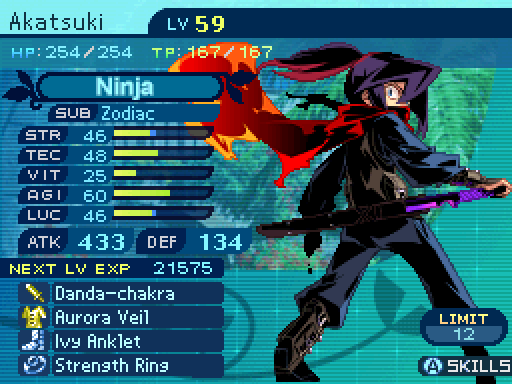


Akatsuki’s not too great at inflicting leg binds, but he can at least deal a respectable amount of damage on top of doing that. He does have access to Tagen Battou, which will deal a ton of damage to Kraken.
The Rest of the Guild:
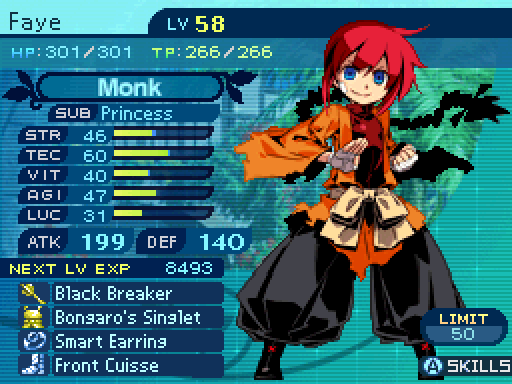


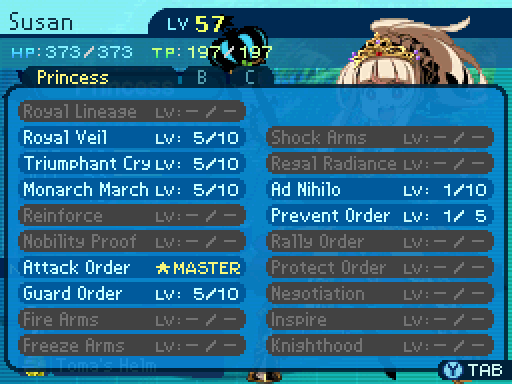
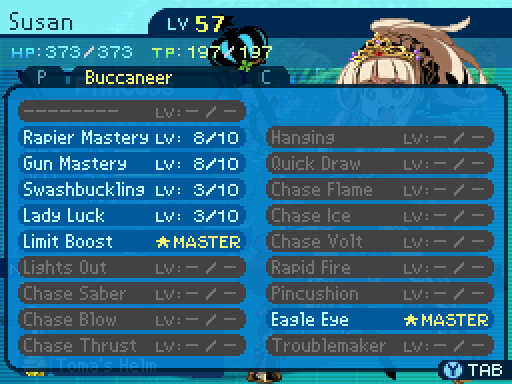
Faye is an okay support, I guess? I mean she can heal up the party, but that requires them to actually survive the attacks that Kraken throws out. Which they’re not likely to pull off at this point. I mean she does have Attack Order, but Susan does that job better since her version is at max level, and she has Eagle Eye on top of that.
But if the party opts to do things the hard way, she’s pretty much required to win since the party needs to actually heal up from the Kraken’s attacks. Of course the only way that can happen is if Cassandra comes along to ensure their survival..

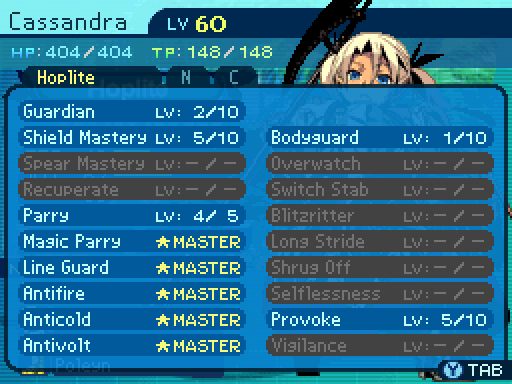
Cassandra’s usefulness varies depending on the party. If the party has access to leg binds, she’s pretty much useless since Kraken shouldn’t be doing a thing at all in the fight.
On the other hand, if the party doesn’t have access to them, she is required to win, since there’s no way to actually survive its attacks otherwise.


Sidney is one of the best physical attackers to bring to the fight, since Front Mortar deals so much damage.
It doesn’t matter if the party gets access to leg binds or not. If they don’t have enough damage, the fight is unwinnable since Restoration is such a huge setback.
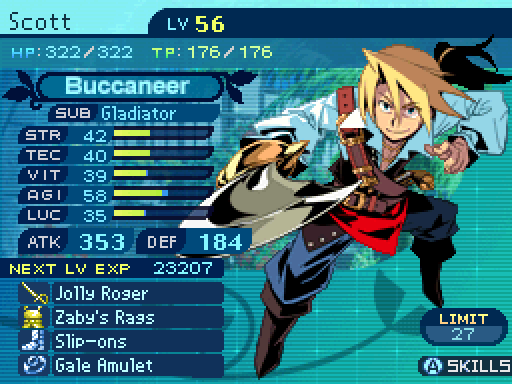


The same applies to Scott thanks to Pincushion.


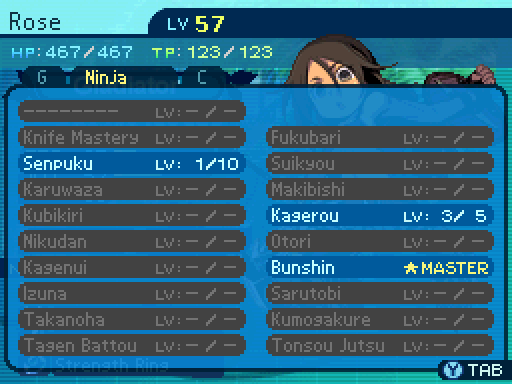
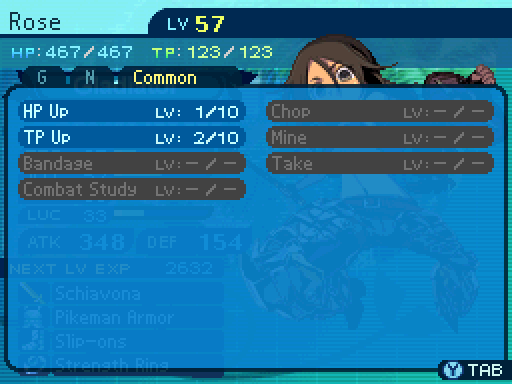
Rose is a decent and sturdy damage dealer. Though the latter doesn’t matter if the party has access to leg binds. And her low TEC means that Tidal Wave will one shot her.
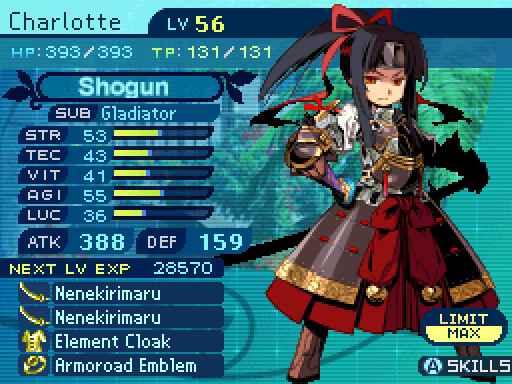


Charlotte could be a great or poor damage dealer, depending on how her 5-Ring Sword rolls go. Though on average, she’s more reliable than Rose.
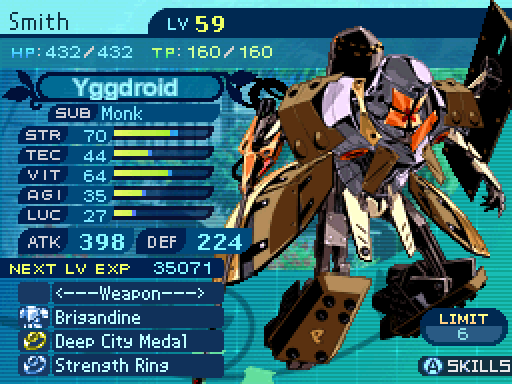

Smith is... not really a great choice for this fight, to be honest. He’s way too unreliable, and even at his best, he deals less damage than the other choices.
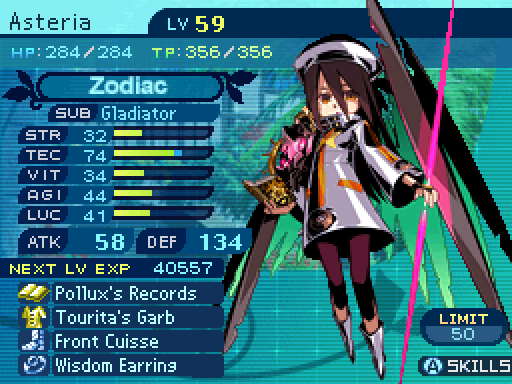


On the other hand, Asteria will have a field day with Kraken, since it’s weak to all damage types. That means it’s one of the few bosses in the game that is weak to Meteor.  Not only that, she can throw out Elemental Limits as well to dish out a lot of damage.

MEGAQUEEN is a fantastic support to bring to the fight. She has access to both Attack Order and Eagle Eye, which will skyrocket all physical attackers’ damage outputs to absurd levels. Though that’s all she has to offer to a party, meaning that a party with no physical damage dealers can’t really benefit from her. Though said party can’t win the fight in the first place, so that’s a moot point.
Vote for up to 3 characters to partake in this fight. Votes must be in bold. For the record, voting for an easy mode party member is not required. The fight can be won the hard way, though significantly more work will have to be put into pulling that off.