Toggle Background Color
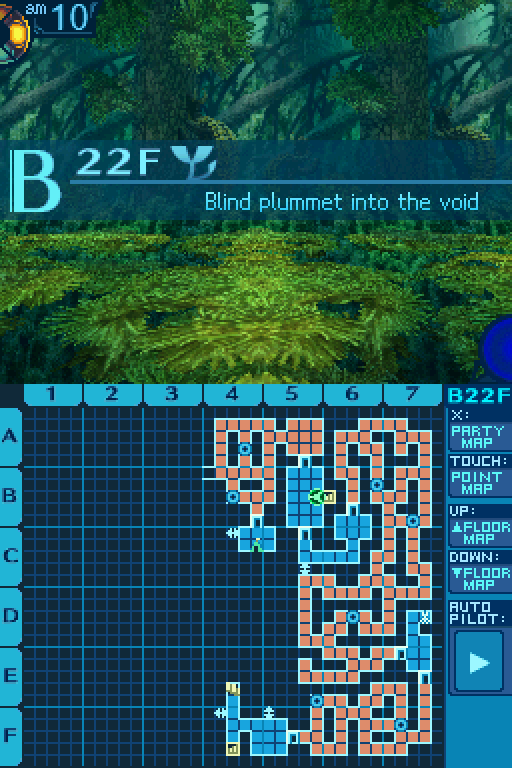
Update 92: Pitfall Minefields


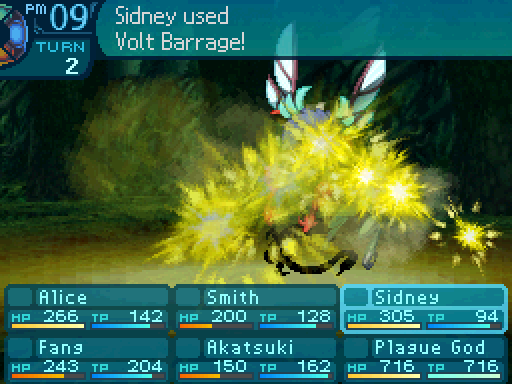
 How does it feel to have a taste of yer own medicine, huh!? Hee hee hee!
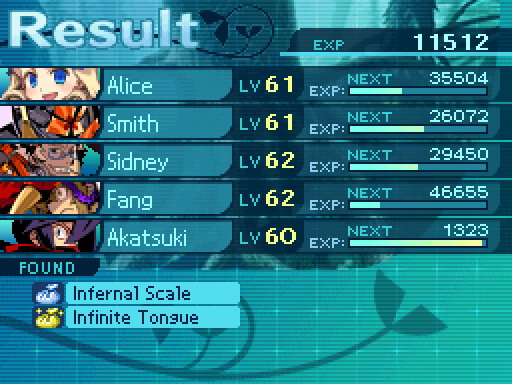
Starting off, Sidney gets some revenge on the Dragonflies.

And snags me their conditonal drop to boot. I probably could have just gotten this more easily with Asteria, but I just opted to get it now


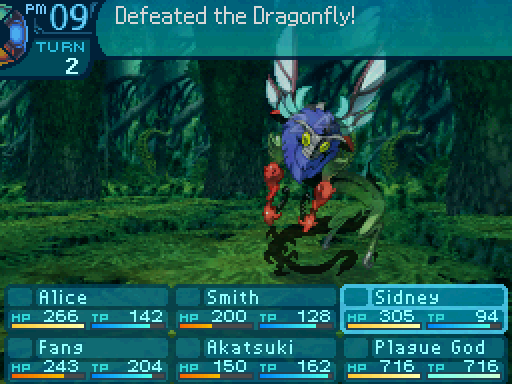
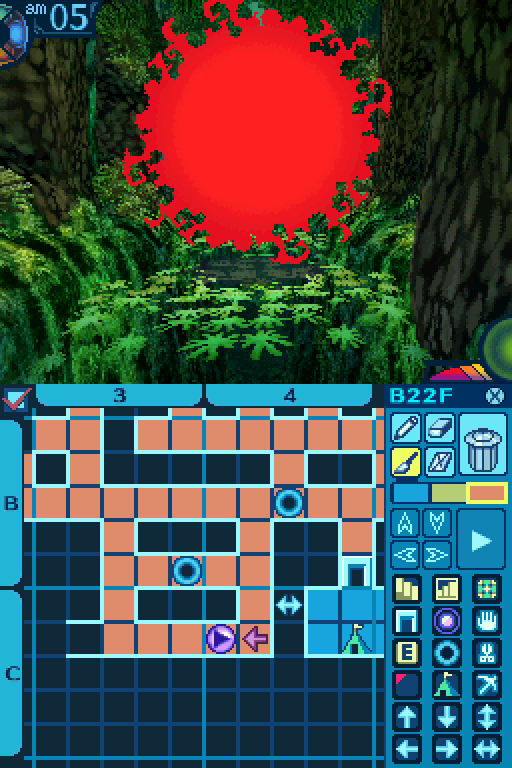
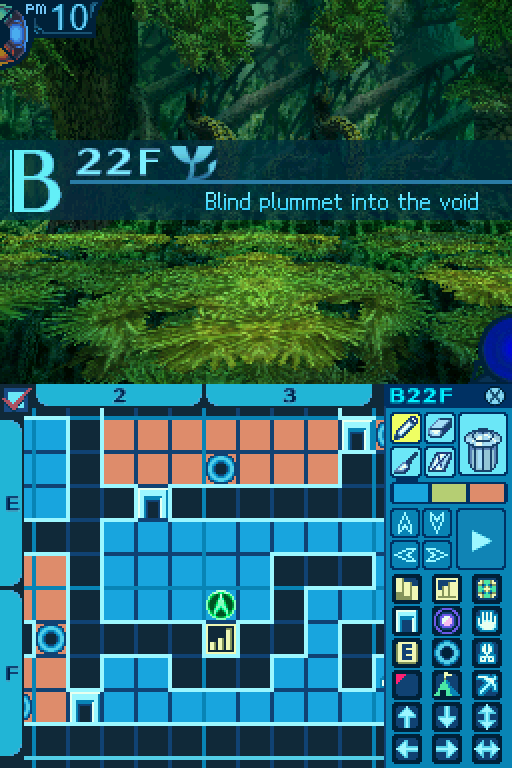
Continuing from where we left off, that’s the end of that mapless maze. Yeah, we were that close to the exit before I screwed up.

Oh, ha ha. Very funny, game.

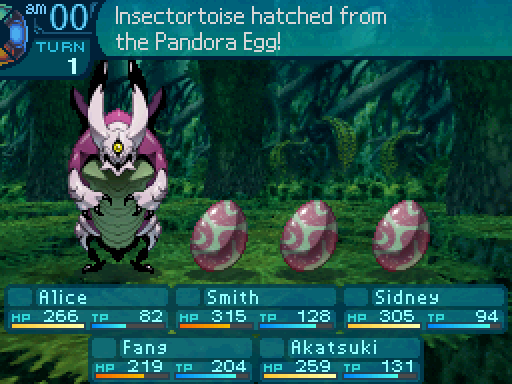
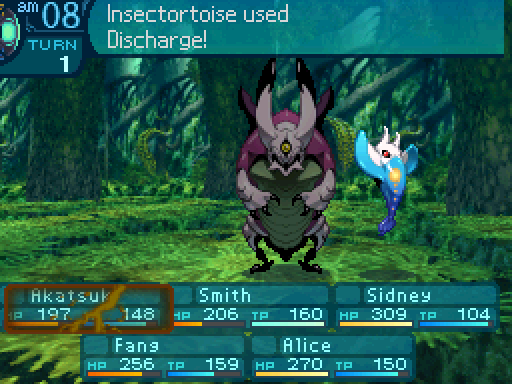
Another enemy that we saw before but one that I didn’t cover at the time. Insectortoises start appearing on this floor, so I’ll cover them now.

Insectortoise
Level: 59
HP: 812
STR: 54
VIT: 53
AGI: 45
LUC: 45
TEC: 61
Attack Type: Strike
Exp: 3813
Item Drops:
-Drop 1: Stink Scutellum - 20% Drop Rate. 1 needed for Kukuri (Knife.)
--Foundation that emits an awful stench in self-defense.
-Drop 2: Shielded Wing - 5% Drop Rate. 3 needed for Tilled Armor. (Heavy Armor.)
--Used for both flight and self-defense.
-Gold: N/A
Description: Resembles an insect, but is structurally unlike any other organism and may actually be alien.
Damage Resistances: Slash: 100% Strike: 50% Pierce: 100% Fire: 100% Ice: 100% Volt: 150%
Ailment Resistances: Sleep: 50% Confusion: 100% Plague: 100% Poison: 100% Blind: 100% Curse: 150% Paralysis: 100%
Bind Resistances: Head: 100% Arm: 100% Leg: 100%
Other Resistances: Death: 100% Petrification: 100% Stun: 100%
Skills:
Discharge: Uses the Head. Deals 85% TEC-based Volt damage to one row. Sacrifices 20% of the Insectortoise's current HP when used. (Insectortoises cannot kill themselves with this skill.) Has an accuracy of 99. Has an action speed of +10.
Lay Egg: Passive skill. Activates upon death. Replaces the Insectortoise with a Pandora Egg.
Throw: ???
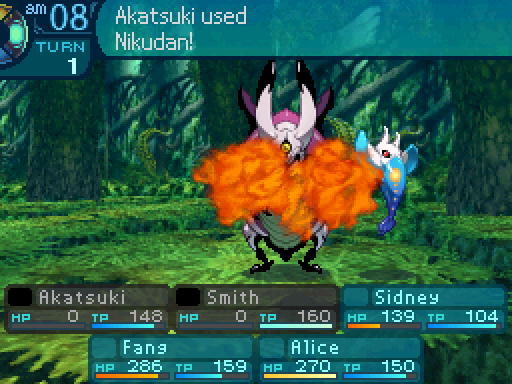
Insectortoises are pretty hard hitting enemies. They love to cast Discharge a lot, and coming off their high TEC stat and damage multiplier, it can wreck the party. It does hurt the Insectortoise itself, though that’s of relatively small comfort since it’s based off of the Insectortoise’s current HP. Also it’s less likely to spam the skill when it’s HP is low, so you ideally want to take them out first.
Now the unique thing about these enemies is that they’re kind of screw yous to 100% completionists. This is because of Lay Egg, which activates when they die, and summons a Pandora Egg while removing them from the battle. And activating Lay Egg doesn’t count as killing them. Which means that you miss out on their EXP, but more importantly, miss out on their monstrous codex entry and their item drops. And as insult to injury, one of their item drops only has a measly 5% drop rate, and you need to farm for multiples of it!
So in order to actually kill them, you’re gonna have to make use of a few special methods. You can put them to Sleep or Confuse them and kill them while they have those ailments, which will disable Lay Egg. Certainly the best time to snag a kill with Lucky Hammer since their item drop rates are so low.

 Oh no. You’re not getting away this time.
Instant Death and Petrification also bypass react on death skills, so that’s another way to actually kill them.

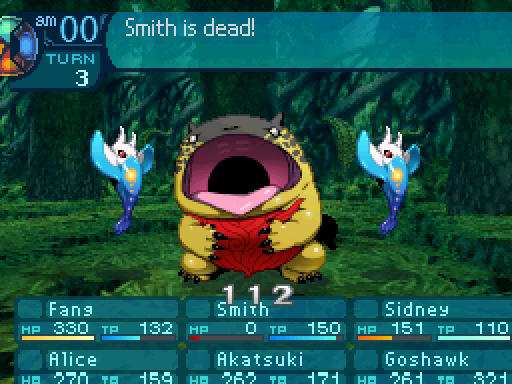
Overall, they’re a pretty annoying enemy in several aspects since you have to kill them in a specific way to even get a chance at their item drops. Smith also got a level up from that.
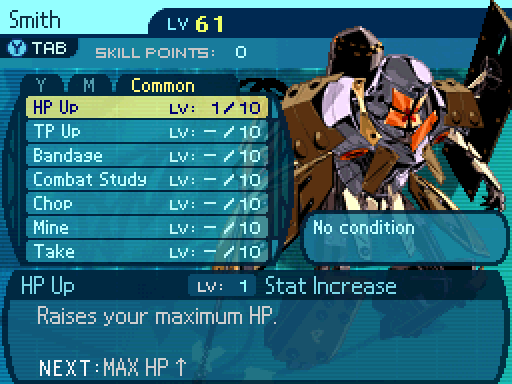
 Armored to the teeth!
Investing a bit in HP Up to him more durable.

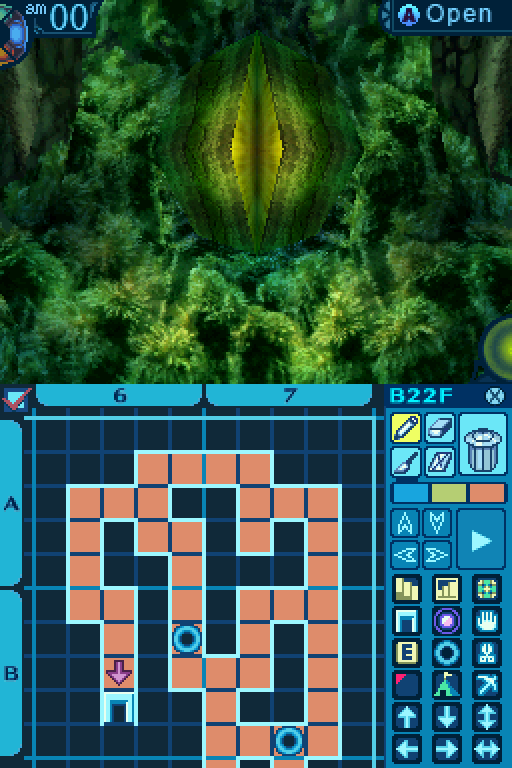
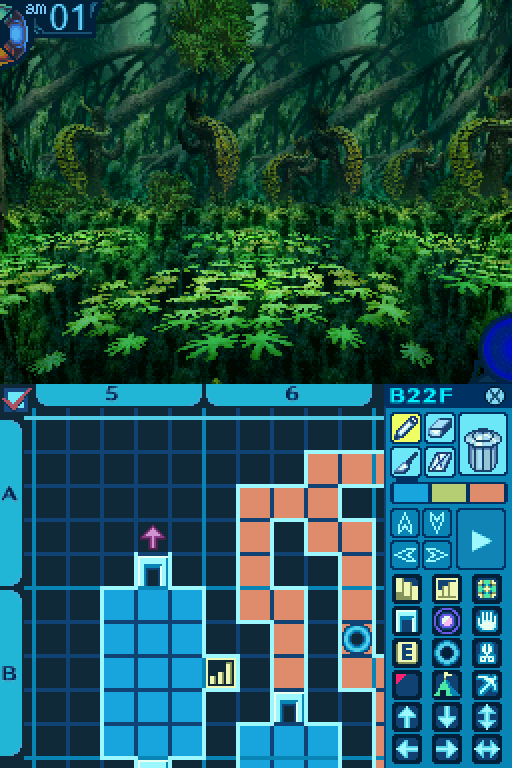
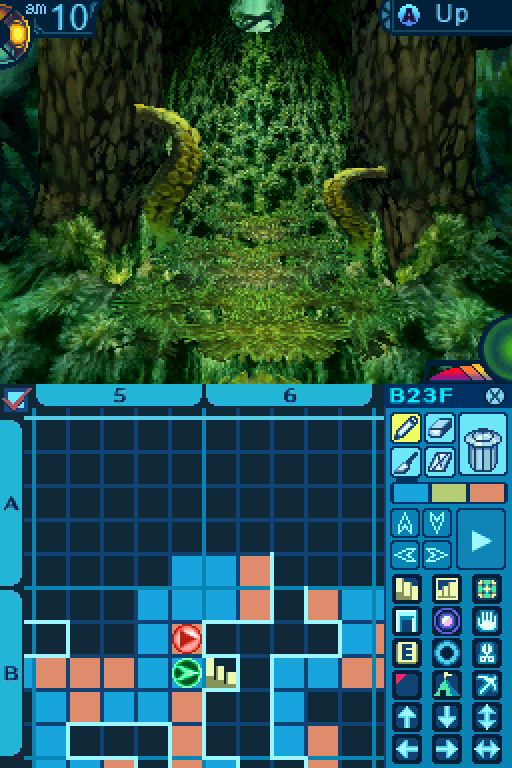
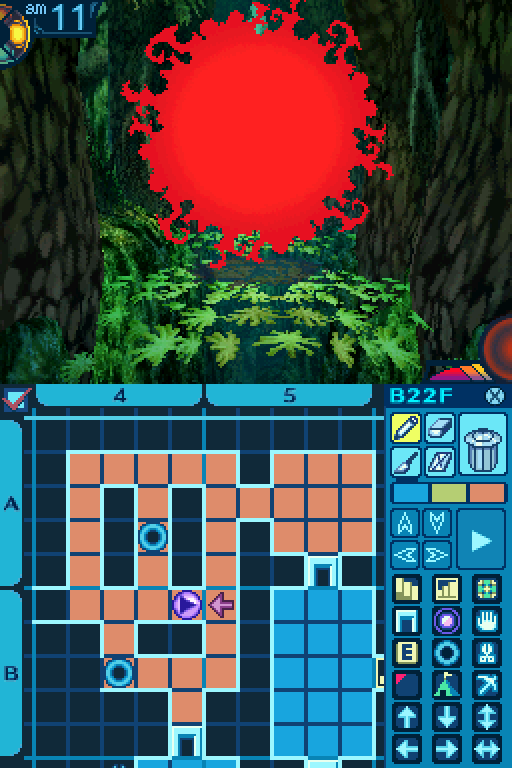
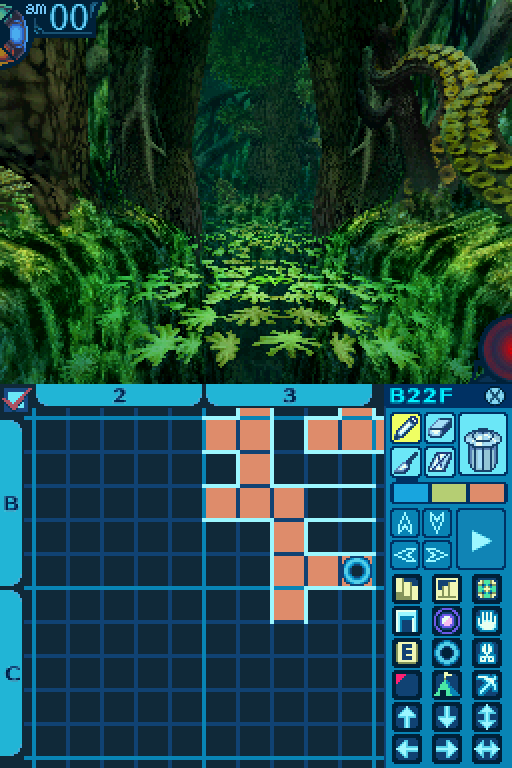
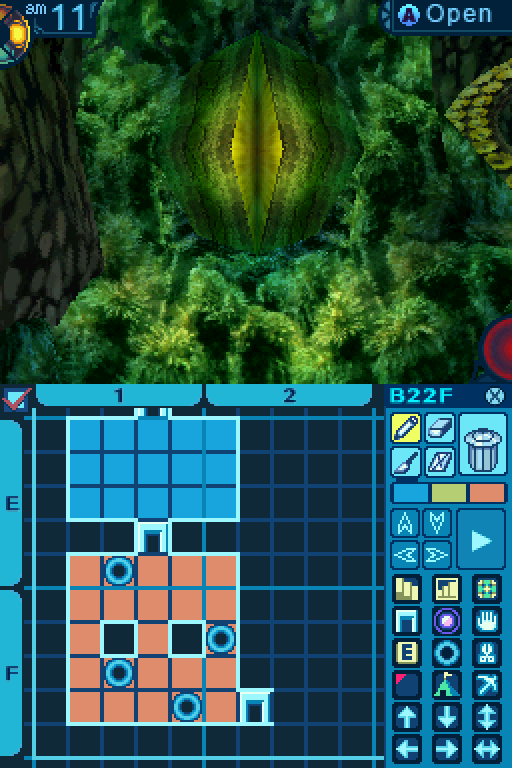
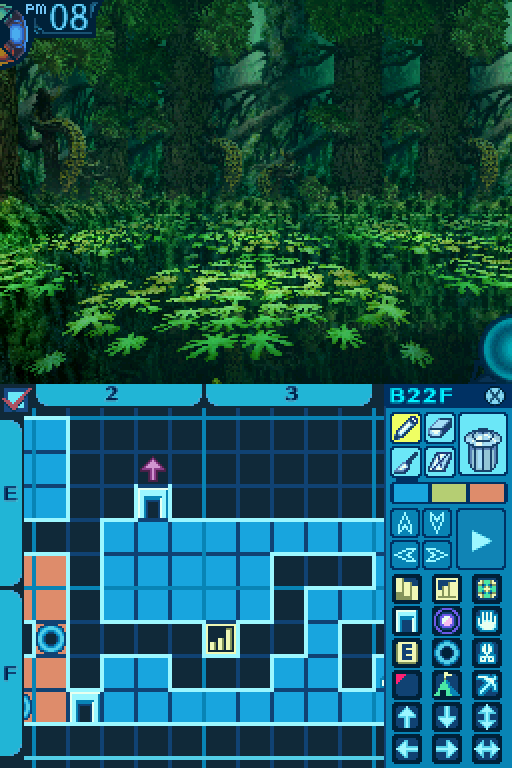
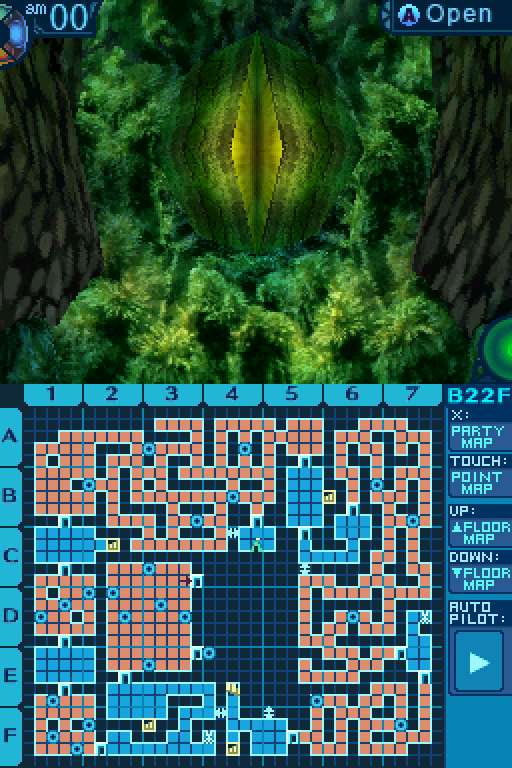
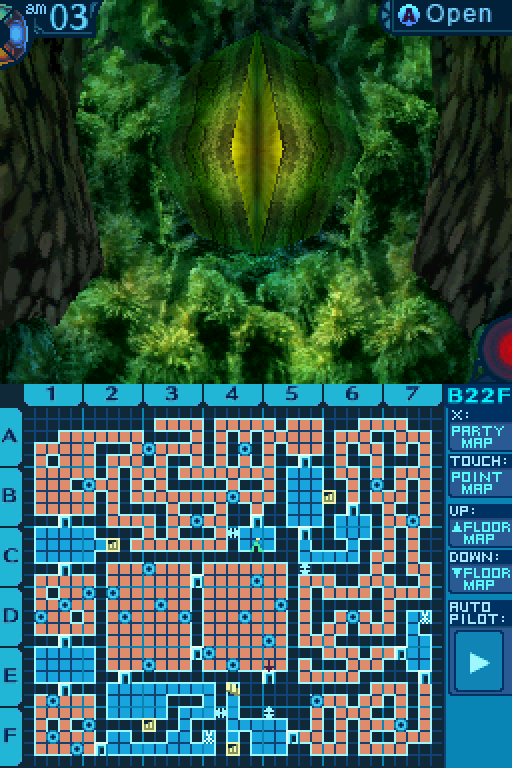
And now we don’t have to deal with all of that particular mapless section when going through here again.

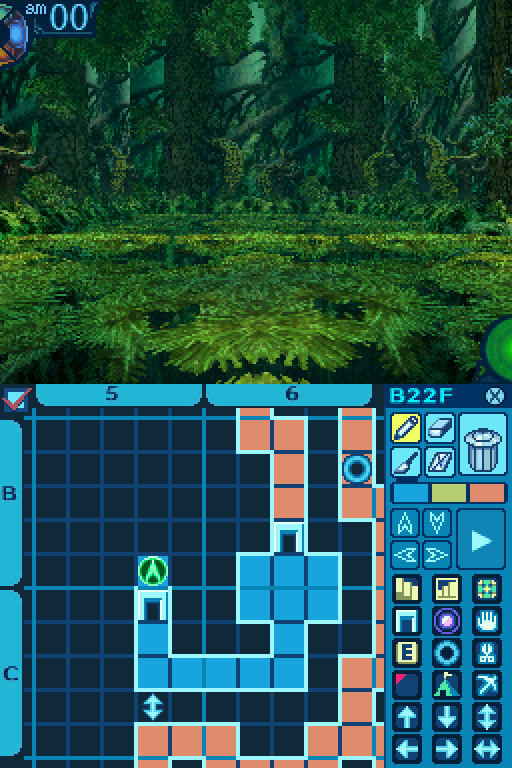
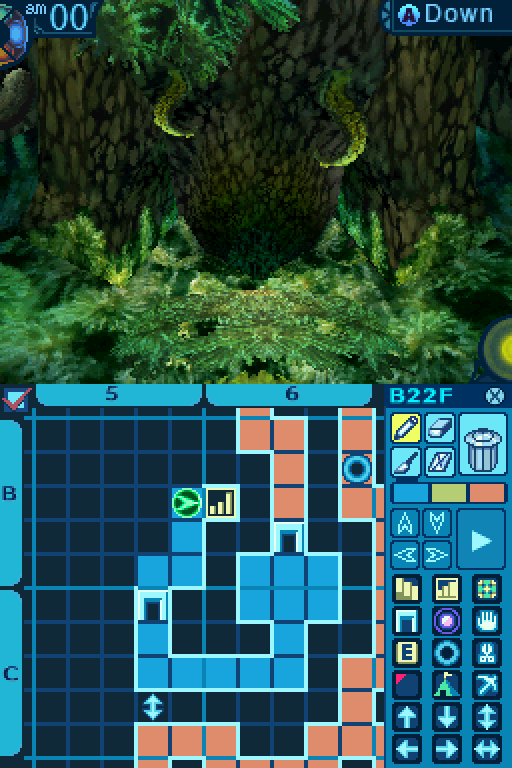
This set of stairs is essentially a checkpoint. When we fall into a pit from now on, we can start back from here instead of all the way back at the start of the floor.

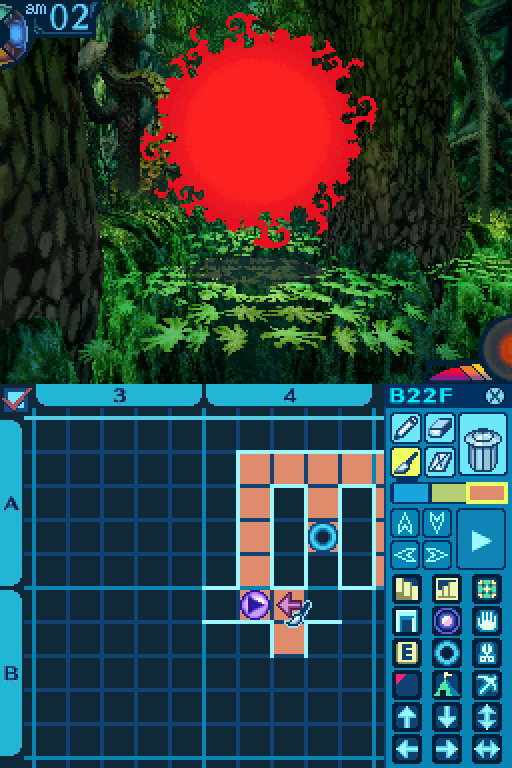
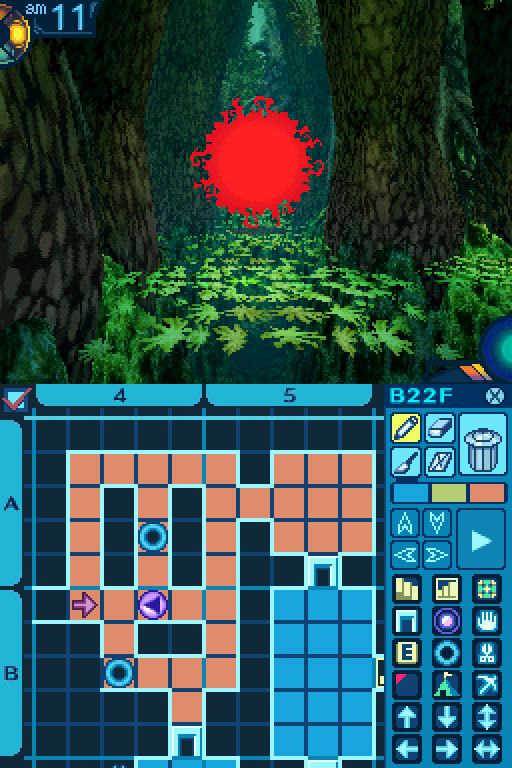
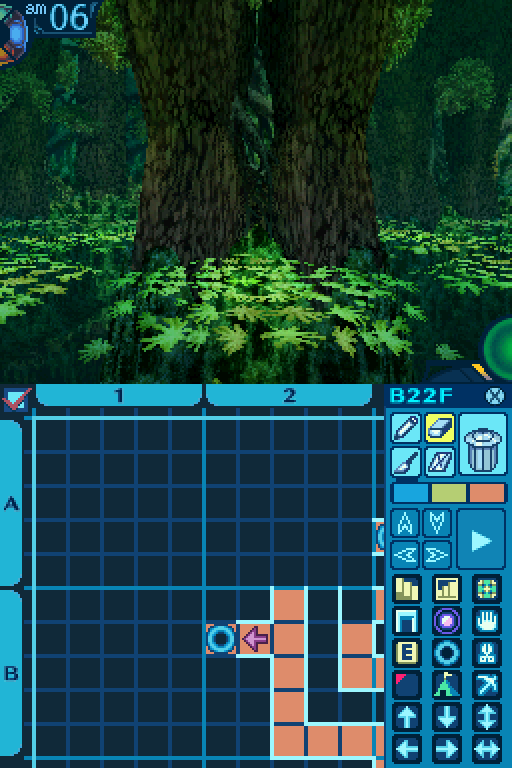
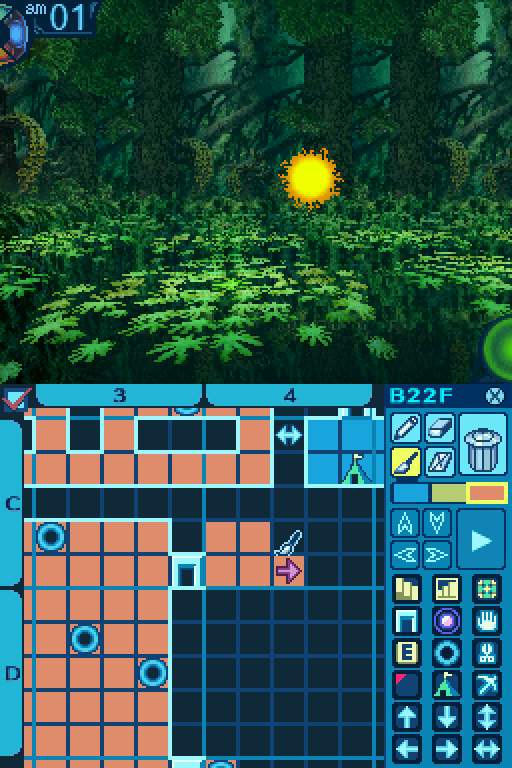
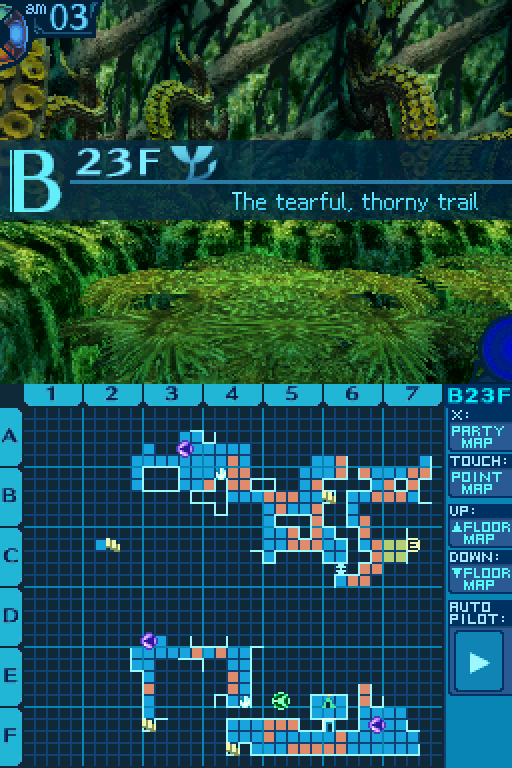
Onto the next mapless section.

Invisible pitfall here.

Oh, and here’s a new FOE. If you remember the Mud Lurkers from the 3rd Stratum, they pretty much behave exactly like those. They’re aggressive and will move toward us, but only if we’re in their line of sight. Unlike the Mud Lurkers, these FOEs are awake all day, so we can’t just change the clock to a specific time to get around their gimmick.
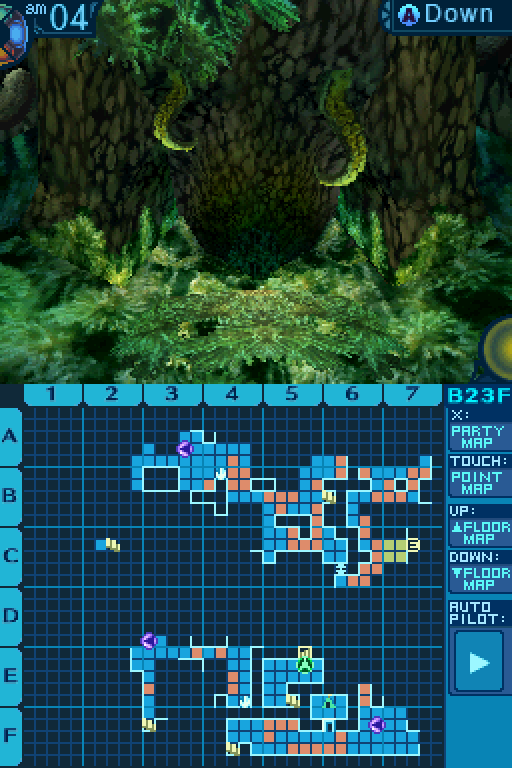
Oh and if you want to close the gap between you and them without outright running into them, you can just step in and out one of these side corridors to move them closer. You’ll have to do this in order to get past some of these FOEs.

Another level up for Sidney.

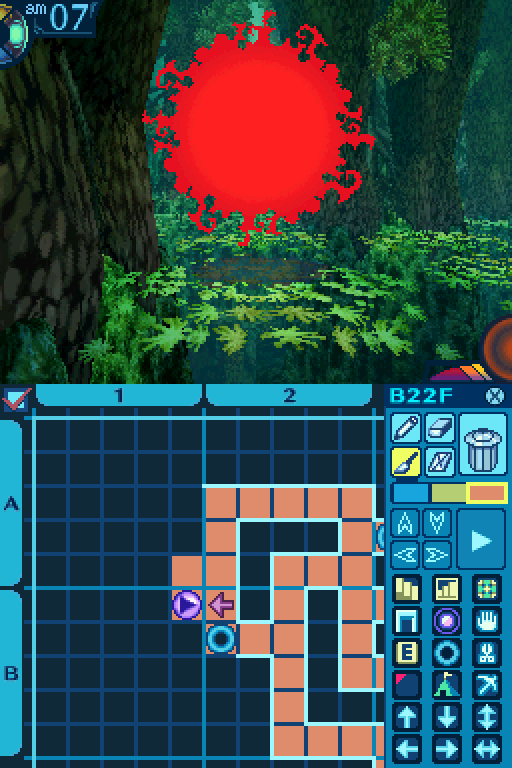
Another pit here.
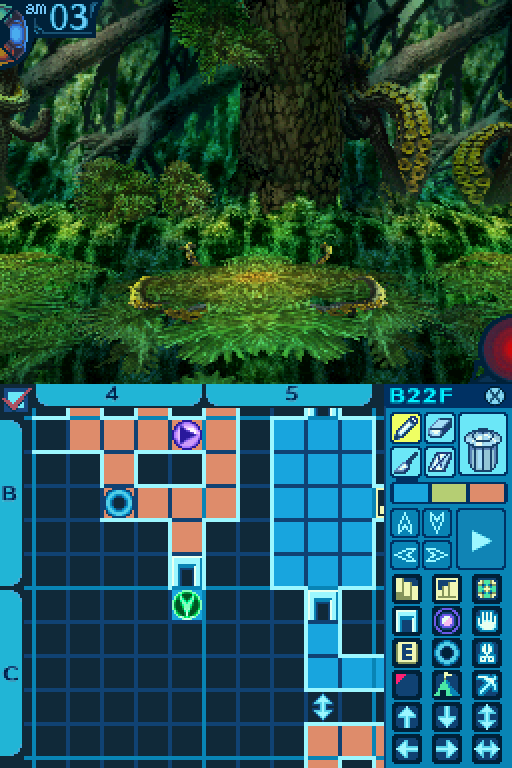
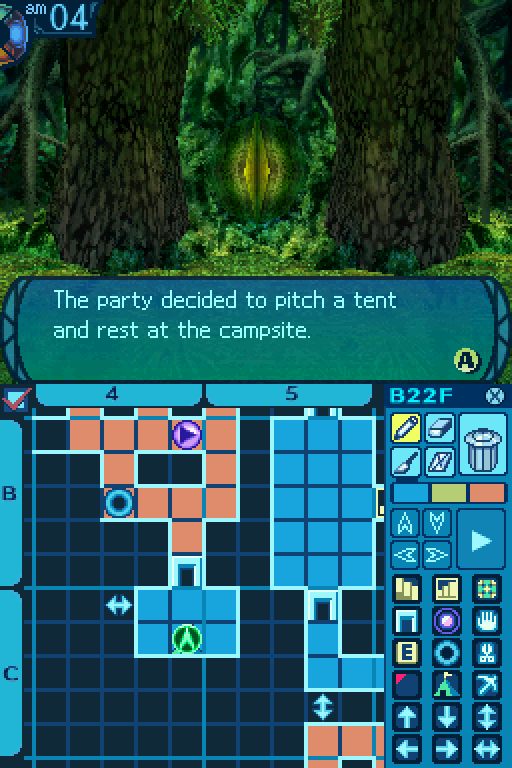
And there’s a campsite in this room if you need to rest up.
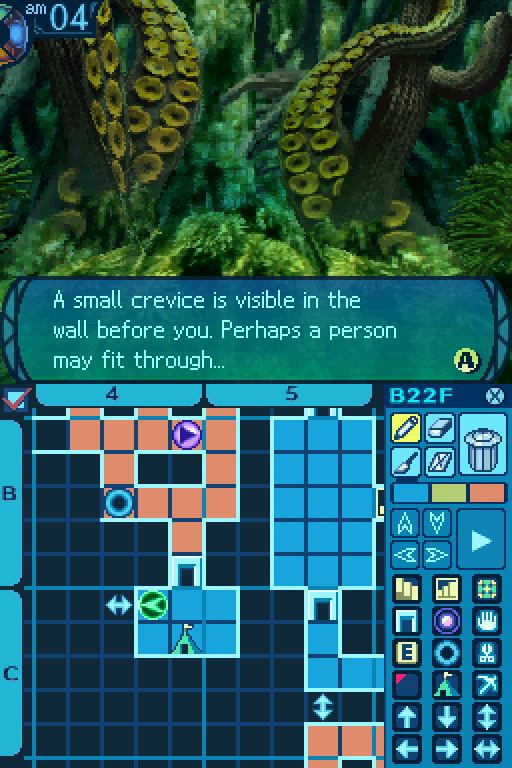
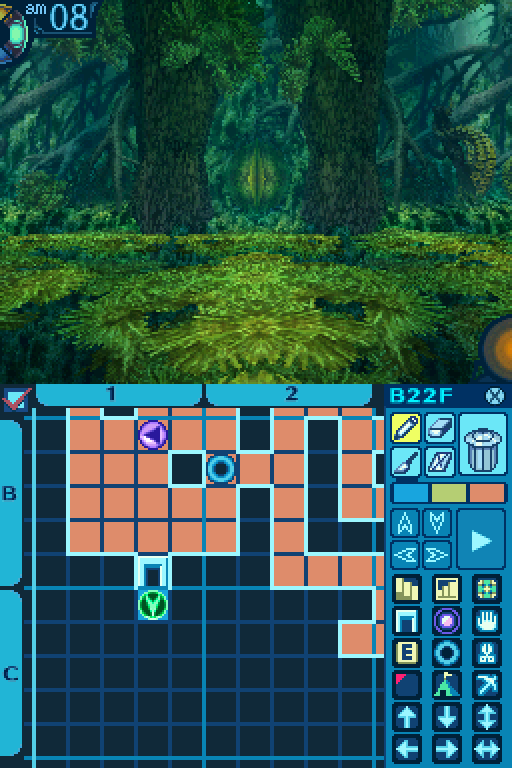
Also it was at this point that I realized I screwed up.
Uhhh, I think we might’ve just boxed ourselves in.
 What do you- oh right, that FOE.
Ooh, hey Alice! Think you can work some of your Ninja magic on it?
Um... I don’t know where to begin stabbing that... thing!
 Maybe if we stay here for a while, it’ll go away.
A sound plan. I shall go ahead and set up the tent.
Yeah, I’m pretty much trapped with no way to get past that FOE. And fighting it would be an even worse idea than fighting the FOEs on the 23rd floor. For one thing, these FOEs have access to an AOE Instant Death attack! Oh and said attack also inflicts a bunch of other ailments if that fails to land. Granted, Alice could probably survive that, but siccing her on the FOE is not an option since it’s also immune to Instant Death and Petrify.

Alright, I think that’s long enough. If it ain’t gone by now, it’s not moving anytime soon.

Well... that plan was a bust! Think we can take it?
Uhhh, I dunno about you, but I think we’d be nothing but dragon food if we fought that thing.
So we do we have to go back to Armoroad again?
Perhaps not... There is one other option.
Which is...?

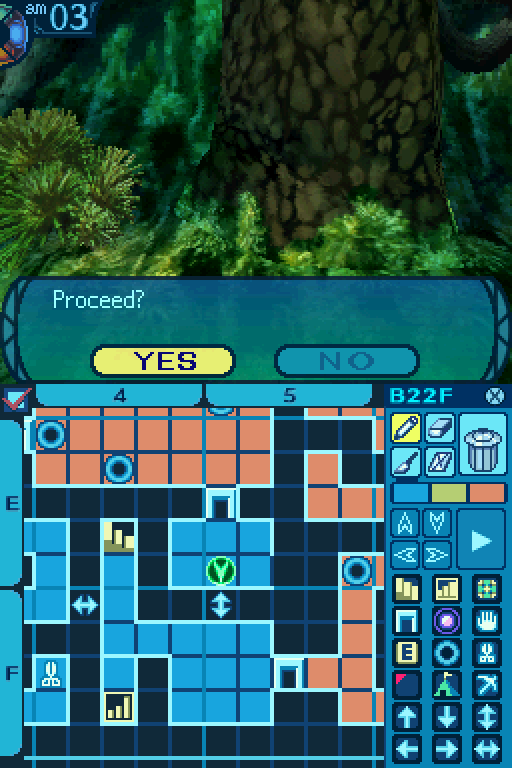
There should be a pitfall over here. And it shouldn’t take that long to walk back to the stairs we saw a while ago.
Hey, it’s worth a shot.

Geronimo!
I didn’t want to go back to town this soon, so I just bit the bullet and fell down the pit to retry that room.
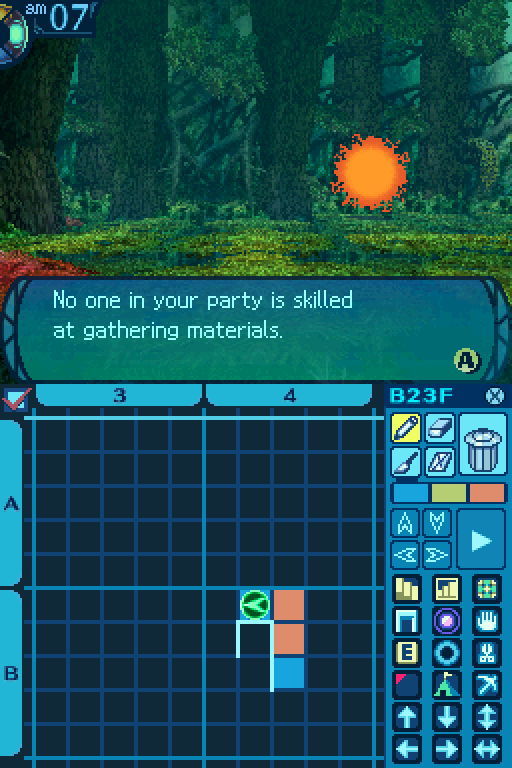
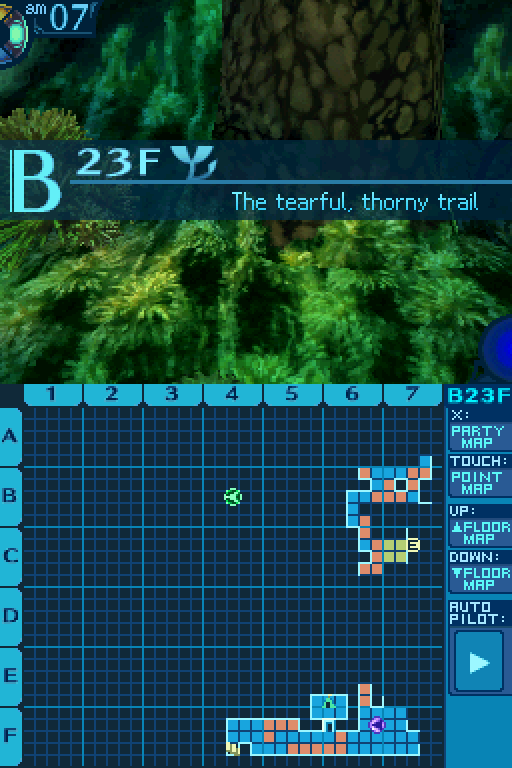
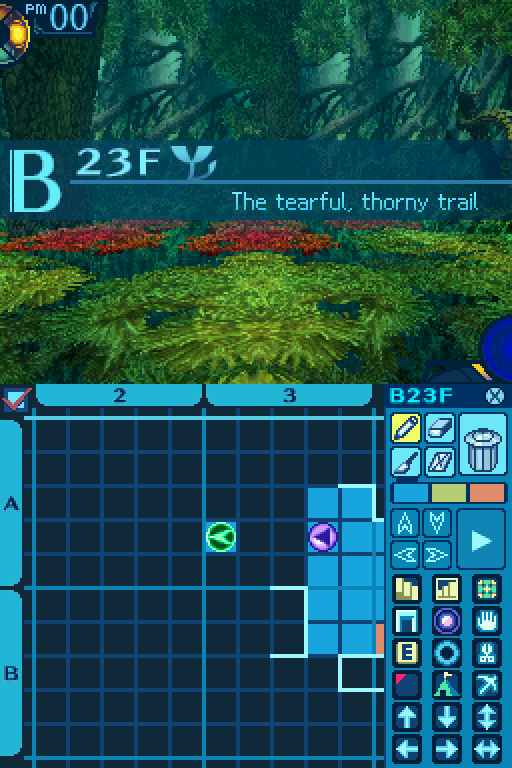
B4 Take Point:
Ambrosia: 75% Gather Rate. 1 needed for Madora II (Item. Must be restocked.)
-Glowing, white analeptic flower.
Hogweed Oil: 25% Gather Rate. 1 needed for Hamao II (Item. Must be restocked.)
-Refined oil that promotes the elevation of motor functions.
Maiden’s Wheat: Rare. 1 needed for Amrita III (Item. Must be restocked.)
-Legendary stalk of wheat left by a fertility god.
Common Gather Periods: 2 to 11.
Rare Gather Periods: 1 to 5.
And say hello to one of the most important Take points in the game. This is where you can farm for Madora IIs and more importantly, Amrita IIIs. Those fully recover a party member’s TP pool, so you want to farm for as many of those as you can.
Oh and I guess there are Hamao IIs.  I will never understand why these are late/post-game items. Well the other 2 items you can get from this point more than make up for that.

There’s also a secret passage hidden here so you can return to the first part of floor 23 if you wish.

Alice got a level up and uh...

Sure, why not? There’s not really anymore essential skills for her to take, anyway.
Okay, let’s try this without getting ourselves boxed in this time.
Okay, what you actually want to do is to lure that FOE to this very spot.
Then go up to get behind it.

And that lets you get past that FOE.

Unfortunately, I ended up losing track of where I was, and ended up falling into this pit as a result.
Shortly afterward, my party got roughed up from some random encounters, and supplies were running low. So I just opted to go back to town at this point.


The only interesting thing of note I’ve unlocked from that trip are the Madora IIs. Those restore a whopping 300 HP to a row. Now that I can farm for these, there’s no reason to ever use Madoras again. And now back to that mapless room. Again.
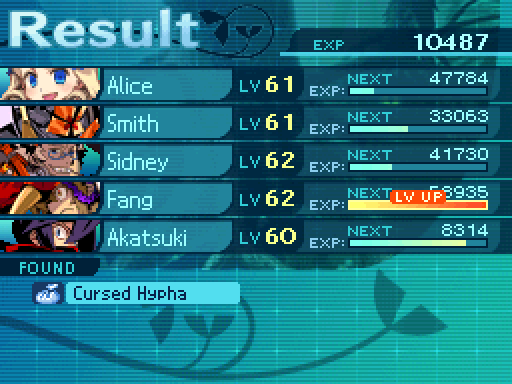
Fang got a level up on the way back.

Call Snake is almost maxed out. Which is good since I’ll be needed all of his binding skills maxed out for something later.
Back to where we left off. There’s an invisible pit down here.

Not that great of a shortcut, since that only lets us skip the first FOE puzzle.

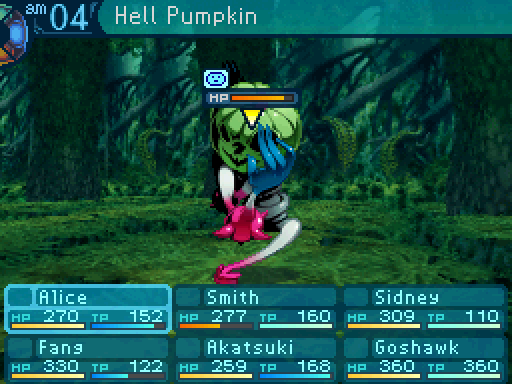
And here’s the 2nd member of the pumpkin trio.

Hell Pumpkin
Level: 0
HP: 1430
STR: 54
VIT: 55
AGI: 48
LUC: 46
TEC: 63
Attack Type: Pierce
Exp: 4666
Item Drops:
-Drop 1: Cursed Bone - 50% Drop Rate. 1 needed for Crescent Robe (Clothes) and Kurikara (Katana.) 2 needed for Grasida (Spear) and Agbuster (Gun.) 3 needed for Dark Gauntlets (Gloves.) 8 needed for Rock Amulet (Accessory.)
--Still radiates an ominous presence after it’s removed.
-Drop 2: N/A
-Gold: Cursed Vine - Kill while fully bound. 100% Drop Rate. 1 needed for Grasida (Spear.)
--Vine-like, invertebrate body of a pumpkin.
Description: A more powerful form of the Death Pumpkin. The grudges given form constrict its prey.
Damage Resistances: Slash: 100% Strike: 100% Pierce: 100% Fire: 75% Ice: 75% Volt: 75%
Ailment Resistances: Sleep: 100% Confusion: 100% Plague: 100% Poison: 100% Blind: 100% Curse: 150% Paralysis: 100%
Bind Resistances: Head: 10% Arm: 10% Leg: 10%
Other Resistances: Death: 50% Petrification: 50% Stun: 25%
Skills:
Scorching Hell: Uses the Head. Deals 55% TEC-based Fire damage to the entire party. Has an accuracy of 99. Has an action speed of -5.
Bewildering Eye: Uses the Head. Has a 90% chance to bind the entire party’s heads. Has an action speed of -5.
Halloween: ???
Hell Pumpkins (also known as Flygourds in other games) basically just try to Head Bind the party with Bewildering Eye, and then take advantage of the TEC halving effect by roasting the party with Scorching Hell. It can be a pretty nasty enemy, especially since Head Binds can screw quite a few classes up. They won’t ever bother to use Scorching Hell unless at least one of your party members has their heads bound. A Hoplite with Antifire can make them trivial to deal with.
Oh, but I’m not done talking about this enemy yet. You see that conditional drop it has? The one that requires you to kill it while fully bound? That means all we have to do is just to bind its head, arms, and legs-
Hell Pumpkin’s Bind Resistances posted:
Head: 10% Arm: 10% Leg: 10%
...Oh. Yeah we don’t have anything like Dominate from the last game to cheese this drop, so we have to do this the hard way. To showcase how much of a problem this is, let’s say Fang has all of his binding animals at max level, his LUC and TEC greatly outpaces the Hell Pumpkin’s LUC and TEC, and he has Wild Mastery maxed out as well. He would have at most, a 25% chance of landing each bind! And there’s no way to reset accumulative resistance in this game, so he only has one shot to hogtie the Hell Pumpkin!
But wait, there’s more! You see how that Hell Pumpkin is level 0? Oh that wasn’t a mistake. It’s actually like that in the game data. And since the Hell Pumpkin’s LUC is far greater than its level, that means that the Hell Pumpkin has at least a 40% chance of recovering from any disables on a given turn! Yeah you see how this conditional drop miiiiiight be a tiny pain in the butt to get? Thought kill with Curse damage was hard to deal with? This one isn’t as bad, but boy does it try to be worse.
All I can really say to this is, Atlus you utter dicks.


Alright, this is looking good so far. Now if I can just land that arm bind...
... 
Oh screw this. Time to activate the nuclear option.
Mr. Pumpkin, would you mind if I pruned your vines real quick? They’re looking awfully long.

Oops, I guess I went tufa!
...Yeesh, remind me to never piss her off.
Would ya believe me if I said that she wasn’t always that good at taking out monsters?
You have me to thank for that.

Yeah as you can probably tell, Alice is this team’s artillery cannon. The heavy hitters in our guild aren’t guaranteed to take out these enemies in one hit, while Alice is just a walking delete button, so she’s pretty much the best in the guild for dealing with the random encounters here.
...I can’t believe that was actually a serious statement I just said. At any rate, those Hell Pumpkins can be threatening if you give them the chance, but they’re not too bad as long as you focus them down.

Back to exploring this floor, there’s an FOE in this corridor that we want to lure to this spot.
Likewise with this FOE in this corridor down here.

We can slip past that lower FOE now that it’s out of the way.
Oh, and watch out for this pit here.

Moving that FOE from even earlier to the bottom of the hallway let us slip past it now.
There’s an FOE in this part of the maze that we want to lure to this tile.

Which lets us slip straight past it, and we can head right to the door.

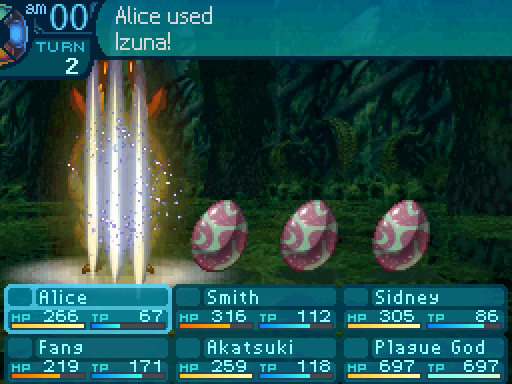
You dirty, dishonorable egg spawn...!
Short circuited...
Oh, and that’s how a Clionean can easily screw over a team.

Dishonor... must be fought with dishonor- oh, really? That didn’t get it?
Don’t worry.


I got it for you.
Hee hee, she’s totally a keeper.
Oh, shut up...

And here’s the next set of checkpoint stairs if we fall into a pit from now on.

Now this next room is a little different.

Instead of navigating through a maze, you now have to navigate through an open room with invisible pitfalls strewn about. So essentially we have to navigate through a minefield of pitfalls. Since there is nothing of interest in these rooms other than the invisible pitfalls, I’m going to be mostly skipping over them.
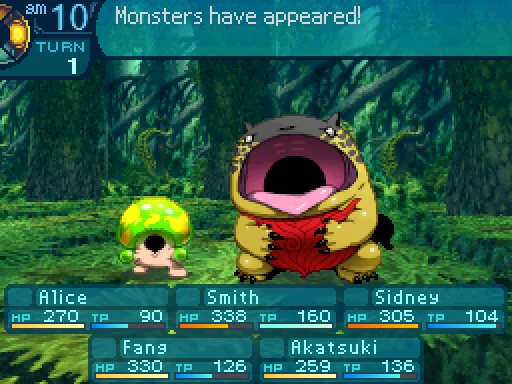
And here’s the last new enemy on these 2 floors.

Omnivore
Level: 60
HP: 2137
STR: 62
VIT: 61
AGI: 38
LUC: 50
TEC: 52
Attack Type: Strike
Exp: 4602
Item Drops:
-Drop 1: Infernal Scale - 20% Drop Rate. 1 needed for Kukuri (Knife) and Beast’s Chain (Wildling’s ultimate clothes.) 3 needed for Kamewari (Katana.) 6 needed for Hildebrand (Shield.) 7 needed for Dvergr Sword (Sword) and Panic Seal (Accessory.)
--Scale with evil flame patterns that calls forth misfortune.
-Drop 2: N/A
-Gold: Infinite Tongue - Kill while head is bound. 95% Drop Rate. 4 needed for Shuriken (Knife.)
--Seems capable of stretching endlessly...
Description: Its mouth is easily half the size of its body, and will devour anything that does not fight back.
Damage Resistances: Slash: 125% Strike: 125% Pierce: 125% Fire: 125% Ice: 125% Volt: 125%
Ailment Resistances: Sleep: 50% Confusion: 100% Plague: 150% Poison: 150% Blind: 50% Curse: 100% Paralysis: 100%
Bind Resistances: Head: 10% Arm: 100% Leg: 100%
Other Resistances: Death: 100% Petrification: 100% Stun: 100%
Skills:
Snapping Teeth: Uses the Head. Randomly hits everyone with STR-based Strike attacks 3 to 5 times, dealing 100% damage per hit. Has an accuracy of 99. Has an action speed of -5.
Swallow Whole: Passive skill. Activates once a fellow enemy’s current HP drops to 25% or lower. Instantly kills the designated enemy, and triggers Kaishaku Heal, even if the enemy in question was not instantly killed. The Instant Death pierces all resistances and immunities. However, the Instant Death component cannot trigger if the user’s arms are bound.
Kaishaku Heal: Passive Skill. Heals the Omnivore for 600 HP if they killed an enemy with Swallow Whole. Heals them for 0 HP if they did not.
Escape: Uses the Legs. Escapes from battle, denying the party experience points and their item drops. Has an action speed of -3.
This enemy is completely unrelated to the Omnivore from EO1. Though if you’re familiar with that enemy, I’m sure you could tell since the Omnivore in EO1 was a plant.
These enemies are fairly interesting. They actually have their own version of Kaishaku, which thankfully only affects their side. If an enemy’s HP gets really low, they’ll get eaten by the Omnivore and restore some of its HP. The Omnivore itself doesn’t do much if it barely took damage and will even spend some of its turns defending, but once it has lost a bit of HP, it’ll make use of Snapping Teeth, and it hits decently hard. Oh and if it’s alone, it’ll either use Snapping Teeth or decide to get out of the battle.
Oh, and as for that conditional-
Omnivore’s Head Bind Resistnace posted:
Head: 10%
...Why do you keep doing this!? 

You’ve been eating too much. You need to go on a diet.
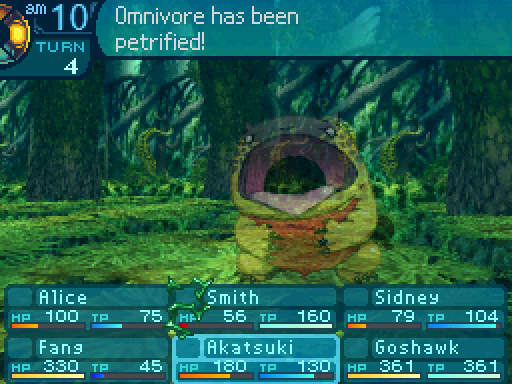
Still snagged that conditional anyway. If you’re gonna take out the Omnivore first, do it in one turn, or your party will take quite a bit of damage from Snapping Teeth.

Nothing really interesting about this room. It’s just a bit of a rest stop before the next minefield.
Here’s the pit layout in this room.

Level up for Akatsuki.

Tagen Battou now has a base damage of 72% and a skill multiplier of 108%.
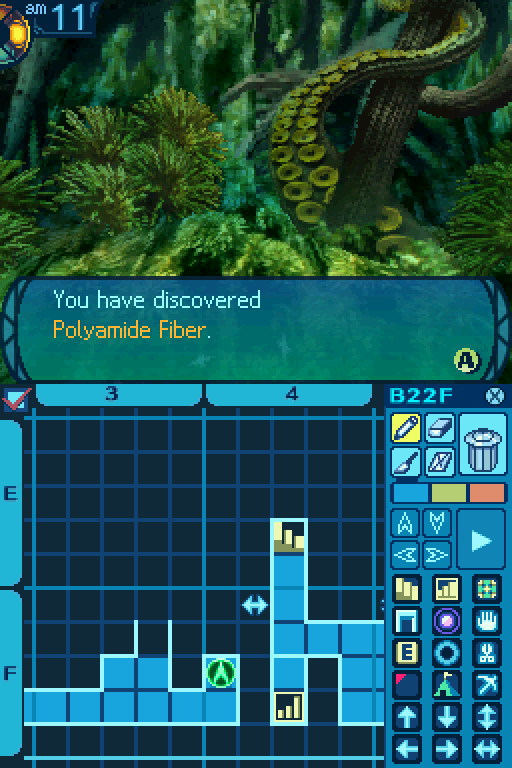
F4 Chop Point:
Polyamide Fiber: 80% Gather Rate.
Star Driftwood: 20% Gather Rate.
Stardust Twig: Rare.
Common Gather Periods: 2 to 12.
Rare Gather Periods: 1 to 5.
And here’s the other Chop Point on this floor.
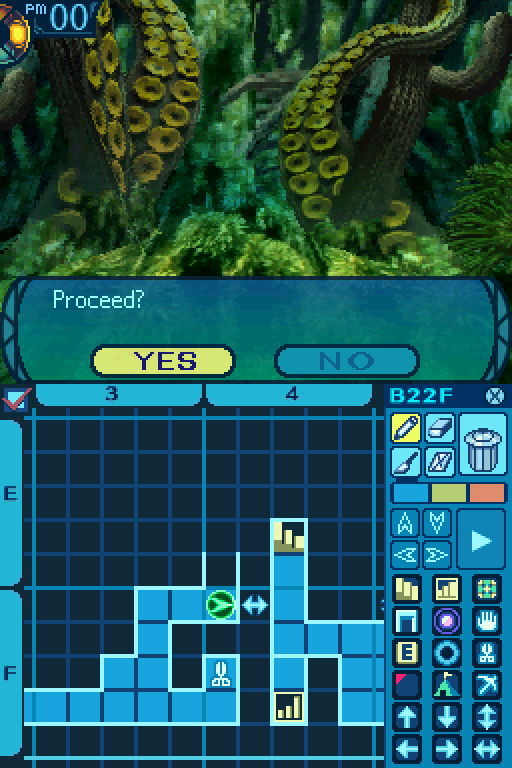
And now we can skip most of the floor on repeat visits. There’s only one last mapless section left. And since I unlocked this shortcut, I went back to town to unload my materials and restock my supplies.

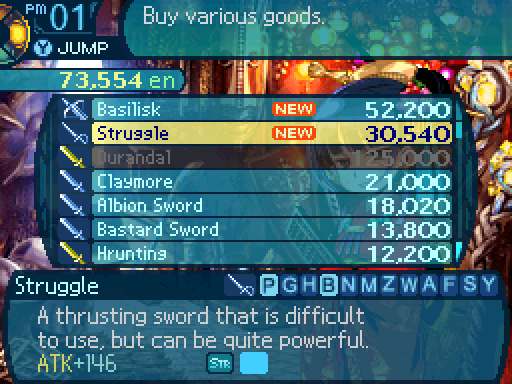
10% TP increase for a Shogun. Not a bad weapon upgrade.

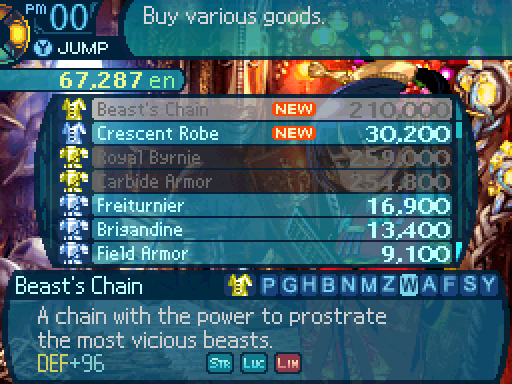
And here’s the Wildling’s ultimate armor, the Beast’s Chain. The LUC increase is nice, as well as the Limit increase, I suppose. And I guess the STR boost can help animals deal more damage?

And that’s all I unlocked on this trip.

Here’s the last set of checkpoint stairs.

Just one more of these sections to go.

And here’s the door to the next room already.

...
I hate this place. So much.
Me too.
Oh Atlus, you utter utter dicks.

E4 Take Point:
Ambrosia: 60% Gather Rate.
Hogweed Oil: 40% Gather Rate.
Maiden’s Wheat: Rare.
Common Gather Periods: 3 to 16.
Rare Gather Periods: 1 to 4.
At least there’s a Take Point down here.
Okay let’s try that again.
Can this just end already!?
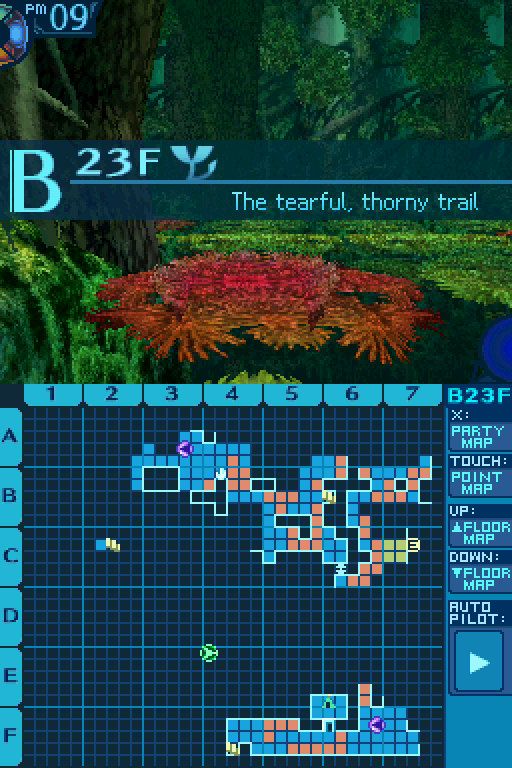
And there’s the map for part 1 of this minefield.
Oh hey, a Pasaran. Too bad I can’t really kill it with this team.
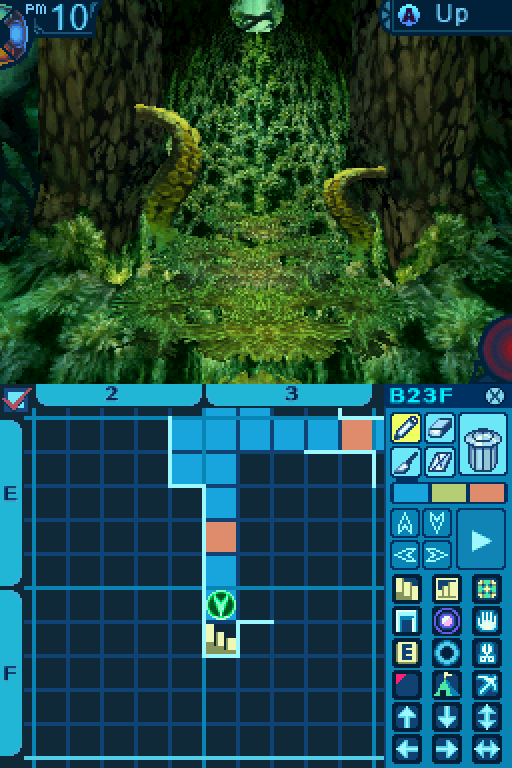
And I am finally, finally done with those stupid pitfalls!

Ooh, double Pasarans! But as tempting as it would be to go after them, this team just has no killing power. And Alice can’t even kill them with Instant Death or Petrification, so that’s not an option for taking them down as well.
And now I no longer have to bother with any of that nonsense! 

Goodbye, you awful awful time waster of a floor!
Floor 23’s map isn’t complete, but whatever. I don’t care. I’m free. Screw that noise.

Unfortunately, as bad as floor 22’s gimmick was, it could at least be circumvented by looking up a map. Floor 24’s gimmick is worse and has no such way out.
And I don’t feeling like dealing with this floor right now, so it’s back to town for us!


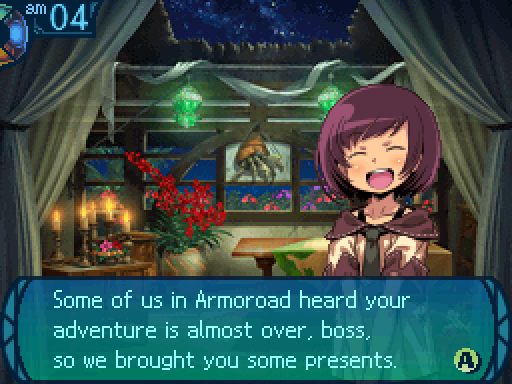
 You’ve done a lot for us, after all, like granting our requests and restoring the sea lanes. I think it’s great that you’ve become real Armoroad citizens during your time here! But... you’ll be leaving soon, won’t you, boss?
...Yeah. Sorry kid, but we can’t stay here forever.
Still, the people of Armoroad--including me, of course!--will never forget you guys! And I hope you won’t forget us either, boss!
We sure won’t!

 How rude! This is the finest tea I could trade for! You should see its golden ring!
...So how much are you demanding from us this time?
No, that’s all right. Just enjoy it. I’ve been making money hand over fist thanks to you all... One cup of tea is a drop in the bucket compared to all the wealth you’ve brought me. The second cup, of course, will cost you. Though I’d sell you the bag at a discount...
Oh, of course it would.

Just one new item this time. Hamao IIs restore 100 HP and 50 TP. Yeah, just go for Medica IVs and Amrita IIIs at this point.

 I’ve got one in today! It’s another request from that monster researcher...
O-oh, we’re not here for a request this time.
...Oh, you aren’t here for a request? W-Well, I’ve got a new item on the menu...
We’re not here for that either.
Yeah uh, we just came to visit. Before we, you know...
...... ...If you make it to the end of the Labyrinth, you’ll leave Armoroad for more adventures... Thinking about that makes my heart cry inside... Hey! How can you let that happen!? Oh, I got it! You guys should just live here in Armoroad! That’d be schway, right? Right?
Uhhh...
...Aw, boo. What kind of person would I be to keep adventurers from having adventures? ...Just go about your business like normal, all right?


 Say, want me to give you a little training and gauge how strong you are now? How about it?

Um, I don’t think that would be a good idea.
...Did you get cold feet? Or are you worried you’d hurt me?
To be honest, yes.
Hah! That’s rich... There’s no need to worry about that. I could take you all at once. But if that’s your decision, I won’t force you.

Oho, fine! Ya wanna fight? Bring it! I’m ready for ya!
That’s what I’m talking about! Wait right here. I’ll go get one of my favorite weapons. The Shichiei Dourin is a legendary sword that can fell seven enemies in one... Oh, crud. Hold up. I completely forgot that it’s being sharpened at the moment. Some other time, I guess.
Aww, I shouldn’t have gotten excited there.


 It’s not good to make an old man like me worry, you know! Hahaha!
You don’t need to worry about us all the time.
Yeah! We’re all rough and tough scrapper!
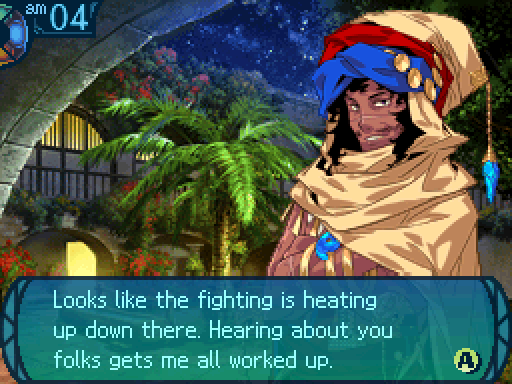
I treat my sailors as though they were my flesh and blood, and the same could be said of you. I’ll have you know, nothing is sadder than a port without ships, so you’d better come back alive!
Don’t worry! We promise!
I certainly hope we can keep that this time.


 How the devil are you supposed to deal with that!? It’s like some sort of alien geometry...
Lots of guesswork.
And sore butts.
I think in the end, it’s best to remember the wariness you felt at the beginning of your journey. In the end, all you can rely on is the map you’ve drawn and the skills you’ve honed!


What makes you say that?
 Hm...? Oh, I’m saying so because the quakes are getting worse. And the guards here are talking like the fate of mankind hangs in the balance here...
Oh, um. No pressure, eh?
But even now, I can’t run away. It’s my job to wait here for everyone who comes back wounded. We’re all in the same boat. Plus, if you croak, I don’t know where in the world I’d be safe. That’s how I see it, anyway. You leave this place to me and go on ahead, okay? ...I wanted to say that at least once before I die.
Well that won’t be today or anytime soon! I’ll say that much!


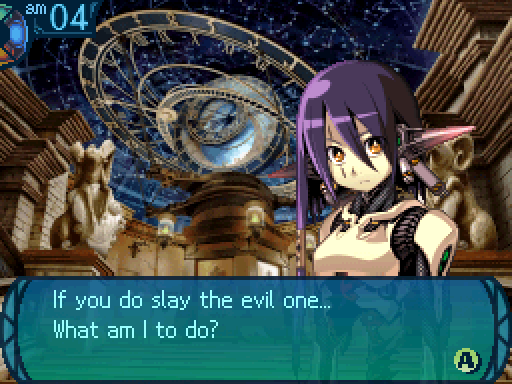
Oh, right. You were, built to um... You can’t think of any ideas of what to do after we’re done?
 My duty will be at an end. I will cease all activity. It is difficult to think of anything else.
Well I don’t feel like tackling the nightmare that is floor 24 anytime soon, so let’s go do something else instead.

Here it is. The last quest in the entire game. This is the last of the letter in a bottle requests, so in order to access this one, you need to have completed those first.
Did something happen over there? I thought we got rid of that disease...
Oh, you’re accepting that request? That is another one from the boy at the inn. Thanks to your actions last time, a lot of people were saved from danger. It is looking like that rascal of a kid is still worried about something, though. So, go talk to him again, just like all the other times. ...Make sure to be ready! ...My bartender sense is telling me this is going to be a big one! Get going then, explorers!

Yeah, so mind telling us what’s wrong?
Thank you very much! I owe you so much for all you’ve done... ...It turns out that the Green Death disease was being spread by a monster under Elly’s town. When the townspeople realized that, they tried to kill it, but it got away. It escaped onto a ship headed for Armoroad, and all the ships they sent to catch it were sunk.
Wait, here!?
Uh oh.
The only warning that made it here was Elly’s letter! Even if I told the guards, they wouldn’t believe me! I’m just a kid! You’re our only hope! Please, find the monster and defeat it before something horrible happens!

 It looked wounded... That may be why it didn’t run into the city and cause any havok. The guards will begin a full and thorough investigation soon. Please stay put until then. ...Then again, I guess there’s no point in telling you that. Just don’t do anything crazy.
...Honest question, does anyone actually expect them to accomplish much?
Not really. And I dunno about the rest of ya’ll, but growing plants outta my body doesn’t sound like my idea of a good time!

However, every member of the crew was found dead, killed by a monster hiding on the ship. The ship reached Armoroad on the currents, and the monster immediately fled to the forest. I think of every sailor who enters this port as one of my children! ...I beg you! Find this monster and avenge these senseless deaths!
...Maybe we should prepare, first.
As you can probably infer, we’ve got a boss fight coming up. Now then, why don’t we see how our guild is doing?
Boss
HP: 22000
AT: 66
DF: 72
Weakness: Fire
Resistance: Ice, Volt
Out of all the post-game quest bosses, this one is probably the toughest of the bunch. Assuming you killed Kraken the intended way, anyway. It has access to hard hitting elemental attacks and access to some very nasty status effects.
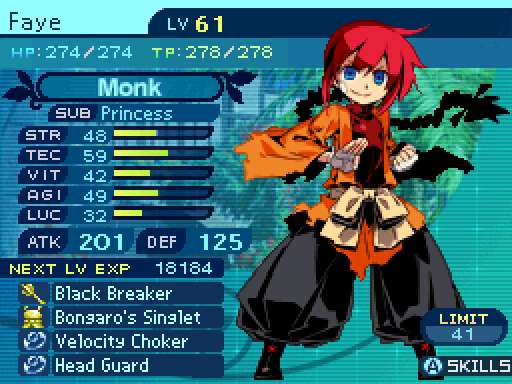


Faye is a fantastic support to bring along. Can heal up the party with Protect Order, and protect them from status effects with Prevent Order. Not only that, she can buff the party’s physical damage output.


Cassandra is also a fantastic support to bring, as her Anti-elemental attacks can take a lot of the sting out of this boss fight. The boss also has a pretty nasty physical attack at its disposal, which she is capable of taking the sting out of as well.


Sidney is a great damage dealer, but he’s also very fragile. Front Mortar can deal a ton of damage to the boss, but he really can’t take hits without proper defensive support.
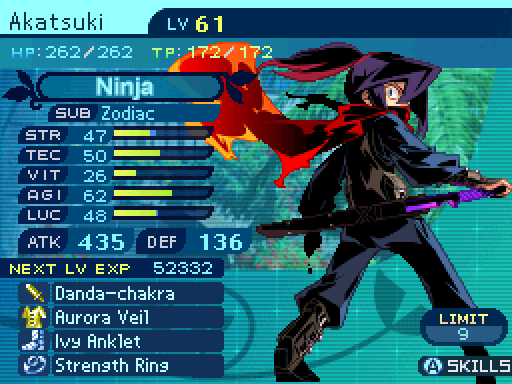


Akatsuki is the fastest party member we have, and a fairly decent low maintenance physical damage dealer thanks to Keburi no Sue. His decent TEC stat also means that he can take hits from the boss’ elemental attacks fairly well.


Meteors always make for a fun time, and Asteria also has the option of roasting the boss with Etheric Charged Hellfires. Her high TEC stat also means that she can take hits from any elemental attacks fairly well.
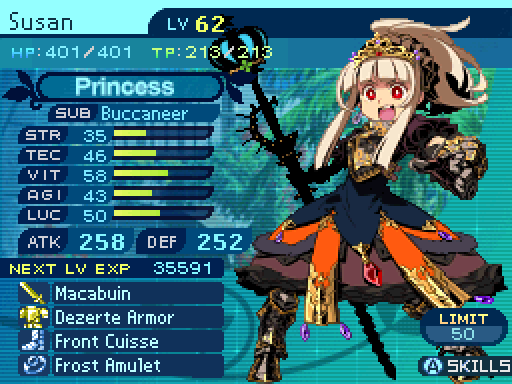


Susan can greatly increase the party’s physical damage output with Attack Order and Eagle Eye, and prevent any ailments from landing on the party with Prevent Order. Only downside is, she doesn’t have the healing capabilities that Faye has.
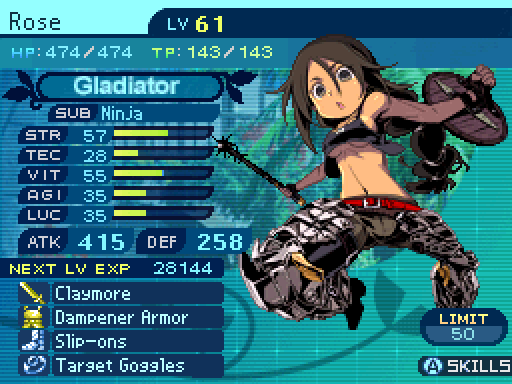


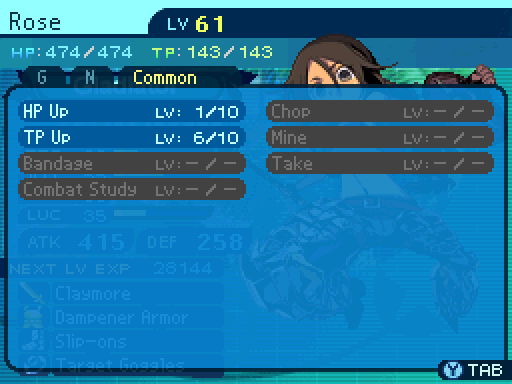
Rose is a decent physical attacker. Unfortunately, since the boss likes to make heavy use of elemental attacks, she’s not quite that durable due to her low TEC stat.


 You don’t get where I am without learning a thing or two about surviving the rough seas.
Increasing Scott’s HP a bit.
Scott is another hard hitting physical attacker, and a fairly fast one to boot. Eagle Eye also lets him support other physical attackers on the team if needed, and he builds up Limit pretty fast.


 There is no strategic benefit to overworking yourself.
A tactician must be prepared for even the worst outcomes.
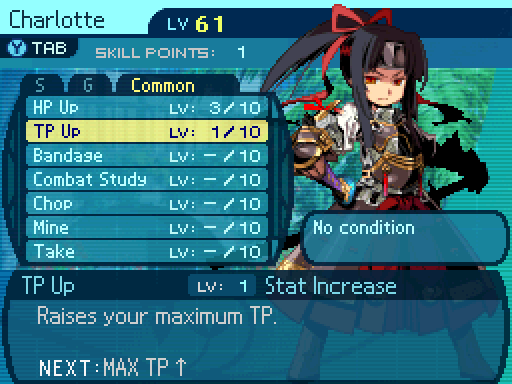
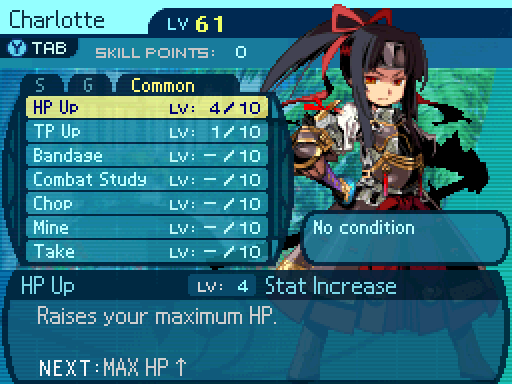
Another physical attacker. Though for once, Charlotte is more durable than Rose, since her higher TEC stat lets her tank the boss’ elemental attacks more easily. She’s also faster than her to boot.


Smith is a decent choice to bring along, as Virus Scanner reduces the chances of him being hit by ailments, and he can deal some good damage with Breakfire Fist, since the boss is weak to Fire. Unfortunately, he’s a bit high maintenance due to his gimmicks.
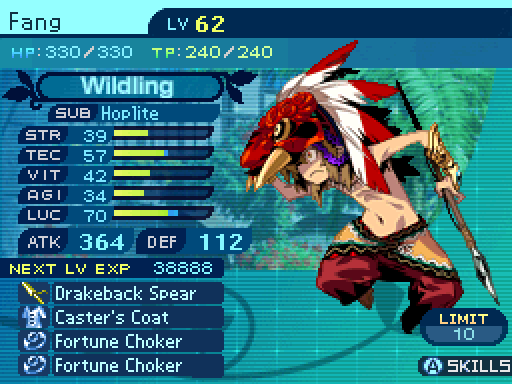

The post-game does not play nicely with ailments resistance, and that means Fang really can’t do much aside from maybe providing meat shields for the party.


While Alice may be an artillery cannon when it comes to random encounters, in boss fights, she is sadly nothing more than a peashooter.
Vote for up to 3 characters to exterminate that monster. Votes must be in bold.