Toggle Background Color
Update 96: Wyrm
 Do they really not put an age restriction on when you’re allowed to start exploring the Labyrinth?
 You’re one to talk.


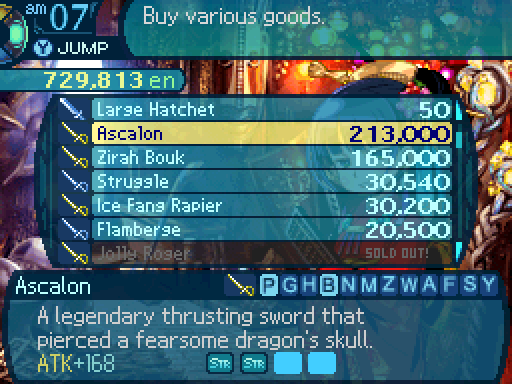
This isn’t the ultimate Rapier, but it is the penultimate one. I get it for Scott to boost his attack power immensely.
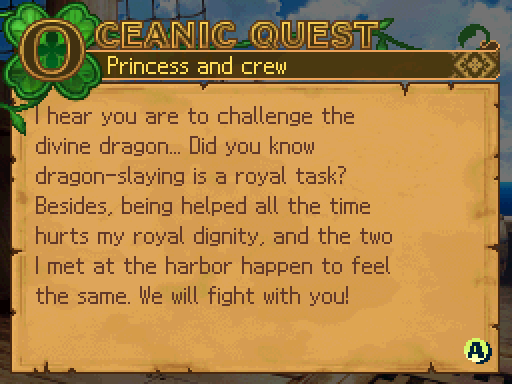
Anyways, here’s the team that was voted in.
Oh and for the record, in order to trigger this chain of events, you have to talk with the Guildmaster first. He gives us a hint on where to find Wyrm.


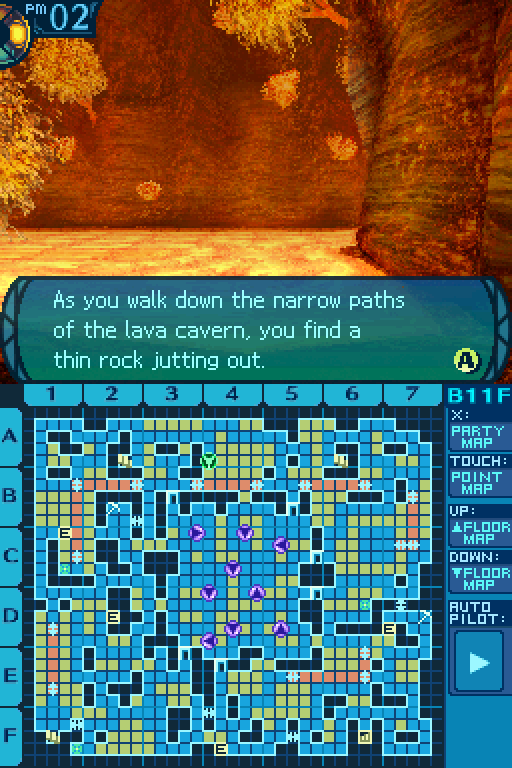
The 3rd Stratum is our destination this time.

What in the world are little girls like that doing here?
 They look kinda lost, don’t you think? Let’s see what’s up with them.
The girls seem suspiciously out of place in this boiling cavern. You decide to investigate.
Here’s another interesting cameo. It’s Ronin 2 and Hexer 2 from Etrian Odyssey 1 and 2! I don’t think I need to say more aside from that. And uh...
Is... is that Hexer not wearing any pants? Or any underwear for that matter? Goddammit Himukai. 
 I haven’t seen you two around before. If I may ask, who are you?
And just what are you doing in such a dangerous place as this?
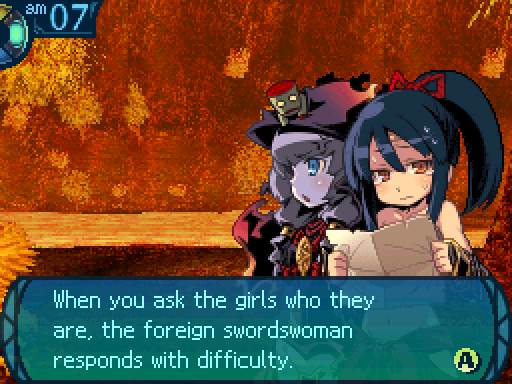
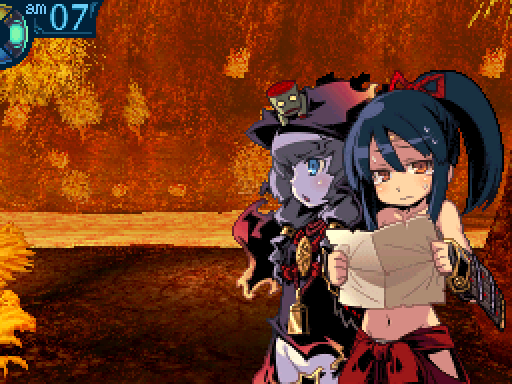
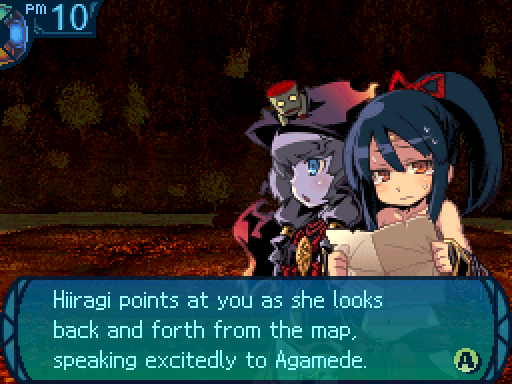
 I-I’m... Hiiragi... The girl... over here... is Agamede...
The girl calling herself Hiiragi seems to be extremely shy and unable to say anything more. The robed girl Agamede seems to have no interest in you and plays listlessly with her robe. Suddenly, Agamede looks up and nods with an understanding expression and forcibly pulls Hiiragi away.
...What the heck was that about?
And shouldn’t we go after them?
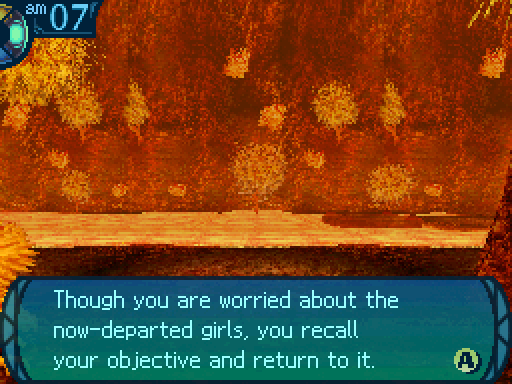
 Eh, if they got this far, they’ll probably be fine. Come on, we got a dragon to hunt down! Besides uhhh, I kind of lost track of them already.
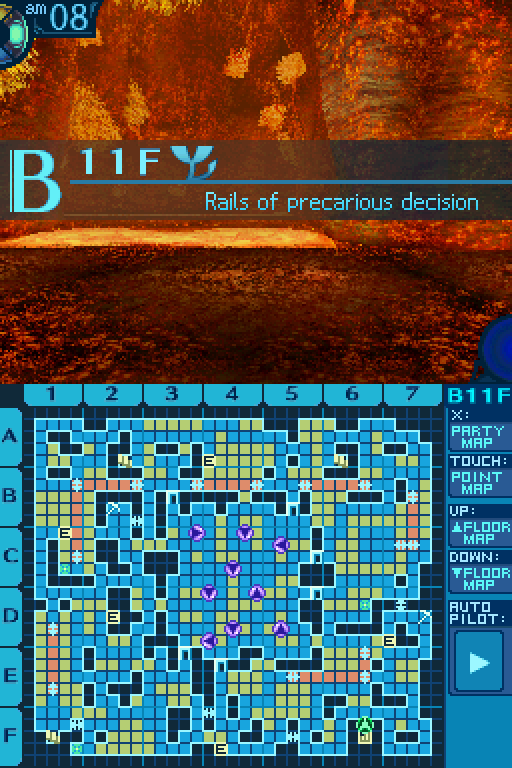
Floor 11 is our real destination.

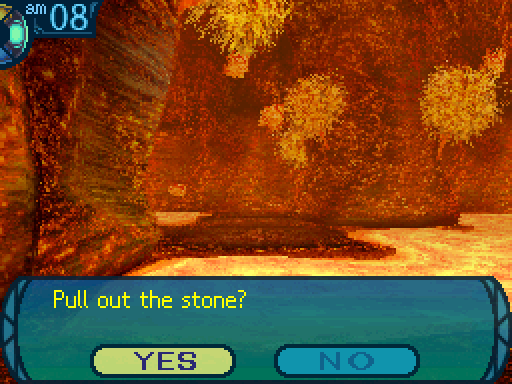
Remember those stones in the lava when we were exploring this floor several updates ago? This is when they finally come into play.
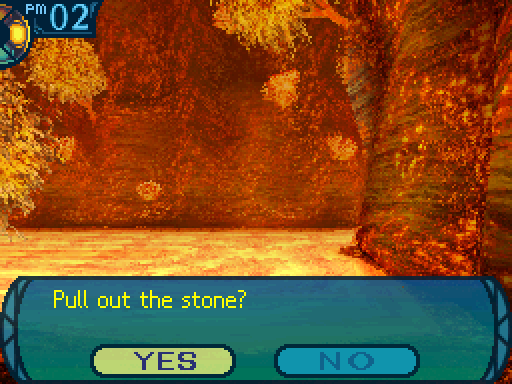
The decorated rock that seems to have been driven in by human hands is precariously placed. This must be the stone sealing the red dragon which the guildmaster spoke of! If you have the courage, you may pull it out and free the red dragon...
Oh, so that’s what this was for!
It’s a good thing that we left it alone until now.
Yeah, fighting a dragon back then sure would’ve been ugly.
The stone came loose more freely than expected. You were able to remove it with ease. However, it doesn’t seem to have caused anything to happen... You decide to leave
Uhhh...
Hm, I don’t think that did anything. So, uh-
Oh wait! There were like 2 more of these on this floor. Maybe we need to pull those out too.
Um... if I may ask-
As you scratch your head over the enigmatic pair, Agamede suddenly claps her hands as if struck. She grabs hold of Hiiragi’s hand and pulls her deeper into the Labyrinth.
...Never mind.
Stone number 2.

Oh, you two again. Just uh, what are you doing here?
Maybe they’re after the dragon too. Pfft, yeah right.
Judging by her expressions and gestures, though, it could be that they also seek the red dragon. Agamede abruptly turns from playing with stones on the ground to you and speaks.
 ...Bingo.
Without another word, Agamede drags Hiiragi away by the hand.
Wait, what!? I wasn’t expecting to be right about that!
Sidney... do you think those two stand a chance against it?
Hmm. How do I put this? No. Very no.
Not even-
Not even the tiniest bit.
Oh goodness. I had a feeling you would say that.
If they don’t stand a chance against the dragon, then lets get to it first before they get burnt to a crisp! Let’s go go go already!
The decorated rock that seems to have been driven in by human hands is precariously placed. If you have the courage, you may pull it out and free the red dragon...
And here’s the last stone.
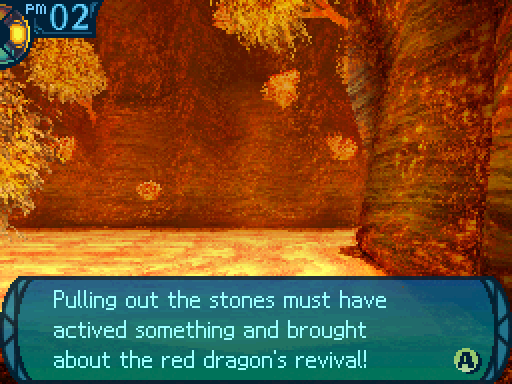
The stone came loose more freely than expected. You were able to remove it with ease. The entire cavern then begins to shake, and a dreadful, unearthly cry reverberates throughout!
Okay, that definitely woke him up.
Now that we’ve “actived” the dragon, let’s go fight it.

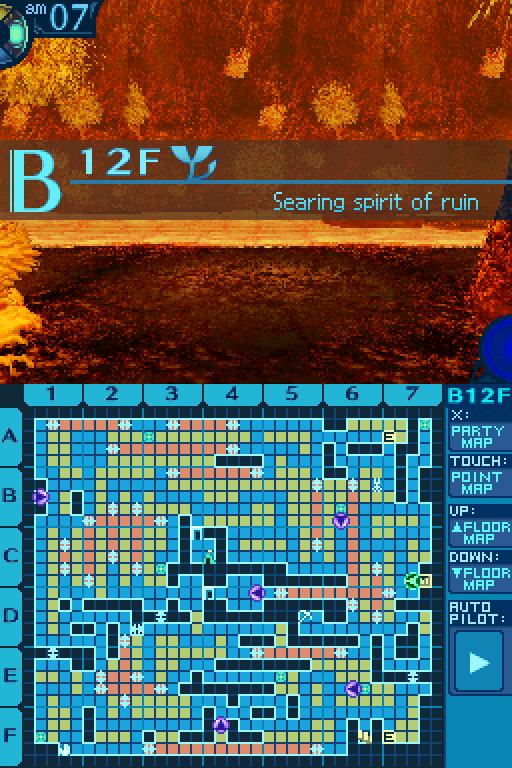
You can see where Wyrm spawned on the bottom screen. He’s on that 3x3 island to the right.
Suddenly, you come across Hiiragi trembling crouched on the ground. Agamede is looking on quietly.
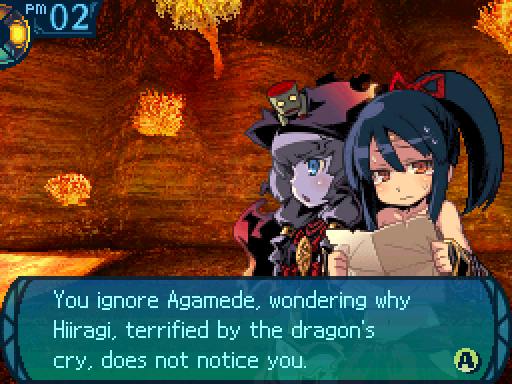
Oh. What’s up, again- oh screw this, let’s get to that dragon while they’re too scared!
You decide the red dragon takes precedence over the girls and hurry to your destination.
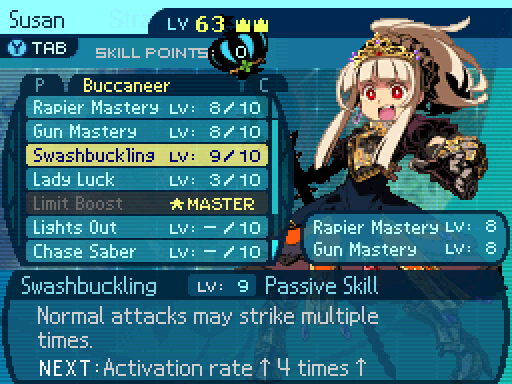
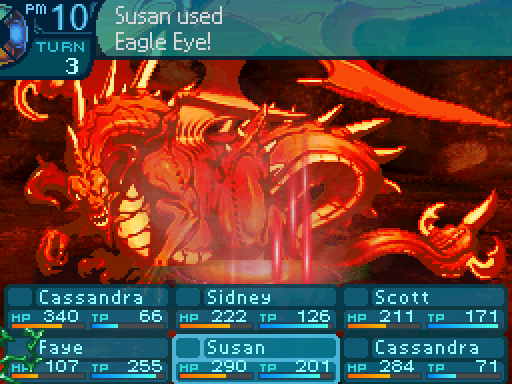
On the way there, I finally remembered to spend Susan’s unspent skill point, and leveled up Swashbuckling. It now has a 33% activation rate.


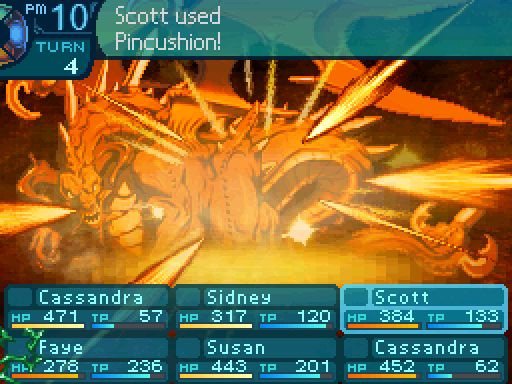
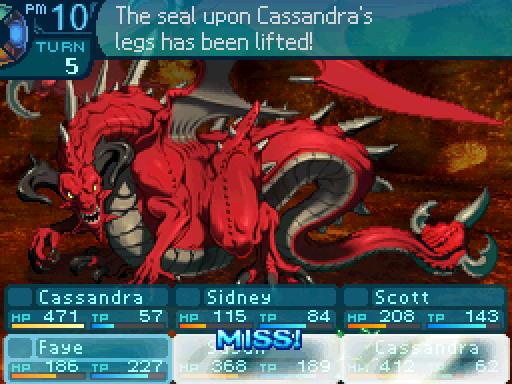
You look toward its source to see a gigantic, red dragon clad in crimson flames! It seems that the seal was broken by the removal of the stones and the red dragon has been revived!
Do yer worst! We already took down 2 of yer kind!
The red dragon seems to sense your reasons for being here and slowly rises to do battle. Take up your weapons and show your bravery against the living incarnation of flame before you!

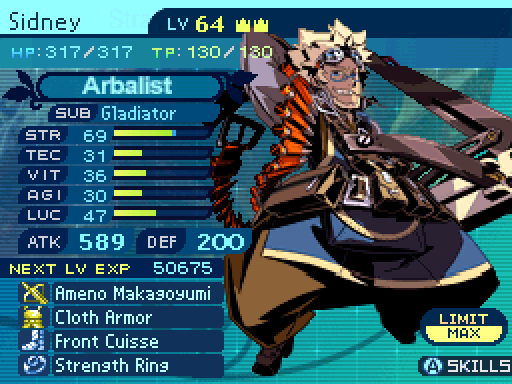
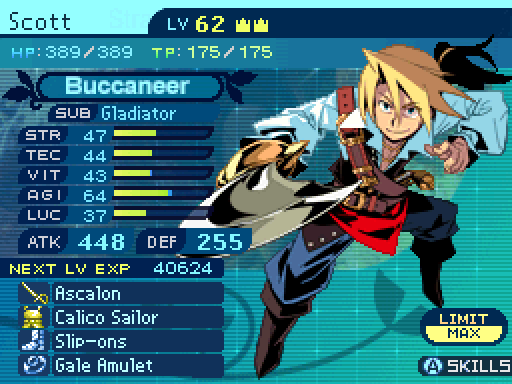
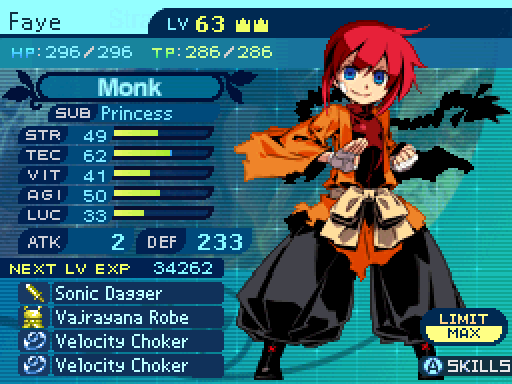
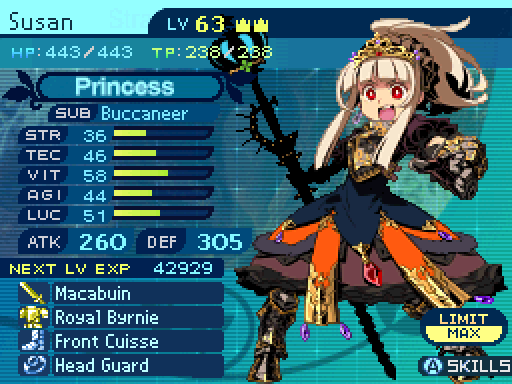
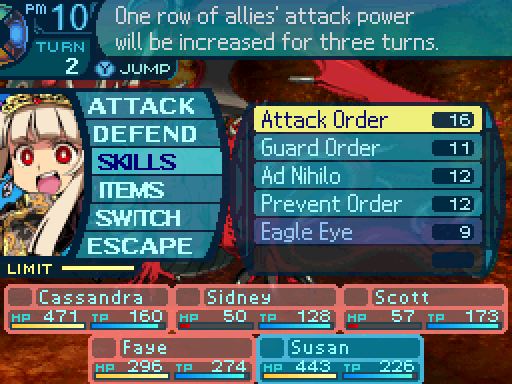
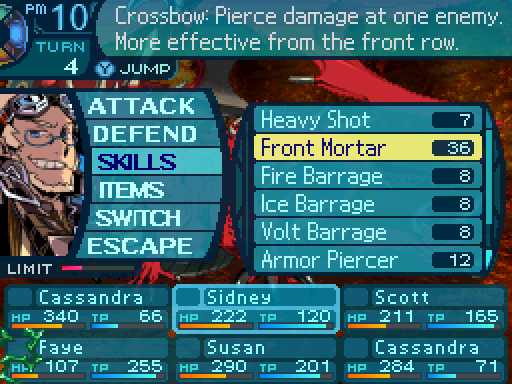
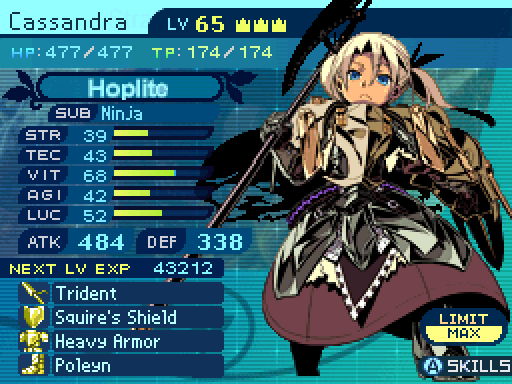
Here’s my party setup. Now that Scott has an actual weapon that can deal damage, he should be able to contribute a lot more.
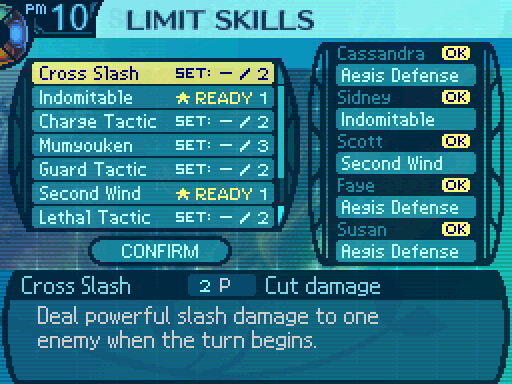
And my Limit setup. Aegis Defense will be as important as always.

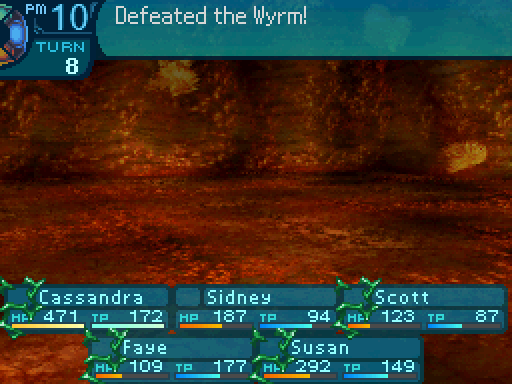
Two down, one to go!
 Video: Wyrm


So, here’s Wyrm. I went over most of the general things he could do last update. Let’s look at them in a bit more detail now.

Wyrm
Level: 76
HP: 25000
STR: 72
VIT: 75
AGI: 56
LUC: 57
TEC: 72
Attack Type: Slash
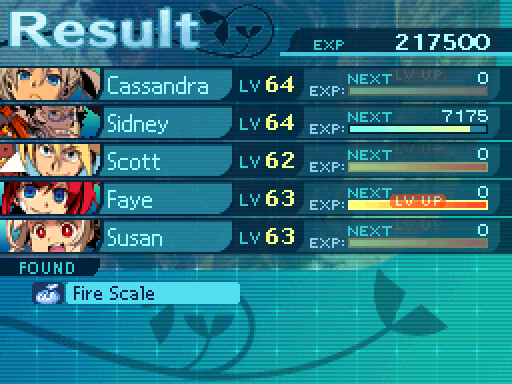
Exp: 217500
Item Drops:
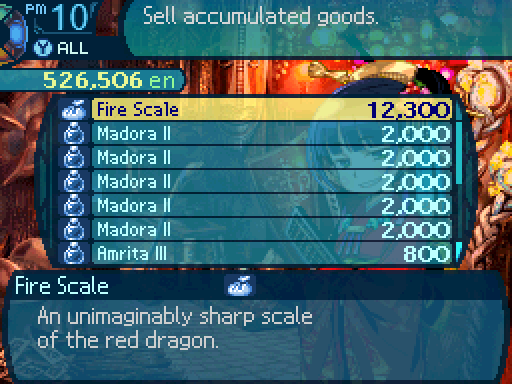
-Normal: Fire Scale - 100% Drop Rate. Unlocks the Dragonbane (Sword. Must be restocked.)
--An unimaginably sharp scale of the red dragon.
-Gold: Fire Fang - Kill with Fire damage. 100% Drop Rate. Prevents normal drops. Unlocks the Sunblade (Ultimate Rapier. Must be restocked.)
--Fire dragon’s fang that spews the fires of ruination.
Description: A grand red dragon kept deep underground since the days of the gods.
Damage Resistances: Slash: 75% Strike: 75% Pierce: 75% Fire: 0% Ice: 150% Volt: 100%
Ailment Resistances: Sleep: 10% Confusion: 10% Plague: 10% Poison: 10% Blind: 10% Curse: 10% Paralysis: 10%
Bind Resistances: Head: 30% Arm: 30% Leg: 30%
Other Resistances: Death: LR – 10% Petrification: LR – 10% Stun: 10%
Skills:
Searing: Uses the Head. Deals 300% TEC-based Fire damage to the entire party. Has an accuracy of 150. Has an action speed of +0.
Howling: Uses the Head. Lowers the entire party’s physical attack by 70% for 4 turns. Has a 20% chance to inflict Confusion. Has an action speed of +3.
Beat: Uses the Legs. Randomly attacks the party 3 to 7 times and deals 140% STR-based Strike damage per hit. Has a 40% chance to inflict Stun. Has an accuracy of 60. Has an action speed of +1.
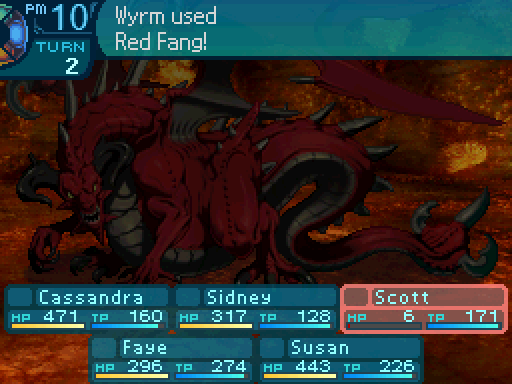
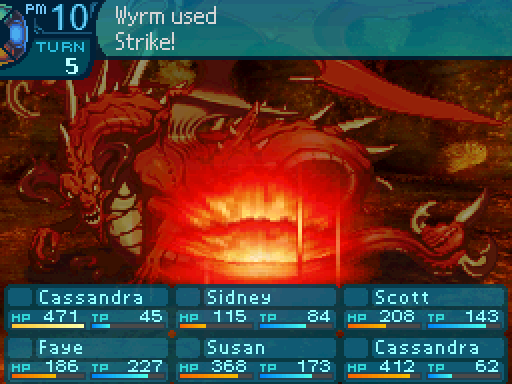
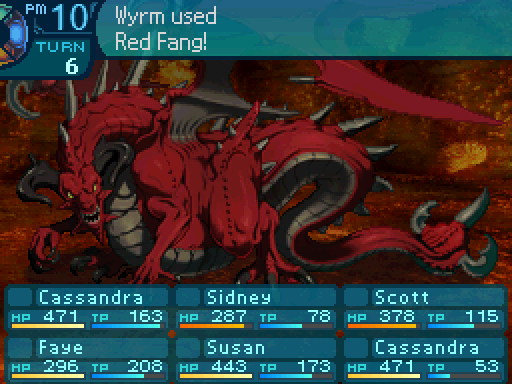
Red Fang: Uses the Legs. Deals 160% STR-based Slash damage to the entire party. Has a 20% chance to inflict Leg Bind. Has an accuracy of 150. Has an action speed of +0.
Strike: Uses the Head. Increases Wyrm’s physical and elemental attack by 50%. Has an action speed of -6.
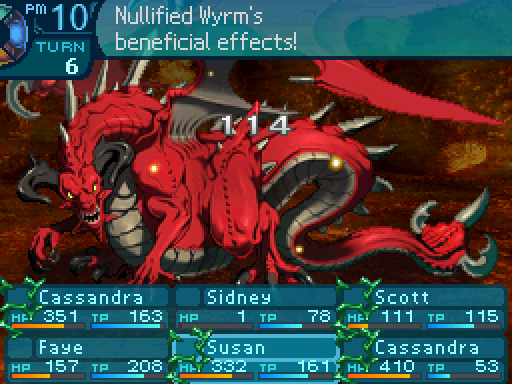
Wyrm has a pretty straightforward kit. He hits hard, and that’s about it. Beat is a bit annoying to deal with since it can Stun, but it’s a bit inaccurate. Though Red Fang (I’m also unsure why as this uses the legs) can inflict Leg Bind, so that’s something to look out for.
Howling is a bit of a dangling sword since Confusion is one of the worst ailments to be hit with, and the attack loss is very very steep. You’ll definitely want to put up an attack buff to shield against that, or purge that debuff off if you don’t have access to attack buffs for some reason.
Wyrm’s AI Script posted:
9% chance to cast Howling. (Standard targeting.)
Cast Searing on the 1st turn. (Standard targeting.)
If self has head bound, cast Beat. (Standard targeting.)
If self's HP is above 10% and below 76%, and self does not have the Strike buff, 59% chance to cast Strike. (Targets self.)
If HP is above 10%, cast Searing on turns that are multiples of 5. (Standard targeting.)
From 100% to 76% HP:
-29% chance to cast Beat. (Standard targeting.)
-71% chance to cast Red Fang. (Standard targeting.)
From 75% to 51% HP:
-39% chance to cast Beat. (Standard targeting.)
-61% chance to cast Red Fang. (Standard targeting.)
From 50% to 26% HP:
-29% chance to cast Howling. (Standard targeting.)
-30% chance to cast Beat. (Standard targeting.)
-41% chance to cast Red Fang. (Standard targeting.)
From 25% HP to death:
-39% chance to cast Howling. (Standard targeting.)
-40% chance to cast Beat. (Standard targeting.)
-21% chance to cast Red Fang. (Standard targeting.)
Wyrm has the same “cast the breath on the first turn and on turns that are multiples of 5” behavior the other dragons did. Though he prioritizes a couple of other things over breathing fire every 5 turns. There’s a small chance that he’ll cast Howling, and it’s not small enough to dismiss entirely. You’ll definitely want to deal with that somehow, or the fight can go south very fast. And once his HP starts dropping low, he’ll have an even bigger chance to cast it.
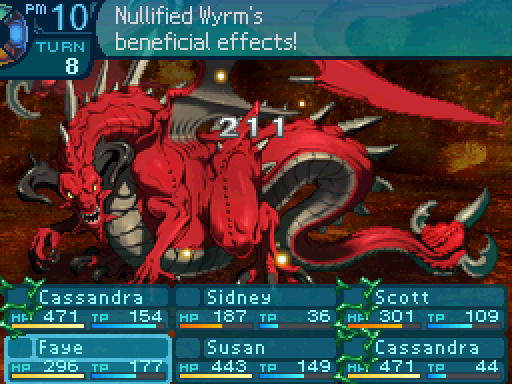
Wyrm also has access to Strike, which will boost Beat and Red Fang’s damage (It’ll also boost Searing’s damage, but that’s irrelevant, as Searing is almost always a one hit kill at this point.) You’ll definitely want to get rid of that as soon as possible unless you’re sure your party is durable enough to survive even stronger versions of Beat and Red Fang. Though if you’ll look closely at his AI, you should notice a potential exploit there. Namely that Wyrm prioritizes getting Strike up a little too much. Placing an attack debuff on him (Use the Wildling’s Beast Roar or the Farmer’s Rotten Egg skill to accomplish this) can cause Wyrm to waste a majority of his turns for a good long while, making the fight a lot more easy. So there’s something else to keep in mind.

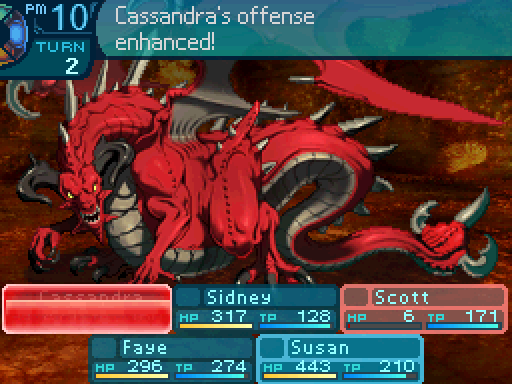
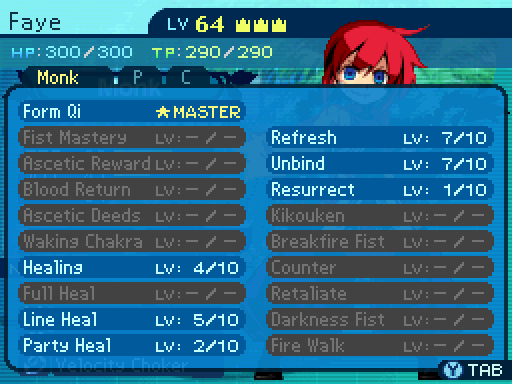
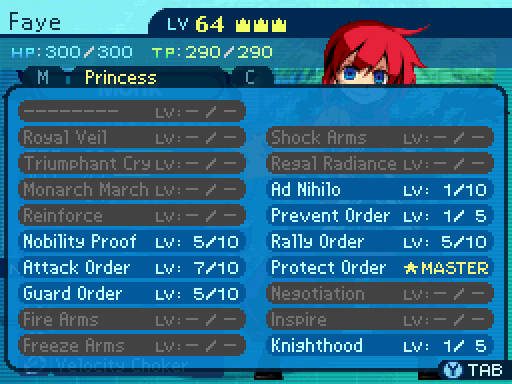
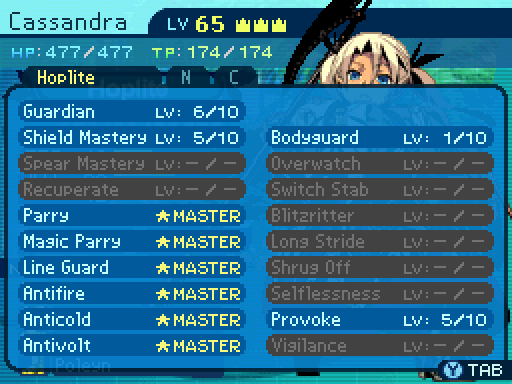
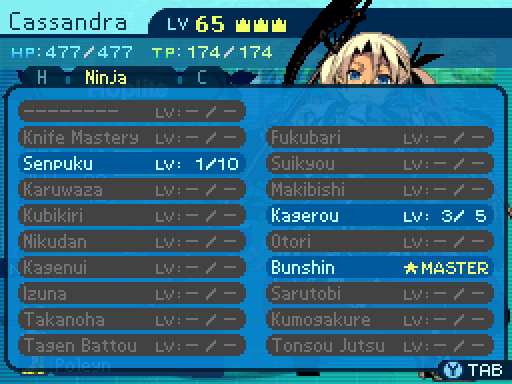
Cassandra will make sure that this fight is actually winnable.

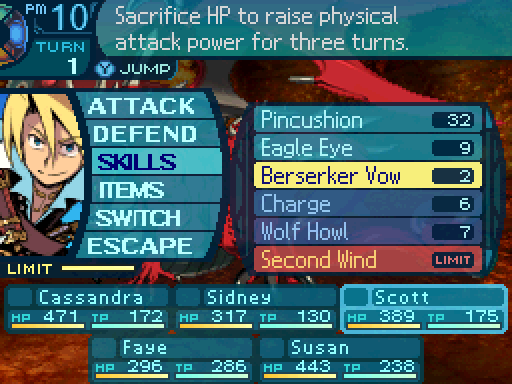
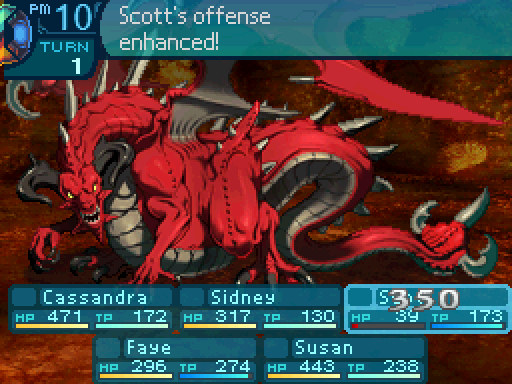
Sidney and Scott will set up Berserker Vows. Howling has a chance to put a damper on everything, but it’s not a big deal since I have MEGAQUEEN to make use of Attack Order instead if needed.


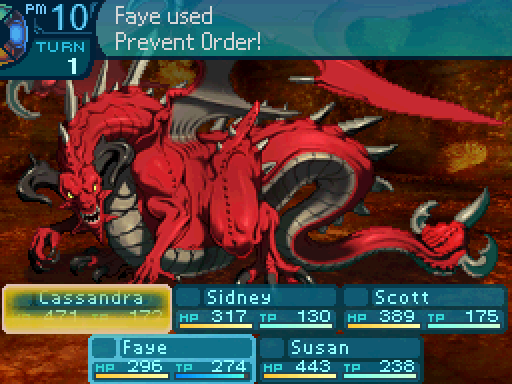
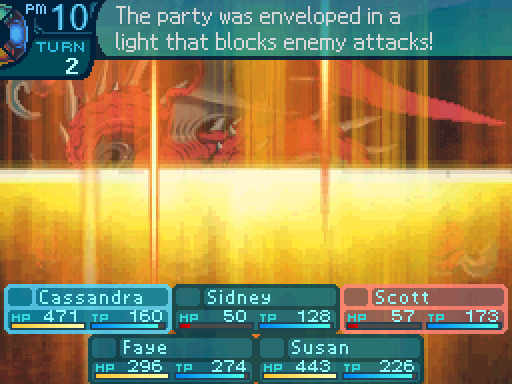
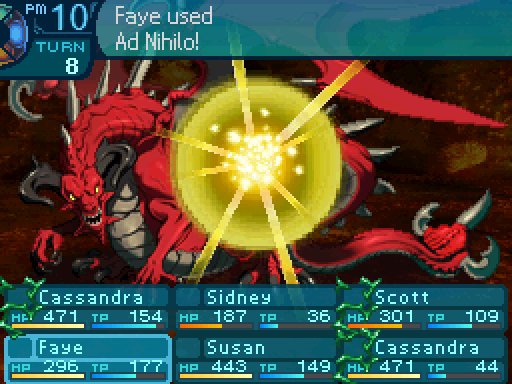
I’m casting Prevent Order on the entire party, as I really don’t want the Confusion from Howling to go through. I can deal with the debuff easily, but if Faye and Susan get Confused, it’ll be very hard to recover. And Cassandra getting Confused at the wrong time will net me a game over.
Careful. Who knows what this guy can do?
...Faye? Little help? I think I twisted my everything.
Maybe if you stopped moving like that, you wouldn’t need my help so much.
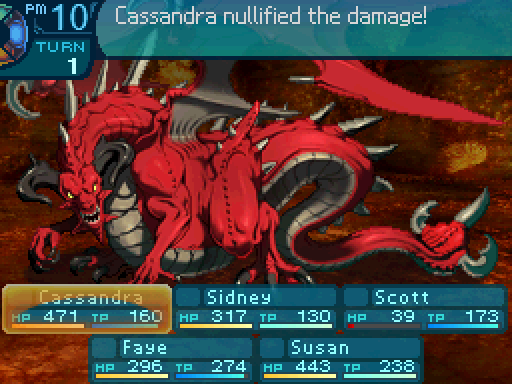
Roast assured that your attack did nothing.

Who needs doctors when you have a MEGAQUEEN!?
...I’ll take my chances with the doctors, thank you very much.

I think my beard just got stuck in my butt.
Really? Really!?
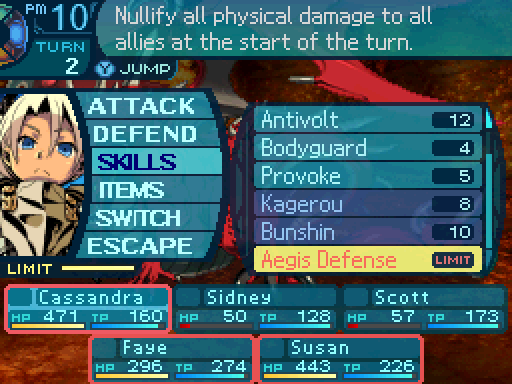

Gonna guarantee myself a free turn so Cassandra can set up Bunshin safely.
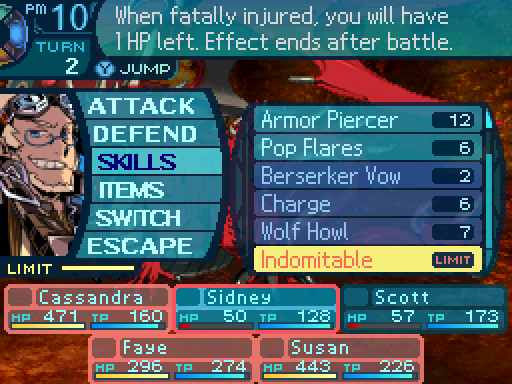
Sidney is the most fragile party member here, so Indomitable will boost his lifespan a bit.
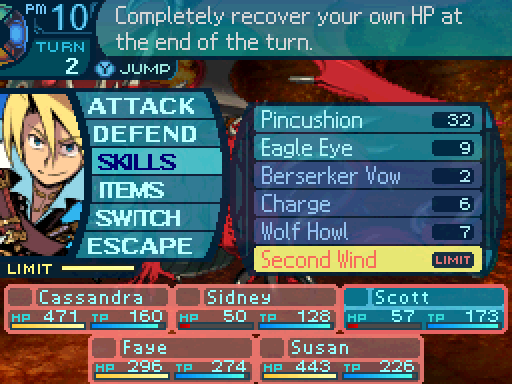
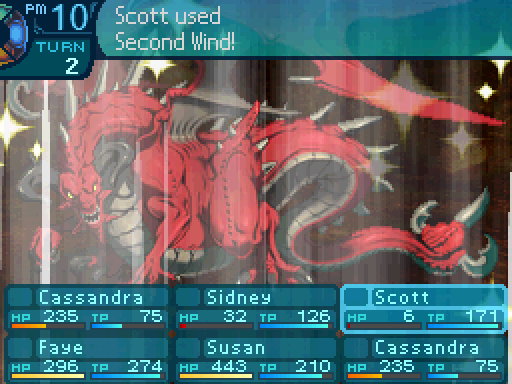
Second Wind should get all of Scott’s HP back so I won’t have to heal him.

This was a bad move. I completely forgot that I turned Faye into a roadrunner with her equipment setup.
Now if Howling gets cast, it should only dispel Attack Order instead of Berserker Vow, which is why Susan was a good pick for this fight.

I’m not going down now! Not when I’m this close!
A tried and true tactic.

...Oops.
...Little too early for that, Faye.
All that HP I just restored is gonna go away again. Good going, Fetus.
That was all for naught, I’m afraid.
A big, stupid lizard should be no match for you loyal subjects!
Susan, that’s a dragon, not a lizard!
You know, I’m just trying to boost morale here.
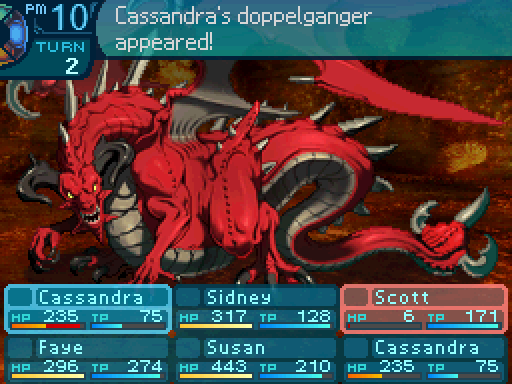
Cassandra number 2, at your service!
Never mind! Won’t need that help, Faye!
...I have so many questions on how you pulled that off, but whatever.
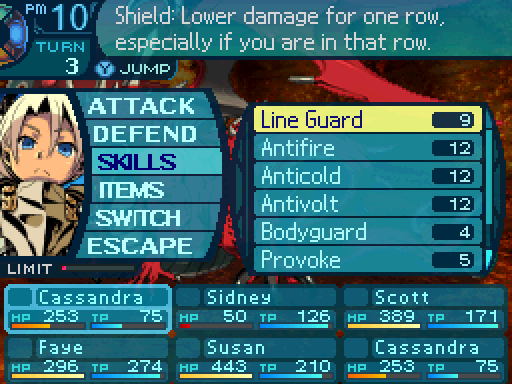
Wyrm’s very likely to be using physicals, so it’s time to break out Line Guard.
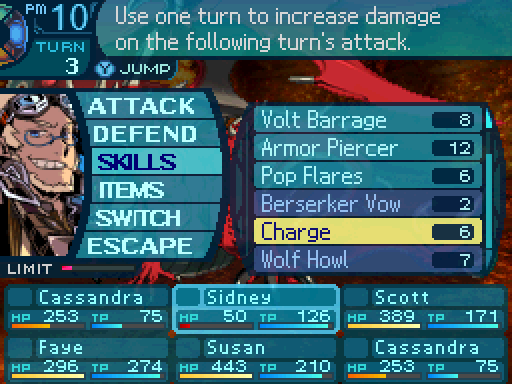
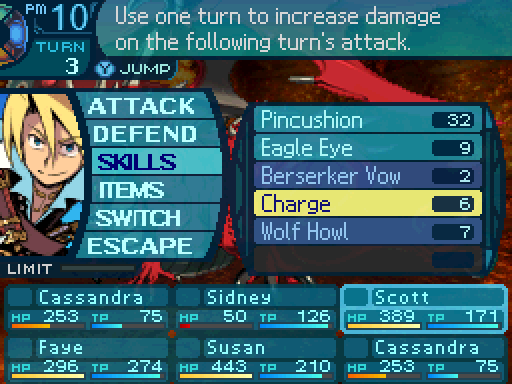
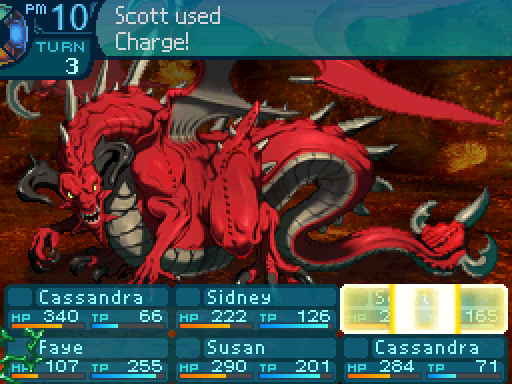
Time for these two to Charge up.
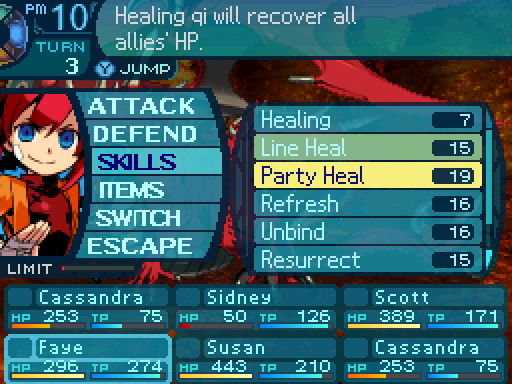
Faye should be able to heal everyone before Wyrm gets an attack in. I’m not really keen on using Protect Order, since I want Attack order to be the buff that gets dispelled if Howling comes out. And I need Prevent Order up to prevent it from landing Confusion in the first place.
Susan will boost Sidney and Scott’s damage outputs even more.

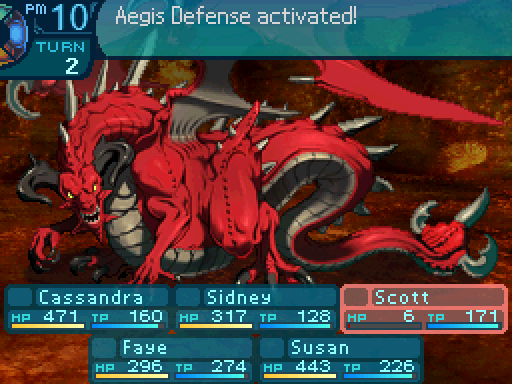
I’ll have Cassandra Bodyguard Sidney, just in case Party Heal isn’t enough to protect him.

Right on time there!

I’ll protect you, Sidney!
So will I!
Yeah, Red Fang deals a lot of damage even if you mitigate it. Also it inflicts Leg Bind, but that’s honestly a really minor concern. While Beat is strong, it’s not really a kill move like some other evasion disabling bosses have.
You may think you’re strong, but I can see your weaknesses oh so clearly!
I’m itching to go!
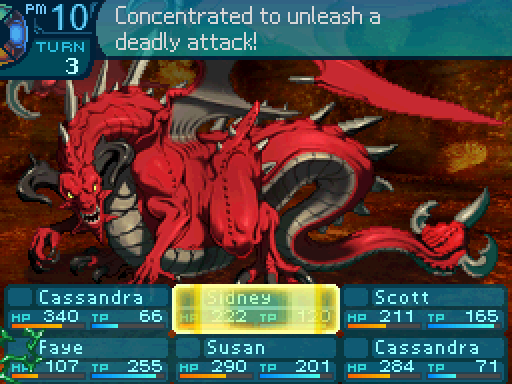
This big beauty is now locked and loaded! Check it out!

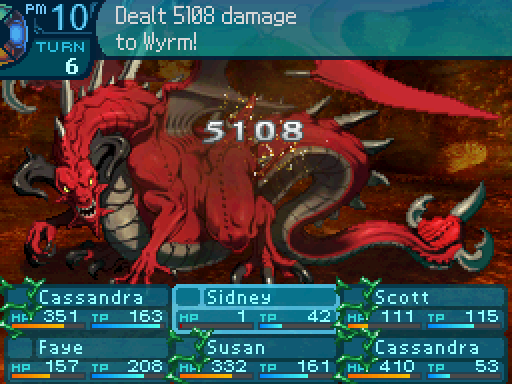
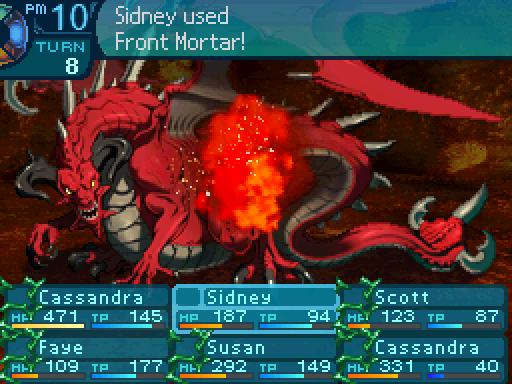
Okay, now let’s actually start damaging him.
Tch, it’s not the size of the weapon that matters, Sidney. It’s how you use it.


I beg to differ.
Yeah, the bigger the weapon, the bigger the boom!
...And now I feel inadequate.
Yeah, at this point, Sidney is pretty much the king of damage. The only one that really surpasses him is Akatsuki, though he needs a lot more setup to pull that off.
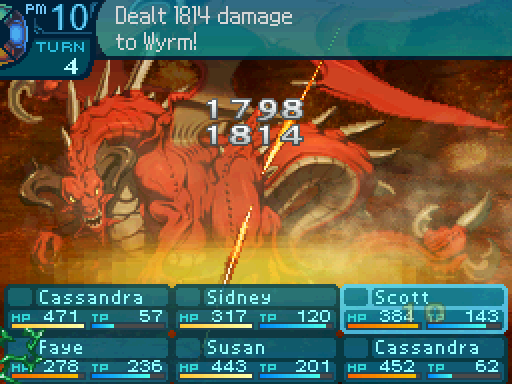
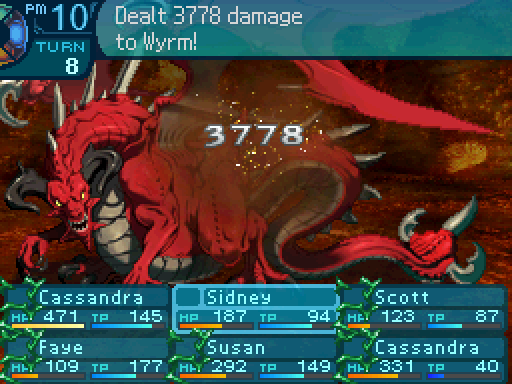
That certainly took off a decent chunk of Wyrm’s HP.
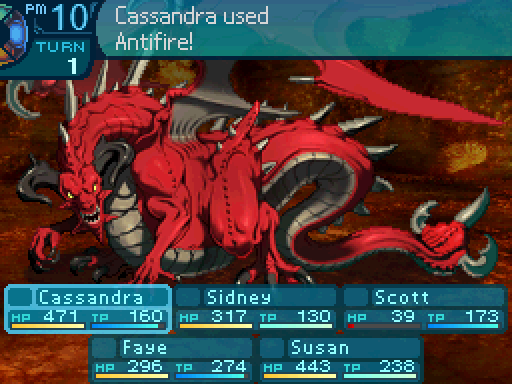
Might as well get rid of those leg binds. This is turn 5, and Cassandra has Antifire ready to go, so I can do whatever I want.
Can’t keep us tied down!

...Or Wyrm could cast Strike instead. That works, I guess.
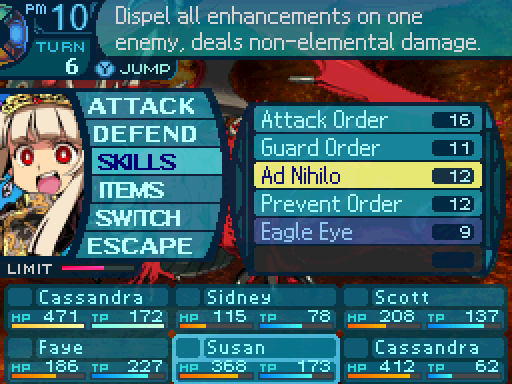
I want to get rid of that buff though, as Wyrm can do some even more serious damage with it up.


Oogh... Nice try, but it’ll take more than that to take me down!
Yeah, like that. Good thing I had Indomitable up.

I decree: No.
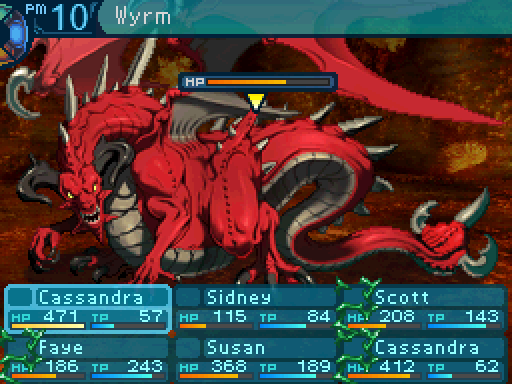
Not much left to go. One more volley should take him down.
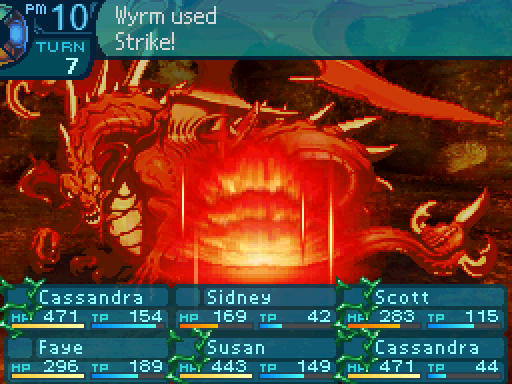
The other reason to dispel Strike is because Wyrm tries too hard to ensure that it has the buff, so you can waste a bunch of its turns if you get lucky. The amount of breathing room you can get from this can be huge.
Awww, did you need that? Too bad, so sad. Hee hee hee!

And that’s the last of them, woo hoo!


Yeah, that’s honestly pretty much it for the fight. Wyrm is very straightforward, and quite frankly, unremarkable. Howling is the only real obstacle in the fight, and if you can deal with that, you’ve got the fight in the bag.

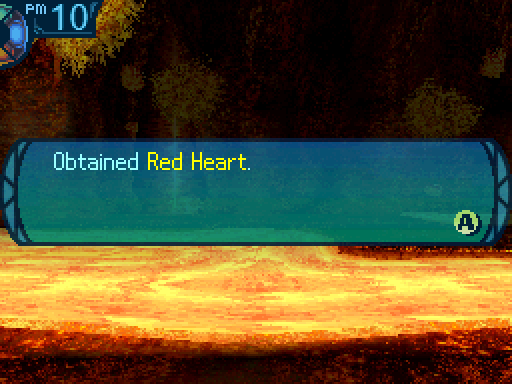
The red dragon collapses, slowly closing its eyes, after which its immense form bursts into flames! Those flames eventually coalesce into a solidified sphere! You reach out and grasp the orb which floats in midair... A rush of energy overwhelms you!
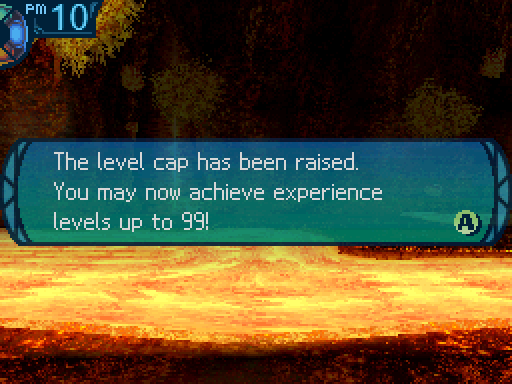
And with that, the final level cap has been removed. Not that we’ll need to level up to 99 in this playthrough at all. Though the important thing is, all 3 ordeals have been conquered.
You have matured immensely as warriors. As you turn to leave the battleground...

...From what it looks like, these two girls aren’t exactly prepared for a big battle.
Huh, wonder what’s up with that.
You gape at them, wondering if you’d get a coherent explanation for their presence if you asked.
Might as well talk with them.

The two then pull a shovel from their pack and begin digging where the red dragon had been seated.
...That just raises even more questions!
What in the world could they be doing...? Your curiosity forces you to ask them about it.
Seriously, what are you two doing here?
Hiiragi then points out a red mark on her map to you. It seems to point to this hall...
Where did you even get that map?
You ask them where the map came from, but Hiiragi’s hesitant answer is circuitous and vague. She seems to mean that Agamede’s father was an astrologer who drew the map on ”Elder’s” advice. The pair evidently followed the map to the red dragon, thinking it to be some sort of treasure.
...You’ve got to be kidding me.
Yeah uhh, that thing you were hunting down? It wasn’t treasure.
Astounded by their naivete, you tell them that this map shows not treasure, but a dreadful beast.
Yeah, see this scale we have? It came from a real, live, dragon.
Agamede freezes, the shovel in her hands falling away, before she slowly turns to face you. Eventually, she seems to recognize that you are telling the truth, and begins packing to leave... One last time, she drags the poor, befuddled Hiiragi quickly out of the red dragon’s hall.
Sheesh, how close were those two to getting roasted?
Far too close, if you ask me.
At least we were able to stop that from happening!

A 3rd crown is placed on our status screen to indicate that Guild Tidehunt no longer has any limits holding them back.
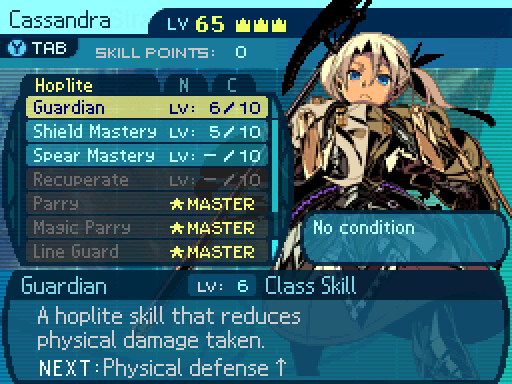
Guardian now reduces physical damage by 24%.

So I can make anyone a knight now? Cool! Ooh, I could have like, my own personal army of Cassandras!
I am your guardian, not your servant, Faye.
Augh, you’re no fun!
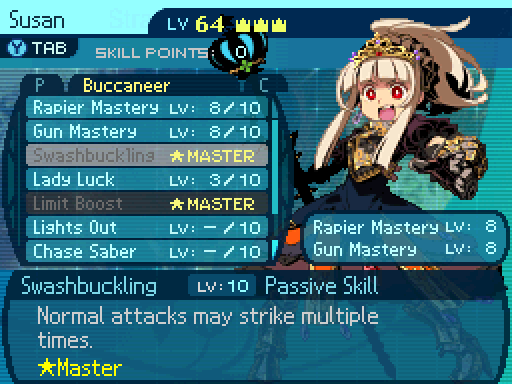
Swashbuckling now has an activation rate of 36%, and can hit up to 4 times.

The Fire Scale unlocks...
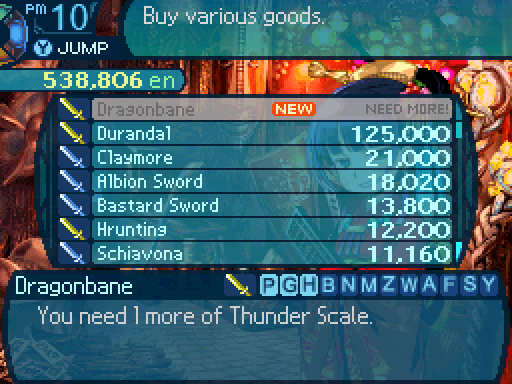
Well, in order to get what it unlocks, we’ll need to get that last scale first. It’s definitely worth it, though.
But now that we have defeated all 3 dragons, there’s one last thing to do.


We need to head back to the island to report our success in conquering all the ordeals.
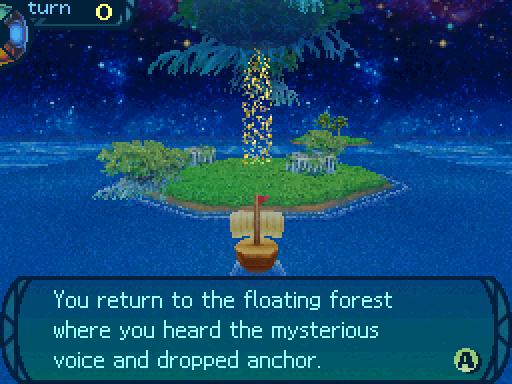
The same magnificent voice you heard before echoes from above!
 Welcome, frail humans. It seems you have defeated one of the three dragons; the great red wyrm... By now, you have surpassed the natural limits of man and gained new power...
Yep! And that’s all of them, now!
You have earned the right to walk the path to the heavens. Show me the keys to open the door.
As you raise the three orbs you won from the dragons, they begin to glow brightly!
Well done, mighty humans. You have opened the way to the heavens and reached the final trial. Beyond here is a land unknown to man. If you are firm in your decision, return here again... It will be at that time that I shall stand before you fragile humans as your final trial...
The voice then fades away. Only the residual effects of that magnificent presence remain... At last, you have defeated the three dragons and earned the right to challenge this grand entity.
One last test, huh? You all ready for this?
Um...
Er...
Didn’t you all say that this guy was a dragon god? I mean, wouldn’t that mean that he’s a step above the other dragons? Maybe we should go back first before taking him on.
Good point. A very good point.
However, it would be best to return to Armoroad first before the battle.


 In other words, you’ll be facing the Elder Dragon’s ordeal: Fighting a dragon not unlike a god. I don’t how they heard, but your allies have been gathering at the port to help you out! You should make use of them. It seems that one good turn deserves another. Now everyone, prepare yourselves! You’ll be challenging the dragon god itself to a fight!

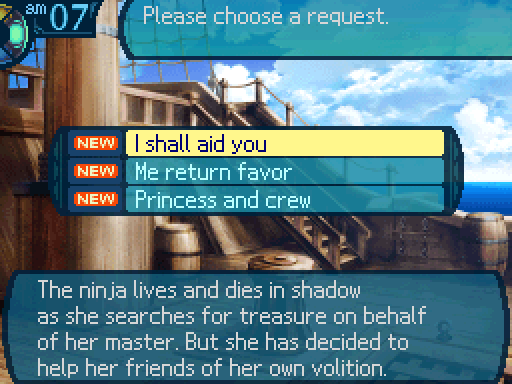

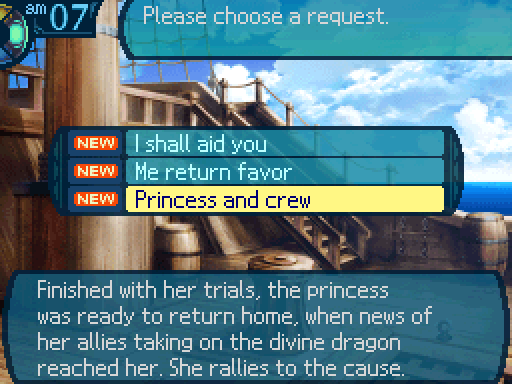
Now that the dragon trio has been taken out, the final set of sea quests are available to us.
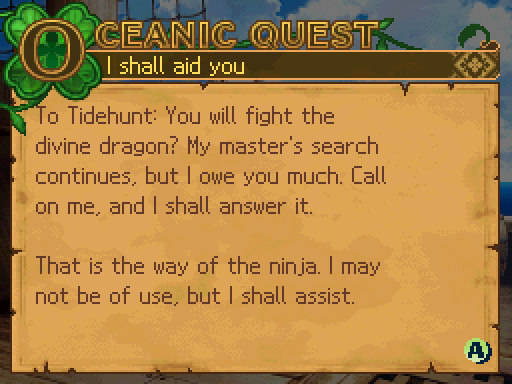

For a long time, Guild Tidehunt has been helping out people across the sea as they worked to restore Armoroad. Now, some of them will return the favor and will help us take on the Elder Dragon.

...Unfortunately, we’re really not ready to take on the Elder Dragon just yet. We’re quite a bit underleveled, as you can tell by Kirikaze’s level. I want the guild to get up to about at least level 70 before taking him on. Besides, I’ve been putting off the rest of the 6th Stratum long enough, and I’d say it’s about time that we covered more of that.

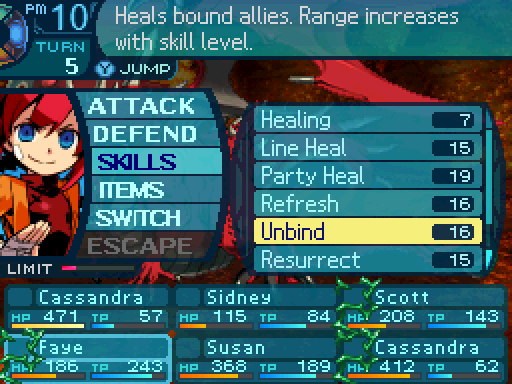
Faye is a strong support to bring along, she’s good at healing, can buff, and can dispel ailments and binds.

Cassandra is a nice defensive support to have along, especially if we have to go up against any FOEs.
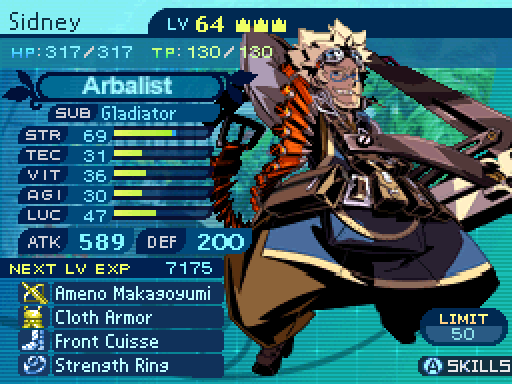


Our strongest physical attacker. Sidney also has elemental coverage and has access to AOEs, which will definitely come in handy. Though he’s a bit fragile.
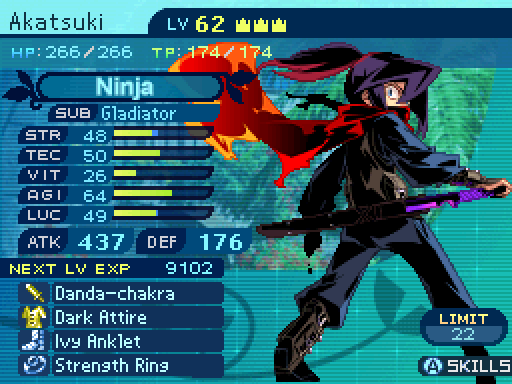

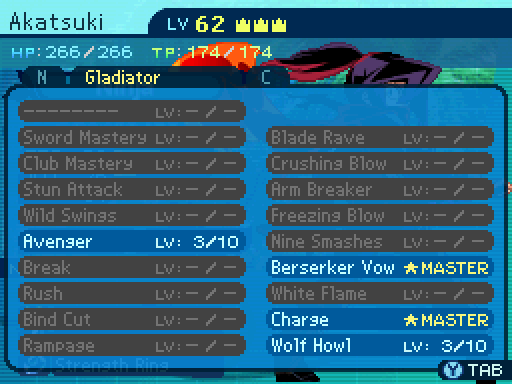
Akatsuki is also a strong damage dealer, and can get some pickoffs with Izuna. Alice is better at that latter bit, though.
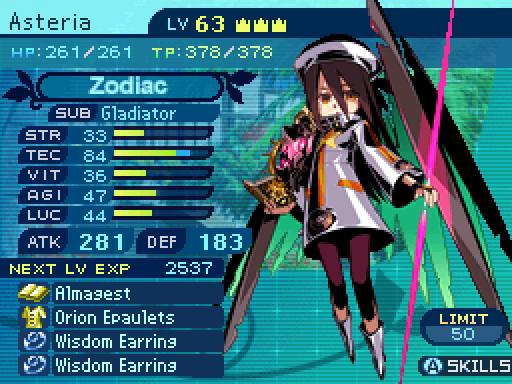

Asteria is a strong attacker, having access to multiple damage types and AOEs.


Susan is a nice support to bring along, as she can buff the party and prevent them from being hit with status effects.


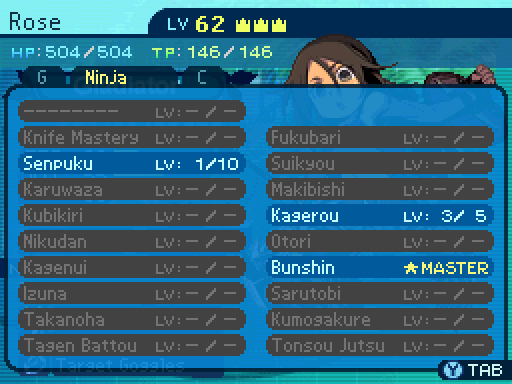
Rose is a fairly durable physical attacker. Though elemental attacks aren’t kind to her.


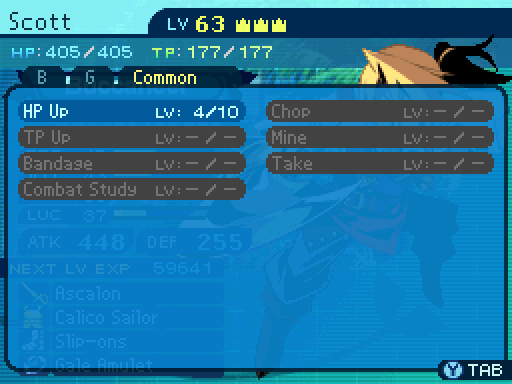
Scott is a fairly strong physical attacker, though he’s no longer the strongest. Though speed is an advantage he has, and is faster than most other physical attackers.
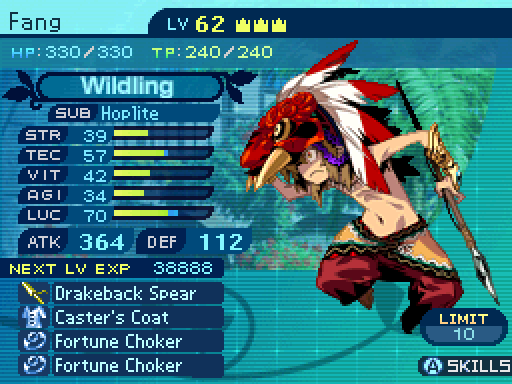

Fang is a decent support for dealing with randoms, as he can disable them far more easily than FOEs or bosses.
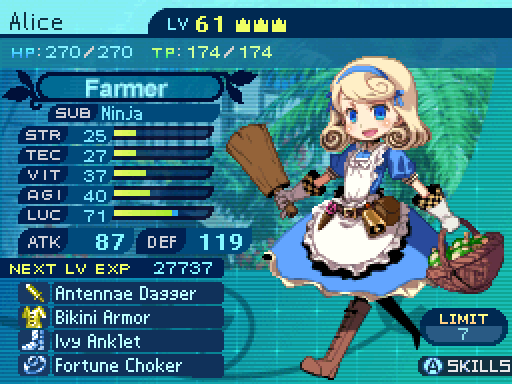

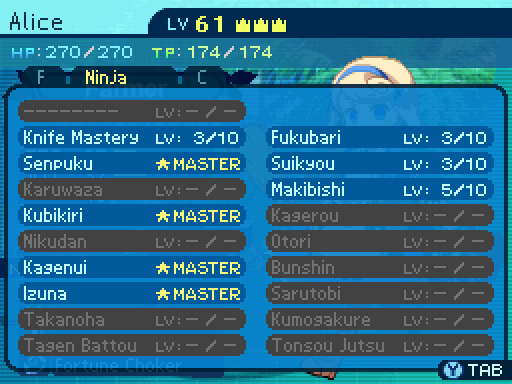

As you already know, Alice is a complete and utter wrecking ball and pretty much every single enemy in the 6th Stratum is a complete joke to her, since she is basically a walking delete button thanks to Kubikiri and Izuna. That power comes at a price though, as she’s not exactly stellar at dealing with FOEs.
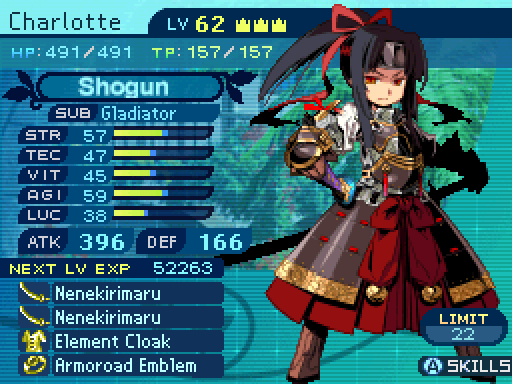

Charlotte is a decently speedy, but fragile physical attacker. She’s also a bit unreliable when making use of 5-Ring Sword, but it can clear out mobs if she gets lucky enough.
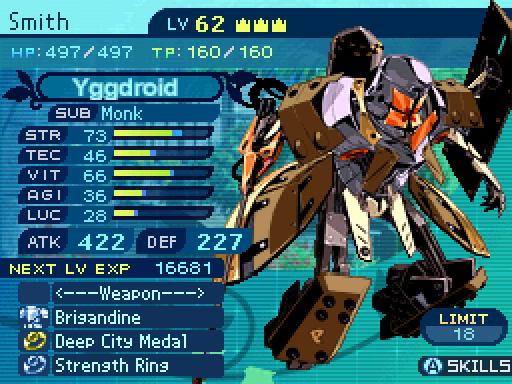
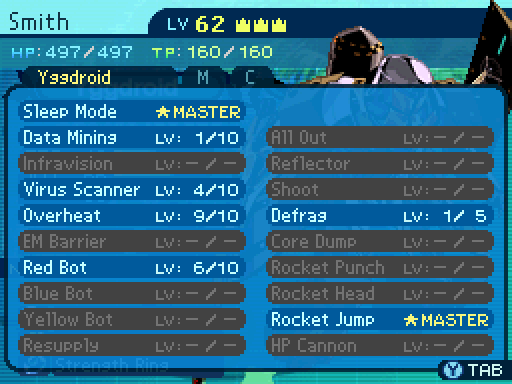

Smith is durable and can dish out physical and elemental damage. Though thanks to Overheat, he’s fairly high maintenance.
Vote for up to 5 party members to explore the final stretch of the Labyrinth. Votes must be in bold.