Toggle Background Color
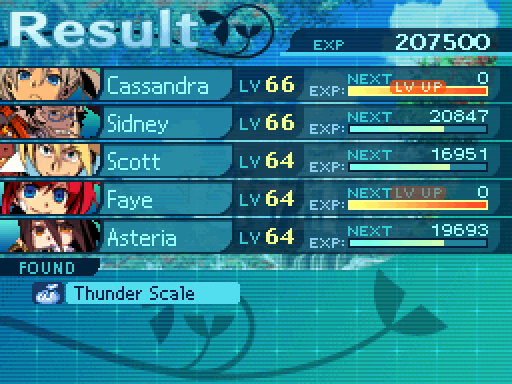
Update 97: The Final Voyage
We won’t be exploring the 6th Stratum in this update. There are some loose ends I would like to tie up before doing so.


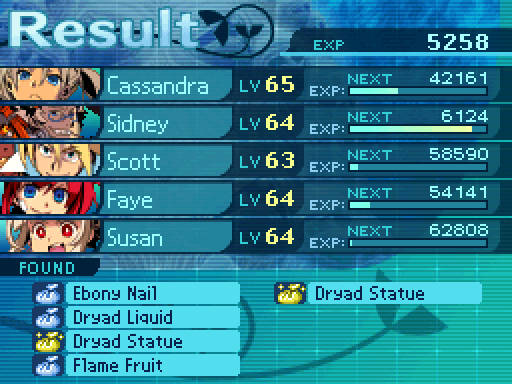
First up is the Otherspawn’s conditional drop. I grabbed this offscreen, but forgot to show off how to get it. You get it by killing them with Ice damage, but they’re immune to it.

Grabbing it is simple. Just use a composite damage attack like Ice Barrage. You can also use an Ice Oil, or a weapon with Ice elemental forges to snag the drop as well.

 Maybe I should take a career in making ice sculptures after we’re done with all this.
 I don’t think shooting at water with a crossbow counts as sculpting ice.

Oh, and while I’m in the 4th Stratum, I would like to bring your attention to this room. This is the room that we fought the Progenitor in. Yeah, they made a full room for it, even tough you wouldn’t see it unless you came back here.

At any rate, the map for this floor is fully completed now.


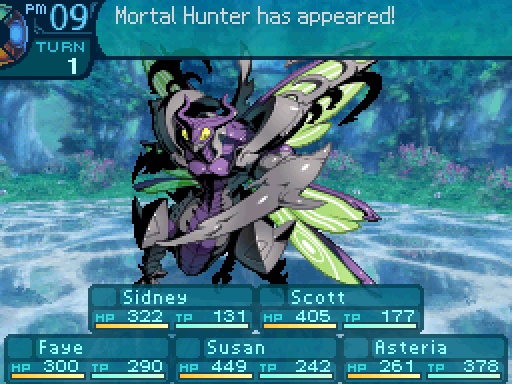
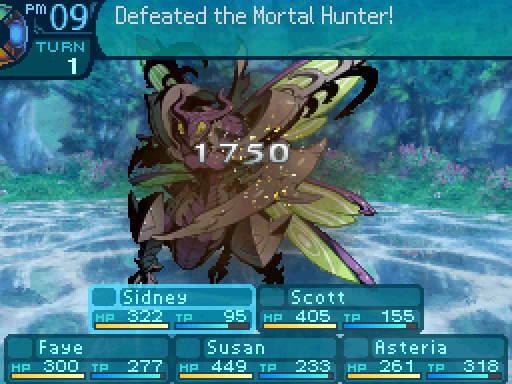
Next up is the Mortal Hunter’s conditional drop, which is to kill it on the first turn. It’s rather trivial once you’re overleveled.


Just refrain from using Charge, and just attack it. You may want Aegis Defense so Amputate can’t instantly kill anyone and ruin your plans. Alternatively, you could try going for Instant Death or Petrification procs, but your chances of pulling that off are really low. Anyways, I advise grabbing two of these if you have a Shogun.


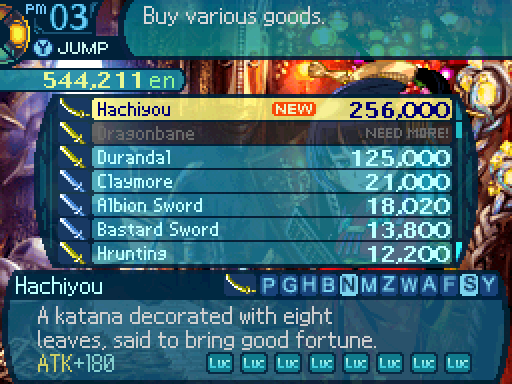
 Fortune shall be in our favor with weapons of this quality in my possession.
As this unlocks a Katana. But more importantly, the Hachiyou is the penultimate Katana. However, the ultimate Katana is unlocked after beating the 6th Stratum Boss, AKA the true final boss of the game. So for all intents and purposes, this is the Shogun’s ultimate Katana.
The Hachiyou boosts LUC by 8 which uhhhh, isn’t exactly the ideal stat to boost for a Shogun. Though subclassing a Wildling to a Shogun just so they can wield this Katana and get a massive boost to their LUC is certainly an option you can take.
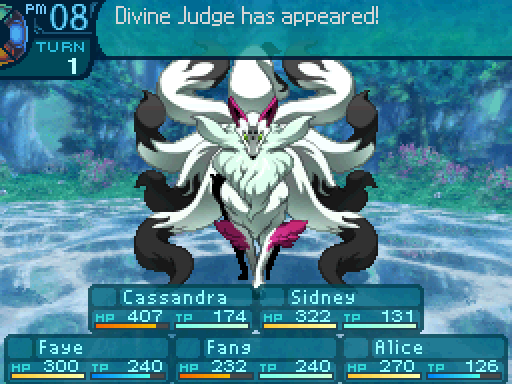
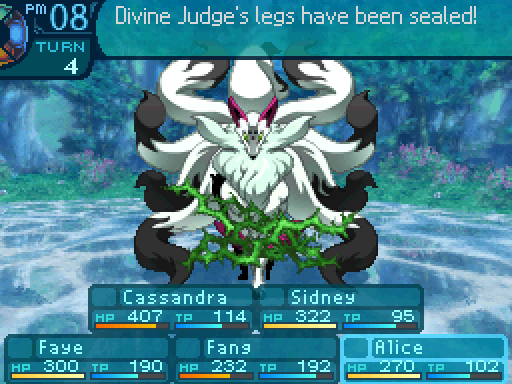
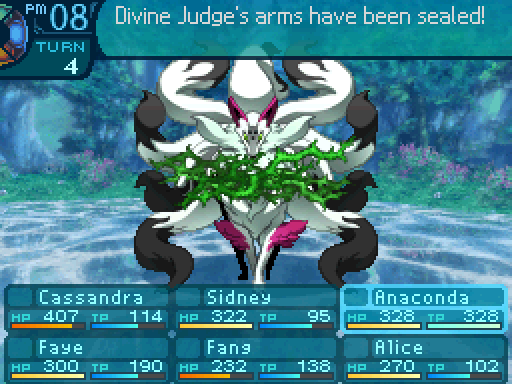
Next conditional drop we’re going to snag is the Divine Judge’s. We have to kill it while it’s fully bound. Which is unfortunately, pretty tricky to pull off. It has a 25% resistance to every single bind, meaning that we only have one shot for each bind. If those wear off, you’ll have to retry the battle, since you can’t reset accumulative resistance.
Before I go for the drop, I want to soften it up a bit, so that it won’t take much time to finish it off once I hogtie it. Fortunately, the minimum chance of the Divine Judge recovering from an ailment right now is 34%. Not great, but it’s something.
 Excuse me while I sew your shadow to the ground.
...Remind me to never let that snake hug me.
 Aww, but he loves all of you!

 That has to be a nasty headache that fox is having right now.
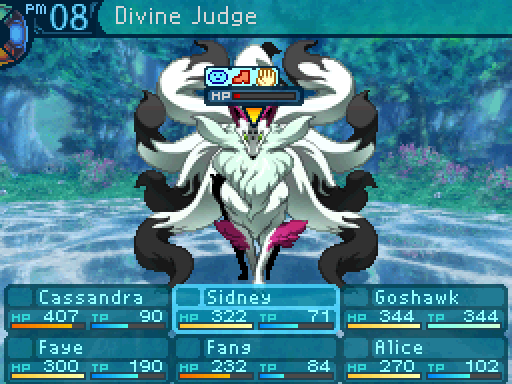
Took me a few battles to get this to happen, but now I’ve fully bound the Divine Judge.
 Uh, I think we should probably just kill that thing already. I’m pretty sure this falls under all kinds of animal cruelty.

Putting them out of their misery is my favorite part!
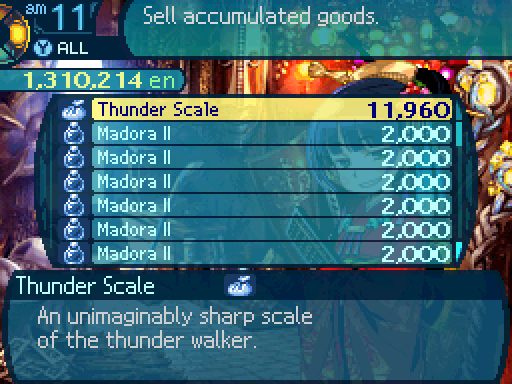
And there’s the drop! It was pretty hard to get, and took me several tries to pull off, so surely this has to unlock something go-

 ...Thanks for nothing, game.


Oh, and there’s me getting the Forest Hare’s drop the proper way, since I snagged it with Lucky Hammer before.
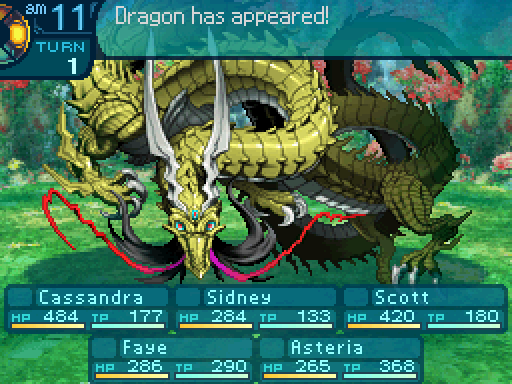
Time for a bit more cleanup. This time I’m going after the dragons’ other drops. Now there’s actually a way to trivialize their fights that a lot of people who enter the post-game make use of. Accessorizing. Aside from their elemental breaths, the dragons only have access to 2 damage types. So equipping 3 physical resistance accessories were far more effective than just wearing armor. This lead to accessory stacking getting kicked out of the series entirely by the next game.
However, if you’re using a Hoplite to block the breaths, they’ll need a shield to be able to use their Anti-elemental skills. So they’re only stuck with 2 slots to accessorize with. Though Hoplites are extremely durable by this point, so it’s not that big of an issue.


And watch as Drake fails to do anything meaningful to the party.  2 Crush Amulets and 1 Pierce Amulets will pretty much shut Drake down. Crush Amulets are prioritized since Ice Crush deals more damage than Shower.
I guess that’s what I get for not being in uniform...
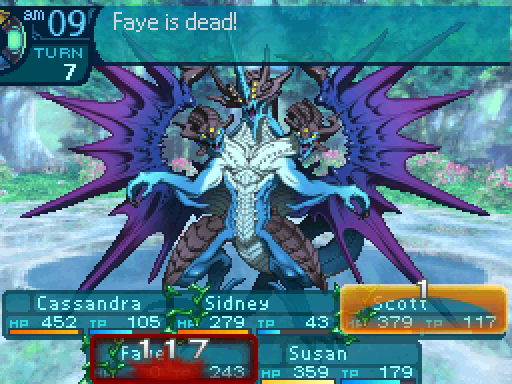
Except for Faye. I completely forgot to change her out of her sonic build. Whoops.
Somebody give that thing hell for me...
Which caused her to die again later.

Hell, given.

And there’s Drake’s conditional drop.
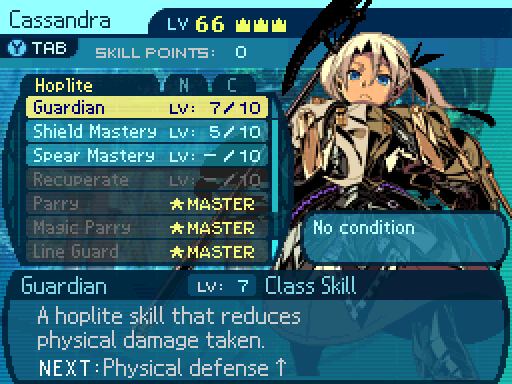
Guardian now reduces physical damage by 28%, making Cassandra even more unkillable. Let’s see what Drake’s conditional unlocks.


 Ooh, looking fierce and imposing there, Charlotte!
Hmmhmm, why thank you, Rose. I do feel more fit to be on the battlefield with this garb.
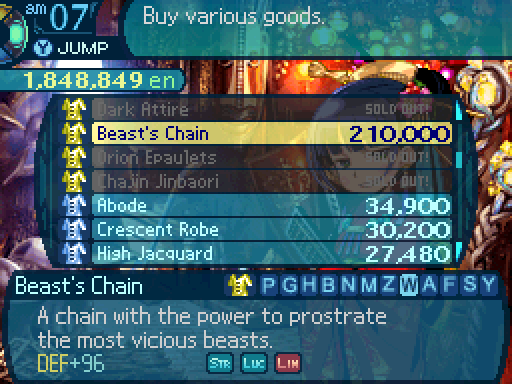
Okay, that’s far more fitting as an ultimate piece of equipment. (Yes I know the Hachiyou isn’t the ultimate Katana, but still.) All those stats boosts are something a Shogun really wants, especially the 5% HP increase since they’re rather fragile.
For Dragon, you still want 2 Crush Amulet’s as Blow is Dragon’s strongest move. However, you’ll want a Slice Amulet instead to deal with Dragon’s other attacks. If you’re that desperate for damage nullification, you can also pack mists to deal with the damage type you couldn’t fully cover, but I wouldn’t recommend doing that at all for this guy, since Corrupt doesn’t give a damn about damage resistance accessories.
Uh, wait, what? She’s not bound, she’s paralyzed! The heck? Anyways, the fact that you don’t have to worry about Dragon damaging you all that much eliminates the need for Protect Order, and you can just focus on having Prevent Order up.
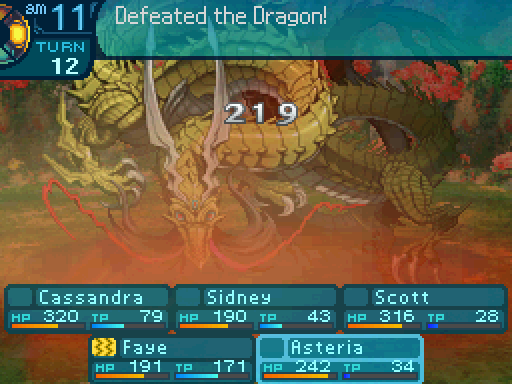
Since I already got Dragon’s conditional before, I can just beat the stuffing out of him without worry.
 Looks like the scales just weren’t tipped in his favor.
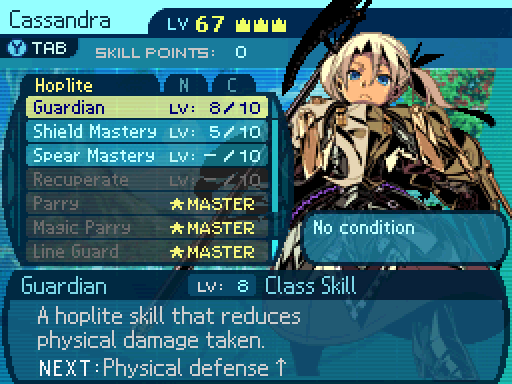
Guardian now reduces physical damage by 32%.
Now that we’ve got all 3 scales, we’ll unlock something rather special.

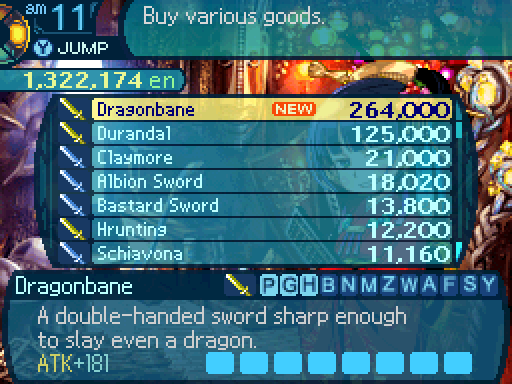
Ye gods... I can feel so much power just radiating from it.
Are swords allowed to be that sharp!?
Not that your equipment has been faulty or anything like that, but you really came through this time, Edie! Come to mama!
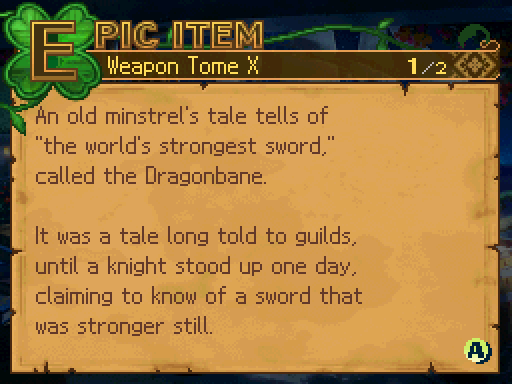
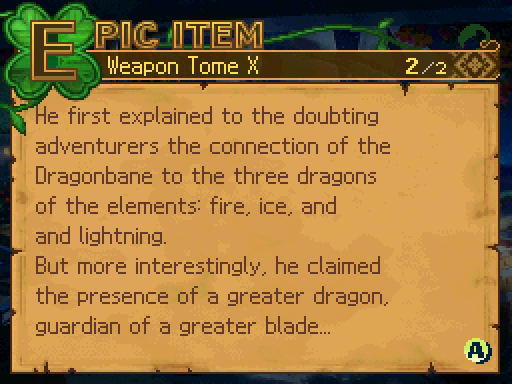
Say hello to the Dragonbane, which is generally considered to be the ultimate Sword, and possibly the strongest weapon in the entire game. (That isn’t the actual ultimate weapon. In terms of raw attack power, there’s one Sword that’s stronger than it, but it’s not considered to be the ultimate Sword for various reasons.) The attack power is fairly high, but it also comes with 8 empty forge slots. Sure, you’ll have to kill the dragons 8 more times to fully forge the thing, but the dragons give out so much exp that people were willing to grind up the materials since grinding levels in EO3 is pretty slow otherwise.
This weapon is considered to be a staple of any Warrior Might team that gets to the post-game, and all the dragons can be fought as soon as you beat the game at least once. When fully forging the weapon, the Fire forge is the most popular forge to use, as Fire is the element all the post-game bosses resist the least. Once you get this weapon in your grasp and fully powered it up, nothing will be able to stand in your way if you’re using Warrior Might.
As for normal usage, well it’s another strong weapon, but won’t snap the post-game in half or anything like that. I suppose 8 ATK forges would be nice to have as that is a 24% damage boost.
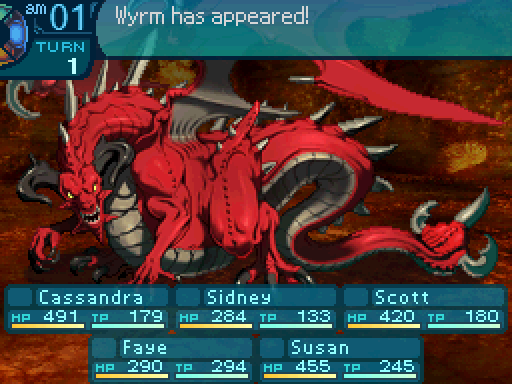
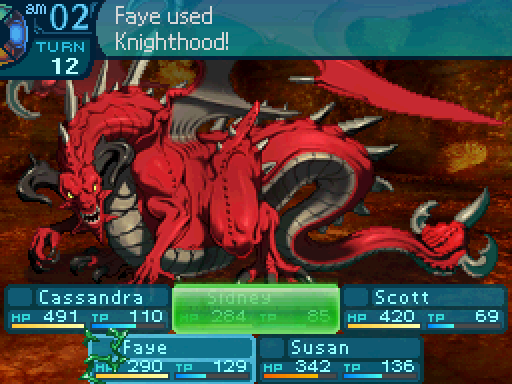
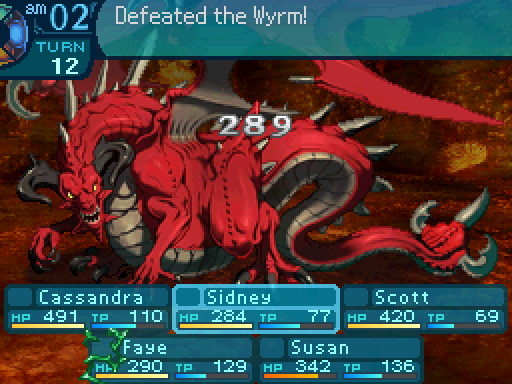
And here’s the last of the dragons again. For Wyrm, you’ll want 2 Slice Amulets to deal with Red Fang, and 1 Crush Amulet to deal with Beat.
He’s on the ropes! Get him, Sid!

Doesn’t it get kind of old watching everything blow up over and over?
...
Uhh... Forget I said anything.

And there’s the last of the dragons’ alternative drops.


 That rapier! It’s so divine! I must have it! Edie, I wish to purchase this-
Aaaaand it’s mine!
Wha- HEY!
The Sunblade is the ultimate Rapier. If you’re wondering why in the world it has 4 Fire forges, this was meant to be used with the Buccaneer’s Chasers. Unfortunately, nobody really uses the Chasers since they’re bad and completely outclassed by Warrior Might. Oh well, at least Scott can get some mileage out of the 2 STR forges there.
Oh. Well then. If that’s the game you wish to play Scott, then...
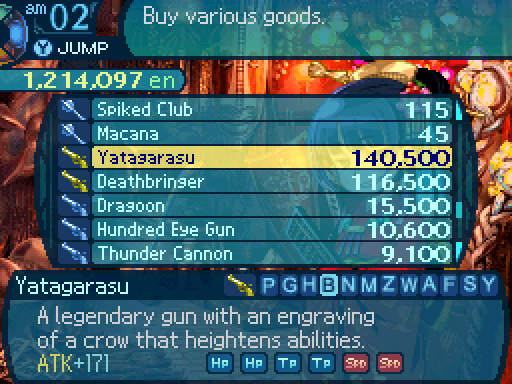
I wish to purchase this weapon please!
Wha- HEY! You can’t have that!
But I purchased it. With my own money. It is my gun now, Scott.
...Oh dear god. There has to be some sort of law against a 13 year-old owning a weapon like that! ...Isn’t there? Please?
Huh? Why would there be one? Anyone is allowed to explore the Labyrinth, and they’ll need all kinds of tools to get the job done.
But-
Besides, you have a 15 year-old girl in charge of the entire guild. This seems like a rather frivolous thing to argue about in comparison.
She’s got you there!
I give MEGAQUEEN a gun since the Yatgarasu’s 10% HP and TP boost, as well as the +4 speed boost, are all good stats for her to have.

Alraune is even easier to trivialize with accessorizing, as you just need 2 Crush Amulets to neutralize Tentacle Beat. A Slice Amulet will also cut down on Vampire Kiss’ damage, and reduce the amount of healing she gets from it as a consequence. And since her elemental attacks can be neutralized with a Hoplite/Ninja, the end result is that she can’t touch your party at all, as long as you make sure to keep up Prevent Order to deal with Pollen.


You know, looking at her when she’s frozen like that, you gotta say, she’s kinda cute when she’s not trying to kill us.
Oh my, Faye! I didn’t know you were into that sort of thing! That explains so much... I’ll have to write down this new revelation.
Wha- OH EW NO! NO, OH GOD NO! Forget I said anything! Hey, did you hear me!? Stop writing! Give me that stupid journal!

Just kill Alraune with composite damage to get her conditional more easily.


Maybe I won’t need Cassie covering me all the time now that I’ve got this baby!
As much as we would both love for that to be the case, you and I both know that won’t be true.
...Yeah.
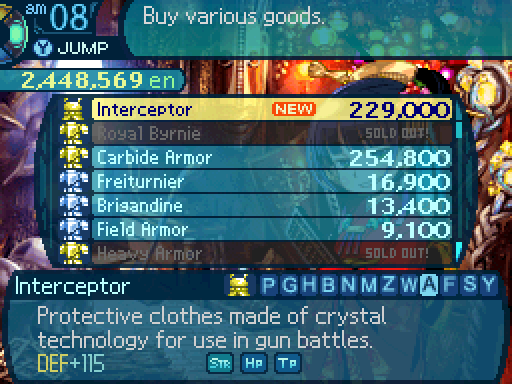
This unlocks the Interceptor, the Arbalist’s ultimate armor. Provides a nice little boost to STR, and Arbalists will like the 5% max HP and TP it provides.
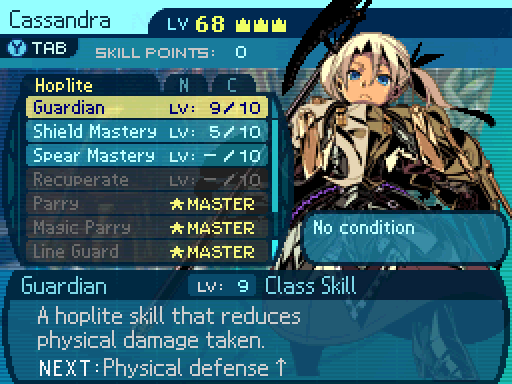
Oh, and Guardian now reduces all physical damage by 36%.
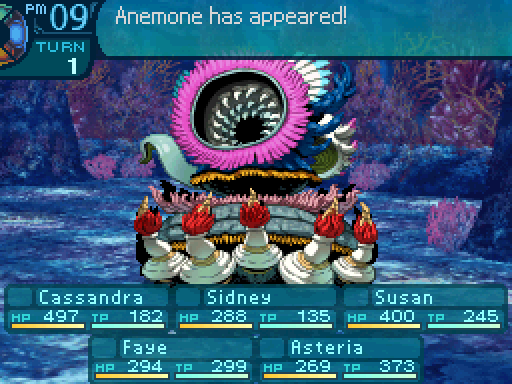
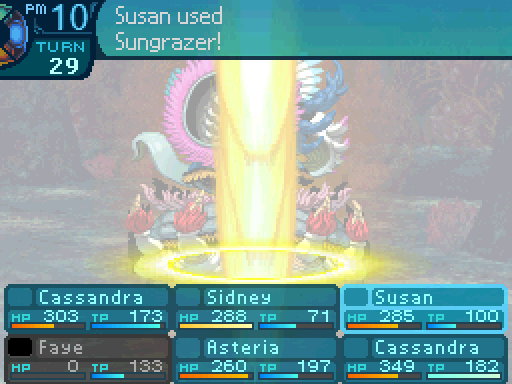
Last boss conditional we’re going after will be Anemone’s. If you want to trivialize this fight, bring 2 Crush Amulets. Anemone doesn’t do that much damage, however, Tentacle Suck deals Strike damage and will heal Anemone by a lot if it hits anyone with a bind. Negating Strike damage will make the fight take much less time to finish. You can also try wearing Death Magatamas to reduce the chances of Tentacle Reap instantly killing anyone if you wish.


Goddammit, Faye.
If it wasn’t for Tentacle Suck being so annoying to deal with, I would recommend prioritizing Death Magatamas. But I can deal with the occasional death over Anemone healing itself for massive amounts.

You are nothing but a mere sea anemone. I on the other hand, have the power of the sun. Just what were you expecting?

In order to snag this conditional, you’ll have to finish off Anemone with anything but elemental damage. This means that composite damage kills are out the window, but thankfully, Anemone isn’t completely immune to physical damage. You can also use Almighty or Poison/Plague damage to finish it off. Even instantly killing it with Call Tiger, while extremely unlikely (You’re looking at a 0.15% chance there), will get the job done.


With this, I’ll ensure that no harm comes to everyone from now on.
A 5% HP increase and 1 point of VIT? That’s it? Oh well, at least it provides the most amount of defense in the game. Not one of the better ultimate pieces of equipment, but you could do worse.
Anyways, while I’m here, I decided to buy everyone their ultimate gear. I also ended up using up all of my coupons in the process.

Come to think of it, that armor Smith’s wearing is basically made from Olympia’s corpse, right?
Yeah, it pretty much is and... That’s uh, really kind of- okay just straight up creepy when you put it that way.
 ...Excuse me while I wipe what you all just said from my memory banks.
Wow, Hoplites got ripped off in comparison. 10% extra resistance to all physical damage types? Yes, please! Unfortunately, in order to get this piece of equipment and actually get some use of out it, you’ll have to play through the game at least twice.

Hmm, how do I look?
 Oh, um. You uh, look uh, very good in that. Very pretty, even. Yes, very.
Smooth.
Hee hee, why thank you, Akatsuki! It means a lot to hear that from you. Um, is he okay?
I- well- I- um- guhh- heh heh- I- I- I-
I think you broke him.
The Kokopeli Vest provides +2 to LUC and increases minimum and maximum Limit gain by 1. Not exactly a stat I would go for on a Farmer, but I guess it lets them be slightly more useful.
But my friends are already good animals!
Um... Admittedly, they could use a bit more training.
I’m sure Edie would have a fit if you were to let loose your bull or tiger in here.
Really, now?
Don’t even think about it.
That 1 point of STR can be nice for the more offensive animals, and LUC is always good to boost for a class like the Widlling. The only questionable forge on there is the LIM forge, but I won’t complain about being able to get full Limit gauges faster.
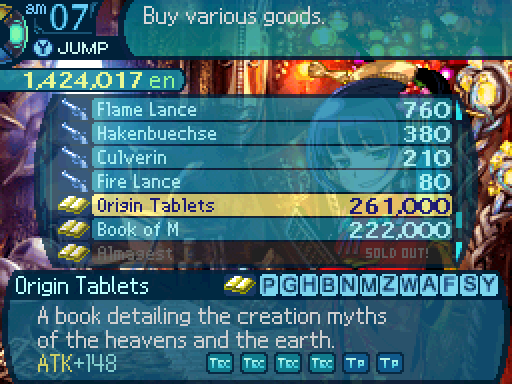
Oh my, this tome has such valuable info! I’ll have to study this intensely once we’re done. Ooh, there are even some classical puns in here, too!
Ugh, that’s just great.
The Origin Tablets provides a decent amount of TEC to increase Asteria’s damage, as well as increasing her already high TP pool even more.


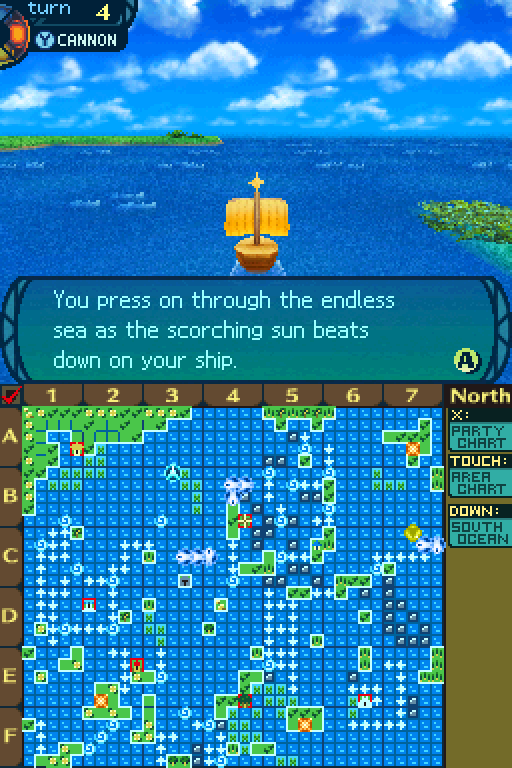
And that’s it for ultimate equipment. The last loose end we’re tying up is everything related to the ocean. First things first, let’s fill in that empty space on the north ocean map.


Much better.

And with that, we’ve completed both the north ocean...
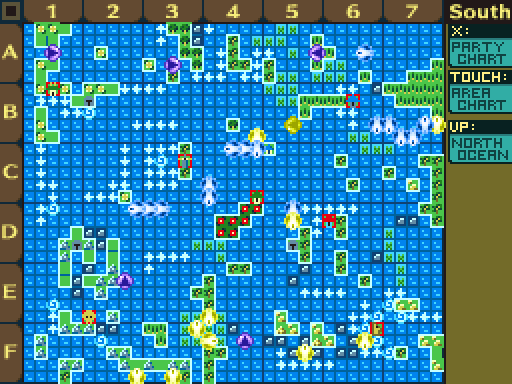
And the south ocean maps!

We don’t get a Guild Card medal for that, but see that statistic that says “charted?” If we made any mapping mistakes, that number displayed next to it would be less than 100.00% right now. So we’re done with the maps, but there’s still quite a bit left to do on the ocean.

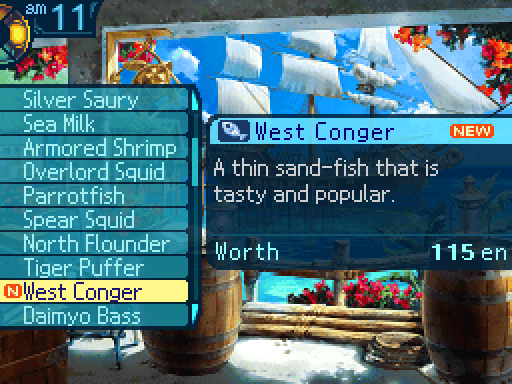
Like catching fish. West Congers can be found in this area.

Sea Turtles are found in this part of the South Ocean, but don’t fret if you can’t find one. I’ll explain why later.


For this next item, you’ll want the South Banner and the Carronade, and set sail somewhere in the South Ocean.

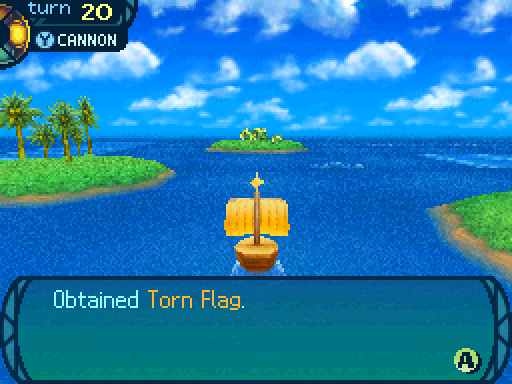
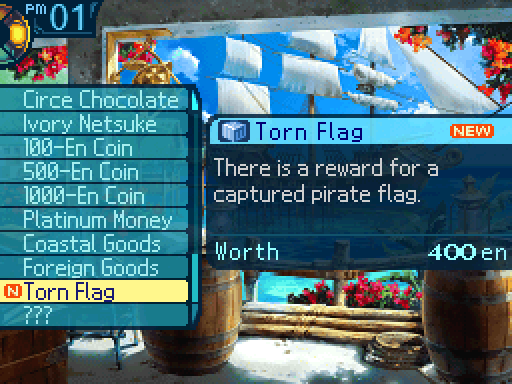
Destroying a black pirate ship while having the South Banner equipped will net you the Torn Flag.
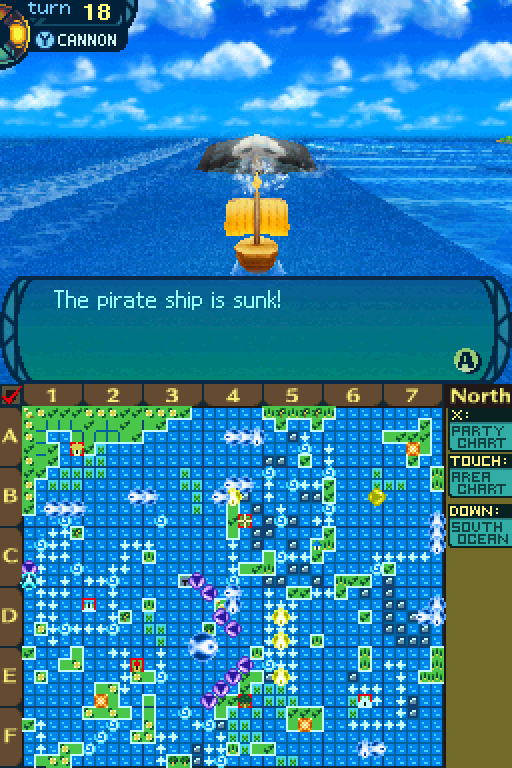
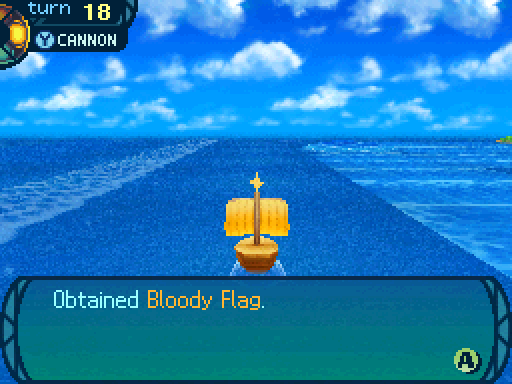

Likewise, destroying a black pirate ship in the north ocean with the North Banner equipped will snag you the Bloody Flag.

Now if you remember from a long while back, there was a guard at this spot that wanted some Garum. We have that now, so let’s talk with him again.
After you dock and disembark, you find a soldier cooking some dried victuals. The sizzling sound of the dried fish’s fat on the fire makes your mouth water... Noticing you staring hungrily at the scene, the soldier calls out to you.

 Thanks to your good work, we’ve been plenty busy. Meals are the only pleasure I get on this island. This here is Bacalhou, dried cod... It’s really great! Of all the preserved foods to take on a voyage, I like this the best. I usually put some Garum on it when I have some, but I don’t have any here.
Hold on, did you say Garum?
You are suddenly reminded of the man you met who had been freediving with a harpoon. He gave you a bottle of Garum, the fermented fish sauce that this soldier just mentioned.
Don’t bite into that yet!
Hold on while we get something, okay?
As the soldier is about to sink his teeth into his meal, you tell him to wait just a moment. You go to your ship and return with the Garum. He delightedly pours it on his fish and eats it.
Nothing beats bacalhau with Garum! Man, this is great! Everybody should eat like this!
After devouring his meal, the soldier finally realizes your plight and goes to his camp. He returns carrying some bacalhau.
Life’s all about give-and-take, huh? Thanks for the Garum. ...I’ve got to get back to work.

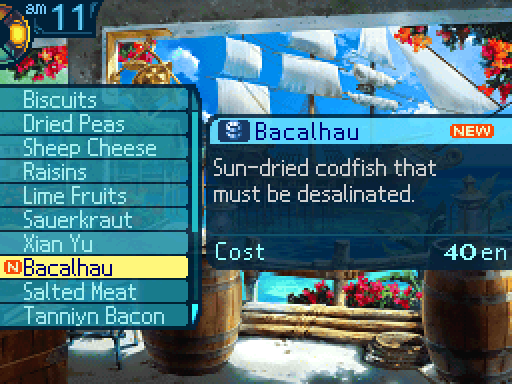

With that, we now have the cheapest 20 turn food available to us. Not that we can really do much with it at this point.
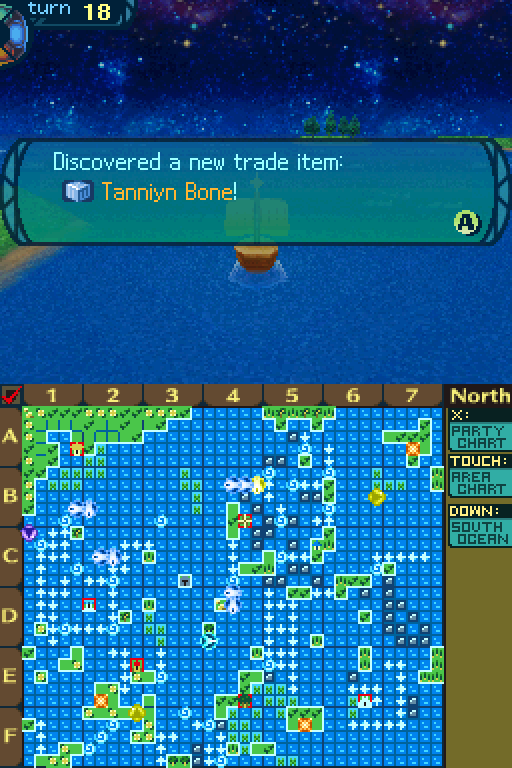
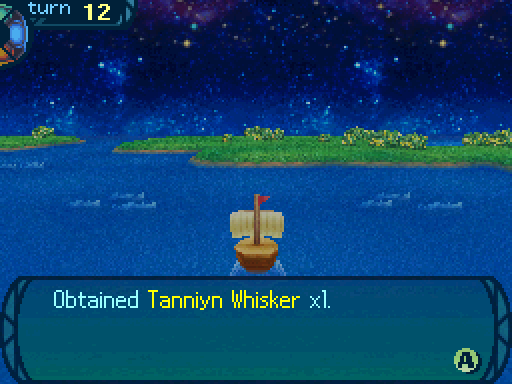
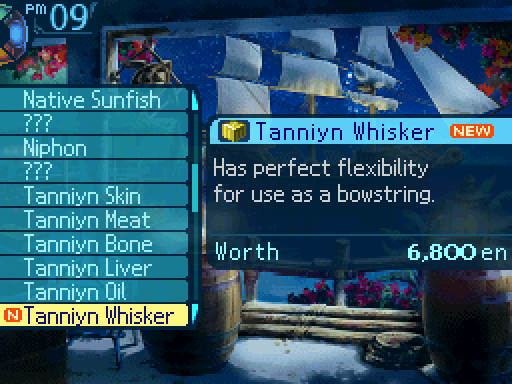
I killed a Tanniyn in the north ocean and got this to drop from it.
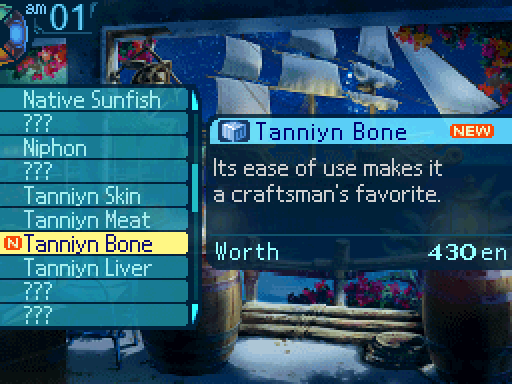
Though you don’t need to hunt down north ocean Tanniyn to get it, as there’s an easier way to get that item.

Holy ship.
This ship has the largest cannon you’ve ever seen, with a huge harpoon in the barrel! It is obvious that this cannon was built to shoot at something very different than yours were!
What the heck is that thing, and what are you trying to hunt down with it!?
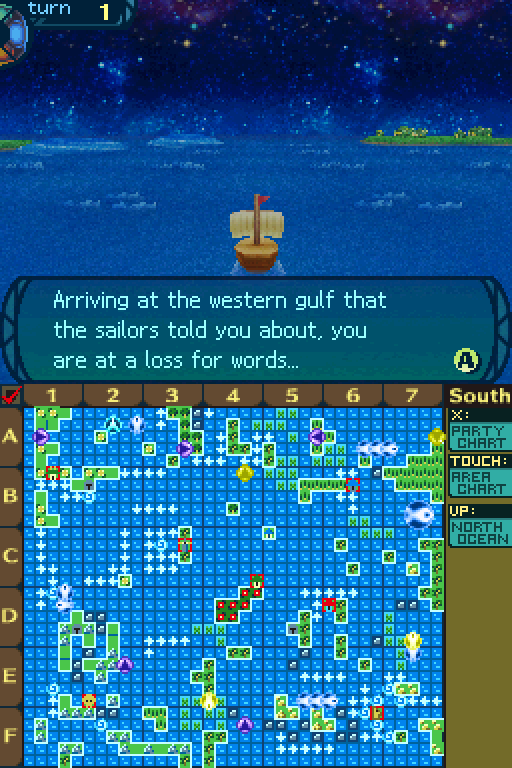
You call out to the frigate from your own deck and ask the crew what that thing is. They reply that they are fishermen from the north, and that it is a Whale Cannon. They are going to a gulf west of here to hunt Pendra, a rogue whale that attacks ships. The sailors wave goodbye to you and sail away to the west, as they said. If you are interested in seeing the power of the Whale Cannon, you could go watch them.
Ye gods...
Don’t tell me that the whale they were hunting down did this!
The wreckage of what certainly appears to be their ship floats all about these waters! Perhaps their campaign against Pendra, the giant whale they were hunting, ended in failure... You then spot the Whale Cannon in the midst of the remains in front of you! You consider salvaging the great weapon...
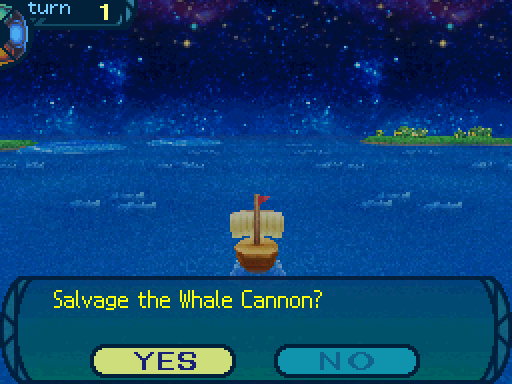
Might as well finish their job for them. It’s only the right thing to do.
You hoist the Whale Cannon with a block and tackle. It seems to be in good condition still... You vow to take the cannon with you and defeat Pendra in place of the fallen sailors.
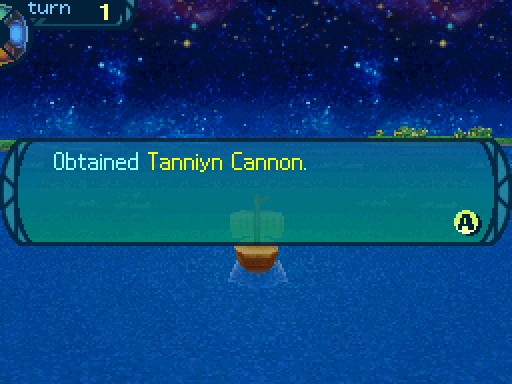

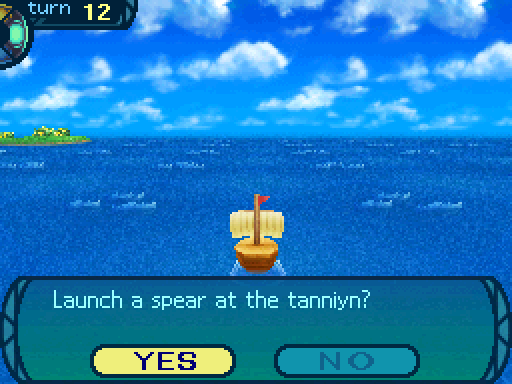
The Tanniyn Cannon is a lot stronger than Ned’s Harpoon. How much stronger? Ned’s Harpoon deals 4 points of damage to Tanniyn. The Tanniyn Cannon deals 16.
Anyways, do you see that big gold fish icon that’s near the top of the bottom screen? That’s our target.

Suddenly, a huge shadow appears beneath the waves ahead of you!
Thar she- what the hell!?
The giant shadow leaps into the air intimidatingly, revealing itself as a whale in plated armor!
...That’s something you don’t see everyday.
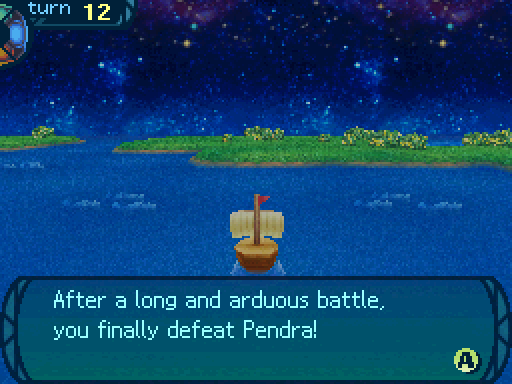
Its monstrous form and evil look can only belong to Pendra, the whale which sunk the frigate! If you are brave enough, you can attempt to capture it, though the wiser course may be to flee...
Hmph! We’ve dealt with worse. A mere whale in metal coating shall not stop us! Let us begin the hunt!
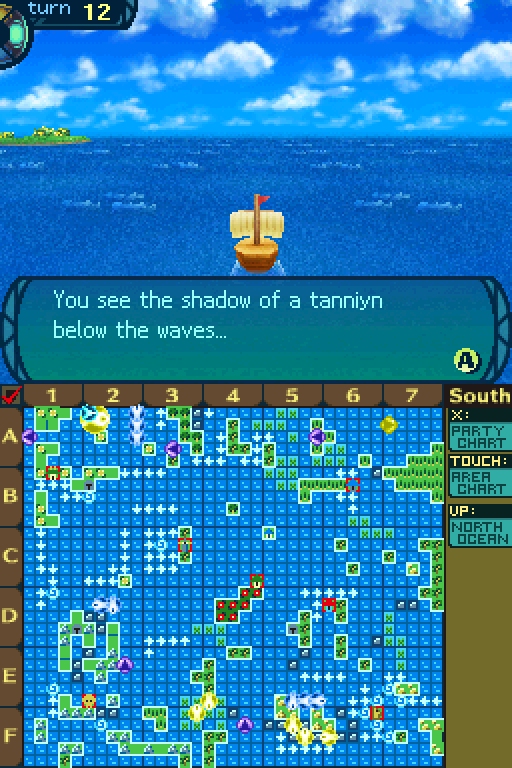
The game is kind of hyping up Pendra here, but it’s really just another Tanniyn. Nothing we haven’t really dealt with before.

After a few hits, we kill Pendra.
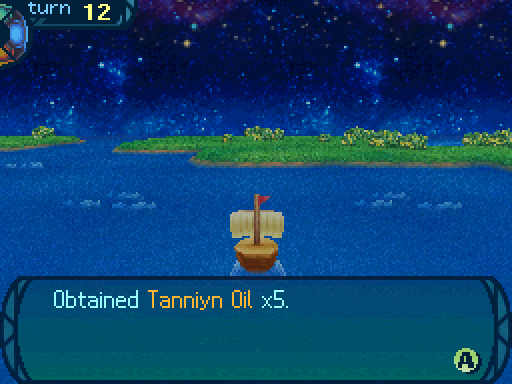
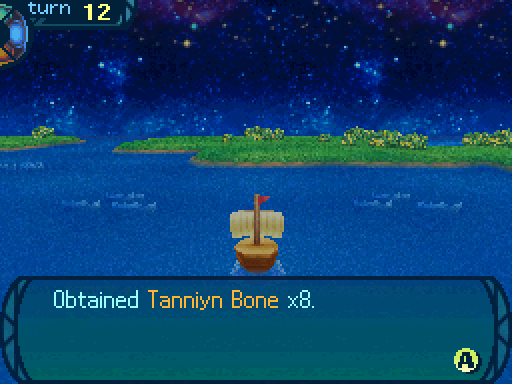
And get the other 2 Tanniyn related items we were missing before.
Rest well, fellow sailors. That demonic whale is no more.
Huh? Hey, you all might wanna have a look at this!
While flensing the meat from the whale’s bones, you find a bundle of old parchment inside of it. Wondering if the writings could be valuable, you decide to take them back to Armoroad.
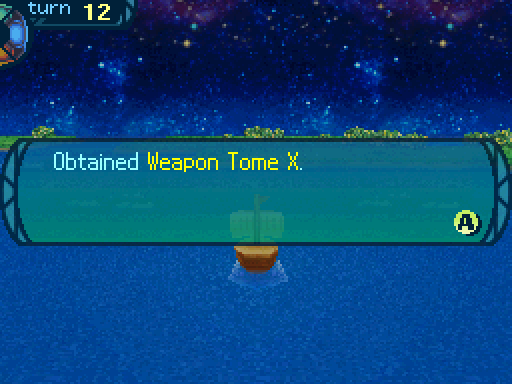
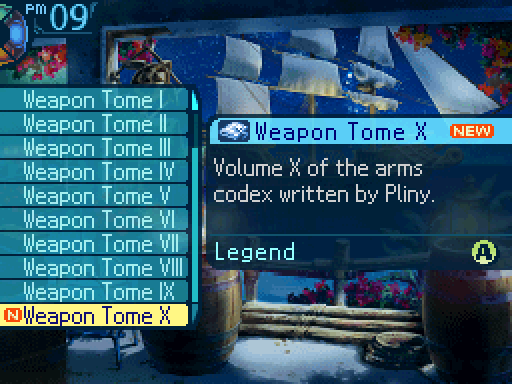
And there’s the last weapon tome we were missing.
An even stronger sword than this one? I’ll believe it when I see it.
I guess this has something to do with that dragon god we met, huh? You think he’s getting antsy to fight us already or something?
Eh, he’s probably waited a long time before. I’m pretty sure he can wait for a bit longer.
Yes, rushing into a fight like that would be incredibly unwise without preparing. A lesson I would have hoped you learned from the last two times things didn’t end well for us.
Hey, only the second time was my fault! You five rushed in yourselves the first time!
...Oh. Right. Yes, let’s forget that any of that ever happened.

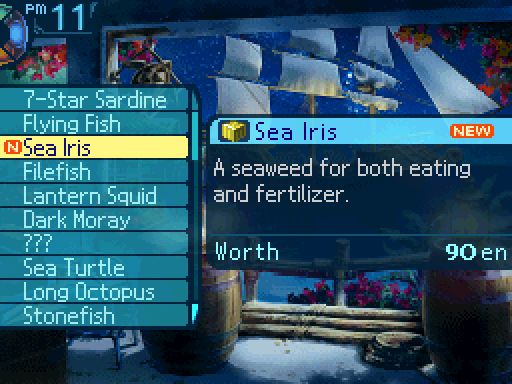
And now back to fish hunting. Sea Irises can be found right near Armoroad.
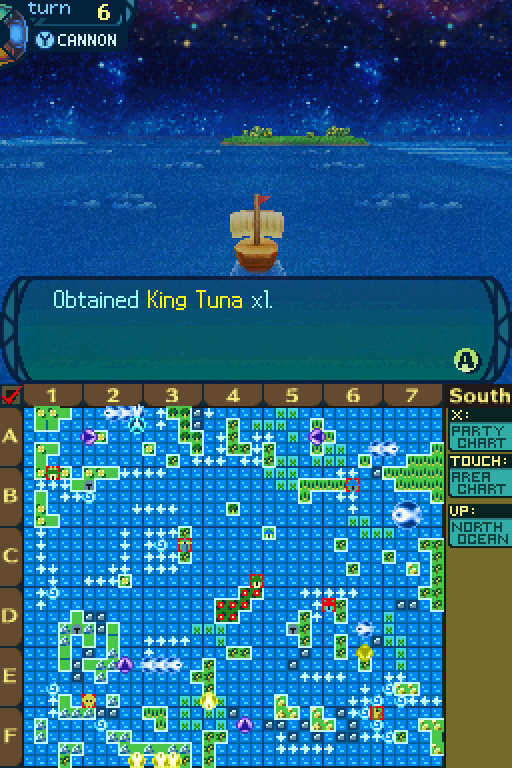
King Tuna can be found in the area where Pendra was fought.


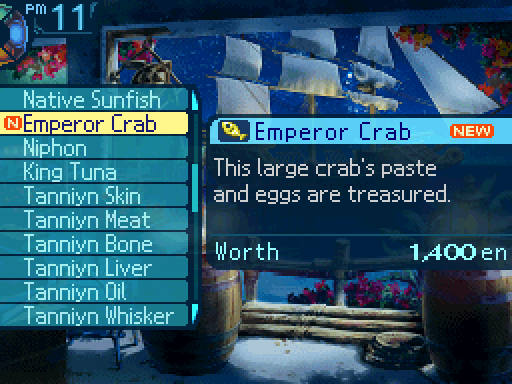
Emperor Crabs can be found near the Aerial Forest.

It looks like foam, but it also appears to be a living being... you think. It just sits there...
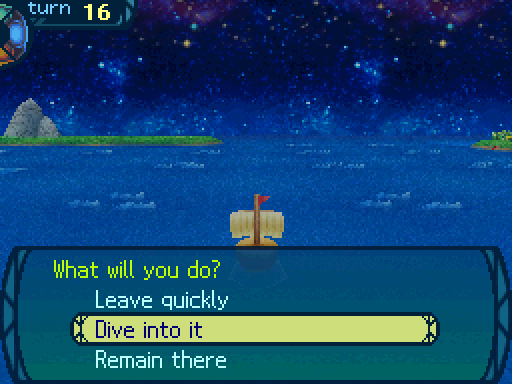
Huh, what should we do about-
I’ll investigate that phenomenon.
Charlotte volunteers to investigate, and leaps into the water without another word!
Whoa! Careful now, Charlotte!
...................................................Everyone holds their breath and watches... and Charlotte happily pops out of the water.
Sheesh, you’re a jerk for giving me a scare like that.
 Hmmhmm, worry not. That dive was fairly productive, see?
You can see Charlotte is holding a large sea turtle that is struggling to get free. Once back on board, Charlotte reports a vent of hot water at the bottom of the sea. This Sea Turtle must have come here to feed on plants that grow on the minerals here. You put the turtle Charlotte caught in the hold and set sail.

You can get a free Sea Turtle this way without having to worry about hunting it down for yourself. Would have saved me a lot of time if I knew that before, but whatever.
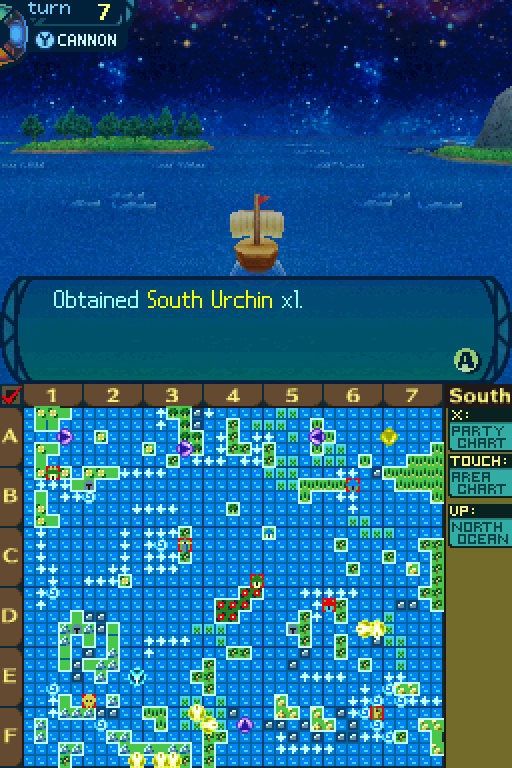
South Urchins can be found in this area.

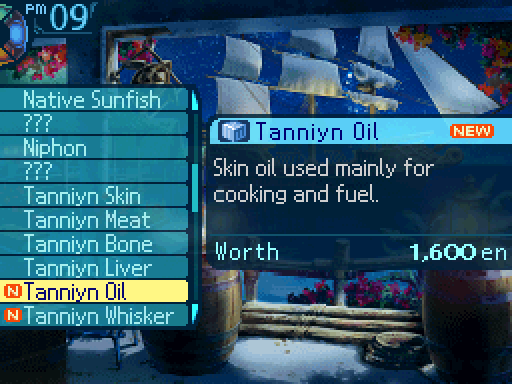
And that does it for all the fish in the Barter Log. But we’re missing one more item. So let’s go after that now.
Burned and weary, you can’t bear the thought of wearing your armor any longer. As you despondently gaze upon the beautiful blue waters, one word pops into your mind... Swimming! Luckily, the sea is calm, making this the perfect time for a dip! Any potential dangers lurking beneath the surface cannot hold back the temptation... You can choose to enjoy a swim in the water, or hold out and continue, avoiding any threat.
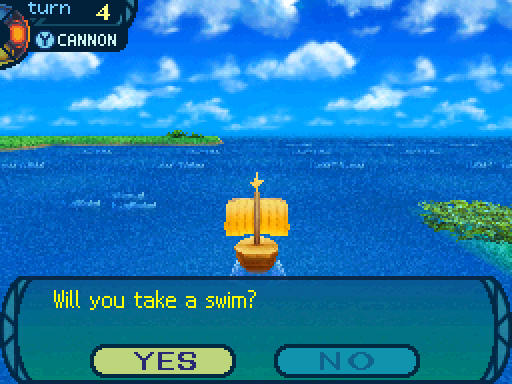
WOO HOO! Last one in is a rotten durian!
Um, Smith? Should you really be swimming with us? I mean, what if you short circuit or rust?
...I lived underwater for my entire life before I met you all. I think I’ll be fine. CANNONBOT!
Oh, right. I forgot about- wait a minute, that just raises even more questions!
I’ve got an answer for you! Ma-
Never mind, forget I said anything.
You decide that everyone needs a break once in a while and strip off your armor. The cold seawater feels good on your burnt skin, and the brightly-colored fish cheer your spirits. For a brief moment, you are able to forget your troubles and duties, and simply relax. But, when the party returns to the ship refreshed, you notice Faye has yet to return... You all begin searching the area and see Faye pop out from the below holding something.
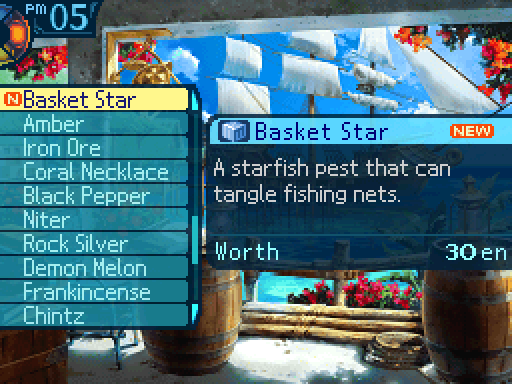
Hey guys, look at what I found!
On closer inspection, you see that it is a Basket Star, a starfish known for its many arms. The tentacle-looking arms look eerie, but the creature is harmless. In high spirits at discovering such a strange creature, you decide to take it with you.

And with that, we’ve filled out the entire Barter Log, Cargo Manifest, and Epic Glossary.
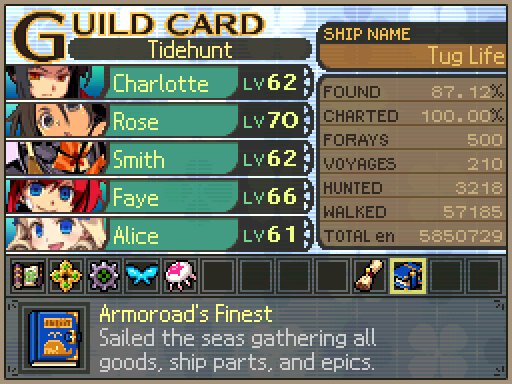
We get another Guild Card medal to commemorate that accomplishment. Now we don’t ever need to touch sailing ever again.
Does this mean that I can bring Tug Bot back?
NO! We still need to sail to the dragon god later to fight him, remember?
Oh, sure. Whatever. You know, someday, you’re going to run out of excuses. And when you do, I’ll be waiting right there to rebuild him.
It’s a bucket of bolts, Asteria! I don’t see what’s the big deal about that thing.
And those are all the loose ends I wished to cover in this update. We’ll be heading back the Labyrinth next time.