Toggle Background Color
Update 101: Fluffy Puffy Loose Ends
This update is pretty much gonna be purely informative since we’re just covering up the last of the loose ends here.
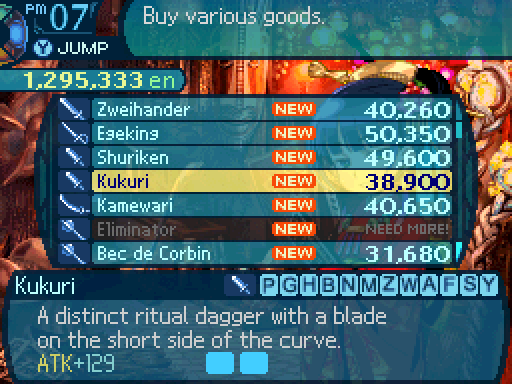
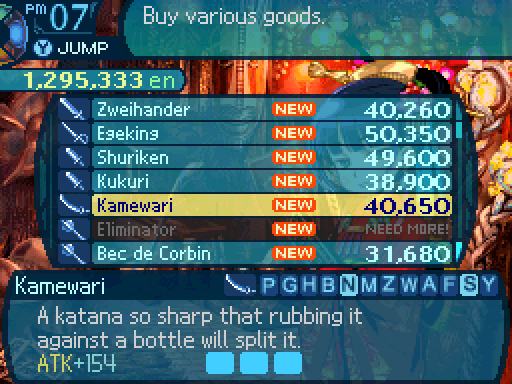
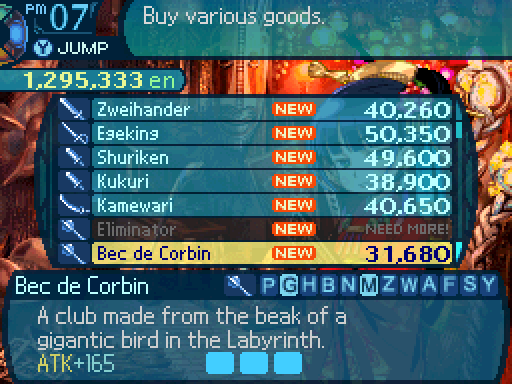
First up, most of the leftover equipment I neglected to unlock.


6% boost to your damage output. A nice upgrade if you haven't already gotten the ultimate Knife just yet.
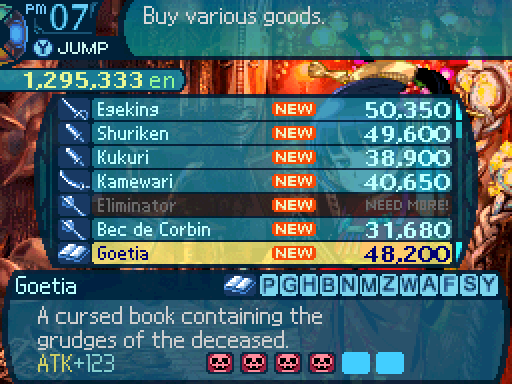
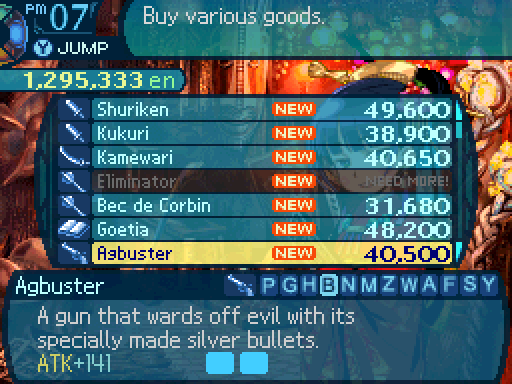
Oh hey, a book with a 15% chance to inflict Curse. You know what I have to say to this? 
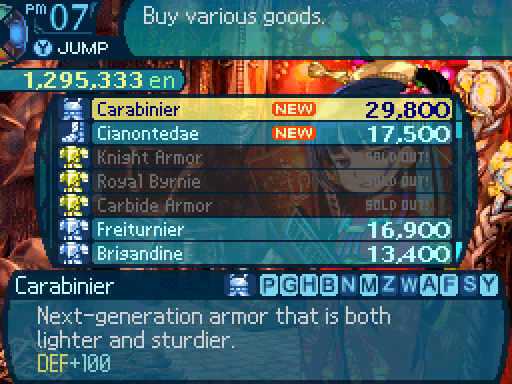
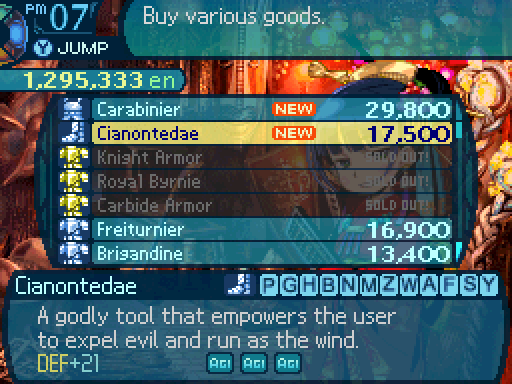
The Cianontadae are pretty much the best Boots in the game, for what that’s worth. At least they provide a nice boost to AGI (and by extension, speed.)

Ah, now we’re talking. Now we get to the really good accessories. Head binds are always nasty for supports to have, and a 50% increase to head bind resistance is nice. Stack 2 of these to gain immunity to the bind.

Curse is a nasty ailment to be inflicted with, but at this point in the game, there’s not much that can inflict Curse on you.
Well, that’s not actually all the drops I could get at this moment in time. But it was a decent chunk at the very least. They’re all just upgrades to various categories of equipment. But if you already have the ultimate weapons or armor, then they’ll be irrelevant to you.
I went back into the 6th Stratum to unlock the rest of the equipment I was missing. Oh, and to tie up another loose end.


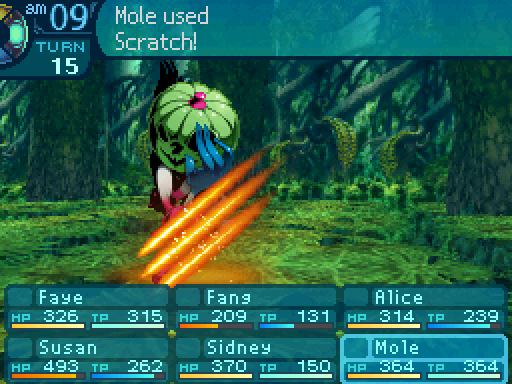
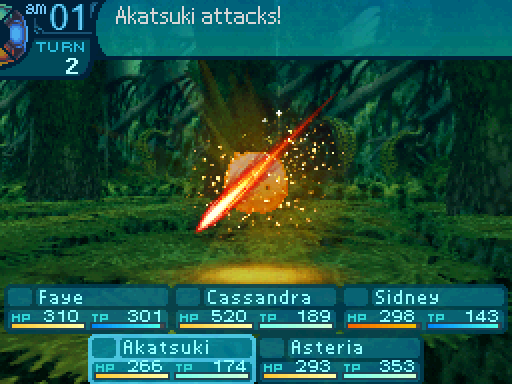
THIS FUCKER. Remember it? Its conditional requires killing it while it is fully bound, but it has a 10% resistance to all binds, meaning that I only have 1 shot to snag it, and it also recovers from disables at the fastest possible rate due to stat dickery on Atlus’ part.

Alright, I just need the leg bind, and I’m golden.


AAAAHHHHHH, you’ve got to be kidding me!

Okay, I have another shot. I think?

AHAHAHA YEEESSSS, wait, does it still have its head and arms bound?

AHAHAHAHAHAHA- ahem. Excuse me.


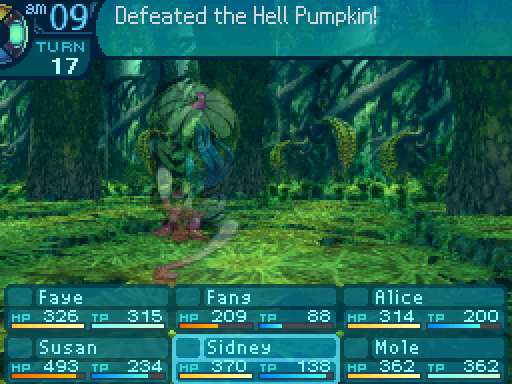

Eat shit, you stupid pumpkin! My goodness, that conditional was such a pain in the ass to grab. Thankfully, I only need to snag one.

...That’s certainly a description alright.

Oh yeah, that Hell Pumpkin’s conditional? It just unlocked this spear. That’s all it unlocked. 

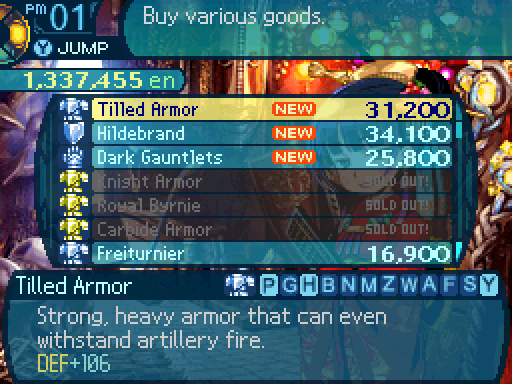
The Tilled Armor is the best piece of Heavy Armor in the game that isn’t a piece of ultimate equipment. Not that it means much since it provides no bonuses other than a boost to DEF.

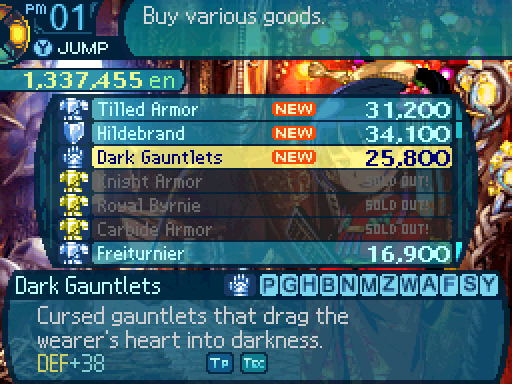
The Dark Gauntlets are the best Gloves in the game. Not that it really means much either.

Boost your crit rate all you want. That doesn’t change the fact that you really shouldn’t be making use of regular attacks as your main form of offense. Even if it is a 15% boost.


A 50% increase to bind resistance is nice to have. Provided you don’t want to wear anything else, that is.
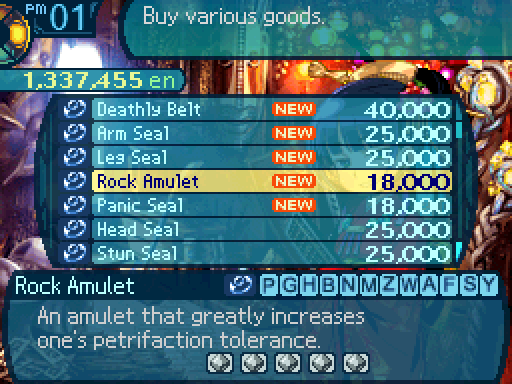
A 50% increase to Petrification resistance is also very nice. Stack 2 of these if you want to deal with the Dreamsmashers without worry.

While a 50% increase to a party member’s Confusion resistance is nice, at this point in the game, not many enemies can inflict Confusion.
Anyways, that does it for all the pieces of equipment that we can unlock at this point. Now there’s one last thing to cover in this update. Namely, Pasaran hunting. But first, preparations for said hunt.

First purchase a Knife. Preferably one with an empty forge slot. And of course, one that you have enough materials for.

 Put an Ice forge in that slot. This is one of the most important steps to the hunt we’re about to engage in.

If you want lots of experience points, get a second Knife and put in a Fire forge in that slot. If you want lots of money, put in a Volt forge in that slot instead.
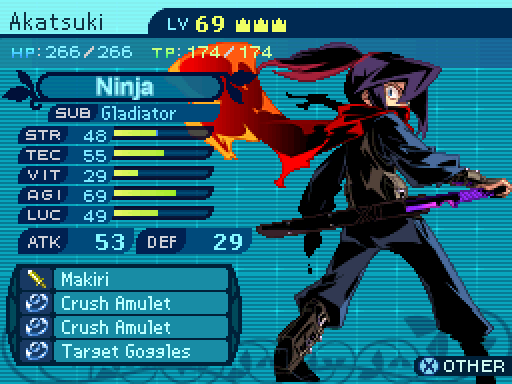
It’s important to put 2 Crush Amulets on everyone. Oh and for the people that have the Knives, it’s best to give them Target Goggles unless you want to play a dangerous game with the RNG. Also your party members pretty much need to have an action speed of 64 or above. If they don’t, then someone needs to have access to Knighthood. One last thing before we set out. You need access to a good single target attack. Random target attacks such as Blade Rave will not cut it here.

If you have access to the Immortal Limit, this will make the whole process easier.
Also make sure to buy a few tents, but they aren’t exactly necessary.


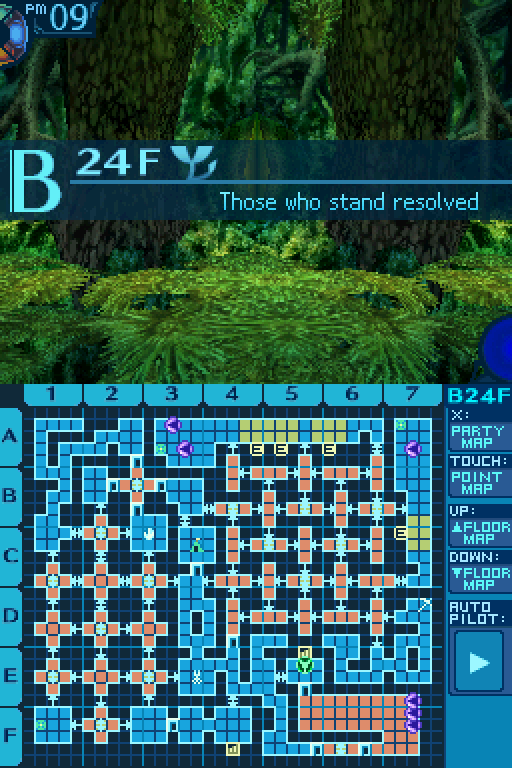
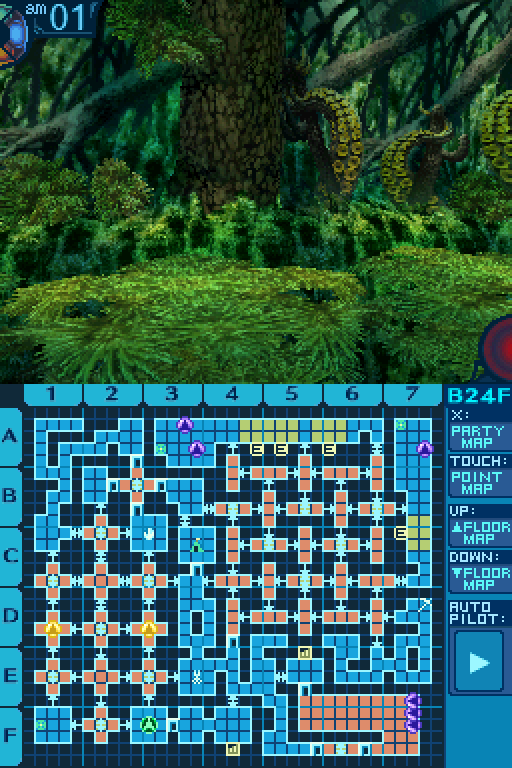
The point of interest in this update is floor 24.

Namely because it’s home to 2 Pasaran spawn points. See those gold FOE icons? That’s where they can spawn. However in order to trigger their spawns, we need to have explored a good chunk of the area in the white rectangles. We’ve already done that when we explored floor 24 a while back, so all we have to do now to spawn them is walk around in the area in the red rectangle. For every step we take there, a Pasaran has a 2% chance of spawning in those spot. Yeah, not exactly a stellar chance, and it can be pretty time consuming to do that.
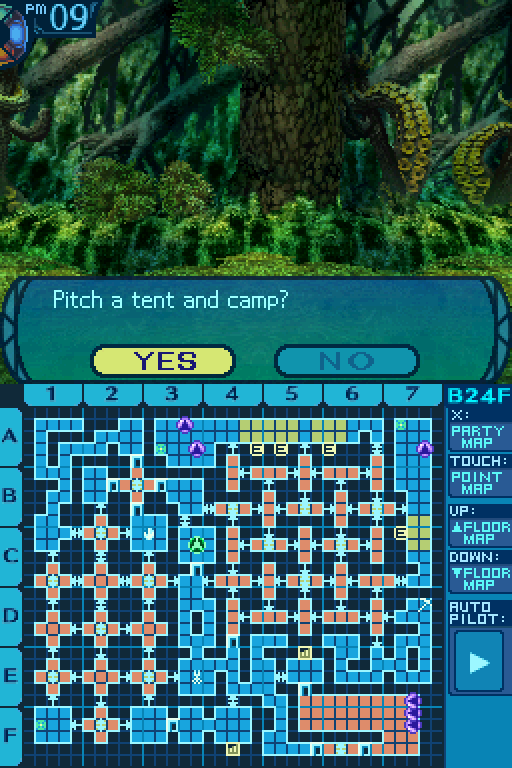
Or we could use a tent instead! Each time we use a tent here, a Pasaran has a 25% chance of spawning in one of those spots.
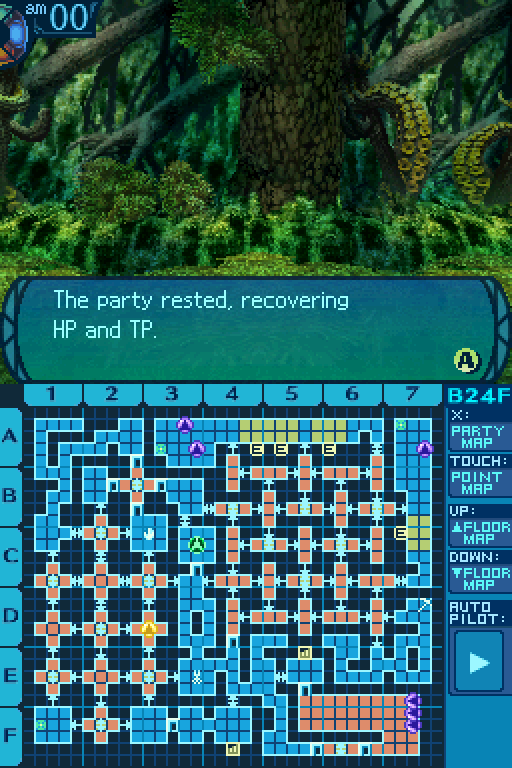
Much better! Now if you’re wondering why this floor is the one we’re performing our hunt on...
Unlike most other Pasarans in the game, the ones on this floor stay completely still and won’t run away from you. Well, unless you take too long to reach them, at which point they’ll just go off the map and you’ll have to spawn them again, but you would have to be wasting a lot of time for that to even happen. At any rate, that makes these ones incredibly easy to farm.

They don’t even turn either, so it’s really easy to grab a preemptive on them.


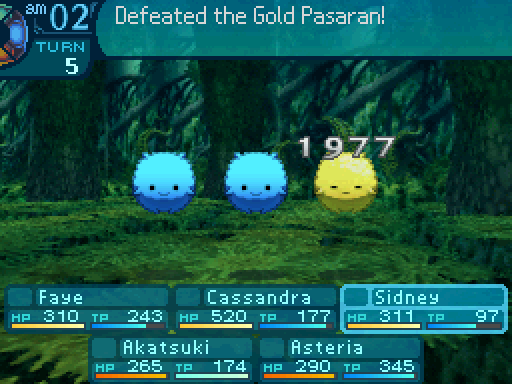
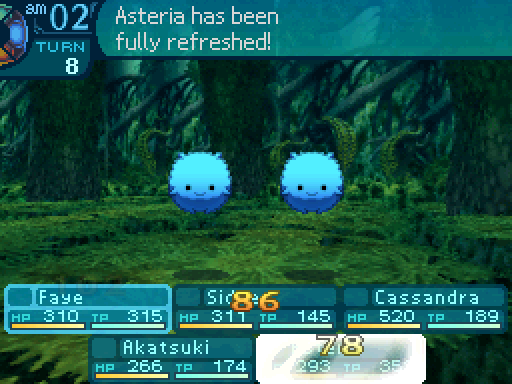
Remember those Blue Pasarans a long while back? They’re also the Pasarans that wander around in this Stratum too. Now there was actually quite a bit more to those enemies than I was letting on back then. I just opted not to go over the Blue Pasaran’s actual gimmick since I thought it was a bad time to go over them back then. But now we’re capable of farming Pasarans, I’ll go over its actual gimmick now.

Blue Pasaran
Level: 58
HP: 650
STR: 38
VIT: 49
AGI: 58
LUC: 59
TEC: 49
Attack Type: Strike
Exp: 2500
Item Drops: N/A
Description: A friendly, blue fluff monster. When many gather, they all explode at once in excitement.
Damage Resistances: Slash: 25% Strike: 25% Pierce: 25% Fire: 25% Ice: 25% Volt: 25% Almighty: 25%
Ailment Resistances: Sleep: 1% Confusion: 1% Plague: 1% Poison: 1% Blind: 1% Curse: 1% Paralysis: 1%
Bind Resistances: Head: 100% Arm: 100% Leg: 100%
Other Resistances: Death: LR - 30% Petrification: LR - 50% Stun: 10%
Skills:
Self-Destruct: Uses the Head. The Pasaran explodes, dealing 140% Strike damage to the whole party, disappearing from the map and denies them exp. Has an action speed of +0. Has an accuracy of 99.
Escape: Uses the Legs. The Pasaran escapes from battle, disappearing from the map and denies the party exp. Has an action speed of -3.
Multiply: Passive skill. When the Pasaran is struck by a Fire attack, a Red Pasaran is summoned to battle.
Multiply: Passive skill. When the Pasaran is struck by an Ice attack, a Blue Pasaran is summoned to battle.
Multiply: Passive skill. When the Pasaran is struck by a Volt attack, a Gold Pasaran is summoned to battle.
The Blue Pasaran itself doesn’t have much going for it. It gives out less exp than the Stratum 1 Pasarans, and doesn’t give out much else. However, strike one with an elemental attack, and it’ll summon another Pasaran. The type of Pasaran that gets summoned depends on the element used.
Blue Pasaran’s AI Script posted:
If Multiply activated at least once, follow this routine for the rest of the battle:
-99% chance to cast Self-Destruct. (Standard targeting.)
-If Self-Destruct does not get cast, 99% chance to cast Escape. (Targets self.)
-If Escape does not get cast, move onto the appropriate routine.
If there are less than 3 allies in the battle:
-49% chance to cast Self-Destruct. (Standard targeting.)
-51% chance to use a regular attack. (Standard targeting.)
Else:
-Cast Self-Destruct. (Standard targeting.)
Also Blue Pasarans like to explode. A lot. If there are 3 or more enemies in the battle, they’re guaranteed to blow up. Setting off multiply also makes them super likely to blow up. They can also run away, but you’re very unlikely to see that over seeing a bunch of blue fluff blowing up in your face.

Before you begin the slaughter, buff up your damage dealers first. Remember that Pasarans are extremely durable, and you effectively have to deal 2600 damage in one turn to kill them before they deny you exp.
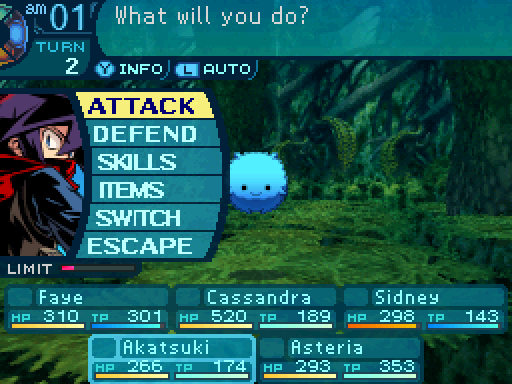
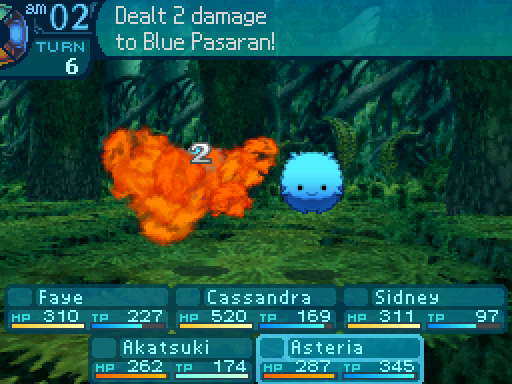
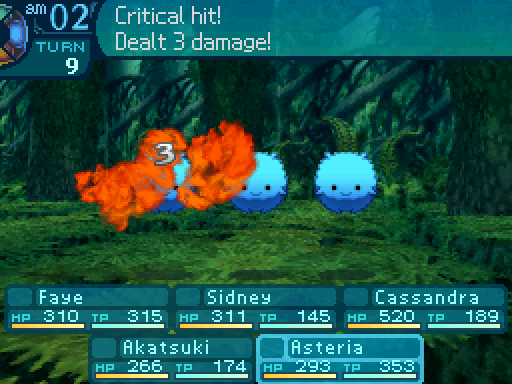
Anyways, for the person who has the ice knife, they have the most important job out of all the party members, and that’s to use regular attacks on the Blue Pasarans.


This is because newly summoned Pasarans cannot act. While the Blue Pasaran they attacked might blow up in the party’s face, the newly summoned one is incapable of doing anything. Meaning that the battle can be dragged out for as long as you wish as long as you ensure that Blue Pasarans keep getting summoned.
Incidentally, this is why you want to wear 2 Crush Amulets. Self-Destruct deals Strike damage, and you really don’t want to let all that add up so easily since you want to summon Blue Pasarans constantly.
Anyways, now that I’ve established the most important part of farming Pasarans...


Let’s check out the other types of Pasarans we can fight.

Gold Pasaran
Level: 58
HP: 650
STR: 38
VIT: 49
AGI: 58
LUC: 59
TEC: 49
Attack Type: Strike
Exp: 2500
Item Drops:
-Drop 1: Happiness Fluff - 75% Drop Rate. Unlocks nothing. Sells for 50000 en.
--Golden shining fluff rumored to bring good fortune.
-Drop 2: N/A
-Gold: N/A
Description: A shining, golden fluff monster. Its fur fetches a high price, making it especially lucky.
Damage Resistances: Slash: 25% Strike: 25% Pierce: 25% Fire: 25% Ice: 25% Volt: 25% Almighty: 25%
Ailment Resistances: Sleep: 1% Confusion: 1% Plague: 1% Poison: 1% Blind: 1% Curse: 1% Paralysis: 1%
Bind Resistances: Head: 50% Arm: 50% Leg: 50%
Other Resistances: Death: LR - 30% Petrification: LR - 50% Stun: 10%
Skills:
Self-Destruct: Uses the Head. The Pasaran explodes, dealing 140% Strike damage to the whole party, disappearing from the map and denies them exp and their item drop. Has an action speed of +0. Has an accuracy of 99.
Escape: Uses the Legs. The Pasaran escapes from battle, disappearing from the map and denies the party exp and their item drop. Has an action speed of -3.
Unload: Uses the head. Deals 50% TEC-based Volt damage to the entire party. Has an action speed of +0. Has an accuracy of 99.
Gold Pasarans don’t give out that much exp either. However, they drop the 2nd most valuable material in the game. It’s a little tough to disable with binds, but at this point in the game, you don’t want to disable them. You want to kill them immediately.
However, something very important to note is that Gold Pasarans (and Red Pasarans) lack the Multiply passives. Meaning that in order to keep farming Pasarans, you must keep at least 1 Blue Pasaran alive at all times.
Gold Pasaran’s AI Script posted:
If there are less than 3 allies in the battle:
-29% chance to cast Self-Destruct. (Standard targeting.)
-If Self-Destruct does not get cast, 59% chance to cast Escape. (Targets self.)
-If Escape does not get cast, 79% chance to cast Unload. (Standard targeting.)
-If Unload does not get cast, use a regular attack. (Standard targeting.)
Else:
-49% chance to cast Self-Destruct. (Standard targeting.)
-If Self-Destruct does not get cast, 99% chance to cast Escape. (Targets self.)
-If Escape does not get cast, use a regular attack. (Standard targeting.)
If there are 3 or more enemies in the battle, you’ll really want to kill these guys fast. Oh, and they have an elemental AOE attack, but that rarely gets to be used by them.

And that’s the Gold Pasaran down. You’ll want your damage dealer to be able to one shot them, as they’ll be likely to deny your their reward either through exploding or running away. And you don’t want to be wasting your time disabling them at this point.

Now for the last kind of Pasaran we can fight.

Red Pasaran
Level: 58
HP: 650
STR: 38
VIT: 49
AGI: 58
LUC: 59
TEC: 49
Attack Type: Strike
Exp: 60000
Item Drops: N/A
Description: A vibrant, red fluff monster. It has a sullen look and catches fire to explode when angered.
Damage Resistances: Slash: 25% Strike: 25% Pierce: 25% Fire: 25% Ice: 25% Volt: 25% Almighty: 25%
Ailment Resistances: Sleep: 1% Confusion: 1% Plague: 1% Poison: 1% Blind: 1% Curse: 1% Paralysis: 1%
Bind Resistances: Head: 100% Arm: 50% Leg: 100%
Other Resistances: Death: LR - 30% Petrification: LR - 50% Stun: 10%
Skills:
Self-Destruct: Uses the Head. The Pasaran explodes, dealing 140% Strike damage to the whole party, disappearing from the map and denies them exp. Has an action speed of +0. Has an accuracy of 99.
Escape: Uses the Legs. The Pasaran escapes from battle, disappearing from the map and denies the party exp. Has an action speed of -3.
Lower Arms: Uses the Arms. The Pasaran wriggles its arms, lowering them, and turns into the Pasaran from the 1st Stratum. Which heavily lowers the party's exp gain. Has an action speed of +0.
Combust: Uses the head. Deals 50% TEC-based Fire damage to the entire party. Has an action speed of +0. Has an accuracy of 99.
Red Pasarans are the ones that are likely to be of interest to players, as they give out the most experience points out of all the Pasarans. 60000 exp is indeed smaller than what post-game bosses give out, except with the right setup, they’ll be easy to kill.
Red Pasaran’s AI Script posted:
If there are less than 3 allies in the battle:
-19% chance to cast Self-Destruct. (Standard targeting.)
-If Self-Destruct does not get cast, 39% chance to cast Escape. (Targets self.)
-If Escape does not get cast, 59% chance to lower arms. (Turns into 1st Stratum Pasaran.)
-If arms are not lowered, 79% chance to cast Combust. (Standard targeting.)
-If Combust does not get cast, use a regular attack. (Standard targeting.)
Else:
-33% chance to cast Self-Destruct. (Standard targeting.)
-If Self-Destruct does not get cast, 66% chance to cast Escape. (Targets self.)
-If Escape does not get cast, 99% chance to lower arms. (Turns into 1st Stratum Pasaran.)
-If arms are not lowered, use a regular attack. (Standard targeting.)
And like with the others, you want to kill them fast since they have so many ways to deny you their payouts.

The other thing about Red Pasarans? You don’t have to stop at killing one.

You can keep generating as many as you wish to keep racking up that exp. It’s one of the easiest ways to grind in the post-game if you have to.

And if you have access to the Immortal Limit, you won’t have to worry about spending resources to keep your party in top shape, and can keep going for as long as you need to.


However, the fun will have to end eventually. Only 8 items can drop in battle, and there is an exp cap of 999999. Once you’ve killed 17 Red Pasarans, you’ll have to stop as you won’t be getting any more exp out of the battle. At any rate, this is one of the more popular ways to grind in the post-game as you can rack up a lot of experience points easily with the right setup.
Oh, and by the way, Pasarans spawned by tents and Pasarans spawned by walking around are considered to be entirely different Pasarans. Meaning that you can do this entire process 4 times before you’re forced to go back to town to rest. And in order to respawn Pasarans, you’ll have to rest for 14 days before you can go back to walloping them.

Happiness Fluffs don’t unlock anything, but they sell for a lot of Ental. In fact, they’re the 2nd most valuable material drop in the entire game. You could try farming them from Gold Pasarans, and get up to a maximum of 400000en per battle.
Anyways, that’s all I wanted to show for this update. Next time, we’ll tackle the final floor. It’s sure to be... tentacular.
By the way, if you’re trying to use the Red Pasaran method to grind all the way up to 99 just to take on the true final boss of the game, let me tell you right now. THAT IS NOT GOING TO HELP ONE BIT. Well, maybe it will. But most likely it won’t. Why? Patience, everyone. I’ll cover exactly how that shitpile functions soon enough.