Toggle Background Color
 Puzzles Reinvented 2
Welcome back, folks. Now that we've sorta freed Flora, it's a good time to try and prevent Clive from doing any real damage.
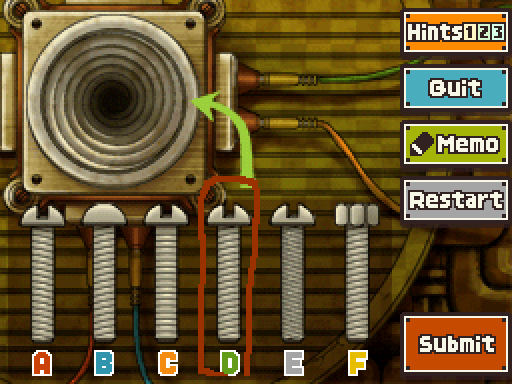
3. Screw B can't be turned with any tool, and screw F can't be turned with a flathead screwdriver. You can cross these two options off the list as well.
S. Screw A is threaded in the opposite direction to the hole, so that can't be the answer. That leaves only two possible choices. Take one last look and you should have this in the bag.
I kinda always just sorta forget that this puzzle exists. I don't think its that bad or anything, but its just... sorta there.


3. Dial D goes in the bottom-left slot.
The key to this puzzle is that all the gems on the inside - both on the right edge of the left column and the left edge of the right column - are yellow!
S. Dial E goes in the top-right slot. If you've followed all the hints correctly so far, the rest will be a doodle!
Might take a bit, but you can track it yourself before submitting so it's not quite as bad as it could be.

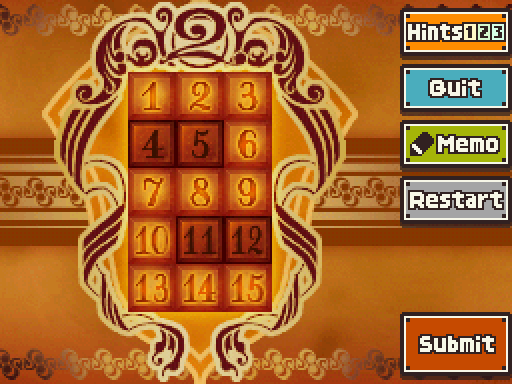
3. "Open with two" refers to pressing the buttons that together form the shape of a number two when lit.
S. Press 1, 2, 3, 6, 9, 8, 7...
You should start to see the shape of a certain number emerge.
That's right! The trick is to press the buttons that together form a number-two shape when lit up. Rather good, eh?
Also, see how there are four buttons left untouched? That's what the other part of the instructions refers to.
Kinda weird how this one's ultimately just a pun.


2. The end button doesn't point to any other button, so it must be a button on the edge that points outwards. Once you've found the end point, you can work your way backwards to find the starting button!
3. The end point is the button in the top-right corner. Work backwards from there to find the start!
S. The starting button isn't pointed at any other button. Can you find it? That's your answer!


Suspicion


The Mobile Fortress

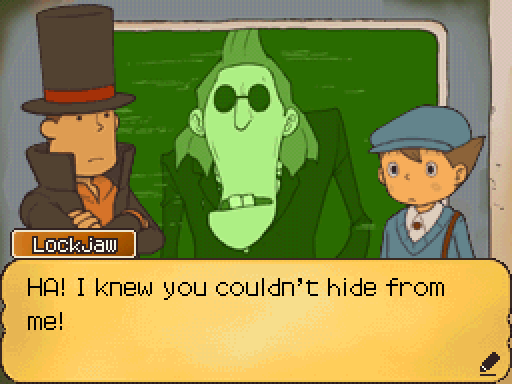
 But there's nowhere to hide!
 Quick - duck behind that piece of machinery over there!

This scene is the one time we get to see Lockjaw's regular dialogue sprite in dialogue without a sepia filter over it.
...I think that's kinda neat random trivia at least.
 Yes... Do you think that might be because you told Layton where to find her? Hmm?
 Leave it out, will you? Yeah, I messed up, but you bangin' on about it ain't helpin'!

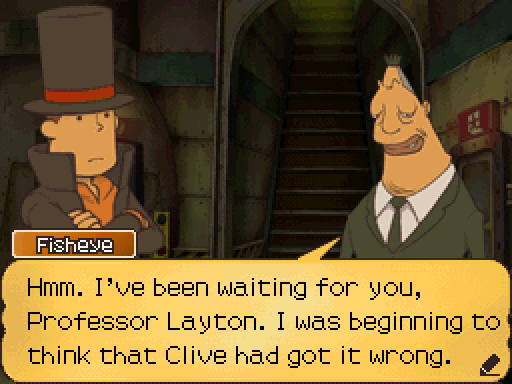
Also Fisheye? We've seen him in group shots involving the Family ever since the Casino, but this is the first of two times we get to see him otherwise.
Again, caring about that's more of a me thing, I think.
All right. While you're doin' that, I'll get after Layton and his cronies.

 So are we going to go and talk to him?
Flora, the man just abducted you. We're not just going to have a pleasant chat!
You're right. That was quite ill-mannered of him!
I love how casual Flora is about a lot of this, but this one's maybe kinda worrying. "Kidnapping a small child? How rude!" is not a normal reaction...
Let's just focus on getting to the surveillance room for now.
All right. Still, it was an awful thing he did, wasn't it, Professor?
We'll head back to the Wonkavator at this point. There's no dialogue or puzzle indicator from the door, but when we enter it...
Oh no! We've been spotted again!
Relax, Luke. There's little he can do from behind that monitor. Now, let's go to the surveillance room.
Pfeh! Show what you know! You need the key code to go to the surveillance room, fool!
 You ain't going nowhere without that!
We'll be sure to decipher the key code beforehand, then. Thanks for the tip.
You're welco- Oi!
Puzzles Reinvented


1. Start by inserting the pieces that go on the ends and those that have a distinctive shape.
2. Each piece can be inserted in various positions by being rotated different ways. However, there is only one pattern that will allow all the pieces to be inserted.
Keep on trying!
3. The first digit in the key code is 0 and the last digit is 7.
There's a 1 in there as well.
Have you worked it out yet?
Remember that torn note puzzle from Viv we did a short while back?

S. There are two 1s in the code. Next to one of them, there is a 2.
The hints have told you what five of the six digits are already.
Go on, insert the key code!
Yeah, this uses the same principle as that one. We have to put this together and then transcribe it. Putting it together is the actual puzzle and then it just tells you the answer, sadly.

The Mobile Fortress

Ohh... Clive is gonna have my hide for this!
If you're so scared of Clive, why don't you just do a runner?
Hrm? Wait, what did you say?
I said you might as well run away if you're going to get punished either way.
You know, that ain't such a bad idea! Yeah... I'm outta here. Later, fellas!
I can't believe that actually worked.
....You and me both, Luke. You and me both.

Added bonus is that now we can go to the Surveillance room. Actively no reason to go to the Pod Entrance, so...

Fisheye's posted between us and Clive, it seems. The transporter also just spits us out right in front of him, so that's awkward.
We lost you for a second when that idiot Lockjaw ran off...
Clive certainly has it all worked out, doesn't he? What did he send you here for?
Isn't it obvious? I'm the muscle.

Watch out, Professor!
Get behind me, you two!
Hmm. Now, now. No need to panic. The only thing I'm throwing your way today is this puzzle...
Got a lot of mandatory puzzles in a row here, so...

We can pass, then?
Hmm. Yes, but only because Clive instructed me not to touch a single hair on any of your pretty heads.
Otherwise I'd be showing you the pointy end of my knife collection. If you know what I mean.
Everyone stay away from him! He could be lying!
Don't worry, boy. Orders are orders. Besides, no one can stop Clive.
Now get moving. The boss hates being made to wait.
Just what is Clive planning with this machine of his?
Well, the quickest way to find out is to just ask him. And he's supposedly right up these stairs...
Tension

And sure enough, here he is. The man of the hour, too sweet to be sour. His plan is futile, not thought out and rather juvenile...
 Dark Justice

Whatever it is you have planed, you can't go through with it.
We know what Bill and Dimitri did. When the world learns of it, they'll be punished.
You said you wanted justice, and isn't that justice enough?
 That's a nice sentiment.

Listen to yourself, Clive! You-
Who are you to argue with me? As a report, I've witnessed countless tragedies first-hand.
And it's clear that my life isn't the only one that's been destroyed in the name of progress!

Conceptually, it is very, very hard to argue against Clive's motivations and what he wants to gain.
But, well, his plan and methods are.. abhorrent and awful.
The only thing a bully understands is force.
So you see, I have no choice but to level this place and rebuild it from the ground up.
What you're saying is unthinkable!
This converation is over.
No, Clive!
End

This segues into a mandatory puzzle. You CAN back out of it without consequence, but... why would you?
 Back Up

What do you mean?

The Mobile Fortress

I see Clive's finally done firing at his own stuff. Took long enough.

He's aiming at the cavern's ceiling, even, and not just with the turrets.

Those hooks are pulling it down, which is an awfully terrible idea if you think about it...

But I get the impression that Clive's not thinking about much here.

It's just the quickest way back to the surface.


It's also, well, very attention grabbing. And... there's no way that he didn't just kill dozens, if not hundreds, of people doing that much.

...So of course he just walks over a very heavily populated area for good measure.

See, this? This is why even if Clive has a solidly agreeable motivation, he's so utterly unsympathetic that it doesn't matter.


This is... utter madness.

Sit back and relax.
After all, you won't be leaving anytime soon.

because this will be your last chance.
So, this is pretty dang bad and we're kinda stuck at this point...
Fortunately, the door opens behind the gang at this point.

"If you want to live"?
 I know how we can stop Clive!

I see! We'll cut off the power at the source.
But wait... This place is huge. We don't have time to scour it all!
What are we going to do?
Look around you. The monitors in this control room are linked to cameras throughout the fortress.
Perhaps they can offer us some clue as to the generator's location.
End
Oddly, at this point the scene ends, and we... have to click on the monitors and have generic pre-puzzle dialogue. That has Luke state this again and the game acts like it was his idea.
I dunno, it just reads like two different versions of events happened here and they left a remnant of the previous take in by accident.

We'll just skip past all that instead, though.
That's it, Luke! Now all we have to do is feed these coordinates into the transport pod. Let's go!
We're right behind you, Professor!
I, uh, I definitely think we should head on over to the generator room as soon as possible now!

Oh? What's that?
How in the world did you manage to get into the fortress?
The professor and I had to do some pretty fancy manoeuvring to get here.
What's more, this fortress is moving now. How did you catch up with us?
Now you're just pulling my leg. Come on, I'm curious.
All right. If you're that interested, I suppose I can let you in on my secret.
Just go through that door to the deck outside.
I'm not sure we have enough time... but I was definitely wondering this as well...
It's just a couple seconds to take a look, so sure. We'll be fine!

That's right. I begged him to fly me up here, so he loaded me in and sent me up.
He controlled the machine from the ground. I didn't have to do anything. Amazing, isn't it?
You can say that again!
Funny, you don't seem so surprised, Professor.
Well, I already knew Paul had his machine with him.

Nothing gets past you, does it, Professor?
So, now that we have Don Paolo's flying machine, we can come and go from here as we please.
That's right, Luke. Why, are you thinking of abandoning our mission?
Never! I just thought it might be a good idea to drop Flora off somewhere safe before heading on.
No way! I'm staying here!
I can't say I blame you, Flora. You've got to stick close to the people you care about.

Should we wish to, I mean.
All right, everyone, we really shouldn't dawdle out here. We need to head to the generator room.
Oh yes, I'd nearly forgotten. Let's go, everyone!

Mhm, so if we'd missed anything in the Fake London before we can now go back and get it. We didn't, though, so we'll just grab these hint coins and head back to the lift.

Hmm. We should be able to enter them into one of these devices.
Oh! What about that one on the wall over there? It's got numbers and things all over it.
Ah, the one with the green monitor? Yes, let's have a look at it.

That being this conspicuous doohickey over on the left.
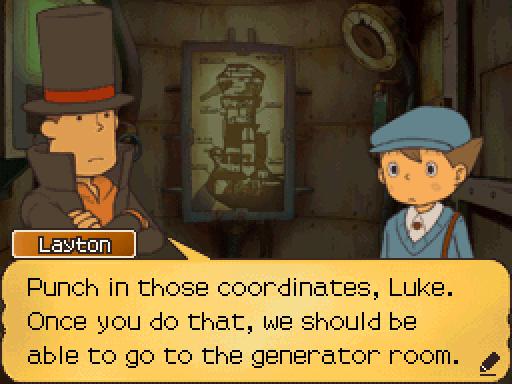
Look, Professor. The button for the generator room lit up!

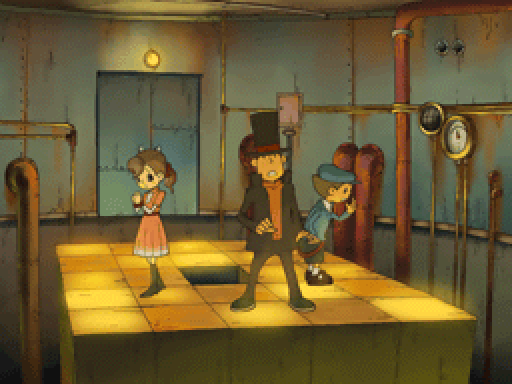
And sure enough, we can now head on down to the Generator room...

...And here we have the final three hint coins, bringing us up to a nice, round 300. Well, let's bring down this titan.

There's the control panel for the generator... But it's locked away!
The lock is a puzzle. Would you like to give it a shot, Professor?
I'll do my best.
126 Ten-Step Solution
Puzzles Reinvented 2


1. The four bars between A and B are what make this a tough puzzle.
Start by moving things around until you get stuck. Then think about how many more steps would have been required.
2. You'll definitely run out of moves if you keep moving A and B alternatively.
At some point, you're going to need to swap A and B in one fell swoop.
3. It doesn't matter whether you start with A or B, but here are the instructions for A:
Slide the second bar from the top over to the left and move A down to the right of the third bar. Then move the second bar all the way to the right and slide the third bar up and to the left of it.
S. Continuing from Hint 3, move B to the left side of the row that A is in. You can now move A into its target slot. All that's left is to use the last four moves to get B into the target slot.
You can do it!
Since we have a finite number of moves here, that tick down rather than up, makes this one seem harder than normal. In practice, I think this is one of the easiest sliding puzzles we've had; since we know it must be doable in 10 moves (or less! ...But I'm pretty sure you can only do it in exactly 10) it can't really be all that convoluted.

End
The Mobile Fortress


Though if you're hoping to find our fearless leader, I'm afraid he's indisposed at the moment.
I know how you like to play the hero, but I'd advise you not to get any foolish ideas.
You see, the prime minister is perched on a very special seat.

Also, you should know that there's enough charge in here to level most of London.
Of course, London's getting levelled either way. He he he!
Now, I do hate to run, but I have work to do.
While it's hard to dispute that the events of this entre game are actively straight up Bill's fault...

...We should do something about this. Not for his sake, God no, but for everyone else's.

It will detonate the charge if the sound of his heartbeat disappears.
Perhaps we can sever the connection somehow.
I wouldn't do that, Professor.
See how there are two sets of wires in the circuit?
I don't think we'll be able to cut both sets before the device reacts.

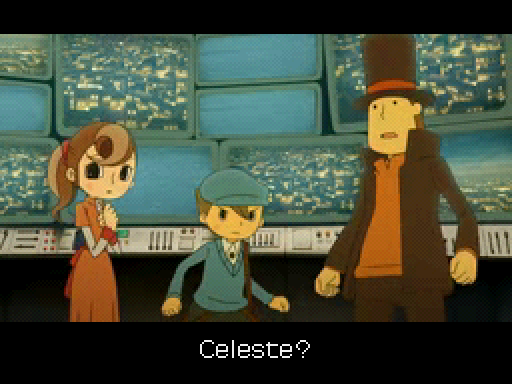
Your sister would be very proud.
Hey, I've just had an idea. What if we use this?


And here I thought it had been lost in the explosion.
No... I actually found it when going through Claire's things after the accident.
Unfortunately, the watch has been broken since I found it.

I see where you're going with this, Celeste.
You're suggesting we replace the sound of the prime minister's heart with that of the pocket watch?
Exactly. It's risky, but it seems to be the only option we've got.
We'll need to disconnect the circuit from the prime minister and attach the watch in one fell swoop.
But even if we succeed, the watch will stop running in 10 minutes and the fortress will explode anyway!
We could end up putting the people of London in real danger!

This is our only chance to stop Clive. The chances of success are slim, but we must try.
Much like before, we can quit out of this with no penalty or repercussions. Still no reason to do that, mind.

Yes, but our work here is far from over.

Puzzles Reinvented 2


1. At first, just try placing stones while following the rule until you can't place any more. If you repeat this process over and over, the answer should start to reveal itself.
2. It's probably obvious, but the answer isn't 16. What about 15 or 14? Nope, you can cross those off your list as well.


1. First try picking a random tile to start from and see how far you can go. You have to find a path that will allow all the tiles to fall away.
2. If you reach a dead end before all the tiles have been cleared, you'll need to start from a different tile or try going in another direction.


1. At a junction with two rounded corners opposite each other, the bots will always turn the corner that they come to first.
2. There are only two security bots, but between them they're able to monitor nearly all the rooms. Their patrol routes cross each other, but if their routes ever become one, you've made a mistake.


1. You need to swap a pair of blocks in one single move. First take a look at how all the wires are connected.
Find the wires connecting the monitor (top-right) to the prime minister's heart sensor (bottom-left).
2. Note that the two wires leading from the pocket watch in the bottom-right corner are connected in the middle. Pay close attention to their route.
So, we haven't reached these next two yet but... it'll make sense when we get there, don't worry.

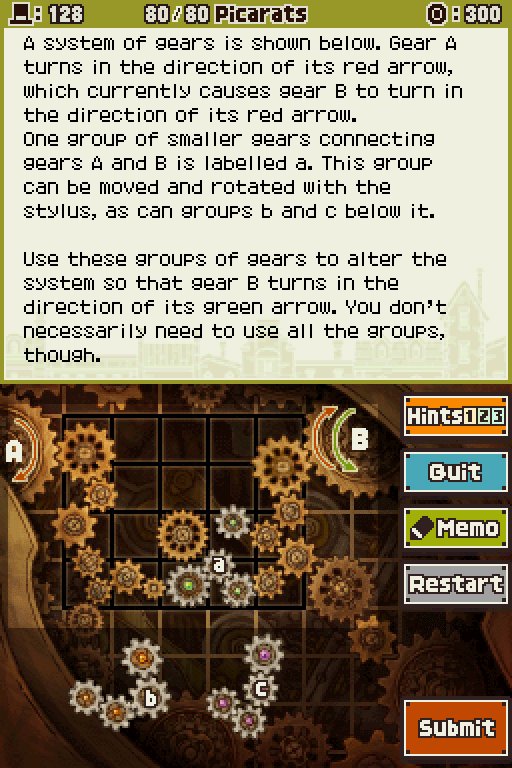
1. The gears can't function properly if they're overlapping, so don't bother trying to stack any of them on top of each other.
2. If you link an odd number of gears between two main gears, the two main gears will rotate in the same direction.
Conversely, an even number of gears linked between two main gears will cause two main gears to rotate in the opposite direction.
There are a lot of gears to count in this puzzle, but try adding them up!

1. There are five specific blocks you need to destroy. Don't worry about making a mistake, though. You can try again as many times as you want, so just have fun blowing stuff up! You're bound to work it out eventually.
2. If you look closely, you'll notice that the blocks are made up of evenly sized squares. Also, the pit is five squares deep. Start your thinking from here.