Toggle Background Color
 Puzzles

Welcome back once again. We've just got the last few puzzles left to do. Let's get to it, shall we?

2. The quickest way to the answer is to try out some placeholder numbers. There are 23 cards in the left pile. Pretend that there are 10 red cards and 13 black cards. There are 52 cards in a deck, so there are 29 cards in the other pile. Try to divide the piles up like so.
3. Continuing on from Hint Two, you can calculate the color of the cards in the right stack based on how many red and black cards are in the left stack.
So, subtract 10 from 26, and you get 16 red cards. Then take 13 from 26, and you get 13 black cards. You now know the difference between the number of red cards in the left stack and black cards in the right! Now try a different set of numbers to see what you get.
S. Keep plugging in different numbers. If the left stack has five red cards and 18 black, the right stack will have 21 red cards and eight black.
Now compare this result with the one from Hint Three. Look at that! The difference is the same no matter how many of each color there are!
Gonna be honest, I... actually kinda like a decent chunk of these. Despite my griping, these are generally pretty fun.


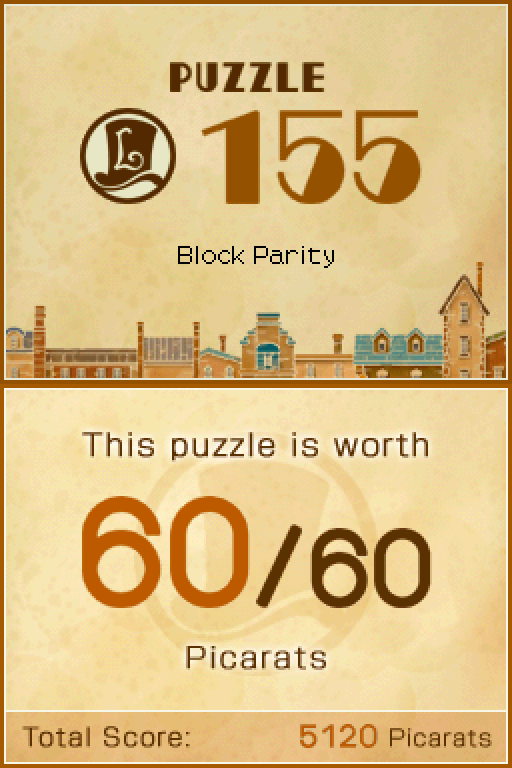
 155 Block Parity

1. If you just keep rotating the board, you'll solve it eventually, right?
Actually, no. If you don't plan ahead, you can get stuck. But if you do think ahead, it's easier than you might expect!
2. If you're not careful, a block might get trapped somewhere and make the puzzle impossible to solve. If you think you're completely stuck, just reset the puzzle.
3. The trap you need to avoid is the space next to the red goal square. If a block ends up in here, you'll have to reset the puzzle and start over.
S. If you're trying to move the blocks out from the starting quadrant all at once, instead try moving them to the other side of the board one at a time. If you can figure this out, the rest shouldn't be too hard.
Oh God, these were already getting pretty bad when they were on the critical path. This one's just incredibly, absurdly mean.

Added bonus: you can mess up and make it actively unsolvable without starting from scratch. No, I certainly didn't do that several times the first time I got here.
...
156 ABCs...and Ds


1. The shape you're moving the letters around in is completely symmetrical, and there are only two blocks in the way, so you should be able to solve this puzzle with a regular, systematic series of moves.
You can start over as many times as you want, so think about the most efficient way to move the letters into place and see what works.
2. You'll run out of moves if you try to maneuver the letters into place one by one. Think about how you can rotate all of the letters into position while making you moves.
3. Here's part of the solution:
Move the lower blue stone over to the right, and slide the C all the way down. Now move the upper blue stone into the A slot, and slide the D all the way left...
Can you figure out the pattern now?
S. Continuing on from Hint Three, put the lower blue stone into the B slot and move the A all the way up. Now you can slide the C into its slot. Then slide the B all the way right, and you can slide the D into its slot.
You're halfway done! And the rest looks pretty easy, right?
Conversely, this is a more traditional sliding puzzle... but we've done harder variations of it before. In other games, yeah, but also in this one too.

I dunno, it's just nice to have a sliding puzzle here that I don't intrinsically hate.
Oh don't worry, we'll get to those.
End


3. You can probably tell just by looking at it that C won't work.
Perhaps surprising, B does work!
Remember, you can rotate the key piece left or right, but you can't flip them over. Be sure to consider how each key piece can be rotated before trying to combine all three together.
S. C doesn't work.
A, B, and G all work.
Of the remaining three--D, E, and F--one doesn't work. Which is it?
I just can't picture this in my head, and trying to draw it out just... doesn't work either. I dunno, might just be me.


3. Station B must come after station A, right? Well, no, actually. That's just the order of letters in the alphabet!
S. In order to fulfill the conditions of the puzzle, the order of the stations must be A to C to B to D. With this knowledge, you should be able to figure out the time it takes to get from station A to D.
Trick to this one is pretty clever, but it doesn't necearily take much to figure it out in the end.

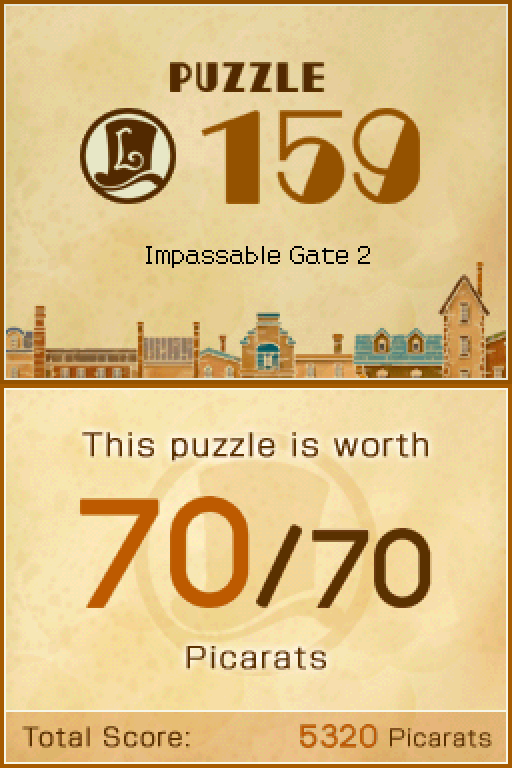
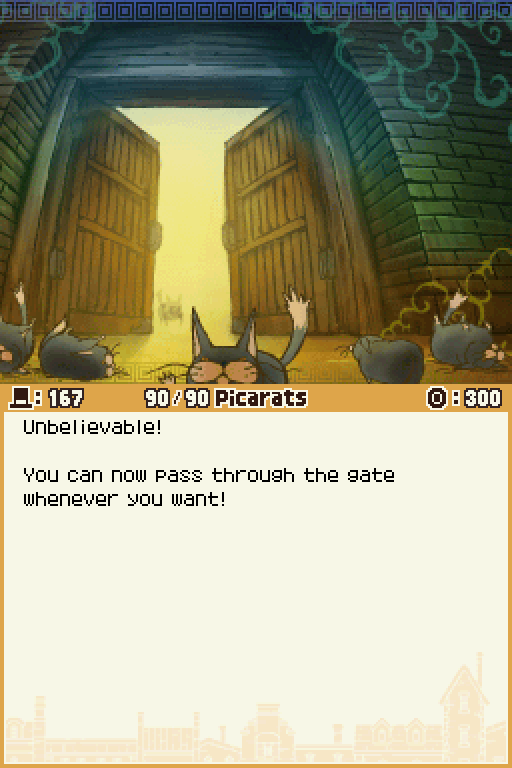
159 Impassable Gate 2

1. There are multiple ways to solve this puzzle. Here's one example:
First, move the yellow block above Professor Layton and Luke up to the right so that it's mostly on top of the red block. Then move Professor Layton and Luke over to the left.
Start from here and see how far you can get!
2. Continuing from Hint One, move the red block down to the bottom and then the yellow block back on top of it. Now move the blue block down and over to the left on top of Professor Layton and Luke.
3. Continuing from Hint Two, move the yellow block up and then the red block up, and slide Professor Layton and Luke to the right under the red block. Now move the blue block down to the bottom and over to the right against Professor Layton and Luke.
S. Continuing from Hint Three, move the yellow block over to the left wall and down on top of the blue block. Then slide the green block down as far as you can, and move the brown block up into the exit square. Now move the green block back to where it started.
See if you can figure out the rest.
Ughh, the first one of these was harder than it looked. This one is even worse. It's a mess, but we've... we've got some right horrible ones coming up later...

End


3. With your five ropes, you can divide the patch of dirt into more than 10 different sections.
S. Use the Memo function to draw a star in the middle of the circle using the five straight lines. Make sure the points of the star are within the circle and the lines creating each point cross and extend out into the grass so they create one more space within the circle.
Now count each section. Well, how many are there?


1. This puzzle might look familiar, but you can't flip these pieces over.
Start by thinking about what a "white top hat" looks like.
2. If you move all the pieces outside the frame, the frame itself becomes a white top hat! See how that works?
Now all you have to do is arrange the pieces around the hat to frame it.
3. So you know what you need to do, but you don't know how to do it? Well, not to worry. Here's a hint:
You can fit the two pieces with two bends around either end of the hat's brim.
S. The short piece with two bends goes around the left side of the brim.
The long piece with two bends goes around the right side of the brim.
The rest should be no problem now!
This one's honestly not too bad at all.

You just need to know there's a white outline underneath the shapes, but that's apparent very quickly.


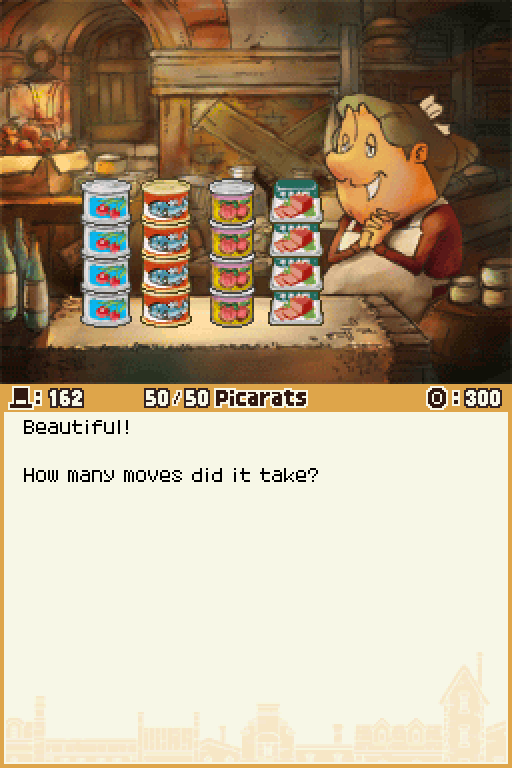
1. There are several ways to solve this puzzle, so start moving those tins around and see how it goes.
It shouldn't be too hard to get to a point where a few more moves will do it.
2. The 14-move limit definitely complicates matters. Don't forget that you can't stack up more than six tins at a time.
Don't get carried away stacking up the same type of tin at every opportunity. It will cost you moves in the long run.
3. Instead of stacking up the same type of can every chance you get, it's better to think about what type of cans you should stack in each row.
Whenever possible, you want to move as many cans together as possible at a time. Of course, sometimes you have to move just one can at a time.
S. From left to right, think of the stacks as the first, second, third, and fourth.
Move the fish from the fourth stack to the first stack. Move the peaches from the second stack tot he fourth stack. Move the ham from the third stack to the second stack. Move the fish from the third stack to the first stack...
You can take it from here!
Nothing too taxing here, either. It seems a bit of a toughie, but this isn't all that bad.
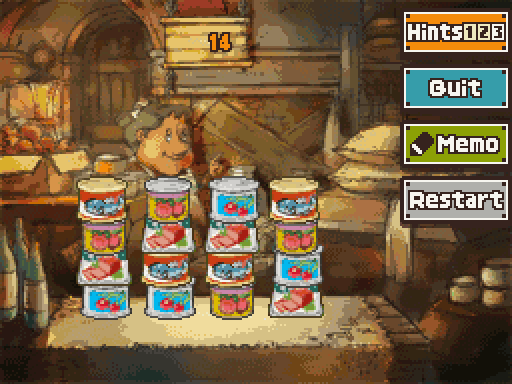
I do also like how you can see the exact moments where I had to stop and think for a second. Not always obvious, that.


3. If the number in box A is greater than one, the lower value will exceed 60 minutes, which isn't allowed. Therefore, the one must go in box A.
S. Here's your last hint:
The one, four, eight, and nine all go in the top time.
The rest can be calculated from there.
If/when you realise the 1 and 9 are easily, immediately placable, that makes it a lot easier to do.


3. On a calendar, numbers to the left and right of each other differ by one.
Also, number above and below one another differ by seven.
Using this pattern, there's a relatively simple calculation you use to solve this puzzle.
S. The lower-right of the four numbers in a square that you're looking for is 26.
The trick to this one is something that I wasn't really all that cognizant of, I don't think. It's not hard to spot, but you kinda have to be trying, I reckon.

165 One Big Necklace


1. Before you start moving things around willy-nilly, think about what kind of large loop shape you can make with the pieces available.
2. Combine the bracelets into the shape of a large plus sign (+).
3. The three blank tiles and one empty square go in the four corners when the necklace is complete.
Even the shortest solution takes quite a few moves, so keep at it, and don't give up!
S. Try sketching out where each type of tile will go when the necklace is complete. Once you figure this out, it shouldn't take too long to maneuver the tiles into place.
Ah, here we go. Here's a sliding puzzle that's actually pretty danged difficult, and not in a fun or clever way. It's just really tedious and annoying.

End
And since we've now beaten every puzzle in the game (except 130), we've unlocked the final puzzle house and it has... two sliding puzzles.


1. The puzzle sure looks fun, but it's really hard. It's even hard to give hints for.
For starters, don't stress out if you can't figure it out at first. Just keep at it.
2. The panels all look so similar that it's hard to figure out where to start. First, just try temporarily placing panels that match up around the center.
By the way, the correct panel that goes above the center panel doesn't have a banana on it.
3. The correct panel that goes to the left of the center panel doesn't have an orange on it.
The correct panel that goes to the right of the center panel doesn't have a melon on it.
S. The correct panel that goes below the center panel has all four types of fruit on it. The top, of course, is a banana. The left is the lower half of a melon, the right is the upper half on an orange, and the bottom is an apple.
And... whatever this is. We've done similar stuff before, so it's easy to grasp.

Despite how late this comes, it's not really all that difficult. Just pick a single spot to do the work on and then switch things around as needed. Helps keep things straight in your head that way.

167 Impassable Gate 3


1. The solution involves too many moves to just list in one hint. For starters, just move the blocks around for a while and think about your options. Like the other two gate puzzles, the horizontal three-square bar is the key.
2. See the small two-squared horizontal bar? It's magenta. You need to figure out how to maneuver that block down to Professor Layton and Luke's level.
3. Once you've figured out how to move the magenta block down toward the bottom, some space will open up at the top. You'll then be able to move the red block down to the middle and the light blue block up to the top square. Now move the red block back up to where it started.
S. You've got the light blue block stashed away in the top square and the red block also up near the top. Now organize the blocks at the bottom so that you can move the red block back down and switch it with Professor Layton and Luke's block.
This Puzzle is designed to be very challenging. Don't give up!
Oh God, this one is a nightmare. The first one was pretty tough, the second one was really bad but this is just... misery. It's awful. And yet... and yet...! There's one that's even worse...
End
168 The Time Machine

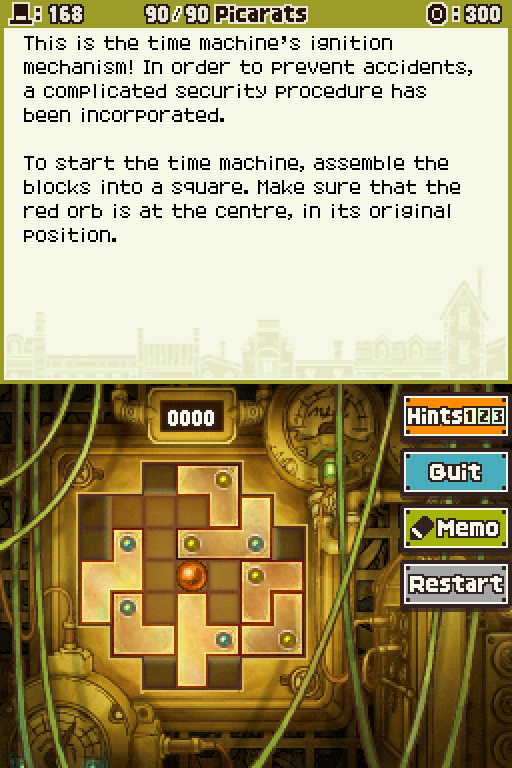
1. Think how the pieces will fit together to make a square before you start moving them around. You won't get very far if you don't plan ahead.
2. Use the memo function to figure out the correct placement for each block. There are four small L-shaped blocks. Three of them form corners of the square.
3. The T-shaped block goes on the right side of the square, slotted into two small L-shaped blocks. The Z-shaped block goes near the center with the red orb right underneath it.
S. The small L-shaped block in the bottom left goes one square above its starting position. The large L-shaped block goes directly below it, forming the bottom-left corner of the square.
I... did not remember this puzzle. At all. I just sat and stared at what this thing was asking, and I could not fathom how it was meant to be possible.
I tried for like 40 minutes to pull it off and I couldn't get anywhere with this thing. As much as I gripe about the others, at least you can bruteforce them with persistence, tenacity and single-minded stubbornness. This? I swear, this has no such mercy.

I even checked my old save file from last time I played, and I had all 168 puzzles beaten so I've done it before. Maybe. I presumably blocked it from my memory because it's the meanest one of its ilk across the entire trilogy. That this isn't worth the full 99 is mindblowing to me.
End
Professor Layton's Theme

...Well, except one. But we'll get to that!
But we've done just about everything we can here. I think it's about time we take a look at our final Hidden Door.
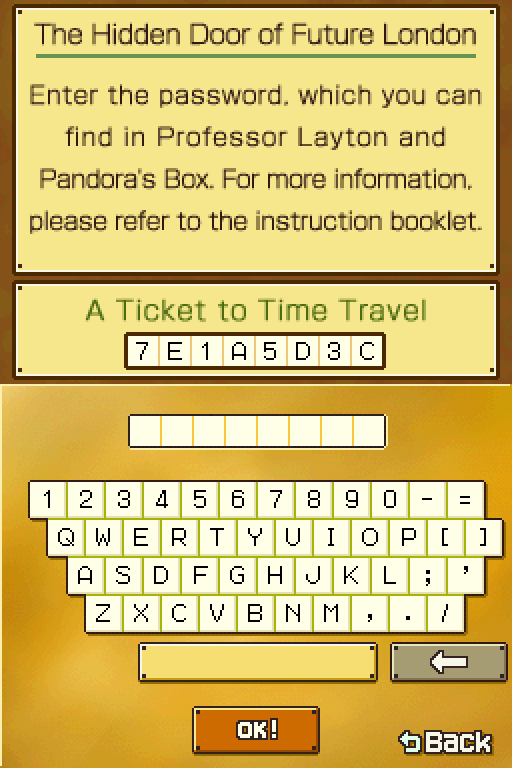
Like before, we get a password entry screen but we have nothing to put here. But... "A Ticket to Time Travel"? That sounds familiar.
So, we'll go back in time ourselves now. Popping back over to Pandora's Box for a moment and heading to its Hidden Door.

Ah, there we go. That option we couldn't do anything with before. We'll just take our Ticket and put its passcode in here.
Much like before, these codes are different from game-to-game so you can't just use these codes yourself.

Also much like before, the only thing locked in here is concept art for Pandora's Box.
Oh and the password we need for the Lost Future but details.


Nothing here as funny or interesting as the previous versions of Layton and Luke. Just Folsense, citizens and... urgh, the Molentary Express.
So now we'll just pop back into the Lost Future...

...Accidentally write down the password wrong. Dangit.

So after going back to Pandora's Box, and getting it right...
 Yep! What kind of puzzle do you suppose is waiting for us inside?
 Itching to find out, are you?
I certainly am!
Well then, let's not keep you or our esteemed player in suspense any longer.
 Here's a little gift from us to you!
The Elysian Box Reopened
Puzzles
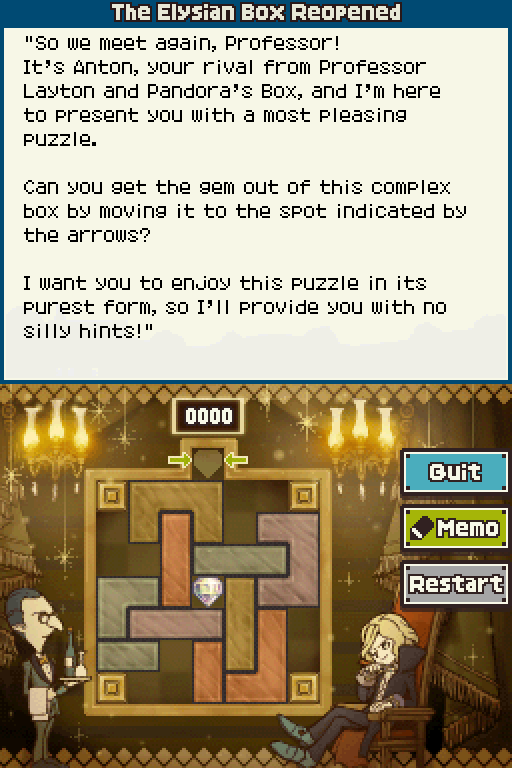
So, this just immediately dumps us into the puzzle with no puzzle name card. Yeah, uh, that's a weird one. That didn't happen in the previous game's special puzzle. 
Also unlike then, we don't even get a hint! It's not super difficult or anything, but it's definitely harder than A Curious Present.

No Layton, Luke, Flora or Clive animation for success either. How bizarre.
Anyway, as I was about to say, this being harder than A Curious Present isn't saying much. It's way, way easier than the last few we've done so it's really not too taxing.
No post-puzzle dialogue this time around either!
End
So, umm... I...
Hang on, doesn't it feel like we're missing something?
Dear Professor Layton
Silence
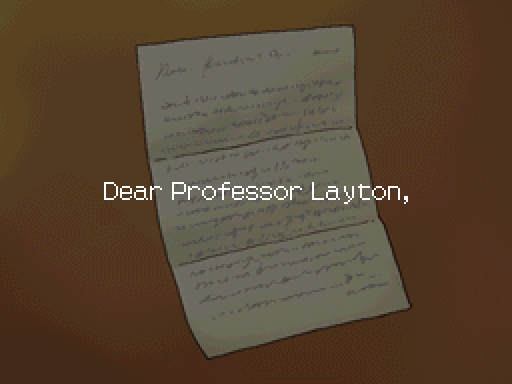

I am writing to you because something deeply puzzling happened here recently.
It seems like the sort of mystery that's tailor-made for Professor Layton and his apprentice.
I don't think anyone else could get to the bottom of this.
I've enclosed a document with this letter that will tell you more about the situation.


1. Keep in mind that a stamp will print a mirror image of its actual design.
2. The stamps are all circular, so pay close attention to what's in the centre: the outline of a hat and an L.
First off, take a look at the direction the L is facing...
3. Stamp B doesn't have the L correctly reversed, so you can eliminate that option.
Now look closely at the hat shapes of stamps A, C and D.
S. The top part of the hat shape in stamp A is touching the outer circle, so you can safely eliminate that option.
It's just between stamps C and D now!
Well, let's see... It's obviously not B, because that'd be mirrored the other way around. The top of A's way too tall so that's not it either. It could be C or D, but if we look at them, D's hat shape is the wrong way around. It's close but it can't be it.

So that just leaves us with Stamp C.


Silence
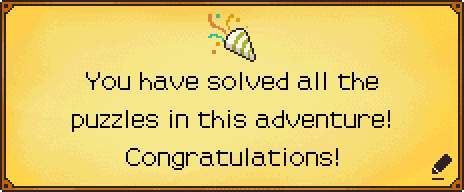
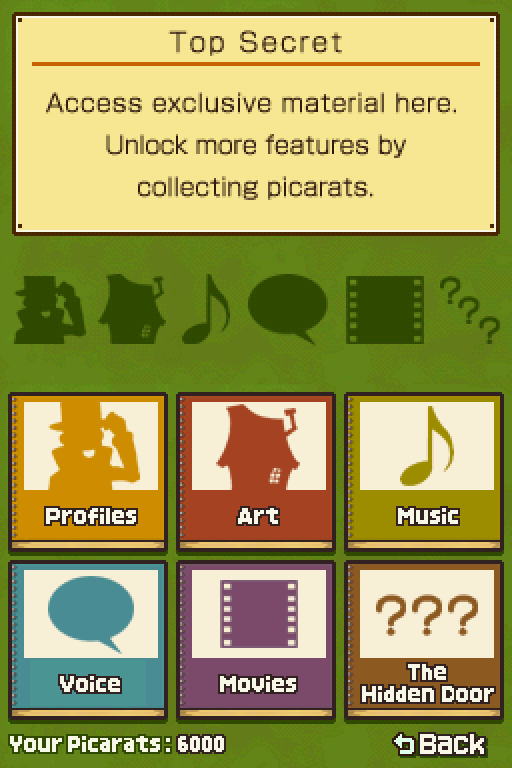
Okay, NOW we've solved all 168 puzzles and gotten a full 6000 Picarats!

Your friend and apprentice,
Luke

Nice to see Layton just sitting in his office, having actual downtime to relax.

After all, tomorrow is another day. A nice, sunny day.

I think things are going to be all right. After all, true friends share a special connection.

Distance and time cannot break the bonds formed by a true friendship.
Thank you very much for reading. I hope that sometime, somewhere, we'll meet again.