Toggle Background Color
Level 1.mp3
So unfortunately, after the last update, my game froze when I tried to save (I had left it open and unsaved in case of LPer curse), so I had to replay back up to this point.
The good news though is that most of the original screenshots I had taken for the second half of the dungeon originally weren't very good and this gives me a chance to do it justice. So let's get underway, shall we?

We decide to head north. I actually forget about the southern door until a bit later, but that's alright as we'll only get dead-ended by a lock block heading that way and we don't have a key yet.

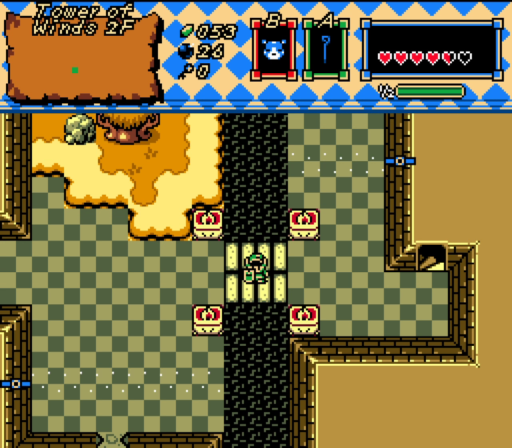
The wall on the left looks a bit cracked, so you know what that means. Time to blow some stuff up!


A map! Wooo! We now have a handy room layout in the upper left corner.
This floor and the previous floor are only 3x3. Not a very big dungeon! Though, we have yet to see floor 3, which we know exists from the stairs leading up on the previous room. That's not the only feature this map has though!

Pressing the select button gives us a full view map of every room we've visited on this floor.

We can zoom it in...

And even move it around! There's the room where we got the leaf.

Before we press onwards though, I have a bit of indulgence to indulge in...


4/4 Heart Pieces found. 
That's a new heart container at our disposal.

The leaf gives us a lot of distance with the whirlwinds. We can cross huge gaps like these with ease!

Or gaps like these, too! Let's finally check these stairs out.


They lead straight to the third floor. This floors a fair bit bigger than the previous floors; it clocks in at about 18 rooms! And there's the boss door too! Sadly, even if we had a small key, we can't unlock it. We'll need a special key to get past it.

Heading over to the right leads us to a bunch of floating blocks and switches. Hmmm...

Aha! The leaf can push these blocks. If you've played Twilight Princess or the DS Zeldas, these act similar to the ice blocks from those games.

Behold the power of gif optimization! A 1MB gif showing the entire puzzle being solved! I'm a bit proud of myself.

We get a small key for our troubles.

At first glance, we appear to be stuck. However, if you remember what kind of pits these are...

We just get dropped to the floor below. Neat!

It's at this point that I remember that this door down south exists.

We can't cross that pit from this side, so the lower right room remains inaccessible to us. However...

Heading left gives us a new way to reach floor 3 with the help of that small key we just got. With the exception of that lower right room, floors 1 and 2 are completely cleared out. Only floor 3 and that one room on floor 2 remain to be explored.

We have what appears to be 2 paths to choose from. But wait! Do you see what I see?

A bombable wall! Sneaky, hiding it on the bottom row. (ZC has this weird quirk where the bottom 8 pixels of the screen aren't drawn, possibly to emulate the original Zelda)

Hey, remember these rollers? They showed up in one room in floor 1, and now we have 2 of them to deal with!

We can deal with them the same way as before, though watch out for the holes in the grating!

Sadly, though, it's a dead end. Darn!

Let's head left instead!

There's a bunch of whirlwinds and a giant fan on the floor. Hmmm...

Aha! If we blow a gust of wind onto it, it'll activate and make a whirlwind for us to jump on!


The center whirlwind is moving left and right. We'll have to time our landing to boost off it.

We catch it right in the center.

Some barriers are blocking us on the other side of the room. Maybe if we kill all the enemies?

I use a bomb to snipe the moblin on the other side of the gate, but no dice. Still won't open.

Hmmm... Maybe our leaf will help?

Aha! We can blow out the torches! Sneaky.

Blowing out all of them lowers the barriers. Huzzah!

This whirlwind is moving around in a rectangle. If we time it right, we can hitch a ride!

We head down, and we're on top of this bridge! Cool!

It takes us to this room from before; hitting the floor switch here turns off the fans and brings the platform over to create a bridge. Now we can go through that path!
We head back to the whirlwind rectangle room, and head right this time.

Another windblock puzzle. Let's avoid it for now and see what's down.


We head under the bridge and we find out that this is where we would have gone had we went right from the start. Alright then, back to the puzzle.


This puzzle is a bit easier than the other puzzle, though it has a possibility for failure. Getting the first block on the switch is easy.

Second one requires a bit more thought but is still fairly simple.

We push the remaining block up and try to push it right, but we hit a snag! Our wind can't reach far enough to hit it!

We have to push it left first...


And then we can push it over to it's final spot. Another key in the bag for us!

I head right and I-

-get my butt handed to me fairly quickly.
Confirmed deaths: 3

I make my way back, and in trying to stun one of the enemies, I figure out the gimmick of this room by accident.

These lower the blocks on the right. I imagine that had we taken the bomb wall south earlier after making the bridge, we would've gotten roadblocked here.

Or here. The door on the right is closed. However...

Bringing renewable, non-fossil fuel energy sources cause the door to open in thanks. Protecting the ecosystem rules!
Some backtracking later, and...

We're back here.

Fun with moving wind platforms!

We reach here, and if my spatial memory serves me right...

Huzzah! That's all of floor 2 accounted for.

And there is what I presume to be our final key of the dungeon.

Now, a quick look at our map shows that heading left will take us back to the stairs to floor 3, where we have to backtrack to where we were before. However...

Remember, pits take you back to where you enter the room! If you're smart and willing to take some damage, you can...

...eh?
The pits... the pits in this room don't work. I can just walk over them.
They don't work! 


Let's... pretend that never happened.

Oh boy. All of these are moving. Fun.


We unlock this block, and head north.

This room is actually nasty. Those spikes cycle between being up and down, there's only 6 tiles of safe space, and all of these are powerful relative to where I am in the game. The skull guys are level 2 goriyas, for the record.

If you don't know what you're doing, you're going to take an absolute beating here.

The game has mercy on me and I'm saved by a lucky life drop.

And we get our prize! We're done with this dungeon now, we just need to go claim our prize.

But not before the dungeon claims my life.
Confirmed Deaths: 4


There it is! The crystal spring banana! It's just on the other side of this wall. Seems like we can reach it by heading to the left...

Boss.mp3
Our first boss battle! The boss theme is a cool remix of the miniboss theme.

Let's put our Moosh powers to the test! The charge attack is very handy for dealing with bosses.

Umm?

OH CRAP RUN

We can't hit it while it's in tornado mode. We'll have to wait it out; thankfully it only uses it when it's starting to get low.

Gotcha!

More sweet loot

And with that (flashing light warning)

The first banana is ours!


With our first banana in hand, we're 1/3 through our journey! Only 2 more to go!
Death Count: 4
Heart Pieces obtained: 4
Heart Pieces taunting us: 4
Next time: Exploring more of Fendora and removing those who dare taunt us.