Toggle Background Color
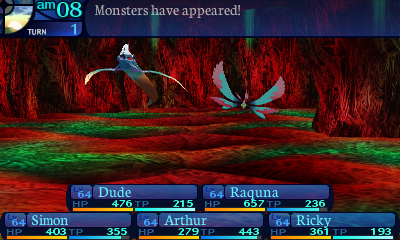
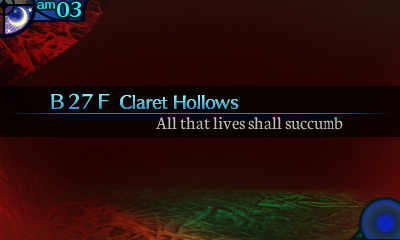
Story Update 27: Mesopelagic (Wyvern)


 We are going to start this update off by murdering a mother. After taking away her unborn child back when we were exploring Stratum 2.
Our guild are sure a bunch of swell folks, aren't they?
 Congratulations everyone, we exterminated the forest!

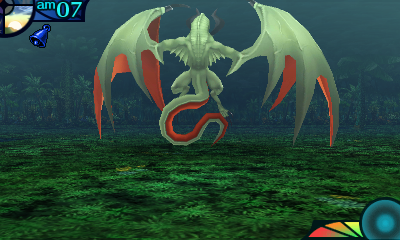
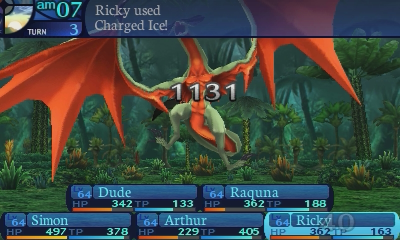
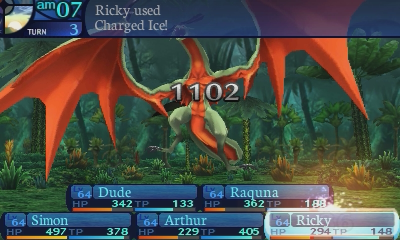
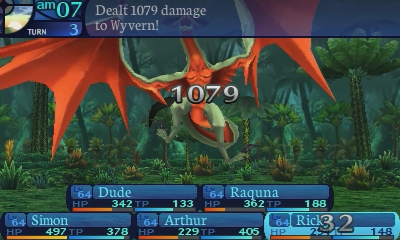
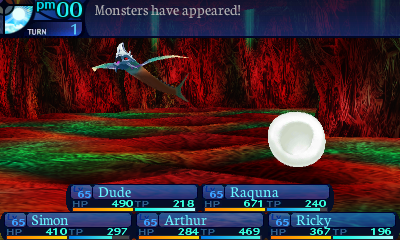
 Video: Wyvern


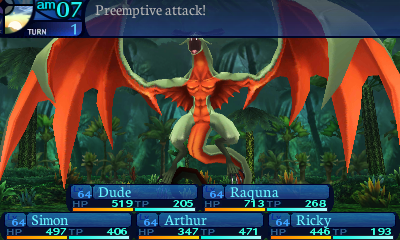
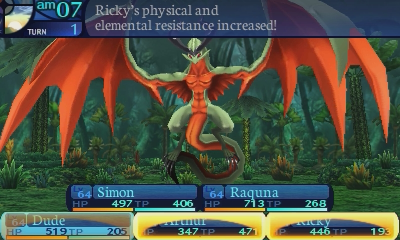
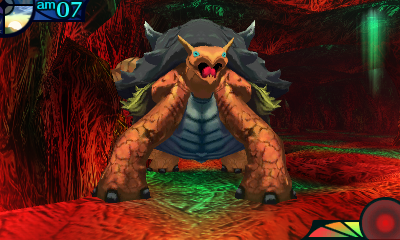
 I'll be the team's shield.
A very apt voice line.

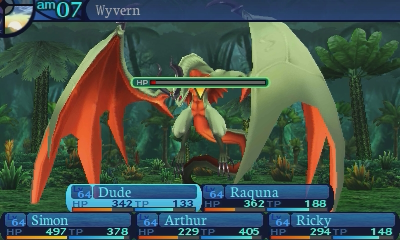
Wyvern
Level: 68
HP: 22500
STR: 80
TEC: 58
VIT: 55
AGI: 55
LUC: 49
Attack Type: Cut
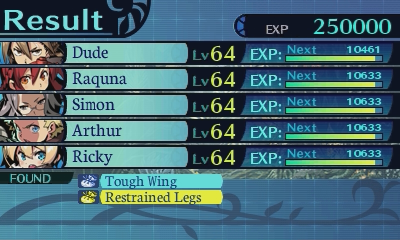
EXP Given: 250000
Damage Vulnerabilities:
 100%
100%  100%
100%  100%
100%
 50%
50%  125%
125%  0%
0%
Disable Vulnerabilities:
 30%
30%  50%
50%  50%
50%  30%
30%  50%
50%  50%
50%  30%
30%
 0.1%
0.1%  0.1%
0.1%  20%
20%
 50%
50%  30%
30%  30%
30%
Mechanics:
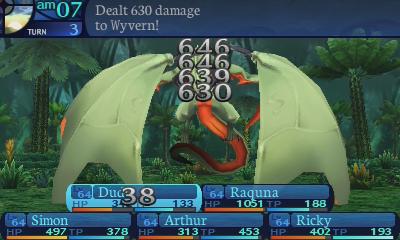
Wing Talon: Deals overkill cut damage to one party member. Very fast.
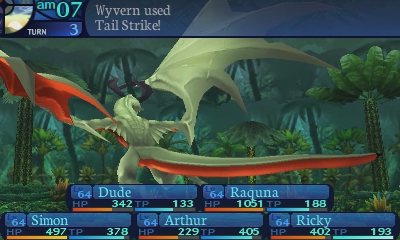
Tail Strike: Deals overkill stab damage to one party member. Slow.
Whirlwind: Attempts to bind the legs of all party members, with an all-but-guaranteed chance. Average speed.
Burning Ray: Deals overkill volt damage to one party member. Very slow.
Skill Data:
Wing Talon: Deals 150% melee STR-based cut damage to one party member. The damage ranges from 702 to 853 on average. Has a 150% speed modifier and a base accuracy of 99%.
Tail Strike: Deals 180% melee STR-based stab damage to one party member. The damage ranges from 842 to 1024 on average. Deals splash damage to adjacent targets. Has a 70% speed modifier and a base accuracy of 99%.
Whirlwind: Attempts to bind the legs of all party members, with an 80% base chance. The effective chance ranges from 102% to 134% on average. Has no speed modifier.
Burning Ray: Deals 450% ranged TEC-based volt damage to one party member. The damage ranges from 677 to 935 on average. Has a 50% speed modifier and a base accuracy of 150%.
Enemy Behavior:
-Wyvern always opens with Burning Ray.
-Wyvern always uses Whirlwind on turns that are multiples of 5 when it's not at extremely low HP.
-Wyvern is slightly less likely to use Wing Talon at low HP.
-Wyvern can target the party member with the lowest current HP with Wing Talon when it's at high HP.
AI Script:
-If this is the first turn, use Burning Ray.
-If the current turn is a multiple of 5, and Wyvern is above 10% HP, use Whirlwind.
-If Wyvern's HP is at 50% or lower:
--29% chance to use Wing Talon.
--Else, 30% chance to use Tail Strike.
--Else, use Burning Ray.
-If Wyvern's HP is at 100% to 51%:
--39% chance to use Wing Talon.
---50% chance to target the party member with the lowest HP.
---Else, use standard targeting.
--Else, 30% chance to use Tail Strike.
--Else, use Burning Ray.
Learnable Skills:
Wing Talon: Deals cut damage to one enemy. Very fast.
Tail Strike: Deals stab damage to one enemy. Deals splash damage to adjacent targets. Slow.
Burning Ray: Deals volt damage to one enemy. Very slow.
Grimoire Skill Data:
Wing Talon: Deals melee STR-based cut damage to one enemy. Has a 150% speed modifier and a base accuracy of 99% at all levels.

Tail Strike: Deals melee STR-based stab damage to one enemy. Deals splash damage to adjacent targets. Has a 70% speed modifier and a base accuracy of 99% at all levels.

Burning Ray: Deals ranged TEC-based volt damage to one enemy. Has a 50% speed modifier and a base accuracy of 150% at all levels.

Drops:
-Normal:  Tough Wing. 100% chance. Sells for 12500 en.
-- Wyvernmail (+70 DEF, +5% damage/ailment/bind resistance): Made from 1 Tough Wing. Costs 100000 en.
-Conditional:  Restrained Legs (Kill while legs are bound). 100% chance. Sells for 37500 en.
-- Wyvern Spear (+218 ATK, +40 HP, +40 TP; Highlander only): Made from 1 Restrained Legs. Costs 220000 en.
Wyvern... exists. She is easily the most pathetic post-game boss in this game. Just look at that barebones skillset, and that really barebones AI. What's easily the biggest flaw in her skillset, is that most of her attacks are single target. Tail Strike is the only one that can target multiple people, and it's splash target. This means that as long as you have enough Nectars and a fast enough character, you can just chain revive party members while you whittle her down if you really have to.
Anyways, she's a really simple boss that's all about overkilling you. But like I said, most of her attacks are single target, so that's a huge setback for her. If you have some way to shut her down, or have enough defense that you can tank her attacks, you've got this fight in the bag. A Medic's CPR is an excellent way to really stop her in her tracks. Or if someone has an aggro buff on them, you can have them use Offering Robe to tank Wyvern's hits without any danger to your party while they wipe out chunks of her HP.
I have no idea what the fuck is up with Whirlwind. Wyvern's attacks aren't inaccurate, so all it really does for her is lock you out of any leg skills. Which uhhh... locks you out of Action Boost, I guess? The fact that it's on a timer makes it easy to plan around if you have to, and it should be nothing more than a free turn.
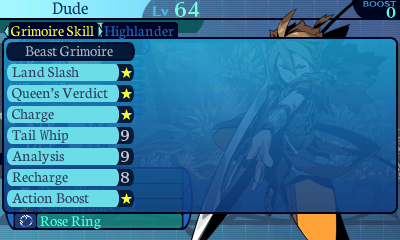
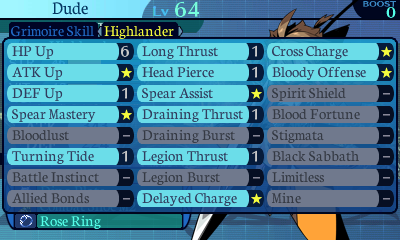
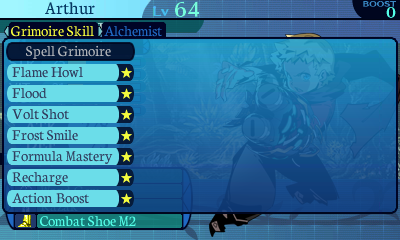
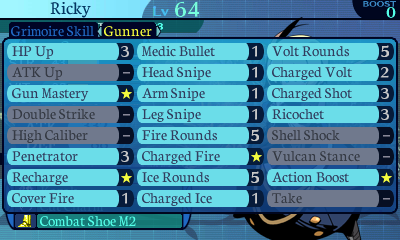
As for Grimoire Skills, Burning Ray is a really good one to shoot for, as that is a straight upgrade over Thor Formula with regards to damage, though it's only single target and really slow to cast.
This makes sense when this is pretty similar to how she is in the original, though there she was fought way earlier, I did it the same time I fought Golem, towards the end of the 4th stratum and I didn't use Immunize! Mainly because it's basically the same as this fight, with the exception of Tornado only being used on the first turn, and single target damage is so whatever. You might go through the whole game thinking this is a big threat, but honestly, you could fight it earlier than this, give it a shot, you never know what'll happen. Also yeah, Leg Binds didn't even prevent escape in the original and her attacks have always been accurate, so Whirlwind is just a puzzle.
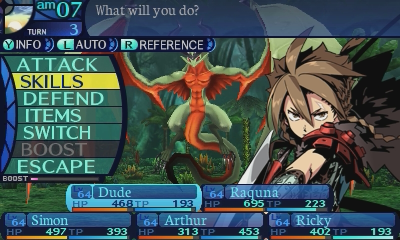
This boss is so pathetic that I'm just going to skip straight to the important parts, which is dealing with her offensives, and then the actual murder.
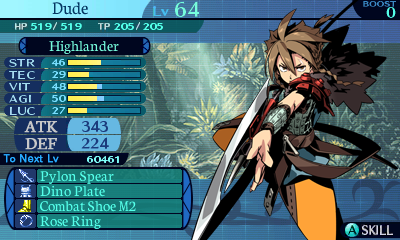
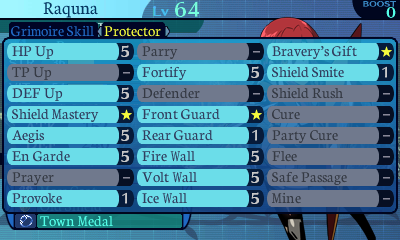
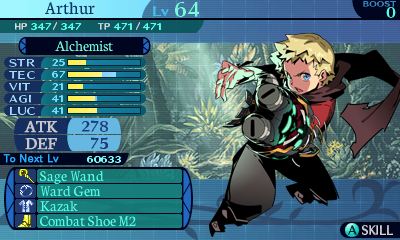
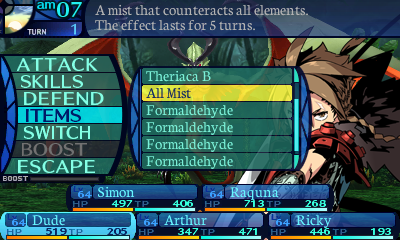
To make up for my horrific guns blazing strategy last time, I'm going to take things slow, and set up my defensives first. I really need to get an All Mist buff on Raquna, but I don't care about the buff on everyone else, so I increased Dude's speed so that he'll be the first one to place the buff on the party, so it can be phased off of them later.
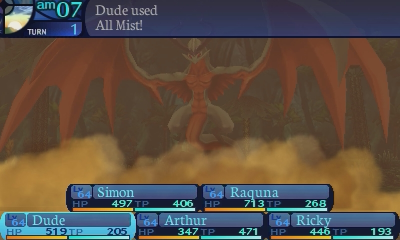
And now the stage is set for my defensive strategy.
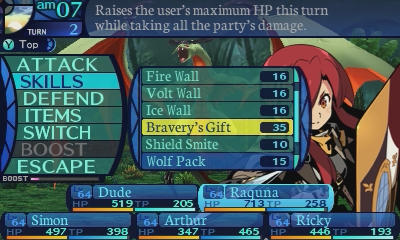
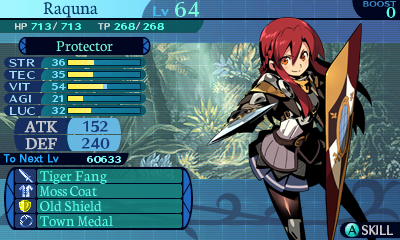
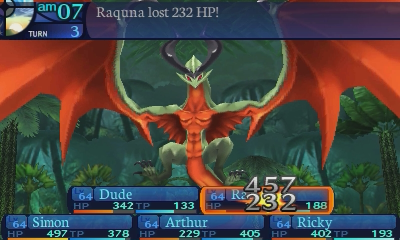
Said strategy is ubertank Raquna! Since most of Wyvern's attacks are single target, as long as Raquna can live through those attacks, I can keep spamming this skill as much as I need to. She's also wearing a Moss coat, so with the All Mist in effect, she only takes half damage from Burning Ray!
And here's a very big change that EOU made with regards to HP pools. Take a closer look at Raquna's HP. You're seeing that right, 4 digit HP! This was the game that increased the HP cap from 999 to 9999 (Sadly in-battle only, as you can't get past 999 HP outside of battle), meaning that HP increasing buffs got a huge buff in this game since they won't slam right into the 999 HP cap like they could in earlier titles.
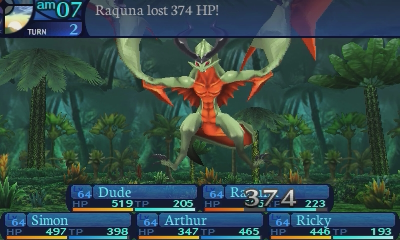
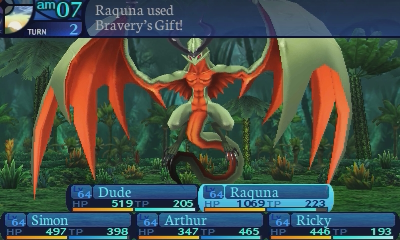
That seemed like a pretty hefty amount of damage she took, huh?
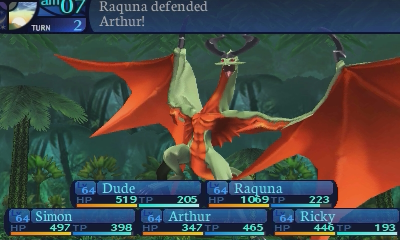
But due to how Bravery's Gift's mechanics work, it's like she barely took any damage at all! This skill is pretty nuts!
Since Arthur's HP pool is pointless, Raquna's HP will be used instead.
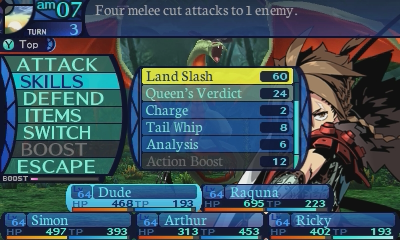
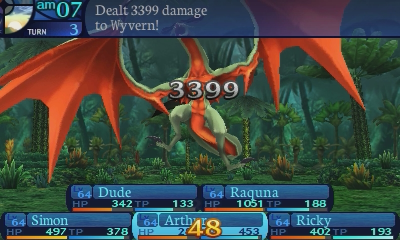
Now why don't we break out the Land Slash? I'm sure some of you have been waiting to see how strong this is.
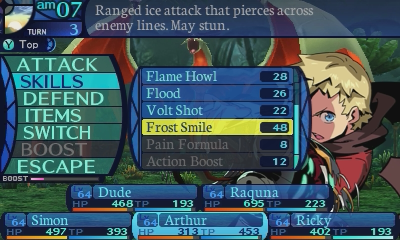
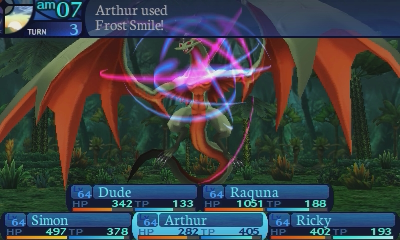
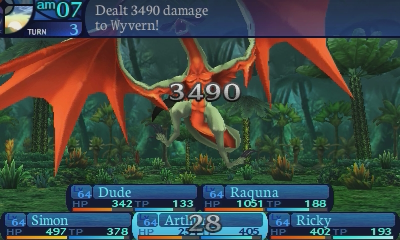
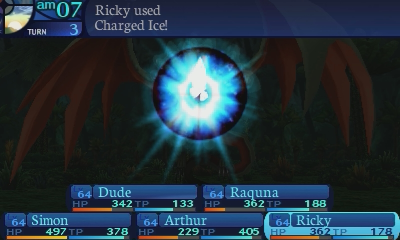
And let's see Arthur's new Frost Smile skill in action!
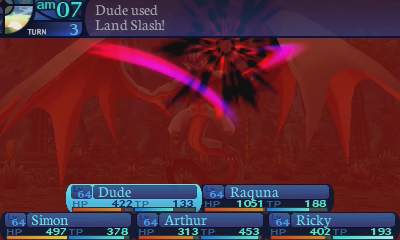
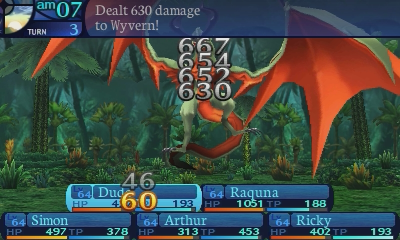

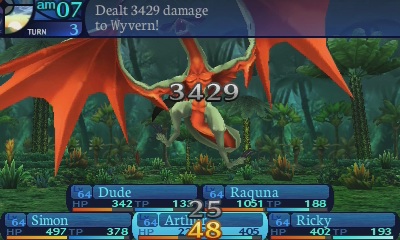
Holy fucking shit. So that was an average of about 2600 damage per attack! And keep in mind Dude isn't hitting a weakness, so he's not getting a boost from that or Analysis. Land Slash is a genuinely absurd skill, and you were definitely not meant to have it this early!
Wyvern proceeds to hear the sound of utter nightmares.
So I need to make a correction to what I said about Bravery's Gift before. It's even more busted than I thought. I said before it multiplied current and max HP by 1.5x at max level. That's not the case. What it actually does is multiply max HP by 50% then add that on to both the Protector's current and maximum HP. This means that since Raquna has a maximum of 713 HP right now, if she were to cast this skill even at 1 HP, she will always have a cushion of at least 356 HP. Oh and boosted Bravery's Gift changes that to 100% of your maximum HP for even more ubertank shenanigans. If you want to make use of a Bravery's Gift build, this means that you want to prioritize every form of HP boost you can get your hands on for best results.
Speaking of Boost, En Garde is actually coded as the Protector using the Defend command whenever it activates. And Boosting the Defend command reduces damage to 25% instead of 50%. So if you were to have a Protector use a Boosted Bravery's Gift, that boost carries over to En Garde procs and causes those to reduce damage to 25%. Making your Protector even more of an ubertank. (However because it's coded as the Protector using the Defend command, actually defending during a turn means En Garde procs do nothing.)
Welcome to EOU, where TEC is the best stat and HP makes you more survivable than your VIT. Would be really nice if Atlus didn't make us juggle 5/6 stats that do different things each game.
This damage kind of pales in comparison, but remember I've busted the game wide open at this point. If you were wondering if it can still be busted open even more, the answer to that question is yes. Very yes. We haven't seen the true extent of how far I can push my fucking bullshit.
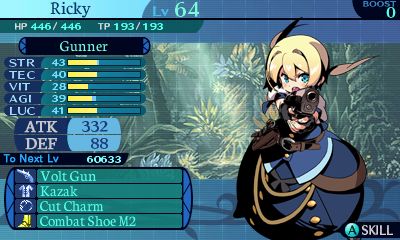
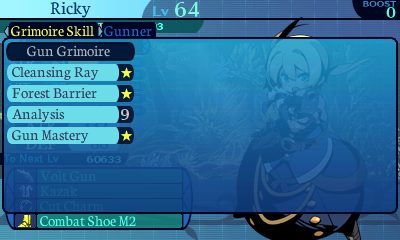
Gunners are getting the short end of the stick, here in the game where they have fucking ACTION BOOST, due to all the other bullshit you can pull with Grimoires on other classes.
Goddamn, just look at Wyvern's HP!
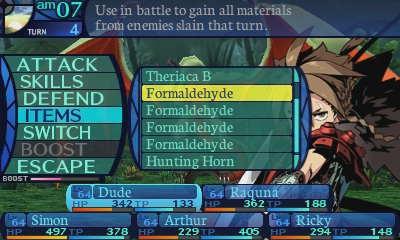
I'm going to splash some Formaldehyde on her because I really want that conditional!
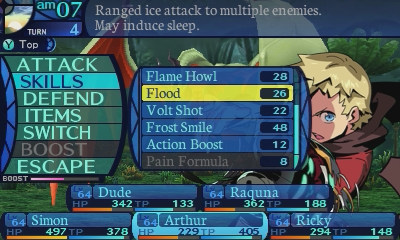
However, Frost Smile will outspeed Dude and kill Wyvern before he can use the Formaldehyde, so I'm going to sandbag a bit and use Flood instead.
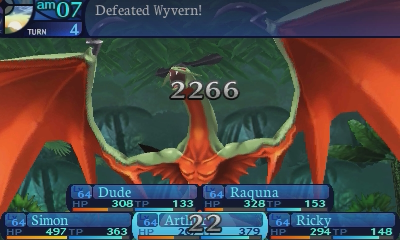
And down she goes!


Not a particularly tough boss. As high as her killing potential is, she's never really in danger of actually causing a wipe unless you're really underleveled.


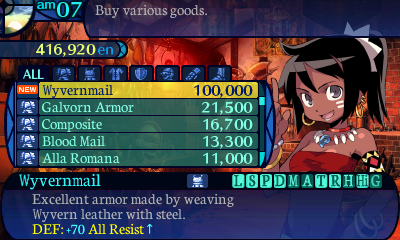
The Wyvernmail is a pretty decent piece of armor. With how the EO series can be inconsistent about how it describes things, "All Resist" is a bit of a vague description, but it actually does mean it affects everything in this case. It provides a 5% resist to everything, damage and disables. Affects every single disable such as death, stuns, ailments, and binds. And it even affects Almighty damage. For a piece of armor, that's a really good secondary effect to have.
Arrows are so fucking misleading in all games, shame they don't just tell us the numbers. Because we need allllllll the numbers.
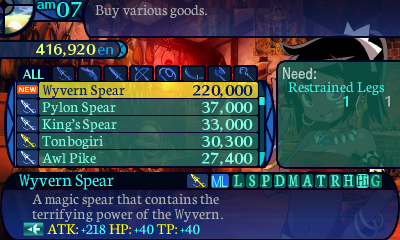
Wyvern's conditional drop unlocks Dude's ultimate Spear. The Wyvern Spear is unfortunately exclusive to him though, since unlike other spears, Raquna can't equip it. Which is a shame because she would really appreciate those secondary stats.


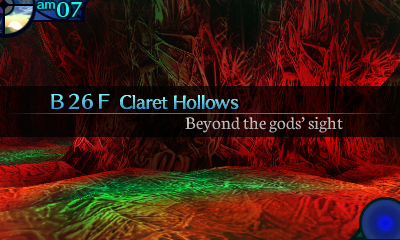
Welcome to hell. The real Etrian Odyssey begins here!
Wyvern may have muddled things a bit, but as Alraune indicates, the post-game is where Etrian Odyssey takes off its kid gloves and just opts to go for your throat right away.
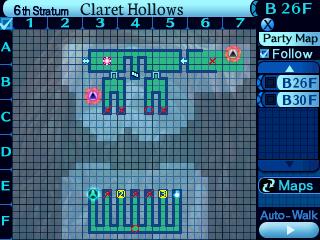
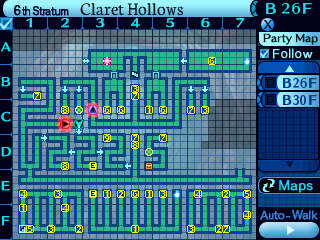
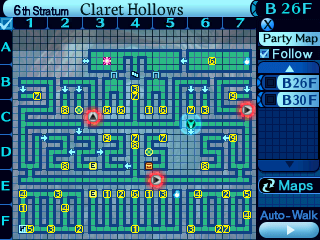
With that said, I really have to bring special attention to Etrian Odyssey Untold's version of Claret Hollows. It is easily what I consider to be the most brutal post-game in the entire series! No other post-game compares to the sheer fucking hatred every step of this place has for you! If you go in here unprepared, you will get your ass handed to you. Multiple times. Oh and the Stratum itself won't make things easy either.
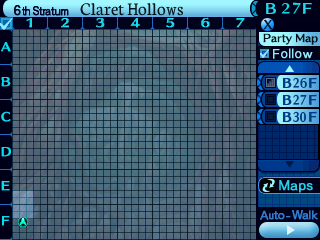
Claret Hollows has always been a severe pain in the ass. While the enemies in the original didn't completely murder you like the ones in this game, you still got your ass kicked because they had a big level difference over you, and that mattered a lot. No, the main reason is due to how insidious the stratum layout was, not just each individual floor, since it had NO SHORTCUTS UNTIL THE VERY END, as well as horrendously bad mapping options and infuriating FOEs.
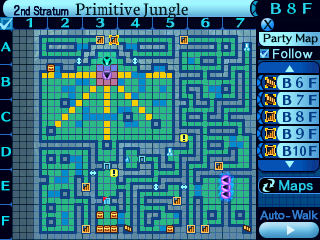
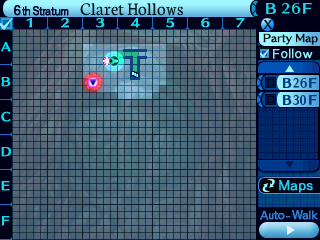
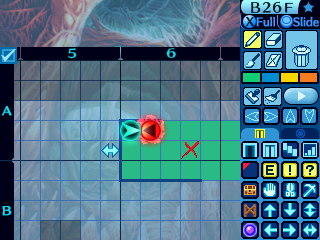
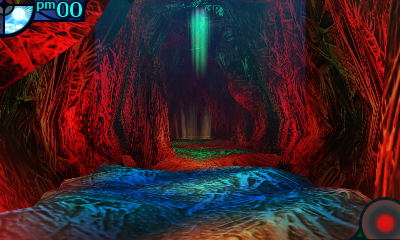
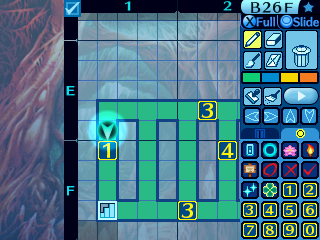
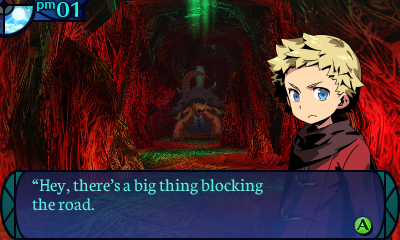
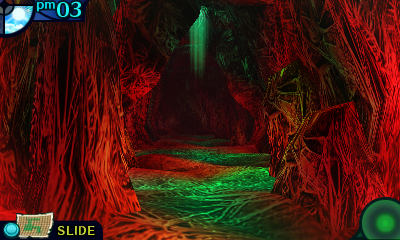
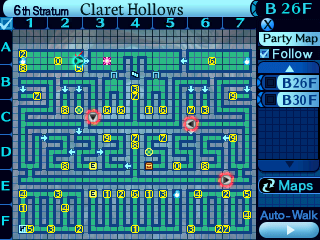
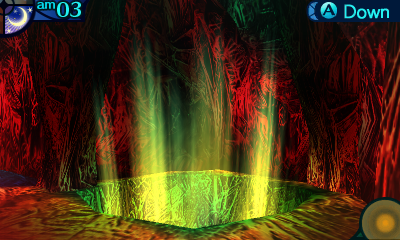
Huh, wonder what that blue spot is.
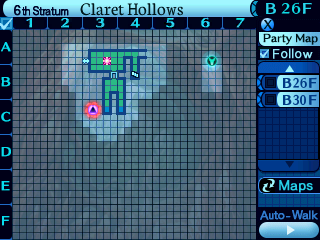
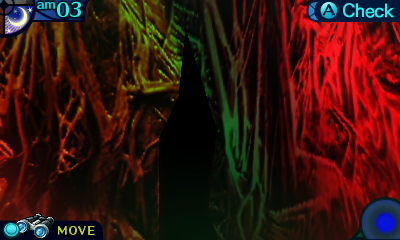
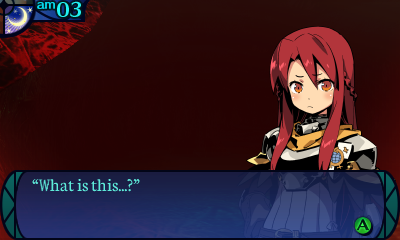
 Oh... We seem to be elsewhere now. That's not the first time we've experienced this, is it? What could have happened?
Maybe it's like a little Geomagnetic Field? Anyway, we'd better keep a good eye on the map as we go, or else I worry we'll lose track of where we are.
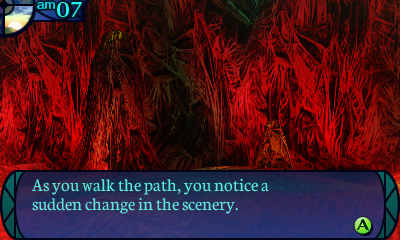
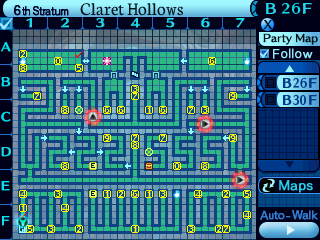
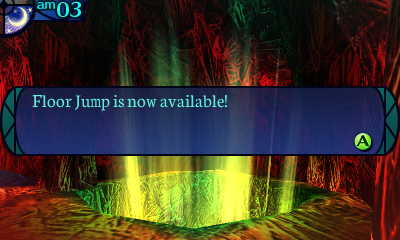
 After reviewing your current location, you decide to press onward.
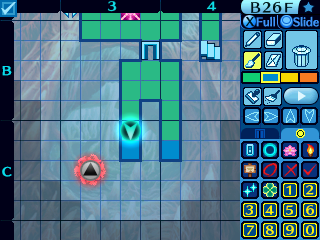
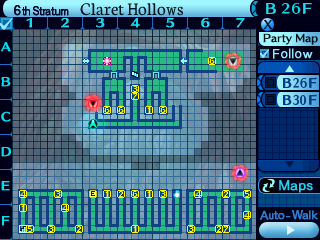
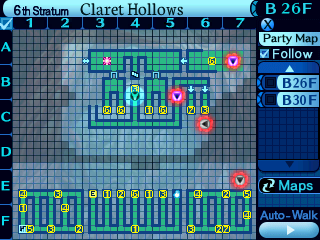
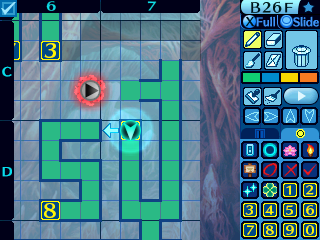
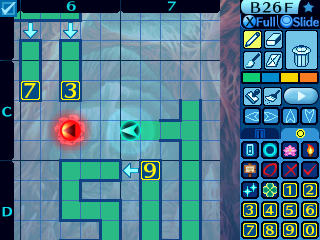
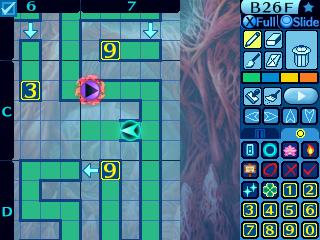
This floor's gimmick is pick a teleporter. Pick the right one to proceed. Pick the wrong one and you don't get to go forward. How do you know which one is the right one? You don't. Welcome to the post-game! It utterly hates you and despises every fiber of your being.
Oh and for those of you familiar with EO2U's story mode (and I guess my LP of that), the Story party actually pipes up during the post-game instead of effectively becoming Classic Mode 2.0. As such, I won't be glossing over most of the post-game this time unlike with 2U's post-game, because there are actually things to show off. And with how brutal Claret Hollows is in comparison to the Forbidden Wood, I just don't feel right glossing over something like that, you know? I'm still going to skip around to just the important parts, I'm just not going to just skip over the entire stratum this time.
Welcome to warp zone.
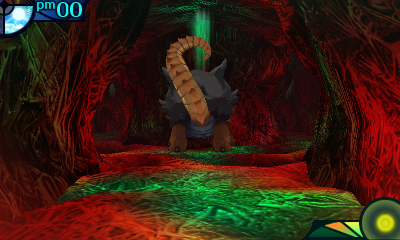
That right there is the Nether Tortoise. They'll move 1 tile every 2 turns, unless you get within 3 tiles of them, at which point they'll aggro onto you, and move at normal speed.


So that song in the first Cutscene Core fight is actually the normal battle theme of Claret Hollows. I still don't like the remix. But do listen to the other versions, they're very good!
Now I normally don't really bother doing this unless it's an important enemy or Rea just forgot to cover it, but I'm going to cover every enemy down here as well because Claret Hollows is that fucking brutal.

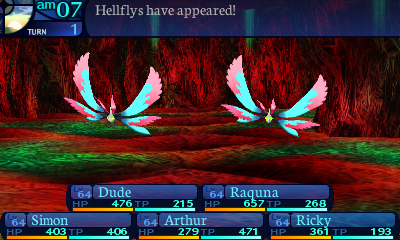
Hellfly
Level: 62
HP: 735
STR: 58
TEC: 49
VIT: 41
AGI: 42
LUC: 40
Attack Type: Stab
EXP Given: 9400
Damage Vulnerabilities:
100% 150% 100%
100% 0% 100%
Disable Vulnerabilities:
100% 50% 100% 50% 50% 100% 50%
100% 100% 100%
50% 100% 100%
Mechanics:
Freeze: Deals heavy ice damage to all party members. Reduces hit targets' evasion by 50% for 4 turns. Average speed.
Skill Data:
Freeze: Deals 120% ranged TEC-based ice damage to all party members. The damage ranges from 138 to 190 on average. Reduces hit targets' evasion by 50% for 4 turns. Has no speed modifier and a base accuracy of 99%.
Enemy Behavior:
-When they're in the back row, Hellflies will always use Freeze.
-Hellflies are more likely to use Freeze when they're at 50% HP or lower.
AI Script:
-If the Hellfly is in the back row, use Freeze.
-If the Hellfly's HP is at 50% or lower:
--79% chance to use Freeze.
--Else, Attack.
-If the Hellfly's HP is at 100% to 51%:
--49% chance to use Freeze.
--Else, Attack.
Learnable Skills:
Freeze: Deals ice damage to all enemies. Reduces hit targets' evasion for 4 turns. Average speed.
Grimoire Skill Data:
Freeze: Deals ranged TEC-based ice damage to all enemies. Reduces hit targets' evasion for 4 turns. Has no speed modifier and a base accuracy of 99% at all levels.

Drops:
-Normal: Wing Scale. 25% chance. Sells for 606 en.
-- Ebon Glove (+44 DEF, +20 HP, +6 AGI; Dark Hunter only): Made from 30 Wing Scales. Costs 45000 en.
-- Quest Rod (+127 ATK, +100 TP, +5 TEC): Made from 1 Wing Scale (Hellfly/Hazefly normal) and 3 Throbbing Vines (Gasser Tree normal). Costs 23600 en.
-- Blazing Sword (+146 ATK, cut+fire normal attacks): Made from 10 Wing Scales (Hellfly/Hazefly normal) and 3 Blaze Minerals (Flame Ooze normal). Costs 36000 en.
-Rare: Ice Wing. 15% chance. Sells for 737 en.
-- Papillon Doublet (+56 DEF): Made from 1 Ice Wing. Costs 13600 en.
-- Papillon Mail (+71 DEF): Made from 7 Ice Wings (Hellfly rare) and 5 Haze Wings (Hazefly rare). Costs 19300 en.
Get used to enemies being way more resistant to disables, because the enemies in the post-game are just that much of a step up. Not only that, but uh, take a look at their drops and the things they unlock. Yeah, grinding these to unlock equipment is so very tedious, even if you're spamming Formaldehydes. Another way the post-game hates you.
Hellflies will deal some Ice damage to everyone and reduce your evasion heavily. A Protector with high level walls is a must for the post-game in general. And if you don't have those, bring mists. Hell, I suggest even bringing mists even if you do have one, because there are just some encounter formations where your Protector just can't cover everything. The evasion reduction may seem a bit weird, but there are some enemies with deadly inaccruate attacks Freeze helps out.
The low drop rates are from the original, if only you could dupe Formaldehyde! Anyway, this is the best part, comparing each enemy to their original counterpart to show just how fucking mean they are! They attempted to inflict Curse... and that was it. Sure that's annoying, but the most dangerous thing some enemies could do in the original is just hit you really hard with their basic attack. No elemental attack and no fucking EVASION REDUCTION! Boy, I wonder if there's a lot of dangerous, but inaccurate attacks that could abuse that.
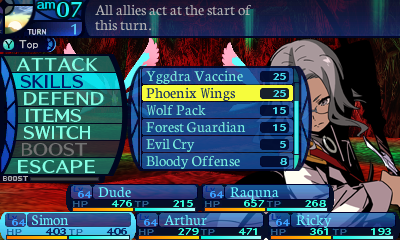
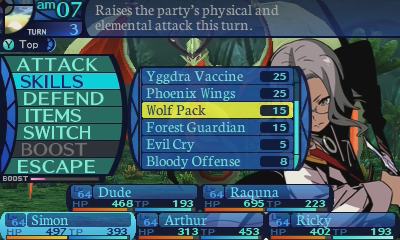
One of the best ways to deal with the post-game encounters is to bring Phoenix Wings. An opportunity to just wipe everything out on the first turn does a lot to lower the difficulty of these encounters.

Sawfish
Level: 62
HP: 815
STR: 62
TEC: 42
VIT: 42
AGI: 45
LUC: 35
Attack Type: Cut
EXP Given: 9200
Damage Vulnerabilities:
50% 100% 100%
100% 50% 150%
Disable Vulnerabilities:
50% 100% 100% 50% 100% 100% 100%
100% 100% 100%
100% 50% 50%
Mechanics:
Saw Slash: Deals severe cut damage to one row of party members. Reduces hit targets' physical defense by 40% for 4 turns. Fast.
Skill Data:
Saw Slash: Deals 120% melee STR-based cut damage to one row of party members. The damage ranges from 353 to 426 on average. Reduces hit targets' physical defense by 40% for 4 turns. Has a 120% speed modifier and a base accuracy of 99%.
Enemy Behavior:
-Sawfishes are more likely to use Saw Slash when they're at 50% HP or lower.
AI Script:
-If the Sawfish's HP is at 50% or lower:
--59% chance to use Saw Slash.
--Else, Attack.
-If the Sawfish's HP is at 100% to 51%:
--29% chance to use Saw Slash.
--Else, Attack.
Learnable Skills:
Saw Slash: Deals cut damage to one row of enemies. Reduces hit targets' physical defense for 4 turns. Fast.
Grimoire Skill Data:
Saw Slash: Deals melee STR-based cut damage to one row of enemies. Reduces hit targets' physical defense for 4 turns. Has a 120% speed modifier and a base accuracy of 99% at all levels.

Drops:
-Normal: Sawfish Scale. 30% chance. Sells for 598 en.
-- Spangen (+42 DEF): Made from 1 Sawfish Scale. Costs 11700 en.
-- Giant Axe (+166 ATK, bash+fire normal attacks): Made from 5 Sawfish Scales. Costs 47020 en.
-- Safeguard (+52 DEF): Made from 10 Sawfish Scales. Costs 15600 en.
-Rare: Saw Fin. 10% chance. Sells for 733 en.
-- Winged Spear (+155 ATK): Made from 3 Saw Fins. Costs 39500 en.
Hi, everything that has physical attacks starts off from final boss tier STR in this Stratum.
These things and Hellflies are probably the closest things to trash mobs in this Stratum. Which is really saying something considering that both of those enemies are more than capable of fucking your shit up, especially if they blindside you! They hit one row really hard, and then hit even harder on anymore attacks thanks to that huge defense debuff they inflict.
Speaking of blindsides, there are quite a few formations that are more than capable of just causing an instant game over even if your party is perfectly healthy. Don't be afraid to just go back to town if you don't want to lose even the tiniest bit of progress. Any bit of progress you make is 1 step closer to the end, and you'll always have your map data even if you do get a game over.
Picnic is also an option, especially if you want to train your party up so you can then beat them up in Expert! Bladers buffed their ATK in the original and also... buffed their ATK due to a bug calling the wrong version of a skill that was meant to boost their AGI. That happened a lot, don't worry about it. So they could hurt after that, but uh, they should be dead by then. They definitely don't soften up an entire row for the next turn or even slower enemies in the same turn, holy shit!
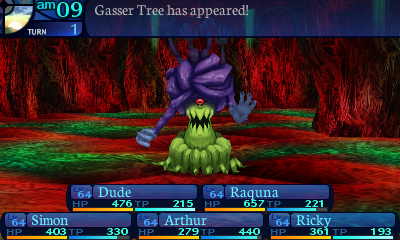

Gasser Tree
Level: 64
HP: 1155
STR: 64
TEC: 50
VIT: 49
AGI: 40
LUC: 46
Attack Type: Cut
EXP Given: 18000
Damage Vulnerabilities:
100% 100% 100%
150% 100% 100%
Disable Vulnerabilities:
100% 0% 100% 100% 50% 100% 100%
100% 100% 100%
50% 50% 50%
Mechanics:
Toxic Breath: Attempts to inflict poison on all party members, with an all-but-guaranteed chance. The poison deals severe damage. Slightly slow.
Branch Flurry: Guaranteed to bind the head, arms, and legs of one party member. Average speed.
Skill Data:
Toxic Breath: Attempts to inflict poison on all party members, with an 80% base chance. The effective chance ranges from 96% to 126% on average. The poison ticks for 316 to 331 damage. Has an 80% speed modifier.
Branch Flurry: Attempts to bind the head, arms, and legs of one party member, with a 100% base chance. The base chance ranges from 120% to 157% on average. Has no speed modifier.
Enemy Behavior:
-Gasser Trees are likely to open with Toxic Breath, if no other enemy has used it.
-If they don't open with Toxic Breath, Gasser Trees are likely to open with Branch Flurry.
-Gasser Trees are very likely to use branch Flurry if all party members are poisoned.
AI Script:
-If this is the first turn:
--If Toxic Breath was not already used on this turn:
---59% chance to use Toxic Breath.
---Else, use Branch Flurry.
--69% chance to use Branch Flurry.
--Else, use Toxic Breath.
-If all party members are poisoned:
--69% chance to use Branch Flurry.
--Else, Attack.
-29% chance to use Toxic Breath.
-Else, 30% chance to use Branch Flurry.
-Else, Attack.
Learnable Skills:
Toxic Breath: Attempts to inflict poison on all enemies. Slightly slow.
Grimoire Skill Data:
Toxic Breath: Attempts to inflict poison on all enemies. Has an 80% speed modifier at all levels.

Drops:
-Normal: Throbbing Vine. 60% chance. Sells for 1325 en.
-- Zamiel Bow (+133 ATK, +4 AGI): Made from 1 Throbbing Vine. Costs 29400 en.
-- Squirming Harp (+80 HP, +80 TP, +30% ailment resistance; Troubadour only): Made from 20 Throbbing Vines. Costs 52000 en.
-- Quest Rod (+127 ATK, +100 TP, +5 TEC): Made from 1 Wing Scale (Hellfly/Hazefly normal) and 3 Throbbing Vines (Gasser Tree normal). Costs 23600 en.
Another thing you may have noticed about these post-game enemies, is that they're pretty bulky. Wiping encounter formations in 1 turn is quite infeasible for more than a few parties, and it can be likely that you can only remove 1 or 2 enemies at best from the battles. Claret Hollows' encounter formations will force you to make some hard decisions, and your strategizing skills will be put to the test.
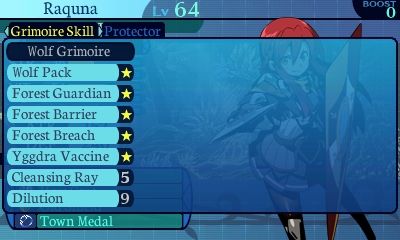
As for these Gasser Trees hahaha holy fucking shit. If you have Yggdra Vaccine, you can deal with these pretty easily, as long as your party is fast and/or has some form of bind protection on them. If you don't, it's definitely a lot more preferrable to see Branch Flurry come out instead of Toxic Breath, as that is more than capable of finishing off your party, while Branch Flurry only locks out one party member out of the battle. Yeah, really says something about this enemy when a full bind skill is the safer of the two skills to deal with!
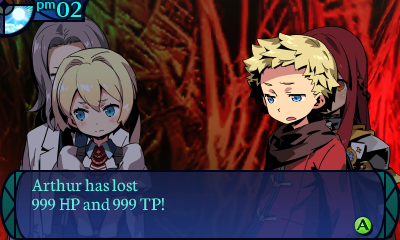
Poison was bugged in the original to be hard capped at 255, though no enemy skill ever got that high anyway. Rockwoods could still fully bind someone, little annoying, but since we already had a Poison tree in Sandy Barrens, while the remake got Petrify tree, fun, it just cured its allies by pitiful amounts. So while Gasser Trees won't kill anyone but Arthur, lol, combined with other enemies, having a huge chance of removing most of the party's health is FUCKING TERRIFYING!
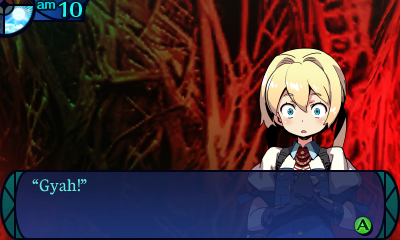
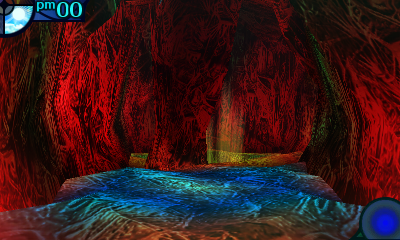
As you walk the muggy passage, you hear a small shriek from Ricky behind you.
 Sorry. Something... slimy just fell on me...
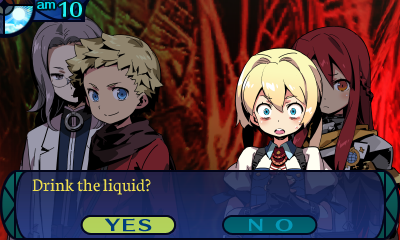
Hearing the disgust in Ricky's voice, you look up at the ceiling. When you do, you find that what had fallen was a liquid dripping from what looks to be a tree. The liquid is rather viscous... You hesitate even to call it water.
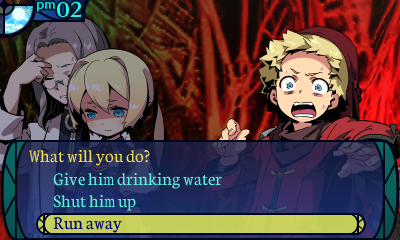
This could be an important source of hydration this deep underground. Given what we may be facing ahead... Why not check to see if it's potable?
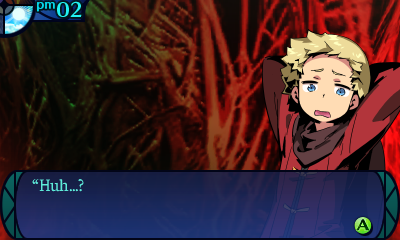
 Huh?
Huh?
 ...If you insist, I'll drink it. We do need to secure a water source on this level, after all.
 It's just a little slimy, that's all! It doesn't even smell bad.
Seriously...!?
You can see Simon's point; given what may lie ahead, it would be helpful to secure a viable source of water.
B-Bottoms up...?
We're really going to drink it, huh...
 And none too soon! I was getting thirsty!
Though the party has mixed feelings on the matter, you all drink the droplets of water. And just as you expected, the slimy texture doesn't sit well with your tongue, making it far from refreshing. But once you have finished drinking the bland liquid, you feel a strange energy well up within you!
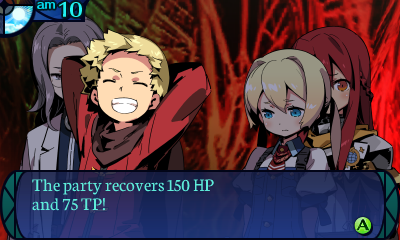
Wow... We made the right choice after all!
 I'm still worried about what's in this stuff... Is it really okay to drink?
 We'll revisit the question later if we start to suffer any side effects.
Having found such a useful healing point, you decide to mark its location for later before resuming your journey.
Fancy that, a daily healing spot, in Claret Hollows of all places!

N-Not something you really want to see down here! (Thank goodness I have Phoenix Wings!)
lmao, hey what if all these incredibly terrifying enemies had increased action speed and got stronger every turn. IMAGINE!
Oh you fucking tease! That glowy spot over there is the staircase, but we can't reach it through here because there's a teleporter in the way!
Ah, the last new enemy on this floor!

Leukocyte
Level: 63
HP: 665
STR: 61
TEC: 42
VIT: 44
AGI: 41
LUC: 42
Attack Type: Cut
EXP Given: 9600
Damage Vulnerabilities:
10% 10% 10%
100% 100% 100%
Disable Vulnerabilities:
100% 100% 100% 100% 10% 50% 100%
10% 50% 10%
100% 100% 100%
Mechanics:
White Plasma: Deals severe stab damage to one party member. Guaranteed to inflict petrification. Average speed and pretty inaccurate.
Skill Data:
White Plasma: Deals 150% melee STR-based stab damage to one party member. The damage ranges from 424 to 507. Attempts to inflict petrification on the target, with a 200% base chance. Has no speed modifier and a base accuracy of 60%.
Enemy Behavior:
-Leukocytes are less likely to use White Plasma when their HP is at 50% or lower.
AI Script:
-If the Leukocyte's HP is at 50% or lower:
--29% chance to use White Plasma.
--Else, Attack.
-If the Leukocyte's HP is at 100% to 51%:
--69% chance to use White Plasma.
--Else, Attack.
Learnable Skills:
White Plasma: Deals stab damage to one enemy. Attempts to inflict petrification on the target. Slightly slow and extremely inaccurate.
Grimoire Skill Data:
White Plasma: Deals melee STR-based stab damage to one enemy. Attempts to inflict petrification on the target. Has an 80% speed modifier and a base accuracy of 30%.

Drops:
-Normal: White Crystal. 35% chance. Sells for 612 en.
-- Dispel Arm (+32 DEF): Made from 1 White Crystal. Costs 9750 en.
-- Topaz (+2 TEC, +50% volt resistance): Made from 10 White Crystals. Costs 34000 en.
-- Angel Helm (+55 DEF, +30 TP; Medic only): Made from 20 White Crystals. Costs 54000 en.
-Conditional: Shrunken Cell (Kill while afraid). 50% chance. Sells for 1875 en.
-- Nectar II (Revives one dead party member at full HP): Made from 1 Shrunken Cell. Costs 3500 en.
I certainly hope you have some form of elemental damage on your side, because you are not getting past those physical resistances.
White Plasma is an inaccurate attack, but is basically guaranteed to inflict Petrficiation unless you have resistance or immunity to it. Oh yeah, Hellflies can lower your evasion, remember? So those formations can be fun to deal with. Ironically, these are one of the least dangerous enemies to deal with simply because they can only take out one party member at most instead of your entire party. Though they like to come in groups later on, so uh... Yggdra Vaccine can deal with the Petrification component sure, but White Plasma hits super hard by itself anyways so it can still deal a ton of damage to you.
Pretty unchanged, though obviously had a much lower base infliction chance at FORTY, while also having higher accuracy. Also it didn't have any physical resistances and was a pretty easy enemy to ignore in a group if you didn't fancy rolling Petrify. Not too bad here, but still has ways to dick you over depending on comp.
Ah, the double tease. Because of course. Fuck you too, game.
 If it's not gonna get out of the way... let's get rid of it!
That's fine if you're sure of victory, but I think the better solution would be to avoid it.
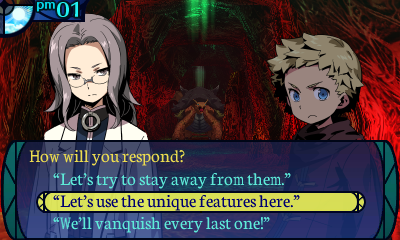
 Let's use the unique features here.
Unique features? You mean the way you get warped somewhere else when you stand in certain places? Yah, I can see how that might help us get through some tight spots.
You make a note to give some thought to the monsters' behavior and the floor's special qualities as you go on your way.
Even in the post-game, they spell things out for you in Story mode. (There's actually an explanation for this that I'll get into later in this update.) Incidentally if you manage to kill this particular Nether Tortoise, there's some additional text that pops up.quote:
-- ID 340 --
"Whew... that was sudden, so it had
me a little worried..."
-- ID 341 --
"While I'm glad we won, it was still a
powerful foe. We shouldn't engage beasts
like that if we can at all avoid it."

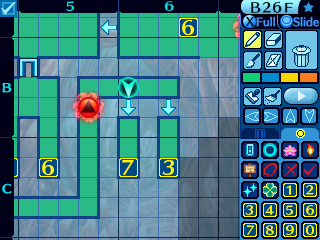
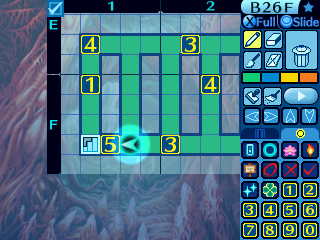
Like they said, you want to make use of these warps to get past them. Aggro that Nether Tortoise and then drag them all the way over here.
Head through the teleporter to be taken back here...
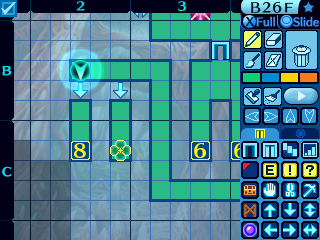
And just slip on by! The 8 teleporter brings progress, the clover teleporter takes you to treasure. As for why I didn't use a number there? I uh, ran outta numbers. That's pretty typical of teleporter puzzles, unfortunately.
At this point I headed back to town to restock. And to save my game cause I sure as heck didn't want to lose that progress!
This floor's "puzzle" in the original was just a million more teleporters and dodging dinos that aggroed if you got even remotely close to them. Not fun, also you didn't have numbers, so very difficult to actually map!
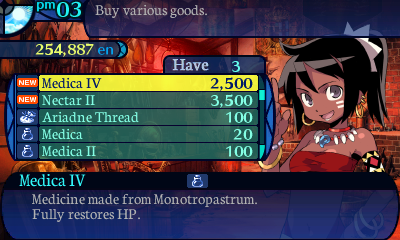
The Monotropastrums from the Take Points unlock these babies. A full heal is a very nice thing to have by this point in the game!
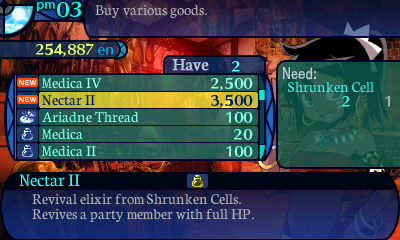
Oh baby! Nectar IIs revive someone at full HP, and these are a great way to regain momentum in a fight. The difference between coming back almost dead and tip top condition is a huge benefit!
And now back to hell.


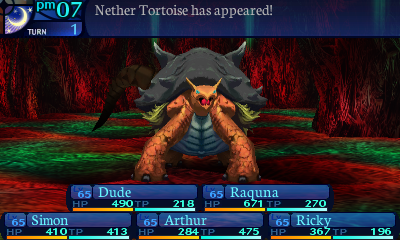
May as well check out the resident FOE of this floor while we're down here.

Nether Tortoise
Level: 84
HP: 16400
STR: 87
TEC: 63
VIT: 63
AGI: 44
LUC: 52
Attack Type: Bash
EXP Given: 180000
Damage Vulnerabilities:
50% 50% 50%
0% 100% 50%
Disable Vulnerabilities:
50% 50% 50% 50% 50% 50% 50%
10% 10% 50%
50% 50% 50%
Mechanics:
Fire Breath: Deals heavy fire damage to all party members. Attempts to bind the arms of hit targets, with an all-but-guaranteed chance. Slightly slow.
Skill Data:
Fire Breath: Deals 170% ranged TEC-based fire damage to all party members. The damage ranges from 256 to 355 on average. Attempts to bind the arms of hit targets, with an 80% base chance. The effective chance ranges from 92% to 123% on average. Has an 80% speed modifier and a base accuracy of 99%.
Enemy Behavior:
-Nether Tortoises always open with Fire Breath.
-Nether Tortoises are far more likely to use Fire Breath when they're at 50% HP or lower.
AI Script:
-If this is the first turn, use Fire Breath.
-If the Nether Tortoise's HP is at 50% or lower:
--79% chance to use Fire Breath.
--Else, Attack.
-If the Nether Tortoise's HP is at 100% to 51%:
--39% chance to use Fire Breath.
--Else, Attack.
Learnable Skills:
Fire Breath: Deals fire damage to all party members. Attempts to bind the arms of hit targets. Slightly slow.
Grimoire Skill Data:
Fire Breath: Deals ranged TEC-based fire damage to all party members. Attempts to bind the arms of hit targets. Has an 80% speed modifier and a base accuracy of 99% at all levels.

Drops:
-Normal: Millenial Shell. 100% chance. Sells for 8000 en.
-- Ancient Shield (+64 DEF, +20 HP): Made from 1 Millenial Shell. Costs 38800 en.
-Conditional: Tempered Shell (Kill with physical damage). 80% chance. Sells for 24000 en.
-- Apocalypse (+100 DEF, +4 STR, +3 TEC; Highlander only): Made from 1 Tempered Shell. Costs 96000 en.
Yeah, you're not meant to take on these things for a good while. Once you can, you'll definitely want to shoot for those drops!
Nothing much to say about it. It's a pretty tanky FOE that basically requires Fire protection. If you don't have a Protector, bring Heat Mists and Arm Bind protection so Fire Breath isn't a party wipe. Fire Breath is actually a really good pickup for a Grimoire skill, if you can get your hands on it.
Since the level cap in the original was 70 and most regular enemies were at that, FOEs were mostly fair game when you encountered them, they just had very scary stats. Like the turtle. Man fuck this guy so much, later floors gave you unavoidable encounters and they were so boring to fight since they just used their Fire breath that also didn't Arm Bind to stop you spamming Antifire as everyone else sloooooowwwwlllyyyyy chipped away at it.
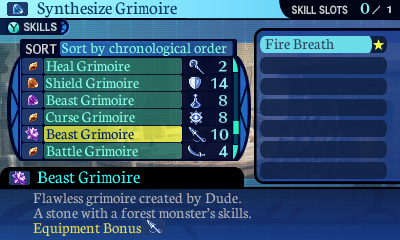
Which I just remembered I already had access to, as the only time you can get this skill before the post-game is from the Fire-Eater event enemy from a Stratum 2 quest. I decide not to fuse this on Arthur's Grimoire Stone. Flame Howl's perfect accuracy is more preferrable for me right now compared to using up 12 more TP for only a +15% increase in power.
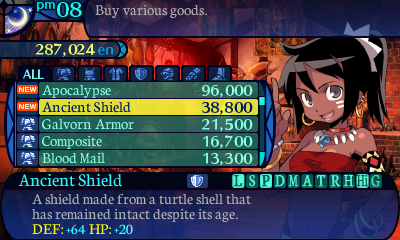
The Nether Tortoise's normal drop makes a fantastic shield. +20 HP for Raquna? Yes, please!
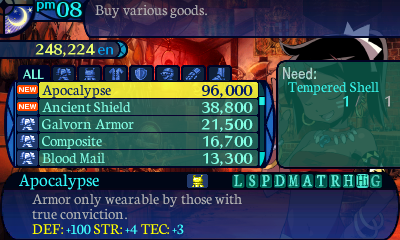
And its conditional drop makes Dude's ultimate armor. Of course I grab it for him!

This Nether Tortoise is in the way. Once again, we need to do a ton of dragging.

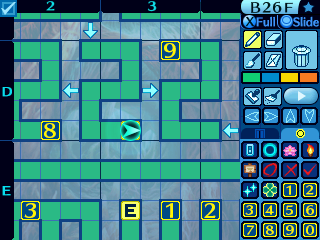
The number 9 warp is our destination. However, we need to distract this particular Nether Tortoise for a looooong time, so this entrance is the only viable option to reach it.
But first, an event!
Heeey, Dude! Look! There's something growing here!
When you look down to see what Arthur is talking about, you spot a rod-like object sprouting from the ground. It has a reddish cast from its pointed tip to midsection; past that is purest white. The surface is slightly moist. Oddly, though its surface is covered in wrinkles, it gives off a slimy sheen... The overall effect is quite eerie.
Is that a mushroom...?
Even Simon, with his vast knowledge of the plant kingdom, can only cock his head silently at the object. If your intellectual curiosity trumps your fear, then you can select someone from your party to try eating it.
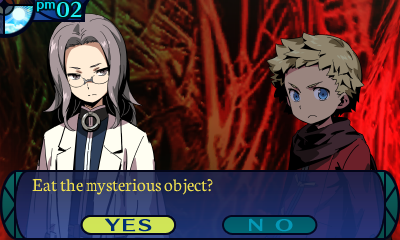
Everything about this screams bad idea, but what kind of an LPer would I be if I didn't suffer for you all, hmm? Besides, the water turned out to be fine, so maybe this will too.
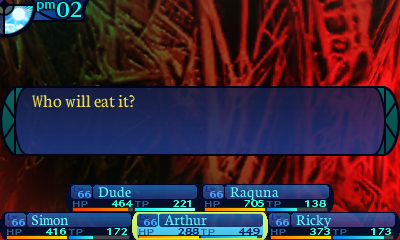
Bottoms up, Arthur!
 Uuugh... Really? It's obviously dangerous.
Despite Arthur's complaints as he sniffs it and feels the texture in his hand, he opens wide and puts it in his mouth. However...!
 Bleargh!
As Arthur spits out his mouthful, an indescribable stench fills the area!
 Wh-What is that...!?
 Urrrp...
 ......It smells like rotten eggs... or a bath in a sewer... The smell is unbearable!
W-Water... Water!
Arthur can't seem to stay put and is running around in vain...
This place is clearly dangerous! We're getting out of here!
Desperate to get away from the source of the stench, you quickly turn and run!
Wh-What're you running for!?
Arthur instantly sees you attempting to flee and gives chase! Unable to stand the pungent smell that grows stronger as Arthur grows closer, you begin to run faster!
 Oh, what is this! How can you guys play around like that, eh!?
Wait... let's leave them to it for the moment. After all, Dude drawing him away from us means the smell can't reach us over here.
 ...Good point.
By the time your legs reach their limit and you return to the group, the stench has faded, making it easier to breathe.
 Ughhh, that was horrible...
Arthur, for his part, still seems rather unwell...
Ouch! Also for a briefest of moments, the story party had a bit of character. I hope you enjoyed it while it lasted.
As you console the sobbing Arthur, you vow never to approach that foul object again before going on your way.
You didn't think Claret Hollows would be generous twice, now did you?
One Medica IV and several Amrita IIs later, we're back on track. Now where were we? Ah, yes!
I almost had sympathy for Arthur. Almost.
Take the 9 warp to get sent over here.
Then make sure to aggro this Nether Tortoise once it's in this corridor! Don't do so near the intersection, or you'll screw this puzzle up.

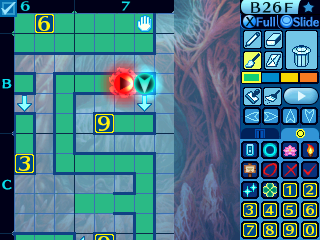
Drag it up here, closing the gap for good measure if needed, then take that 9 warp through this passage.
Then you'll be able to slip past!
The reason we dragged that first Nether Tortoise to the other side of the map instead of taking the quick passage was so it couldn't interfere while we were draggin the second Nether Tortoise out of the way.
Breathe a sigh of relief, because you never have to do that again! We have an actual shortcut here that lets us skip this floor every time we have to go through it now!
How nice I'm so happy for you.
Take the checkmark warp and be taken to the end of the floor.

And we are done.
So uh, remember when I joked about having to go through Claret Hollows as a part of Story Mode? It turns out that was exactly what they intended at some point in development. Not that one section of floor 30 we basically blitzed through, the whole damn stratum.
That said, the way they handled that was... interesting. Ricky would offer to help you out and allow you to skip through the floors if you wanted to, or you could say no and go through the floors for real. If you accepted Ricky's help, she would unlock the 2 way passage we unlocked for you, and tell you which warps were the correct ones. But as far as I can tell, the game didn't have any railroading for that section, so if you chose to deviate from her directions, you made your bed, now lie in it. If you opted not to, you were on your own. And once you reached the end of the floor either way, you were treated as still being part of the plot, with them mentioning M.I.K.E.'s directions and everything.
It's why there are still plenty of events in the 6th Stratum, and this part of the game is basically being treated as the unseen journey down to the Yggdrasil Core. Because it actually was.
It's weird, they obviously had way bigger plans for this game and then cut back to make the Story mode feel pretty empty towards the end, such is game development, but going through the entire stratum, and able to do so properly, is a very interesting idea. Shame they didn't actually force little Timmy through Claret Hollows, oh well.
Before you spreads a darkness so absolute that it's difficult to make out even what's at your feet. You produce lanterns from your packs, but they're barely enough to light your immediate surroundings.
We can't even see a step ahead of us like this. What should we do?
What CAN we do but go on?
 Let's be sure not to get separated. That would be a terrible thing to happen down here...
We're heading back to town right away because like hell I'm doing all that again!


It's a complete and utter disaster! ...Which is probably what most players would be saying.
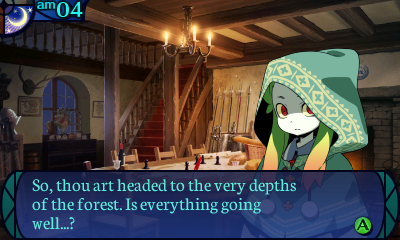
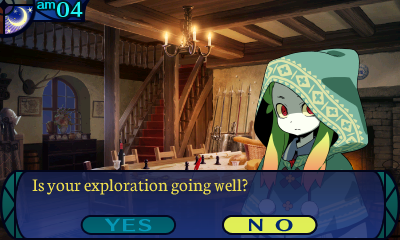
 What? Even thou art having trouble? ...I see.
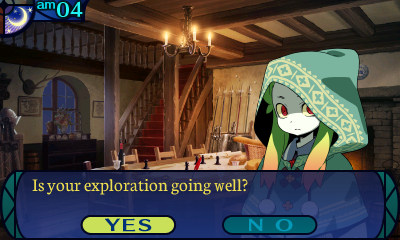
But for me, it's going well.
...I see. Good.
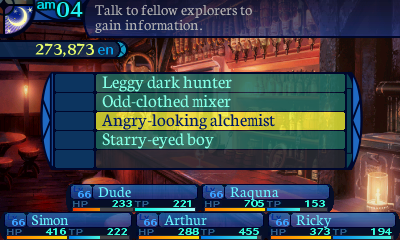
Fighting today, fighting tomorrow... Fighting yesterday, and the day after tomorrow, too... Our leader's started up again. She's getting us into long fights just to beat enemies in strange ways... Why? Why do I torture myself like this? Ugh! Stop! Stop it, please! Someone stop the Flame Oozes from exploding! *shudder* I don't want to be burned by those Explosions any more... I don't want to be a pile of ash in the dirt...
And that's it for new town dialogue. Next time, we go slaying. Dragon slaying.