Toggle Background Color
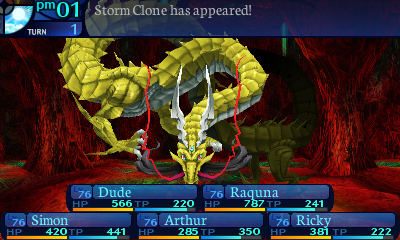
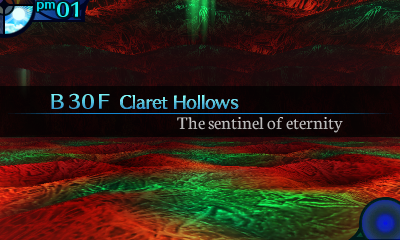
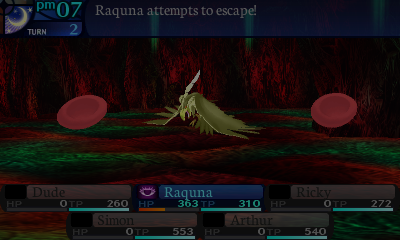
Story Update 31: Hadopelagic (Great Dragon)


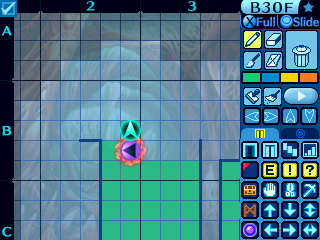
 Just as Raquna says, there are two holes in the wall here that would be just the right size for your arm...
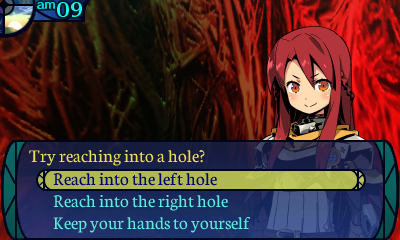
 Left hole first I suppose.
On impulse, you reach your hand into the left hole!
 Dude!?
You grope around the back of the hole to see if there's anything inside, but you can feel nothing. The only thing even vaguely worth reporting is that the inside of the hole is slightly damp.
 Geez, what's gotten into you...?
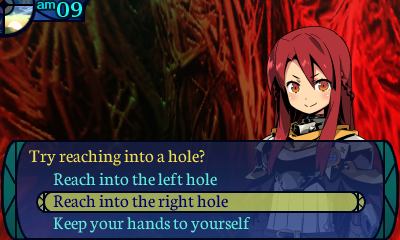
Perhaps the other hole has something of note in it.
On impulse, you reach your hand into the right hole!
 H-Huh!?
Though the opening is small, the hole is much more spacious further in. You feel around, wondering if there's anything inside... ......
 Uh... doesn't it feel gross, sticking your hand into a wall like that?
It's true that the interior of the hole is moist, with an oddly gelatinous film on them. The experience is not pleasant. Just as you are considering giving up the search, your hand brushes up against something hard! When you pull the object out of the hole, you are surprised to find a bulbous plant shaped like a human arm!
Huh? Wh-What is that...?
 ...I don't know, but anything we find this deep in the Labyrinth would fetch some good coin at Shilleka's.
Giddy at the unexpected find, you put the bizarrely bulbous plant away in your pack.

Free Armroot, how nice! You get no such freebies for the other limbed plants though.
 Please do not stick your arms into mystery holes, they are safe shelter for animals and they will bite you.
You already know what these holes contained. For that reason, you turn your back to them and resume your investigation.
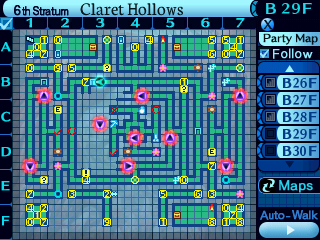
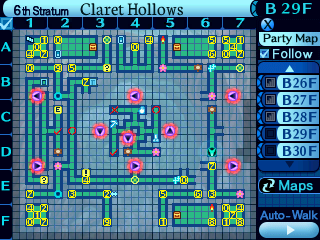
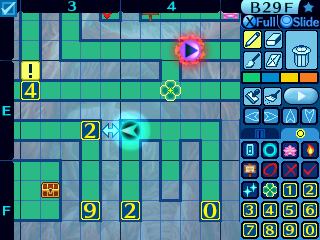
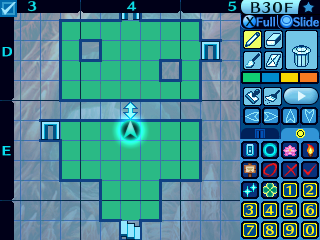
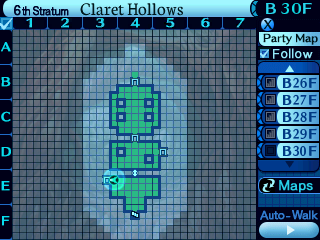
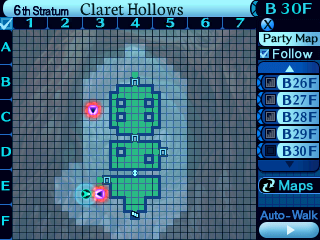
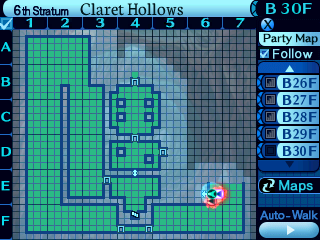
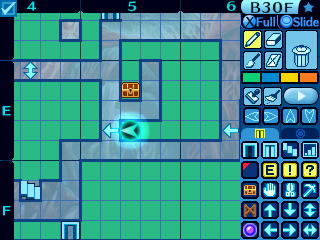
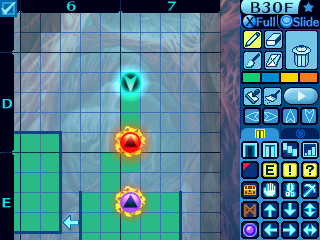
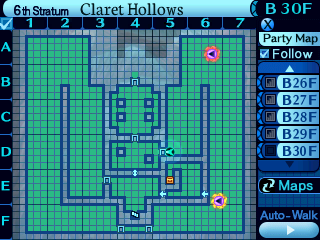
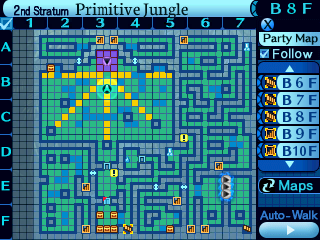
This teleporter over here doesn't lead forward, but it does lead to a special location, so you should make sure to take it.
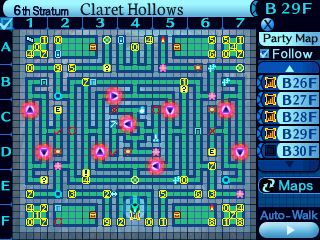
Also I am so so sorry for the monstrosity that is my teleporter map, but when you only have single digit numbers to work with, this is what I have to create. I am so so sorry for this monstrosity.
If you want a clear version of the maze hell, then there's online maps. Since I can't really detail how they go, I just use the standard warp icon and just denote which ones lead to the exit. Ones that have a set pattern are a different story, I colour code EO5's, which makes the map pretty, and I use the number icons for the mist wraps in EO4 since there's enough icons for that. Usually.
...Wow Claret Hollows. Just. Wow.

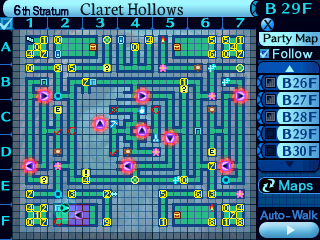
Ahem, as I was saying, that teleporter takes you to this secret room down here.


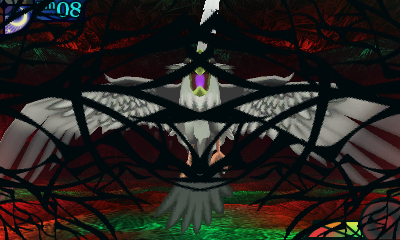
Storm Clone
Level: 70
HP: 16000
STR: 84
TEC: 59
VIT: 59
AGI: 59
LUC: 58
Attack Type: Bash
EXP Given: 200000
Damage Vulnerabilities:
 100%
100%  100%
100%  100%
100%
 150%
150%  100%
100%  0%
0%
Disable Vulnerabilities:
 30%
30%  50%
50%  30%
30%  30%
30%  50%
50%  10%
10%  10%
10%
 10%
10%  10%
10%  20%
20%
 30%
30%  30%
30%  30%
30%
Mechanics:
Volt Torrent: Deals overkill volt damage to all party members. Very slow.
Judgement: Deals very heavy bash damage to all party members. The damage ranges from 344 to 417 on average. Attempts to inflict paralysis on hit targets, with a moderately low chance. Slow.
Ancient Curse: Deals severe cut damage that pierces party rows. Heals Storm Clone for 200% of the damage dealt. Slightly slow.
Skill Data:
Volt Torrent: Deals 400% ranged TEC-based volt damage to all party members. The damage ranges from 600 to 823 on average. Has a 50% speed modifier and a base accuracy of 120%.
Judgement: Deals 70% melee STR-based bash damage to all party members. The damage ranges from 344 to 417 on average. Attempts to inflict paralysis on hit targets, with a 20% base chance. The effective chance ranges from 26% to 34% on average. Has a 70% speed modifier and a base accuracy of 99%.
Ancient Curse: Deals 100% melee STR-based cut damage that pierces party rows. The damage ranges from 492 to 596 on average. Heals Storm Clone for 200% of the damage dealt. Has an 80% speed modifier and a base accuracy of 99%.
Enemy Behavior:
-Storm Clones always open with Volt Torrent, and will always use it again on turns that are a multiple of 5.
-Storm Clones start using Ancient Curse when they're at 50% HP or lower.
AI Script:
-If it's the first turn, or the current turn is a multiple of 5, cast Volt Torrent.
-If the Storm Clone's HP is at 50% or below:
--44% chance to use Ancient Curse.
--Else, 40% chance to use Judgement.
--Else, Attack.
-If the Storm Clone's HP is above 50%:
--69% chance to use Judgement.
--Else, Attack.
Learnable Skills:
Volt Torrent: Deals volt damage to all enemies. Extremely slow.
Judgement: Deals bash damage to all enemies. Attempts to inflict paralysis on hit targets. Slightly slow.
Grimoire Skill Data:
Volt Torrent: Deals ranged TEC-based volt damage to all enemies. Has a 40% speed modifier and a base accuracy of 120% at all levels.

Judgement: Deals melee STR-based bash damage to all enemies. Attempts to inflict paralysis on hit targets. Has an 80% speed modifier and a base accuracy of 99% at all levels.

Drops:
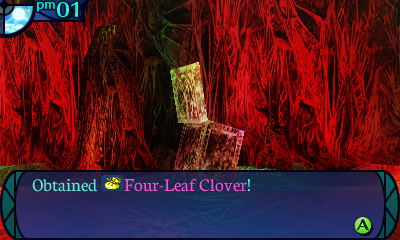
-Normal:  Dragon Core. 100% chance. Sells for 13000 en.
-- Four-Leaf Clover (20% chance to add several levels to any Grimoires generated on the turn of use): Made from 1 Dragon Core. Costs 10000 en.
-Conditional: Dragon Horn (Kill with bash damage). 100% chance. Sells for 29000 en.
-- Lightning Gage (+41 DEF, +4 STR, +2 TEC; Gunner only): Made from 1 Dragon Horn. Costs 42000 en.
FOE version of Storm Emperor. What's there to say?
Other than why the fuck was he placed here instead of Blizzard Clone, who can be encountered much sooner and more easily.
Dragoid is actually harder than the original due to it only having 1 attack in Curse, so it actually did damage to you outside of the basic attack! That's more than Dragon can claim if you don't bind its head...
Because this really needed a clone of a dragon guarding it. Sure.
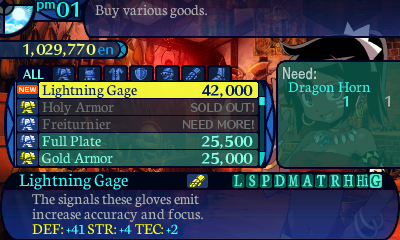
Wrong game Lightning Gage. TEC doesn't affect accuracy at all in this one!
The Storm Clone's conditional drop unlocks a Ricky exclusive glove, and the STR bonus is good, so I pick it up for her.
lmfao
fuck me

FUCK ME!
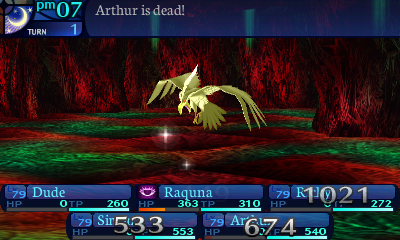
Fortunately Arthur was the only one that died, so I was able to escape.
Because Arthur's survivability is useless, everyone else runs away instead.
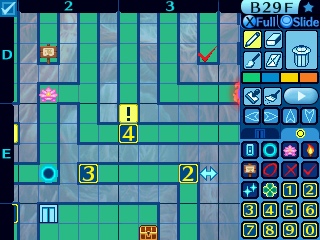
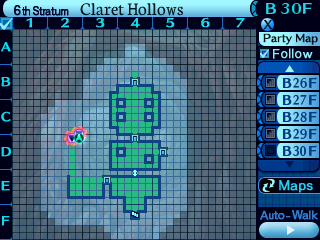
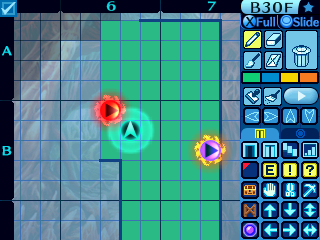
Your destination is the teleporter I've marked with an exclamation point.
And we are out!

Open up this shortcut so you never have to do this fucking floor again!
So the way this floor was handled in the cut journey to the core was that accepting Ricky's help would have her tell you which teleporters are the correct ones, and then she opens up this shortcut so you can basically skip straight to the end.
So hey, do you remember that I mentioned the original didn't have any shortcuts meaning you had to do it all in one go? Well considering everything you've seen, the remake is pretty faithful to the original. YEAHHHHHHHHHHHH...

Never again! Never again! We are free! Free at last!

Well, isn't this a familiar sight?

So there's another place where the Story advantage rears its head.
Yeah that shortcut that we unlocked back in our intial trek down here? It's permanently open now. We can just skip straight to the end and ignore the rest of floor 30. Oh and in the cut adventures, you could choose to go through this floor for real instead of accepting Ricky's help (which just opened up that shortcut.)
But what kind of an LPer would I be if I were just to skip a lot of content just like that? Also as you can tell from the radar, encounters are actually enabled now, so don't dilly dally here.
Before we tackle this floor for real, let's head back to town.


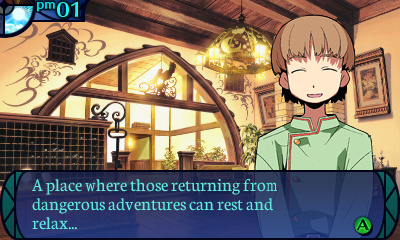
 A place where one can recover strength in order to challenge the Labyrinth once again... That's the kind of place I want the Rooster Inn to be. Am I doing my job properly?


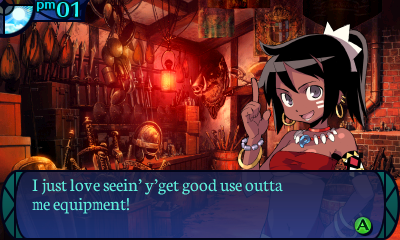
 It makes me proud to be t'is shop's owner!


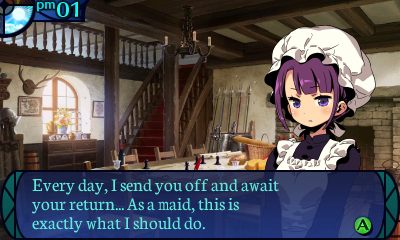
 But sometimes, I wonder... What would it be like if I could explore with the rest of you?
 ...I feel as if I would be more of a nuisance than a help.
Maybe if the original plans for the guildkeeper system went through you would find out, but alas.
 Perhaps this town, with adventurers constantly coming and going to explore the forest, is perfect for me.
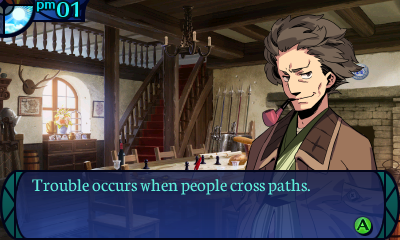
 ...So this is life for an adventurer.
 I mean, they can ask the greatest adventurers in Etria to do whatever little job they want! Ha, well, keep up the good work.
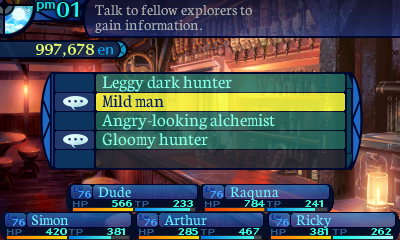
Hello, Achievers. I've got a question for you... Do you have time? You're the ones who found the new Stratum, and you're planning to go even deeper into the Labyrinth... Have you ever considered not being explorers?
Sometimes this work can be exhausting. And sometimes I wonder what it would be like for me to have never gotten into LPing at all...
Really? That's kind of surprising. You've reached places that no one ever has before. You really are incredible. I'll be rooting for you. I need to keep up my work, too...
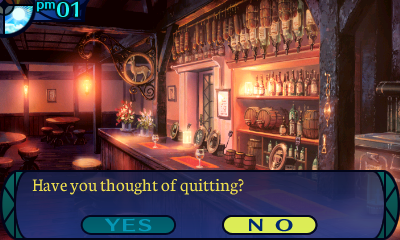
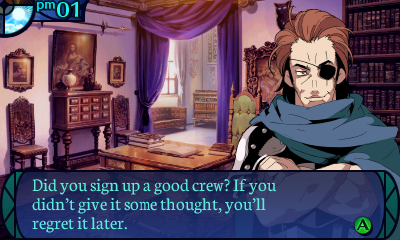
...Hmmm, I thought so. It's that iron will that keeps you going to reach new depths, huh... When you first came to this pub, you seemed like ordinary people. Heck, you seemed a little flaky. ...Maybe I should step up my work, too.
But I wouldn't have gotten as far as I did in life if I just gave up and buckled over easily!
I would be nice if I got paid for this...
Ah, Achievers... I saw you in the Labyrinth. If you've made it to that Stratum, then try looking for a World Clover. They don't appear very often, so you'll be sticking around for a while. ...The Iron Crab's a troublesome monster, too. If you run into one, be careful. It's usually quiet, but if its partners are defeated, it gets very violent. Finding a four-leaf clover would be pointless if you die in the process. Take care.
Ah, one last thing that wants to murder us horribly, of course.

Here it is, the final quest in the entire game. It's been a long journey getting here, but all good things must come to an end. I'll take this quest now, but I won't actually do this right away.
Do you remember the investigation you did into that Wyvern? The Hall's investigation team took the Hollow Fang you found and headed to the Wyvern's lair. They played the Hollow Fang, and agiant red dragon appeared! The wind from its wings knocked down the person who played it, and the flute was broken. It seems the dragon was trying to take over the Wyvern's lair, but the sound of the flute was driving it away. So, up until now, it couldn't get near the Wyvern's home. Now that you've defeated the Wyvern, the red dragon took over. It's really strong, and the Hall's team barely made it out alive. We can't allow such a dangerous beast to stay there. It must be defeated. This is a dangerous job, so don't get reckless.


 ...But you don't need to hear that from me. Just watch yourselves out there.


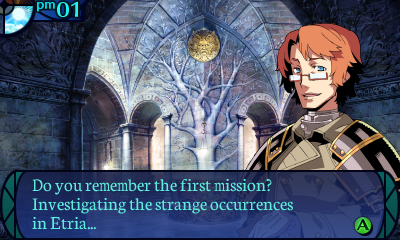
 Who would have thought that it would result in something so serious? I am glad that you were the one who accepted our summons, Highlander. I hope that you find your true justice here.
Did we really? I feel like some schmucks in High Lagaard or so could do a better job of that than we ever did.


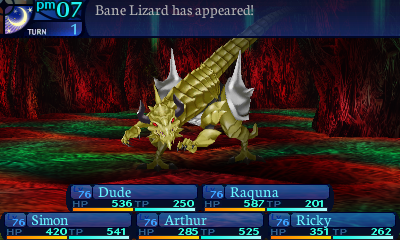
Time to deal with this FOE, I suppose.
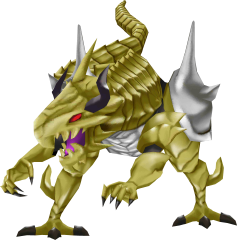
Bane Lizard
Level: 90
HP: 18504
STR: 90
TEC: 70
VIT: 62
AGI: 58
LUC: 60
Attack Type: Cut
EXP Given: 220000
Damage Vulnerabilities:
50% 50% 50%
100% 100% 100%
Disable Vulnerabilities:
50% 50% 50% 50% 50% 50% 0%
10% 10% 50%
50% 50% 50%
Mechanics:
Dragon Fang: Deals severe cut damage to all party members. Attempts to inflict fear, with an all-but-guaranteed chance. Average speed.
Lethal Glare: Attempts to instantly kill one party member, with a high chance. Average speed.
Skill Data:
Dragon Fang: Deals 140% melee STR-based cut damage to all party members. The damage ranges from 702 to 855 on average. Attempts to inflict fear on hit targets, with an 80% base chance. The effective chance ranges from 96% to 130% on average. Has an 80% speed modifier and a base accuracy of 99%.
Lethal Glare: Attempts to instantly kill one party member, with a 50% base chance. The effective chance ranges from 60% to 81% on average. Has an 80% speed modifier.
Enemy Behavior:
-Bane Lizards always open with Lethal Glare.
-Lethal Glare, after use, will not be used again until the Bane Lizard randomly decides that it can.
-Bane Lizards are far more likely to use Dragon Fang when their HP is at 50% or lower.
AI Script:
-If this is the first turn, use Lethal Glare. Set the Lethal Glare flag to True.
-If the Lethal Glare flag is False, 49% chance to use Lethal Glare. If used, set the Lethal Glare flag to True.
-If Lethal Glare was not used on this turn, 49% chance to set the Lethal Glare flag to False.
-If the Bane Lizard's HP is above 50%:
--34% chance to use Dragon Fang.
--66% chance to Attack.
-If the Bane Lizard's HP is at 50% or below:
--74% chance to use Dragon Fang.
--26% chance to Attack.
Learnable Skills:
Dragon Fang: Deals cut damage to all enemies. Attempts to inflict fear on hit targets. Slightly slow.
Lethal Glare: Attempts to instantly kill one enemy. Fast.
Grimoire Skill Data:
Dragon Fang: Deals melee STR-based cut damage to all enemies. Attempts to inflict fear on hit targets. Has an 80% speed modifier and a base accuracy of 99% at all levels.

Lethal Glare: Attempts to instantly kill one enemy. Has a 120% speed modifier at all levels.

Drops:
-Normal: Blue Sternum. 80% chance. Sells for 10000 en.
-- Blue Mail (+82 DEF, +10 AGI; Ronin only): Made from 1 Blue Sternum. Costs 39500 en.
-Rare: Blue Blood. 40% chance. Sells for 13500 en.
-- Munechika (+221 ATK, +20 TP): Made from 1 Blue Blood. Costs 108000 en.
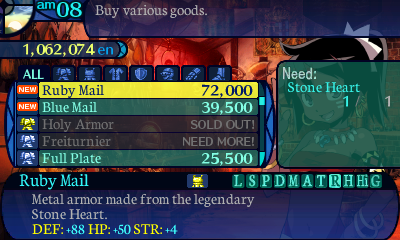
-Conditional: Stone Heart (Kill with petrification). 80% chance. Sells for 30000 en.
-- Ruby Mail (+88 DEF, +50 HP, +4 STR; Ronin only): Made from 1 Stone Heart. Costs 72000 en.
Bane Lizards have 2 tactics. Killing you, and then killing you. If you run into them accidentally, yeah you're pretty much screwed if you're unprepared. There isn't really a whole lot to them other than them being a deterrent to brute-forcing their puzzles.
Dinolichs were a pain, hit super goddamn hard, but only ever killed one person at a time, so were completely manageable. And since they had the highest STR of any non-Boss enemy, they were killing someone without defensive buffs.
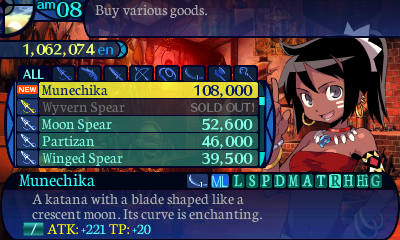
Here's the loot that we got from the Bane Lizard.
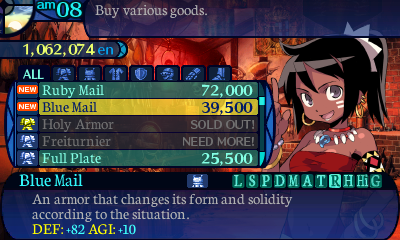
...Um. Why the hell does the Ronin get two exclusive body armors? I'm having EO2 flashbacks here.
Well you can get as many Blue Mails as you want, I guess. Ronin only ever use their Overhead tree regardless of game since the other 2 are just so so bad, but maybe this AGI armor might convince you otherwise? It sure didn't for me!

So. What exactly did we skip over? Let's find out.
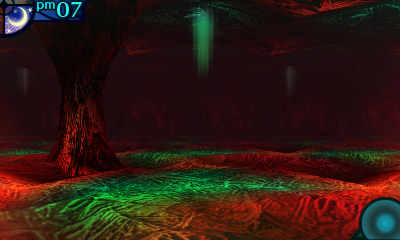

We're in a fairly big and open area.
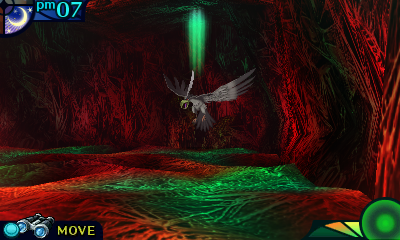
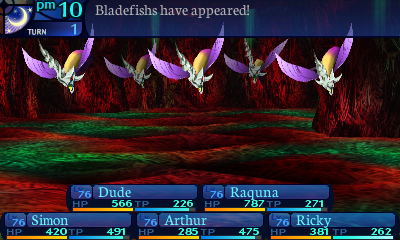
THAT IS FILLED WITH ENDLESS AMOUNTS OF DEPTH DANCERS!
Did you get enough practice dodging Depth Dancers in B28F? Because that's this floor's central gimmick. Dodging Depth Dancers endlessly. (And now I'm sure you can see why they have that name.)
Remember that B28F was about 4 times the size, so get learning the pattern. The original B30F was just a very long corridor that you dedicated yourself to since endless Dinolichs spawned behind you. This floor is... incredibly not that.
FUCK!
One Flee later...


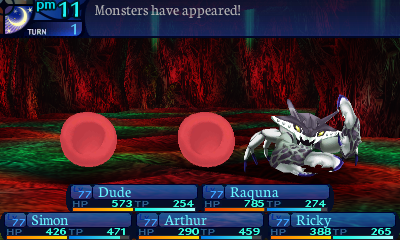
Well this is certainly a situation I've gotten myself in...

Iron Crab
Level: 89
HP: 1580
STR: 83
TEC: 64
VIT: 58
AGI: 52
LUC: 55
Attack Type: Cut
EXP Given: 65500
Damage Vulnerabilities:
0% 0% 100%
0% 0% 100%
Disable Vulnerabilities:
50% 100% 50% 10% 10% 100% 50%
10% 10% 10%
10% 10% 10%
Mechanics:
Scissor Wrath: Deals massively overkill cut damage to all party members. Very fast. Very accurate.
Scissor Wrath: Passive. Triggers the instant an enemy is killed, and gets stronger each time it activates. Deals overkill cut damage to all party members.
Skill Data:
Scissor Wrath: Deals 200% melee STR-based cut damage to all party members. The damage ranges from 850 to 1032 on average. Has a 130% speed modifier and a base accuracy of 150%.
Scissor Wrath: Passive. Triggers the instant an enemy is killed. Deals 115% melee STR-based cut damage to all party members. Each time it activates, 5% is added onto the damage, up to a maximum of 15 activations, at which it caps at 190% damage. Has a 70% speed modifier and a base accuracy of 99%.
Enemy Behavior:
-Iron Crabs will do nothing until a single enemy dies in the battle, at which point they will always cast Scissor Wrath.
-Iron Crabs decide what to do the moment it's their turn instead of at the start of the turn, meaning that killing an enemy in the middle of a turn before an Iron Crab has acted will still cause them to use Scissor Wrath.
AI Script:
-Run this script at the moment of the user's turn.
-If a single 6th Stratum enemy is dead, cast Scissor Wrath.
-Else, do nothing. Display message: "Iron Crab is watching."
Drops:
-Normal: Gray Shell. 35% chance. Sells for 1504 en.
-- Crab Sield (+61 DEF): Made from 1 Gray Shell. Costs 18000 en.
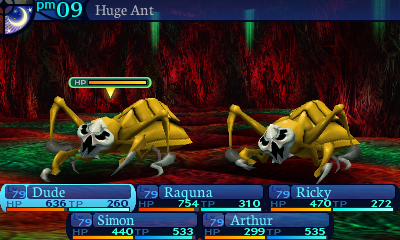
-- Freiturnier (+95 DEF): Made from 7 Gold Carapaces (Huge Ant normal) and 7 Gray Shells (Iron Crab normal). Costs 27000 en.
-Rare: Gray Pincer. 25% chance. Sells for 1985 en.
-- Earth Axe (+195 ATK, bash+fire normal attacks): Made from 1 Gray Pincer. Costs 62600 en.
-- Judgement Sword (+177 ATK): Made from 9 Gold Carapaces (Huge Ant normal) and 9 Gray Pincers (Iron Crab rare). Costs 48000 en.
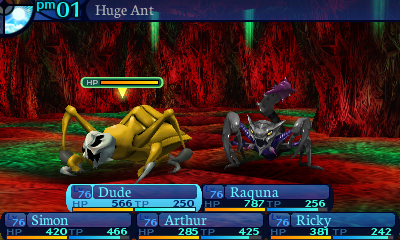
Did you think you saw the last of the sadistic choice enemies? Nope, there's one last enemy on floor 30 and it's a motherfucker. Like the Steel Barb, it's basically immune to everything but Bash and Volt. If you kill even a single enemy in the battle, the crab will go fucking apeshit and send you on a paid vacation to the game over screen. You're basically forced to target the crabs because they're so utterly dangerous. But they're so tanky that this gives ample time for the other enemies to maul you.
Oh, and these things are the reason why people unlearn Severing Slash in the post-game. They're super resistant to instant death, so Severing Slash is unlikely to kill them, but it's likely to kill the other enemies. Meaning that you start off the battle with the Iron Crab currently going completely apeshit. Scissor Wrath is actually both a counter skill and an attacking skill, so if you kill an enemy, it will instantly activate, and do this each time you kill an enemy. Oh and it doesn't count as eating up the Iron Crab's action, so the next time they get to act, you'll be eating a super powerful Scissor Wrath to the face.
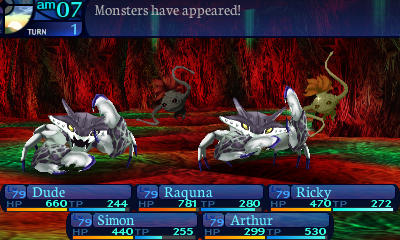
Also with that writeup, you can tell that the people who designed Claret Hollows are sick sick fucks, because look at that formation! Just look at it, what the hell!? If you kill the Iron Crab first, you'll have to deal with the Flame Ooze exploding on you. If you kill the Flame Ooze first, the Iron Crab will scissor you.
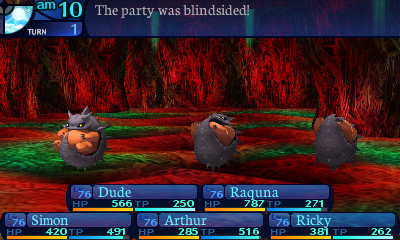
Sometimes the only winning move is not to play and just fucking run. But that's not always possible. For one thing, EOU's escape rates suck ass. And look at the bottom screen, there's a Depth Dancer right behind me. I can't even afford to run.
AHAHAHAHAHAHAHAHAHAHAHAHAHAHAHAHAHA!!! I've been waiting all LP to talk about these guys!!! What an absolute dick move, I love it so much. Ironcrab were available from B26F in the original since they didn't really do all that much. They only took damage from Volt so if you didn't have that, there was no point fighting them, but goddamn they got maybe one of the biggest upgrades due to how they completely change how you tackle random encounters. It's insane how much shit is thrown at you in this game, way more than any other postgame.
...Holy fuck EOU.

This is when you get a break of sorts from endless Depth Dancers.
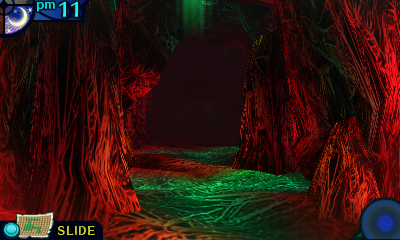
Enjoy it while it lasts because we're about to go into dancing hell again.
There is something special about this hallway though.
NOT THESE!
NOR THESE!
Yeesh, finally!

World Clover
Level: 10
HP: 400
STR: 10
TEC: 10
VIT: 10
AGI: 10
LUC: 10
Attack Type: Bash
EXP Given: 10000
Damage Vulnerabilities:
300% 300% 300%
300% 300% 300%
Disable Vulnerabilities:
100% 100% 100% 100% 100% 100% 100%
100% 100% 100%
100% 100% 100%
Enemy Behavior:
-World Clovers will either defend or attack..
AI Script:
-49% chance to defend.
-51% chance to use a regular attack.
Drops:
-Drop: Lucky Leaf. 100% chance. Sells for 10000 en.
-- Moss Band (+100 HP, +7 STR, +7 VIT): Made from 1 Lucky Leaf. Costs 14000 en.
The real challenge about these enemies is finding them in the first place.
And that is every single regular enemy in the entire game covered. There are no more new assholes lying in wait, we're done on that front. All that we need to do now, is reach the end.
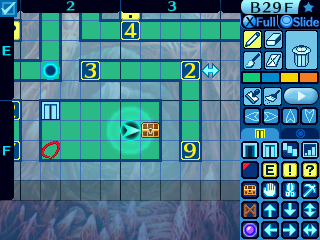
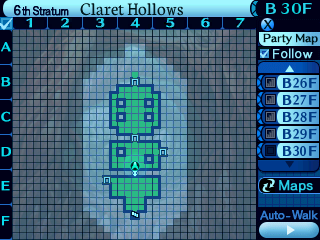
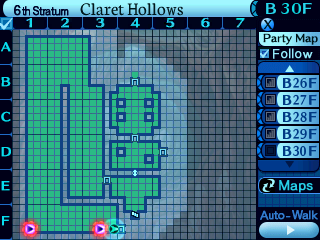
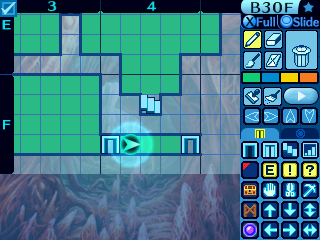
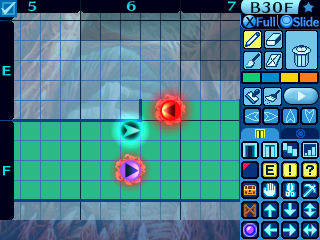
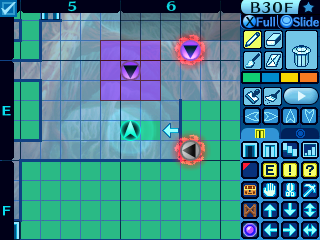
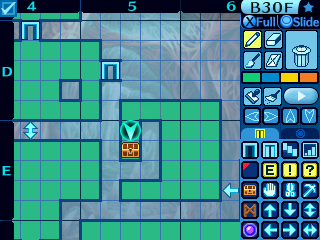
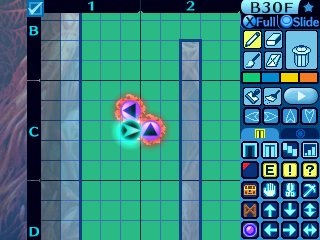
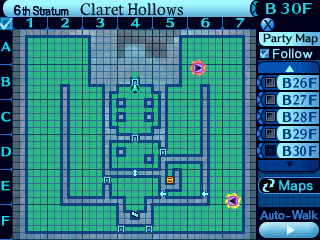
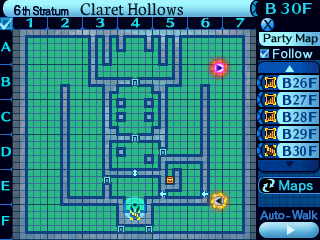
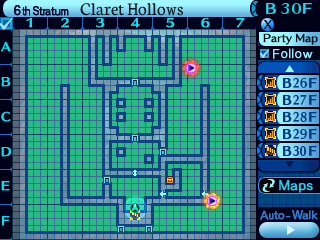
If you're wondering how to find these enemies in the first place, let me show you.
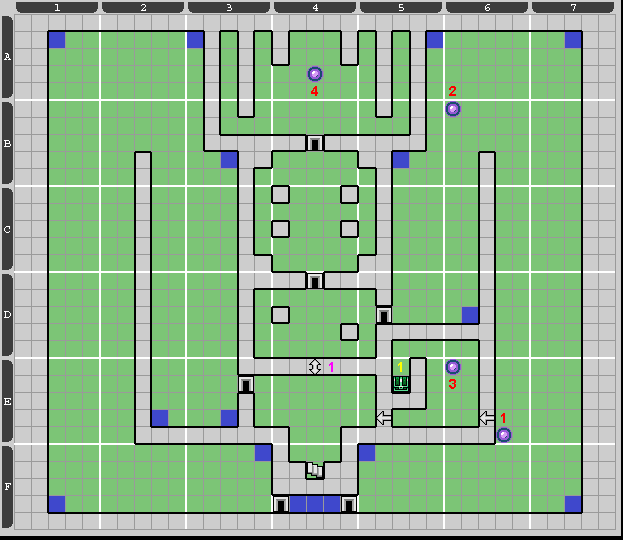
Those tiles I marked in blue are the only places you can find a World Clover. And even then, that's not a guarantee. The hallway at the bottom is the safest place to look for them, though the danger values of the tiles there are pretty low, so it takes a while to get into an encounter, annoyingly.
The encounter formations you can find on said tiles are as follows:
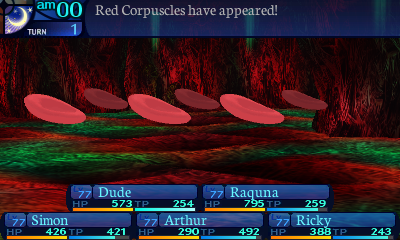
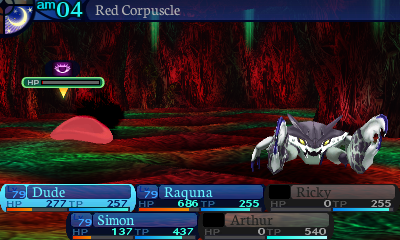
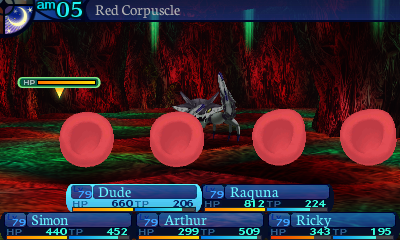
Group 1, 30% chance:
6 Red Corpuscles
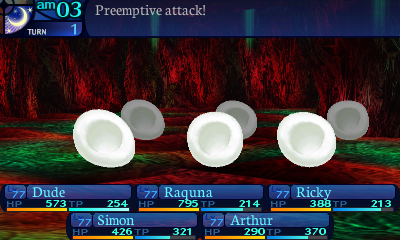
Group 2, 30% chance:
6 Leukocytes
Group 3, 30% chance:
3 Red Corpuscles
3 Leukocytes
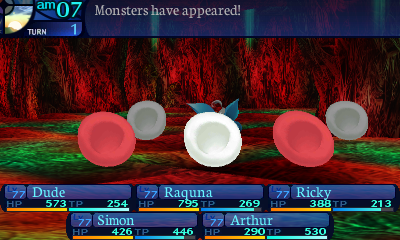
Group 4, 7% chance:
2 Red Corpuscles
3 Leukocytes
1 World Clover
Group 5, 3% chance:
1 World Clover
So it's only 10% of the time that you'll find a World Clover, and only 3% of the time it'll be in a safe formation. You'll probably be here for a while hunting it down. Especially if you want to farm multiples of the equipment its item drop creates.
Aw, that's nice. You faced a freebie Clover in a quest, but if you wanted the equipment from 3 of its drops, then you needed to hunt it in the only tiles it spawned. Unlike here, it didn't have any cocurrent tiles, so you wasted a lot of time getting the wrong encounters. And then the Dinolichs appeared and you had to stop. You could also encounter them on B29F, but you needed to kill the patrolling FOEs and could still get the wrong tile. Would not recommend.
If you wanna know how many times this damn Stratum gave me a heart attack, I've lost track. It's like way too many at this point.
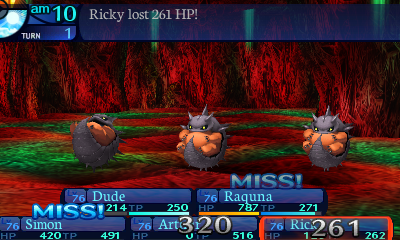
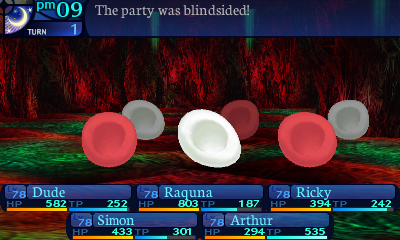
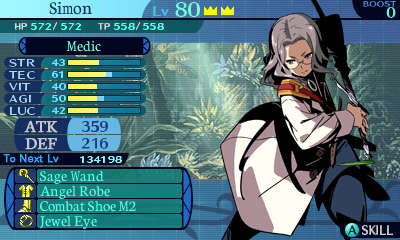
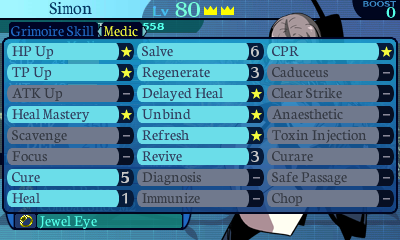
Fortunately this encounter accidentally neutralized themselves as the Red Corpuscles opted to use Red Plasma on Simon. Who had a Jewel Eye equipped.  And only Raquna got hit with White Plasma, so everyone else was able to kill them.
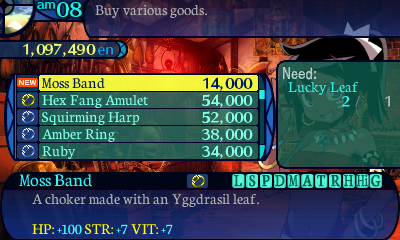
The Lucky Leaf the World Clover drops makes one of the best accessories for physical attackers. +100 HP and +7 to STR and VIT? Yes, please!
Also, really appreciate it game, when you gave a +11 TEC accessory, which is one of the best stats in the game, back in the 5th Stratum. While keeping the BIS STR accessory, which is only +7, at the very end of the game, from a rare enemy. Really appreciate it!
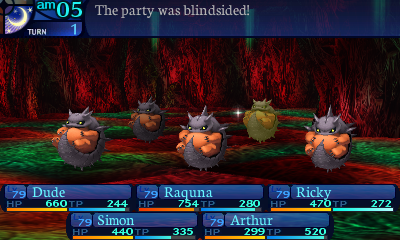
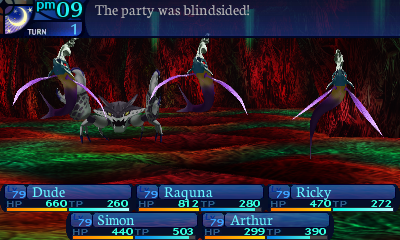
MY WORST NIGHTMARE!!
You may all scream now!
Oh god, this is going to hurt...
Well. So now you know why everyone fears these things. They will destroy you.
And now you may all breathe a sigh of relief!
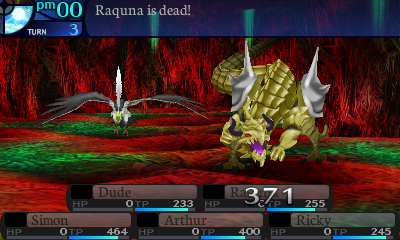
The Depth Dancer opted to summon the Red Corpuscles instead of going for the kill, which gave Raquna the opportunity to escape! Holy fuck that was too close! I cannot believe I made it out of that one alive! That thing had me dead to rights finished, but screwed up spectacularly instead!
Raquna is only surviving these hits due to her insane HP, which is the most important defensive stat in the game, as well as her VIT. Now would be a great time to have her learn Flee.
Beyond the hallway is another dancing in the depths section. Unfortunately, they placed other FOEs in there to make life harder, because fuck you. I hope your dancing skills are up to snuff.
This is the point where I found out something terrifying about Iron Crabs. THEY DO NOT GIVE A SHIT ABOUT PREEMPTIVE ATTACKS! Even during a preemptive, their passive version of Scissor Wrath will still be active, slamming your party for tons of damage if you kill any enemies during that time without targeting them!

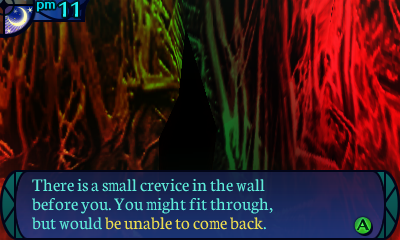
Over here is a 1 way passage. There's definitely something of interest inside, so you may want to check it out.
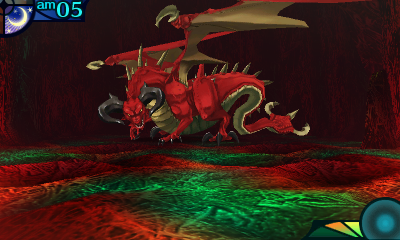
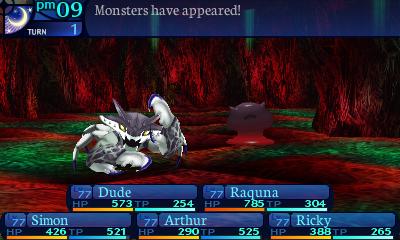
Greetings.
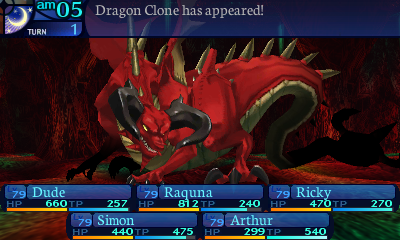

Dragon Clone
Level: 90
HP: 20000
STR: 90
TEC: 65
VIT: 62
AGI: 57
LUC: 60
Attack Type: Bash
EXP Given: 240000
Damage Vulnerabilities:
100% 100% 100%
0% 150% 100%
Disable Vulnerabilities:
30% 50% 50% 10% 30% 50% 20%
10% 10% 20%
30% 50% 30%
Mechanics:
Fire Torrent: Deals overkill fire damage to all party members. Very slow.
Dragon Claw: Deals severe cut damage to one row of party members. Attempts to bind the arms of hit targets, with a moderately low chance. Slightly slow.
Dragon Strike: Deals 3-4 instances of heavy bash damage to random party members. Attempts to stun hit targets, with a moderately low chance. Slightly slow.
Skill Data:
Fire Torrent: Deals 400% ranged TEC-based fire damage to all party members. The damage ranges from 600 to 842 on average. Has a 50% speed modifier and a base accuracy of 120%.
Dragon Claw: Deals 90% melee STR-based cut damage to one row of party members. The damage ranges from 446 to 544 on average. Attempts to bind the arms of hit targets, with a 20% base chance. The effective chance ranges from 23% to 31% on average. Has an 80% speed modifier and a base accuracy of 99%.
Dragon Strike: Deals 3-4 instances of 60% melee STR-based bash damage to random party members. The damage ranges from 297 to 363 on average. Has no limit on how many times one target can be hit. Attempts to stun hit targets, with a 20% base chance. The effective chance ranges from 23% to 31% on average. Has an 80% speed modifier and a base accuracy of 99%.
Enemy Behavior:
-Dragon Clones will always open by using Fire Torrent.
-Dragon Clones will always use Fire Torrent if the current turn is a multiple of 5.
-Dragon Clones start using Dragon Strike when their HP is at 50% or lower.
AI Script:
-If this is the first turn, or the current turn is a multiple of 5, use Fire Torrent.
-If the Dragon Clone's HP is at 50% or below:
--44% chance to use Dragon Strike.
--40% chance to use Dragon Claw.
--Else, Attack.
-If the Dragon Clone's HP is at 100% to 51%:
--69% chance to use Dragon Claw.
--Else, Attack.
Learnable Skills:
Fire Torrent: Deals fire damage to all enemies. Extremely slow.
Dragon Claw: Deals cut damage to one row of enemies. Attempts to bind the arms of hit targets. Average speed.
Grimoire Skill Data:
Fire Torrent: Deals ranged TEC-based fire damage to all enemies. Has a 40% speed modifier and a base accuracy of 120% at all levels.
Dragon Claw: Deals melee STR-based cut damage to one row of enemies. Attempts to bind the arms of hit targets. Has no speed modifier and a base accuracy of 99% at all levels.

Drops:
-Normal: Dragon Core. 100% chance. Sells for 13000 en.
-- Four-Leaf Clover (20% chance to add several levels to any Grimoires generated on the turn of use): Made from 1 Dragon Core. Costs 10000 en.
-Conditional: Wyrm Head (Kill with cut damage). 100% chance. Sells for 29000 en.
-- Dragon Helm (+57 DEF, +20 HP, +20 TP; Highlander only): Made from 1 Wyrm Head. Costs 60000 en.
Weaker version of an upcoming boss, do as you see fit.
Wrymoid has less dangerous skills than its original, but could still kick your ass. Nothing too special about it, but it's only scary due to Wyrm being the toughest dragon to face.
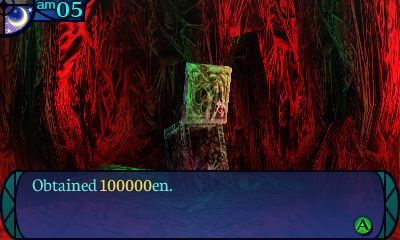
As for what he was guarding, it was money. But also, the final chest in the entire game!

If you looted all the Gladsheim chests as well, you'll be rewarded with this medal. Unfortunately that means yes, Classic is locked out of this achievement. Great move there.
On the next installment of "WHAT THE FUCK, ATLUS!?"


I also found out that Phoenix Wings does jack shit against Iron Crabs. If you don't kill them at the same time as all the others, you just fucking die. I'm honestly speechless.
And yes, this happened right after looting the treasure chest, so I have to go all the way back to the Dragon Clone's room and kill it again. Sigh.
Please don't do Claret Hollows on Expert.
quote:
On the next installment of "WHAT THE FUCK, ATLUS!?"
quote:
quote:
On the next installment of "WHAT THE FUCK, ATLUS!?"
We're leaving. We're leaving Claret Hollows.
This game will not be satisfied until I am nothing more than a small red smear upon its floor of blood vessels.
PLEASE DO NOT DO CLARET HOLLOWS ON EXPERT
Rosa, a cup of your finest cordial, please.
Excellent.
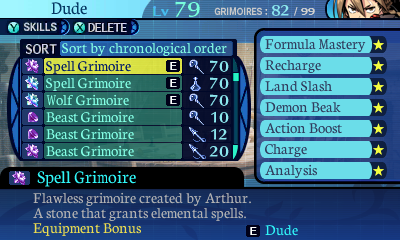
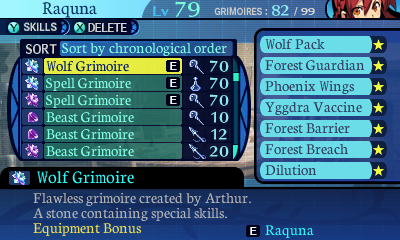
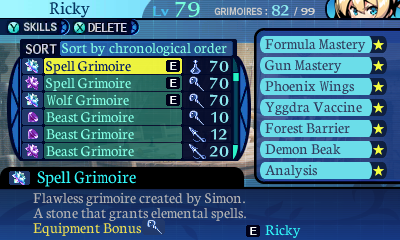
After farming for fucking hours for the last remaining Grimoires I needed, I now have a set of perfectly optimized Grimoire Stones. After I am done with this game, it shall be nothing but dust in my hands.
The game clearly wants to fucking murder me. So I am going to fucking murder the game right back!
FOR FUCK'S SAKE!
That murder lasted long.
So uh, here's a rather big problem with floor 30. Quite frequently, the game can decide to spawn completely impossible to escape from Depth Dancer formations.
You're probably thinking "you're just terrible at this game, just plan out your route better." Unfortunately, it can just decide to just spawn an unescapable formation just a few steps after entering the room. I've experienced this multiple times myself, and it's rather frustrating.
"Just escape, you idiot." Well uh, escape rates suck in this game. I can try, but most likely it'll just end with me going on a paid vacation to the game over screen, especially when they outspeed me. Flee doesn't really count, as it forces me to start the floor all over.
"Why not just kill the Depth Dancer, you coward?" I mean I can try, but most likely I'll be seeing the game over screen through that method as well.
In short, getting through this floor can be slightly luck based. You can do things to mitigate the luck, but sometimes, the game just deals you a really bad hand, and there's little you can do about it. After all, it's the final floor of Claret Hollows. It's not going to make this easy for you.
Oh and you have to get through this entire floor in one go. There's only 1 shortcut, which was the one that basically skips the entire floor.
If you are thinking Arax isn't good at this game, you can fuck off. It's definitely fun seeing how much this series can fuck you over, but fuck me there's a limit, and Atlus realised this, since future postgames are not this horrifying. Uh, EO2U's B31F excluded, of course. I believe this was in response to how easy they made EO4's Hall of Darkness, and that's fine, but go too far in the other direction and it's just not fun. I know, it's not satisfying dropping down the difficulty and breezing through this section on Picnic. If you legitimately clear Claret Hollows on Expert, give yourself a pat on the back, but you really, REALLY don't have to. I'll always advocate having fun with a game before completing a game, so cheat, drop the difficulty, or beat your head on the Depth Dancer spawning walls like a masochist for internet points. Do whichever method you prefer, it's cool, we're all Etrian Odyssey lovers here.
Fun fact, it's actually been hours before I was even able to get back to the point where I previously wiped.
Oh by the way, don't use Kupala's benefits on floor 30. They're an absolute death sentence because if they kill an enemy in a formation that has an Iron Crab in it, you'll instantly get Scissor Wrath'd.
Okay, I finally made my way back to the Dragon Clone room after several hours of failed attempts, and rebeat the Dragon Clone. And here's your exit out of this secret room.
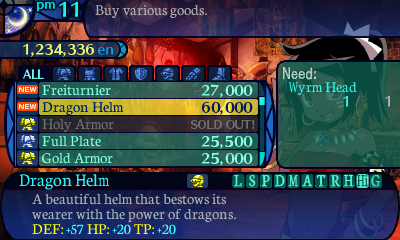
The Dragon Clone's conditional drop makes a Highlander exclusive helmet. I guess those secondary stats are alright, but I don't bother grabbing this for Dude.
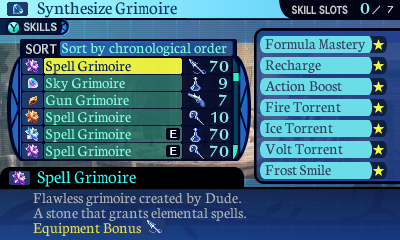
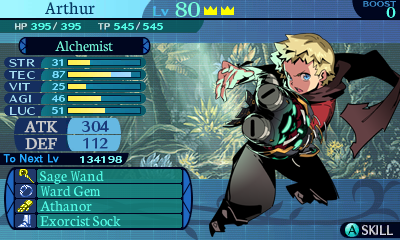
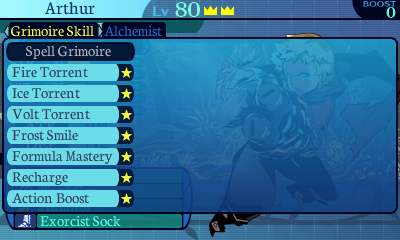
I got the last Torrent from Arthur, and fused it onto his Grimoire Stone. He now has ultimate power.
Something nice about this Nether Tortoise is that it can act as a shield against these Depth Dancers. As if they crash into it, they die. Unfortunately I screwed up this part of the floor and had to start all over.
And of course, they had to throw yet another wrench into the mix, by forcing you to navigate past this Bane Lizard.

I failed to do so.
I've never figured out this room, so I just encountered everything and ran away. But of course you can do that on Picnic.

But eventually, I MADE IT OUT! It only took seven hours!
Yeah, that's a pretty huge story advantage right there, they get to skip out on B30F. Playing Classic? Yeah have fun doing all that in 1 go.

So after making it through all that, what awaits you at the end?
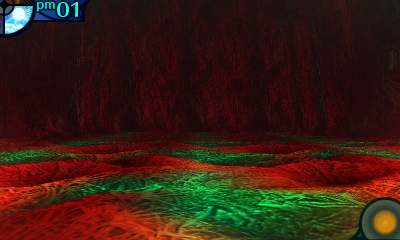

Nothing. There's nothing in this room.


Or so it seems.
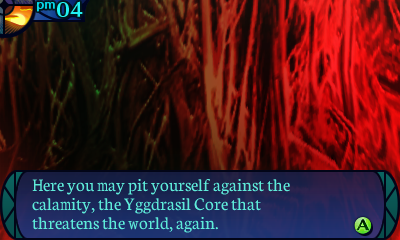
We're not going to be doing that just yet. But here's the last place the Story advantage rears its ugly head. In Classic Mode, the Yggdrasil Core would be waiting for you beyond that door. If you killed it, you had to wait 14 days for it to respawn, just like all the other bosses. But in Story, you can just interact with that spot on the wall to rematch it anytime, even if you've killed the true version before.
This was the case for the original, reenter the labyrinth and boom, you can fight it again. Though why the hell would you.

At any rate, we're done with floor 30 for good. And by extension, the entire Labyrinth!
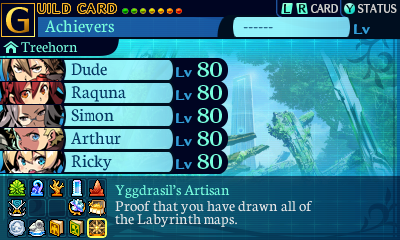
Map completion is judged by how many floor jumps in the game we've activated. If we've activated it for every single staircase in the game, we get this medal signifying that we've fully mapped out the entire Labyrinth. And since Gladsheim doesn't have any staircases, this is actually a medal you can get in Classic Mode.
There's not much left in the game to do. Just a few loose ends to tie up now...
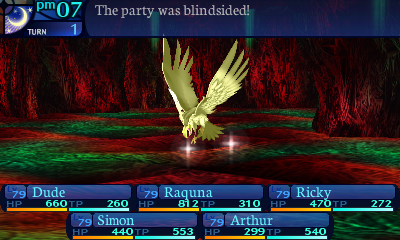
COME AT ME YOU FEATHERY BASTARD!
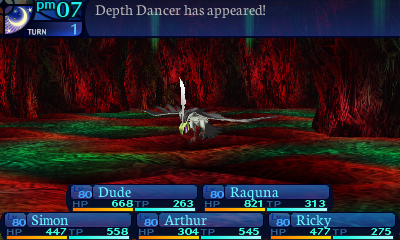

Depth Dancer
Level: 84
HP: 14200
STR: 88
TEC: 56
VIT: 55
AGI: 65
LUC: 53
Attack Type: Stab
EXP Given: 160000
Damage Vulnerabilities:
100% 125% 100%
50% 50% 50%
Disable Vulnerabilities:
0% 50% 50% 50% 50% 50% 50%
10% 10% 50%
50% 50% 50%
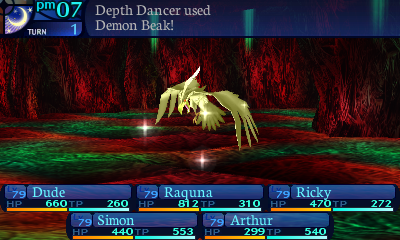
Mechanics:
Demon Beak: Deals overkill stab damage to all party members. Attempts to inflict blind on hit targets, with a basically-guaranteed chance. Average speed.
Skill Data:
Demon Beak: Deals 150% melee STR-based stab damage to all party members. The damage ranges from 738 to 902 on average. Attempts to inflict blind on hit targets, with a 100% base chance. The effective chance ranges from 108% to 145% on average. Has no speed modifier and a base accuracy of 99%.
Enemy Behavior:
-Depth Dancers will open by either using Demon Beak, or by summoning Red Corpuscles.
-If Depth Dancers are alone, they have a high chance of summoning Red Corpuscles.
-Depth Dancers are far more likely to use Demon Beak when they're at 50% HP or lower.
AI Script:
-If this is the first turn:
--49% chance to use Demon Beak.
--Else, summon two Red Corpuscles to the front row.
-If the turn count is under 30, and the Depth Dancer is the only alive enemy, 59% chance to summon two Red Corpuscles to the front row.
-If the Depth Dancer's HP is at 50% or lower:
--74% chance to use Demon Beak.
--Else, Attack.
-If the Depth Dancer's HP is at 100% to 51% HP:
--34% chance to use Demon Beak.
--Else, Attack.
Learnable Skills:
Demon Beak: Deals stab damage to all enemies. Attempts to inflict blind on hit targets. Average speed.
Grimoire Skill Data:
Demon Beak: Deals melee STR-based stab damage to all enemies. Attempts to inflict blind on hit targets. Has no speed modifier and a base accuracy of 99% at all levels.

Drops:
-Normal: Sinister Beak. 70% chance. Sells for 4500 en.
-- Abaddon (+209 ATK, +5 TEC): Made from 1 Sinister Beak. Costs 79700 en.
-Conditional: Stiff Wing (Kill while legs are bound). 100% chance. Sells for 27000 en.
-- Ghost Vest (+95 DEF, +5 TEC, +9 LUC; Dark Hunter only): Made from 1 Stiff Wing. Costs 85500 en.
Depth Dancers are without a doubt, one of the deadliest FOEs in the game, and considered by some to be the strongest FOEs in the entire series. That's not a title given lightly, and it certainly is a contender for it. Unlike the other FOEs, it really doesn't have that much that can count as a free turn, and getting a preemptive on it isn't feasible. The only thing that comes close to a free turn is its summon.
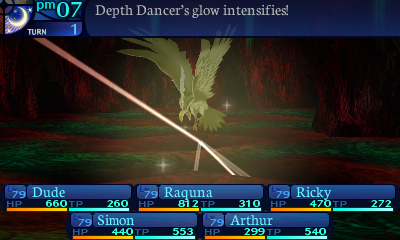
Demon Beak is just a super hard hitting attack, and the Depth Dancer is so fast that it's likely to cut off your escape attempts by pecking your party members' eyes out. And in a toe-to-toe battle, it'll be likely to deal a ton of damage and is going to blind you. Fun. Oh, but it has another trick up its sleeve. It can summon help. Red Corpuscles, you know, those enemies with the slightly inaccurate attack that's guaranteed to instantly kill you if it lands. And since Demon Beak is a nearly guaranteed blind, Red Plasma basically becomes a guaranteed instant death.
Not only that, but the Depth Dancer is really resistant to elemental attacks, so you can't just easily erase it with an Alchemist. Disables are pretty much your only form of reliable defense against it, as its offenses are just too overwhemling to defend against them in the conventional ways.
Of course, if your party is capable of clearing out the Red Corpuscles easily, you could potentially lock the Depth Dancer in a cycle of summoning help over and over again, without it ever attacking you. So there's a potential strategy to consider when dealing with these things.
Another FOE that got a massive upgrade, but that's fine, buff them as much as you want, but chill on the regular encounters lmao. Macabres were still deadly, but bugged. They always blindsided and just killed someone, since their AI was supposed to buff during that free turn, but it pointed to the default attack table and, yeah. That was about it, once you recovered, they weren't a big deal. They also had an FOE-lite, the Lucifird, that you could practise on, that sadly isn't in this game.
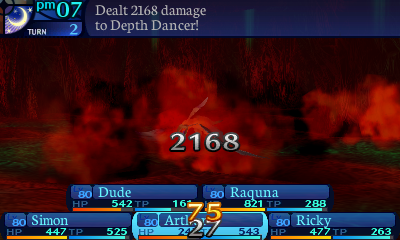
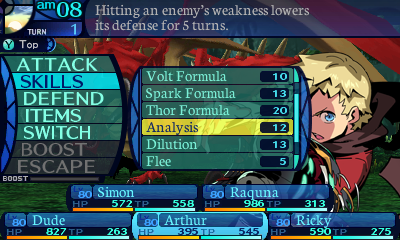
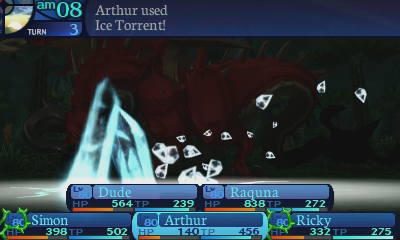
Even with a huge amount of elemental resistance, Arthur is still utterly roasting it. Just goes to show you how strong the Torrents and TEC stacking are.
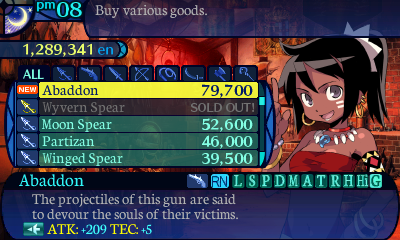
Revenge is so so sweet! The Depth Dancer's normal drop makes the penultimate Gun for Ricky.
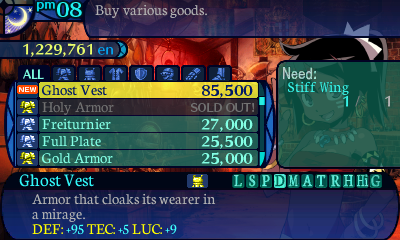
While its conditional drop makes the Dark Hunter's ultimate armor, which we can't use. I'm sure they'll enjoy it though.
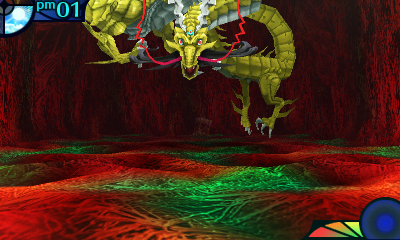
With that nuisance out of the way, it's time to take on one last adversary...


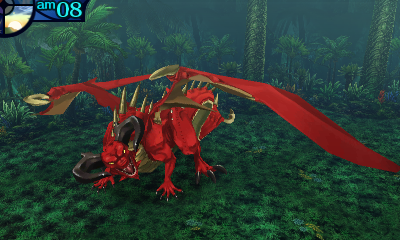
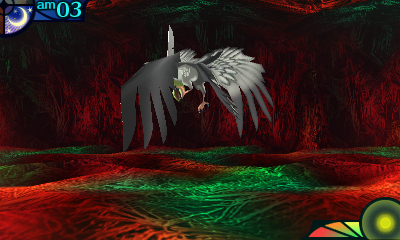
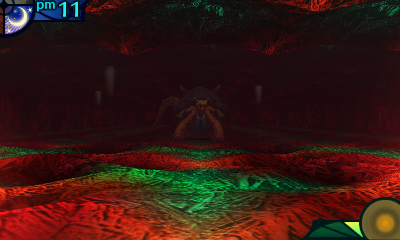
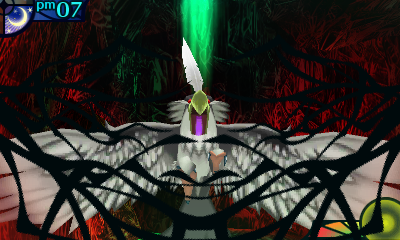
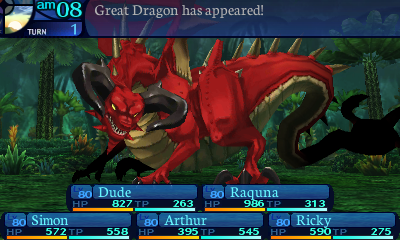
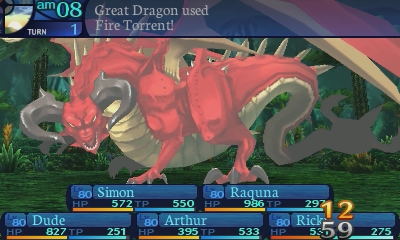
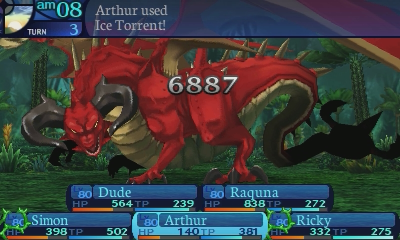
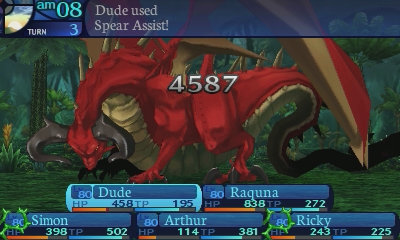
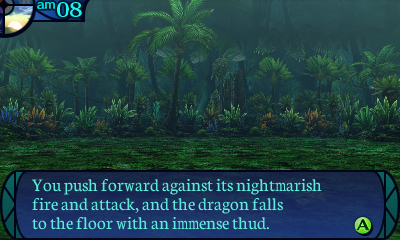
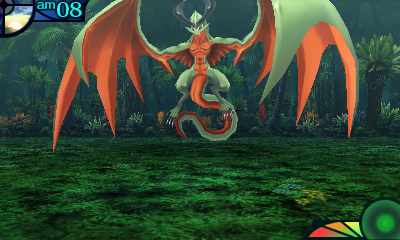
The lair of the terrifying Wyvern has been taken over by an even more frightening interloper. Humongous and red like fire, its very strength fills the air, causing you to tremble.
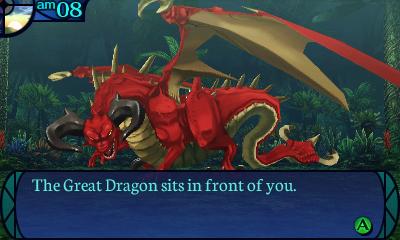
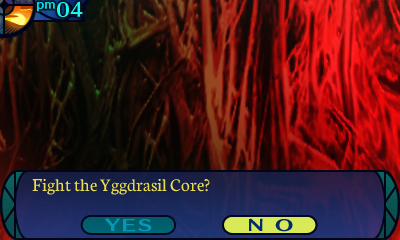
Do you have the courage to take on this dragon!? If you do, step forward!
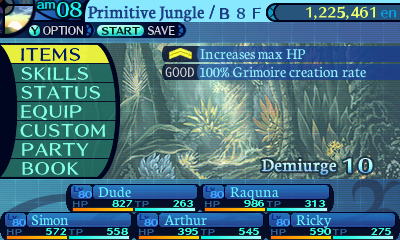


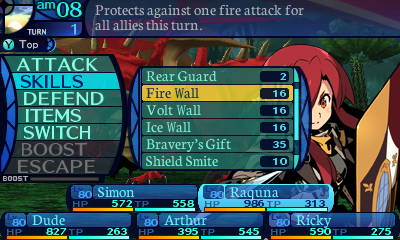
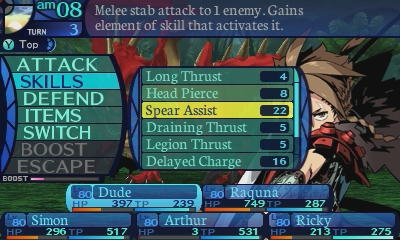
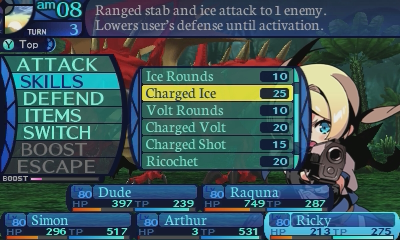
The Great Dragon has access to binds and Panic, so you may want to bring protection for those. Oh and Metopons, as he likes to buff himself.
Unfortunately, due to the way he's positioned, you can't get a preemptive on him like you could with Wyvern.
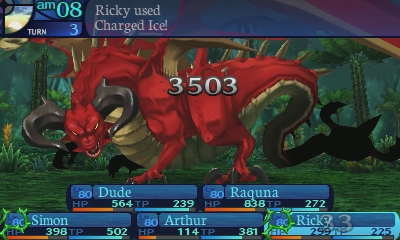
 Video: Great Dragon
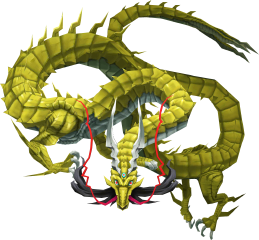
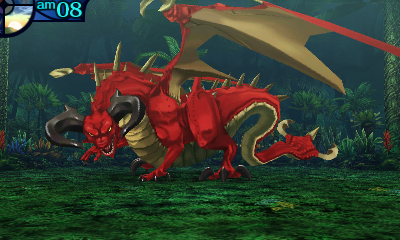
Great Dragon
Level: 90
HP: 45000
STR: 95
TEC: 75
VIT: 64
AGI: 59
LUC: 62
Attack Type: Bash
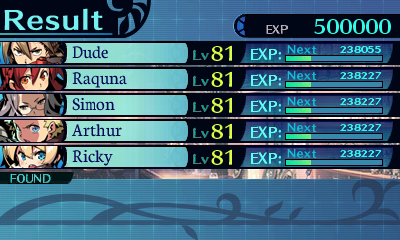
EXP Given: 600000
Damage Vulnerabilities:
100% 100% 100%
0% 150% 100%
Disable Vulnerabilities:
30% 50% 50% 10% 30% 50% 30%
0% 0% 20%
30% 50% 30%
Mechanics:
Fire Torrent: Deals overkill fire damage to all party members. Very slow.
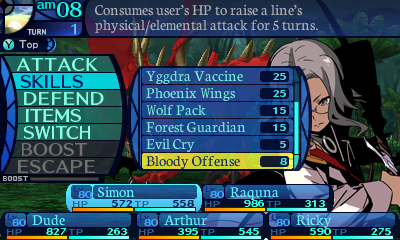
Resonant Roar: Reduces all party members' physical attack by 50% for 4 turns. Attempts to inflict panic on all party members, with a very high chance. Average speed.
Dragon Strike: Deals 4-6 instances of severe STR-based bash damage to random party members. Attempts to stun hit targets, with a moderately low chance. Slightly slow.
Draconic Fury: Increases Great Dragon's attack by 50% for 4 turns. Average speed.
Dragon Claw: Deals overkill cut damage to one row of party members. Attempts to bind the arms of hit targets, with a moderately low chance. Slightly slow.
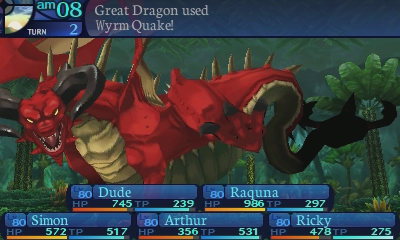
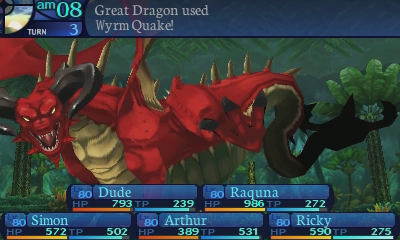
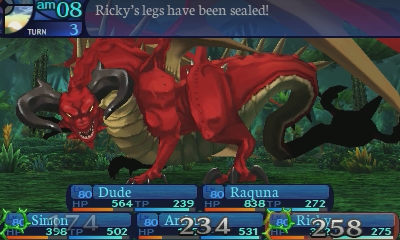
Wyrm Quake: Deals very severe bash damage to all party members. Attempts to bind the legs of hit targets, with a moderately low chance. Slow.
Skill Data:
Fire Torrent: Deals 500% ranged TEC-based fire damage to all party members. The damage ranges from 1018 to 1414 on average. Has a 50% speed modifier and a base accuracy of 180%.
Resonant Roar: Reduces all party members' physical attack by 50% for 4 turns. Attempts to inflict panic on all party members, with a 50% base chance. The effective chance ranges from 63% to 85% on average. Has no speed modifier.
Dragon Strike: Deals 4-6 instances of 70% melee STR-based bash damage to random party members. Has no limit on how many times one target can be hit. The damage ranges from 392 to 478 on average. Attempts to stun hit targets, with a 20% base chance. The effective chance ranges from 25% to 34% on average. Has an 80% speed modifier and a base accuracy of 99%.
Draconic Fury: Increases Great Dragon's attack by 50% for 4 turns. Has no speed modifier.
Dragon Claw: Deals 100% melee STR-based cut damage to one row of party members. The damage ranges from 560 to 684 on average. Attempts to bind the arms of hit targets, with a 20% base chance. The effective chance ranges from 25% to 34% on average. Has an 80% speed modifier and a base accuracy of 99%.
Wyrm Quake: Deals 80% melee STR-based bash damage to all party members. The damage ranges from 448 to 547 on average. Attempts to bind the legs of hit targets, with a 20% base chance. The effective chance ranges from 25% to 34% on average. Has a 70% speed modifier and a base accuracy of 99%.
Enemy Behavior:
-Great Dragon always opens with Fire Torrent.
-Fire Torrent, from then on, is always used as a followup to Resonant Roar.
-Resonant Roar has a cooldown of 5 turns at above 50% HP. When he is below that threshold, its usage is randomized, and there's a small chance that the cooldown will be set to 5 instead.
-Great Dragon will actively avoid using Draconic Fury if its head is bound.
-Draconic Fury is very likely to be used when Great Dragon first hits 50% HP. It will stop being used when Great Dragon is at 10% HP or less.
-Phase 1: Used when Great Dragon is between 100% and 76% HP. He uses Wyrm Quake, Dragon Claw, and normal Attacks here.
-Phase 2: Used when Great Dragon is between 75% and 51% HP. Great Dragon starts prioritizing Dragon Claw over Wyrm Quake and normal Attacks.
-Phase 3: Used when Great Dragon is between 50% and 26% HP. He starts randomizing the use of Resonant Roar and, by extension, Fire Torrent here. He also starts using Dragon Strike.
-Phase 4: Used when Great Dragon is between 25% and 11% HP. Normal Attacks are completely phased out here.
-Phase 5: Used from 10% HP to death. Great Dragon stops using Draconic Fury here.
AI Script:
-If this is the first turn, use Fire Torrent.
-If the Fire Torrent flag is set, use Fire Torrent, and unset the Fire Torrent flag.
-If the Great Dragon's HP is at 50% or lower:
--If the Resonant Roar cooldown is less than or equal to 0, use Resonant Roar, set the Fire Torrent flag, and set the Resonant Roar cooldown to 6.
--If the Resonant Roar cooldown is less than or equal to 1, 39% chance to use Resonant Roar, set the Fire Torrent flag, and set the Resonant Roar cooldown to 6.
--If the Resonant Roar cooldown is less than or equal to 2, 29% chance to use Resonant Roar, set the Fire Torrent flag, and set the Resonant Roar cooldown to 5.
-If the Great Dragon's HP is at 100% to 51%, and the Resonant Roar cooldown is less than or equal to 1, use Resonant Roar, set the Fire Torrent flag, and set the Resonant Roar cooldown to 6.
-If the Great Dragon's head is bound:
--69% chance to use Dragon Strike.
--Else, use Wyrm Quake.
-If the Great Dragon's HP is between 50% and 10%, and the Draconic Fury flag is not set, 64% chance to use Draconic Fury, and set the Draconic Fury flag.
-If the Great Dragon's HP is between 100% and 10%, and the Draconic Fury cooldown is less than or equal to 0, 69% chance to use Draconic Fury.
-If the Great Dragon's HP is at 25% or lower:
--9% chance to use Wyrm Quake.
--Else, 50% chance to use Dragon Strike.
--Else, use Dragon Claw.
-If the Great Dragon's HP is at 50% or lower:
--39% chance to use Dragon Strike.
--Else, 25% chance to use Wyrm Quake.
--Else, 25% chance to use Dragon Claw.
--Else, Attack.
-If the Great Dragon's HP is at 75% or lower:
--24% chance to use Wyrm Quake.
--Else, 55% chance to use Dragon Claw.
--Else, Attack.
-If the Great Dragon's HP is between 100% and 76%:
--54% chance to use Wyrm Quake.
--15% chance to use Dragon Claw.
--Else, Attack.
Learnable Skills:
Fire Torrent: Deals fire damage to all enemies. Very slow.
Draconic Fury: Increases the user's attack for 4 turns. Average speed.
Dragon Claw: Deals cut damage to one row of enemies. Attempts to bind the arms of hit targets. Average speed.
Grimoire Skill Data:
Fire Torrent: Deals ranged TEC-based fire damage to all enemies. Has a 40% speed modifier and a base accuracy of 120% at all levels.
Draconic Fury: Increases the user's attack for 4 turns. Has no speed modifier at all levels.

Dragon Claw: Deals melee STR-based cut damage to one row of enemies. Attempts to bind the arms of hit targets. Has no speed modifier and a base accuracy of 99% at all levels.
Drops:
-Normal: Fire Fang. 100% chance. Sells for 25000 en.
-- Flame Axe (+229 ATK, +30 TP, bash+fire normal attacks): Made from 1 Fire Fang. Costs 163000 en.
-Rare: Fire Scale. 25% chance. Sells for 35000 en.
-- Shinryuu (+210 ATK, +5 all stats): Made from 1 Fire Scale (Great Dragon rare), 1 Ice Scale (Blizzard King rare), and 1 Volt Scale (Storm Emperor rare). Costs 200000 en.
-Conditional: Heat Horn (Kill with fire damage). 100% chance. Sells for 60000 en.
-- Megido Gun (+232 ATK, stab+fire normal attacks): Made from 1 Heat Horn. Costs 240000 en.
Great Dragon has pretty much stayed the same boss in the entire series, aside from some extremely minor tweaks here and there. There's not really much to him, he's just a straightforward slugfest. As a result, he's by far the easiest fight in terms of mechanics, so all you really have to watch out for is passing his stat checks, a few of his attacks, and just his overall damage.
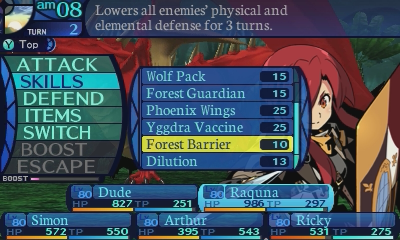
He has two attacks that can bind you, and a disable in his telegraph, Resonant Roar. It inflicts a heavy physical debuff as well, so you'll also want some way to deal with that, such as unihorns or attack buffs. It also has Panic tied to it, which is probably the biggest thing you want to protect against. He can also buff up his damage further with Draconic Fury, but that's easily dealt with by debuffing his attack, or throwing a Metopon at him. Aside from that, use your damage rotations and defensives as you see fit.
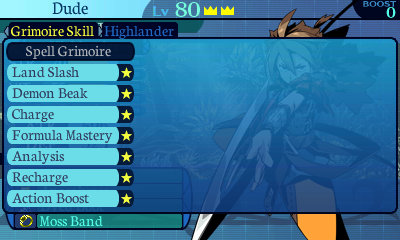
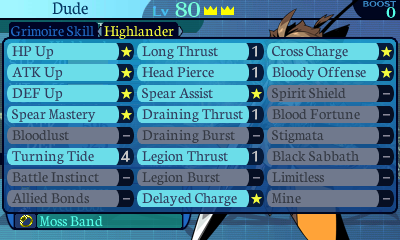
As for Grimoire Skills, Draconic Fury is definitely worth going for, as it's the strongest buff in the entire game! No other buff ever goes beyond 50% without having to be boosted, but Draconic Fury is the only one to do so, giving a 65% damage boost at level 10, which goes up to 80% when boosted.
Ah, another day, another dragon. Wyrm is pretty much the same in the original, so the same strategy applies. Though with its endless party wide attacks, it made excellent Bait, uh, bait. This fight made a Troubadour mandatory since if Howling removed the ATK buff from Bravery, or any ATK buff in general, it didn't roll the Panic infliction, incredibly useful. Otherwise either it killed you or you killed it, there was not middleground with this fight and I'm glad they kept it mostly the same, even after all this time, it's a fun fight.
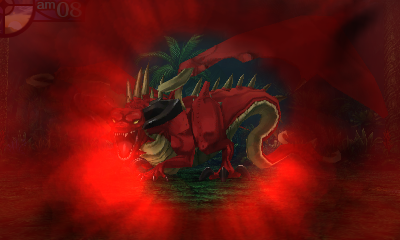
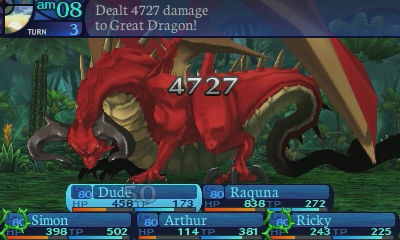
Instead of giving the Great Dragon the slugfest he wants, Claret Hollows has pissed me off, so I'm going to play a game instead. It's called "how fast can Araxxor eviscerate 45,000 HP?" Take your bets now!

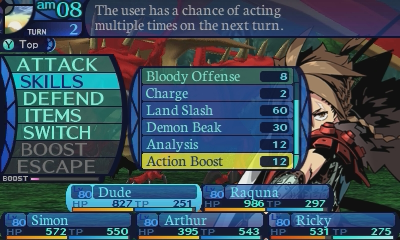
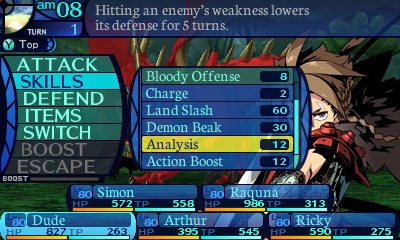
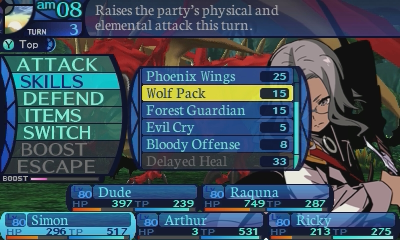
I am going to pile on every single damage multiplier I can.
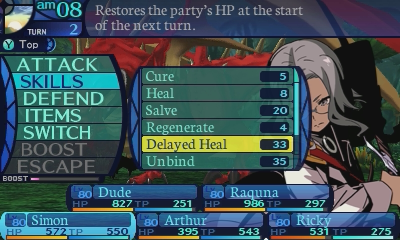
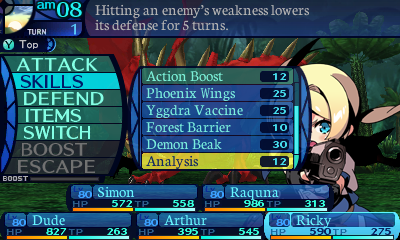
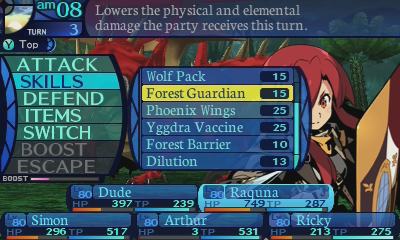
Can't forget my safety nets though! Never attempt to kill a territorial dragon without the proper protection!
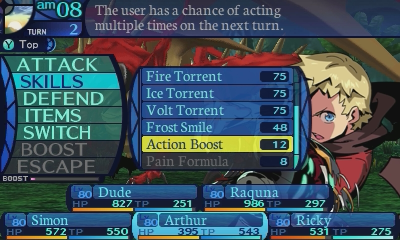
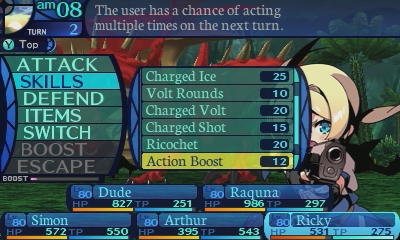
And loading up my artillery!
Close call for Arthur there. He was left with 3 HP!
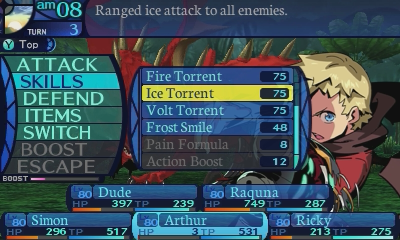
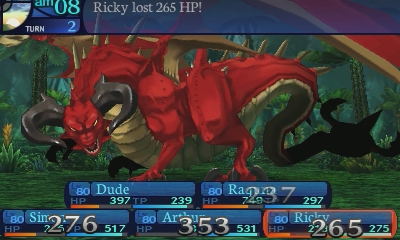
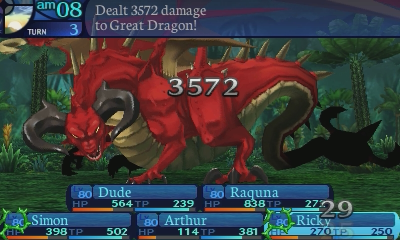
Now let's see how much murder we can do this turn!
Not even a setback.
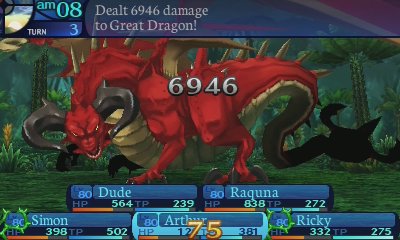
That's a lot of murder!
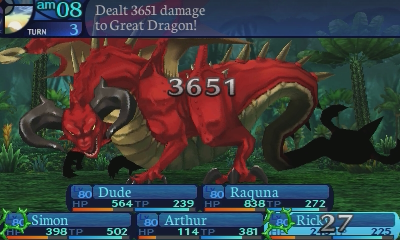
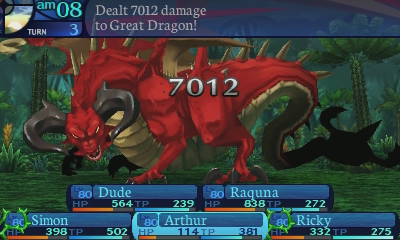
Even more murder!
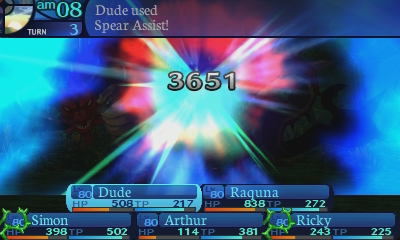
 A low effort win. I like it.
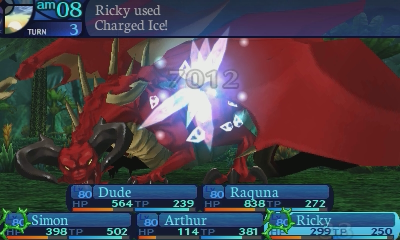
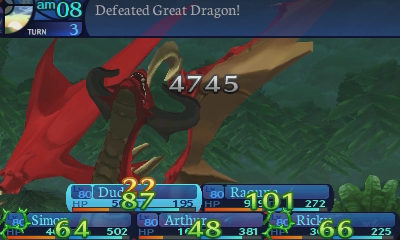
Oh, there's our answer! 3 turns! AHAHAHAHAHAAAA!
Action Boost is so fucking stupid.


Great Dragon has the least amount of mechanics to deal with out of all the dragons, as such, he's basically the most straightforward fight by far.


 D-Did we win...?
 Y-Yes, I think so...
Panting for breath, you watch the dragon closely, but it shows no signs of moving again. You have managed to defeat theGreat Dragon, a dread adversary with tremendous power!
 Hell yeaaaaah! We did it! We won!
I was in a cold sweat near the end... But with our abilities combined, we were able to defeat it.
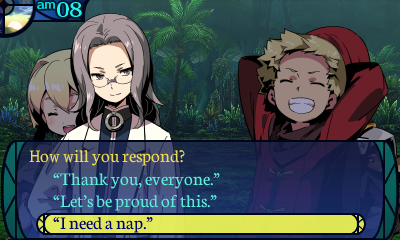
 I need a nap.
 Me, too. This fight tired me out. I want to go home and sleep.
But food first, right? Food! I'm starving here!
 Then let's get back to the Golden Deer and celebrate with something to eat!
 It sounds to me like you're simply more interested in drinking.
Of course I am! The first drink after a fight like this is going to be the best!
You don't even deny it... Well, I can understand the sentiment.
All right, Dude. Let's get back to town and report this.
 I'm sure everyone will be happy to hear the news.
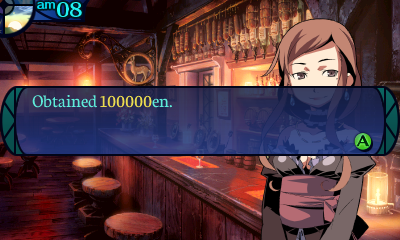
Taking heart from this victory, you decide to return to town and report what you have accomplished.
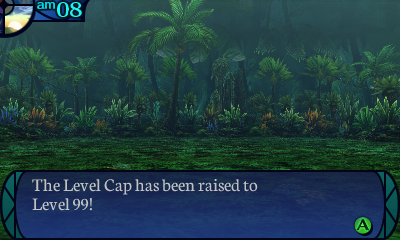
We have obtained ultimate power.
If you're wondering why killing a dragon just suddenly grants us a power boost, there was actually a reason for that in the previous games. In EO3 and 4, upon killing a dragon, their body would turn into a gem, which your guild would touch, granting them more power. This got cut out of the later games and just killing a level cap boss increases your power.
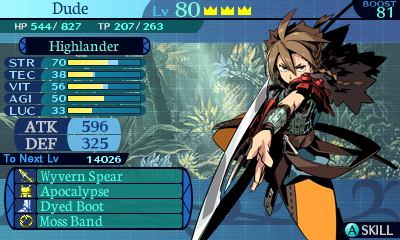
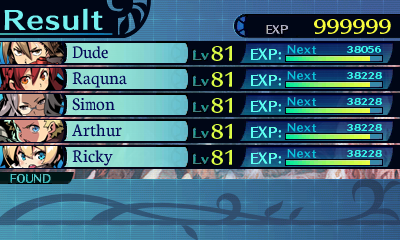
And we are now triple crowned. This is our true limit.
Oh and if you're wondering what happened to Wyvern...
She got evicted. She resides in this room now, so you can rematch her if you so wish, despite the Great Dragon taking over her nest. However, due to the way she's positioned in the room, you can no longer get preemptives on her. But at least you no longer have to make your way through her lasers.
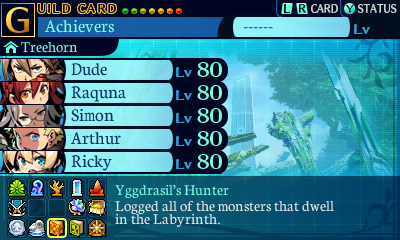
Now that we've seen every single monster in the Labyrinth, we get this medal! Remember, the Cutscene Core is counted as the actual Yggdrasil Core in the codex.


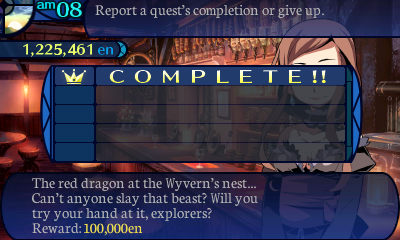
Good work, really. You've done everyone a service by killing that red dragon. I'm so glad I asked you. You guys are incredible. That's the only word I can think of to describe you. I'll inform the Hall about the defeat of the red dragon.
And we're now done with every single quest in the entire game.
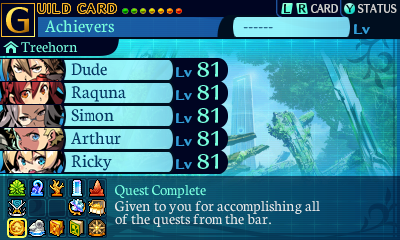
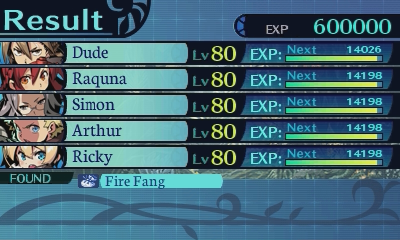
For that, we're rewarded with the highest tier of the quest medal. Now lets take a look at our loot.
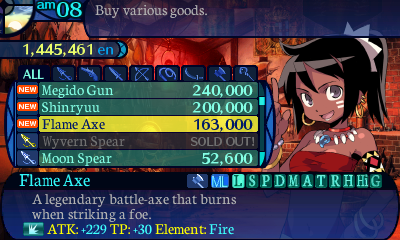
The Great Dragon's regular drop makes... an Axe, I guess. Pales in comparison to the ultimate Axe you get from Golem.
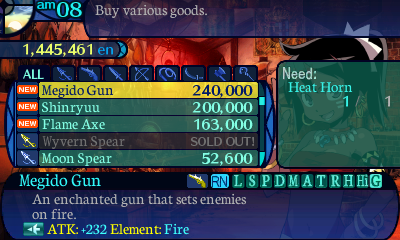
His conditional drop on the other hand, makes Frederica's ultimate Gun. Pretty straightforward, has high attack and is imbued with fire. But there's more to this gun than it seems, ohoho! But you'll have to wait until the next update to see what I'm talking about. Of course, I purchase it for Ricky.
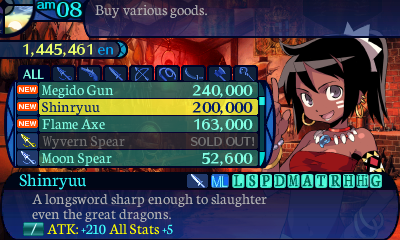
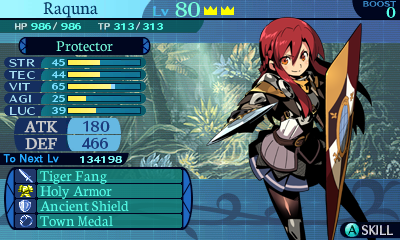
If you manage to get all 3 of the Dragon Trio's scales, you are rewarded with the Shinryuu Sword. This is a weapon that anyone can equip, and it grants +5 stats to the holder. I pick this up for Raquna, finally getting rid of that Tiger Fang she's had for a long time, as she'll most certainly appreciate the stat boosts!
With that done, there's only one final challenge left to tackle. The true version of the Yggdrasil Core. There's... just one problem.
We're at too low a level to even think about tackling the Yggdrasil Core. We would get slaughtered, as it's at level 99. So how do we grind up there in a timely manner?
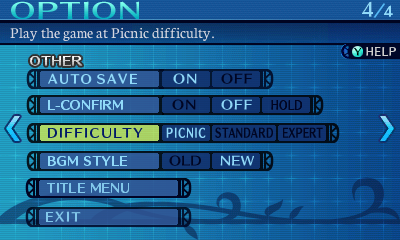
First, set the difficulty to Picnic.
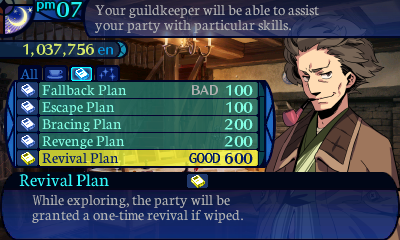
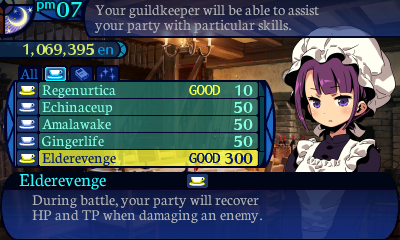
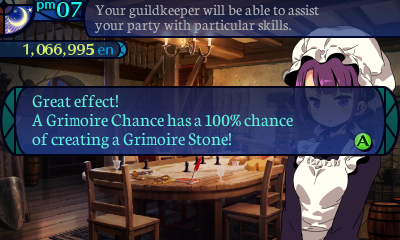
Then check in with your guildkeepers, and see if they have any benefits that have a good effect. You're not really looking for a specific benefit here, just if they have the good effect next to them. If you don't see any, head into the forest and win a battle, then check back here until you get an effect that has a good one.
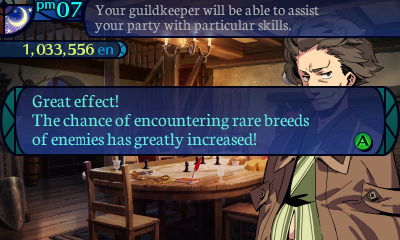
The effect you want is the one that increases the rate at which you see rare breeds. This triples the spawn rate of those, so you really want to get this effect. If you don't get the great effect you want, head into the forest and immediately head back out without getting into a battle so you can try again.
You may also want to bring some Divine Gifts for this next part, as that increases your exp payouts by 40%. But if you're playing the European version, you're stuck with having to farm for the Servitor Ant's conditional drops for those.

Head down to B30F and then...
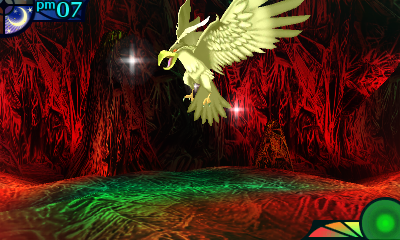
SLAUGHTER EVERY SINGLE GOLDEN DEPTH DANCER IN SIGHT!
Since Depth Dancers spawn endlessly, you effectively have an endless source of free exp to farm. And if you need to heal up or restore your TP, there's a spring on floor 28 you can head over to.
If you're using Citra to play these, and I'd recommend it, it runs the games pretty well, please use exp cheats instead. You're welcome!
And now I'll revel in the murder of Depth Dancers until I'm ready to take on the Yggdrasil Core. I'll see you all then.