Toggle Background Color
Part XXXI: The Tales We Told
So why is this Part XXXI when the final part is Part XXX? Production order rather than release order, let's say, shall we? Let's.

Welcome to the post-game, one and all. In Tales fashion in more recent games, there's special post-game content that only unlocks after you finish the game. What happens is that after you see the ending, you'll be prompted to create a save file before you're dumped back to the title screen. If you take the game up on that, you'll create a save file that has a star in the save game icon; this indicates you're in the post-game roam and can do whatever you want...provided the window for seeing that content still hasn't elapsed. As I remarked near the start of the thread when we were in Hellawes the first time, there's not a whole of substance, as in, content that could potentially carry over between playthroughs, that's permanently missable.
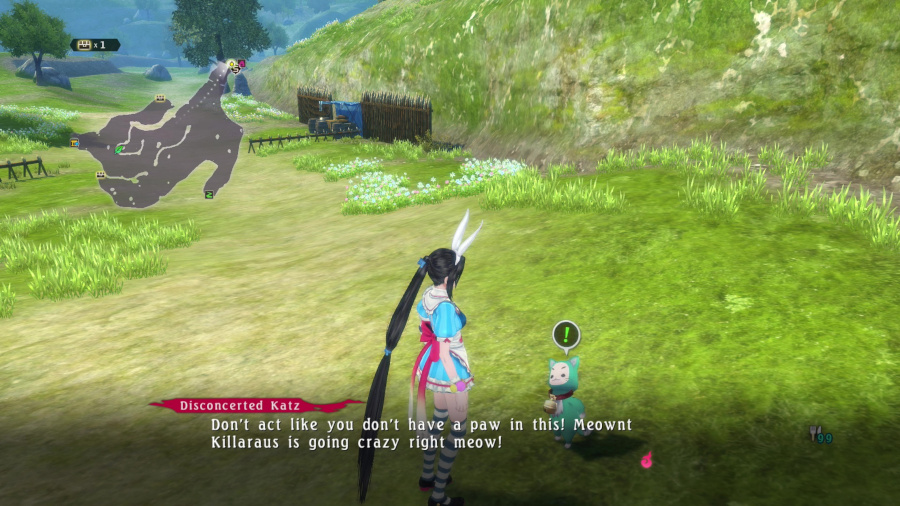
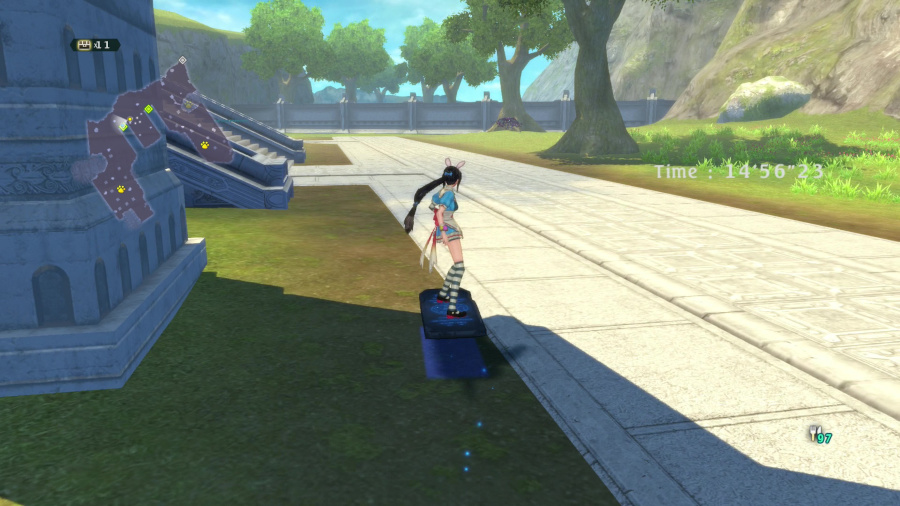
But, where to start? Well, we started off the post Mt. Killaraus section of the game by doing a tooon of sidequests, and that's what this update's gonna be about, too. Wrapping up the last few sidequests of the game, including the big one, which will be the last thing we do. But for now, let's return to Danaan Highway for our first bit of added material.
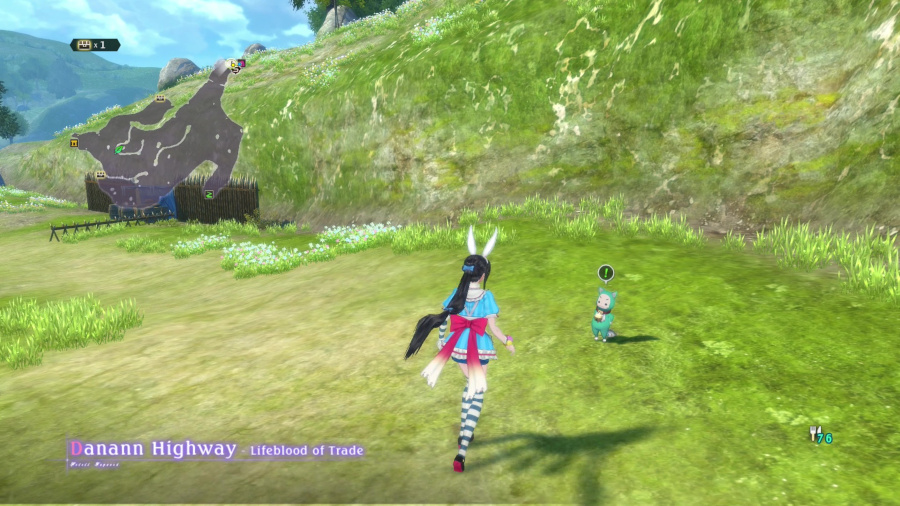
This Katz's conversation will eventually lead you to the requisite bonus dungeon (not counting Davahl Forest and Zamahl Grotto, of course), so we'll skip him for now. He'll just keep dancing till we come back.

Next bit, this pirate in Port Zekson, who unlocks the final Class 4 island: Boss Island. Unlike other Class 4s, which have tended to sound a lot more dangerous than they actually are, this one's the real deal, and the last of the Class 4s we'll conquer. In fact, we'll be taking on the last three right after this conversation. Remember, the other two we already unlocked over at Lionel Wharf in Endgand.
Oh, and if you haven't already, make sure you talk to a Bloodwings rep to collect your final Code Red bounty for Rokurou's Mom. 35,000 gald for just one enemy. Not too bad. But 31/31 makes all of them hunted, you know. The Abbey should be thanking us.
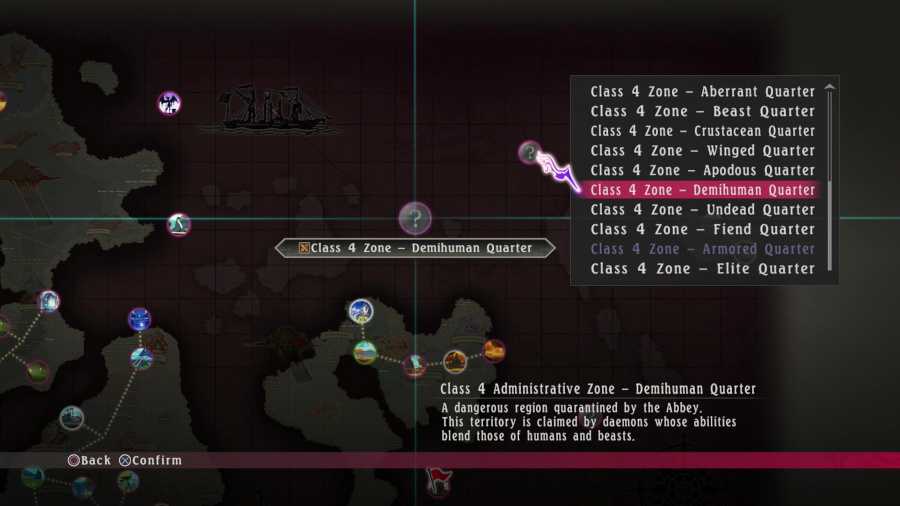
The final three are located in the forbidding seas near Endgand, where few dare to roam. We're one of those few.

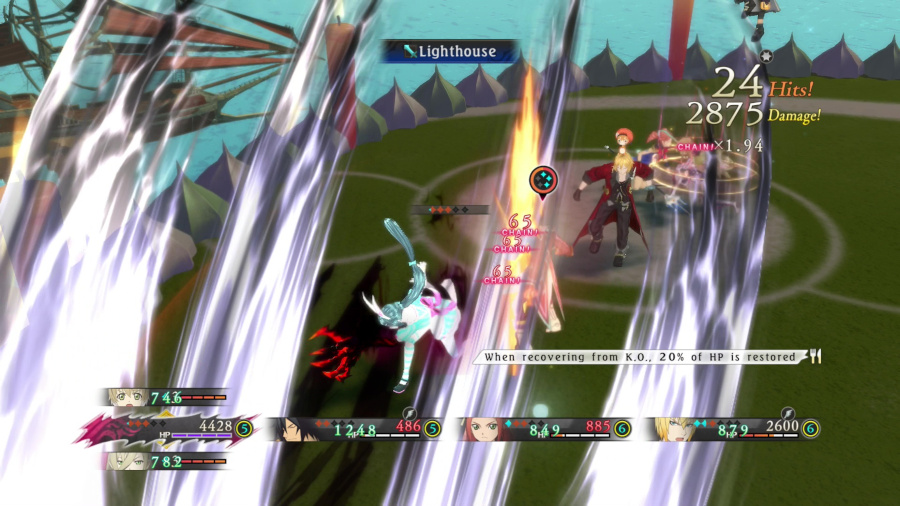
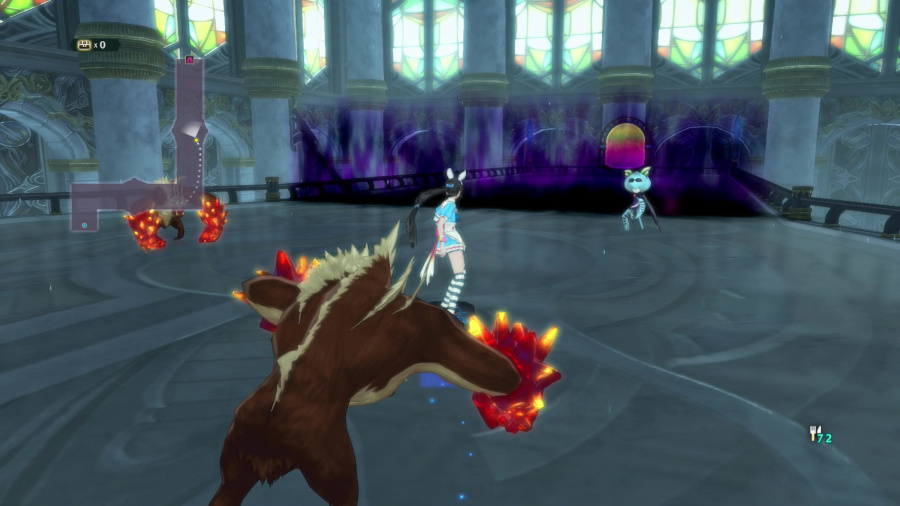
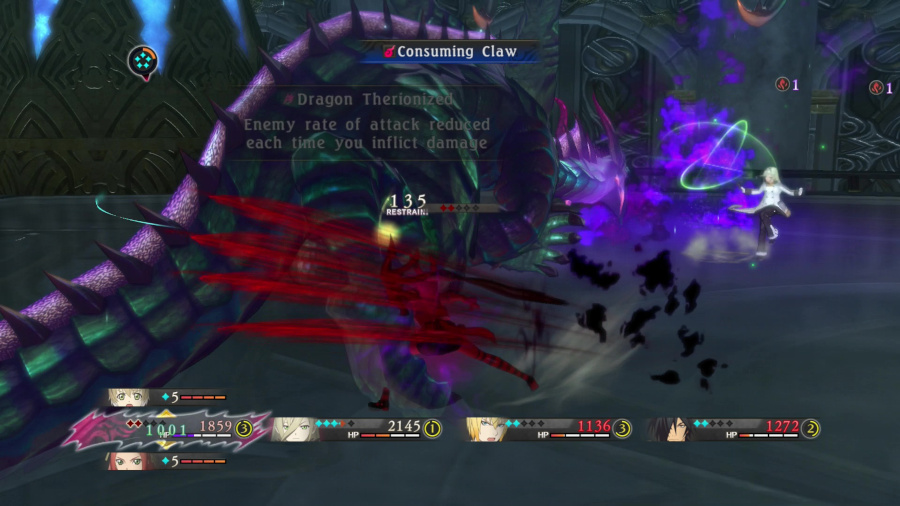
The Undead daemon army sure got last dibs on decent-looking arenas. Aside from lots of spellcasting ghouls and ghosts, not too much of a challenge here, even on Chaos (which I am on, for the record). Magilou's ability to turn the enemy's strength to YOUR advantage is very valuable here, and lots of fun to play with. Your reward for winning is a Barrier Ring.

Demihuman Island looks a lot better. Yeah, I'm digging this shade of blue.


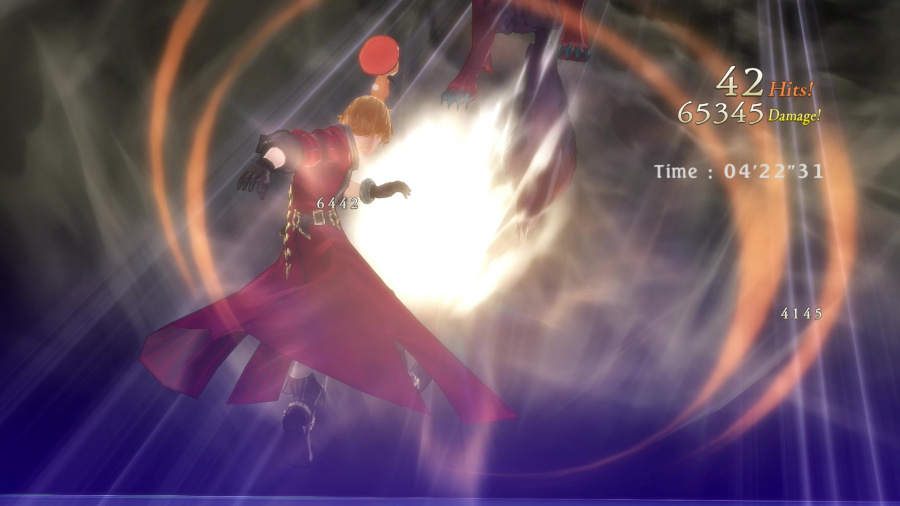
Highlight here was pulling of Eleanor's third Mystic Arte, Gungnir Twister. Pretty sweet. Actually, a lot of Eleanor's weapons, once you get them to +10 Enhancement, have names of famous spears, like Gae Bolg (the Irish hero Cuchulainn's weapon), or the Green Dragon Crecent Blade (the alleged weapon of a famed Chinese general of the Three Kingdoms period, Guan Yu).


I was also, somehow, able to pull of Magilou's third Break Soul, Tetra Detonator. I imagine the ending would have been a lot more interesting if there were enemies actually IN that blast radius when it finished, but alas. It is what it is. Definitely a more difficult Class 4 than the previous one but nothing I wasn't able to overcome. For winning, I got a legendary, one-of-a-kind...Blood Blade. Velvet's...starting weapon. It does have some pretty unique skills on it, like a 1% to insta-kill lower-than-boss enemies, but as some point, you just want to use fancier-looking weapons, right? It's up to you.


Well. This certainly does not seem like the kind of place one idly goes to. Also, this Katz Box is, I believe, the second-to-last one in the game. Bonus dungeon I'm pretty sure has one, but that should be all of them opened once we have it.

I would very, very strongly recommend that, before you attempt this island, to go to any inn and rest, fully restoring everyone's BG, as well as changing Strategies to ensure they don't use any, either for Mystic Artes or Blast Switching, for one particular part of this challenge. You'll need every advantage you can get, and believe you me, I'm glad I rediscovered chaining Mystic Artes when I did.
So first up, we have the boss of Vortigern x3. Obviously with much, much higher stats, even disregarding the enemy's stat bonus on higher difficulties. That guide I linked a couple updates ago has a comprehensive list of all the changes, but it's stuff like enemy spellcasting time is cut in half (with Normal used as a baseline, of course), 2x as much HP, 50% more Physical defense, that kind of thing. They're not toooo dangerous but I would highly advise you not use Mystic Artes unless absolutely necessary. You shouldn't be getting into a position where it's absolutely necessary.
Second wave is a bit of a breather. A flight of 4 Wild Thickjaw Beetles. Not an adversary we've faced before, but they're just fairly hardy bugs. Not really any gimmicks worth going over. Eizen in particular can make pretty short work of them with his Break Souls. Third wave is...

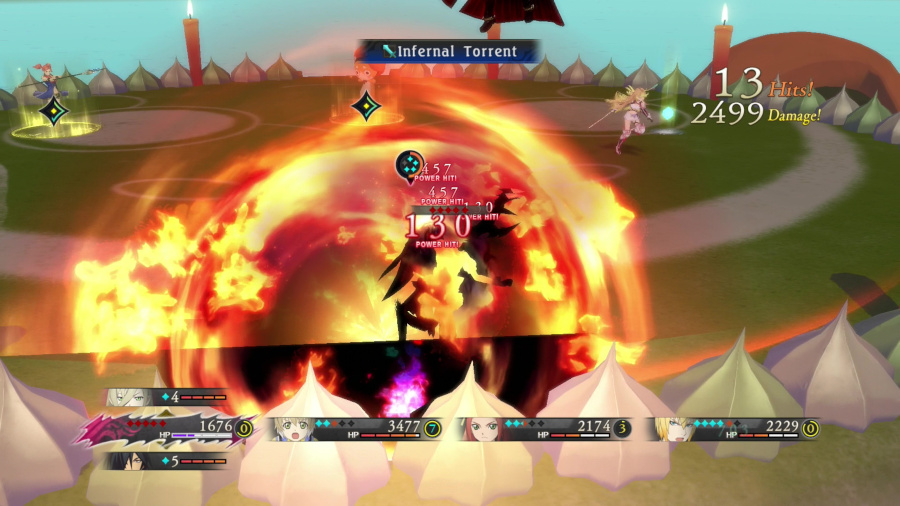
Ugh, these guys. These two jokers are why I told you to prepare that BG beforehand. Most important thing to note about them is...

Well, they're obnoxiously powerful, but what I really wanted to say is...
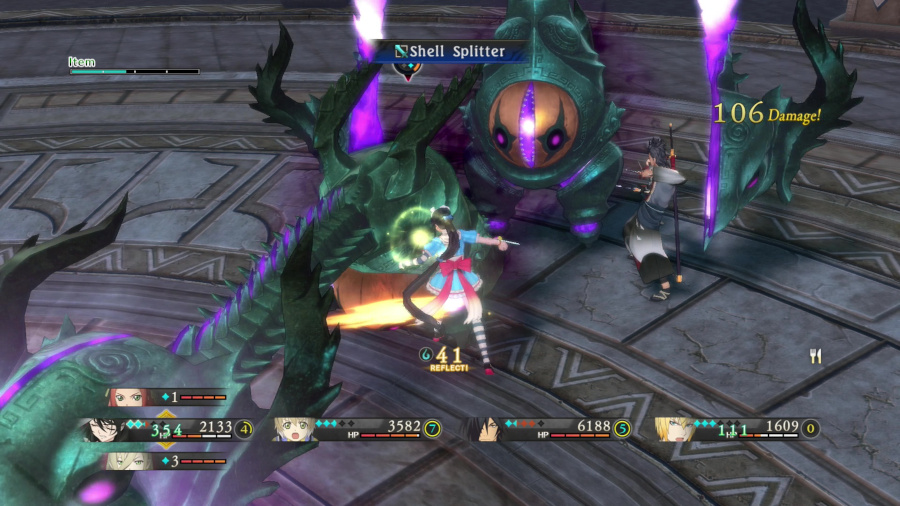
They reflect Non-elemental / Water damage. Fun times. Which means Velvet's Break Soul, for instance, will do far more damage to her than them, which is none at all. Makes these guys incredibly annoying to fight, but you know what source of damage can't be reflected?

Mystic Artes, of course. I like to open a combo against one of their weaknesses and use extreme prejudice to wipe out one of them. The reason we couldn't do that against Spectral Crystal back in the day was because we couldn't inflict damage at all. Once you're only down to one, it becomes much easier to manage. Just find whatever artes you're comfortable with to actually do damage and don't reflect yourself to death.

These guys' Break Soul is called Face Cannon, where it shoots out that massive orb. That orb itself does very little damage. It just has a ton of hits and keeps anyone hit by it locked in place for a very long time. More than enough time for the Face Cannoner to inflict a much more powerful attack, one virtually impossible to dodge because, as mentioned, you're locked in place. Very annoying. You don't wanna know how previous runs at this one went against these two, trust me.
Fourth wave is two Gentlemen. A recurring Tales enemy, these guys are strange humanoid creatures that vaguely look like guys wearing tuxedos, I think, but they've come in a variety of guises. Vesperia had a virtual cornucopia of enemies like Gentlemen you could find as rare encounters. Any way you slice it, in this title, these guys are quick and have lots of moves at their disposal. Their Break Soul is Air Blitz, which is basically a very wide Hadoken. Pretty effective, and you'll need to keep up the pressure to keep them from overwhelming you. If you can get both of them together, you can easily get them in a vicious cycle of getting ripped apart by malak artes as well as quick attacks from melee fighters.

Fifth is a wave of prickleboar who have had enough of poaching and decided to become the hunters. Wrathful Prickleboars, you might say. If they bunch up together, that's both good and bad. AOE attacks can hit them all at the same time and you can keep an eye on all three at once, but if things go poorly, anyone cornered is in big trouble. Particularly if they use their Break Soul, Overrun, where they charge forward, doing lots of damage to anything in their path.
The final wave is against these cool-looking guys, the Hecatoncheires, a Greek mythology reference. In mythology, the three brothers who collectively were known as the Hecatoncheires were named Cottus, Briareus / Aageaon, and Gyges. They all had fifty heads and a hundred arms, and were the offspring of Uranus and Gaia. Figures of terrifying strength, in the most common story of their involvement in the world's history, they were freed from their Uranus-imposed bondage by Zeus to aid the Olympians in their war against the Titans, their siblings, in the Titanomachy. Afterwards, they basically just settled down peacefully. Huh.
In Berseria, these two will be your final challenge of Boss Island.

It can get a little...complicated to tell what exactly your allies or enemies are doing when they're together like this. They certainly got the "Massive size" part right. In spite of their power, though, they're not particularly dangerous foes, just because they're so large and easy to mob. In fact, I think my 116 combo against the final one to fall is my next best combo score, on this playthrough at least. They have that Asura's Frenzy move where they flail their many weapons around right in front of them, but I only saw these two do it once.

Eleanor's pretty pleased about the party conquering all of the Class 4s in this skit after you finish the final one. Oh, and we got Adamantine Boots as a reward for winning. Sounds uh...cool?

Back when I was on my...second playthrough of Berseria, I believe, I liked this place as a sort of final area because of the nice view here. It also helps that, on the PS4, the Class 4s are the only areas of the game where the PS4's internal recording thing runs, I guess because they're plot-free zones or something? I think that's right. Either way, I chose this place as where I got my Platinum trophy screenshot (this exact shot, but Velvet was wearing her Pirate Queen outfit). Good times. Oh, and another neat thing about Class 4s is that, if you lose, you won't get a Game Over. The challenge will just end and you'll go right back to just outside the black portal thing where you began, exactly as you were. This includes refunding any and all items you might have used in your failed attempt.
Also, for Expeditions, I have, of course, been keeping up on those, but I'll wait until I have a full treasure room to go over the lands we've uncovered and the things we've found.
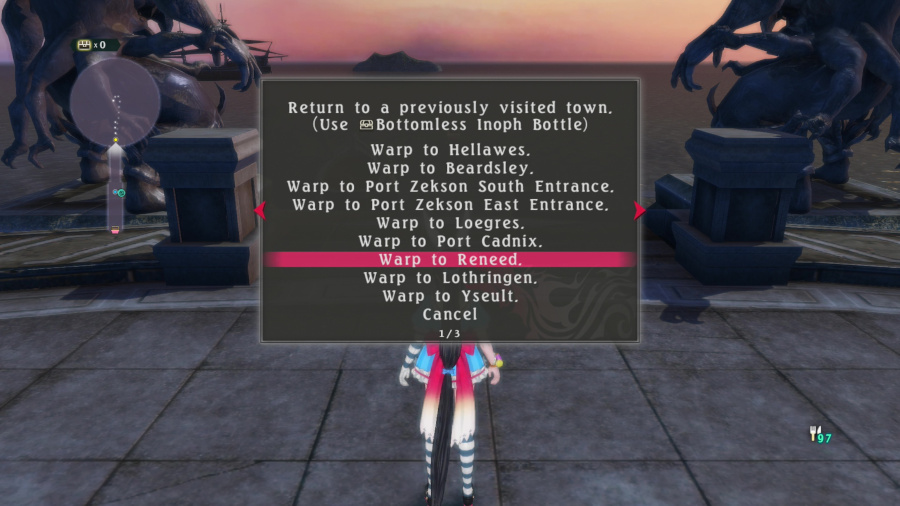
But for now, we're headed to Reneed to begin another sidequest. Also, I was wrong. You can use Inoph Bottles to travel to both Katz Korner and Normin Island. But again, we're headed to Reneed.
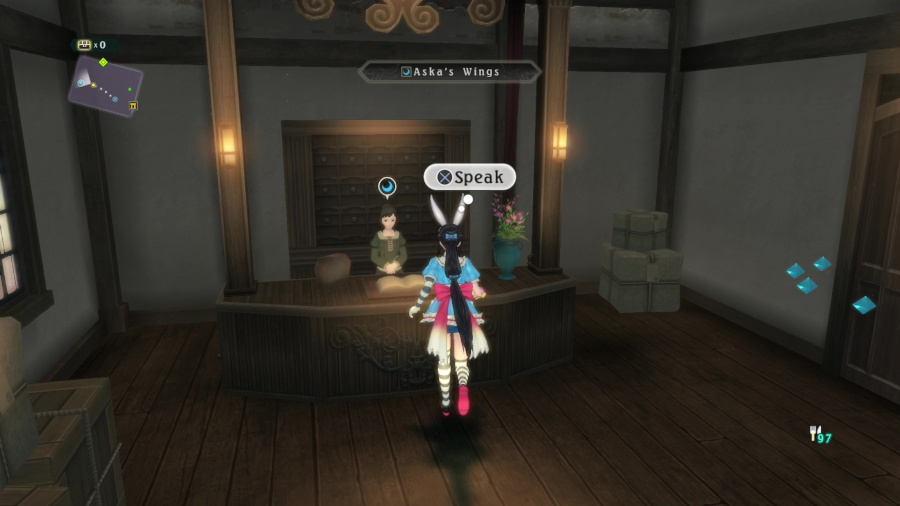
Spoiler alert: what we're doing next involves another difficult boss fight, so get another good night's rest to refill that BG. Also, Aska is the name of a spirit of light that occasionally shows up in this series. Good to know. All of the inns, like the weapons shops, have references like this.

This Katz tells us a curious tale about a figure known as the Harbinger of the End coming to Normin Island. Apparently this rather odd fellow says he'll destroy the world if he judges a person unworthy, but grants a single wish if they are worthy. Definitely unusual, and honestly, don't we have enough problems? I guess not, because we're headed there now.
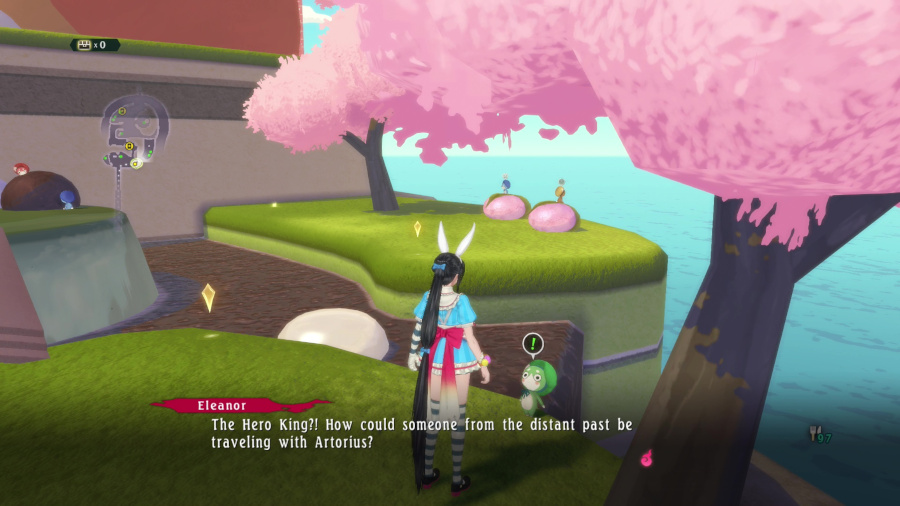
On our way to the top of Normin Island, we hear another interesting yarn about Artorius' mysterious mentor. He was none other than the Hero King Claudius, who was also the first head of the exorcists (Melchior mentioned him), who was supposed to have lived hundreds of years ago. It certainly seems Artorius has also lived for hundreds of years himself, all for this very moment, it seems. The Normin Heerow directs us to Lothringen, as well as Eleanor in a follow-up skit, if we wish to continue inquiring into Artorius' history. Well, we can certainly do that, but not until we've wrapped things up with the...Harbinger of the End. Showdown at Normin Island

Wait, what are these two doing here?
 Oh, it's Jude and Milla.
 What are you two doing here?
 Is there any chance you two are the Harbinger of the End?
 No, we're not.
 But the Harbinger has entrusted us with his battle... The battle of judgment.
 The battle of judgment?!
You're not saying that if we lose to you, our world will be destroyed, are you?
That's exactly what we're saying.
 This Harbinger of the End...did he promise to send you back to your world if you won?

I'm sure you do, but... We've got unfinished business in our world, too!
 A girl and her pet... You really want to take us on?
Not a pet...


What?! I've never seen my little incantation have such an effect before?!
Such is the power of the Harbinger of the End. Perhaps now you see the gravity of this battle.
You'll have to give it everything you've got if you want to beat us!

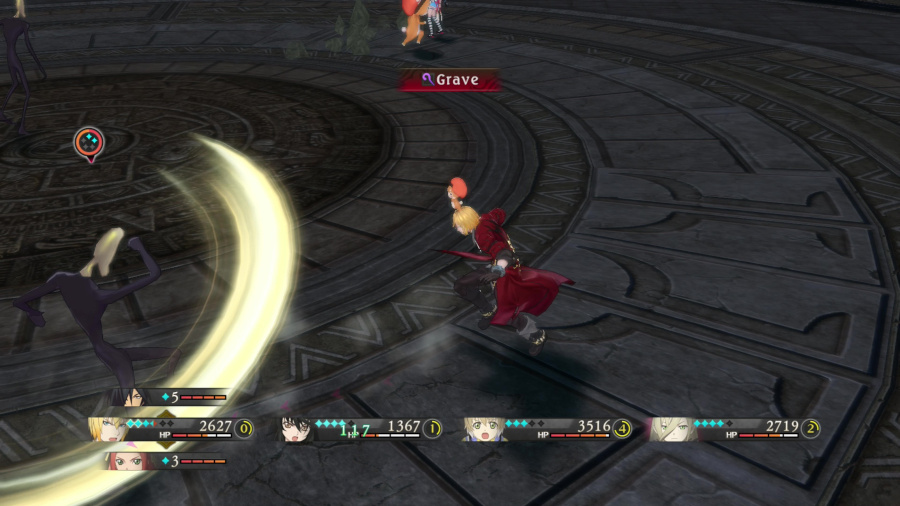
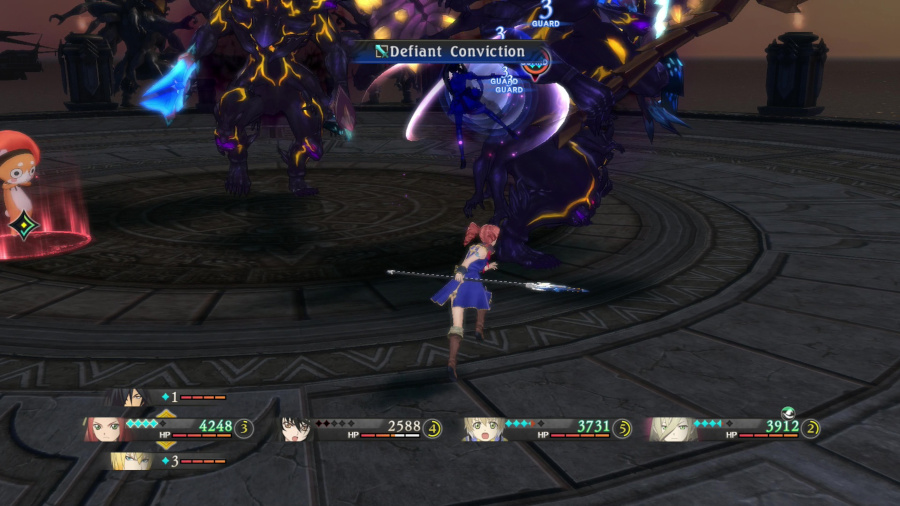
And brother, he ain't kidding. Although we've fought Jude and Milla before, for all intents and purposes, this is the REAL cameo battle of Berseria. I initially wanted to beat this fight on Chaos but uh, that wasn't in the cards, let's say (and after like 90 minutes of trying. Not fun). So I dropped it down to Intense, which is still a plenty meaty challenge.
The battle theme for this is from Xillia...wait, it's not actually from Xillia. Either of them. It's from THIS game, funnily enough. Clenched fist and the sword dances, appropriately. It just does a good job of making you think it should be from a Xillia, is the thing.
So it's important you go after Jude as quickly as possible. See, my difficulties with this fight (about more than 2 and a half hours of JUST this fight), made me look up exactly what a Power Combo in this game is, since we didn't get the tutorial for it when we fought Dyle, as we should have. How it works is thus: as you might have noticed, every enemy in this game has a certain type and, usually, elemental weaknesses / resistances. How a Power Combo works is that if you hit the enemy in all of their vulnerabilities in the same combo, you'll get that Chain pop-up in the top right. Once that happens, any attack, regardless of what element / what enemy type that arte is normally powerful / weak against will count as a Power Hit and lead to those big damage combos we need.
For Jude, he's weak to Fire and is an Person-type enemy. Which means Velvet is the only one who can naturally start a Power Combo against him, because she has both Fire artes and Defiant Conviction, which is the only arte that is strong against Person-type enemies. Discord, shown here, is also anti-Person. Unfortunately, Milla is one of those annoying ?-type enemies, which means it's not possible to open up a Power Combo against her. So Jude is by far the easier enemy to defeat and we absolutely need to defeat one of them as quickly as possible.

Jude's most dangerous arte is easily Whirlwind Snap, because it's fast, hits a wide area around him (basically only right behind him is safe, and only relatively), and he can launch it at range. The only nice thing about it is that Jude, regardless of what he might do when he attacks, he won't combo from this attack. So once you've blocked or dodged Whirlwind Snap, you can be assured he won't launch another attack instantly.

The reason I was wanting to look up Power Combos in the in-game encyclopedia thing was because, before your buddies start getting picked off by either protagonist, you'll want to hit Jude with as much Mystic Arte firepower at once with a Chain going. He has a TON of HP on Intense, but it's better than that BG going to waste, right?

Once those theatrics are over, your general strategy for this game is be on Jude's ass like ugly on an ape. Velvet should basically never NOT be in therion mode, because you need to open decent damage combos against Jude as much as possible.

Your ideal scenario looks like this. Milla and Jude will both be wasting their firepower on an invincible Velvet while your buddies pound them from a distance with whatever spells they can manage.
Eizen makes for a good active party member, because his first Break Soul is Fire, and with Defiant Conviction, you can open up a Power Combo. It's just...it's difficult to keep things running smoothly and Milla wasting her time on you rather than attacking your buddies.

Also, after you finish a Mystic Arte combo, be very aware the AI will likely instantly counterattack you. Happened to me more than once. This is only because, as I said earlier, an enemy or ally using a Mystic Arte resets what everyone's AI is currently doing, so it's likely they'll go after the nearest target, which would be you.

Once Jude throws in the towel, your job becomes considerably easier. Both in terms of them losing half their fighting power, and in terms of losing access to their dual Mystic Arte. Yes, in addition to their regular ones we saw in our 4-1 battles against them, Jude and Milla have a combination Mystic Arte, Tiger Blade Σ, that they also had in Xillia 1. Of course, this will only potentially trigger if both Jude and Milla are on the field at the same time and at least one of them is below 50% HP? I dunno. In my many, many attempts at this fight, they only did this to me once.

Even by herself, she's still a plenty dangerous adversary and still has access to her solo Mystic Arte, so she's certainly not to be taken lightly. It's just with a big arena and only one enemy (a fast enemy, though), it's easy enough to separate your team from her so she can't overwhelm your team, especially with Velvet still abusing her therion form). Basically, she's a noticeably weaker Phoenix right now, is how I'd sum her up.

I was able to pull off Rokurou's second Break Soul, Vengeful Retribution, but again, I'm still not sure why I can't activate it most of the time. It seems very picky, is what I'm saying.

Yeah...the me that recorded this was pretty pretty pretty ready for this to be over by this point. You have no idea.

In Velvet's Menagerie DLC costume, she has a cookie-laden bracelet on her right wrist that says "EAT ME!", which somewhat undermines her tone right now.
...
*steps in-between them* Milla!
...

I take it you're the Harbinger of the End?
??? Correct. I am the one who delivers judgment upon this world. As the victor, I shall grant you one wish. Whatever it be, speak it now.
I want you to return these two back to their world.
Why?
You said you have things to do back home, right? That's why.
??? ...Are you certain? I can grant you anything your heart desires, even the chance to turn back time and undo the past.
*looks at Laphicet* No, I won't run away. Not from my past, and not from the wrongs I've done. That is my decision.
??? Then the judgment has been dealt. I sense no malice in your will. As such, the world shall not meet its demise.
Huh?
You see, your answer was the true test of judgment.
We were charged with drawing out your true innermost wish.
Then the Harbinger's a fool. I'm the Lord of Calamity, here.
??? And what of it? Not all demons must be evil, and not all heroes must be good. Humans are complex creatures, as capable of love as they are of hatred, and committing sin as often as acts of charity. Goodness and malice are but two halves of one whole, the line between which is ever shifting.
Well then, you're as bad as it gets. You were ready to destroy the world, had the one who answered fallen under the shifting notion of evil.
??? Indeed. But the good within that same single person carries the opportunity to save the world, as well.
...That's a terrible gamble.
No, I always believed it would turn out this way.
Me too. I trusted you would all do the right thing in the end. Jude has good instincts when it comes to humans.
That's too bad, because I'm not a human.
You're not? Well, that still doesn't really change anything.
*nods* No matter if you're a human, a spirit, or a demon lord.
*nods* Yeah, that doesn't matter at all!

??? It is finally time for me to return you to where you belong.

Huh?!
Goldipen?!


What a twist. So the "talking pengyon" we heard about in Yseult wasn't Jude...it was in the Harbinger of the End all along. That's um...yeah. What's with everyone trying to judge us lately? Starting it to take it personally.

Huh, I totally forgot I also didn't have Magilou's third Mystic Arte. Well, now I do. Next up, we're headed to Lothringen. After we get some sleep, of course.

This Normin's a little more hesitant about blabbing about Artorius' and Claudin's past to this bunch, so Magilou had to grease the wheels of truth a bit to get him to open up. According to Krimsen here, Lothringen marks the place where Claudin died. The Hero King had used an oath never to kill to sustain his life, but he broke that vow to save Artorius' life. Blaming himself, Artorius decided to take up Claudin's cross, but his efforts to honor his master's legacy were for naught, and the Empyreans went into slumber and...here we are. Artorius again thought he had failed, and ended up abandoning everything and heading east. To Aball.

Ooof... Velvet and Laphicet, in a follow-up skit, direct us toward Aball where we can, presumably, hear the rest of this story, assuming there is much to tell.

Next to the graves, of course... Hero's shadow

Who are you?
 Who, me? I'm a normin who traveled the continent with Artorius years ago. He's been on my mind quite a lot lately. So I followed a rumor that led me here.
If you talk to this normin after this scene, his name is actually Normin Etirniti.
*notices a flower on the grave* That Princessia... Were you the one who put it out?
Nope, wasn't me! It was already here when I arrived. Do you know the deeper symbolic meaning behind the Princessia flower?
It can mean an irreplaceable treasure, or that you wish them well for years to come.
Then the one who planted it was...!
Yep, that's right... The person lying in this grave saved the life of a certain someone who had been worn down and broken by his mission. Thank you...

The poor fellow... He was always so serious... So deadly, deadly serious. And he was practically always being strangled by his own conscience... So much so that the deluded himself into believing he needed to erase the emotions of the human race he so dearly loved. Please, if I may... Somehow, some way, set the poor guy free.
Oh, I intend to... But my version of setting him free might be a bit different from yours.
Well...I'm still counting on you... Lord of Calamity.

A strength we're going to have to match if we hope to match him. It certainly helped to know what kind of man he really is.
In less serious business, we're finally ready to go after the bonus dungeon. A bit of prelude, though, is talking to the Katz I previously mentioned near the Empyrean's Throne. Unfortunately, I accidentally skipped one of the Katz' lines, so the full line for one piece of dialogue is "You think?! Of course it is, meow! Take some puursonal responsibility!". But anyway, it turns out waking the Empyreans has caused some kind of row at Mount Killaraus, and since nobody else can even potentially investigate, I guess it's up to us. Even though, as Velvet says, we're not friends of the Katz.
There's a short follow-up skit about Rokurou getting a Katz Towel, and if this is your first time talking to this Katz, you'll get a Hot Spring outfit for Rokurou, which is just his towel. Well, still not sure what the difference is between a Katz Towel and a normal towel is, but let's not waste the creature's gratitude. To Mount Killaraus.

Luckily, there's a blue warp right near the start of Killaraus that leads back to the middle of the dungeon, this cauldron area here. That rift there seems...new. Let's check it out.

Uh-huh... Well, we've not heard that name before, that's for sure.

First order of business. I do believe this is the last Katz Box in the game, but I didn't get the Katz Person trophy to check, and there's no in-game skit for opening all of them. Of course, the only reason I know I didn't get the trophy was because...I already got it, years ago.

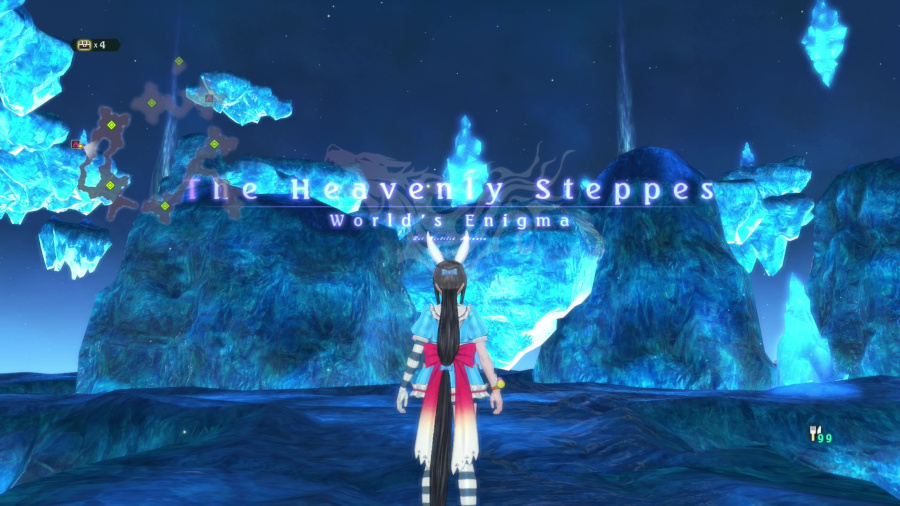
As for where we go next, the northern rift in the first area is where you should be headed, but the alternative will lead you to a couple platforms that have assorted goodies on them, that are restocked every time you come through this area. This opening area is not particularly representative, in any meaningful sense, of what goes on in the Heavenly Steppes, but we'll get to that soon.

This seems promising. Or maybe "promising" isn't the most appropriate word here. An unusual space

I don't think so.
 Purrcisely correct! These are the Heavenly Steppes, meow.
The Heavenly Steppes?
It's a space where the world's secrets are tucked away. It's got an apawling power that draws in malakhim, meow! My Katz friends couldn't resist and got pulled deep inside.
So then you ARE malakhim.
No, we're Katz! Katz are just Katz. They went in because they were curious.
You know what they say about Katz and curiosity. This place was sealed away until you opened it up! I'd say you share a good purrtion of the blame, meow.
If it was sealed before, there's probably a strong chance it was for a very good reason.
No kidding. And it's bad news if it can attract malakhim. It's probably not something we should just ignore.
What do you think, Velvet? Should we go and have a look?
Pleeease! My friends were reckless, but that's no reason to abandon them, meow!
*begins thinking*
??? Turn back...
Who--?!
Uh-huh... An entirely different entity from the Harbinger of the End. What's with all the floating orbs and disembodied voices lately, too?
??? It would be futile to proceed... Naught but despair awaits you within. Go back to your world and you may live a long life. Continue onward, and your life will be very short. *disappears*
Oh, come on! Now we HAVE to continue onward. Doesn't she know anything about human psychology?
We're going ahead, and not just for the Katz. Being told it's futile makes me want to check it out more.
Right?! That's what I'm saying!

Let's say there are very very very good reasons this geotree is unmissable and just continue on for now. We can't go into the ice portion of pseudo-Killaraus here, so nowhere to go but up. Although there are treasures on the way, there's nothing particularly worth mentioning, aside from very powerful random encounters, until then.

Well, that's new.

As is this. Speaking with this Katz will get you Laphicet's Hot Springs outfit, but this conversation introduces you to the mechanics of the Heavenly Steppes. I'll be honest, I forgot how much goddamn fighting there is in this dungeon. There's loooots and lots of fighting, and it's full of annoying gimmicks, as any proper Tales post-game dungeon should be. This opening area will give you your first taste of a major one. See that big spike of malevolence in the center? Once you touch that, you'll start a battle with a huge horde of daemons. As for me, it was a big mistake to fight this bunch on Chaos. Took forever.

Mostly because of these jerks, with all their spinning around. It's about as much fun as it looks to fight these enemies on any difficulty. Over 9 minutes on Chaos, this time for me.

On the other hand, the Heavenly Steppes is by *far* the best EXP grinding area in the game. not even a comparison. Like many recent Tales, there's a trophy for getting to the max level, 200. This is basically the only place where one can reasonably do that. "Reasonably" is being stretched to the breaking point, but you know what I mean.
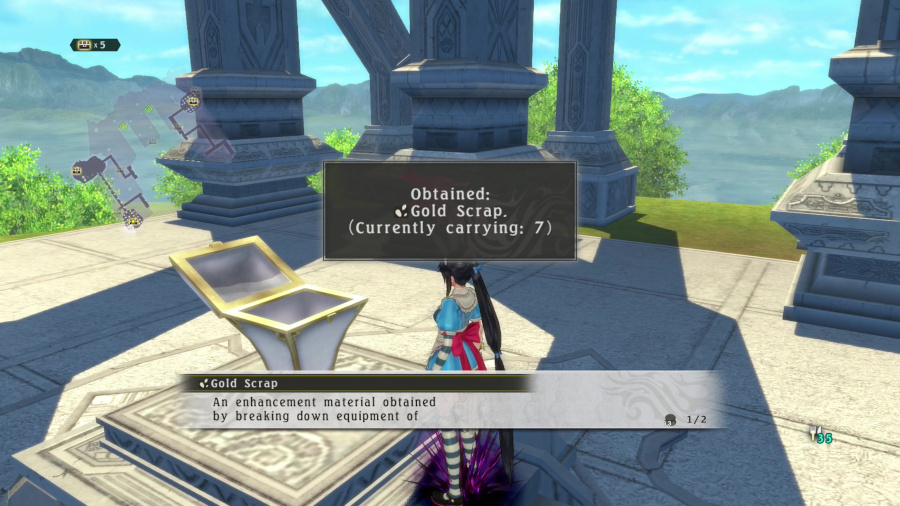
The Heavenly Steppes is also your best place for grinding Adamantine or Mythril equipment. This place just disgorges the stuff.

Once you vanquish that big pillar of malevolence, you get the best of all gimmicks: a time limit. In each area of the Steppes (6 in total), once you win that first fight, you get a time limit to win the remaining fights. What happens if you don't win in the time limit? Oh, the whole area just resets and you have to fight the big malevolence pillar again. And then the time limit fights. Again. Yeaaaaahh...I can deal with a lot of gimmicks, and I have, in my day, but I still hate time limits in games like this. Especially since there's no Devil Arms mechanic in this game for uber powerful weapons.

One mulligan you do get is that during Mystic Arte animations, the timer is paused. But basically anywhere else, including the in-battle menu, the time will keep counting down. So do not dawdle.

Yes, because I was playing on Intense, I only got through one battle before the time limit expired. Hard is the maximum I'd do these timed fights on.

By the way, if you were expecting the fearsome Almond Jelly here to be among the common enemy types in Heavenly Steppes, let's just say, I have very bad news for you.

As for the little sandspurs, well, touching them is about as much fun as stepping on sandspurs in real life. What they do is knock off 15 seconds from the timer. I don't think they do anything before you win that first fight. Oh, and they slightly move around, too, just to be extra fun.

I did get a slight break in the monotony; I unlocked the Quickie Peninsula, the final location in the Expeditions menu. Quickie is the name of Eternia's mascot character, so-named because its sputterings were transcribed as "Kwik-ee!". It was given this moniker by Meredy, one of Eternia's four main party members. It also has a cameo appearance in Tales of Symphonia in that game's cameo battle, because Quickie frequently rode on her shoulder and in general can usually be found in close proximity to her. A loose depiction of the beast is that strange peninsula in the southwest of this continent. I'll go over Isles of Noct and Dia, Albane, and the Swordian Peninsula when we get the final treasure from Quickie.

We also get a skit marking the occasion. For an explorer like Eizen, there's no end to this journey. While his own personal end may come sooner than he likes, the journey goes on. After this skit, I dropped the difficulty back down to Hard, because this dungeon is long enough as it is and I didn't wanna be here all day. Well, I say that, but I ended up taking a break from this dungeon about 3 and a half hours into it because I don't have all day to record and more to the point, I was getting sick of way too much heavy fighting in so short a period. I'd advise you do the same. We'll get a way to save your progress in the dungeon soon enough.


Yeah...now THAT'S a level 3 Mystic Arte.

After like 30 minutes just on this little room here, I finally managed to beat all three under the time limit. This area did not start me off in a good mood because even on Hard, you just barely have enough time to win all three fights under par.

So once you get past that first room, you'll come to this lobby area with a single Katz. This Katz is good people because for 100 spirits, they'll create a warp portal right back to this room. This portal is permanently open and you absolutely should take them up on that. Oh, and the reason you'd want to do this in particular is because, if you get wiped, you'll get punted clear out of the Heavenly Steppes, right back to the rift in Real!Mt. Killaraus. Which means you'll need to make the long, pointless hike through Fake!Killaraus and that Earthpulse area to get back to relevant content.
Oh, and you'll need to do everything you already did all over again to get back to where you were. So yeah, open these damn portals. The first portal you'll come across is right at the start of the Earthpulse layer and can teleport to any of the following 6 layers.
Next area I got was this area packed to the brim with enemies taken from that previous area. This room is randomly generated, by the way, so it could have been either a Candle Room / Katz Spirit Room / Malevolence Room / Treasure Room / Enemy Room. So basically, the structure of the Steppes is Lobby Room -> Random Room -> Black Flame Room -> Boss Room -> Lobby Room. What Random Rooms you get are determined the instant you enter the Heavenly Steppes. So, if you want to grind for Katz Spirits, just keep entering and leaving until you get what you want.

And of course, we have Boss Rooms at the end of each level. This first one is the Basilisk. Unlike its mythological counterpart, this one can't kill at a glance. Also, unlike the other bosses of this dungeon, the Basilisk isn't generally considered to be a dragon, just a very very very deadly snake. This was on Chaos, as a sort of a compromise, though. Not too hard of a fight, and because the first level of the Steppes is the easiest, just running up to Basilisk, beating it, then warping out is a pretty cost-effective way to grind.

It is generally similar to that lizard boss we fought just before we met Grimoirh for the first time. "Dangerous but not too interesting" is a good way to describe this fellow.

You get a curious item upon winning, this Ventite. Remember how I vaguely hinted that the level 3 Mystic Artes weren't the last ones to unlock? Well, this is what I was referring to. Beat three specific bosses in the Steppes and you'll get these Dual Mystic Artes, with the name hinting as to the applicable characters. In this case, Laphicet and Velvet. To use it, both Laphicet and Velvet need to be linked up (so, for example, Velvet can Switch Blast with Laphicet) and the two need 5 BG apiece. Hold down the Mystic Arte button while you're performing the Switch, and they'll launch the Dual Mystic Arte. Simple.

Ah, but it's good for the soul, isn't it?
??? *appears* The dragons have all come to this place in search of the Gate.
Not you again!
What gate is this?
??? It is the doorway to the heavens.
Can you be any more cryptic?
Don't even bother, Velvet.
??? ...
See? We're just going to have to keep moving if we want to find out. It's the way these things work.
...This better be worth our time.
So next up is a Lobby Room. Open that portal and move on.

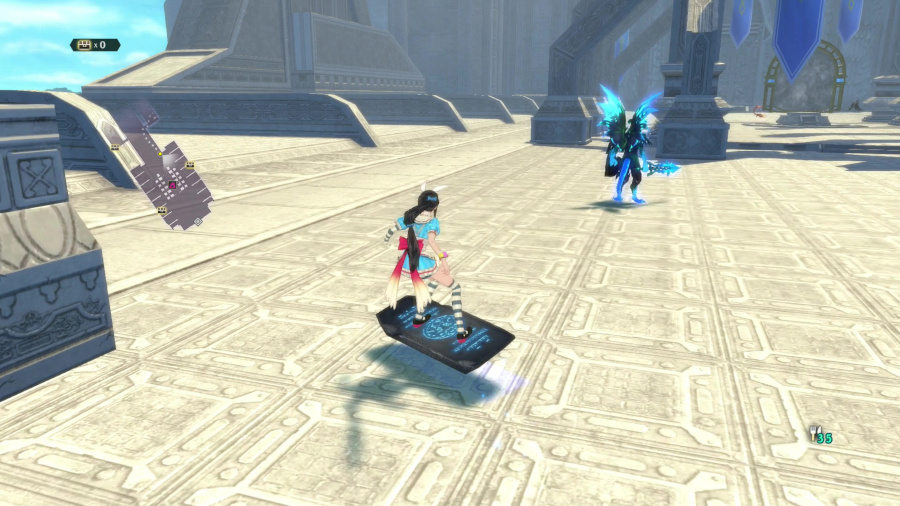
These are what I like to call Malevolence Rooms. For obvious reasons. You need to use the Geoboard to surf over the malevolence and avoid any enemy encounters. If you get into a fight while over the malevolence, once it's over, you'll be teleported back to the start of this room. Obviously, you can't surf into the walls of the malevolence.

Of course, don't forget to look for treasure in these bigger rooms. I believe the Empress Shield is the highest-tier armor for the girls.

Next area takes you back to the Yvolg Ruins. Haven't seen these in a while. Once you finish that central flame fight, the four timed fights are in the four smaller rooms, one apiece. The exit to the Boss Room is in the northern room.

Of course, treasure to be gained, including unique items like this. I finished this area with 6 seconds left on the clock on Hard, so yeah...don't hold back.
Another re-skin of the Xeno Mantis. Vouivre, basically a French dragon, is definitely not the most fascinating boss, but thankfully, the next three bosses are more interesting. The Armor Acerite X it drops halves SG costs if a party member has +50 total enhancements on their equipment loadout. So, very powerful, but the amount of effort needed to actually take advantage of it is considerable.

It ain't like you're not egging us on, you know...
??? I do not understand. I assure you, my warnings are quite genuine.
If your intentions are truly pure, then tell us of the heavenly realm.
??? The heavenly realm is where the seraphim reside. It is the true world. It has existed since before your own earthly land and the malevolence that mars it.
The true world...where the seraphim reside.
What are seraphim?
??? In the farthest reaches of the Steppe stands the Heavenly Gate, which only opens when certain precise conditions are met.
Hey, wait!
??? But in tens of thousands of years, none have succeeded in opening the Gate. To proceed is futile.
Damn it!
??? *disappears*
I can't tell if she's toying with us, or if she's just really, really bad at this.
Well, either way, she is pissing me off.
Do you think a gate to a heavenly realm really lies at the end of the path here?
Well, if it's not, this is quite the elaborate set-up for a ruse.

If even Eizen has never heard of this heavenly realm, it must really be something. He reveals he's 1000 years old, which is apparently young for malakhim. Eleanor seems so out of place in this bunch, doesn't she?

Not well, that's for sure.

Beyond the next lobby room, this is a Katz Spirit Room. These rooms can take one of a few different forms, I think depending what layer you're on. For this, there's a total of 440 - 480 spirits to be gathered, depending on the Katz Spirit layout you get. In a dungeon with so much conflict, these rooms are very relaxing.
It's about when you get to this layer that you really need to take random enemy mobs seriously. They can be considerably deadlier than even bosses now.

This is the second time we could have encountered a Katz like this, that, in exchange for spirits, makes certain aspects of these layers easier. First one reduces the number of sandspurs, second one eliminates all sandspurs in the area, third one detects where the timed fights are located (they're always in the same places), fourth reduces the number of these timed fights, and the final one gives you a longer timer. All pretty valuable stuff. In addition, once you've completed the entire dungeon, I believe, you can choose a sixth option that eliminates all timed fights for 250 spirits. All of these Katz generally hang out near the big flame.

But yes, on the subject of random encounters being deadly, check out the damage on that damn Rising Beak. Granted this is Chaos, because I forgot to drop the difficulty, but still.

Guess who gets to go back and re-do the entire dungeon up to this point because I forgot to open any portals?


At least I got to use Eizen's third Mystic Arte on the way back. Now that is a veritable megaton punch.
The party's questionable tastes in recipes aside, if you come to a room setup with red and blue torches, some lit and some unlit, you've found yourself a Candle Room. Essentially, the goal of these rooms is to light the red candles and extinguish the blue ones, eventually leading to a dead-end. The goal at that point is to have ALL the candles lit up so you can take the teleporter in the first area out of here. Can't say it's the best use of my time.

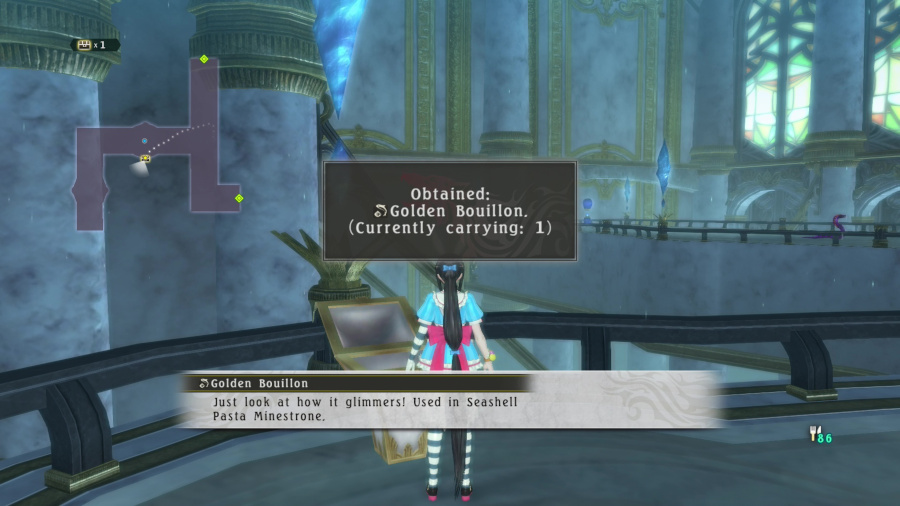
While I was going back to the Fake!Aldina Plains, I finally got the last treasure in the Expeditions menu. So, behold, a full room of treasures. I sure hope their actual owners won't miss 'em. The earrings on the table are from the Islands of Noct and Dia, a reference to Tales of the World: Reve Unitia. The earrings belonged to two characters in that game. As for the party's thoughts on them...
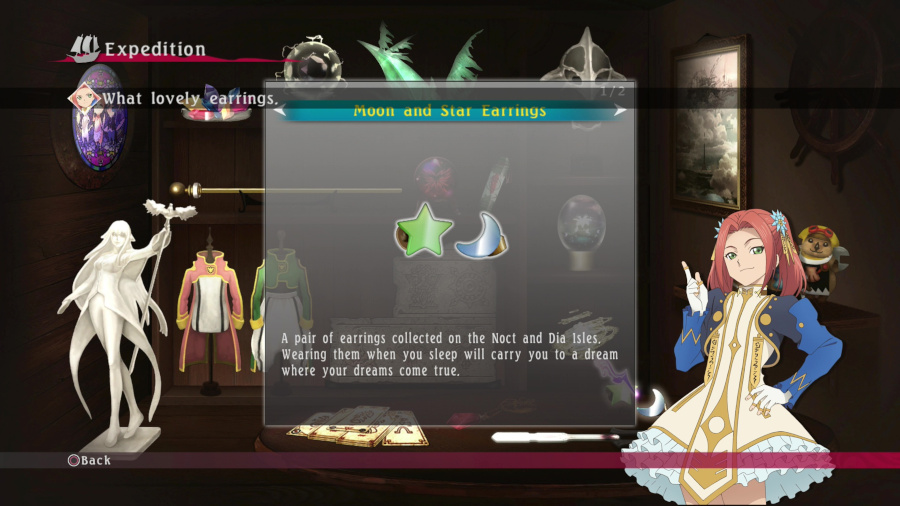
Earrings that make you dream of your dreams coming true...
They sound like something out of a dream themselves.
Yeah... If anyone is suffering from constant nightmares, I'd want to give these to them. People should at least be able to be happy in their dreams.
You really are a kind boy, Laphicet.
What about you? Do you ever have nightmares?
Don't worry about me! I sleep soundly, and almost never dream. And once I am awake, there is another day of work to be done! I'm simple that way.
You work to make your dreams come true, you mean. That suits you just fine, Eleanor.
For the staff, it's from the continent of Albane, the surname of the protagonist of Phantasia, localized as, ugh, Cress Albane. This is the only context where I'll ever acknowledge that translation, as I'm firmly in the camp of his name being "Cless Alvein" in English. The description for this continent in Berseria says that some its inhabitants are masters of being able to control time, also a Phantasia reference, and that the Rangetsu style comes from the Japon area of this land, which is the name of the hidden ninja village in that game. For that staff, it's actually the staff of Mint Adnade, the first Tales heroine and about as archetypical of an RPG heroine as you can get. She shows up in Xillia 2's cameo battle if you want a relatively recent appearance from her.

Surpassing through time and space... Does that mean we could travel into the past and future?
Awesome! That means we could go into the past and-
I wouldn't go back, even if I could. Even if we could undo the things that have been done, the soul of whoever did those deeds will remain the same. I wouldn't change who I am inside... Or who *he* is...
So... What about the future?
I'm in no hurry to see what might come. No, I have to accept who I am and the present I've created.
That shows just how determined you are, Velvet.
And how "on" she has to be all the time, evidently. That large jewel on the top shelf is from the Swordian Peninsula, a reference to Tales of Destiny, the second game in the series. The Swordians were weapons imbued with personalities and memories of various individuals, one of them belonging to the protagonist, Stahn. As for this jewel, it's a smaller version of a jewel that made a city fly in Destiny. Not having played that game, couldn't tell you much more about it.

Here's a pretty little piece of art. You know, I can definitely imagine a larger version of this being able to levitate an entire city.
You're right... Right out of your mind! What possible purpose is there in floating a city? I don't get it!
Why indeed? I don't claim to have any answers, but they must have had their reasons. Maybe they just wanted to see if they could.
That's ridiculous... But I wish I could say you were wrong. That's a bigger part of human nature than one might think.
Aye. That drive is a major difference between them and malakhim.
But it also leads to malevolence.
I'm aware. But still, it's a part of who they are that I don't entirely mind.
Aye. But now we have the man himself for our last treasure.

What's this about uniting two different energies? Does that mean this object could bring about harmony between humans and malakhim?
It's possible. But without ever knowing how to operate this thing, we can never be sure. In any case, these were originally used to enable people of two opposing worlds to wield magic.
What?! That sounds like how exorcists use malakhim. So, these were weapons, then.
Some say they were also used to unite mabo tofu and curry to create mabo curry.
You mean... We owe mabo curry to this thing?!
Heh... There's no need to get worked up, Eleanor It's only natural, when you think about it. Whenever there are two opposing sides, both a sense of animosity an a desire for harmony are perfectly normal.
Right. What matters is the path you choose!
Well, Eizen's not totally off-base. In Eternia, this thing was used to provide a cage for the Summon Spirits from the two worlds of Inferia and Celestia. They were called "craymels" there but yeah, they're called Summon Spirits outside of that particular game.


A full look at the world the Van Eltia's B-squad revealed. For the B-team, though, they did good work.

Now that we're finally back here, a full charting of this area's treasure chests. The 4 remaining were items I couldn't pick up because I was full. As for unique treasures, I the Ephemeral Wings for Rokurou was a lucky random find here, and I also got an Elixir and Demon Ring from other chests in this area.

Once the timer starts, there's a total of 6 fights spread out pretty far from each other, but it is a large location. The most out of the way one is on Shenlong's plateau, which you really should save for last, because if you don't, you'll have to backtrack from there and waste a lot of time. Not to mention the fact that the door leading to the third boss is up there. The most well-hidden fight is in that little ring southeast of the blue dot.

And when you're looking around, sometimes you'll get lucky like this and the grass that's normally supposed to be there hasn't rendered yet, making that next fight very easy to find.

Having a map allowed me to finish this one with a pretty comfortable margin, and this is even after stepping on a couple sandspurs, and going to Shenlong's plateau's fight first, like what I told you NOT to do. Pretty good time. If you want to know what Tales of Berseria looks like in a hurry, here you go. Just a sample of this dungeon.

Oh hey, a model we actually haven't seen before. A curious specimen named Illuyankas. Which sounds like a made-up name, but it's actually a dragon in Hittite mythology. The more you know.


So before too long had passed, I managed to pull of Velvet's Impulse Desire, another pretty cool-looking third Mystic Arte.

Its unique Break Soul is Heavensbolt, where it flies into the air and fires a massive ball downwards to do tons of damage in its area of effect. Very very dangerous. If you're fighting it head-on and it does this, just run underneath or far away.
Speaking of dangerous techniques, watch out for its tail attacks. They hit a very wide radius, so blocking is by far the safest option.

So if you watch this video, you'll notice I somehow managed to more or less stunlock this guy playing as Rokurou. Maybe it's just his quirks or his current build or Form 3 in particular, but it just couldn't break out until I let it out. More or less. It was pretty embarrassing, all things considered. Your reward this time is Eizen and Rokurou's Dual Mystic Arte.

Well, we may have bailed out another Bewildered Katz and got a towel for Magilou, but we're not gonna make much from it, apparently. What a shame.

Yeah, the enemies in the fourth area are uh, dangerous. Mostly skeleton mages and pissed off orcs. Neither pleasant on Chaos. Thank god I opened the portal back to before this layer.

One of the treasures in Not!Lothringen. Now THAT'S a spear. On the other side of the lower level, I found a Mumbane in a treasure chest. I believe this armor first showed up in Phantasia, but it's made numerous appearances as late-game armor in this series. For the men only in this game.


Nice save, everyone.

Yeah, when you get the Undead Wizards casting these Shadow Servant spells at you (as seen on the right), while Mythril Golems are body blocking for them, these encounters can get real rough.

Not a huge fan of the orcs, either. The small malevolence points can be found on the lower level, the mess hall, and that big central courtyard. Two on the lower level, one in the mess hall, two in the courtyard.

They do have a cute move called Find Item where they stop for a second, paw at the ground, then heal themselves. Guess they found some inchworms or grubs or something. The warp to the fourth boss is at the very top of the stairs.

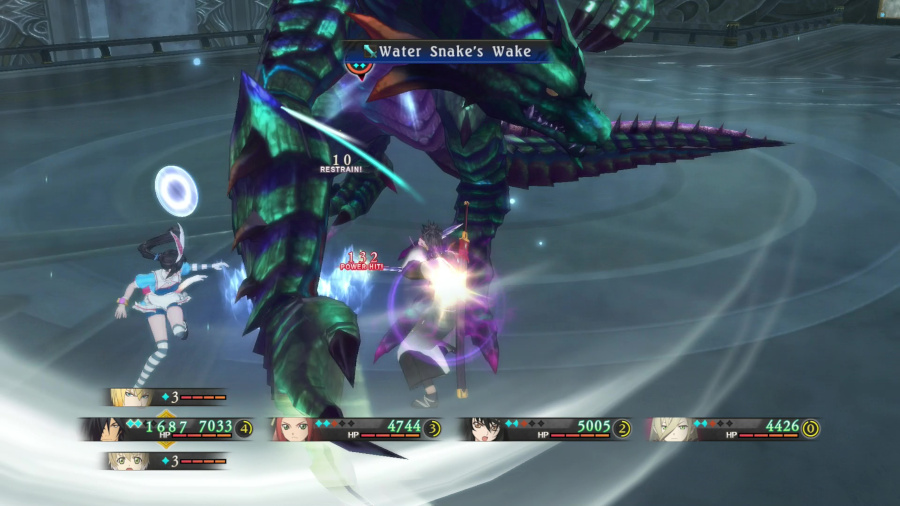
Mmmmm, looks like a tough guy. It IS a Leviathan, after all.


This is one of the most difficult bosses in the game, with a very long reach on its tail attacks and its unique Break Soul, Rumbler, which fires a number of lightning bolts in a fairly wide area around it, and they're all very deadly. You don't want to be anywhere near this guy if you're not attacking. If you're next to it and Rumbler goes off, you're practically guaranteed to be KO'd.
As for elemental resistances / weaknesses, it's weak to Earth and Wind and strong against the other two, so make sure you switch your artes appropriately.

Don't know whether I'm happy or upset I beat this guy on Hard. Will try not to let that happen again. The Mimicking Ignicite it drops increases the drop rate of random skills that the killing character has already equipped on their equipment loadout. So if you really want to double up on Dragon-killing random skills, for example, this one's for you.

That glowing ball of light's a little late to the party. We already heard this about Innominat and human civilization's rise and fall from Melchior. At least we got a bath towel for Eizen. Or something.

I really needed to restock after Leviathan, and thankfully, the portals make it so easy to do so. You will have to go back through Killaraus just a bit to get back to that rift we first entered to get to the Heavenly Steppes, but it's a minor inconvenience. Especially since you can use a Bottomless Denore / Inoph Bottle to effortlessly get back to any town you want. While you're in town, it would be a good idea to dismantle some of that Adamantine / Mythril equipment you've been getting in droves and upgrading as you see fit.

Like this. That's uh...quite a line-up. And I like it.

One general gameplay tip I can give is to switch everyone's titles to the one that prevents BG loss when they get KO'd. The thing with losing BG is that getting KO'd and losing access to Mystic Artes can really, really slow your momentum and turn a difficult battle into a very difficult one. Also, another advantage with Mystic Artes is that they refill the Soul Gauge (how much depends on the level of Mystic Arte) so you can get back to fighting effectively very quickly, without need to inflict status effects or sidestep enemy attacks, so not wasting a valuable resource like BG is always a good choice.
The enemies in the fifth layer are, um, dangerous. Mostly because, as I've mentioned, whenever you get large groups of spellcasting enemies in Berseria or Zestiria, and they just keep spamming spells, it's practically a death sentence, and the most common enemies in the fifth layer are spellcasters. Annoying as hell, good god.
Well, this is a sticky wicket. What to do... Just surf into one part of the malevolence. You'll absorb it, get respawned back at the start of the random room, except the part you surfed into will be gone. Why was this deemed necessary? Apparently the rules of good dungeon design go out the window in bonus content. The one nice thing I can say is there are no *mandatory* fights in these Random Rooms.

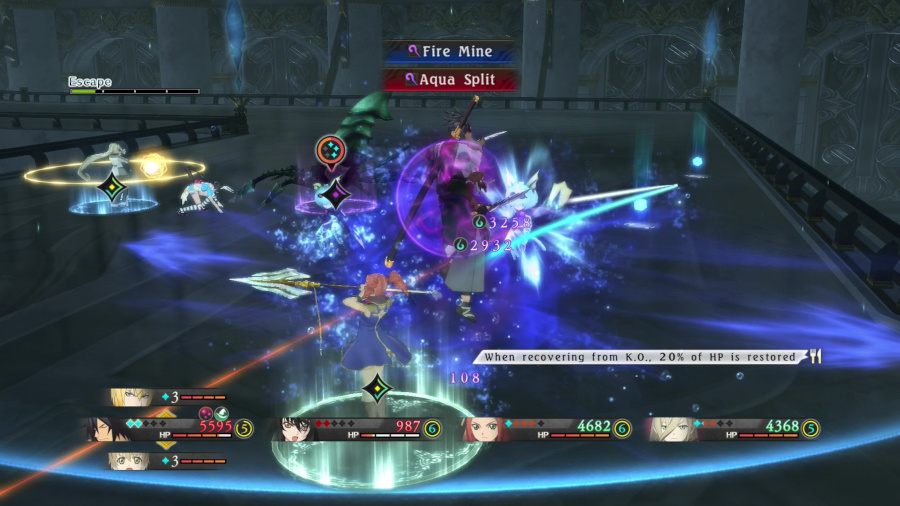
As if the spells weren't annoying enough, these mage enemies have an incredibly irritating attack called Death's Embrace that summons a poison...aura, I guess, that just sucks you in from very far away and will usually inflict Poison. It does very little damage, but in timed fights, it wastes a ridiculously long amount of time for the whole animation to play out.

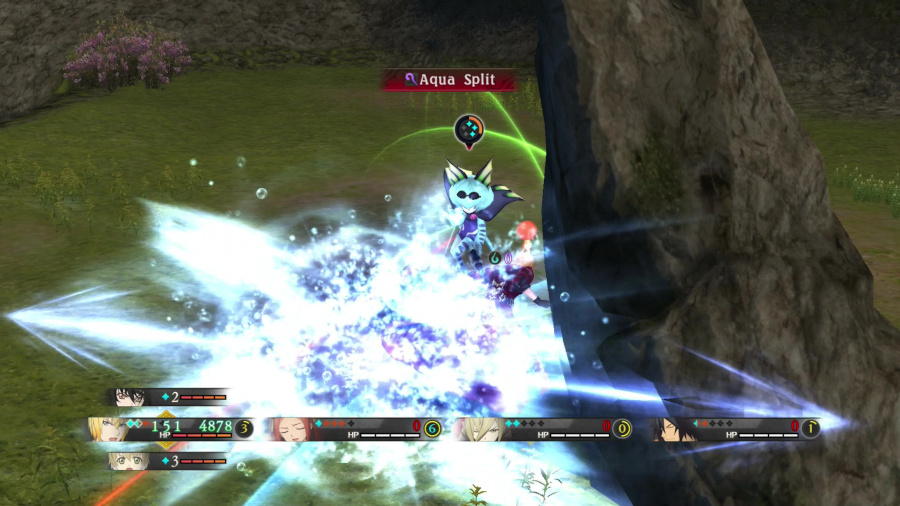
But I think the Water Witches take the grand prize as the most annoying enemy in this game, boss or not. They fire incredibly powerful Aqua Splits most of the time, more powerful AOE spells when they're low on health. They also have a charging attack, shown here, that knocks you down and also does tons of damage, and they always come in obnoxious groups like this. Oh, and you take a ton of damage from anything they do regardless of whether you're downed or not. Never ends.
It was about here, on Not!Hexen Isle, that, on my first recording of the Heavenly Steppes, I was just getting too tired to go any further. It had been 4 hours of so.much.fighting, and I just didn't want to fight another couple of hours to get to the end.

It was this fight, specifically, where I had to fight like 3 of these things more or less by myself, that caused me to call it quits for about...a week. Let's just jump ahead in time a bit, shall we?
Side-stepping an Aqua Split in such an incredibly tight environment was some very dangerous showboating that could have easily gotten me killed. Even if it had, though, it wouldn't have been the worst thing. I probably would have just gone off and saved at the nearby point in Mount Killaraus and hardly wasted any effort I wasn't already gonna expend.

And here we are, a week later, give or take. I said before that the Helper Katz are usually located near the big malevolence flames, and they are, it's just it's not always obvious where they are. For example, we're very close to this area's Katz in this screenshot, but can YOU see where it is?

Yeah, that pink blob at the edge of the bush is the Katz. You know, if they want our help, they could try and make themselves a bit more obvious. Anyway, because this layer has some of the most annoying enemies in the game, I would strongly advise getting the "Increase timer / reduce number of black flames" perks, for a total of 95 spirits. As far as I'm concerned, you left the "Good for grinding" layers long behind; it's just about getting to the end of this hellhole now.
For a general description of where all the fights are, one can be found at each of the island's major branches.

I generally rather dislike using Mystic Artes on such encounters, but seriously. You gotta kill these mages as fast as possible.

Normally there would be a black flame in the middle of those sandspurs, but if you're taking the hard road, be careful about approaching them, because a sandspur will spawn right as you approach it, and it doesn't matter if you hit one of them on your Geoboard or on-foot. Anyway, I'm just glad I don't have to bother.

You know, the Abbey wasn't TOTALLY wrong sealing this place off in the real world. Thank god you can still run even when you're KO'd.

This is a REALLY fun layer. So fun that, before I recorded this last part of the dungeon, I wasted 40 minutes on entirely pointless footage that was basically all just this place and running back to this place. Aside from a few moments of actual interest, like seeing how Tetra Detonator is supposed to work (that white orb continually does damage while it's present to enemies caught in the middle), it was just trying to beat this fourth layer and failing, so it got deleted.

Even in spite of the fact I had fewer battles needing to be won and a longer time limit to do it in, I still only finished with only 27 seconds left. Just the worst. The warp to the boss is in that very small alcove in the center of the island.

And uh, what a boss it is. I did discover there was a way to check global playtimes and records and such. In Library -> Player Records, in fact.

Just a sampling of what I've achieved over three playthroughs. Anyway, back to being on Chaos for Fafnir.
Ugh, where's Sigurd when you need him? Sigurd, also known as Siegfried in German, was the hero who slew the dragon Fafnir with the sword Gram / Balmung / Nothung, bathed in its blood, and acquired its cursed treasure, the Nibelungen.
Unfortunately, we have no such legendary dragon-slayers on-call, so it's up to us. Fafnir doesn't really fly around or move quickly, but it's very big and very dangerous, as you might expect. Of course, it has tail and flame breath attacks, but most of the time it will lean forward and swipe at you with its claws, either from right to left or left to right. Do keep in mind, though, that its tail attack is a Break Soul, so don't try to block it.

Its unique Break Soul is Gravity Press, where it begins building up a big purple ball of energy, before firing it at the ground right in front of it. Thankfully, this one's pretty easy to dodge, since the only dangerous part is right in front of it.

The weirdest thing about non-Magilou / Laphicet spellcasting AI is that it seems to find it endlessly amusing to run right up to an enemy and start casting spells. This tends to happen more with damage spells than healing or resurrection ones, but still. Very odd. It also has no comprehension that Break Souls give the character I-Frames, but I wouldn't expect it to, honestly. Consequently, the AI cannot play Velvet anywhere near her maximum potential.

If you watch the video, you might notice that I'm starting to act very oddly at this part of the fight, like I'm not really trying at all. Well, that's because I accidentally switched control methods to Auto, which means the AI is controlling everyone right now. Obviously an oversight, but you really learn a lot about how passive the AI gets in a situation like this.

Below 50% HP, it'll also start casting spells, including this new one, Sinister Soul. It's just an orb that flies slowly in a single path, but obviously, stay away from it. It doesn't cause a massive explosion at the end or anything, so as long as you stay out of its way, you'll be fine.

It'll also add in Jump, which is...about what it sounds like. RIP Rokurou and Eizen there. Ouch.
Eventually it also gets a third Break Soul, Breath Combo. Again, as long as you stay away from its mouth, this shouldn't ever trouble you.

Eventually this fight boiled down to a Velvet solo. In most Tales games, solos are either not viable or only possible during some boss fights, but it's fun when it works out well if the combat system is robust enough to handle all kinds of movements and techniques. There are lots of Tales Solos out there, and, while they vary in how interesting they are to watch, they're interesting experiments, at the very least.
With Berseria, though, abusing Velvet's therion form is like, an entirely legitimate strategy. The reason it's so viable is because of one crucial fact: the window where you can use another Break Soul is open before your invincibility at the end of a Finishing Arte ends. So, as long as you keep the SG coming, there's basically no moment where you're not invulnerable. It may not be interesting to watch most of the time, but when it does work, like this did, it works. This is why your buddies getting KO'd isn't always a bad thing; their useless SG can be put to much better use in your hands.

Do I have to do EVERYTHING around here? The reward for this fight is unlocking Magilou/Eleanor's Dual Mystic Arte.

We're very grateful for the information about Innominat, seraph.
??? I see my message has reached you, then. So now you understand, correct? Innominat's suppression of your world is inevitable. To resist would be futile.
Futile this, futile that. How can you be so sure? Are you controlling Innominat?
??? Yes...and no. Allow me to explain... Empyreans and malakhim once resided in the heavenly realm. At the time, they were known as seraphim.
"Seraphim" describes the highest order of angels in Christian mythos, whereas they're halfway up the food chain in Judaic cosmology. Like with a lot of these concepts, it really depends on what source you're looking at, but malakhim are generally depicted as a lower order of angel. At least compared to seraphim, of course.
Malakhim and seraphim are the same thing?!
??? Essentially... Malakhim are merely seraphim who descended from the heavenly realm. And the Prime Lords who ruled over them eventually came to be called Empyreans.
So then...a malak is one who serves the Empyreans. Got it.
But the real name for them would be seraphim.
??? It's only natural that this knowledge has been lost to you. Tens of thousands of years have passed since we left the heavenly realm... Indeed, nearly all malakhim on the surface world are ignorant of the oath made all those years ago upon their ancestors' descent. *disappears*
Wait! What's this oath you're talking about?
I guess we'll just have to keep going to find out.

Well, in-between episodes of this secret history of the world, we're also getting more and more Katz Towels. I don't know about you, but I know which reward I prefer. Also, don't feel too bad for this Katz; if you talk to it afterwards, he says the prospect of this is exciting. Anyway, open that next portal and move on.

And our final Random Room type: the treasure room. 9 treasure chests always lined up in this formation, these rooms *can* contain some items I don't believe you can anywhere else in the game. Emphasis on "can". Obviously most of the stuff you'll get is consumable rubbish, occasionally you'll find stuff like...

High rarity stuff like Lunar Tempests. Besides the story / EXP stuff, the other reason for coming to the Heavenly Steppes is to get everyone's best, stat-wise, equipment. Most of them can be acquired from enemy drops, but you can also find them in chests. Really in-depth Equipment discussion is definitely too elaborate for my tastes to go into for the purposes of this LP, so if you really want to dive deep into this, this Guide is very interesting on this particular point.
My problem in general with the equipment system in this game is that, unlike a few other Tales games, you don't carry over equipment in any capacity in this game. I guess the Ignicites / Ventites / Glacites are a small exception, but the stuff you actually put *effort* into enhancing, nope. All that disappears between playthroughs. This makes fully enhancing equipment kind of a niche thing to do, since you can only really bring super powerful, +50 enhanced equipment into the Heavenly Steppes / repeat battles of the final boss. Hell, you can't even unlock +10 Enhancement until you win the Milla Solo fight if you're on a New Game file. You'll probably do it more for the bragging rights than any particular gameplay relevance. But, well, good rule for life in general is you find the fun in what you participate in. If grinding the drops / money / materials needed for fully enhancing equipment is what you find fun in this game, certainly don't let me hold you back.
But yes, getting back to equipment. Equipment rarity goes up to 21, and always is stuff like "Unnamed Blade" or "Unnamed Bracelet" to refer to the rarest equipment type for that category. This item may not necessarily be the best equipment for a character, just that it has a fancy green Rarity 21 in the top right there and highest base stats. I find the Lunar Tempests here pretty cool, so I'm gonna use 'em. Also, just so that it isn't lost forever, that 40 minutes I wasted before this recording started, the only thing of note that happened is getting a Jeanne d'Arc Sash for Velvet from one of these treasure rooms, Velvet's Rarity 20 belt. I also got Eizen's Rarity 20 Bracelet, Broken Shackle, from Hexen Isle after I began recording this last bit of content for this update. Two of 'em, in fact.
I cannot rightly say I'm a fan of giving everyone's unique weapon / armor name to the *second* highest rarity item, but Berseria seems to have a thing for "sets" of costumes or equipment or what have you.

And the final layer brings us to the Empyrean's Throne, of course. I believe every enemy around here can drop, very rarely, a character's Unnamed weapon. For example, the blue lizard knight there, the Dragoon, drops the Unnamed Blade for Velvet, whereas the Hell Harpys drop Unnamed Paper for Laphicet. While Chaos does technically give the best drop rates, the difficulty isn't really worth it compared to Intense or even Hard. So choose one of those if you're grinding equipment. And also defeat enemies with Mystic Artes to improve your odds. Level 1 MA = +30% chance, level 2 is +40%, and level 3 is +50%.

Also, what scraps you get from equipment isn't determined by the item you're Dismantling, per se. It depends on the rarity of the equipment, as explained here. The treasure chest in the middle of the big staircases leading up to the highest reaches fo the Throne contains the Pirate King Seafood Bowl recipe.

As for where this area's Helper Katz is, well, he's a tricky one to find. The description I got for its location is "The Helper Katz is located in the southwest corner on the upper level of the throne", which is fairly vague. Is the "upper level" referring to the upper level in general, which would include the little outcroppings on either side of the main staircases? Does it refer to the entire upper area, including that little courtyard you start out in? Does it refer only to the area just outside the throne room? It turns out that's referring to the third one.
How am I standing on this sandspur without triggering it? A story for another day. As with two sandspurs triggering when I finished the dialogue boxes for this chest. Just one more layer, one more layer.
It also can be a little confusing in that it's referring to the southwest corner of the *area in general*, not from the perspective of when you actually come up here, which would put it in this corner, here.

But yes, sneaky little guy was hiding here the whole time. As before, reducing the number of fights and increasing the amount of time to do the remaining ones is your best bet. Once you've unlocked all the Katz chests, there's definitely nothing else to spend spirits on.

And a new recipe to go with these final timed fights. Let's just say I learned what a "Barghest" is about a year ago, in June 2021, and leave it at that. But it's basically a British devil dog. The people of the Kritiyan Archipelago have odd tastes in names.

Although all the enemies you can potentially fight here are dangerous, special attention must be drawn to the Megaphoners, the highest tier of wall enemies. In addition to the...depiction of Normin Island to be found on their back, they also have...megaphones for hands. Would it surprise you to learn they can drop Magilou's Unnamed Guardian? I shouldn't think so.
And they wear goofy comedy glasses and a mustache. Awful things. Just awful.

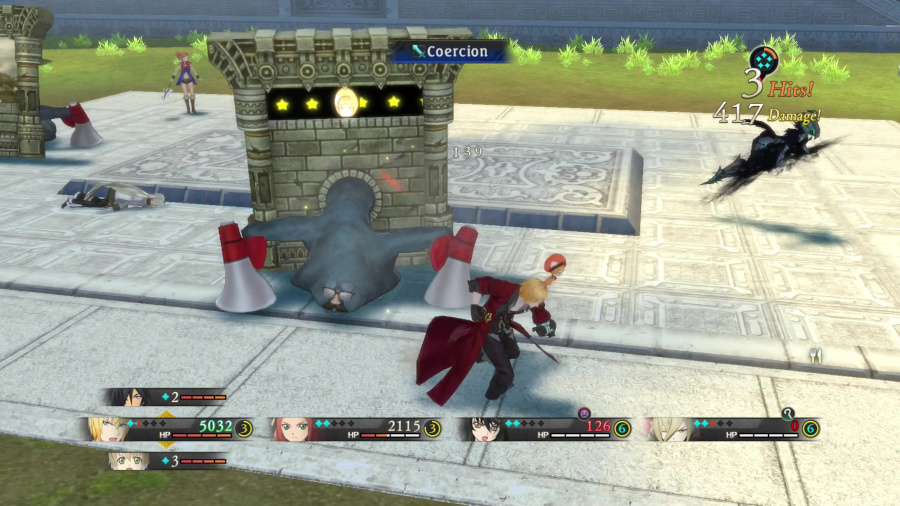
These things are ridiculously tanky and a huge time sink to fight normally, so you definitely need to know how Power Combos work in order to bring them down promptly. To that end...

Know thine enemy. Switch an artes line-up, I like Rokurou for this purpose, to strike all these vulnerable categories. Get that Power Combo and hit them with a bombardment of Mystic Artes. There's no prejudice like extreme prejudice. Eizen also has a good line-up for these guys: Deceiving Pummel -> Clear Path -> Winter Winds. For Rokurou, I like Mirage Dance -> Armor Crusher -> Shooting Star.

Oh hey, would you look at that. I actually got an Unnamed Guardian.
If you select the applicable option, you'll find fights are marked by paw prints on the mini-map.

These scorpions (can drop Rokurou's Unnamed Daggers) are *incredibly* annoying with their burrowing attack, making Velvet highly recommended against them. Actually, the enemies around here aren't *too* bad, at least not compared to the mage groups from the previous layers. I am dreading when we get to the mage groups in Zestiria. I envision myself getting wiped more than a few times.

Wow. Only three fights out of a normal 7 for this area? Must be our lucky day.

On the way to the final portal, though, I got involved in this fight. It, uh...was a bit dicier than I was anticipating. Really bad environment.

Final portal is exactly where you think it would be.

Oh look, it's another reskin of the Chimaera. Just this guy is left between me and the effective end of this playthrough. Azhdahak, you Armenian dragon, your time has come.

Who do I have to thank for it being resistant to every element? Keep in mind, though, that you can still open up Power Combos against it, for the simple reason it still has Dragon/Beast/Amorphous vulnerabilities. I believe only Velvet can hit every potential enemy's categories, with, of course, the exception of ? category foes.
Anyway, I don't believe this fellow has any unique artes, not even Break Souls. Pretty sure its entire line-up was borrowed from Chimaera, which is odd, considering both Leviathan and Fafnir had decently unique line-ups. So, yeah, I really got nothing to add here. I don't think I denied myself or any of you any amazing entertainment by this fight accidentally being on Hard instead of Chaos.

Oh, excuse me, it has Shadow Servant. Lifted straight from the Undead Wizards in the fourth layer. Yawn.

I don't think this fight would have turned out any different on Chaos, for whatever that's worth. It just would have taken a hell of a lot longer. As opposed to Leviathan. Had I fought THAT on Chaos (remember, Heavenly Steppes bosses respawn), I'm pretty sure I would have lost that fight.
The Alchemist's Acerite it drops is pretty sweet. What this does is that it doubles the amount of materials you get from dismantling upgraded equipment. Makes it very valuable for the fabled +50 enhancement loadout, but whether any man of woman born has actually seen a +50 loadout, well, I won't swear to that.

Please miss, can you tell us what happened in the heavenly realm?
??? As you wish. As a young malakhim, you have every right to know the nature of the events in which we have entangled you. To the seraphim, malevolence is as poison. The earth-dwellers create malevolence, and therefore pose a very real threat. Thus the seraphim decided to eradicate the surface world, humanity included.
*gasps* But that's insane!
??? There did dwell among the seraphim those who desired coexistence with mankind. Those more merciful seraphim made a bet with the ones who sought annihilation. They descended to the earthly realm. They would prove that they could overcome the malevolence and live among the humans.
And those seraphim became the Empyreans and the malakhim.

??? And so the pact was formed between our realms.
But even after tens of thousands of years, that dream has not come to be.
??? There was never any chance. In exchange for making the pact, the remaining seraphim imposed a rule upon human and malak. More a curse than a rule, truth told. It made coexistence impossible. From the beginning, the seraphim decided to cast us and the humans aside, and to destroy us together. It was all meaningless... Futile... *disappears*
A rule and a curse imposed upon human and malak...
Hm. I'm pretty sure I see where this is going.
Yeah...I think I get it...
I don't like this.

And now it's Eleanor's turn. None too thrilled about it, of course, but I think the reason they're giving us this stuff is no one else is worthy of it.

Anyway, I was serious the sixth layer is the end of the dungeon. From now on it's cutscenes and stair-climbing.

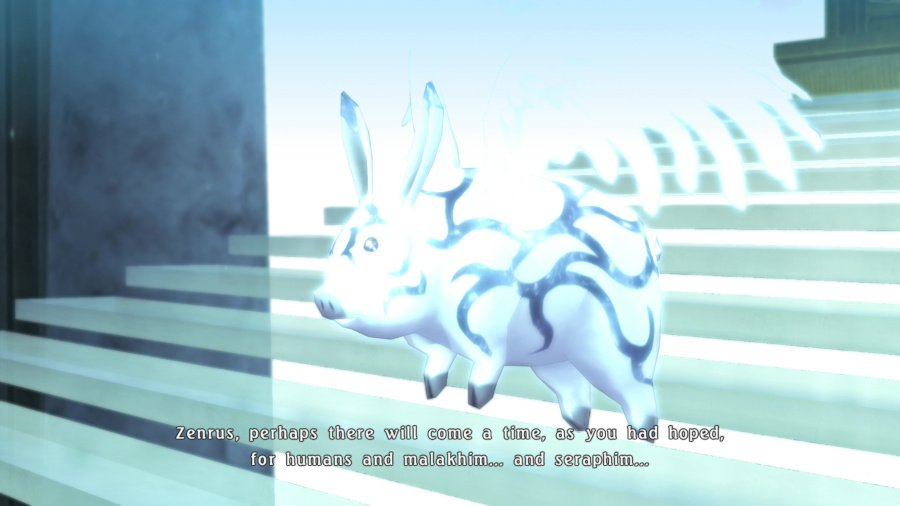
Looks like...there's *something* there. An old story


There's some cutesy looking creature over there...

That voice... You're the one who's been speaking to us?!
??? Yes, that is me. I am Zui Fuu, a malak and former seraph.
Wait a minute...you're a rappig. Did the curse turn you into one?
A *flying* rappig, at that. Not sure if that can be considered an improvement.
No, that's just how she naturally is. She's like Morgrim that way.
That curse is what turns humans and malakhim into daemons and dragons, right?
??? ...That is correct. The malakhim who descended to the surface banded together with like-minded humans. They truly believed they could change the world. But because of the curse, their cooperation came to a swift end. Even minor disputes gave rise to malevolence, and daemons and dragons quickly filled the land. The daemons shredded the malakhim who loved humanity, and the dragons devoured the humans who trusted the malakhim. Nearly all malakhim abandoned their dream of peaceful coexistence and distanced themselves from humanity. They would forever regret having descended from the heavenly realm.
Catch all that? Heavenly Realm? More like "Full of Dicks" Realm. I don't think we have any business ever going to such a place.
Then every dragon we fought on the way up...was here simply because they were trying to get back home.
Eh. If they were trying to rejoin the genocidal seraphim back in their former home, I'm not losing too much sleep over it.
That must be what the Katz meant when they said this place has the power to draw in malakhim.
What about you? Are you one of the malakhim who gave up?
??? It was futile... Humans with resonance, already rare, dwindled to almost total extinction. Eventually, they forgot the very existence of us malakhim. Malevolence spewed forth endlessly, and again and again did daemons and dragons cover the land. If Innominat hadn't subdued the world and reset the balance, mankind and malakhim would likely be extinct.
Is that to say Innominat is a safety valve of sorts?
??? That is precisely his function. Innominat stands as an auxillary Empyrean tasked as the final bastion preventing this world's destruction.
Malevolence spreads, Innominat suppresses, malevolence spreads again... We're stuck in a vicious cycle.
Oh my...seems we're screwed!
??? Our only hope lay with the Empyreans' pact keepers, but...
A pact keeper?
??? A pact keeper is one who posseses an honest heart and strong enough resonance to form a pact with an Empyrean.

??? Although...when the alternative is an eternal cycle of tragedy, perhaps it is better not to feel tragedy at all.

??? It's not a joke! I believed in humanity for tens of thousands of years, but there's no point. And what of you? Do you still cling to the hope that malevolence can be extinguished...that we can coexist?
I'm not sure I care.
??? What?!
I'm tired of you going on and on about how everything is futile, so I've got one thing to say. Wallow in your own misery for all I care, but this so-called earthly world is where we all live. Yeah, maybe it's futile, and maybe it's irrational, but as long as we're born here, here is where we live. Right here, we're living our lives. Humans, daemons, malakhim... Witch, reaper, exorcist... Each one of us!
??? But the time for Innominat's suppression is close at--
I WILL stop it. No matter what.
??? You... You've learned the workings of this world, and yet...
*turns around* I don't give a damn about seraphim in some heavenly realm or the nasty way the world works. When it comes down to it, I'm still me. What I hope for is mine to decide, and no one else's.
??? ...
Well, if everyone's said their piece, let's get going.
I truly feel your pain. I honestly hope you can find a way to be at ease.
You keep on angsting about this heavens thing...just leave the rest of us out of it.
And if you get in our way, we will not go easy on you. *everyone but Laphicet walks off*

??? Humans are peculiar.
They are. They're strange, scary, and they do what they want. But really, if you ask me for my opinion... I honestly don't think that their world is all that bad of a place.
??? Do you think you'll still be saying the same thing when you've become a dragon in the ages to come?
I...really don't know. But... For now I'll live my life to the fullest.

Well, hopefully not seraphim, if that rappig's right about things. In any case...

Nice view, but it seems we've reached the end of the line. But wait, what's that ! icon for?

Maybe this is the real heavenly realm? Yes, the final cutscene you'll get in Berseria is a hot spring scene. Alright then... This spaw (hah!) apparently is why we've been getting these silly towels. Well, there's no mixed-bathing, so it seems everyone's in. Well-earned R&R

Aaaah... You know, I'm pretty okay with this.
I'll second that. This feels really nice.
Yeah... It's like I can feel my soul just floating off with the steam.


Aahh... It feels like all my wounds are melting away.
I'll say. The water is just the right temperature. Soothes all the important places.
Uh...are you guys okay? You sound a little...higher-pitched than usual.
Wait, what... What the hell?
Don't splash the water around, Velvet! That's totally bad manners!
I can't help it. My legs don't reach the bottom...

(Eleanor) Augh, and I'm inside Rokurou! Eww, look at these muscles!
(Magilou) *stands up* Heh, I'm actually as tall as I always wished I was! What the devil's going on in here?!
 (Katz) This is what makes this place so special, meow. You feel so purrfectly divine that your soul floats away and switches bodies with someone else, meow!
Sheesh... Looks like even Bienfu and the Katz have swapped bodies.
Wait...does that mean that the men are now in our bodies?!

(Rokurou) Well. This place certainly wasted no time in getting weird or awkward.
(Laphicet) U-Uh... I'm not really comfortable with this. What do we do? I feel like I've got an inner tube strapped to my chest.
Eizen, is this another side-effect of your curse?
(Eizen) As if the Reaper's Curse would do something so ridiculous. It's probably just that Katz playing a prank on us.
I'm amazed you can stay so calm despite all of this, Eizen.
Hah, this doesn't bother me in the least. My sister and I used to take baths together when we were kids.
I suppose that...makes sense. ...Well, we might as well enjoy ourselves. The wear here does feel quite nice.
Rokurou, you letch! Cover your eyes this instant!
Uh...Eleanor says, while the Lloyd doll covers Rokurou's eyes... This is getting confusing.
*stands up again* Fine, fine. No need to shout, Eleanor. Though I have to say, your body is quite agile. Though your butt is a bit bulky.
Hey! Keep my hands to yourself! *stands up*
E-Eleanor! Dont' stand up!
...*sits down*
Hey, Katz! We better not be stuck like this forever!
No need for confurn, meow! You'll all go back to normal once you leave the spring.
Right then, everybody out. This is just too weird to be relaxing.
Actually, before we go... I've noticed the Katz's been staring at us for pretty much the entire time.


Got it.

I think we can all agree it was a *massive* mistake coming here. Now that you've finished this terrible, terrible place, two things have changed, one more important than the other.

Forget we asked... First up, that skit player machine in Katz Korner now works properly, and you can use 500 Katz spirits to unlock any skits you haven't seen already on any of your previous playthroughs. I have a handful of those to go. The stragglers, here. For the 12 Year Sickness / Cloud-Sheep Egg skits, I should explain. I mentioned that you can get the Cloud-Sheep Egg for the Omega Elixir at either Baird Marsh (which triggers the (Later) version) or the Galles Lake Road (which triggers the normal version), so that's easy enough, but the 12 Year Sickness (Later) skit triggers if you began looking for it after returning from The Calix / Hexen Isle at the start of the third act, as you might be able to guess from the skit itself. Magilou got another hilarious line in the (Later) version, and I quote "Keep asking in them sun shining rainbow kids", which, funnily enough, was transcribed correctly in the normal version. Oh those localizing funsters. They also mutilated one of Rokurou's lines in the normal Cloud-Sheep skit. "I suppose a dumb ol' daemon like me doesn't quite feel the same need for action." became "As per as dumb old daemon like me, doesn't quiet feel the same need for action". I'm so glad we got a couple more of those for the road.
The remaining skits are mostly food related (I assume triggered by getting chracters to cook specific recipes. It's not really clear to me) or related to sidequests I didn't bother seeing through to the end, like opening up every geotree, if you wanna call that a sidequest. A funny note about Katz Korner is, that, if you wander around, every now and then Velvet will sneeze.
The other notable change is...well, is an upgraded final boss, named Deified Artorius as opposed to Armatized Artorius. So far as I know, this is just an upgraded version of the boss, and all the cutscenes and dialogue therein, are all exactly the same, but just with a nice healthy bump in stats. He does come with his own logbook entry, so if you care about that, there you go. Speaking of the logbook, we have one very final piece of the game left to go...

Bullying Prickleboar at the very start of the game, after we went to the Cape Shrine but before we met Artorius in the Tranquil Woods. For the final Dire Foe, the difficulty needs to be on Chaos, and you have to trigger it during this very specific point in the game. I don't know if you can't get it any more after you have that scene with Artorius in the forest, but I just know you don't have to see that scene to do what needs doing here. I also know that it will NOT trigger if you're coming through here while looking for Laphi, so if you're at that point, you've definitely gone too far.
As for the difficulty requirement, Chaos isn't normally available at the start of the game, so you need to carry over your Ignicites and Glacites in the Grade Shop, using the New Game+ option on the title screen, to have access to it from the word "Go". So obviously, like the other Dire Foes, you just need to fight and fight until it triggers. Just run back and forth between this central clearing and the southeast clearing, defeating Prickleboars until it shows up.
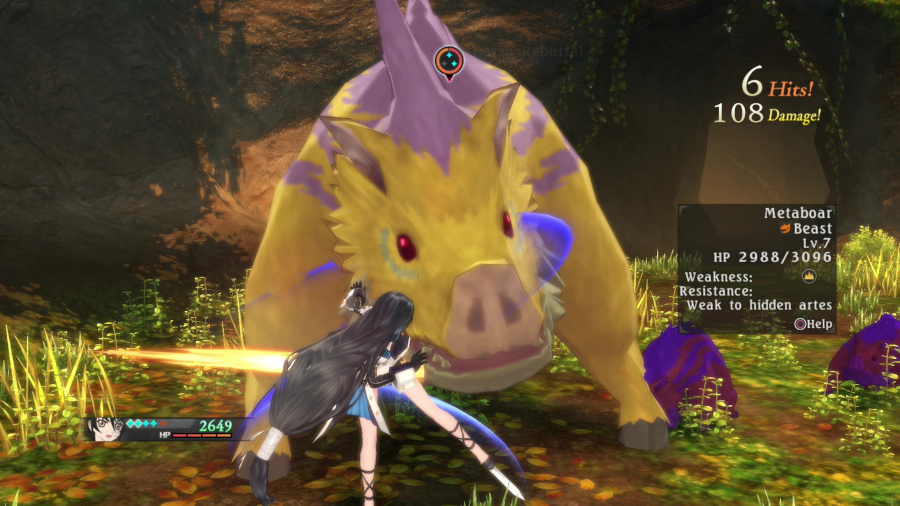
And this is what IT is. A giant Prickleboar, of course. Velvet, obviously, does not have access to her Break Soul and has very few artes, so this is a long, but not particularly difficult fight. Let's skip ahead to the end.

Nice gald amount. As for the Sovereign Acerite, well...you can get it here, but you can also get it by dismantling +10 Enhanced Equipment for up to 99 of the things. As for what they do, well, that gameplay mechanic guide I linked a couple updates ago explains it better than I will here, but, hypothetically, if you had a Blood Blade at +10 and Dismantled it for a Sovereign Acerite, there's a probability of further Blood Blade drops having a special skill on it. This applies ONLY to Blood Blade drops, if we're continuing this example. Apparently even at 99 Sovereign Acerites, which is an insane amount (you can't grind the Metaboar, except if you played the game...100 times) the chance of that happening is pretty garbage, so...one more bizarre gameplay mechanic for the road. Of course.
Well....as I mentioned, this is the last-produced update for Berseria, and that means this is the end of the first half of the thread. I'll take a bit of a break before I start Zestiria, but I do hope you'll keep this gravy train rolling with me when that happens. Now move on to the final update if you're reading this in the Archive to see how it alllll turned out.