Toggle Background Color
Part XXII: The Tales of a Troupe
So I think you'll agree that Zenrus can handle himself. Even among seraphim, he's a big deal, and he hasn't seen this world's transformations for nothing. Although the plot continues in the first dungeon, I think we have more than enough time to handle a bunch of sidequests that have popped up now that we're in the final act.

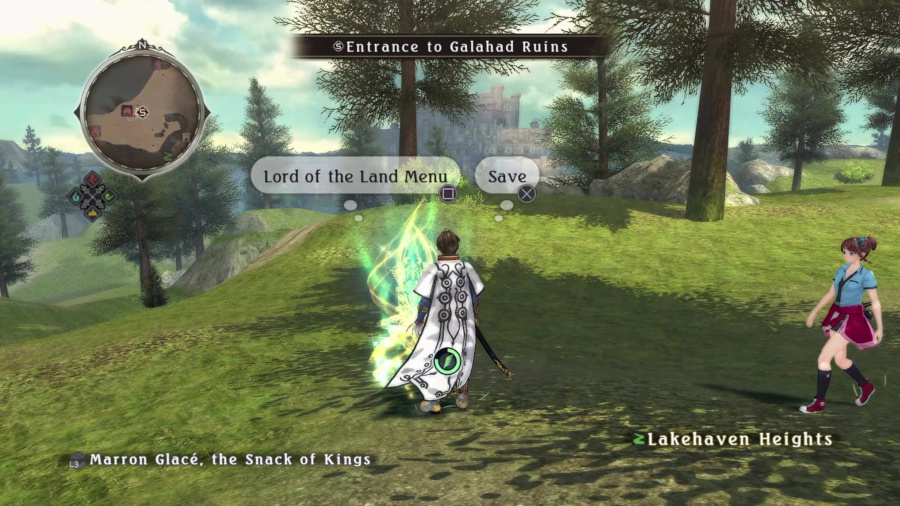
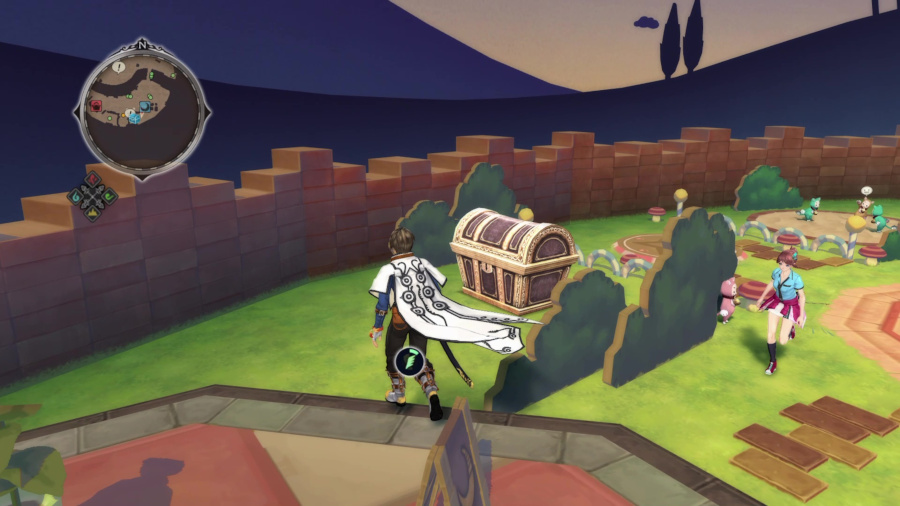
Our tale today begins in the depths of Galahad Ruins, on a corner of B1. This particular food item is very powerful and, while it *can* be created via Snack Preparation, it is evidently super rare because I've had Snack Preparation on some characters for nearly the entire game and have never once seen someone create it. If I have on prior playthroughs, well, I can't swear to that. Point is, without entering the final dungeon, this is the earliest you can get it. Well, as soon as you get the Gold Key, I guess.
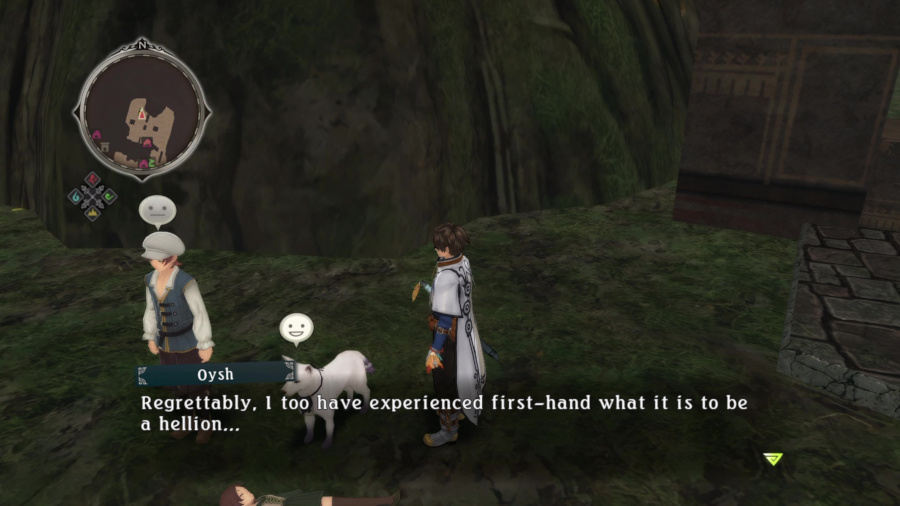
The first time you get one, the next save point you stop by, you can trigger this skit. Oh, and Zaveid and Edna to be in the party for it, of course.
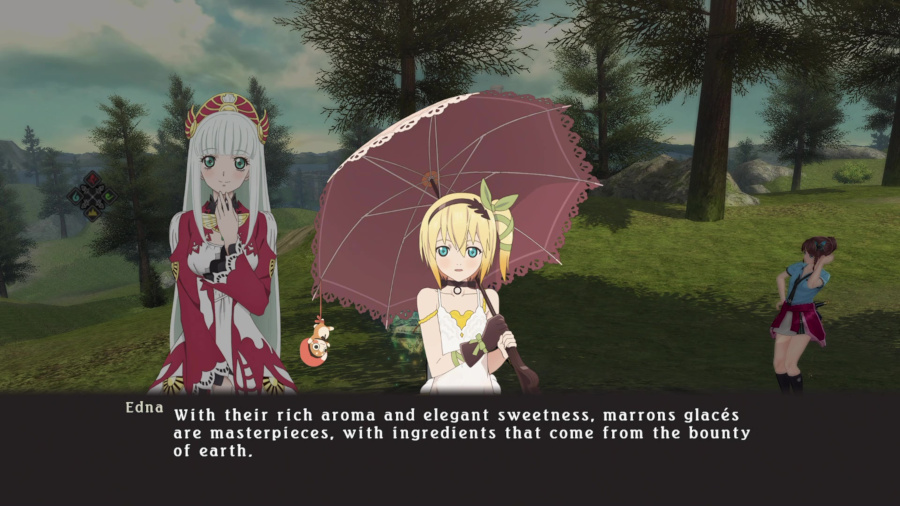
Like most snacks in this game, they are actually a real thing. A popular pastry primarily served in France and Italy. They do sound pretty good. There are two other gold chests I picked up, one in Bors Ruins just north of the save point (Spear of Impending Death) and an Anthro Ring just outside the Dumnonia Museum entrance. Despite the name making them possibly anti-Person equipment, they're for Therion enemies.
The next business is another round of minibosses. We'll be revisiting all the places where we received the Spiritual Powers to find them except Fire. Fire is uh, well, there IS a boss to be found there, just none right now, is all I'm saying. I think you have to enter the final dungeon and then leave to potentially make it spawn, since, at the very least, the Wind Trial one is one that certainly immediately spawns there after your plot business in Guinevere is over. Oh, and leave and come back to the roof. Also important.

Bison Heddin is actually a pretty powerful enemy, but Wind!Form absolutely *destroys* it. It's savage. Really nothing to it, especially since Wind is good at fighting enemies that are floating above the ground like this one does. Next up is Wind, actually, and thankfully, there's a save point right before the stair case leading to the roof.

So this enemy, the Harpy Go Lucky, is pretty powerful, and I'd recommend switching Mikleo to your primary armatization because he's the most effective here by quite a bit. So how do I know this one spawns as soon as you get the Spiritual Power here? Well, remember that skit with Rose and Dezel I needed to get before he died? The one I ran around at the base of Guinevere to get? My initial idea was to come up to the roof and run around in this big circle, but sadly, when I ran up here at the start of Act 3, I saw the Harpy here fluttering about and realized that wasn't gonna work, so to the base of Guinevere I went, since it's a large area without any enemies or lots of obstructions around to prevent my process there. But now we do have business here.

Your battle will certainly be inconvenienced by two Wendys who show up to help, but they have to be dealt with. This is a decently hard fight, actually.

Luckily, the spells the Wendys fire are pretty easy to sidestep off of, so my advice would be to sidestep 'em, then punish the Wendys at range with Water!Form before they start casting again. If your buddies can stay alive, great, in the likely event they can't, well, just hope you don't get surrounded. Luckily, none of the mooks have too much health, so you can quickly whittle them down.
Also, many of Go Lucky's attacks can inflict Paralysis, but luckily Elixir Vitae can restore a lot of HP and clear most negative status effects (not Petrify, of course), so it's not that huge a deal.

Trickstar, located where we fought Asura, is our final enemy for now. Aside from The Big One, which is just coming up, actually. This one's pretty simple, but here, Earth will be your go-to. Not only for the fact Trickstar resists all other elements, but also Scrap Toss will open up a Power Combo. The only bad thing about this strategy is Scrap Toss can either toss a huge boulder, like here, or a small little bag with a much smaller hitbox. Especially if the battle shifts to a side of the arena, Scrap Toss can be very hard to hit with. As far as I know, what object Scrap Toss actually throws is entirely random.
Oh yeah, and accidentally no video for Trickstar. You didn't miss anything. Even on Intense this fight is a breeze.

See that 116 HP with Sorey and Zaveid? That's the result of Lailah's Health Maintenance in action and yeah...it ain't too impressive. I've actually had it on Lailah just as a change of pace, since Edna and Rose have been making snacks for quite some time now, but the actual effect is marginal at best.

And now the action shifts over to Pendrago, and more Waymarker lore. And yep, the Ark Sentinel's Heart was indeed one of Xillia 2's Waymarkers, name and all. But as a result of wanting to restore Zaveid and Sorey's HP...

Now, the largest city on the continent having hot springs, especially classy ones like these, I could see as much more plausible. I also didn't realize how apropos it was I got the girls and boys hot spring skits in opposing capitals. Well, formerly opposing.
But the real reason we're in Pendrago is two important sidequests to start. First one, with Sergei. Also his last scene, I believe. As you might guess, he may be found outside the Knights' Tower. The peace process

 His Majesty and the King of Hyland agreed to make peace with each other. But the process is proving quite difficult.
 Even though the King agreed to it?
It's a mere formality. The conservatives are steadfastly refusing to give up their conditions. And the progressives use this opportunity to build political power. We have allies and enemies on both sides of the fence. Things are indeed in disarray.
Man, just hearing about it wears me out.
 Yeah, sounds pretty tough.
Never! It's nothing, compared to what Sorey and his lady have endured.
Uh... Just FYI, I'm not actually his...
Milady. It's very fortunate to have someone by your side when the road ahead is rife with danger.

Please, look after him.
Well...he may be under *some* wrong impressions, but he's not wrong about this, at least.
All right! Leave it to me.
Please forgive me. I'm sure I didn't need to tell you. Ah, it's time for the next meeting. Please excuse me. *turns to leave* Don't worry. I won't budge. For all those who have paved the way for us.

Well Sergei, you had all the earmarks of a villain this series, just going by the OP, but you were an alright guy from start to finish. For seeing that scene, Sorey has learned his second Mystic Arte, Divine Wrath, and we also got a Pompadour accessory. Pretty successful outing, but now for our second important thing in Pendrago.

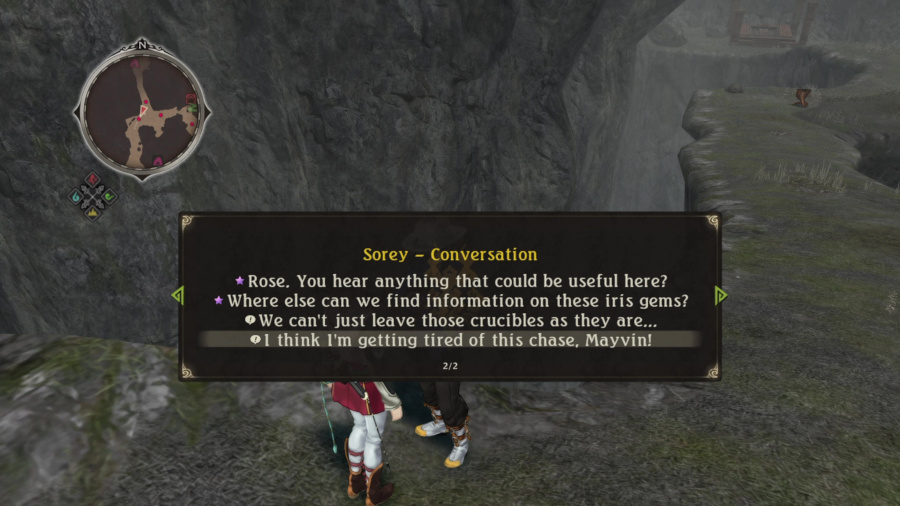
 Oh, right! Mayvin! The one they call the beautiful explorer-poet of the ruins. I should drop by Trizolde Cave and see if Mayvin has any new poems to delight us with.
Uh... I...don't think we're thinking of the same person, but sounds like our next stop is Trizolde Cave.

Oh hey, that out of place coffin I mentioned when we first came here actually does have some importance now. Let's see... Those who saw the world
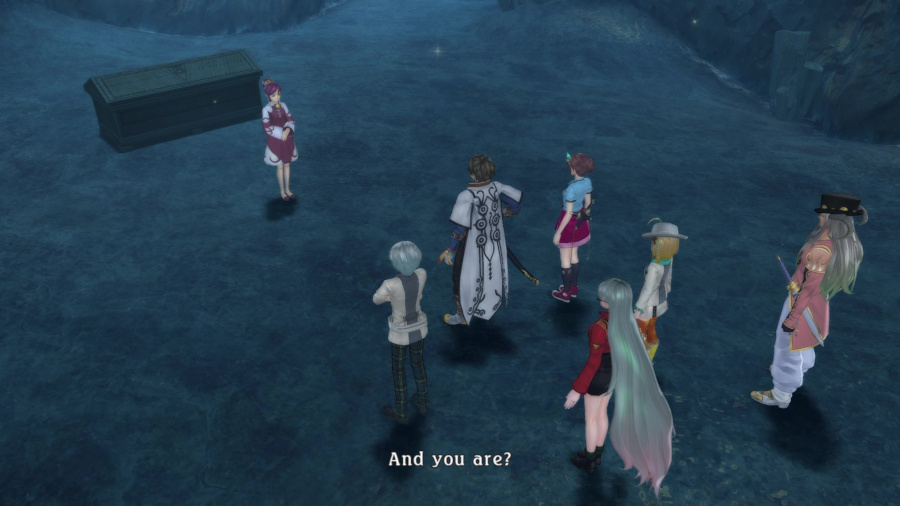
 I am the seraph Aksha. May I ask what has brought you to this distant realm, Shepherd?
*bows* My name is Sorey. Um...
We heard about a poet or something named Mayvin. Do you know anything about that?
Ah... If it is the poet Mayvin you seek...

She passed away?
Yes, over 300 years ago. As her old friend, I care for her grave.
300 years... He didn't mention that part.
 It happens sometimes with long-lived seraphim. Their sense of time gets out of sync with the real world. For the man who told us about her, 300 years ago probably felt like no more than two or three.
 Oh yeah, I've gotten that. Set my pudding down once and only remembered it a hundred years later!
 Really?
 Doubtful.
*shrugs*
Was there something you had wanted from her?
We have an acquaintance named Mayvin who's an explorer. We thought maybe she was family, but...
Looks like the name was just a coincidence.
It is not coincidence. Your explorer friend is the Storyteller of Time, is he not?
How do you know that?
This Mayvin was also a Storyteller. Those in the clan of Storytellers have no names of their own. The name "Mayvin" is passed down through the generations.
So the poet Mayvin was his ancestor from centuries ago!
Doesn't "Mayvin" mean "Caregiver" in the old tongue?

But I wonder... Why is that their fate?
Wasn't it, like, the first one did some damn fool thing and wound up forced to take the oath as punishment for something?
That I could not say. Only the Storytellers themselves might know for sure. Where is the current Mayvin?
We were there when he...
I see... "I watch the world with measured gaze as moments turn to history. The world, a lute the people play, and history its melody."

"If solitude must be my fate, then people are my heart, my heart. I know your sins and shrieks and joys, for people are my heart, my heart."
Is that...by the poet Mayvin?
The words are filled with love for people.
Yes. It was her dream, but surely only shared by her entire clan. It is solitude itself that leads Storytellers to cherish the world and its people. I am sure the Mayvin you knew was happy to have you by his side in his final hour.
I hope so...
We need to work hard to live up to the hopes that Mayvin placed in us. *everyone nods*

So, Aksha using a feminine pronoun to refer to the person in this coffin, and the name "Mayvin"...well, I won't say it's *impossible* that this is Magilou's final resting place, but of course, that's pure speculation. Can take it or leave it.


On the way out, I got into this fight, and I just wanted to show off Earthshaker. One of the coolest spells in this game, this fires off a wave of damage that will hit every enemy in the screen. I don't know if it affects flying enemies, but I doubt the game is so picky that it won't hurt them. Point us, it's pretty cool.

He was a good ol' man, wasn't he...
Also, speaking of Mayvin, time for something I'm almost sure you forgot about.

Yes, there was a sidequest that involved delivering Mayvin himself something from the church in Pendrago, and it eventually directed us to the Great Camelot Bridge. But, the problem is the time you can effectively do this has a very small window. By reloading that ever-reliable post-Water Trial save, I thought I could progress this sidequest just by going to the Great Camelot Bridge, but sadly, it is, for all intents and purposes, unavailable until after receiving all the Spiritual Powers. So guess what I had to do? Replay nearly all of Part XIV's content...again...so I could actually progress this quest. Nearly the fourth time recording the content for that update. Told ya it was cursed.

And the kicker? After about a half hour of completely pointless footage, he's not even AT the Great Camelot Bridge. Oh well, not for nothing, let's just wrap this up.
Are you kidding? Now I'm really fired up! We'll corner that slippery old dude for sure this time! Get moving, Sorey! Next stop--Westronbolt's Ganglen Ruins!

Rose's instincts, man. A well-connected man

 Oh my! What are you doing here?
The priest in Pendrago asked us to pass along this thank-you gift.
You followed me all the way HERE?
"Trust is everything, whether it's business or personal". Isn't that what you taught me?
We promised the priest we'd do it.
I don't know what to do with you two.
Still, you've got an eclectic circle of acquaintances.
One of the hazards of the trade, yes. But then, you could say it's connections like these that make up the world.
Makes you tough to track down though.
Hahaha, quit your bellyaching! Here, I'll let you keep that gift.
We can't do that.
Oh, don't be that way. This is how those connections get their start!
All right. Thank you.
Wait... Then what was the point of coming here at all?

Classic Mayvin... Turns out the gift was a "Fluffy Repede", actually, which, as I mentioned before, was the dog party member from Vesperia and the character on the patch on Mayvin's coat, actually. So, why is this sidequest kinda tricky? Well, in addition to the fact you can't progress it before gaining all the Spiritual Powers, I'm *pretty* sure this sidequest is no longer available once you encounter Heldalf in Aifread's Hunting Grounds, get directed to Lohgrin, and actually go to Lohgrin. If you'll recall, Mayvin showed up on our first visit there and decided to hang around until we had gathered all the Earthen Historia. As I recall, when I started the recording for Part XVIII, since I knew we'd fight and (sorta) kill Mayvin at the end of it, I remembered this sidequest existing and wanted to resolve before we crossed that bridge. I figured that, as long as Mayvin was alive, you coudn't fail this sidequest.
Sadly, when I talked to Rose about it (who is basically your cheat sheet for available sidequests), there was no option for following up on this quest line. Good rule of thumb is that if you can't talk to Rose about a specific quest line or something, it's not, or is no longer, available. So while I didn't check to definitively see for myself, I must presume that was the case. So that very small window of the game, between returning to Glaivend Basin and meeting Mayvin in Pendrago, you need to talk to that dude in the market on Great Camelot to continue the quest. But, we've done it now, and that's what counts.

And speaking of Lohgrin, I decided I was gonna get in the mood to set up that gald farming method I've mentioned. First up, getting the shop in Lohgrin to 4 stars is mandatory, since this is the only shop that will sell Drop Bottles at the appropriate rank. Luckily, both buying and selling items will increase a shop's rank, so uh, do that, if you want to.
I also got the Eephon Inn in Lohgrin to four starts, to get the Deep-Fried Prawns recipe, but when the game is calculating Max Damage, it does it a bit strangely, if you ask me. I'm honestly not quite sure how the game determines that specific metric, despite what I said earlier, but the Chilled Tofu in Pendrago has the same gald bonus condition for 75 hits during a battle, which, against Mimic enemies, is honestly not that hard, so I'd suggest that as an alternative to Prawns if you're gald farming. I will say, though, that racking up 75 hits against Mimic Giants is pretty hard, and not at all reliable. Up to you to choose which you're better at, damage or combos.

Like, check this out. This combo has done more than 10k to this Mimic Zombie, that may not be gainsaid, but when I actually get the results screen...

I get 7186? C'mon. Oh, another thing I discovered while doing this less optimal grinding is that if the game decides a chest will spawn a Mimic enemy, that's locked in, until you open the chest and either defeat the enemy or it runs away. So, for example...

This silver chest will give me a Mimic Zombie, I can tell you that for free. But if I went to the nearby save, saved, and reloaded the game a million times after that, I'd encounter a Mimic Zombie from this chest 1,000,001 times.

Sadly, even with Chilled Tofu activating and 6x Drop Bottles, the payoff wasn't quite as awesome as I was hoping. Remember, Drop Bottles cost 20k gald, so this payoff can't even cover that. I'm guessing the difference between the Mimic Giant and Zombie is pretty massive, and it's probably easier with the Giant anyway, since it has a larger hitbox. So we need to get to level 76 pronto to do this right, but sadly, Zestiria is one of those games that, because levels aren't *that* important, skills and equipment much moreso, it's hard to effectively grind EXP in this game outside of the final dungeon, apparently. So, I'll just to put this on hold.

The next order of business returns us to the aquapolis. First up is that little outcropping of the city just outside the aqueduct's entrance. Consequences

Did something happen?
Oh, apparently they found the body of a child.
What?!
One of those pickpocket kids. We thought he'd turned over a new leaf, but... Guess he was back at it, and he picked the wrong pocket.
*pained grunt*
Whoever it was showed no mercy, even for a child.
Poor kid didn't understand the danger he was courtin'.
That's true. I remember there used to be a whole gang of them. I bet his buddies all met the same fate, too.
That's the life of a street kid. Nasty, brutish, and short.
If you're a dumb thug, reputation is everything. Anyone who messes with them gets pounded into the ground.
Let's go.
Not actually the end of this sidequest, but we have other business in Ladylake to attend to before we follow up on it.

Also, full disclosure, I was wrong about Rountabel Palace never being available for exploration again. I guess this is for that one bookcase landmark you could have missed your first time here, and I guess with Alisha back in the (relative) good graces of the king, there's no issue with letting us wander about again. But our real business in the Nobles District is... Savior of Katz


Hey! Quit bullying that cat!
*the kids run off*
Keep it up and it'll turn into a cat hellion and getcha!


 Thank you very meowch!
Whoa! A cat hellion?!
I'm not a hellion, meow. I'm a katz.
This is...
...a katz?!
Are you a human? Or just a cat?
Whichever.
As long as it's cute?
*doesn't deny it*
I'd like to invite you all to Katz Korner as thanks for lending a paw!
Really?!
We had all been working so hard on our own...and we found out like this...
It's our lucky day!
I'll say! Take us there!
Unfortunately, we do not allow first timers to enter Katz Korner, meow.
But you just invited us!
You have a point, meow.

Guess cats are high maintenance pretty much everywhere.
You know, if inviting us is simply out of the question, don't hype everyone up like that. I also don't see how that "response" is relevant at all, honestly.
It's definitely a hard decision to make as a business.
Katz Korner is a business? Really?
Well if so, connections are super important!
Me-ow! You got that right! You get me? Meow.
Of course! I know just what you mean.
Yes, meow!

*laughs*
You just need to show us that you're a relative of a regular customer who's a high-ranking seraph, meow!
Well? Got anything, Sorey?
Proof of my relationship with a high-ranking seraph...
Well, I believe we may have something along those lines. By the way, still don't see how "response" is relevant. Also, we got Zenrus' pipe already, but if you hadn't picked up on it, or hadn't talked to any of the Lords of the Land to get the hint about it, Rose will certainly point you in that direction. Or, I guess, you could have had the pipe already just by not doing the little Elysia Pitstop sidequest earlier in the game.
Look what the katz dragged in! This is Sir Zenrus' pipe! A friend of his is a friend of ours! We welcome you to Katz Korner!

And we return to this bizarre korner of the world. Thankfully, no one currently in attendance has any feline allergies, so need to worry about that at least, but still...something seems tense about the atmosphere here.
This comically oversized chest has a Kitty Cap in it, so yeah, no reason not to pick it up.

Well, let's just say I hope the inn's recipes get upgraded at some point. Oh, actually, that Saury recipe has a "If you get a 50 hit combo, +30% EXP", so that's pretty good, actually. I assume you can unlock a a stronger version at some point.

Katz Korner is actually a very very old place, actually. And yeah...we've heard.

Mmm, sounds delicious. This is our latest landmark, actually. Lailah's pun powers were in top form here.

Tiger-Striped Foxtails posted:
A particularly large foxtail with a tiger-stripe pattern. Even a large carnivorous feline would be a sucker for this.
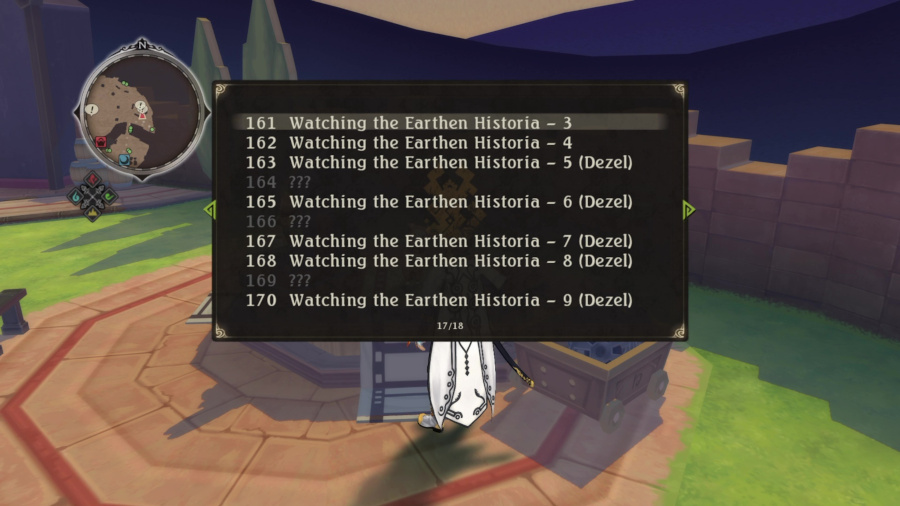
And yep, there is a skit player, just as I thought there would. Trouble is, because of the whole Dezel/Zaveid thing, even just that, it's not possible to get all skits on one playthrough...or should I say, but there is a way to unlock all the ??? skits for purchase, just like in Berseria. That's at the end of the post-game, by the way, so we're still a ways off. The other Katz on this little platform has an anime movie player, but we still have six unknown ones, so we'll just have to progress the story to get those.

Not this again...

Now, this shop I *know* allows you to buy Elixirs once you get the shop's level high enough, but I have nowhere near the money for that, so we'll just have to come back for this.
Hmm, seems Katz sporting pastimes have changed a bit in the past 1000 years.
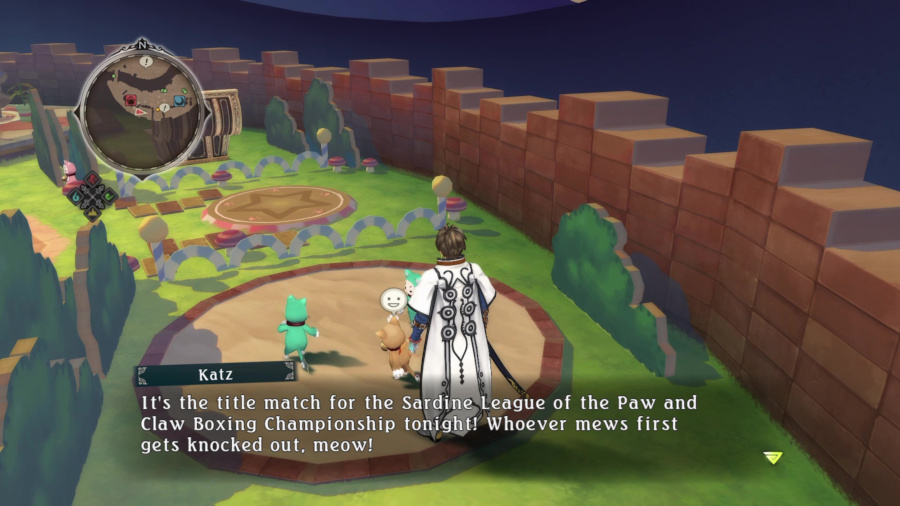
But as for our last business for now here, yes, there is an optional boss fight you can trigger by going into that little coliseum there, and it is quite difficult, so prepare appropriately if you want to fight it now. For the Sakez of Mutual Turtlez

What's this song?!
 It's called "The Hymn of Turtlez". It'z an old family song, a real blast from the past. It's a songz supposed to turn away folkz you ain't longing to see. But it lookz like it did the opposite. So youz made it in, huh.
Like they say, you gotta be like the turtlez... At ease in your own shellz.
*chortlez* Then you've done well. *jumps down*
Enough talk. Atone for your betrayal...of the turtlez clan! *draws fish blades*
*does same* I see you have a similar grip. You and I are definitely turtlez!


Turtlez!
You can't stop my ambitionz! Nor the tragedy of the clan!

But why are we turtlez still so slow?!

I failed my mission...

Yeah!
Hmph!
So a little introduction, since the turtlez are once again in our presence, a bunch of the lines the Dark Turtlez said here were initially said, with, uh, *some* variation, by Julius Kresnik from Xillia 2. Makes sense, because, as I mentioned, the Turtlez really love their Xillia 2 references.

One such example of the parody going on herez. Now, back in the Xillia 2 thread, I actually linked a successful run of this fight, on Chaos, no less. I'm doing it again but keep in mind I am *way* more powerful in this video than I am at my current place in the playthrough I'm doing for this thread, but the basic strategy of that Earth!Form spell where you grab a sufficiently-sized enemy, jump up, and slam them down, actually does work super well against the Dark Turtlez.

But we'll also have to make do on the current playthrough, at my current power level. Hint, it ain't gonna be easy, and this is also on Hard, full disclosure. This is a much harder version of the same fight in Berseria, where, yeah, he was a nasty little shrimp, but not really any big sweat. Turtlez is fast, very powerful, has blistering combos, tons of HP, and a not easily accessible weakness (Crustacean). Basically a considerably harder version of the Maltran fight. So how do you overcome such a beast, or at least give it your best shot? Well...

So I never really mention switching strategies, because it's rarely relevant, but it absolutely here is. Prioritize Defense will cause CPU allies to avoid combat as much as possible. They'll never directly fight back, casters will try to heal wounded party members if they get the chance, but overall, the AI's primary strategy is to sidestep / run away whenever an enemy get close.

Perfect example, right here. I tried for a long time to fight Dark normally, but it just wasn't taking, because your allies do not realize the true scale of the power difference here. But you, as a human, should. The basic strategy, at least the one I employed, is actually pretty simple. The only reason this strategy works so well is because Dark seems to have a very strong preferance to go after non-human controlled party members if possible, and tear them to shreds, before going after humans. But when the non-humans prioritize keeping themselves alive, it causes Dark Turtlez to waste the vast majority of his time hunting them down, and you can attack in relative peace and quiet.
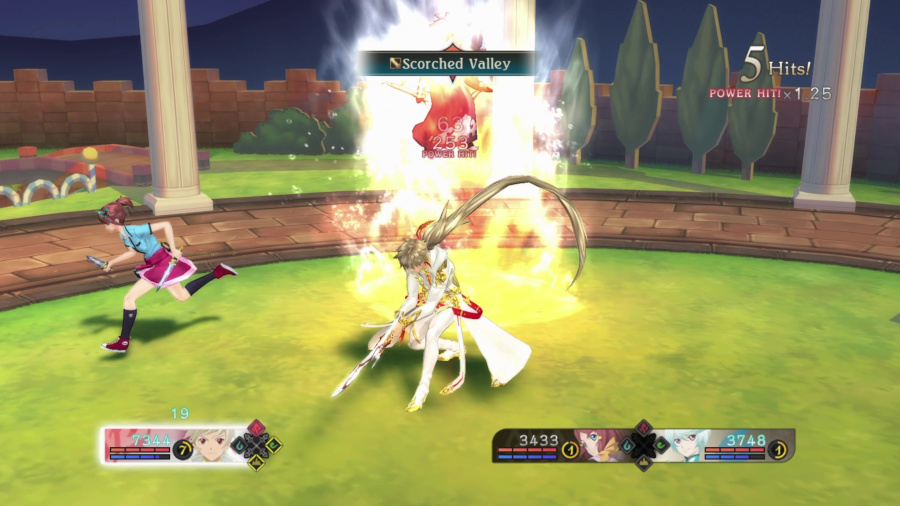
In my case, as you can see, I was heavily favoring Fire!Form, since Sorey still has that Draupnir, and Vermillion Crescent -> Scorched Valley will begin a Power Combo. However, this is one case in which Dark's small size will help him, since Tower of Blood, which would normally end this combo, will frequently not hit, either because Dark is too far or too close from you. However, if you're at the right distance, Tower of Blood will hit.


So, as for Dark's attacks? Well, they're all very quick, and virtually impossible to punish, since he has very little lag time between attacks. Typically, he'll chain up to three attacks, and a full combo can easily take a full health character to 0. Even though Rolling Thunder here, Tiger Blade, or Azure Edge (a projectile attack) seems like it's easily punishable, do not try this. Dark can recover instantly from either arte and begin another attack. Crimson Fury or Lunar Reflection are punishable, however. If you're trying to dogfight Dark, and I wouldn't recommend doing so, these are the artes you'll want to look out for if you want to begin an attack.

Time Disintegration is another arte you can punish, since it's another long melee string, which is always a good sign. What's not a good sign about him starting to use this, though, is that I believe as soon as he can start using this, he can start using his Mystic Arte.
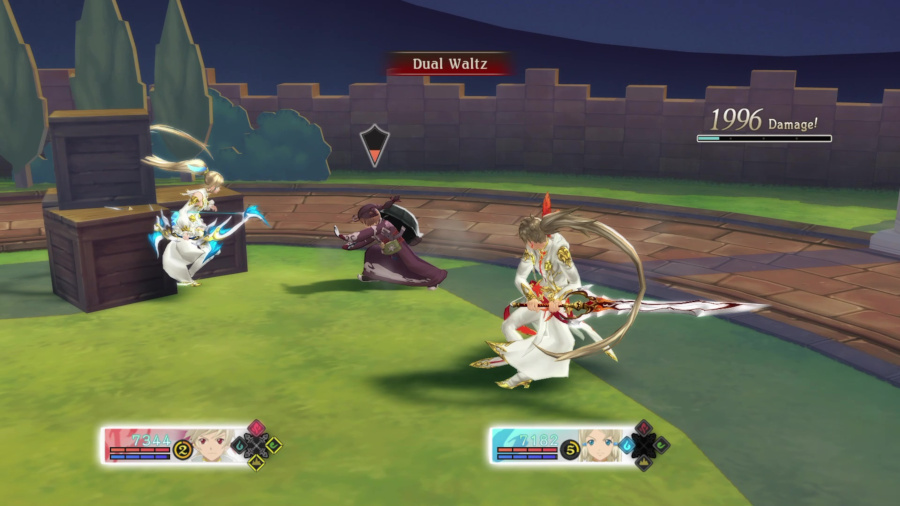
It's when Dual Waltz (all of his artes except his Mystic Arte are also artes Ludger Kresnik could use) comes out that you *really* need to be careful. This is an *incredibly* fast arte that comes out instantly, and if that first hit gets you, you're gonna get hit by the whole combo. The arte itself actually isn't that deadly, it's just he's very likely to use his Mystic Arte after he entirely finishes the animation, and it also seems he's impossible to stagger while he's using Dual Waltz. The only reliable way I ever found to dodge this one is, whenever he gets to around this percentage of HP, and he has the potential start using Waltz, dodge to the left, then dodge back again as fast as possible, multiple times if necessary. If Dark indeed used Waltz, and of course, that's not guaranteed, that dodge to the left will dodge the initial incredibly fast charge, while the back dodges will get out of the way of the rest of the attacks. But especially if you get caught up on those crates, that can be a difficult proposition.


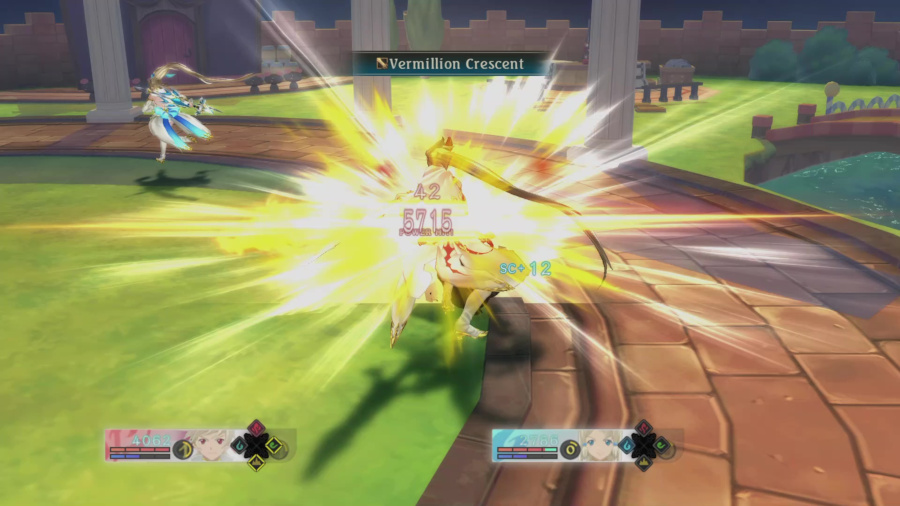
Goes without saying his Mystic Arte is *incredibly* powerful, but thankfully, it only hits one target. Well, I say that, but it can hit multiple, but the second target has to be very close to the actual target to get caught up in it.

I actually should have gone out at some point and actually gotten a few Arcane Bottles, but eh. There's few better excuses than this fight to actually use Elixirs.


Now, I've watched this moment a few times, and even after seeing it, I *still* have no idea why the game decided he was allowed to use his Mystic Arte here (targeting Rose, thankfully. Didn't hit Edna, Rose was just getting revived, so he didn't hit her either, and I was clear across the field. The game just...kinda decided he was allowed to. I call that "cheating".

Phew...that was like 3 hours on my end...

It all endz here.
Wait!
Please! You mustn't fight amongst each other.
Wait, did he really do something that bad?
He...thiz guy... He stole the moneyz we reserved for the seniorz' vacation fund!


And?
The seniorz are mad that their spa vacationz got cancelled! They told me not to come backz until I bring themz the culprit. Now pay us back, you soft-shelled coward! Before we sellz yaz to a restaurant!
Too bad. I used up all your moneyz already.

Wait a meow-ment! Dark Turtlez has been working hard to earn money for us katz, meow! He's donated all his money to our village, meow! Thanks to him, we are able to maintain Katz Korner.
Dark Turtlez, did you really...
Why didn't you say soz?
*stands up* There'z no way I could. Can't believe a Turtlez like me ended up falling in love with such a simple village.
You're such a numbshell.
Hmph...takes one to know one.
I'm glad, meow! Now he can come back to the shop, meow!
Shop?
Oh yeah! The local hip club in Katz Korner, the Katz Pajamaz! It's a place where you can forget about your worries in life and eat, drink, and be meow-y! Dark Turtlez is a valued patron who brings expensive bottles of milk for us every time he visits!
*runs off* Hey suckerz! You can leave the bill for yesterday's bottles to Turtlez here!
Hey! W-Why yooouuu! *runs after him*
What's the Katz Pajamaz?
Tell us, Mikleo.
Don't ask me!
Time to do some field work!
No! You'll become malevolent!
I guess nothing got resolved after all.

As good as a denouement as we could ask for, with a sidequest like this... What did we do all that for, anyway?

Well, maybe the Falkewin Hillside can answer that question. Oh, and another reward for defeating the Dark Turtlez is a pair of Autumn Blades for Rose. If you equip them, you'll find that they're Dark's fishy blades. So yeah, she can use those for herself. Trouble is, they're kind of a novelty, since I'm pretty sure you can't get more of them by any means, and you just can't really use them for adding skills since they're unique and all that... Again, a novelty. Art investigation

We were going to report to you about two separate incidents...
...but it looks like they're related.
What do you mean?
I had some info about the Romano Firm. The owner, Romano, is supposedly an art connoisseur. People who went bankrupt offered him their prized arts as collateral for relief.
Mine was about the children of the vagrant hunters. Apparently their targets were carriers hired by those bankrupt families. So the stolen goods were works of art to be taken as collateral for Romano.
Could that be just coincidence?
"Everything happens from the interrelated strands of coincidence. But behind every hint of self-interest is an intention."
Right.
Romano claimed breach of contract, saying he didn't get the goods and gave a final warning. That's why so many have had to file bankruptcy.
And what happened to the artworks?
He's taken them all for himself.
So this was all a scheme for him to get his hands on them...
Can't be held accountable if there's no evidence, right?
The only "evidence" there is would be the group of children who attacked the carrier.
So that's what he meant by "destroying the evidence". That no good lousy sonofa...
*pained grunt*
All right. I'll go find out for myself.
Romano's headed for Marlind...be careful.
He must have bodyguards too.
Roger. You two keep investigating. Hey...
I'll go too.
Thanks!

And where would any shady art collecter head for in Marlind? Well...

How are you going to go about this?
Just leave it to me! Let's meet with this Romano.
I have a bad feeling about this...

Let's see if we can settle this like grownups... The culprit

Using our little refund for renovation! Just too smooth!
Are you mister Romano?
Who the hell wants to know? I've got this place reserved.
There's something I wanna ask you. You can just buy works of art. Why are you getting them through such underhanded means?
She sure doesn't waste time.
Figures.
Who are you?

Wh-What?!
Hmph. Is this some kind of joke, little girl?
A joke?
Er...
Taking all the property from bankrupt people... Killing all the children you've used... You've really messed up now.
Y-You think you can prove it?!
I'd say she has. Hard to imagine an innocent man who would respond to such accusations like this.
Do you understand the situation you're in, Mister Romano? *draws blades*
Don't just stand there, protect me, you fools! Do your jobs!

Hah! Thanks for proving me right, Romano!

There being only two Orc Kongs, when Romano had four guys with him, if you watch the video you'll notice two of them ran off, so yeah, that's decently likely, Sorey.
So speaking of the Orc Kongs, this is quite a difficult fight. This is another small arena to be fighting in, and both enemies are very powerful with hard-to-sidestep axe attacks.

Although they're weak to Wind, so Zaveid is going to be your best way to keep them off-balance, Lailah also works quite well here, and I got a lucky Stun while both enemies were together, so my Mystic Arte and Divine Phoenix Blade were able to hit both for quite a bit of damage.

Yeah...would it surprise you to learn this fight took me quite a few attempts? Normally I'd like to say this was because I was on Intense, and, of course, that's part of it, but it's also a symptom of me being underleveled and having awful equipment, just because I haven't seriously grinded at all for equipment this playthrough. This will soon change.

One other reason this fight is hard is because, at low health, the Orc Kongs will gain this stupid arte, Royal Majesty. It...throws down a volley of spears? What does that have to do with being giant monkeys with axes? That's why it's dumb. It also does a lot of damage and falls in incredibly strange ways...definitely not fun.
As far as movement goes, the rain of spears will travel in a large circle around the arena, so actually the safest place to be is in the middle of the field. I just didn't notice this during the recording for this part of the update (this update had three separate recordings for all the content), so that's why I'm seemingly helpless against it in the actual fight.

Fun times.
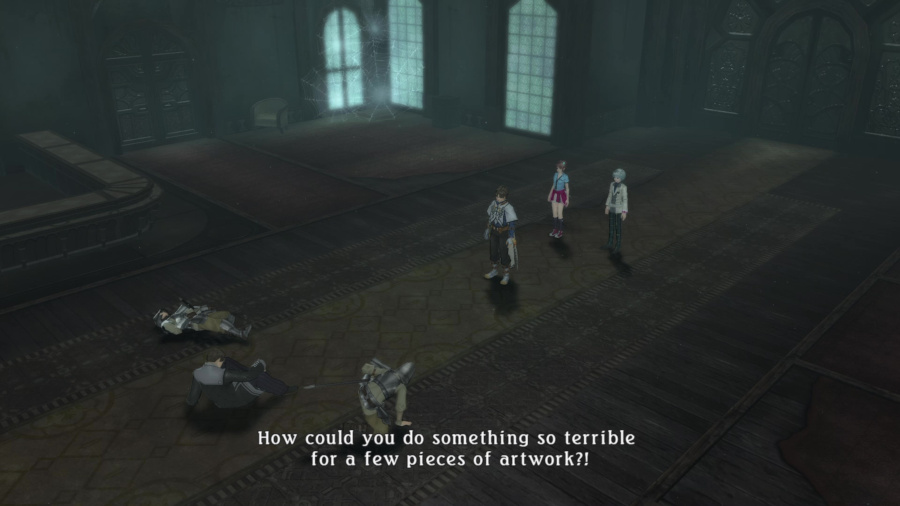
"Pieces...of artwork"?! *stands up* I am reclaiming these beauties! From fools like you, who would reduce such beauty to monetary value! Why would I buy them?! I would never tarnish their value by degrading them to property! True beauty should rightfully be in the hands of one who truly comprehends it! Me! These works of art should be mine and mine alone! This is my calling, my war I shall fight to protect artistic beauty the world over! For the sake of such a historic undertaking, who cares about one or two dead brats?!
Can he be purified?
He...isn't emitting any malevolence.
Figured. *draws blades*
Hold on a moment.

Gugh...


When did you--
We figured out who these two are.
They're kidnappers who've killed over 30 people. There were requests from the victims' families.
That's the end of that. Mission accomplished.
How should be report back to our client?
I'll tell the children myself. *turns back to Sorey* Could you come with me?
Of course.


But we've still got to let them know this is all over. You mind coming with me to see John and Shino?
If you forgot where we initiated this sidequest, those kids are back in Tintagel Ruins. The safe front area, of course.

 Why did you kill them?!
Quick! Stop 'em, Shepherd!


The memory of her companions getting killed had probably taken over her troubled state of mind.
And so, she became a hellion once again.
In the end, I couldn't save anyone...
That's not entirely true. Think about it: If you hadn't purified her, she would have killed many more. If that was the result of her grief toward her companions, then she would be beyond redemption. The lad was just...unfortunate, is all.
The Scattered Bones have delivered their vengeance. So didn't he get his wish after all?
No. We just did what we had to. Nothing more. That's not "saving" anything, if you think about it.
Huh...
Then why do it?
You know how all kinds of terrible things happen in the world lately? I want to do everything I can to stop them before they start happening all over the place.
Of course. That's the duty of the Scattered Bones.
Yeah. We've had our share of hard knocks too. That's why it's our duty to put an end to it if we can.
Meaning that it's your job to kill.
Yeah. But it's true that a world where we don't have to kill would be best. Eguille, Felice, Talfryn, Rosh, and the others feel the same way. As do I. But Sorey, you can actually save them. Haev confidence and just do your thing!
My job is to give life...
You got it!

Good boy... You also received Rose's Scattered Bones outfit from this scene, so Rose is the one character who gets two totally unique costumes that have no color variation.

Most of these endgame sidequests will end with a skit, this certainly being one of them. These two do make quite the chalk and cheese pairing, but it seems to have gone well so far.

The Legendary Wyvern... It appears to be a formidable hellion.
Appears to be?
I'm not an expert on every hellion in the land.
You're right. Sorry.
Whoa, sincerity. That's new.
It is, and this is going to be our next sidequest, beginning on Great Camelot. I certainly didn't know this at the time I recorded this update, but it would be three days of lots of equipment grinding to actually get around to finish it. And when it comes to equipment grinding, that's when The Real Tales of Zestiria starts.

So the reason I warped over to Lohgrin was because I wanted to pick up some Arcane Bottles at the shop, but that's when I noticed I still hadn't shown the God Eater collab area. Well, this is what *actually* prompted me to finally get around to equipment grinding, since I tried for a very long time and wasn't able to beat it. But, I think I got enough of the picture to show you in abridged form.

So the gimmick with the God Eater arena is that you face up to potentially 10 different battles against varying numbers and strengths of Aragami, the enemies from God Eater and the eponymous "Gods" of that series. It's the same battlefield type as the Malevolent Crucibles, but you have a totally unrestricted party, but also including a Game Over if you fail. Between any fight, assuming you're victorious, of course, you can choose to leave with all your winnings, EXP, and Gald. I thought at the time it might be decent for grinding, but it's not, really. But, at the very least, I can give you an abridged picture of it, as I said. This video only goes up to the end of Battle 6, which is enough for you to see all the enemies on display here. It will suffice.

The first enemy type you'll encounter is the "Ogre Tailen", which is otherwise known just as the "Ogretail" in God Eater. From what I remember, Ogretails were very standard enemies in those games, plentiful but easily dispatched, and basically just used as body blockers for more powerful Aragami in their finest moments. Here, though, they're powerful, large, and quick when they're jumping around. You'll really want to thin out their numbers as quickly as possible, because there's not much harder to break out from than a bunch of these guys surrounding you. They're strong against Earth but weak against Void attacks.
Oh, and as a general note, Aragami in this game are all ?-type enemies, so elemental weaknesses are the only way to open Power Combos against 'em. Luckily, they all have at least one weakness.
The second Aragami type is the "Chihyu Dragon", which in actual God Eater games, is called the Chi-You. They begin to show up at the end of the second battle. They are mid-tier enemies, proving plenty of a challenge depending on whether they come in groups or supplement even more powerful enemies. As you might guess, they rely a lot on their wings to attack, either gliding at you or attempting to slam the ground in an unblockable attack, throw up a whirlwind around them for the other unblockable, throw an energy ball, or rush at you and slam their wings together to do a lot of damage, with a high chance of stunning. As may be inferred, the last attack is their most deadly, since Stun is a very nasty thing to get hit with. You take a lot more damage and can't move out of the way of danger until it's over.
Thankfully, in spite of their variety of attacks, they are weak to Fire and Water, both excellent forms.
Wanted to get a good action shot for the final Aragami, who first shows up at the end of Battle 6. Yep, just the three. Vajras are the most dangerous Aragami on display in this game. In the original games, they also served this purpose, being regular members of more difficult quests, with the combination of lots of health, high mobility, and lots of attacks.
In Zestiria, their primary attacks are pouncing from long distances away, using those appendages on its back to create five lightning balls in front of it before shooting them out (both the balls and the Vajra recoiling do damage), and...

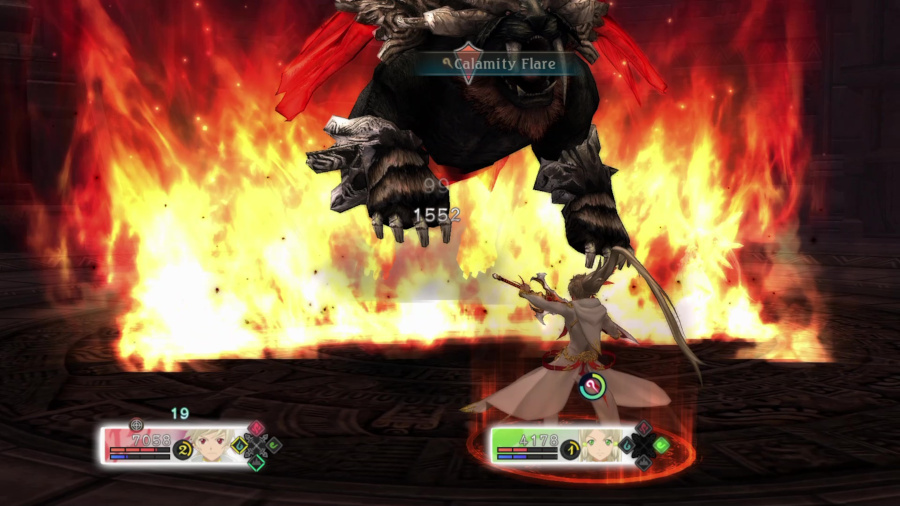
This attack, where, after rearing back for a second, it'll create a huge field of lightning around itself. This attack is extremely powerful and is unblockable, so if there's anything that can wipe you in a flash, it's this. If you have no alternatives and can't sidestep the whole thing in time, being fairly close to the Vajra will somewhat cut down on the amount of time you're exposed to the damage field. At relatively mid-range, though, you'll get hit by the whole attack, which can very very easily kill you. But, if you sidestep just in time and keep sidestepping while the field is up, you can rack up lots of sidesteps and recharge a lot of BG. The Vajra is weak to Earth and strong to Wind, so plan accordingly.

Yeah, this is about the most dangerous range you can be at when it starts this attack. Here, I backstepped out of danger, but if you don't...yeah, you're gonna feel it.

She's doing that a lot lately. Anyway, once you finish Battle 6, you've seen all the enemy variety on display, and future waves are just...more of that, y'know. In later battles, two Vajras can be on the field at once, and yeah, that's when it gets real rough, or when you have a bunch of Chi-Yous running around while a Vajra is on the field. You don't get any special item or message for beating the whole challenge, so it's basically a "Do it if you want to" type thing.


So yeah, after I gave up on trying to finish with my weak build, I, uh...did something about that. About 3 days' worth of work, to be exact. So, let's talk item grinding, since I sure did it a bunch. Gonna put it to you straight, this is about the earliest in the game you can start realistically doing this. First up, you'll need lots of normin to do it right. Having a normin able to be assigned to a Lord of the Land significantly increases the chance that normin skill, such as Windur, will appear on equipment dropped by enemies in that region. A normin can only be assigned to one Lord at a time, but they can be switched around at any save point in any region. So that's simple enough. Full disclosure, This is the spreadsheet I was using to get much of the following information from, as well as guiding my grinding. An invaluable asset, to be sure.
Oh, before all that, this skit about cakes or something, I dunno. Lailah seems pretty proud of herself, and she would like fancy little cakes, wouldn't she?
Next up, getting the equipment. This is the part everyone hates, since there's a lot of mechanics on display here. First up, enemy levels. Enemy levels increase the tier of items that enemies can drop, with the drops reaching their max potential if an enemy is level 90 or above. For example, Sorey's current earring, the Irminsul, is only dropped by enemies at least at level 90. Now, if you go into the Luring menu, or use R3 to check all area information at a glance, if an enemy is level 90, it can technically drop any type of equipment, even if it will drop one type more than others. For example, if you look them up in the game, the Axe Beak and Duobomber in Trizolde will frequently drop earrings, but they can drop any equipment type such as, say, Edna's umbrellas. Still, that preference effect is very strong, so if you're trying to grind a certain piece of equipment, bully those enemies.
Another *very* important thing to keep in mind with equipment drops is Mystic Arte kills will dramatically increase the odds of getting equipment, to the point where you'll basically want to be MA killing everyone you find, at least the enemies you want drops from. You can also get into Dangerous Encounters to further boost your odds, though this isn't always available. You can get more Arcane Bottles in Lohgrin, so a good loop to keep in mind is Money -> Drop/Arcane Bottles -> Grind Drops -> Mimic Giant Shuffle, repeat, to keep the gravy train rolling. As far as I know, Wind!Form's Sylphistia has the largest area of effect, so that should probably be your go-to, at least against enemies not strong against Wind.
Enemy levels increase both with the assigned normin (so, attaching Windur to an enemy whose level is 90 will make that enemy become level 100) and the current difficulty level. Difficulty level will progressively increase every enemy's level, with Chaos maxing out. Chaos (just fight enough battles on Intense to unlock) is a very good setting because it's generally not *that* much harder than Intense, item drop rates are boosted I think, and if you're in the later areas of the game, such as areas within Alken's domain, you'll almost never see anything but a character's best equipment. Also, when it comes to drops, enemies can drop items within their current tier, as well as the one below it, as a general rule. For example, the Draupnir, which I've mentioned before, is Sorey's "level 80" earring, so you'll very frequently see Draupnirs dropped alongside Irminsuls, his "level 90" earring. But there's no risk of sufficiently high-level enemies dropping crap like Amber or Calcite weapons, so if, for whatever reason you wanted those, you'd need to return to early areas of the game and grind there.
Another important thing to keep in mind is that if you're bumping up against the item limit, you'll stop getting drops, so make sure to regularly flog equipment you have no interest in keeping to make sure you always have room. Which brings us to...

The effects of the Lord of the Land. As you acquire more Grade in a Lord's domain, as well as offering items to them via save points or talking to them directly, you can access more boons, and points to spend on those booms. From top to bottom, they are...
Lord of the Land boons posted:
Traveler's Repose (0 points) - spend Gald to warp between any save point in the game. The amount of Gald is determined by another boon and the amount of gald you have. Less Gald on-hand means cheaper warping.
Treasure Restoration (1 point) - most treasure chests will refill after visiting enough locations in-between opening the chest and returning. Crucial for grinding Mimic Giants.
Hellion Detection (2 points) - hellion groups will appear on the mini-map.
Healing Air (2 points) - increase effect of cooking items.
Sanctification (0 points) - have a Lord transform an item that is at least at +10 enhancement. I'll go into this more after this quote.
Miracle of Life (4 points) - prevent the first KO during a fight. The affected character will instantly be revived upon reaching 0 HP.
Drop Rate Boost (3 points) - increase an item's drop rate by 50%. If it was 6% before, now it's 9%.
Traveler's Guide (0 points) - halves the cost of save point traveling. No reason not to enable both this and save point travel, since they both cost 0 boon points to use.
Prolonged Satiety (3 points) - sometimes will not lose cooking effect from an inn's meal even after a battle, which normally depletes that counter. So, if Chilled Tofu, for example, lasts for 8 battles, if you get lucky, the next battle, it will still be at 8 battles left until it wears off.
Service of the Normin (1 point) - get a second normin slot. Each Lord has one normin slot by default. Enemy levels will stack with each normin currently assigned to a Lord.
Treasure Rarifier (3 points) - increase the rarity of items obtained from treasure chests. Only works if Treasure Restoration is also enabled.
A Little Good Luck (1 point) - sometimes will receive the same cooking item used before the most recent battle, basically a free usage of that snack.
Nimble Feet (2 points) - increases movement speed dramatically. Basically equivalent to a full level Windstepping. Might be *slightly* slower.
Resistant Body (7 points) - time spent staggering from an enemy's attack is reduced by 20%.
Tribute from the Defeated (3 points) - increase drop rate of items currently equipped by characters who defeated the enemy who dropped it. For armatization, this counts both characters. So if Sorey has a Mumbane on, and Lailah has an Empress Shield, then defeating a group of enemies with Flamberge will increase the drop rate of *both* armors.
Drop Rate Boost (5 points) - +50% drop boost and stacks with the above Drop Rate Boost to further increase the drop rate. So a 6% rate is now 12%.
Protection from the Strong (7 points) - if an enemy is higher leveled than the character being hit, reduces damage by 20%. Also applies if those levels are increased via normins, not just difficulty levels. Also, just to be clear, boss levels are not affected by normin.
Merciless to the Weak (9 points) - increases enemy stagger time by 20%.
Unshakeable Resolve (4 points) - Probability of allies being stunned drops by 50%. This is the state where the character is downed and has stars circling above their head, just so we're clear.
Service of the Normin (1 point) - adds an additional normin slot, up to a maximum of 3.
In a NG, you'll only get 20 points to work with if a Lord is fully leveled, but you can get an additional 5 points via a Grade Shop choice, but I don't have that luxury at the moment. Obviously, when you're equipment grinding, you'll want the Drop Rate Boosts enabled, as well as Tribute from the Defeated, since you can only fuse items together with the same name. Fusing increases both the stats of the equipment itself (up to +99), as well as letting you mix and match normin skills based on what normin skills are on the items being fused together.
When it comes to Fusing, keep in mind that a skill name in blue counts as "not being there" as far as fusing is concerned. If two different skills attempt to occupy the same slot, the skills themselves will synthesize into a third skill, but they'll be blue until you get one level of equipment mastery for that item. A skill name that's not in blue will automatically override one that is, without any fusion of the skills happening. Let's go to the phones to illustrate this concept a bit better.

So this umbrella is Edna's best umbrella-stat wise, and just to make sure I'm coming across here, rather than a thing I might have focused on in the recording, let's say I had another Scáthach Greifon with Urth in the second slot and Phoenix in the fourth slot (the first slot for an item is always the same, so for every Scáthach Greifon, Aster will be in the first slot) and attempted to fuse it with the one I'm currently highlighting. Both Voyd and Blokk, currently shown, will become a new skill, colored in blue (another skill represented by a normin you can find in the world, just for the record). As long as you don't get at least one level of equipment mastery on that, if you wanted to fuse it, the game will consider it as a Scáthach Greifon with 3 empty slots.

So why would I want weapons or equipment without anything in the three variable slots? Well, it lets you keep desirable weapons + skills like what she currently has. Edna, of course, has no need for fire-boosting normin skills; she doesn't have any Fire abilities, so if, by haphazardly fusing, you created a Faira in the second slot, you'd be taking something useful away from her (Earth+) and replacing it with something useless (Fire+). Of course, for Lailah, this would be exactly opposite. As far as I know, there is absolutely no way to influence what slots will have a skill in it, so if you're desperately needing a Fethur in your third slot, uh, get cracking, and also keep in mind you may be able to create it via fusion if you're at your wit's end. So why is Fusing good, and why would you want to get things to +10? Let's go to Alken for that one.

Well, when an equipment reaches that threshold, you can offer it to the Lord of the Land to bless it and transform it into a (technically) new item. You have to actually visit a Lord of the Land, by the way, this is the one LotL-related thing you can't do at save points. Although the game says you "offer" it to the LotL, don't worry, they won't take the item. Now, there's a reason you might not want to bless everything as soon as possible, but we can go into that next time. In this case, Sanctifying this would cause this to become...

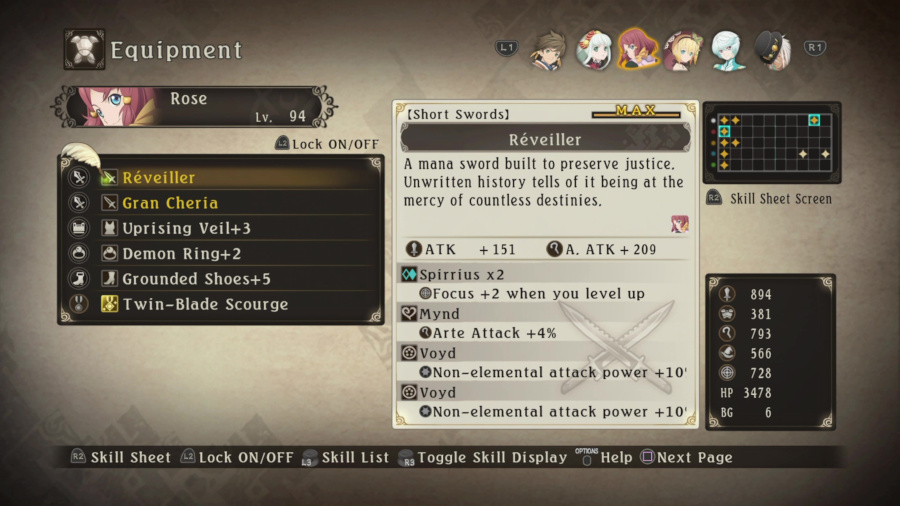
Yep, that's why you want to. In addition to getting a fancy new name, gold text for that item's name, you double the effectiveness of the trait in the first, fixed slot of the item. For most equipment, this won't be a huge gamechanger, for the Irminsul, absolutely it changes things. Axcell normally drops a Mystic Arte's cost by 1 BG, so, for example, now it drops by 2, so I can launch armatized Mystic Artes at only 2 BG (I'll explain how armatization influences skills in a bit), or Bolt Tempest with even one. It's boss. Now, Axcell is one of those skills *not* represented by one of the 50 normin you can find out in the field, no matter how hard you look. Outside of Irminsul, you can only get Axcells on another character by stacking enough instances of a single skill on a character's build. Let's go to another screen to illustrate this.
But before that, it goes without saying, of course, that dropping the cost of armatized Mystic Artes is very helpful for grinding, especially being able to launch them for only 2 BG. I'd also highly recommend equipping lots of Wundors, who increase the amount of BG gained from killing enemies, on both the human you're armatizing and on the seraph you're armatizing with. Helps keep you stocked up on BG, getting BG back for killing enemies with BG, though obviously Arcane Bottles are also very important for making up the difference. Remember, you always need to spend 1 BG to armatize in the first place.
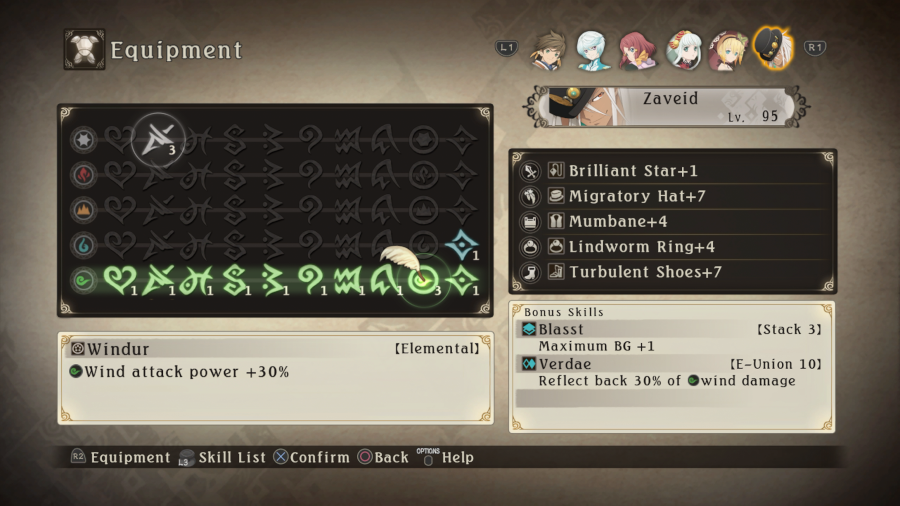
So to get Axcell on another character, you need to stack 7 instances of a single skill on them. Any bonuses gained below that number are lost on succeeding levels. So, I wouldn't have Blasst in this hypothetical build. If I had done that for good ol' Zaveid here, that Blasst would be Axcell, and the cost of his Mystic Artes would all drop by 1, including armatized. Now, while you can stack a lot of things in this game, there are limits when it comes to bonus normin skills like Blasst and Axcell. Axcell caps at two, meaning any Axcell after that is totally wasted, so do keep that in mind. Verdae is another of these skills that you can only stack twice. You can cap it out at 60% by having two of all of those Wind skills in the bottom row, but anything after that is wasted, aside from the individual stat bonuses. Like, Lindwurm (anti-Dragon skill), which is immediately to the left of Windur, if that was at +3, then I'd get 45% increased effectiveness against Dragons, but it wouldn't help me stack Verdae a third time. Simple enough. Speaking of easy ways to stack skills...

Notice how the Faira there is x2. Should be self-explanatory, but it's basically the game's official way of having two instances of the same skill fit in the same slot, since normally, you only have a maximum of 20 slots for skills. There is a way to very brute force these showing up, but before the final dungeons of the game, it's not really worth it, aside from just saying that x2 boosts like this will *very* rarely show up, for now. I'm well aware there's a way to guarantee generic normin skills these dropping at x2, or even the fabled x3, but in due time, in due time. Also, when it comes to fusing, a lower level won't override a higher level of the same skill. So if I attempted to fuse this Lost Parlance with a Lost Parlance with just an ordinary Faira in the second slot, the Faira x2 would remain.
However, there is a catch. On a NG, even if you get a double skill like this, it will still only count for one instance of that skill on the skill sheet. So, that Faira x2 would only create one stack on Faira, despite what it says. There *is* a Grade Shop choice that will cause it to accurately reflect that x2 status on the skill sheet, so it's actually easier than you might think to get multiple stacks of crazy skill sheets like what I have Zaveid with.
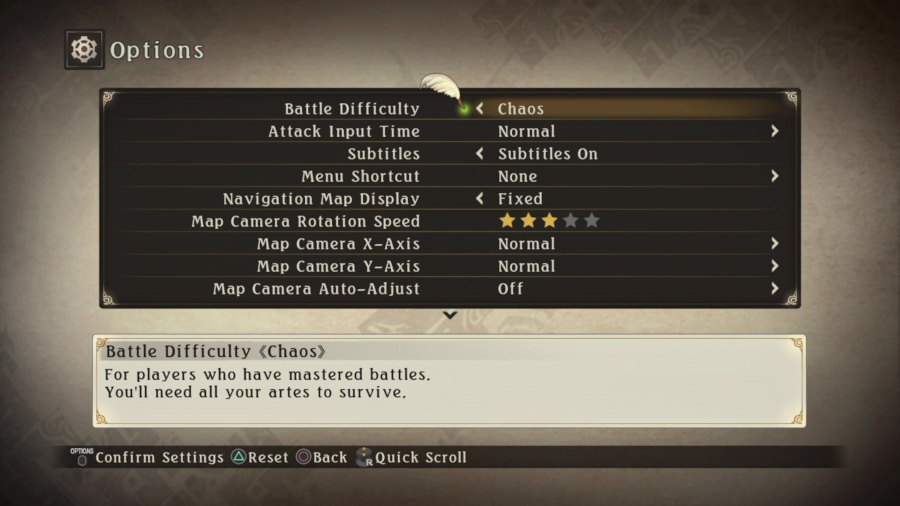
On another note, really should be mentioned that x2 skills will only drop on Hard and above, while x3 will only potentially drop on Chaos. It should be noted that the game is keeping track of how many battles you fight on a particular difficulty. If you've done like, 200 battles on Normal and 5 on Hard, you'll never get x2 skills, at least until you get 201 battles on Hard. with the same mechanic applying to x3 drops. Most of your battles need to be on Chaos, BUT, these battle difficulty counters do reset on NG+, so it's easier to grind x2 and x3 on NG+s. You also have to be ON the applicable difficulty in order to get drops, so you can't grind x3 on Simple, for instance. But the larger point remains that, for a variety of reasons, there's really no reason at all not to play this game at least on Hard, unless you just absolutely want to breeze through it. One last note on big unions like that...
Notice how Rose's entire first column is filled up. That gives her the special normin Soljur, which is a +20 to all her normal stats (everything above HP). You can stack that particular normin up to 5 times, giving her +100 just from those bonuses alone, let alone the increases she'll get from the actual normin skills. The 10th column is also pretty cool if it you stack it enough. At 10 instances of this column being filled out, you'll get 60 seconds of invincibility per fight. Definitely takes a lot of effort to pull that off, but it's worth it, since 60 seconds in a battle is a long time in this game to do whatever you want.
NOW, when it comes to armatization rules, both characters in the armatization will combine all their effects on the skill sheet, but will NOT apply to create stacks, or columns, or rows. So let's say Sorey has Voyd at level 6, and Lailah has Voyd at level 1. By armatizing, you won't create Axcell, but you will get the Void power increase from seven stacks of Voyd, because you're combining Lailah's and Sorey's sheets. But, special skills will still apply during armatization if at least one character has that special skill. So as long as Sorey has those Yggdrasil Earrings equipped, any seraph he armatizes with, the Mystic Arte cost is only 2 BG.
One last note is Phoenix, which deserves special mention as to how it functions. Normally, you can find Phoenix on any Mumbane or Bloodied Sword. What it does is provide a +20% chance to avoid KO. Now, you might be thinking, if you stacked Phoenix enough, couldn't you make a basically invincible character? Well, professional game designers ain't paid to overlook obviously gamebreaking stuff like that. Every time Phoenix is triggered, the chance for automatic revival is cut in half, I assume even if you have like, 200% chance of KO revival, and then 100%, then 50%, and so on. It's still really good, don't get me wrong, but in general, you just don't want to play defensively in this game, for a number of reasons. Like, if the crux of your builds involves getting 20 stacks of Fatigue resistance, well, you're a braver man than I.

Also, there's something very special about the transformed Bloodied Sword and one of Rose's currently-equipped weapons, but I'll probably just do it once and reload my save, since I don't wanna equipment grind anymore on this LP.

Lemme tell you, seeing this guy, seeing actually NEW content after days straight of grinding...it was healing. By the way, I'm on Chaos now, my having unlocked it early on in my grinding. An old score
He...seems pretty insistent about it, so why not? Wyvern is quite a strong enemy, of course, but if Zaveid seems serious about it, then...

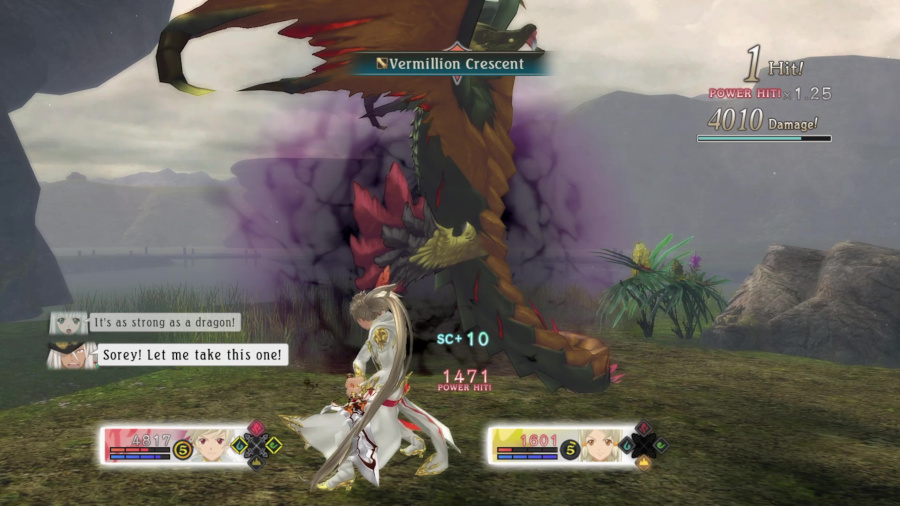
This is an arte I was super looking forward to unlocking: Cloudburst. Wind!Form will jump into the air, then after a short delay, fire a big, sweeping volley of lasers in front of it. If you'll recall, this is actually something Oscar busted out against us, and now, we finally get to use it. Against large targets like Wyvern, its full potential can come out, and it's cool. It's definitely my favorite armatized spell. So cool-looking.

I didn't really show it off in the actual video you'll see, but for various unimportant reasons, I had to record it twice, so I got to see Shadow Eye in more action on the second go. I'm...not quite sure what it does, but apparently it's AOE damage. But either way, with vastly upgraded builds, even on Chaos this one didn't pose too much of a threat.

Yeah... Finally.
Zaveid, was this hellion someone you knew?
This is where my old comrades and I first embarked on our journey, way back when. This was a slight acquaintance.
Amazing! You actually had friends, Zaveid?
Ouch! Right in the dignities!
I wish I could meet them, Zaveid. Your old comrades.
Me too.
But you can't, can you.
Probably not.
Oh... I'm sorry...
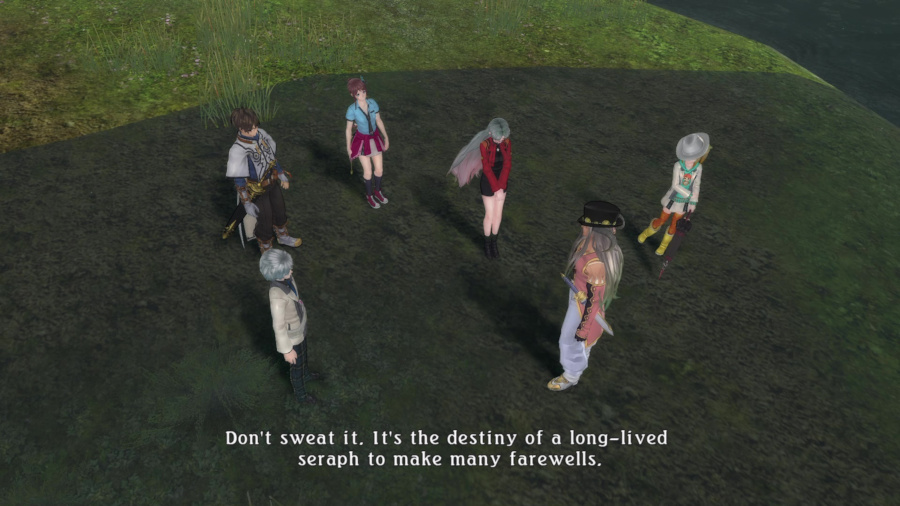
Destiny, huh...
And hey! I'm here again in the same place, with a whole new set of comrades. Life sure is funny sometimes.
Is that the destiny of the seraphim?
Yup. I hope you'll remember it, Mickey-boy.
It'd be harder to forget it.
Hah! Well said.

Hm, indeed. Well, if you need a refresher, since we've seen Berseria already, well, the Legendary Wyvern? Remember when Zaveid showed up at Lothringen and we had a boss fight with a flight of Wyverns? While Zaveid was tangoing with Melchior, we were fighting the Wyverns (and yes, they were all called Legendary Wyvern), and after the fight, we took out two of them. Just then, Zaveid got all pissed off and stopped us from killing the third. That third one is the one we just fought, hence Zaveid getting all sentimental here. As for what he said about old comrades, well, that's fair enough, too. Although the first time we saw Zaveid was shortly before going to the Empyrean's Throne, our little encounter there was little more than smacking some sense into him and getting him to open a door for us. I'm sure we'll recall we had a much more pleasant discussion with him after returning from Warg Forest for the first time in the Fens of Nog.
As far as gameplay benefit, you'll get another Anomalous Orb, of course, but you'll also get Zaveid's second Mystic Arte, Heaven or Hell, and the Young Dark Wing outfit, which is that outfit Dezel was wearing during his Lafarga flashbacks.

But as for now, that's all the sidequests that can be finished before advancing the plot a bit more. Fun fact, if you go too far towards that big monument in the distance, you'll get this conversation.
You're going the wrong way.
Sorry! I forgot it's past the prickleboar hunting grounds.
I know how you must feel, but you've got to relax.
Nice little detail.

This place certainly has seen better times.

Everything is returning to where it began. This statue is actually our next landmark, but you have to be right up close to examine it. Y'know, in a place where the characters wouldn't be able to see it well.

Yep, it was supposed to be Zenrus the whole time, actually. Well, based on some NPCs in Berseria, she's certainly not wrong.
Stern Thunder God Statue posted:
A gigantic thunder god statue believed to be the god venerated at Mt. Mabinogio Ruins. It has an impressively stern look on its face.
But this is not the only thing to be discovered in these ruins, far from it.

If you warp to the Inside Circular Hall save, the first save point in the entire game we activated (this is where Sorey and Mikleo crashed down into at the start of the game. Well, Sorey had a water landing and Mikleo a controlled one, but still), you can find our final powerful hellion. Well, there's still Heldalf, of course, but you know what I mean.
Angel has a very unique gimmick, in that, while it IS weak to Void attacks, it also has a 60% chance of reflecting them. What this means is that it's actually counterproductive to fight with Void attacks, since unless you are stupidly lucky, you'll be doing as much damage to Angel as you're doing to yourself, even before factoring in Angel's actual attacking. So it's much better to fight while armatized since, even though it's strong against all the elements, you can hit its Type weakness and accomplish the same thing as Void attacks, without the risk of reflecting yourself to death. Aside from that, fight carefully and dodge Screw Driver and you shouldn't have much trouble.

Told you it was the last of these powerful optional hellions.
Well, if she learned something from the past 36 enemies, well, it was all worth it.

But now, this mysterious door is finally available. Seems convenient, but I'm guessing the plot reason is that Zenrus was using his power to keep the road to Camlann firmly shut, and it's only in this state, where malevolence is weakening his domain, that it's finally normally available.

Whoa... Tragedy in the ruins


What is this...
He was the one who brought in the soldiers.

Bartlow... Actually, this is less random than you might think. If you hang around Ladylake at this point in the game, some of those random unvoiced conversations will talk about how Bartlow got in his carriage and just got out of Dodge in a hurry. That wasn't him being run out of town, what with the appetite for his pro-war sentiments falling out of favor, it was him headed to Elysia for all this.
*notices the collapsed woman* Muse!
*rushes to her side*

Lailah, quickly! Heal her!
*nods, heals her*
*wakes up*
Are you all right?
I sense...malevolence... But... It's not too late... If I still have my life to give.
What are you doing? Don't try to move!
Please, dear seraph... I need to... I must do this... I want to give the world reason to hope! Even should it cost me my life!
But why?
Because I believe... I believe that the children raised by Seraph Zenrus will one day grow to become a Shepherd...and his companion... I believe they will lead us to hope for the future... A bright future where humans and seraphim can live hand-in-hand..
And that...is your answer...
Please... My staff...

Thank you.


*stops Sorey* Farewell, Muse. I too believe in your wish. And I know it will surely come true.
Thank you.


Mikleo...I--I'm so sorry...
I'm fine.

I'm sure we'll find Zenrus just up ahead.
And our missing Maotelus as well.
Not to mention cat-face.
*puts hand on Mikleo's shoulder* Let's get it on!
Yeah.
Everyone! Let's do this!


 The prologue to the final act, huh? Lord Heldalf, my master... Can these people truly be stained with the colors you desire? But then... It is my job to see that they are.
Oh we'll see about that Symonne. After that scene, you also get Muse's Staff, which an actual weapon for Mikleo, but it's your third novelty weapon for...obvious reasons, y'know. There's nothing special about its operation. I mean, you can carry over equipped equipment via the shadow battle thing I mentioned early on in this half of the LP, but to sanctify Muse's Staff, you'd need to beat the game 10 times and have Mikleo equipped with it at the end of your playthrough each time which is, like, no.
Yep, no doubt about it.


Yeah.
Must be Symonne.
Definitely.
Hmm... I wonder what she's playing at.
Let's stay on guard.

Oh boy, but where to go... Oh well, maybe we'll have some fun with those Hydras.
(Hydra) Hydra has the ability to regenerate.
Just like immortals or something.
They're weak to non-elemental attacks, so we should try to paralyze them!

Once it bites you, it may never let you go...
Let's make sure that doesn't happen!
Sounds much less fun than Hydras, to me.

So really, where ARE we going? Well, if you just go in a straight line from where you spawn in, you'll eventually hit an invisible wall, so uh...not that way. Truth be told, the correct direction is about at 10 o' clock from where you start, but there are lots of invisible walls to be found. Eventually, your exploring should lead you to here...

Those two mysterious figures in the distance. Wait, don't they look familiar? Mirror
This is Symonne's doing!
Y-Yeah...
We don't have any time to lose! Let's blow through this one!
You got it!

*gasps*

Man, I *completely* forgot about this fight. Despite the fact we're facing our armatizations, neither Rose nor Sorey have that much HP, so be aggressive, dodge when you see an opening, and crush 'em.


I dunno, that seemed like a pretty powerful illusion to me. Further in the depths of Mt. Mabinogio, you'll come across this next part of the dungeon, with four rooms to either side of the central hallway. The most important one is the first room on the right.

Yep, this a good drop when you take out the first wave of a Dangerous Encounter, by ending the fight immediately, with a Mystic Arte. I should note that, if you get into a Dangerous Encounter and the enemy counter reaches 0 at any point, the battle ends there, even if more enemies could show up. There's nothing like in Berseria's Dire Foes where you can be in a battle without any enemies to fight.
Anyhow, the gold chest in this first room has a pair of Round Sunglasses in the gold chest, an Elixir in the silver one, and the normin Sheeld on the right wall of the chamber. So yeah, no sense in not picking everything up. The other three rooms comparatively have minor treasures in them, like Pegasus Wings or Death Sheets for Lailah, but after getting all my equipment up to snuff, I can't say they interest me much.
I swear, you really are a kid sometimes.
If you can't have fun when you're young, when can you, Meebo?
It was also around this point that I noticed that, after I Game Over'd once to Angel and had to reload my pre-Legendary Wyvern save, I forgot to switch the difficulty back to Chaos. But I did want to check because I thought I was winning battles just a bit too easy. Well, this would certainly explain it. Rest assured, though, that the Legendary Wyvern fight you see in this update was on Chaos.

Think Symonne needs some new material.

Well, I guess this barely counts as "new". The second mirror


I mean, I thought I was ending battles too easily, but even on Chaos, they don't fare much better. 26 second battle, and I even ended before I wanted to, in the middle of one of Meebo's lines.

Let's go.
But Symonne's just going to throw more of her crap at us!
I bet she will. But it won't be anything we need to worry about.
Probably not. Even her illusions are starting to lose their spectacle. She can make passable imitations of Rose and Sorey, sure, but it's looking like everything else is beyond her reach.
Yeah, if she could scare us with anything she wanted, you'd think there'd be more guts and stuff. Spleens.
Spleens?
Anyway, let's keep moving forward.
Right. We don't want to let her stall us here while we talk about how bad she is at her job.
Yeah. *begins walking forward*


What did I say about Heldalf not being a ghost being a huge advantage for Sorey?
Also, that purple portal functions like the one in Lefay, in that it acts as an in-dungeon teleporter to lead you back to friendlier parts of Mt. Mabinogio, but that save point has an important skit attached to it, wherein Rose starts thinking about going back to basics to get stronger, in spite of the potential of generating malevolence from that desire. Specifically, we get directed to return to the bridge leading into Ladylake, where we first met her and her band of assassins/merchants. This is just a sidequest, by the way, so all the save points within Ladylake are still active.

Oh yeah, and there are no encyclopedia entries for the fake armatized Sorey and Rose. Test of strength

Something's goin' on over there.
Seems like their carriage wheel broke.
Why don't we help them out?
Sure. *works until sunset*

...
You can tell Rose is still feeling a little uneasy over that whole "desire for strength" thing we talked about earlier.
Looks like it. Seems complicated.
It is.
*turns around* I was just reminded of the first time I met Sorey.
Yeah. Me too.
I had no idea I'd be going on a journey with you. Let alone with a buncha ghosts.
You were so gullible when you first joined. Used to be way more fun to scare you.
It was honestly kinda depressing to be feared so much.
You were really mean, Edna! Freakin' terrorist.
You know, you once did a bit of terrorizing yourself.
Rose-the-infamous-assassin had Sorey in her sights once, didn't she.
Yeah. And then she suddenly turned around and risked her own life to save his. How precious.
We were with Sorey the whole time, watching by his side, but powerless to do anything.
It really was completely nuts, what you did there.
Hah. I was just foolhardy back then. And blind to things.
You need to be that way. For some things.
Huh. So that's why you did that for him.
Hey now, Rose. You're thinking too hard about all this again. You don't have to say everything that pops into your head.
Kay.

Lailah. Strength can warp you, if you don't have the proper intentions. Lunarre was like that.
But if you don't have the strength and skills to make those intentions a reality, you'll just get trampled underfoot.
Yeah. Mayvin risked his life to teach me that. He strove for power, too, but it was for the sake of his comrades... For the sake of the Windriders. I do want to learn confidence in my strength. And I'm ready to get stabby for it.
Got it.

Sure. Let's go in order.
That should be sufficient.
Should be a doozy of a training session.
*everyone laughs*
Bring it, suckers!
You got it!

Well now, this was an unexpected, but welcome development. I think the odds are fair here. Four on four...oh, you don't know who Rose's two other allies are? Those would be the camera and the environment. Yes, this is another case in which both will work against you. Both Rose and Zaveid are very quick and powerful enemies, and you better believe this is Chaos. Your first priority will very much be Rose, since, although Zaveid is plenty dangerous, Rose is much faster and she doesn't have spells, so she'll always be laying traps or running after you. One thing with Zaveid, too, is that spellcasting enemies will very often break off from attacking you to go to a safe distance and cast spells. Like, if you see Zaveid using his Hidden Artes against you, and then decides to run off, he's going to try to cast a spell at you. If you interrupt him while he's running away, you'll basically reset his AI, and from there, he might attack you directly or try to cast a spell. So it pays to generally *not* interrupt him and just focus on outfighting Rose. If both of them were just all up in your grill all the time, this fight would be much harder.
Now, Rose is strong against Fire and Water, while Zaveid is strong against the other two, but I'd like to direct your attention to something.

Notice how I'm doing normal damage to her, and also staggering Rose, while I'm in Fire!Form. This is thanks to Igneet, which is the special normin skill you get by putting 7 fire skills back-to-back on the skill sheet. What this does is negate an enemy's Fire resistance, meaning they'll take normal damage and also stagger from Fire hits, even if the game says they resist it, which is why Rose is taking all that damage here. It's also a very good idea to, prior to this fight, use a bunch of Arcane Bottles on Sorey in trash battles outside Ladylake just prior to fighting, so you can fire lots of Mystic Artes in a row. That's the best way to quickly take Rose out, especially if she gets Stunned.
When you're not Mystic Arting, you should do your utmost to break out of an enemy attempt to surround you against one of the sides of the bridge, where they'll likely do most of their damage, and try to keep both enemies on one side. The other advantage to doing so is they'll frequently take damage together, limiting the amount of damage that needs doing against the surviving party member. Oh, and both of them can use their Mystic Artes, but you really don't want this fight to come to the enemy hitting YOU with Mystic Artes.

Like, take notice of how much more damage is Zaveid is taking, when I had to switch to Mikleo. Those skills that negate elemental resistances aren't always applicable, but this does mean I can use Lailah against any enemy in the game and not be much worse off for it. But the real reason is I didn't wanna build everyone the same way or in boring ways. I wanted to show off the crazy things builds you work for can do in this game.
It's in a fight like this where you can truly appreciate how powerful Axcell x2 is. Even with such a difficult fight on Chaos, only needed two attempts to win.
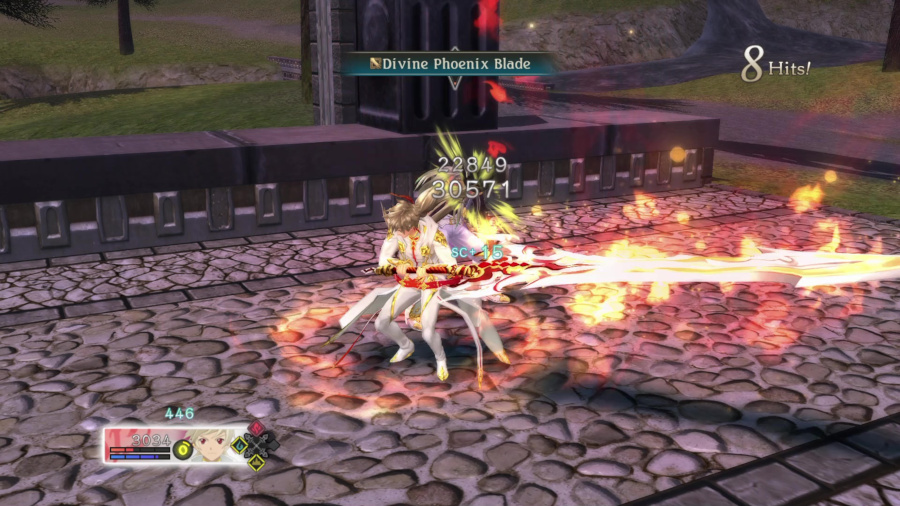
To say nothing of a Divine Phoenix Blade right to the Stunned face to end this.


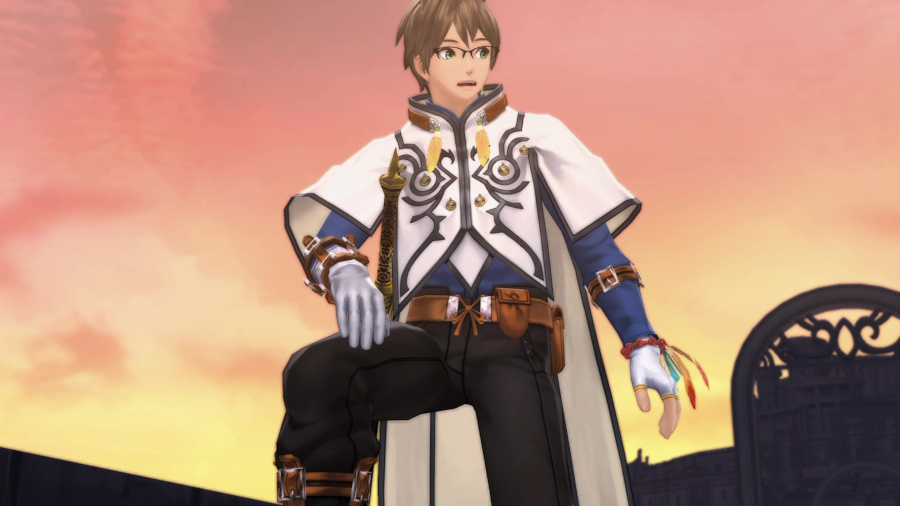

*trips and falls*
Rose!
Ow...
Are you okay?
Sorey, everyone! Thank you!
Did something click?
Yup!
Show us. We could give you some feedback.
*shakes head* Mmm, not here. I'm still figuring out how to adjust my strength, and I don't want you all to get hurt.
Oh, okay...
Rose... If I may ask now, what is the reason you felt the need to gain confidence in your strength?
Huh? *pauses* It's my way of preparing for the final battle, I guess. Like, I'm not as capable as you guys are. I wanted to feel... Not just passion, but real physical strength. So that I'll know I can follow through on the answer I reach.
Rose...
Aw, c'mon, guys, don't take it so seriously!
Rose, don't you think this might be the perfect time to tell everyone what you said to me in Lastonbell?
Waht? Not now! The moment's, like, way passed already.
What is it? Now I'm curious.
Um, well...

Rose, I want you to know that I'm really, really glad we met you.
So Lailah style!
Huh? I didn't mean it to sound like that...
Sheesh, I'm joking. Anyway! The sun's down already. Let's spend the night in Ladylake! I'm staaarving! *leaves to grab a bite*
Mikleo, your perceptions weren't wrong after all.
Though it's more trouble on our plates.
So says the biggest trouble of them all.
YOU'RE a trouble!
Hah-hah-hah! Face it, we're all trouble.
Haha, you can say that again!
Guys! Dinnertime! Chop chop!


Nah, that's one thing you don't have to spare a thought for, Lailah. Can't imagine Rose holding a grudge, especially against you. Something tells me, though, Professor Mikleo shouldn't look forward to tenure any time soon.
But the tangible reward here, since we certainly earned it? Rose's Crown of Torment Mystic Arte and her titles levels up. So that's Edna, Sorey, Zaveid, and Rose. Lailah and Mikleo, as I mentioned, only get their second Mystic Artes in the post-game, so before we return to Mt. Mabinogio, one more stop. This time... Growing up


 It's quite alright. I would like to ask you for your continued support in liasing between the two countries.
Well, about that. There's still quite a bit of business left for me to take care of. I will require some...assistance.
If you forget, this guy was Logos, that shady merchant dude who we discovered was providing valuable underground networks of communication between Hyland and Rolance before tensions eased. After exposing him, Alisha had to prostrate herself a bit for jeopardizing his role, and now he's here again, and apparently willing to bury the hatchet.
Assistance? Oh, "assistance"! I see.
You do understand what I mean, yes?
Y-Yes... Of course, we'll do our best to...uh, accommodate your needs.
If that's the case, then I shall uphold my end and work hard as well. But your answer leaves something to be desired. If you're too readable, you'll be taken for all you're worth one day or another. Be mindful.
Huh?
You'd need to be able to manipulate people like me if you are to rise above and lead others. You must grow stronger. *excuses himself*
Yes sir. I will take it to heart. *sighs* I still have so much to learn...
Please, don't push yourself too hard.
Thanks. But I'm really not. I'm merely doing what's necessary.
It must be hard for you, Princess Alisha.
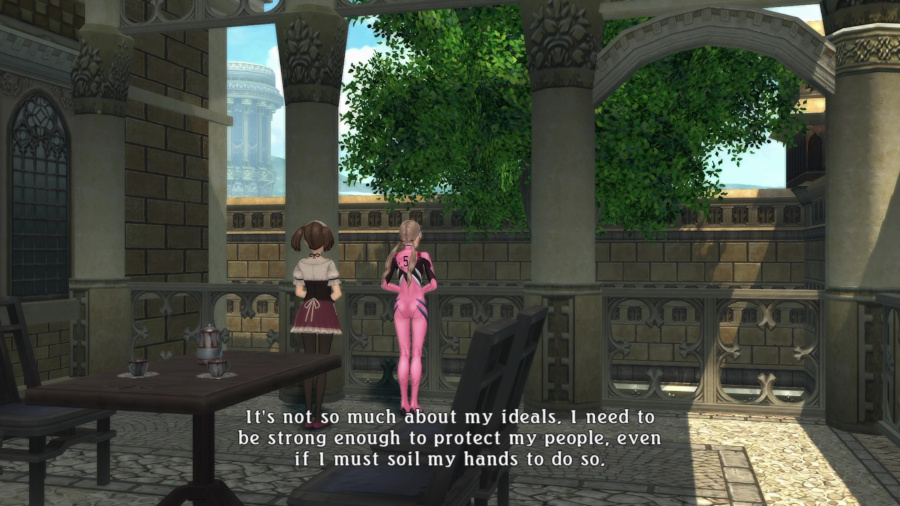
"The strength of a knight exists to protect; and their kindness serves the people." It is the people who will create a malevolence-free Kingdom of Hyland. I must be strong enough if I am to be its foundation.
You have changed much, Princess Alisha.
*shakes head* It's nothing special. Those out there fighting against unknown disasters are the real heroes. As their companion, I can't stop here.
Then at least please get some rest.


Oh, she will. Might as well spoil it now, but Alisha's recompense for not making it into the final party in Zestiria is that the DLC campaign stars her, and we'll be starting that in...two updates. Once you download it, it'll appear as an option on the main menu, and you don't need to finish the main game to start it. However, since the DLC takes place like, a week or so after the end of the main story, it's highly recommended you play it after you finish the main game.
The problem for me, though, is that normally I'd cover the endgame the way I did for Berseria. Put everything right up to the final boss in normal updates, skip the final story sequence and go right into the postgame, then circle back around to the final story sequence to finish up the LP. With a post-plot DLC, though, that kinda goes out the window, and the DLC story's plot kinda assumes you know how everything turned out. Ah well, Alisha can be kept in the dark as much as the reader will until I finish up Zestiria, I guess.
The one final thing to do with Alisha right now, though...

This cute little baby chest has 30k gald in it. Drop in the bucket, but hey.

Then I had to hop on over to Katz Korner to record this skit. I actually got this skit while I was grinding, because I was wanting to level up Katz Korner's inn, and this showed up, which only shows up if you rest at Katz Korner. It's a pretty good one, but sadly, the outcome is left hanging.
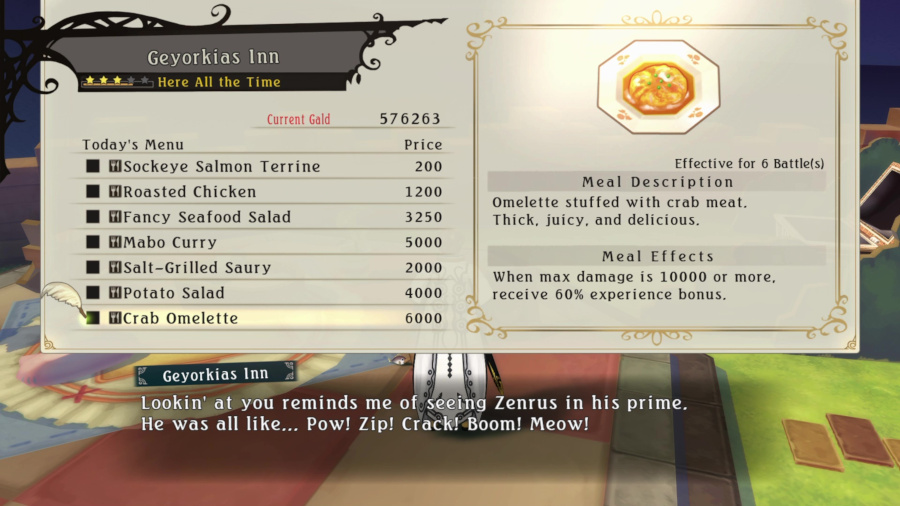
And yeah, Katz Korner dishes let you get big EXP payouts like this. Hey, I don't need to grind Gald anymore, so why not? Oh yeah, and speaking of this bizarre corner of the world, Weaponsmith Katz' Klaw starts selling Elixirs at 2 star level, so it's not too hard to get them to start selling that. 75000 Gald a piece, though, so buy sparingly. Anyway, time for the final part of this update... Illuminate

A dead end...
What?! But this was the only path!
Another illusion.
We can't waste any more time. I think we'll need to come up with a way to punch through her illusions.
How?
Illusions or not, they still punch back pretty good.
I don't think the illusions will last much longer.
Huh? Why not?
Symonne is a seraph. *begins talking loudly* It's got to be hard for her to maintain her powers in the middle of all this malevolence.

Speak of the devil.
For all the illusions I craft for you, your hearts refuse to budge the slightest inch. *draws scepter* It seems I will need to take...other measures.
What? Baton-twirling?
Submit yourselves!

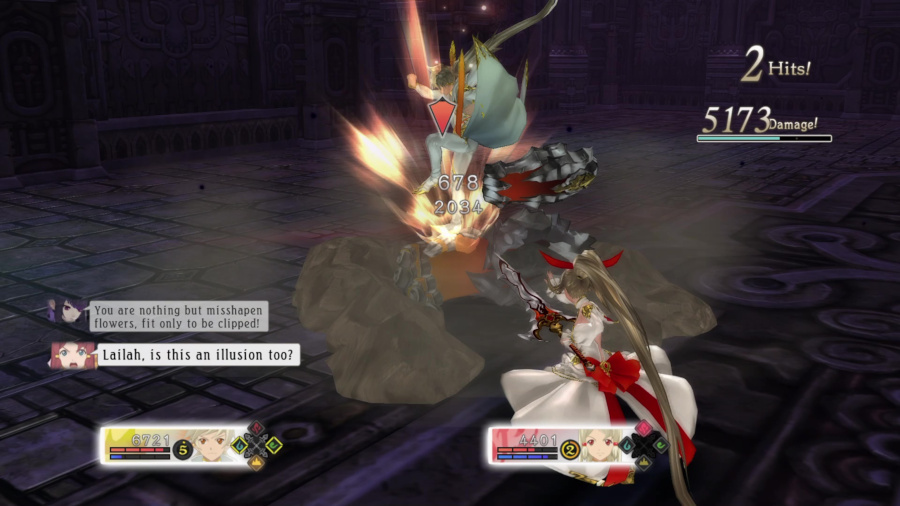
For being Heldalf's chief flunky, Symonne is actually not too hard, because she's not very powerful nor has a lot of health. She'll run around and try to smack you and cast seraphic artes, but nothing that can't be overcome. Frankly, I'm disappointed.
Oh, and Gigaton Smash, what I'm using now. It's a short range spell, but what it does is that the right Earth gauntlet will lunge forward and attempt to grab whatever's in front of it. If the enemy is sufficiently small, it will grab them, then the armatized character will jump into the air, the right gauntlet will come back down first, and then the armatized character will crash down on top of them. The chief advantage, besides the good damage, is that the affected enemy is totally helpless during this time, and they're free to take more damage while the animation is playing out.
The disadvantages are of course the range, and if the enemy is too big, then the right gauntlet's swipe will do some damage, but nothing else. Kind of a waste to use it against them, but hey, who can say no to pounding a large percentage enemies in this game into the dirt in this fashion?

When she's at 25% HP, she pulls out her final trick: duplicating herself 3 times, so 4 Symonnes are running around, doing what they can to stop you. In spite of that, though, this isn't too tough, either. All of them have a low amount of HP, but they can certainly make it awkward to attack the real one. Of course, if you're lucky enough to get them all together, an armatized Mystic Arte with a large area of effect, can pound their asses into grass in seconds. The reason I didn't was I didn't want to interrupt any dialogue during this last phase of the fight.


Oh yeah, and Mystic Arte, too. Good for her.

Symonne, that's enough. *sheathes sword*
Do you accept death?
*shakes head*


*begins to leave*
*grabs his hand* Wait! Shepherd!
*shoves her off*

There it is. So that's your real face.
...
Let's go. I'm worried about Gramps.
Oh. Sure. *begins walking away*
It's already too late... Everything is lined up just as our Lord has planned it...
And what? You think we're the types to just turn around and run home?
Why must you fight back? The more you fight, the more you suffer... Why do you resist our Lord's vision... A world free of suffering, free of restraint... I know... I know you haven't forgotten that wind seraph who gave his life for the burden of his sins... The answer he reached was that of revenge. Tell me, is that not the same goal our Lord shares? By denying our Lord, are you not denying him as well?
Dezel did suffer, I know. But he made a decision and put everything toward achieving it.
Yes. With the end goal of freedom from agony.
But Dezel was--
To resist and fight against one's own sins... Such foolishness is nothing less than the denial of the self. And for all that resistance and denial, all of the sacrifice, nothing awaits but an empty death.

Since you stopped resisting... Have you ever felt truly alive?
What?
It is true that fighting back brings pain and suffering. But once you raise your head and take the first step toward your answer... Wouldn't you think THAT is when life begins? At first, I'm sure Dezel was trying to break free from his suffering... But even when he remembered his true past, did he curse the very sins you speak of? Did he despair and just give up?
Oh, I see.
So that's why, in the end, Dezel was smiling. Why he was able to smile. Is that it, Lailah?
*smiles at her*
But what does that matter?! If you don't reach the correct answer, you've got nothing to show for it but hollow contentment!
And when did contentment become a bad thing?
The goal is important... But, that doesn't mean the journey is not.
Mere sophistry.
*smacks her with the umbrella* Haven't you noticed by now? We're pressed for time, and yet here Lailah is, trying to do you a favor...
Symonne, remember what you asked me that one time? Should one who only brings misfortune be allowed to exist? Is that entity evil to the core and worthy of death?
It wasn't a question that required an answer.
But I'm answering it anyway. You don't have to think of yourself as evil. Or, um... I mean, it's okay if you're evil.
What?

Don't try to be eloquent.
*nods* I think all kinds of people should live. Together we can find the way for all of us to be happy. And so you too--
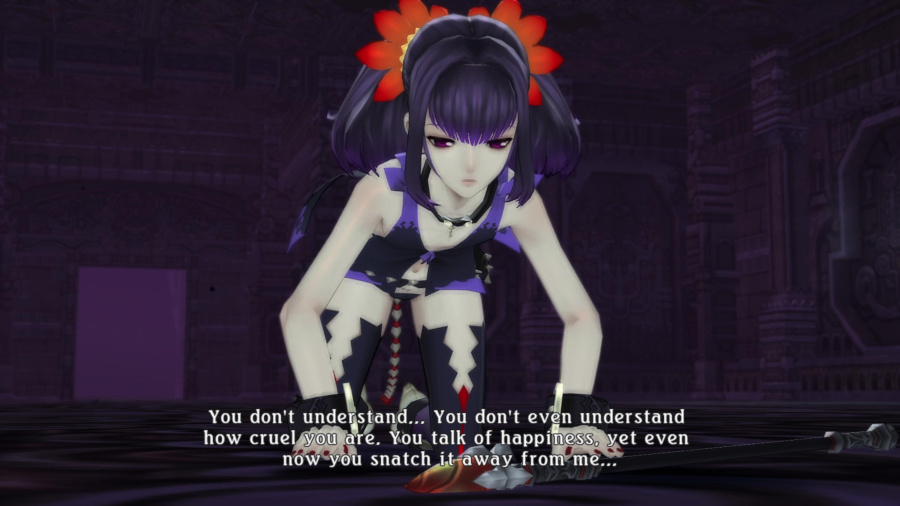
I have no reason to exist if I cannot work for the cause of our Lord. No reason at all...
Aaaugh, will she not GET it?! Can I please punch her?
*continues sobbing*
Let's go, Sorey.
Yeah.


Well, I think this is a good place to end today, don't you? If you want to take one final divergence, you can warp back to the inn save point in Pendrago for this skit. Strangely, it doesn't have anything to do with Symonne, it's about...Sergei continuing to be under the impression Rose and Sorey are a married couple. Not sure that was the kind of plot thread that needed resolution, but hey, we're here, ain't we?
Next time...the Origin Village.