Toggle Background Color

People ignorant of SOTN's plot might be wondering why I left off where I did last time. I promise, everything will be made clear to those individuals within a few screenshots.
Anyway, this is directly above where I saved at the end of the last update. Don't really need this; I don't think I need anything else from the shop.

Sword Card, a Boomerang, a Heart Refresh, a Ring of Arcana, and a Frankfurter in a room in the top-right corner of the wide-open area (which is clearly the same place from the prologue, albeit with the stairs destroyed).
The Ring doesn't seem to do anything, and its description doesn't lead me to believe it has any special effects.

Switch hidden in a corner of the doorway to open up the attic.


There're some smashables here. Left has a Stone Mask and a Talisman, right has a Bastard Sword, Dragon Helm, Medusa Shield, and Neutron Bomb. I would like to remind you, though, that item names are shuffled, so the Medusa Shield and Dragon Helm... probably aren't.

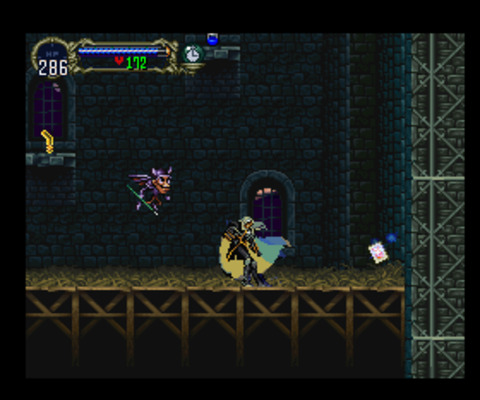
And one more smashable on the way to the boss.


Hi Richter. Have an exorcism, on the house.
Anyway, the reason you need the Holy Glasses is to spawn the real target in this fight; if you focus, you can see it just starting to fade in on the left screenshot, above the skull on the throne.


And the reason that unlocks so many checks is that there is literally a second copy of the castle locked behind the good ending of that fight.
Yes, everything is upside-down here. ...okay, technically, it's rotated 180 degrees instead of just upside-down, but that still counts as upside-down, right?

Grab some miso from a smashable on that table on the ceiling...


...and then back to the attic. From the left: King's Stone, Library Card, Holy Rod, HP boost, Potion, Resist Dark, Red Rust, and a Morning Set. Don't get too excited about the King's Stone; it's just vendor trash this seed.

This room again, but upside-down this time. I find a Shuriken, another Potion, a Chinese Bun, a Herald Shield, and another HP boost here. The Herald Shield might be the Alucard Shield; I'd need a Shield Rod to test, and I don't know if I'd recognize it if I found it.


The places that had relic checks in the first castle don't necessarily have them here, but the walls are still breakable and still have items inside them. In fact, rule of thumb: If you could break something before, you can break it here too.
Side-note, I actually found a use for Force of Echo: Breaking that second wall open without needing to fly back up. That greenish thing above me is a Sirloin; reminds me of Dr. Seuss... albeit with a lower probability of me actually giving in.

Potassium.

More bombs.


Anyway, heading left to... I think it was the Clock Tower? It's harder than you'd think to parse things that're rotated 180 degrees... Well, wherever this is, I immediately run into a really big bat boss. The fight goes about how you'd expect from a bat trying to fight a guy with double Crissaegrims.

...I was hoping for more; I'm pretty sure most of these upside-down bosses drop Vlad pieces in vanilla. I might be confusing which ones do so, though; there're probably more bosses than relics here, after all.

Anyway, more walls to break. Manna Prism, Resist Dark, and Flame Star.

Gee, thanks, just what I always never wanted- the worst consumable weapon in the game.

Amidst the meatgrinder traps and the Bomberman wannabes, I find... yet another buff potion. Meh.


That walled-off bit above (below, now) the gears has some tea and a useless accessory.

And the gears themselves lead to an Omelette, a buff potion, and a HP boost.

Vendor trash in a corner room.

Remember those pillars next to the collapsing bridge? Lotsa boosters here.
Of course, as you can see, I need to take a bit of a break to recharge my MP. I mean, I could just use a Manna Prism, but my inner miser is greatly offended by the suggestion.


For some reason, the bridge itself doesn't collapse when it's upside-down.

Heart Max at the no-longer-functional Outer Wall elevator controls.

The upside-down Library, also known as the land of Wizard of Oz references.
The Librarian's room has a few smashables containing Onyx, a Pizza, and a Chakram.

Not much for me in this room- just a Firebrand, a consumable, and a Circlet.

I'll do the back next time. Plus presumably finishing up the reversed Outer Wall; that shouldn't take too long either.
Exploring areas goes a lot faster when you don't need to backtrack, doesn't it?